Table des Matières
Publicité
Liens rapides
Publicité
Table des Matières

Manuels Connexes pour Konica AUTOREFLEX T4


Sommaire des Matières pour Konica AUTOREFLEX T4
-
Page 2: Table Des Matières
Zeit-Aufnahmen ......55 Self-Timer ........56 Selbstauslöser ......... 56 Multiple Exposures ..... 58 Mehrfachbelichtung ..... 58 Accessories ........60 Zubehör ........60 Maintenance of Camera Pflege der Camera und des and Lens ......... 75 Objektivs ........77 Konica Interchangeable Lenses ... 78... - Page 3 INNEHÅLL TABLE DES MATIERES INDICE Maniement fondamental pour les Instrucciones básicas la AEC-fotografering; instruktioner... 6 Delarnas namn ......fotografía con AEC ....6 photos AEC ......6 Nomenclature des pieces ....9 Byte av objektiv ......13 Nomenclatura de las partes ..9 Cambio de objetivo ......
-
Page 4: Major Specifications
Standard Lens: KONICA New Hexanon AR 50mm f/1.7 (6 elements and 5 groups), AE lock available, closest taking distance 1.75ft (0.55m), Color Dynamic Coating. Lens Mount: Bayonet Konica mount II, 47 mm in diameter, 40.5 mm in flange back. Aperture Mechanism: Fully automatic aperture, minimum aperture f/16. - Page 5 Meter Coupling Range: EV 1.5 with ASA 100 film (f/1.7 Self-Timer: Operation variable from 4 to 10 sec. at 1 sec.) to EV 18 (f/16 at 1/1000 sec.) Finder: Pentaprism-used eye-level finder, magnification Film Speed Range: ASA 25 - 1600 (15 - 33 DIN) 0.89X (with 50mm standard lens at infinity), field of view at 90% of actual picture, real-image aligning type with microdiaprism and split-image.
-
Page 6: Basic Manipulation For Aec Photographing
BASIC MANIPULATION FOR AEC PHOTOGRAPHING 1. Insert Mercuty Batteries 2. Load Film (P. 17) 3. Set Film Speed (P.21) 4. Set AE Mark (P.30) (P.14) BEDIENUNG FÜR AUTOMATISCHE AUFNAHMEN l. Einlegen der Quecksil- 2. Filmeinlegen (S.17) 3. Einstellen der Filmemp- 4. - Page 7 7. Check Exposure and Shut- 8. After the film has 5. Determine Shutter Speed. 6. Focus and Frame (P.24) ter Release (P.32) been exposed, rewind 1/125 sec. outdoors and 1/30 sec. indoors (P.31) it (P.50) 8. Wenn Film 7. Prüfen Sie die Belichtung 6.
-
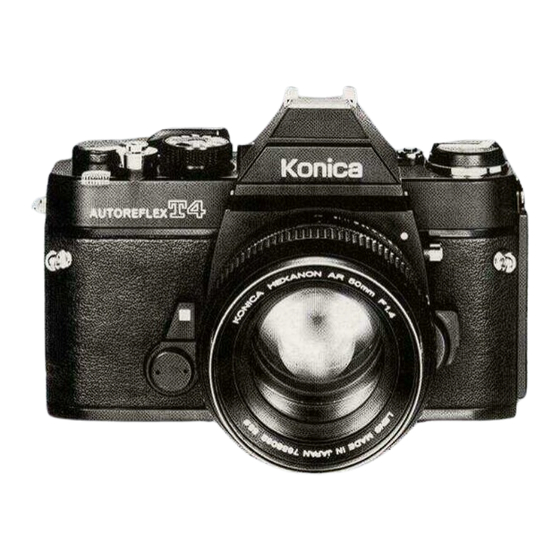
Page 8: Nomenclature Of Parts
(22) Film Rewind Crank (8) Distance Scale (23) Film Rewind Knob (9) Manual Aperture (24) Flash Contact (X) Scale (10) Konica Hexanon Lens (25) Neckstrap Eyelet (11) Focusing Ring (26) Lens Release Button (12) Aperture Ring (27) Depth-of-Field Preview Lever... -
Page 9: Bezeichnung Der Einzelteile
BEZEICHNUNG DER NOMENCLATURE DE NOMENCLATURE DES EINZELTEILE LAS PARTES PIECES DELARNAS NAMN (1) Auslöser (1) Avtryckare (1) Botón del disparador (1) Bouton de déclenchement (2) Contador de película (2) Bildzählwerk (2) Compteur (2) Bildräkneverk (3) Självutlösaren låsning (3) Cierre de enganche de Selbstauslöser-Sperraste (3) Epingle de verrouillage (4) Självutlösararm... - Page 10 (29) Back Cover Lock (36) Shutter (30) Auto Winder Terminal (37) Film Guide (31) Film Rewind Spindle (38) Meter/Shutter "Off" Switch and Multiple Exposure Control (32) Battery Check Lamp (39) Sprocket (33) Film Cassette Chamber (40) Wrist Strap Eyelet for Auto Winder (34) Take-Up Slit for Accessories (41) Film Take-Up Spool...
- Page 11 (29) Verriegelung für Rück- (29) Verrou du dos (29) Lås för bakstycke (29) Seguro de la tapa wand (30) Borne de extraîner (30) Anslutning för motorn trasera (30) Anschlußkontakt für a u t o m a t i q u e (31) Filmåterspolningsaxel (30) Terminal para el Auto-Winder...
-
Page 12: Changing Lens
CHANGING OF LENS OBJEKTIVWECHSEL To Dismount the Lens: While the Lens Release Button (26) Um das Objektiv abzunehmen, greifen Sie es an der gerändel- is depressed, grip the lens barrel and revolve it counterclock- ten Fassung, drücken den Knopf (26) und drehen es entge- wise. -
Page 13: Changement D'objectif
CHANGEMENT D'OBJECTIF Pour démonter l'objectif: Presser le bouton de verrouillage kameran. Se också till att objektivets glas inte blir repat (26). tourner la partie chromée de l'objectif d a n s l e sens eller fläckas ner av fingeravtryck. Under inga omständig- inverse de la rotation des aiguilles d'une montre. -
Page 14: Inserting Of Mercury Batteries
INSERTING OF MERCURY BATTERIES The KONICA Autoreflex T4's TTL meter takes two 1.35V mercury batteries as its electric source. Wipe the separately enclosed mercury battery cells with a piece of dry and clean cloth and put them into the mercury battery chamber. - Page 15 1. Die Kappe der Kammer für Quecksilberbatterien (49) • Si vous n'utilisez pas votre appareil pendant longtemps, retirez la pile au mercure et mettez-la dand unendroit sec. mit einer Münze in entgegengesetzter Richtung des Uhrzeigers drehen und abschrauben. 2. Die beiden Quecksilberbatterien einlegen, wobei die "+" Seite der Batterien entsprechend der Zeichnung in der 1.
-
Page 16: Meter On/Off Switch And Shutter Safety Lock
Belichtungsmesserschalter und Auslöserarreitierung Zum Einschalten der Camera bewegen Sie den Film- aufzugshebel (14) bis zum ersten Rastpunkt; dabei wird der rote Indexmarke (15) sichtbar. Das Belichtungsmeß-System der Camera ist jetzt eingeschaltet. Zum Abschalten der Camera drücken Sie den Ausschalter (38), der sich unter dem Filmaufzugshebel wieder in seine Ausgangsstellung zurück. -
Page 17: Filmeinlegen
Vid sådana fall bör man byta ut de gamla batterierna mot nya. CHARGEMENT DE LA PELLICULE Le KONICA Autoreflex T4 utilise le film de 35mm en Interruptor Conexión/Desconexión cartouche de sécurité. Pour charger l'appareil, éviter l'ex- posímetro Cierre de Seguridad del Obturador... - Page 18 3. Pull out the film while the cartridge is lightly pressed 1. Pull the Back Cover Lock (29) and open the Back Cover down and then choose any slit of the Film Take-up Spool (43). (41) into which the film tip may be inserted with ease and 2.
- Page 19 4. While lightly pressing down the cartridge, turn the Film Transport 5. Flip up the Film Rewind Crank (22) and Lever (14) and take up the film on the spool. Ascertain that the turn it in the direction indicated by an arrow mark on it to reduce the slack of teeth of the Sprocket (39) are in gear with film perforations before the back cover is closed.
- Page 20 Film um eine Aufnahme weitertransportiert, der Ver- schluss gespannt und die Spiegel- und Blendenmechanik betätigt. 6. Entraîner le film et appuyer sur le bouton de déclenche- ment (1). Répéter cette opération à plusieurs reprises jusqu'à ce que le chiffre "1" se trouve devant le repère dans la fenêtre du compteur (2).
- Page 21 7. Set Film Speed (ASA) Lift and turn the external ring of the Shutter Speed Dial (20) and align the reading equivalent to the speed of the film loaded in your camera with the index mark of the Film Speed Indicator Window (ASA) (16). When they are aligned, the ring drops and is fixed into position.
-
Page 22: Holding Of Camera
HOLDING OF CAMERA To take a sharp picture, the important thing is to hold your • In taking pictures at slow shutter speeds or with a telephoto lens, the camera is likely to be jarred if it is hold in camera in a stable manner to prevent it from being jarred when the shutter button is depressed. -
Page 23: Halten Der Camera
HALTEN DER CAMERA Um scharfe Bilder aufzunehmen, muss die Camera fest und ruhig gehalten werden, damit beim Auslösen keine Verwacklungsgefahr entsteht. Halten Sie die Camera am besten mit beiden Händen und drücken Sie sie leicht gegen Ihr Gesicht, stützen Sie dabei die Ellbogen gegen Ihren Körper ab. Der Auslöser wird mit dem Zeigefinger leicht gedrückt. Bei Aufnahmen mit längerer Verschlusszeit (unter 1/30 Sekunde) oder bei Verwendung von Teleobjektiven besteht leicht die Gefahr des Verwackelns. -
Page 24: Focusing
NO ESTA ENFOCADO FOCUSING ENTFERUNGSEINSTELLUNG The Focusing Screen of KONICA Autoreflex T4 is of a dual Die Entfernung kann entweder mit dem Schnittbildentfern- range meter of Split-Image (51) at the center and Micro- ungsmesser (51) im Zentrum des Sucherbildes oder auf dem diaprism (50) at the outside. -
Page 25: Mise Au Point
MISE AU POINT Le système de mise au point du KONICA Autoreflex T4 associe un stigmomètre à champs coupés placé au centre du viseur, entouré d'une plage de microprismes (50). La mise au point peut se faire a l'aide de l'un ou de l'autre dispositif. - Page 26 (5 3) Manual Aperture Indicator Mark (54) Index Point for Stopped-down Metering (55) Automatic f/1.4 Under-exposure Indicator (56) Meter Needle (57) Aperture Scale f/22 (58) Over-exposure Indicator...
-
Page 27: Control Center" Viewfinder
"CONTROL CENTER" VIEWFINDER If you look through the viewfinder, you will note a range (53) Anzeige für manuelle (53) Markering för manuell meter at the center of the field, f-number information on Blendeneinstellung bländarinställning the right hand side, and a manual aperture indication mark (54) Markierung für (54) Indexmärke för ob-... -
Page 28: Kontrollzentrum Im Sucher
KONTROLLZENTRUM SUCHER VISEUR, CENTRE DE CONTRÔLES En regardant dans le viseur, on distingue le stigmomètre au Beim Blick durch den Sucher sehen Sie rechts eine Zahlen- centre du champ, l'indication de l'ouverture du diaphragme reihe mit den Blendenzahlen sowie links oben eine Markie- sur le côté... -
Page 29: Sökarens Är Kontrollcentrum
SÖKAREN ÄR KONTROLLCENTRUM VISOR DE "CONTROL EN CENTRO" I sökarens centrum finns en inbyggd avståndsmätare. Till höger i sökaren finns en skala med bländarvärden och längst Al mirar por el visor, Vd. encontrará el telémetro en el upp till vänster ett indikeringsmärke för manuell foto- centro del campo, la información del valor F a la derecha y grafering. -
Page 30: Vollautomatische Belichtung
AEC: AUTOMATIC EXPOSURE CONTROL PHOTO- GRAPHY (Light Metering at Full Lens Opening) This method is commonly used when pictures are taken under the AEC system with an AR lens having the AE mark. VOLLAUTOMATISCHE BELICHTUNG (Belichtungsregelung bei voll geöffneter Blende) Diese Messmethode ist bei allen vollautomatischen Hexanon- AR-Objektiven mit AE-Markierung verwendbar. - Page 31 2. Determine Shutter Speed. 2. Déterminer le temps de pose Turn the Shutter Speed Dial (20), select a reading on Tourner le sélecteur (20) et placer le chiffre correspond- the Shutter Speed Scale (17) suitable for your subject ant à la vitesse désirée devant le repère (17). Il est and bring it in line with the index mark.
- Page 32 3. Look Through Viewfinder. 3. Visée, lecture du posemètre Train your camera at the subject, look through the view- Viser un objet, regarder dans le viseur, régler la mise au finder, focus the lens, frame your subject and look at the point, cadrer l'objet et contrôler l'aiguille du posemètre Meter Needle (56) in the viewfinder.
- Page 33 Lorsque l'aiguille du posemètre indique la sous-exposition, choisir un temps de pose plus long. Lorsqu'elle indique la surexposition, choisir un temps de pose plus rapide. L'expo- sition sera correcte aussi longtemps que l'aiguille est visible entre les deux marques rouges supérieures et inférieures. Lorsqu'il s'agit de choisir d'abord l'ouverture avant de dé- terminer le temps de pose, pour raison de profondeur de champ désirée, tourner le sélecteur de temps de pose tout...
- Page 34 EXPOSURE METERING RANGE OF KONICA T4: Portée du posemètre Le posemètre TTL du KONICA Autoreflex T4 est couple au déclenchement de 1 sec. avec f/1,7 à 1/1000 de sec. avec f/16, lorsque la sensibilité de pellicule est de ASA 80 à 100.
-
Page 35: Hints For Unusual Exposure Situations
Reihe von ungewöhnlichen Situationen, die besondere Bedienung verlangen. SUGGESTIONS POUR DES CONDITIONS EXCEPTIONNELLES D'EXPOSITION Le système de mesure SdC double et comprimé de l'Autoreflex T4 est très sélectif, et n'est généralement pas affecté par les objets qui sont en dehors de la gamme d'exposition initiale. Il est programmé... - Page 36 Against-the-Light Shots: In such situations Gegenlicht-Aufnahmen: Bei solchen Situa- the light can shine directly into the camera tionen kann es passiercn, daß das Licht and adversely affect readings for the main direkt in die Kamera fällt und so die portion of the subject. In most cases tem- Belichtungswerte fur den Bereich des Haupt- porarily changing the film speed setting to a motivs ungünstig beeinflußt.
- Page 37 Contre-jour: Lorsque l'appareil est à contre- Motijusfotografering: I denna typ kan ljuset Tomas contra la luz: En tales situaciones, la - jour, la lumière entrant directement dans skina rakt in i kameran och helt förändra luz brilla directamente contra la cámara y l'objectif, les affichages sur la partie princi- exponeringsvärdena för motivet.
-
Page 38: Aperture
APERTURE BLENDE Die Blende regelt durch grössere oder kleinere Öffnungen The lens aperture is designed to control the amount of light (in Abhängigkeit mit der Verschlusszeit) das die Filmober- reaching the film surface in terms of area and the depth of fläche zur Belichtung erreichende Licht. -
Page 39: Ouverture Relative
OUVERTURE RELATIVE Le diaphragme sert à limiter la quantité de lumière • Ringen med vilken man manuellt ställer in de olika bländarvärdena och med vilken man också kan ställa in atteignant le film, il affecte en premier lieu la profondeur de champ (voir page 43) c'est-à-dire les limites de la netteté. -
Page 40: Shutter
At 1/30 Second synchronization with an electronic flash. SLUTAREN VERSCHLUSS Der Metallschlitzverschluss der KONICA Autoreflex T4 Slutarens funktion är att tidsmässigt reglera mängden av det ljus som når filmen och vilket fotografiskt fäster motivet på regelt die Belichtungsdauer des Filmes. Verschlusszeiten von l bis 1/1000 Sekunde und B können eingestellt werden. -
Page 41: Manual Picture-Taking
Manuelle Belichtungseinstellung Wenn Sie die Blende von Hand einzustellen wünschen, z.B. bei Blitzaufnahmen oder wenn das Bild absichtlich über- oder unterbelichtet werden soll, so drücken Sie die Sperre am Blendeneinstellring (12), dadurch wird die AE-Rastung aufgehoben, der Blendeneinstellring kann gedreht und die gewünschte Blende von Hand eingestellt werden. -
Page 42: Depth-Of-Field
DEPTH-OF-FIELD Depth-of-Field for f/16 When the lens is focused on a subject at some distance, not only the subject but also a certain area around the subject for f/4 will be sharply delineated in a photograph, and this area is known as a Depth-of-Field and has the following features. -
Page 43: Schärfentiefe
SCHÄRFENTIEFE PROFONDEUR DE CHAMP Wenn das Objektiv auf ein Motiv in bestimmter Entfernung Lorsque l'objectif est réglé sur une distance déterminée, il scharf eingestellt ist, so wird auch ein gewisser Raum davor est possible de photographier nettement dans une zone und dahinter noch genügend scharf abgebildet. -
Page 44: Skärpedjup
PROFUNDIDAD FOCAL SKÄRPEDJUP När objektivet ger skärpa på ett motiv på ett visst avstånd, Cuando el objetivo está enfocado al objeto que está a cierta blir inte bara själva motivet skarpt återgivet utan också ett distancia, existe una extensión en la cual salen enfocados visst område framför och bakom motivet. - Page 45 Contrôle visuel de profondeur de champ: Si on désire vérifier la profondeur de champ au viseur, lire la valeur d'ouverture f indiquée par l'aiguille, régler l'ouver- ture manuellement en tournant la bague d'ouverture de façon qu'elle ne soit pas devant la marque AE, et enfin appuyer sur le levier de contrôle de profondeur de champ (27).
- Page 46 Permissible Aberrated Circle Diameter 3/l00mm (Unit: Feet) Depth-of-Field Table (50mm f / 1 . 7 • 50mm f/1.4) Permissible Aberrated Circle Diameter 3/l00mm (Unit: Meter) Depth-of-Field Table (50mm f / 1 . 7 • 50mmf/1.4)
-
Page 47: Photographing In Stopped-Down Metering System
2. Cuando la abertura automática no se puede usar debido a que se usa el aro de extensión o fuelle. 3. Cuando se usa en la Autoreflex T4 el objetivo cuando se usa con adaptador de montaje algún objetivo de otro fabricante... - Page 48 turn the aperture ring. This action will make easier the manipulation. • Microphotographic pictures are also taken under the stopped-down metering system. Make an adjustment either with shutter speed or according to the brightness of the light source since no aperture is available. Belichtungsregelung Bei manueller Belichtungsregelung durch Abblenden findet die Blendenskala im Sucher keine Anwendung.
- Page 49 lägsta bländarvärde och sätt först därefter fast objek- si l'aiguille stationne au dessous du repère et la diminuer si au contraire elle reste au-dessus. tivet. Det underlättar fastsättandet. • Avec le réglage semi-automatique, on constate plus • Vid mikrofotografering kan exponeringen ej justeras souvent qu'avec le réglage automatique, l'entrée de genom avbländning.
-
Page 50: Film Rewind
FILM REWIND FILMRÜCKSPULUNG After a pre-determined number of pictures have been taken Wenn das Filmzählwerk die Zahl der auf dem Film befind- on the film loaded in your camera, the film will be wound lichen Aufnahmen anzeigt und der Filmtransporthebel beim back into the original cartridge. -
Page 51: Rebobinage Du Film
REBOBINAGE DU FILM Après avoir effectué le nombre de prises prévues, le film doit être rebobiné. Si le dos de l'appareil est ouvert sans que le film soit rebobiné, certaines vues risquent d'être voilées. NOTA: Si le levier d'armement (14) se trouve bloqué en fin de film, ne pas forcer mais débrayer et procéder au rebobinge du film. -
Page 52: Flash Photography
X-Blitzlichtkontakt (24) angeschlossen. Im to 1/30 second. KONICA Autoreflex T4 permits use of Zubehörprogramm stehen 3 Elektronenblitzgeräte mit der either a cordless or cord type flash unit. The Cordless Flash Bezeichnung KONICA X-28, X-20 und X-14 zur Verfügung. -
Page 53: Photographie Au Flash
1/30 seg. La KONICA électronique sur la contact du flash sans fil (19). S'il s'agit Autoreflex T4 es apta tanto para la unidad de flash sin de KONICA X-28, X-20 ou de X-14, flash électronique à... - Page 54 2. Déterminer l'exposition: Les flashs électroniques sont Flash Synchronization for KONICA T4 synchronisés avec les vitésses jusqu'à 1/125 de sec. Le système AEC n'est pas utilisable avec flash, celui-ci fonc- Shutter tionnant comme unique source d'éclairage. Avec le flash, Speed Con- l'appareil doit être réglé...
-
Page 55: Time Exposure
The KONICA trådulösare 3 har ett "T"-stopp så att den kan KONICA Cable Release 3 with a lock has a "T" stopper, användas direkt. so that it may be put to use for time exposure without a releast lock lever. -
Page 56: Self-Timer
SELF-TIMER Bei Aufnahmen ohne Selbstauslöser, drücken Sie den Hebel The self-timer of the KONICA Autoreflex T4 is usable in im Uhrzeigersinn ein und stellen ihn dann mit der Selbstaus- AEC, manual and flash photography. Use the self-timer when löser-Sperraste (3) fest. Sie verhindern dadurch ein un- you are to take pictures of your companiones and yourself beabsichtigtes Auslösen des Selbstausl-sers. -
Page 57: Retardement
Podrá usar el disparador automático de la KONICA a des cas où le bouton de déclenchement se trouve pressé, Autoreflex T4 tanto para las tomas de AEC (automáticas) un gros rayon de lumière entre accidentellement par como para las tomas con flash. Utilice el disparador l'oculaire, entraînant alors une erreur importante d'exposi-... -
Page 58: Multiple Exposures
MEHRFACHBELICHTUNG MULTIPLE EXPOSURE Wenn Sie den Filmaufzugshebcl betätigen und gleichzeitig auf If the film transport lever is cocked while depressing the Multiple Exposure Control (38) under the film transport den Mehrfachbelichtungsschaltcr (38) unter dem Filmauf- zugshebel drücken, so wird zwar der Verschluß gespannt, lever, the film will not be wound (nor will the film counter advance) but the shutter will be charged, so that it is possible jedoch der Film (wie auch das Bildzählwerk) nicht weiter... -
Page 59: Multi-Exposition
MULTI-EXPOSITION On peut surimprimer les images en appuyant la commande de multi-exposition (38) qui se trouve sous le levier d'armement. Quand on appuie sur cette commande, on peut déclencher l'obturateur autant de fois qu'on désire sur le même cadre de pellicule. -
Page 60: Accessories
1.8 frames per second or to take single-frame pictures, while looking Este aparato es un accesorio de uso exclusivo con la KONICA through the finder at a moving subject, as it is coupled to the Autoreflex T4. - Page 61 • Eyecup 2 (for T4) • Diopter Correction Lens 2 (for T4) For long- and short-sighted persons, it is advisable to use an Made of rubber, it is for use on the eyepiece diopter correction lenses on the eyepiece frame. It will become assembly.
- Page 62 Eyepiece Converter for use of the magnifier The magnifier, as it is equipped to the eyepiece assembly of the camera, is or angle finder 3 with KONICA Autoreflex designed to blow up for viewing the image which appears at the center of T4.
- Page 63 • Angle Finder 3 • Attachment Lens 55 The use of the Angle Finder makes it possible to look into Simply by screwing this lens in on the taking lens, close-up the viewfinder from above the camera. This gadget is quite pictures may be taken under the AEC system.
- Page 64 • Extension Ring 3 Placed in between the camera body and the taking lens, it is used in doing copying work on literatures and documents and taking pictures of insects and flowers. With a combination of a set of base rings and three intermediate rings, it is feasible to take blow-ups of IX in magnification with a standard lens and of 2X with a reverse ring, which is available as an accessory.
- Page 65 • Automatikring 2 und Doppel-Drahtauslöser 2 • Auto Ring 2 and Bei Verwendung der Zwischenringe kann der automatische Blendenmechanismus Double Cable Release 2 nicht benutzt werden. Hier wird durch Verwendung eines Doppel-Drahtauslösers das The use of an extension ring will Fokussieren erleichtert und das Objektiv wird unmittelbar vor dem Auslösen des not permit the taking lens to serve Verschlusses auf die voreingestellte Blendenöffnung abgeblendet.
- Page 66 • Focusing Rail • X-28 Automatic Electronic Flash The focusing rail is used when a camera on whose lens an A compact automatic light adjusting electronic flash clipping attachment lens or the Extension Ring 3 is fitted is mounted on at the guide number 90 (ASA 80/125), and the automatic on a tripod.
- Page 67 • X-20 Electronic Flash • X-14 Electronic Flash A small electronic flash with a guide number of 64 (ASA This is a small electronic Flash with a guide number of 45 80/125) and features extremely short flash intervals of 4 to (ASA 80/125) for exclusve use on the hot shoe (cordless).
- Page 68 • Adaptador auto helicoid bilder tas ined lång slutartid. Acoplado al lente Macro Hexanon AR 105 mm f/4, este • Disparador de cable 3 KONICA adaptador posibilita la toma, de fotografías con exposi- Emplee el Disparador de cable ción automática de infinito hasta una amplificación de KONICA para evitar que le 0,2X.
- Page 69 • Auto Bellows •Automatisches Balgengerät This gadget makes it possible to take a Das Balgengerät ermöglicht zwischen Camera und Objektiv gesetzt — broad range of close-ups and blow-ups in a extreme N a h a u f n a h m e n mit Vergrößerungen von 1:1 bis 3,6-fach. Der continuous manner.
- Page 70 • Bellows 3 • Balgengerät 3 Dieses tragbare Zubehörgerät ist im Vergleich zum automatischen Balgengerät This gedget is a portable bellows and, unlike the Auto Bellows, does not have an auto- nicht mit Blendenautomatik und Fokussierschiene ausgestattet. Mit dem Balgengerät 3 können serienmässige Aufnahmen mit Vergrösserungsfaktor matic diaphragm mechanism and focusing 0,9X bis 3,5X Standardobjektiv (50mm f/1.7) gemacht werden.
- Page 71 • Macro Stand • Slide Copier Adapter This adapter is required for reverse photography with t slide • Makroständer copier and used together with a reverse adapter. The Slide • Statif Macro Copier Adapter is usable at the magnification factors of 1.5Xto4X.
- Page 72 • 57mm f/1.2 Bellows Adapter • Reverse Adapter Even with the Bellows, it is possible to take pictures in reverse This is an adapter indispensable for reverse photography in which the lens is put into reverse position, but the photography and slide copying with a 57mm reverse adapter system in which a lens of the 55mm screw filter is f/1.2 lens and reverse adapter.
- Page 73 This adapter makes it possible to take microphotographic pictures only with the object and eyepiece lenses of a microscope. While used for a lens other than the Autoreflex T4 lens. looking through the camera finder, it is possible to check the field •...
- Page 74 • Standard Case • Front Cover of Semi-Hard Case • Normalfutteral Type M: Usable even when a 15, 24, 28, 35mm w/a lenses or 57mm f/1.2 standard lens is mounted on the camera. • Etui standard Type L: Usable even when a 85, 100, 135mm telephoto •...
- Page 75 • Copy Stand 2 • Kopierständer 2 This gadget is quite handy in taking close-ups of drawings, Dieses Zubehörgerät erleichtert die Reproduktion von literatures and photos in dimensions of up to 11-5/8" x Zeichnungen, Dokumenten und Photographien mit einem 16-1/2". The focusing rail, which is available as an Format bis"...
-
Page 76: Maintenance Of Camera And Lens
• Lens Soft Case No. 50, 135 and 300 • Etui pour mou d'objectif No. 50,135 et 300 Ces étuis mous sont préparés pour les objectifs Hexanon, These soft cases are prepared for Hexanon lenses and soft and et ils sont mous et élastiques. Les étuis No 135 et 300 elastic. -
Page 77: Pflege Der Camera Und Des Objektivs
PFLEGE DER CAMERA UND DES OBJEKTIVS SÅ HÄR SKÖTER NI KAMERAN • Verwenden Sie zum Reinigen des Cameragehäuses und des Objektivs lediglich einen weichen Pinsel, am besten • När Ni dammar av kameran, gör det med en borste, helst mit Blasebalg. Reinigen Sie nicht den Reflexspiegel, da försedd med blåsbälg. -
Page 78: Konica Interchangeable Lenses
KONICA INTERCHANGEABLE LENSES ®screw-in, ©clip-on LENS APERTURE LENS ANGLE MINIMUM CLOSEST LENS TYPE FILTER LENGTH WEIGHT OF VIEW CONSTRUCTION SYSTEM APERTURE DISTANCE HOOD fish-eye built-in 15mm f/2.8 180° 7groups, l0elements Auto f / 1 6 built-in 60mm 395g 0.15m(6") extreme 21mm f/4 90"... - Page 79 ANGLE LENS APERTURE MINIMUM LENS CLOSEST LENS TYPE LENGTH WEIGHT FILTER OF VIEW SYSTEM APERTURE HOOD CONSTRUCTION DISTANCE 400mm 1/5.6 ultra telephoto 6° 5groups, 9elemeiits Auto f/45 4m(13ft) 77mm® pull-out 217mm l,600g 800mm f/8 ultra telephoto 3° Manual 775mm 1group, 2elements f/45 20m(65ft)