Table des Matières
Publicité
Liens rapides
Publicité
Table des Matières

Manuels Connexes pour Konica AUTOREFLEX T3


Sommaire des Matières pour Konica AUTOREFLEX T3
-
Page 2: Table Des Matières
Basic Manipulation for AEC Photographing ..... Autoreflex-T3 ..............Name of Each Part ............... Bedienung für AEC-Aufnahmen .......... Major Specifications of KONICA Autoreflex-T3 .... 12 Bezeichnung der Einzelteile ..........Inserting of Mercury Batteries ..........13 Einlegen der Quecksilberbatterien ........(Meter On/Off Switch and Shutter Lock Control) Belichtungsmesser-An/Aus-Schalter und Check of Batteries ............... - Page 3 TABLE DES MATIERES INNEHÅLL Beskrivning av KONICA Autoreflex-T3 ......Caractéristiques du KONICA Autoreflex-T3 ....AEC-Fotografering; instruktioner ........Maniement fondamental pour les photos AEC .... Namn på delarna ............... Nomenclature des pièces et organes essentiels ....Att sätta i batterierna ............
-
Page 4: Features Of Konica Autoreflex-T3
It is also usable in manual shooting. vorgewählter Belichtungszeit automatisch eingestellt. Die 2. The KONICA Autoreflex-T3 has a TTL meter of the Automatik kann auch abgeschaltet und die Blende von variable metering type in which the kind of metering that Hand eingestellt werden. -
Page 5: Caractéristiques Du Konica Autoreflex-T3
KONICA AUTOREFLEX-T3 KONICA AUTOREFLEX-T3 1. KONICA Autreflex-T3 är en helautomatisk SLR* 1. Le KONICA Autoreflex-T3 est un appareil automatique (TTL-AEC system) där slutarhastigheten har givits pre- SLR* (système TTL-AEC) qui accorde la priorité à la ferens. Även manuell användning är möjlig. -
Page 6: Basic Manipulation For Aec Photographing
BASIC MANIPULATION FOR AEC PHOTOGRAPHING 1. Insert Mercury Batteries 4. Set AE Mark (P. 36) 2. Load Film (P. 17) 3. Set Film Speed (P.21) (P. 13) BEDIENUNG FÜR AUTOMATISCHE AUFNAHMEN l. Einlegen der Quecksil- 2. Filmeinlegen(S.17) 3. Einstellen der Filmemp- 4. - Page 7 5. Determine Shutter Speed. 6. Focus and Frame (P.44) 7. Check Exposure and Shut- 8. After the film has 1/125 sec. outdoors and ter Release (P.34) been exposed, rewind 1/30 sec. indoors (P.36) it (P.54) 6. Die Entfernung einstellen 5. Die Verschlußzeit ein- 7.
-
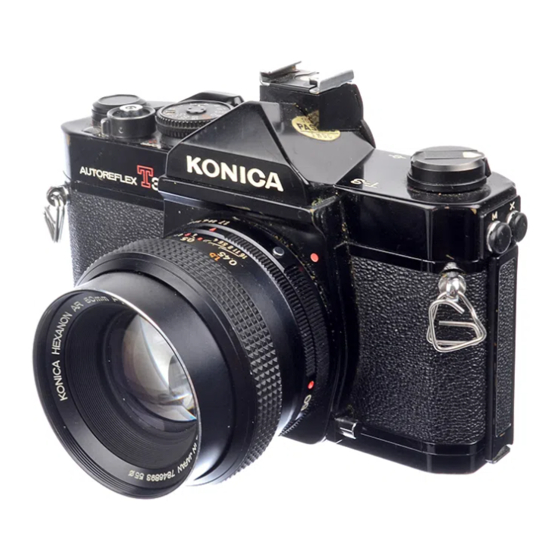
Page 8: Name Of Each Part
NAME OF EACH PART (1) Shutter Release Button (14) Film Wind Lever (15) Film Speed Indicator (2) Film Counter Window (DIN) (3) Meter On/Off Switch (16) Film speed Indicator and Shutter Lock Window (ASA) Control (17) Shutter-Ready Indicator (4) AEMark (18) Multiple Exposure Lever (5) Self-Timer Lever and Depth-of-Field Lever... -
Page 9: Bezeichnung Der Einzelteile
BEZEICHNUNG DER NOMENCLATURE DES PIECES NAMN PÅ VARJE DEL EINZELTEILE ET ORGANES ESSENTIELS (1) Slutarknappen (1) Auslöser (1) Bouton de déclenchement (2) Bildzählwerk (2) Compteur (2) Bildräknare (3) Belichtungsmesser-An/Aus- (3) Commutateur du posemètre On/ (3) Mätarkontakt (On/Off) och slut- Schalter und Auslösersperre Off et verrou d'obturateur arlås kontroll (4) AE-Markierung... - Page 10 (28) Back Cover Lock (34) Film Guide (29) Film Rewind Spindle (35) Sprocket (30) Film Cartridge Chamber (31) "X" Synchro Contact (36) Film Take-up Spool (for Hot Shoe Clip) (37) Film Take-up Slits (32) Eyepiece (38) Pressure Plate (33) Shutter (39) Back Cover (40) Film-Type Reminder Slot...
- Page 11 (28) Verrou du dos (28) Bakre lock (28) Verriegelung für Rückwand (29) Axe de rebobinage (29) Axel för tillbakavevning av fil- (29) Filmriickspulspindel (30) Logement du chargeur (30) Raum für Filmpatrone (31) Contact synchro flash "X" (Pour (30) Kammare för filmhylsa (31) "X"-Blitzkontakt (zum la griffe d'allumage exclusive)
-
Page 12: Major Specifications Of Konica Autoreflex-T3
Correct aperture reading system coupled to film speed, shutter speed and at-full-lens-opening aperture value. Mount: Konica Mount II of bayonet type, 47mm in Preset, normal aperture lens (stopped-down metering): diameter with 40.5mm flange back. Index-point alignment system (match-needle) coupled to film... -
Page 13: Inserting Of Mercury Batteries
MISE EN PLACE DES PILES AU MERCURE Le posemètre TTL du KONICA Autoreflex-T3 est alimenté par deux piles au mercure 1,35V. Bien essuyer la surface des piles livrées avec l'appareil, avec un chiffon sec et les placer dans leur logement. -
Page 14: Belichtungsmesser-An/Aus-Schalter Und Auslösersperre
Belichtungsmesser-An / Aus-Schalter und Auslösersperre Wenn Sie den Belichtungsmesser-Drehschalter (3) um den Auslöser (l) durch Drehen gegen den Uhrzeigersinn auf "OFF" stellen, wird der Belichtungsmesser ausgeschaltet und der Auslöser arretiert. Stellen Sie den Schalter auf "OFF", wenn Sie Ihre Kamera mit gespanntem Filmaufzugshebel tragen. -
Page 15: (Meter On/Off Switch And Shutter Lock Control) Check Of Batteries
Check of Batteries come to that point or gone farther down from that point, it is advisable to change the battery with a new A mercury battery will be fully usable over a period of one one. year in normal circumstances. There will be a sudden drop in voltage when its days are numbered. -
Page 16: Prüfen Der Batterien
Prüfen der Batterien Contrôle des piles au mercure En usage normal, une pile au mercure dure plus d'un an. La Eine Ouecksilberbatterie kann unter normalen Umständen über den Zeitraum eines Jahres hinweg voll verwendet werden. tension descend subitement lorsque la pile est complètement Wenn sie sich ihrem Ende nähert, gibt es einen plötzlichen usée. -
Page 17: Film Loading
är färgade i rött. Försäkra Er om att mätarnålen går över det röda märket när filmhastighet Le KONICA Autoreflex-T3 utilise le film de 35mm en och slutarhastighet är inställd i rött och att armen är cartouche de sécurité. Pour charger l'appareil, éviter l'ex- förd mot den röda Bokstaven "C". - Page 18 3. Pull out the film while the cartridge is lightly pressed 1. Pull the Back Cover Lock (28) and open the Back Cover down and then choose any slit of the Film Take-up Spool (39). (36) into which the film tip may be inserted with ease and 2.
- Page 19 5. Flip up the Film Rewind Crank (22) and turn it in the 4. While lightly pressing down the cartridge, turn the Film direction indicated by an arrow mark on it to reduce the Wind Lever (14) and take up the film on the spool. Ascertain that the teeth of the Sprocket (35) are in gear slack of the film.
- Page 20 6. Transportieren Sie jetzt den Film mit dem Aufzugshebel (14) und drücken Sie den Auslöser (l). Wiederholen Sie diesen Vorgang, bis die Zahl "1" dem Indexstrich im Bildzählwerk (2) gegenüberliegt. Wenn der Film ordnungs- gemäss transportiert wird, dreht sich der Filmrückspul- knopf (23) während des Filmtransportes entgegen dem Uhrzeigersinn.
- Page 21 7. Einstellen der Filmempfindlichkeit (DIN) Der Aussenring des Verschlusseinstellrades (20) wird nach oben gezogen. Jetzt kann durch Drehen die Filmempfindlichkeit nach ASA oder DIN im Sichtfen- ster eingestellt werden. Sobald die gewünschte Film- empfindlichkeit dem Index gegenüberliegt, lassen Sie den Einstellring nach unten einrasten. •...
-
Page 22: Shutter-Ready Indicator
Anzeige für Auslösebereitschaft Ziehen Sie den Filmaufzughebel etwas heraus, um ihn leichter bedienen zu können. Bewegen Sie den Filmaufzu- gshebel bis zum Anschalg; der Film wird dabei um ein Bild weitertransportiert. Gleichzeitig stellt sich das Filmzählwerk um einen Strich weiter und die Anzeige für die Auslösebereit- schaft (17) wechselt von rot auf grün. -
Page 23: Film-Type Reminder Slot
Halter für Filmtyp-Kontrolle Als eine Information über Marke und Typ des in Ihre Kamera eingelegten Films und seine DIN-Filmempfind- lichkeit, schneiden Sie den Deckel der Schachtel, in der die Filmpatrone geliefert wird, ab und schieben ihn in den Halter für Filmtyp-Kontrolle (40) ein. Repère du film utilisé... -
Page 24: Shutter
SLUTAREN VERSCHLUSS Slutarens funktion är att tidsmässigt reglera mängden av det Der Metallschlitzverschluss der KONICA Autoreflex-T3 regelt ljus som når filmen, och vilket fotografiskt fäster motivet på die Belichtungsdauer des Filmes. Verschlusszeiten von l bis den. Slutarskalan omfattar "läge B" samt tiderna från l 1/1000 Sekunde und B können eingestellt werden. -
Page 25: Lens Interchange
LENS INTERCHANGE (27), tourner la partie chromée de l'objectif dans le sens To Dismount the Lens: While the Lens Release Button inverse de la rotation des aiguilles d'une montre. Lorsque le (27) is depressed, grip the lens barrel and revolve it point rouge de la monture coïncide avec celui du corps de counterclockwise. -
Page 26: Aperture
NOTES: • When the lens is detached, see to it that dust will not come in the camera and lens barrel and the lens surface will not be either scratched or marred with fingerprints. Under any circumstances, do not touch the inner parts of the camera. -
Page 27: Blende
nique (système AE automatique d'exposition) lorsque la marque AE sur la bague d'ouverture est portée devant le repère, le diaphragme est automatiquement réglé sur cette ouverture puis s'ouvre au maximum immédiatement après la prise de vues, prêt une nouvelle visée. •... - Page 28 Compensating Resistors Shutter and Film Speed Coupling Variable Resistors Shutter and Film Speed Dial Compound CdS Cells Meter Switch Pentaprism Eyepiece Meter Needle Meter Shutter Speed Scale Condenser Lens "Control Center" Viewfinder Focusing Screen Mirror Mark for Indication of f/stop at Full Lens Opening Lever for Transfer of' f/stop at Full Lens Opening...
- Page 29 Leterally thousands of lenses can aperture required for a perfect exposure at that instant be used with this system. In addition to KONICA Auto- when you press the button. Reflex lenses, lenses in mounts for KONICA FP, Pentax/...
- Page 30 Sie die automatische Blendeneinstellung AEC Belichtungsmessung: Bei einem KONICA Hexanon AR abschalten und Ihr KONICA Hexanon AR Objektiv auf den (automatischen) Objektiv dient die Belichtungsmessernadel gewünschten Blendenwert von Hand Einstellen. im Sucher nur dazu, Sie zu informieren, bei welchem Die KONICA Autoreflex-T3 läßt Ihnen die Wahl, vollauto-...
-
Page 31: Mesure Ace (Contrôle Automatique D'exposition) Et Controle Non-Automatique
Cette limite correspond à l'ouverture exacte utiliser des milliers d'objectifs. En plus d'objectifs Auto- nécessaire au moment de la prise. reflex de KONICA, les objectifs avec la monture pour le Avec l'objectif AR Hexanon de KONICA intégré dans KONICA FP, par exemple, Pentax/Praktica, Exakta/Topcon l'Autoreflex-T3, aucun réglage n'est nécessaire. - Page 32 Förutom KONICA Auto- ing, i det ögonblick som slutaren nertryckes. Med ett KONICA Hexanon AR objektiv påsatt på Er Autore- Reflex objektiv, kan objektiv med fästen avsedda för KO- flex-T3, förloras ingen tid på att få nålen att passa in på ett NICA FP, Pentax/Praktica, Exakta/Topcon samt Nikon/ Nikkormat användas för Stopped Down-inställning med...
-
Page 33: Control Center" Viewfinder
"CONTROL CENTER" VIEWFINDER (47) Manual Aperture Indicator Mark (40) Under-exposure Warning Mark for f/1.2 Lens (45) Index Point for Stopped-down Metering (48) Mark Indicating F-number at Full Lens opening (49) Meter Needle (50) Battery Check Mark (51) Aperture Scale (46) Shutter Speed Scale (52) Over-exposure Warning Mark (44) Varning för underexponering (44) Warnsignal bei Unterbelichtung... -
Page 34: Looking At Meter Inside Viewfinder
LOOKING AT METER INSIDE VIEWFINDER KONTROLLZENTRUM IM SUCHER F-NUMBER FOR CORRECT EXPOSURE: When the Meter Bei vollautomatischer Belichtung (AE-Einstellung) zeigt der Needle (49) stops within the range of correct exposure, the Zeiger des Belichtungsmessers (49) auf der Blendenskala (51) f-number on the aperture sacle (51) to which the meter die Blende, mit der vollautomatisch optimal belichtet wird. -
Page 35: Indications Du Posemètre Dans Le Viseur
INDICATIONS DU POSEMETRE DANS LE VISEUR VALEUR D'OUVERTURE ( F ) POUR L'EXPOSITION SÖKARENS KONTROLLCENTRUM CORRECTE: Si l'aiguille (49) s'arrête dans les limites de RÄTTA BLÄNDARVÄRDEN: När ljusmätarens visare l'exposition correcte, la valeur f sur l'échelle d'ouvertures (49) stannar inom exponeringsområdet är det bländartal (51) indiquée par l'aiguille est l'ouverture du diaphragme au visaren pekar på... - Page 36 AEC: AUTOMATIC EXPOSURE CONTROL PHOTOGRAPHY (Light Metering at Full Lens Opening) This method is commonly used when pictures are taken under the AEC system w i t h a n A R lens having the AE mark. 2. Determine Shutter Speed. 1.
-
Page 37: Vollautomatische Belichtung
VOLLAUTOMATISCHE BELICHTUNG (Belichtungsregelung bei voll geöffneter Blende) Diese Messmethode ist bei allen vollautomatischen Hexanon-AR-Objektiven mit AE-Markierung verwendbar. 1. Stellen Sie den Blendenring (12) des Objektives mit der AE-Marke (4) dem Index gegenüber. Der Ring rastet in dieser Stellung ein. 2. Stellen Sie die Verschlusszeit ein. Hierzu drehen Sie das Verschlusseinstellrad (20) bis die für die Aufnahme geeignete Verschlusszeit gegenüber dem Index steht. - Page 38 Steht der Zeiger im oberen roten Warnfeld, so wird unter- belichtet, d.h. die Verschlusszeit muss verlängert werden. Steht der Zeiger im unteren roten Warnfeld, so wird überbelichtet. In diesem Fall muss man die Verschlusszeit verkürzen. Falls Sie wegen einer bestimmten Schärfentiefe einen bestimmten Blendenwert verwenden müssen, drehen Sie die Verschlußzeiteinstellung solange,...
-
Page 39: Manual Picture-Taking
Manuelle Belichtungseinstellung Wenn Sie die Blende von Hand einzustellen wünschen, z.B. bei Blitzaufnahmen oder wenn das Bild absichtlich über- oder unterbelichtet werden soll, so drücken Sie die Sperre am Blendeneinstellring (12), dadurch wird die AE-Rastung aufgehoben, der Blendeneinstellring kann gedreht und die gewünschte Blende von Hand eingestellt werden. -
Page 40: Hints For Unusual Exposure Situations
HINTS FOR UNUSUAL EXPOSURE SITUATIONS Against-the-Light Shots: In such situations The compound dual CdS metering system in the Autoreflex-T3 is very the light can shine directly into the camera selective, and is generally not unduly affected by subject matter and adversely affect readings for the main outside its p r i m a r y exposure reading range. - Page 41 Gegenlicht-Aufnahmen: Bei solchen Situa- Contre-jour: Lorsque l'appareil est à contre- Motljusfotografering: I denna typ kan ljuset tionen kann es passieren, daß das Licht jour, la lumière e n t r a n t directement dans skina rakt in i kameran och helt förändra direkt in die Kamera fallt und so die...
-
Page 42: Training Of Camera
TRAINING OF CAMERA Hold your Camera Tight To take a sharp picture, the important thing is to hold your • In taking pictures at slow shutter speeds or with a telephoto lens, the camera is likely to be jarred if it is hold in camera in a stable manner to prevent it from being jarred when the shutter button is depressed. -
Page 43: Halten Der Camera
HALTEN DER CAMERA Die Camera fest Um scharfe Bilder aufzunehmen, muss die Camera fest und ruhig gehalten werden, damit beim Auslösen keine Verwacklungsgefahr entsteht. Halten Sie die Camera am besten mit beiden Händen und drücken Sie sie leicht gegen Ihr Gesicht, stützen Sie dabei die Ellbogen gegen Ihren Körper ab. -
Page 44: Focusing
FOCUSING (53) Focusing Screen (53) Plage de mise au point (53) Einstellfeld (53) Fokuserande plattan (54) Mat Plane (54) Plan dépoli When the lens is When the lens is not (54) Mattscheibe (54) Matta ytan focused ..focused . -
Page 45: Entfernungseinstellung
ENTFERNUNGSEINSTELLUNG Das Einstellfeld (53) ist entweder mit einem Mikro-Prismenfeld oder mit einem Schnittbild-Entfernungsmesser ausgerüstet. Die Methode der Entfernungseinstellung ist für beiden Systeme gleich. Bei Mikro-Prismenfeld: Drehen Sie, indem Sie in den Sucher blicken, den Entfernungseinstellring (11) so, daß das im Mikro-Prismenfeld erscheinende Bild deutlich sichtbar ist. -
Page 46: Depth-Of-Field
DEPTH-OF-FIELD When the lens is focused on a subject at some distance, not Depth-of-Field for f/16 only the subject but also a certain area around the subject for f/4 will be sharply delineated in a photograph, and this area is known as a Depth-of-Field and has the following features. -
Page 47: Schärfentiefe
PROFONDEUR DE CHAMP SCHÄRFENTIEFE Lorsque l'objectif est réglé sur une distance déterminée, il Wenn das Objektiv auf ein Motiv in bestimmter Entfernung est possible de photographier nettement dans une zone scharf eingestellt ist, so wird auch ein gewisser Raum davor s'étendant avant et après cette distance. -
Page 48: Skärpdjup
SKÄRPDJUP När objektivet ger skärpa på ett motiv på ett visst avstånd, FOCAL PLANE MARK: The distances shown on the blir inte bara själva motivet skarpt återgivet utan också ett distance scale are those between subjects and the Focal Plane visst område framför och bakom motivet. -
Page 49: Bilddjupsarmen
Hebel für Schärfentiefe: Die Hexanon AR Objektive messen die Belichtung bei voll geöffneter Belnde; dadurch bleibt das Sucherbild hell. Wenn Sie den Hebel für Schärfentiefe (5) in Richtung Objektiv drücken, wird das Objektiv auf den Automatisch gewählten Belndenwert. der von der Belichtungsmesser- nadel angezeigt wird oder auf den manuell eingestellten Blendenwert abgeblendet. -
Page 52: Use Of Self-Timer
USE OF SELF-TIMER SELBSTAUSLÖSER Der Selbstauslöser der KONICA Autoreflex-T3 kann sowohl The self-timer of the KONICA für vollautomatische als auch für manuelle Aufnahmen Autoreflex-T3 is usable in AEC, manual and flash photography. verwendet werden, Er ist nützlich, wenn man selbst mit auf's... -
Page 53: Utilisation Du Retardement
UTILISATION DU RETARDEMENT SJÄLVUTLÖSAREN Självutlösaren till K O N I C A Autoreflex-T3 kan användas Le retardement du KON1CA Autoreflex-T3 peut être utilisé såväl till AE-systemet som till manuell inställning och soit en position automatique, soit avec le synchro-flash. fotografering med blixt. Använd självutlosaren när ni tar Utiliser le retardement si l'on desire f i g u r e r sur la photo. -
Page 54: Film Rewind
FILM REWIND After a pre-determined number of pictures have been taken 1. Depress the Film Rewind Button (41) on the underside of on the film loaded in your camera, the film will be wound your camera. Once it is depressed, the button will remain back into the original cartridge. -
Page 55: Filmrückspulung
FILMRÜCKSPULUNG Wenn das Filmzählwerk die Zahl der auf dem Film befindlichen Aufnahmen anzeigt und der Filmtransporthebel beim Bewegen starken Widerstand aufweist, ist der ganze Film belichtet und muss in die Filmpartone zurückgespult werden. Öffnen Sie die Camerarückwand auf keinen Fall bevor der Film nicht ganz zurückgespult ist. •... -
Page 56: Multiple Exposure
MULTIPLE EXPOSURE The Multiple-Exposure Lever (18) is situated under the shutter speed dial. With this lever kept pressed down in the direction indicated by the arrow mark, cock the film wind lever, only the shutter will be charged but the film will not be wound (nor will the film counter advance). -
Page 57: Mehrfachbelichtung
MEHRFACHBELICHTUNG Der Hebel für Mehrfachbelichtung (18) befindet sich unter der Verschlußzeitenwählscheibe. Wenn Sie den Filmaufzugshebel betätigen und dabei diesen Hebel in Pfeilrichtung gedrückt halten, wird der Verschluß gespannt, der Film jedoch nicht transportiert (auch das Zählwerk schaltet nicht weiter), so können Sie beliebig oft das selbe Bild belichten. (1) Machen Sie die erste Belichtung. -
Page 58: Time Exposures
The When such a long time exposure is required, turn the Shutter KONICA Cable Release 3 with a lock has a "T" stopper, Lock Control (3) and set it to "OFF" while the shutter so that it may be put to use for time exposure without a release button is kept depressed. -
Page 59: Zeitaufnahmen
• AEC-systemet är oanvändbart vid exponering på tid. Ställ in kameran på manual för bestämning av bländare. • För att förhindra kameran från att skaka till, är det nödvändigt att använda stativ och en kabelutlösare. KONICA Cable Release 3 med lås har ett "T"-stopp så att den kan användas direkt utan en utlösarlåsarm. -
Page 60: Flash Photography
KONICA. Lorsque les flashs électroniques in a dark room and at night. Flash bulbs or electronic flash KONICA X-20 ou X-14 sont connectés à cette griffe are also usable in day light flash photography as auxiliary d'allumage (sans fil), le contact électrique est établi. - Page 61 The conventional d'allumage, il suffit de le mettre sur la griffe, le contact KONICA Accessory Clip 3 may also be fixed and used. électrique s'établit seulement lorsque le flash est monté. 2. Mount an Electronic Flash: Insert the seat of an Aucun danger même si l'on touche le contact.
- Page 62 Flash Synchronization for KONICA Autoreflex-T3 korrekten Blendenwert erhalten Sie, wenn Sie die Leitzahl (siehe Angaben des Blitzgeräteherstellers) durch die Auf- nahme-Entfernung dividieren. Ist die Lietzhal z.B. 20 und die Entfernung 5 m, so müssen Sie mit Blende 4 belichten. Die Leitzahl ist von der Helligkeit des Blitzgerätes und der Empfindlichkeit des Films abhängig.
-
Page 63: Photographing In Stopped-Down Metering System
2. When automatic aperture cannot be put to use due to the utilization of an extension ring and bellows. 3. When a KONICA FS, FP or FM, or a lens produced by other camera manufacturer is used for the Autoreflex-T3 together with a lens mount adapter. - Page 64 Exposure Determination The aperture scale visible in he viewfinder is not usable for the stopped-down metering system. Turn either the aperture ring or the shutter speed dial and align the Meter Needle (49) with the Index Point for Stopped-down Metering (45) situated at the reading "f/1.4" to secure a correct exposure. If the combination of aperture and shutter speed is improper, the needle will not come in alignment with the index mark.
- Page 65 Détermination de l'exposition La méthode de réglage semi-automatique n'a aucun rapport direct avec les valeurs de diaphragmes affichées dans le viseur. Tourner soit la bague d'ouverture, soit le sélecteur de temps de pose, pour faire coïncider l'aiguile du posemètre (49) au repere (45) situé à l'affichage "f/1,4", pour avoir l'exposition correcte.
-
Page 66: Zubehör
ACCESSORIES / ZUBEHÖRGERÄT / ACCESSORIOS / ACCESORIOS • KONICA Filters COLOR EFFECTS NAME As the KONICA Autoreflex-T3 is of Absorbs ultra-violet. Prevents excess bluishness with color film. No the TTL type, there is no need to Colorless* UV (L39) change in the overall color rendition. Also used for atmospheric haze. - Page 67 • Semi-Hard Case Front Cover • Lens Hoods • Body Cap and Mount Cap for 135mm Telephoto Lens The body cap is designed to protect The use of a lens hood is indispen- the inner parts of the camera and the sable to the prevention of unneces- Usable even when a 1 3 5 m m , 1 0 0 m m rear part of the lens when the lens is...
- Page 68 • Eyecup • Eyesight Correction Lenses • Magnifier Made of rubber, it is for use on For long- and short-sighted persons, it The magnifier, as it is equipped to the the eyepiece assembly. This gad- is advisable to use an eyesight adjust- eyepiece assembly of the camera, is designed get makes the finder easier to ment lenses on the eyepiece frame.
- Page 69 • Attachement Lens 55ø • Angle Finder 3 Simply by screwing this lens in on the taking The use of the Angle Finder makes it possible to look into the lens, close-up pictures may be taken under the viewfinder from above the camera. This gadget is quite handy AEC system.
- Page 70 • KONICA Cable Release 3 Placed in between the camera body and the taking lens, it is used in doing copying Use of the Konica Cable Release is work on literatures and documents and taking pictures of insects and flowers. With a...
- Page 71 • Auto Ring 2 and Double Cable Release 2 • Automatikring 2 und Doppel-Drahtauslöser 2 The use of an extension ring will not permit the taking lens Bei Verwendung der Zwischenringe kann der automatische to serve as an automatic aperture one. Focusing may be Blendenmechanismus nicht benutzt werden.
- Page 72 • Focusing Rail • Auto Helicoid Equippped to the Macro Hexanon AR 105mm f/4 lens, this adapter The focusing rail is used when a camera on whose lens an attachment lens or the Extension Ring 3 is fitted is makes it possible to take pictures in AEC photography from infinity mounted on a tripod.
- Page 73 This accessory serves as the clip for the hot shoe (cord-less) fitted With this flashcube, 4 flashes may be emitted in to the KONICA Autoreflex-T3. A small electronic flash or a flash succession. An AG cube adapter is usable on this gun will be electrically connected, if it is fitted to the clip.
- Page 74 • X-20 Electronic Flash • X - 1 4 Electronic Flash • Lens Mount Adapters A small electronic flash with a guide This is a small electronic Flash with Fitted between the lens and camera, number of 64 (ASA 80/125) and fea- a guide number of 45...
- Page 75 • Automatische Balgengerät • Auto Bellows Dieses gibt Ihnen die Möglichkeit Nahaufnahmen und Vergrösserungen mit This gadget makes it possible to take a einem kontinuierlich veränderten Aufnahmebereich zu machen. Es handelt broad range of close-ups and blow-ups in a sich hier um ein Hochleistungs-Nahaufnahmegerät. Mit dem Automatische continuous manner.
- Page 76 • Bellows 3 This gadget is a portable bellows and, unlike the Auto Bellows, does • Macro Stand not have an automatic diaphragm mechanism and focusing rail. There is no change • Makroständer in the magnification factor. Bellows 3 makes it possible to take pictures in succession at the magnification factors of 0.9X to 3.5X with a standard lens (50mm •...
- Page 77 • Slide Copier Adapter • Reverse Adapter • 57mm f/1.2 Bellows Even with the Bellows, it is possible to This adapter is required for reverse pho- Adapter tography with the slide copier and used take pictures in reverse photography in This is an adapter indispensable together with a reverse adapter.
- Page 78 • Microscope Adapter 2 • Copy Stand 2 This adapter makes it possible to take microphoto- This gadget is quite .handy in taking close-ups of drawings, graphic pictures only with the object and eyepiece literatures and photos in dimensions of up to 11-5/8" X 16-1/2". lenses of a microscope.
-
Page 79: Maintenance Of Camera And Lens
MAINTENANCE OF CAMERA AND LENS ENTREITIEN DE L'APPAREIL ET DE L'OBJECTIF • In wiping the camera body and lens barrel, take off dust with a brush and blower before they are cleaned with a • Pour nettoyer le boîtier et la monture de l'objectif, piece of soft cloth.