Graco LineLazer IV 3900 Manuel D'opération
Masquer les pouces
Voir aussi pour LineLazer IV 3900:
- Manuel d'installation et de réparation (38 pages) ,
- Réparation (20 pages)
Liens rapides
Operation / Fonctionnement /
Funcionamiento / Funcionamento
™
LineLazer
Airless Line Stripers / Traceurs de ligne airless / Señalizadoras /
Kit de marcação de baias Airless (de alta pressão)
- For the application of line striping materials -
- Pour tracer des lignes à la peinture -
- Para la aplicación de materiales trazalíne -
- Para aplicação de materiais de marcação de baias -
3300 psi (22.8 MPa, 228 bar) Maximum Working Pressure /
Pression de service maximum 3300 psi (22,8 MPa, 228 bars) /
Presión máxima de trabajo de 3300 psi (22,8 MPa, 228 bar) /
Pressão de trabalho máxima de 3300 psi (22,8 MPa, 228 bar)
Important Safety Instructions
Read all warnings and instructions in
this manual. Save these instructions.
IV 3900, 5900
FieldLazer R300
,
ti6394a
311017G
EN FR ES PT

Manuels Connexes pour Graco LineLazer IV 3900


Sommaire des Matières pour Graco LineLazer IV 3900
- Page 1 Operation / Fonctionnement / Funcionamiento / Funcionamento ™ LineLazer IV 3900, 5900 FieldLazer R300 Airless Line Stripers / Traceurs de ligne airless / Señalizadoras / 311017G Kit de marcação de baias Airless (de alta pressão) EN FR ES PT - For the application of line striping materials - - Pour tracer des lignes à...
- Page 2 Contents Warnings ........4 Tip Selection .
- Page 3 Models Covered / Modèles concernés / Modelos / Modelos Abrangidos ti6394a 3900 ✔ ✔ 248862 ✔ ✔ 248863 ✔ ✔ 249008 ✔ ✔ 249009 ✔ ✔ ✔ 248864 ✔ ✔ ✔ 248865 ti6394a R300 ✔ ✔ ✔ ✔ 24M605 ✔ ✔...
- Page 4 Warnings Warnings The following are general warnings related to the safe setup, use, grounding, maintenance and repair of this equipment. In the text of this manual, the exclamation point symbol alerts you to a warning and the hazard symbol refers to specific risks. Refer back to these General Warnings pages.
- Page 5 Check equipment daily. Repair or replace worn or damaged parts immediately. • Do not alter or modify equipment. • Use equipment only for its intended purpose. Call your Graco distributor for information. • Route hoses and cables away from traffic areas, sharp edges, moving parts, and hot surfaces. •...
- Page 6 Mise en garde Mise en garde Les mises en garde suivantes sont des mises en garde de sécurité générales relatives à la configuration, utilisation, maintenance et réparation de ce matériel. Dans ce manuel, le point d’exclamation est une mise en garde et le symbole de danger fait référence à...
- Page 7 Ne pas modifier cet équipement. • N’utiliser ce matériel que pour l’usage auquel il est destiné. Pour plus de renseignements appelez votre distributeur Graco. • Écarter les flexibles et câbles électriques des zones de circulation, des bords coupants, des pièces en mouvement et des surfaces chaudes.
- Page 8 Advertencias Advertencias A continuación se ofrecen advertencias en general relacionadas con la seguridad de la puesta en marcha, utilización, conexión a tierra, mantenimiento y reparación de este equipo. En el texto de este manual, el símbolo acompañado de una exclamación le indica que se trata de una advertencia y el símbolo de peligro se refiere a un riesgo específico.
- Page 9 No altere ni modifique el equipo. • Utilice el equipo únicamente para el fin para el que ha sido destinado. Si desea información, póngase en contacto con su distribuidor Graco. • Desvíe las mangueras de zonas de tráfico intenso, de curvas pronunciadas, de piezas movibles y superficies calientes.
- Page 10 Advertências Advertências Seguem-se advertências gerais relativamente à instalação, utilização, ligação à terra, manutenção e reparação deste equipamento com segurança. Ao longo do texto deste manual, o ponto de exclamação alerta-o para uma advertência e o símbolo de perigo refere-se a riscos específicos. Consulte estas páginas de advertências gerais. Serão incluídas mais advertências específicas relativamente a procedimentos, quando aplicáveis.
- Page 11 Não altere nem modifique este equipamento. • Utilize o equipamento apenas para o fim a que se destina. Solicite informações ao seu distribuidor Graco. • Afaste os tubos flexíveis e cabos de áreas com movimento, pontas afiadas, peças em movimento e superfícies quentes.
- Page 12 Advertências Tip Selection / Sélection des buses / Selección de la boquilla / Selecção do bico (cm) (cm) (cm) (cm) ✔ LL5213* 2 (5) ✔ LL5215* 2 (5) ✔ LL5217 4 (10) ✔ LL5219 4(10) ✔ LL5315 4 (10) ✔ LL5317 4 (10) ✔...
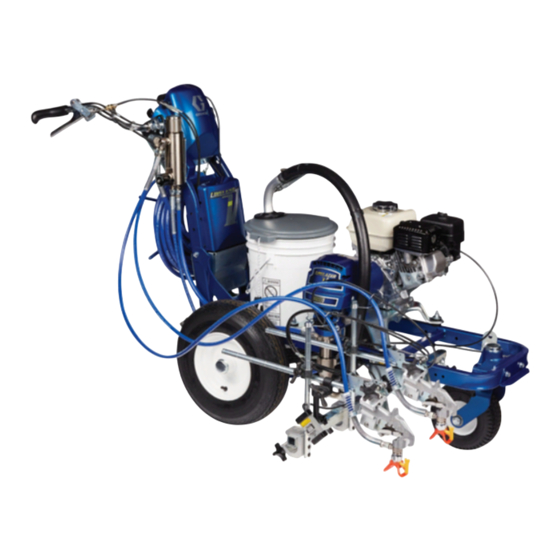
- Page 13 Component Identification / Identification des composants / Identificación de los componentes / Identificação dos componentes Component Identification / Identification des composants / Identificación de los componentes / Identificação dos componentes ti6597b English Français Español Português Display Afficheur Visualización Visor Pump ON/OFF switch Commutateur MARCHE/ARRÊT Interruptor ON/OFF de la bomba Interruptor de ligar/desligar (ON/OFF)
- Page 14 Setup / Réglage / Configuración / Instalação Setup / Réglage / Configuración / Instalação Approximate Fill Level ti3308a ti3307a ti3309a ti3306a Ground sprayer with Each time your spray and Check engine oil level. Fill fuel tank. grounding clamp during store, fill throat packing Add SAE 10W-30 Setup and Cleanup.
- Page 15 Setup / Réglage / Configuración / Instalação ti6477a ti6473a ti6594a ti3430a Set pump switch OFF. If removed, install Turn prime valve down. Turn pressure control strainer. counterclockwise to lowest pressure. Mettre l’interrupteur de la Remettre la crépine en Abaisser la vanne d’amorçage. Tourner la régulation de pompe sur OFF.
- Page 16 Setup / Réglage / Configuración / Instalação ti3310a PAINT FLUSH CAUTION • Minimum hose size Place siphon tube set in grounded metal pail partially filled with flushing fluid. Attach ground wire to pail and to true earth ground. Do 1. - 5. of Startup to flush out storage oil shipped in allowable for proper sprayer.
- Page 17 Startup / Démarrage / Puesta en servicio / Colocação em serviço Startup / Démarrage / Puesta en servicio / Colocação em serviço ti3313a ti3312a ti6480a ti3315a Start engine. Move fuel valve to open. Move choke to closed. Set throttle to fast. Set engine switch ON.
- Page 18 Startup / Démarrage / Puesta en servicio / Colocação em serviço ti3317a ti6482a ti6433a ti3316a Pull starter cord. After engine starts, move Set throttle to desired Digital display is choke to open. setting. functional after engine starts. Tirer sur le cordon du Dès que le moteur tourne, Régler l’accélérateur en L’affichage numérique...
- Page 19 Startup / Démarrage / Puesta en servicio / Colocação em serviço ti6472a ti6476a ti3322a ti6596a FLUSH ti6596a 3304c 15 SEC. Set pump switch ON. Turn pressure down, turn Hold gun against grounded Inspect fittings for leaks. Do not - Pump is now active - prime valve horizontal.
- Page 20 Startup / Démarrage / Puesta en servicio / Colocação em serviço ti3325a ti3324a PAINT ti3316a ti3322a FLUSH ti6638a ti3327a SwitchTip and Guard Assembly Place siphon tube in paint Trigger gun again into Engage trigger safety. Insert SwitchTip in tip pail. flushing fluid pail until Use end of SwitchTip (A) bore and firmly thread...
- Page 21 Gun Placement / Mise en place du pistolet / Colocación de la pistola / Preparação da pistola Gun Placement / Mise en place du pistolet / Colocación de la pistola / Preparação da pistola ti3331a ti6550a ti3332a ti3330a ti6549a Install Gun Position Gun Select Gun Insert gun into gun holder.
- Page 22 Gun Placement / Mise en place du pistolet / Colocación de la pistola / Preparação da pistola TI3710b English Français Español Português One line Une ligne Una línea Uma linha One line up to 24 in. Une ligne jusqu’à 24 in. una línea de una anchura Uma linha com largura de (61 cm) wide.
- Page 23 Gun Placement / Mise en place du pistolet / Colocación de la pistola / Preparação da pistola Trigger Sensor Adjustment / Réglage de sensibilité de la gâchette / Ajuste del sensor de disparo / Ajuste do sensor do gatilho ti6637a ti3691b ti3691c ti6636a...
- Page 24 Gun Placement / Mise en place du pistolet / Colocación de la pistola / Preparação da pistola Clearing Tip Clogs / Déboucher la buse / Ajuste del sensor de disparo / Desobstrução do bico ti3355a ti3347a Release trigger, engage Engage gun trigger gun trigger safety.
- Page 25 Digital Tracking System (DTS) / Système de contrôle numérique (DTS) / Sistema de control digital (DTS) / Digital Tracking System Digital Tracking System (DTS) / Système de contrôle numérique (DTS) / Sistema de control digital (DTS) / Digital Tracking System (DTS) ti6433a ti6435a ti6436a...
- Page 26 Digital Tracking System (DTS) / Système de contrôle numérique (DTS) / Sistema de control digital (DTS) / Digital Tracking System ti6438a ti6437a ti6440a ti6439a Short press DTS button to Short press DTS button to Short press DTS button to Press and hold DTS move to Job Distance (ft or move to Job Material move to Line Width (LW)
- Page 27 Digital Tracking System (DTS) / Système de contrôle numérique (DTS) / Sistema de control digital (DTS) / Digital Tracking System ti6443a ti6441a ti6442a ti6444a Short press DTS button to Short press DTS button 10 Press and hold DTS move to Job Film Build. to move to job RESET button to reset job Note: Displays the average...
- Page 28 Digital Tracking System (DTS) / Système de contrôle numérique (DTS) / Sistema de control digital (DTS) / Digital Tracking System ti6524a ti6599a ti6602a DTS Secondary Menu Start engine, page 10. Press and hold DTS button. At the same time, turn pump SERIAL NUM scrolls Pressure display appears.
- Page 29 Digital Tracking System (DTS) / Système de contrôle numérique (DTS) / Sistema de control digital (DTS) / Digital Tracking System ti6447a ti6525a ti6600a ti6601a Short press DTS button Short press DTS button Short press DTS button MEASure mode display and part number scrolls appears.
- Page 30 Digital Tracking System (DTS) / Système de contrôle numérique (DTS) / Sistema de control digital (DTS) / Digital Tracking System ti6450a ti6449a ti6448a ti6451a To use MEASure mode, Short press DTS again to Short press DTS again to Press and hold DTS press and hold DTS start measuring.
- Page 31 Digital Tracking System (DTS) / Système de contrôle numérique (DTS) / Sistema de control digital (DTS) / Digital Tracking System ti6477a ti6453a ti6452a ti6454a Set pump switch OFF to Short press DTS button to 10 Short press DTS button 11 Short press DTS button exit MEASure mode.
- Page 32 Digital Tracking System (DTS) / Système de contrôle numérique (DTS) / Sistema de control digital (DTS) / Digital Tracking System ti6457a ti6456a ti6528a ti6455a 12 Short press DTS button to 13 Short press DTS button to 14 Short press DTS button to 15 Short press DTS button move to TOTAL (distance).
- Page 33 Digital Tracking System (DTS) / Système de contrôle numérique (DTS) / Sistema de control digital (DTS) / Digital Tracking System Roll 25ft or 10 m TI6460a ti6459a ti6529a ti6461a 16 Press and hold DTS 17 Short press to move to 18 To calibrate distance meter, 19 Move LineLazer exactly button until CLEAR, then...
- Page 34 Digital Tracking System (DTS) / Système de contrôle numérique (DTS) / Sistema de control digital (DTS) / Digital Tracking System ti6477a ti6462a ti6608a ti6463a ti6464a 20 Press DTS again to return 21 Short press DTS button. 22 Short press DTS button to 23 Turn pump switch OFF at to CALibration display.
- Page 35 Digital Tracking System (DTS) / Système de contrôle numérique (DTS) / Sistema de control digital (DTS) / Digital Tracking System LITERX10 ft m ti6609a ti6466a ti6465a Change Display Units Pressure: Volume: Distance: From Pressure display only, From Job Material Counter display From Job Distance Counter display pressure below 200 psi;...
- Page 36 Pressure Relief / Décompression / Descompresión / Descompressão Pressure Relief / Décompression / Descompresión / Descompressão ti6477a ti6594a ti6473a ti3324a ti3305a PAINT ti5405a ti3306a Ground sprayer with Set pump switch Turn pressure to lowest setting. Engage gun trigger grounding clamp. OFF.
- Page 37 Cleanup / Nettoyage / Limpieza / Limpeza Cleanup / Nettoyage / Limpieza / Limpeza TI3371A TI3375A ti6269a FLUSH Caution: Perform Pressure Remove guard and Unscrew bowl, remove Clean filter, guard and Relief, page 36. SwitchTip. filter. Assemble without SwitchTip in flushing filter.
- Page 38 Cleanup / Nettoyage / Limpieza / Limpeza ti6472a ti3310a ti6595a ti3315a ti3417a PAINT PAINT ti6476a FLUSH Remove siphon tube set Turn engine ON and Turn prime valve Hold gun against paint pail. horizontal. Disengage gun trigger safety. Turn from paint and place in start engine.
- Page 39 Cleanup / Nettoyage / Limpieza / Limpeza ti6477a ti6473a PAINT FLUSH TI3383A TI3377A ti5405a FLUSH 1 -2 MIN. 15-30 SEC. Move gun to flushing Turn prime valve down 10 Raise siphon tube above 11 Turn pump switch OFF. pail, hold gun against and allow flushing fluid to flushing fluid and run Turn engine OFF.
- Page 40 Cleanup / Nettoyage / Limpieza / Limpeza TI3388A TI3390A FLUSH Pump Armor ti6271a ti2895a CAUTION If flushing with water, flush 12 Make sure plastic center 13 Wipe sprayer, hose and 14 Clean tip, guard and again with mineral spirits, tube is tightened gun with a rag soaked in gasket with a soft bristle or Pump Armor to leave a...
- Page 41 With the exception of any special, extended, or limited warranty published by Graco, Graco will, for a period of twelve months from the date of sale, repair or replace any part of the equipment determined by Graco to be defective.
- Page 42 Graco Headquarters: Minneapolis International Offices: Belgium, China, Japan, Korea GRACO INC. AND SUBSIDIARIES P.O. BOX 1441 MINNEAPOLIS MN 55440-1441 USA Copyright 2005, Graco Inc. All Graco manufacturing locations are registered to ISO 9001. www.graco.com Revised by Graco ProStore by RAE Products, 2013...