
Manuels Connexes pour Chopin Alveolab graph


Sommaire des Matières pour Chopin Alveolab graph
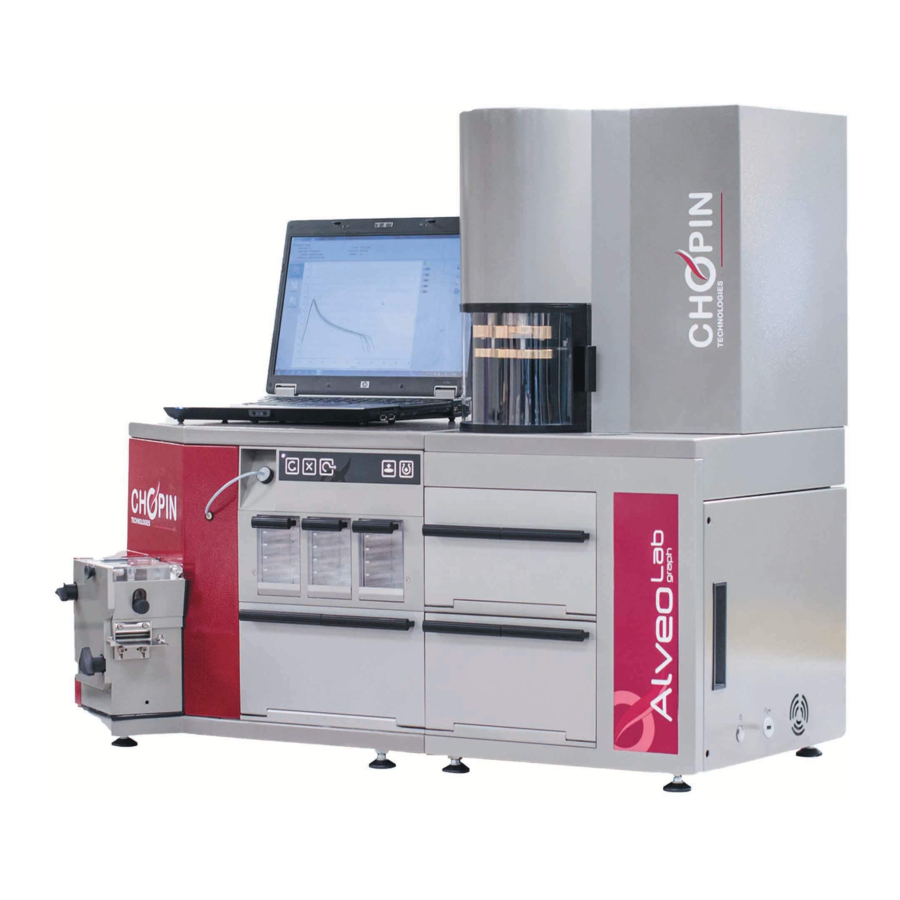
- Page 1 Quick installation and first test Installation rapide et premier test Instalación rápida y primer test Краткое руководство по установке и проведению первого испытания...
-
Page 2: Connecting The Power
*Upon first use or after a thorough clean, these accessories must be lubricated with a thin, smooth layer of oil. B. Installation We recommend that the Alveolab should be delivered installed by an authorized CHOPIN Technologies technician. Keep the packaging, as the unit must be repacked when transported. -
Page 3: Software Installation
D. Software installation Configuration required: − Windows 7, Windows 8 or Windows 10 − Core i5 1.7GHz / 4Go − USB Port − PDF reader On the provided USB stick, double-click on the software installation icon: If the Microsoft .NET framework and SQL Server Compact are not installed on the PC, they will automatically be installed by the software. -
Page 4: Starting The Unit
C. Configuring the test Choose one of the five CHOPIN Technologies protocols. Click on the appropriate box to place a check mark. Click [Next] to confirm. - Page 5 D. Dough mixing Place the nozzle on its supporting platform. Click on the icon and the protocol configuration will be sent to the device. During the first test of the day, a message indicates that the upper and lower press must be lubricated. Fill the mixing bowl with the quantity of flour specified by the software, using a funnel, before closing the lid.
-
Page 6: Cleaning The Mixer
Remove the extrusion plate and slide the dough onto the stainless steel plate of the rolling frame. Replace the extrusion plate. Use the roller, passing over the dough twelve times (or six return movements) to roll the dough. Use the dough cutter to cut the dough and remove the excess outer ring. Place the dough on a resting plate and place the remainder in the resting chamber. - Page 7 G. Inflating dough pieces When the timer shows 28 minutes, the Alveolab will automatically power up the air generator at the rate specified in the protocol, and will automatically place the loading plate into the loading zone. Oil the loading plate and place the first piece of dough on it. Put a drop of oil on the dough.
-
Page 8: Switching Off The Unit
I. Printing a test Select a test from the list. Click on the [Print test] icon, and the following window will be displayed: Choose the type(s) of curve(s) to be printed. Check [Custom print settings] to configure your own custom print settings. Click on [Print]. -
Page 9: Installer Votre Alveolab
*Pour une première utilisation ou après un nettoyage complet, il est nécessaire d’huiler ces accessoires d’un film uniforme. B. Mise en place Il est recommandé que l’Alveolab soit livré et installé par un technicien agréé CHOPIN Technologies. Conserver l’emballage. Il est à utiliser impérativement pour tout transport de l’appareil. -
Page 10: Installation Du Logiciel
D. Installation du logiciel Configuration nécessaire : − Windows 7, Windows 8, Windows 10 − Core i5 1.7GHz / 4Go − Port USB − PDF reader Sur la clé USB fournie, double-cliquer sur l’icône d’installation du logiciel : Si les composants Microsoft .NET Framework et SQL server compact ne sont pas installés sur le PC, ils sont installés automatiquement par le logiciel. -
Page 11: Mise En Marche De L'appareil
à l’aide de la pissette avec de l’eau déminéralisée. Le niveau d’eau doit être au dessus de la marque rouge. C. Configuration de l’essai Choisir un protocole parmi les 5 protocoles CHOPIN Technologies. Cliquer sur la case correspondante. Cliquer sur [Suivant] pour valider. -
Page 12: Pétrissage De La Pâte
D. Pétrissage de la pâte Placer la buse sur son support. Cliquer sur l’icône Les paramètres du protocole de l’essai sont envoyés à l’appareil. Au premier essai de la journée, un message indique qu’il faut huiler les platines supérieure et inférieure. Remplir le pétrin avec la quantité... -
Page 13: Nettoyage De La Cuve
Retirer la plaque d’extraction et faire glisser la pâte sur la plaque d’inox du cadre de laminage. Remettre la plaque d’extraction en place. Utiliser le rouleau de laminage (12 passages ou 6 aller-retours) pour aplatir la pâte. Utiliser l‘emporte pièce pour découper le pâton et enlever l’anneau de pâte extérieur en excès. Disposer le pâton sur une plaque de repos et le placer dans la chambre de repos. -
Page 14: Gonflement Des Pâtons
G. Gonflement des pâtons Quand le chronomètre affiche 28 minutes, l’Alveolab auto-étalonne le générateur d’air au débit du protocole et place automatiquement le tampon sous la zone de chargement. Sortir le premier pâton et le poser sur le tampon de chargement. Ajouter un peu d’huile sur le pâton. -
Page 15: Eteindre L'appareil
I. Imprimer un essai Sélectionner un essai dans la liste. Cliquer sur l’icône [Imprimer], la fenêtre suivante s’affiche : Choisir les types de courbes à imprimer. Cocher [Imprimer les paramètres personnalisés] pour faire figurer les paramètres personnalisés sur l’impression. Cliquer sur [Imprimer]. La prévisualisation s’affiche (fichier PDF), cliquer sur [Imprimer]. -
Page 16: Conexión Eléctrica
*Para un primer uso o tras una limpieza completa, es necesario engrasar estos accesorios con una capa de aceite uniforme. B. Instalación Se recomienda que el Alveolab sea entregado e instalado por un técnico homologado por CHOPIN Technologies. Conservar el embalaje. Hay que utilizarlo imperativamente para cualquier transporte del equipo. -
Page 17: Configuración Del Software
D. Configuración del software Configuración necesaria: − Windows 7, Windows 8, Windows 10 − Core i5 1.7GHz / 4Go − Puerto USB − PDF reader En la memoria USB proporcionada, hacer doble clic sobre el icono de instalación del software: Si los componentes Microsoft.NET Framework y SQL server compact no están instalados en el PC, estos se instalan automáticamente con el software. -
Page 18: Puesta En Marcha Del Equipo
Llenarlo con la ayuda de la pipeta con agua desmineralizada. El nivel de agua debe estar por encima de la marca roja. C. Configuración del ensayo Elegir 1 protocolo entre los 5 protocolos CHOPIN Technologies. Hacer clic sobre la casilla correspondiente. Hacer clic sobre [Siguiente] para validar. -
Page 19: Preparación Del Material
D. Amasado Colocar el tubo sobre su soporte. Hacer clic sobre el icono Los parámetros del protocolo de ensayo son enviados al aparato. En el primer ensayo del día, un mensaje indica que hay que engrasar las platinas superior e inferior. Llenar la amasadora con la cantidad de harina indicada por el software, utilizando un embudo, después volver a cerrar la tapa. - Page 20 Retirar la placa de extracción y hacer deslizar la masa sobre la placa inoxidable del marco de laminado. Volver a poner la placa de extracción en su lugar. Utilizar el rollo de laminado (12 pasajes o 6 ida-vuelta) para aplanar la masa. Utilizar el sacabocados para cortar el amasijo y quitar el anillo de pasta exterior en exceso.
- Page 21 G. Inflado de los amasijos Cuando el cronómetro marca 28 minutos, el Alveolab autocalibra el generador de aire al flujo del protocolo y coloca automáticamente el tampón bajo la zona de carga. Sacar el primer amasijo y posarlo sobre el tampón de carga. Añadir un poco de aceite sobre el amasijo.
-
Page 22: Apagar El Equipo
I. Imprimir un ensayo Seleccionar un ensayo en la lista. Hacer clic sobre el icono [Imprimir], se muestra la siguiente ventana: Elegir los tipos de curvas a imprimir. Marcar [Imprimir los parámetros personalizados] para hacer figurar los parámetros personalizados en la impresión. Hacer clic en [Imprimir]. -
Page 23: Подключение Питания
*При первом использовании или после тщательной чистки, эти аксессуары должны быть смазаны тонким, равномерным слоем масла. Б. Установка Мы рекомендуем, чтобы Alveolab был доставлен и установлен компетентным техником CHOPIN Technologies. Сохраните упаковку, так как прибор должен быть переупакован при транспортировке. Разместите Alveolab на горизонтальной, устойчивой... -
Page 24: Работа С Прибором
Г. Установка ПО Требуемая конфигурация: − Windows 7, Windows 8 или Windows 10 − Core i5 1.7GHz / 4Go − USB-порт − PDF reader На прилагаемом к USB-накопители, дважды щелкните на значок установки ПО: Если на ПК не установлены Microsoft .NET framework и SQL Server Compact, они будут автоматически установлены с помощью программного обеспечения. Щелкните [Accept], а затем [Install]. Подождите... -
Page 25: Запуск Устройства
спрею. Заполнить его деионизированной водой с помощью бутылки для воды. Уровень воды должен быть выше красной линии. C. Настройка процесса Выберите один из протоколов CHOPIN Technologies. Нажмите на нужную ячейку, чтобы поставить галочку. Нажмите [Next] для подтверждения. Введите название процесса. - Page 26 D. Замешивание теста Поместите насадку на поддерживающую платформу. 2. Нажмите на значок и конфигурация протокола будет отправлена на устройство. Во время первого процесса в день, сообщение указывает на то, что верхние и нижние пресс должен быть смазаны. Заполнить тестомесилку тем количеством муки, которое указано в программе, используя воронку, перед тем как закрыть крышку. 4. Нажмите на значок Устройство...
- Page 27 Удалите экструзионную пластину и положите тесто на область раскатного столика из нержавеющей стали. Вновь установите экструдную пластину. Сделайте двенадцать движений (или шесть возвратных движений), чтобы раскатать тесто с помощью валика. Использовать округляющий резак для теста, чтобы вырезать тесто и убрать лишнее наружное кольцо. Положите...
- Page 28 G. Раздутие заготовок теста Когда таймер покажет 28 минут, Alveolab автоматически подаст питание на генератор воздуха на установке, указанной в протоколе, и автоматически выведет пластину Альвеографа для размещения тестозаготовки. Смажьте пластину и поместите на нее первую заготовку теста. Нанесите каплю масла на тесто. Нажмите...
-
Page 29: Выключение Устройства
I. Печать результатов Выберите тест из списка. Щелкните на значок [Print test], и будет отображено следующее окно: Выберите тип(ы) кривая(ых) для печати. Проверьте [Custom print settings], чтобы настроить собственные параметры печати. Нажмите на [Print]. Предварительный просмотр отображается в виде PDF-файла; нажмите... - Page 30 Notes / Notas / Примe ания ч...
- Page 31 Notes / Notas / Примe ания ч...
- Page 32 Research, loans and training Tel. : +33 1 41 47 50 48 export@chopin.fr Tel. : +33 1 41 47 17 15 Tel. : +33 1 41 47 50 33 service@chopin.fr labo.application@chopin.fr Documentation produced by CHOPIN Technologies © 2017 – Pictures: CHOPIN Technologies...