Nice ROBUS RB400 Instructions Et Avertissements Pour L'installation Et L'utilisation
Masquer les pouces
Voir aussi pour ROBUS RB400:
Table des Matières
Les langues disponibles
Les langues disponibles
ROBUS
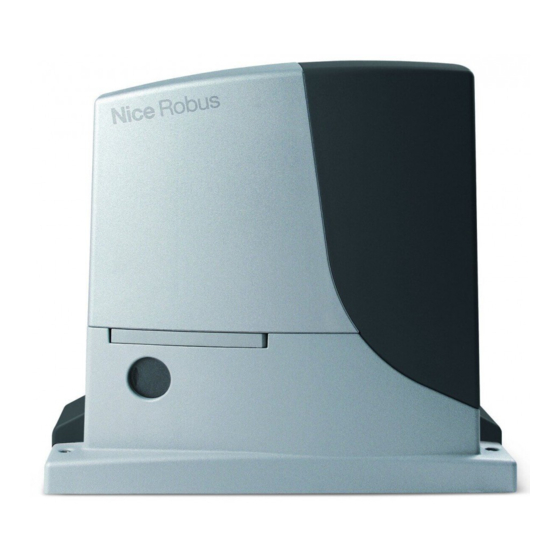
RB400
RB600/600P
RB1000/1000P
RB250HS
RB500HS
Sliding gate opener
EN - Instructions and warnings for installation and use
IT - Istruzioni ed avvertenze per l'installazione e l'uso
FR - Instructions et avertissements pour l'installation et l'utilisation
DE - Installierungs-und Gebrauchsanleitungen und Hinweise
ES - Instrucciones y advertencias para la instalación y el uso
PL - Instrukcje i ostrzeżenia do instalacji i użytkowania
NL - Aanwijzingen en aanbevelingen voor installatie en gebruik
RU - Инструкции и важная информация для технических специалистов
Chapitres
Table des Matières

Manuels Connexes pour Nice ROBUS RB400


Sommaire des Matières pour Nice ROBUS RB400
- Page 1 ROBUS RB400 RB600/600P RB1000/1000P RB250HS RB500HS Sliding gate opener EN - Instructions and warnings for installation and use IT - Istruzioni ed avvertenze per l’installazione e l’uso FR - Instructions et avertissements pour l’installation et l’utilisation DE - Installierungs-und Gebrauchsanleitungen und Hinweise ES - Instrucciones y advertencias para la instalación y el uso PL - Instrukcje i ostrzeżenia do instalacji i użytkowania NL - Aanwijzingen en aanbevelingen voor installatie en gebruik...
- Page 55 Table des matières : page 7.2.1 Instructions générales : sécurité - installation - utilisation 2 Fonctions premier niveau (fonctions ON-OFF) 7.2.2 Programmation du premier niveau Description du produit et type d’utilisation (fonctions ON-OFF) Limites d’utilisation 7.2.3 Fonctions deuxième niveau Installation typique (paramètres réglables) Liste des câbles 7.2.4 Programmation deuxième niveau (paramètres réglables) Installation...
-
Page 56: Instructions Générales : Sécurité - Installation - Utilisation
1) Instructions générales : sécurité - installation - utilisation AV E R T I S S E - Instructions importantes pour la sécurité. Il est important de suivre toutes les instructions fournies étant MENT donné qu’une installation incorrecte est susceptible de provoquer des dommages graves. ATTENTION Consignes de sécurité... -
Page 57: Description Du Produit Et Type D'utilisation
2) Description du produit et type d’utilisation ROBUS est une ligne d’opérateurs électromécaniques irréversibles plusieurs dispositifs avec seulement 2 fils. ROBUS fonctionne à destinés à l’automatisation de portails coulissants. Ils disposent l’énergie électrique, en cas de coupure du courant, il est possible d’une logique électronique de commande et d’un connecteur pour de débrayer l’opérateur avec une clé spéciale et de manœuvrer le le récepteur de la radiocommande SMXI ou SMXIS (en option). - Page 58 La longueur du portail permet de calculer le nombre maximum de cycles à l’heure et de cycles consécutifs tandis que le poids permet de calculer le pourcentage de réduction des cycles et la vitesse maximum admissible ; par exemple, pour ROBUS 1000, si le portail mesure 5 m de long, on peut avoir 33 cycles/heure et 16 cycles consécutifs mais si le portail pèse 700 kg, il faut les réduire à...
-
Page 59: Installation Typique
2.2) Installation typique La figure 2 présente l’installation typique pour l’automatisation d’un portail de type coulissant utilisant ROBUS Sélecteur à clé Bord secondaire fixe (option) Photocellules sur colonne Clignotant avec antenne incorporée 10 ROBUS Photocellules 11 Patte de fin de course « Fermé » Bord primaire fixe (option) Bord primaire mobile 12 Bord secondaire mobile (option) 6 Patte de fin de course « Ouvert »... -
Page 60: Installation
3) Installation L’installation de ROBUS doit être effectuée par du personnel qualifié, dans le respect des lois, des normes et des règle- ments ainsi que de toutes les instructions de ce manuel. 3.1) Contrôles préliminaires Avant de continuer l’installation de ROBUS il faut effectuer les • Vérifier que la zone de fixation de l’opérateur permet la manœuvre contrôles suivants : de débrayage de manière facile et sûre. -
Page 61: Fixation Des Pattes De Fin De Course Dans Les
Si la crémaillère est déjà présente, après avoir fixé l’opérateur, agir sur 7. Ouvrir complètement le portail, poser sur le pignon le premier les goujons de réglage comme dans la figure 8 pour mettre le pignon segment de crémaillère et vérifier que le début de la crémaillère de ROBUS à... -
Page 62: Installation Des Divers Dispositifs
3.4) Installation des divers dispositifs Installer les autres dispositifs prévus en suivant les instructions respectives. Vérifier dans le paragraphe « 3.6 Description des connexions électriques » et dans la figure 2 les dispositifs qui peuvent être connectés à ROBUS. 3.5) Connexions électriques Sur la membrane de caoutchouc, découper un trou un peu plus étroit Toutes les connexions électriques doivent être effectuées en que le diamètre des câbles regroupés et enfiler la membrane le long l’absence de tension dans l’installation et avec l’éventuelle bat- des câbles jusqu’au collier ;... -
Page 63: Description Des Connexions Électriques
3.6) Description des connexions électriques Ce paragraphe contient une brève description des connexions élec- Fermé », « Normalement Ouvert » ou des dispositifs à résistance triques; d’autres informations se trouvent dans le paragraphe « 7.3 constante. D’autres informations sur STOP se trouvent dans le para- Ajout ou enlèvement de dispositifs ». graphe « 7.3.2 Entrée STOP ». FLASH : sortie pour clignotant type « LUCYB » ou similaires avec P.P. -
Page 64: Reconnaissance De La Longueur Du Portail
4.4) Reconnaissance de la longueur du portail Après la reconnaissance des dispositifs, les led L3 et L4 commenceront à clignoter ; cela signifie qu’il faut faire reconnaître la longueur du portail (distance entre le fin de course de fermeture et le fin de course d’ouverture) ; cette mesure est nécessaire pour le calcul des points de ralentissement et le point d’ouverture partielle. -
Page 65: Essai
5.1) Essai Chaque élément de l’automatisme comme par exemple les bords à clé, boutons de commande ou émetteurs radio), effectuer des sensibles, les photocellules, l’arrêt d’urgence, etc. demande une phase essais d’ouverture, de fermeture et d’arrêt du portail et vérifier que le spécifique d’essai;... -
Page 66: Approfondissements
7) Approfondissements Ce chapitre explique les possibilités de programmation et de personnalisation, ainsi que le diagnostic et la recherche des pannes sur ROBUS 7.1) Touches de programmation Sur la logique de commande de ROBUS se trouvent 3 touches qui peuvent être utilisées aussi bien pour la commande de la logique durant les essais que pour les programmations : Open La touche « OPEN » permet de commander l’ouverture du portail ou de... -
Page 67: Programmation Du Premier Niveau (Fonctions On-Off)
7.2.2) Programmation du premier niveau (fonctions ON-OFF) En usine, les fonctions du premier niveau sont toutes mises sur « OFF » mais on peut les modifier à tout moment comme l’indique le tableau 8. Faire attention dans l’exécution de la procédure car il y a un temps maximum de 10 s entre la pression d’une touche et l’autre, autrement la procédure se termine automatiquement en mémorisant les modifications faites jusqu’à ce moment-là. Tableau 6 : pour changer les fonctions ON-OFF Exemple Presser et maintenir enfoncée la touche [Set] pendant environ 3 s... -
Page 68: Programmation Deuxième Niveau (Paramètres Réglables)
Led d’entrée Paramètre Led (niveau) Valeur Description 0,5 m Règle la mesure de l’ouverture partielle. 1,5 m L’ouverture partielle peut se commander Ouverture uniquement avec la 2e commande radio ou partielle 2,5 m bien avec « FERMETURE », si la fonction est présente, « Fermeture » devient alors 3,4 m « Ouverture partielle » Automatique, (suivant la charge de travail et les conditions des manœuvres) 1000 Règle le nombre de manœuvres après... -
Page 69: Exemple De Programmation Premier Niveau (Fonctions On-Off)
7.2.5) Exemple de programmation premier niveau (fonctions ON-OFF) Comme exemple nous indiquons les diverses opérations à effectuer pour modifier le réglage des fonctions fait en usine pour activer les fonctions de « Fermeture Automatique » (L1) et « Ferme toujours » (L3).). Tableau 9 : exemple de programmation premier niveau Exemple Presser et maintenir enfoncée la touche [Set] pendant environ 3 s pendant 3s Relâcher la touche [Set] quand la led L1 commence à... -
Page 70: Entrée Stop
7.3.2) Entrée STOP STOP est l’entrée qui provoque l’arrêt immédiat de la manœuvre • Deux dispositifs avec sortie à résistance constante 8,2 kΩ suivi d’une brève inversion. On peut connecter à cette entrée des peuvent être connectés en parallèle ; s’il y a plus de 2 dispositifs, dispositifs avec sortie à contact normalement ouvert « ... -
Page 71: 7.3.5 Robus En Mode « Slave
7.3.5) ROBUS en mode « Slave » Si on le programme et si on le connecte de manière spécifique, ROBUS peut fonctionner en mode « Slave » (esclave) ; ce mode de fonctionnement est utilisé s’il faut automatiser 2 parties coulissantes opposées et si l’on souhaite que leur mouvement s’effectue de manière synchronisée. Dans ce mode un ROBUS fonctionne comme Master (maître) c’est-à-dire qu’il commande les manœuvres, tandis que le deuxième ROBUS fonctionne comme Slave, c’est-à-dire qu’il exécute les commandes envoyées par le Master (par défaut, tous les... -
Page 72: 7.3.6 Reconnaissance D'autres Dispositifs
Tableau 12 : programmations sur ROBUS Slave indépendantes de ROBUS Master Fonctions premier niveau (fonctions ON-OFF) Fonctions deuxième niveau (paramètres réglables) Stand-by Vitesse moteur Démarrage Sortie S.C.A. Mode Slave Force moteur Liste Erreurs Sur le Slave, il est possible de connecter : •... -
Page 73: Vérification Du Nombre De Manœuvres Effectuées
Vérification du nombre de manœuvres effectuées Avec la fonction d’« Avis de maintenance » il est possible de vérifier le nombre de manœuvres effectuées en pourcentage sur la limite fixée. Pour la vérification, procéder suivant la description du tableau 15. Tableau 15 : vérification du nombre de manœuvres effectuées Exemple Presser et maintenir enfoncée la touche [Set] pendant environ 3 s pendant 3s Relâcher la touche [Set] quand la led L1 commence à... -
Page 74: 10 7.6 Résolution Des Problèmes
7.6) Résolution des problèmes Dans le tableau 17 on peut trouver des indications utiles pour affron- ter les éventuels problèmes de fonctionnement pouvant se vérifier durant l’installation ou en cas de panne. Tableau 17 : recherche des pannes Symptômes Vérifications conseillées L’émetteur radio ne commande pas le portail et Vérifier si les piles de l’émetteur sont usagées et les remplacer éventuellement. -
Page 75: 11 7.7.1 Signalisations Avec Le Clignotant
7.7.1) Signalisations avec le clignotant Durant la manœuvre, l’indicateur clignotant FLASH émet un clignotement toutes les secondes ; quand des anomalies se vérifient, les cligno- tements sont plus brefs ; les clignotements se répètent deux fois, à intervalles d’une seconde. Tableau 19 : signalisations sur le clignotant FLASH Clignotements rapides Cause ACTION Au début de la manœuvre, la vérification des dispositifs connectés à BLUEBUS 1 clignotement ne correspond pas à ceux qui sont mémorisés durant la phase de reconnais- pause d’1 seconde Erreur sur le BLUEBUS sance. -
Page 76: Accessoires
Tableau 21 : led sur les touches de la logique Led 1 Description Éteinte Durant le fonctionnement normal elle indique fonction « Fermeture automatique » non active Allumée Durant le fonctionnement normal elle indique fonction « Fermeture automatique » active • Programmation des fonctions en cours Clignote • Si elle clignote en même temps que L2 cela signifie qu’il faut effectuer la reconnaissance des dispositifs (voir paragraphe « 4.3 Reconnaissance des dispositifs »). -
Page 77: Caractéristiques Techniques
8) Caractéristiques techniques Dans le but d’améliorer ses produits, Nice S.p.a. se réserve le droit de modifier les caractéristiques techniques à tout moment et sans préavis, en garantissant dans tous les cas le bon fonctionnement et le type d’utilisation prévus. - Page 78 24 – Français...
- Page 79 Débrayage et mouvement manuel : avant d’effectuer cette opération, faire attention au fait que le débrayage ne peut être fait que lorsque le portail est à l’arrêt. Pour bloquer : effectuer les mêmes opérations dans le sens contraire. 1 Faire coulisser le petit disque qui couvre 2 Introduire la clé...
-
Page 80: Instructions Et Recommandations Destinées À L'utilisateur De L'opérateur Robus
étude et pour éviter les activations involontaires, de ne pas particulière de la part de Nice pour vous assurer toujours laisser à leur portée les émetteurs qui commandent la une utilisation extrêmement simple et aisée, sans aucun manœuvre: ce n’est pas un jeu! - Page 212 Nice SpA Oderzo TV Italia www.niceforyou.com info@niceforyou.com...