Table des Matières
Publicité
Les langues disponibles
Les langues disponibles
Liens rapides
Publicité
Chapitres
Table des Matières
Dépannage

Manuels Connexes pour TechniSat DIGITRADIO 2


Sommaire des Matières pour TechniSat DIGITRADIO 2
- Page 1 DIGITRADIO 2 DIGITRADIO 2 S...
- Page 2 CONTENTS DEUTSCH ..................4-69 ENGLISH ..................72-137 FRANÇAIS ................140-205 ITALIANO ..................208-273 NEDERLANDS ................276-341 POLSKE ..................344-409 ČEŠTINA ..................412-477...
- Page 3 Bedienungsanleitung DIGITRADIO 2 DIGITRADIO 2 S...
-
Page 4: Abbildungen
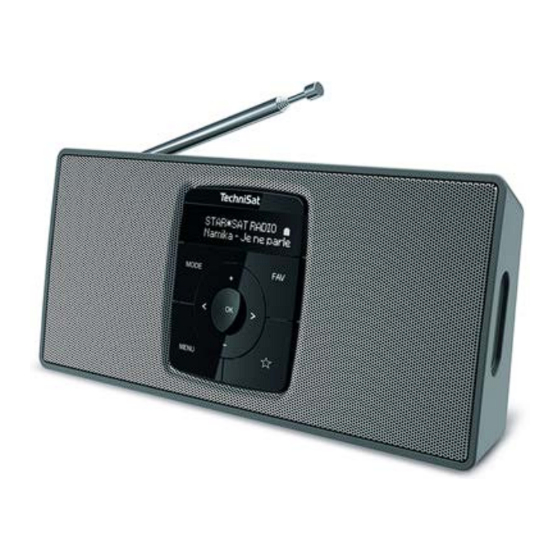
1 Abbildungen 1.1 Ansicht von vorne/seite DIGITRADIO 2... - Page 5 Ein/Standby (Oben) Lautsprecher (Mono) MODE Taste zum Moduswechsel MENU zum Aufrufen des Menüs OK Taste zum Bestätigen Lautstärke +/- Tasten (laut/leise) Direktwahltaste FAV Taste Display < / > Auswahltasten/Navigation Kopfhörerbuchse (3,5mm Klinke) DC-IN USB-Buchse zur externen Stromversorgung...
-
Page 6: Rückseite
1.1.1 Rückseite Kontakte Teleskopantenne Kunststoffführung Akku Akkufach... -
Page 7: Ansicht Von Vorne Digitradio 2 S
1.2 Ansicht von vorne DIGITRADIO 2 S... -
Page 8: Ansicht Seitlich Und Erklärung Digitradio 2 S
1.2.1 Ansicht seitlich und Erklärung DIGITRADIO 2 S Ein/Standby (Oben) Lautsprecher MODE Taste zum Moduswechsel MENU zum Aufrufen des Menüs OK Taste zum Bestätigen Lautstärke +/- Tasten (laut/leise) Direktwahltaste FAV Taste Display < / > Auswahltasten/Navigation Kopfhörerbuchse (3,5mm Klinke) DC-IN USB-Buchse zur externen... -
Page 9: Rückseite
1.2.2 Rückseite Kontakte Teleskopantenne Kunststoffführung Akku Akkufach... -
Page 10: Table Des Matières
Ansicht von vorne/seite DIGITRADIO 2 ................4 1.1.1 Rückseite ............................6 Ansicht von vorne DIGITRADIO 2 S ..................7 1.2.1 Ansicht seitlich und Erklärung DIGITRADIO 2 S ............8 1.2.2 Rückseite ............................9 Inhaltsverzeichnis ....................10 Vorwort ........................14 Die Zielgruppe dieser Bedienungsanleitung ..............14 3.1.1... - Page 11 Die besonderen Eigenschaften des DIGITRADIO ............30 DIGITRADIO 2 S zum Betrieb vorbereiten ..............31 5.3.1 Akku einlegen (am Beispiel des DIGITRADIO 2 S) ............31 5.3.2 Netzteil anschließen ........................33 5.3.3 Teleskopantenne ausrichten ....................34 5.3.4 Kopfhörer benutzen .........................35 Allgemeine Geräte-Funktionen ..................36 5.4.1 Gerät einschalten ........................36 5.4.2 Gerät ausschalten ........................
- Page 12 7.2.3 DAB+ -Sender auf einem Speicherplatz ablegen ............. 44 7.2.4 DAB+ -Sender von einem Speicherplatz abrufen .............45 7.2.5 Überschreiben/Löschen einer Programmplatz-Speicherung.......45 7.2.6 Signalstärke ..........................45 7.2.7 Manuell einstellen ........................46 7.2.8 Lautstärkeanpassung (DRC) ....................47 7.2.9 Inaktive Sender löschen ......................48 FM (UKW)-Betrieb ....................48 UKW-Radiobetrieb einschalten ..................
- Page 13 Sleep-Timer .......................56 Equalizer ........................57 11.1 MeinEQ ............................57 Systemeinstellungen ....................58 12.1 Uhrzeit- und Datumseinstellungen ...................58 12.1.1 Zeit/Datum manuell einstellen ...................58 12.1.2 Zeitaktualisierung ........................59 12.1.3 Uhrzeitformat einstellen ....................... 60 12.1.4 Datumsformat einstellen ......................61 12.2 Displayhelligkeit .........................62 12.3 Sprache ............................63 12.4 Werkseinstellung ........................
-
Page 14: Vorwort
3 Vorwort Diese Bedienungsanleitung hilft Ihnen beim bestimmungsgemäßen und sicheren Gebrauch Ihres Radio-Gerätes, im folgenden DIGITRADIO oder Gerät genannt. 3.1 Die Zielgruppe dieser Bedienungsanleitung Die Bedienungsanleitung richtet sich an jede Person, die das Gerät aufstellt, bedient, reinigt oder entsorgt. 3.1.1 Bestimmungsgemäßer Gebrauch Das Gerät ist für den Empfang von DAB+/UKW-Radiosendungen entwickelt. -
Page 15: Sicherheit
Achtung - Kennzeichnet einen wichtigen Hinweis, den Sie zur Vermeidung von Gerätedefekten, Datenverlusten/-missbrauch oder ungewolltem Betrieb unbedingt beachten sollten. Tipp - Kennzeichnet einen Hinweis zur beschriebenen Funktion sowie eine im Zusammenhang stehende und evtl. zu beachtende andere Funktion mit Hinweis auf den entsprechenden Punkt der Anleitung. - Page 16 Bei längerem Transport bei Kälte und dem anschließenden Wechsel in warme Räume nicht sofort einschalten; Temperaturausgleich abwarten. Setzen Sie das Gerät nicht Tropf- oder Spritzwasser aus. Ist Wasser in das Gerät gelangt, schalten Sie es aus und verständigen Sie den Service Setzen Sie das Gerät nicht Heizquellen aus, die das Gerät zusätzlich zum normalen Gebrauch erwärmen.
- Page 17 Bei auffälligem Gerätedefekt, Geruchs- oder Rauchentwicklung, erheblichen Fehlfunktionen, Beschädigungen an Gehäuse das Gerät ausschalten und den Service verständigen. Das Gerät darf nur mit der auf dem Netzteil angegebenen Netzspannung betrieben werden. Versuchen Sie niemals, das Gerät mit einer anderen Spannung zu betreiben. Das Netzteil darf erst angeschlossen werden, nachdem die Installation vorschriftsmäßig beendet ist.
- Page 18 Versuchen Sie niemals ein defektes Gerät selbst zu reparieren. Wenden Sie sich immer an eine unserer Kundendienststellen. Fremdkörper, z.B. Nadeln, Münzen, etc., dürfen nicht in das Innere des Gerätes fallen. Die Anschlusskontakte nicht mit metallischen Gegenständen oder den Fingern berühren. Die Folge können Kurzschlüsse sein. Es dürfen keine offenen Brandquellen, wie z.B.
- Page 19 Dieses Gerät ist nicht dafür bestimmt, durch Personen (einschließlich Kinder) mit eingeschränkten physischen, sensorischen oder geistigen Fähigkeiten oder mangels Erfahrung und/oder mangels Wissen benutzt zu werden, es sei denn, sie werden durch eine für ihre Sicherheit zuständige Person beaufsichtigt oder erhielten von ihr Anweisungen, wie das Gerät zu benutzen ist.
- Page 20 Normale Batterien dürfen nicht geladen werden. Akkus dürfen nicht mit anderen Mitteln reaktiviert, nicht auseinandergenommen, erhitzt oder ins offene Feuer geworfen werden (Explosionsgefahr!). Akkukontakte und Gerätekontakte vor dem Einlegen reinigen. Bei falsch eingelegter Akku besteht Explosionsgefahr! Ersetzen Sie Akkus nur durch Akkus des richtigen Typs und der richtigen Modellnummer Vorsicht! Akkus keinen extremen Bedingungen aussetzen.
-
Page 21: Entsorgung
3.2.2 Entsorgung Die Verpackung Ihres Gerätes besteht ausschließlich aus wiederverwertbaren Materialien. Bitte führen Sie diese entsprechend sortiert wieder dem “Dualen System” zu. Dieses Produkt darf am Ende seiner Lebensdauer nicht über den normalen Haushaltsabfall entsorgt werden, sondern muss an einem Sammelpunkt für das Recycling von elektrischen und elektronischen Geräten abgegeben werden. - Page 22 Batterien/Akkus können Giftstoffe enthalten, die die Gesundheit und die Umwelt schädigen. Batterien/Akkus unterliegen der europäischen Richtlinie 2006/66/EG. Diese dürfen nicht mit dem normalen Hausmüll entsorgt werden. Entsorgungshinweise: Entsorgung der Verpackung: Ihr neues Gerät wurde auf dem Weg zu Ihnen durch die Verpackung geschützt. Alle eingesetzten Materialien sind umweltverträglich und wieder verwertbar.
- Page 23 Entsorgung des Gerätes: Altgeräte sind kein wertloser Abfall. Durch umweltgerechte Entsorgung können wertvolle Rohstoffe wieder gewonnen werden. Erkundigen Sie sich in Ihrer Stadt- oder Gemeindeverwaltung nach Möglichkeiten einer umwelt- und sachgerechten Entsorgung des Gerätes. Vor der Entsorgung des Gerätes sollten enthaltene Batterien/Akkus entfernt werden.
-
Page 24: Rechtliche Hinweise
Batterien/Akkus bei Ihrem Fachhändler oder an speziellen Entsorgungsstellen unentgeltlich entsorgen. 3.2.3 Rechtliche Hinweise Hiermit erklärt TechniSat, dass der Funkanlagentyp DIGITRADIO 2 und DIGITRADIO 2 S der Richtlinie 2014/53/EU entspricht. Der vollständige Text der EU-Konformitätserklärung ist unter der folgenden Internetadresse verfügbar: DIGITRADIO 2: http://konf.tsat.de/?ID=11932 DIGITRADIO 2 S: http://konf.tsat.de/?ID=11933... - Page 25 Änderungen und Druckfehler vorbehalten. Stand 02/19. Abschrift und Vervielfältigung nur mit Genehmigung des Herausgebers. Die jeweils aktuelle Version der Anleitung erhalten Sie im PDF-Format im Downloadbereich der TechniSat-Homepage unter www.technisat.de. DIGITRADIO 2, DIGITRADIO 2 S und TechniSat sind eingetragene Warenzeichen der: TechniSat Digital GmbH TechniPark Julius-Saxler-Straße 3...
-
Page 26: Servicehinweise
Mo. - Fr. 8:00 - 20:00 unter Tel.: 03925/9220 1800 erreichbar. Für eine eventuell erforderliche Einsendung des Gerätes verwenden Sie bitte ausschließlich folgende Anschrift: TechniSat Digital GmbH Service-Center Nordstr. 4a 39418 Staßfurt Namen der erwähnten Firmen, Institutionen oder Marken sind Warenzeichen oder... -
Page 27: Aufstellen Des Gerätes
4 Aufstellen des Gerätes > Stellen Sie das Gerät auf einen festen, sicheren und horizontalen Untergrund. Sorgen Sie für gute Belüftung. Achtung!: > Stellen Sie das Gerät nicht auf weiche Oberflächen wie Teppiche, Decken oder in der Nähe von Gardinen und Wandbehängen auf. Die Lüftungsöffnungen könnten verdeckt werden. - Page 28 > Beachten Sie, dass die Gerätefüße u. U. farbige Abdrücke auf bestimmten Möbeloberflächen hinterlassen könnten. Verwenden Sie einen Schutz zwischen Ihren Möbeln und dem Gerät. > Halten Sie das DIGITRADIO von Geräten fern, die starke Magnetfelder erzeugen. > Stellen Sie keine schweren Gegenstände auf das Gerät. >...
- Page 29 > Bei Störungen oder Rauch- und Geruchsbildung aus dem Gehäuse sofort Netzstecker aus der Steckdose ziehen! > Wenn das Gerät längere Zeit nicht benutzt wird, z. B. vor Antritt einer längeren Reise, ziehen Sie den Netzstecker. > Wenn das Gerät längere Zeit nicht betrieben wird, entnehmen Sie den Akku. >...
-
Page 30: Beschreibung Des Digitradio
5 Beschreibung des DIGITRADIO 5.1 Der Lieferumfang Bitte überprüfen sie vor Inbetriebnahme, ob der Lieferumfang vollständig ist: 1x DIGITRADIO 1x Akku 1x Netzteil 1x Bedienungsanleitung 5.2 Die besonderen Eigenschaften des DIGITRADIO Das DIGITRADIO besteht aus einem DAB+/UKW-Empfänger, mit folgend aufgeführten Funktionen: Sie können bis zu 20 DAB+ und 20 UKW-Sender speichern. -
Page 31: Digitradio 2 S Zum Betrieb Vorbereiten
5.3 DIGITRADIO 2 S zum Betrieb vorbereiten 5.3.1 Akku einlegen (am Beispiel des DIGITRADIO 2 S) > Öffnen Sie das Akkufach auf der Geräterückseite, indem Sie den Akkufachdeckel in Richtung der aufgeprägten Pfeile schieben (1). Nehmen Sie den Deckel anschließend ab (2). - Page 32 Der Akku des DIGITRADIO kann auch einzeln im Handel erworben werden. > Setzen Sie den Akkufachdeckel auf das Akkufach (1) und schieben Sie Ihn entgegen der aufgedruckten Pfeilrichtung bis er einrastet (2) Der Akku wird geladen, sobald das Gerät mit dem Stromnetz verbunden ist. Der Ladezustand wird im Display anhand eines Batterie-Symbols angezeigt.
-
Page 33: Netzteil Anschließen
Vergewissern Sie sich, dass die Betriebsspannung des Netzteils mit der örtlichen Netzspannung übereinstimmt, bevor Sie es in die Wandsteckdose stecken. Nach erstmaliger Herstellung des Netzanschlusses erscheint „TechniSat Digitalradio“ im Display. Anschließend können Sie die Bediensprache auswählen. Wählen Sie hierzu mit den Tasten < oder > eine der zur Verfügung stehenden Sprachen und bestätigen Sie die Auswahl durch Drücken der Taste... -
Page 34: Teleskopantenne Ausrichten
5.3.3 Teleskopantenne ausrichten Die Anzahl und Qualität der zu empfangenden Sender hängt von den Empfangsverhältnissen am Aufstellort ab. Mit der Teleskopantenne kann ein ausgezeichneter Empfang erzielt werden. > Richten Sie die Teleskopantenne auf und ziehen Sie sie der Länge nach aus. Wichtig ist oft die exakte Ausrichtung der Teleskopantenne, insbesondere in den Randgebieten des DAB+ -Empfangs. -
Page 35: Kopfhörer Benutzen
5.3.4 Kopfhörer benutzen Gehörschäden! Hören Sie Radio nicht mit großer Lautstärke über Kopfhörer. Dies kann zu bleibenden Gehörschäden führen. Regeln Sie vor der Verwendung von Kopfhörern die Gerätelautstärke auf minimale Lautstärke. Verwenden Sie nur Kopfhörer mit 3,5 Millimeter Klinkenstecker. > Stecken Sie den Stecker des Kopfhörers in die Kopfhörerbuchse auf der Seite des Gerätes. -
Page 36: Allgemeine Geräte-Funktionen
> Durch Drücken der Taste Ein/Standby auf der Oberseite des Gerätes, schalten Sie das DIGITRADIO 2 ein. Nach dem erstmaligen Einschalten müssen Sie zuerst die [Sprache] festlegen. Wählen Sie hierzu mit den Tasten < oder > eine der zur Verfügung stehenden Sprachen und bestätigen Sie die Auswahl durch Drücken der Taste OK. -
Page 37: Gerät Ausschalten
5.4.2 Gerät ausschalten Im Netzbetrieb: > Durch kurzes Drücken der Taste Ein/Standby können Sie das Gerät in den Standby-Modus schalten. Im Display erscheint kurz der Hinweis [Standby]. Datum und Uhrzeit werden im Display angezeigt. Die Displayhelligkeit im Standby-Modus können Sie wie unter Punkt 12.2 beschrieben ändern. >... -
Page 38: Umschalten Dab+/Fm/Bluetooth-Modus
5.4.3 Umschalten DAB+/FM/Bluetooth-Modus > Mit der Taste MODE kann zwischen DAB+ (Digital Radio), FM (UKW) und Bluetooth umgeschaltet werden. 5.4.4 Lautstärke einstellen > Stellen Sie die Lautstärke mit den Tasten Lautstärke +/- ein. Die eingestellte Lautstärke wird im Display anhand eines Balkendiagrammes gezeigt. Beachten Sie auch Punkt 5.3.4 zum Betrieb mit angeschlossenen Kopfhörern. -
Page 39: Displayanzeigen Aufrufen
5.4.6 Displayanzeigen aufrufen > Drücken Sie die Taste MENU und wählen Sie mit den Tasten < oder > das Untermenü [Display]. Drücken Sie anschließend die Taste OK. Wählen Sie mit den Tasten <, > und OK eine Anzeigeoption. Sie haben die Wahl, sich folgende Infos anzeigen zu lassen: Im DAB+ -Betrieb (gewählte Funktion wird mit einem “*”... -
Page 40: Menübedienung
Die Displayanzeige kann auch durch kurzes gedrückt-halten der Direktwahltaste geändert werden. 6 Menübedienung Über das Menü gelangen Sie zu allen Funktionen und Einstellungen des DIGITRADIO. Die Menü-Navigation erfolgt mit den Tasten MENU, <, > und OK. Das Menü ist aufgeteilt in Untermenüs und enthält je nach Modusart (DAB+ oder FM) unterschiedliche Menüpunkte bzw. -
Page 41: Die Dab+ (Digital Radio)-Funktion
Funktionen und zu drückende Tasten werden in dieser Bedienungsanleitung in fett dargestellt. Displayanzeigen in [eckigen Klammern]. Einige Textdarstellungen (z. B. Menüeinträge, Senderinformationen) sind eventuell für die Anzeige im Display zu lang. Diese werden dann nach kurzer Zeit als Lauftext dargestellt. 7 Die DAB+ (Digital Radio)-Funktion 7.1 Was ist DAB+ DAB+ ist ein neues digitales Format, durch welches Sie kristallklaren Sound ohne... -
Page 42: Datenkomprimierung
7.1.1 Datenkomprimierung Digital Radio macht sich dabei Effekte des menschlichen Gehörs zunutze. Das menschliche Ohr nimmt Töne, die unter einer bestimmten Mindestlautstärke liegen, nicht wahr. Daten, die sich unter der sog. Ruhehörschwelle befinden, können also herausgefiltert werden. Dies wird ermöglicht, da in einem digitalen Datenstrom zu jeder Informationseinheit auch die zugehörige relative Lautstärke zu anderen Einheiten gespeichert ist. -
Page 43: Dab+ (Digital Radio) Empfang
7.2 DAB+ (Digital Radio) Empfang > Drücken Sie die Taste MODE bis [DAB] im Display angezeigt wird. Wird DAB+ zum ersten Mal gestartet, wird ein kompletter Sendersuchlauf durchgeführt. Nach Beendigung des Suchlaufes wird der erste Sender in alphanumerischer Reihenfolge wiedergegeben. 7.2.1 Vollständigen Suchlauf durchführen Der automatische Suchlauf Vollständiger Suchlauf scannt alle DAB+ Band III - Kanäle und findet somit alle Sender, die im Empfangsgebiet ausgestrahlt werden. -
Page 44: Sender Wählen
Wird keine Station gefunden, prüfen Sie die Teleskopantenne und verändern Sie ggf. den Aufstellort (Punkt 5.3.3 / 3.2.1). 7.2.2 Sender wählen > Durch drücken der Tasten < oder > kann die Senderliste aufgerufen und zwischen den verfügbaren Sendern umgeschaltet werden. Je nach Einstellung unter MENU >... -
Page 45: Dab+ -Sender Von Einem Speicherplatz Abrufen
Der Sender, der auf den FAV-Speicherplatz 1 gespeichert wurde, ist auch über die Direktwahltaste aufrufbar. 7.2.4 DAB+ -Sender von einem Speicherplatz abrufen > Um einen Sender abzurufen, den Sie zuvor im FAV-Speicher abgelegt haben, drücken Sie kurz die Taste FAV und wählen Sie mit den Tasten <, > einen Senderspeicher (1...20). -
Page 46: Manuell Einstellen
> Wählen Sie mit den Tasten < oder > den Eintrag [Signalstärke] und drücken Sie die Taste OK. > Verlassen Sie das Menü durch mehrmaliges drücken der Taste MENU. > Im Display wird die Signalstärke anhand eines Balkendiagrammes dargestellt. Sender, deren Signalstärke unterhalb der erforderlichen Mindestsignalstärke liegt, senden kein ausreichendes Signal. -
Page 47: Lautstärkeanpassung (Drc)
Sender, deren Signalstärke unterhalb der erforderlichen Mindestsignalstärke liegt, senden kein ausreichendes Signal. Richten Sie die Teleskopantenne ggf. wie unter Punkt 5.3.3 beschrieben aus. 7.2.8 Lautstärkeanpassung (DRC) Mit dem Menüpunkt Lautstärkeanpassung wird die Kompressionsrate, welche Dynamikschwankungen und damit einhergehende Lautstärkevariationen ausgleicht, eingestellt. -
Page 48: Inaktive Sender Löschen
7.2.9 Inaktive Sender löschen Dieser Menüpunkt dient der Entfernung alter und nicht mehr empfangbarer Sender aus der Senderliste. > Drücken Sie die Taste MENU und wählen Sie mit den Tasten < oder > den Eintrag [Inaktive Sender löschen]. > Drücken Sie die Taste OK. Es erfolgt die Abfrage [Löschen], ob die inaktiven Sender gelöscht werden sollen. -
Page 49: Fm (Ukw)-Empfang Mit Rds-Informationen
Bei RDS-Sendern erscheint der Sendername. Um den Empfang zu verbessern, richten Sie die Teleskopantenne aus (Punkt 5.3.3). 8.2 FM (UKW)-Empfang mit RDS-Informationen RDS ist ein Verfahren zur Übertragung von zusätzlichen Informationen über UKW-Sender. Sendeanstalten mit RDS senden z. B. ihren Sendernamen oder den Programmtyp. -
Page 50: Manuelle Sendersuche
Für die Einstellung schwächerer Sender benutzen Sie bitte die manuelle Sendersuche. 8.4 Manuelle Sendersuche > Drücken Sie mehrmals kurz die Tasten < oder >, um den gewünschten Sender, bzw. die Frequenz einzustellen. Das Display zeigt die Frequenz in Schritten von 0,05 MHz an. 8.5 Suchlauf-Einstellung In diesem Menüpunkt kann die Empfindlichkeit des Suchlaufs eingestellt werden. -
Page 51: Audio-Einstellung
8.6 Audio-Einstellung > Drücken Sie die Taste MENU und wählen Sie mit den Tasten < oder > den Eintrag [Audio-Einstellung]. > Drücken Sie die Taste OK. > Wählen Sie mit < oder > den Eintrag [Stereo möglich] oder [Nur Mono], um die Wiedergabe in Stereo oder nur in Mono-Ton bei schwachem FM-Empfang wiederzugeben. -
Page 52: Ukw-Sender Von Einem Speicherplatz Abrufen
Der Sender, der auf den FAV-Speicherplatz 1 gespeichert wurde, ist auch über die Direktwahltaste aufrufbar. 8.8 UKW-Sender von einem Speicherplatz abrufen > Um einen Sender, den Sie zuvor im FAV-Speicher abgelegt haben wieder abzurufen, drücken Sie kurz die Taste FAV und wählen Sie mit den Tasten <, > einen Senderspeicher (1...20). -
Page 53: Bluetooth
9 Bluetooth Im Bluetooth-Modus können Sie Musik von einem verbundenen Smartphone oder Tablet über die Lautsprecher des DIGITRADIO wiedergeben. Hierzu müssen zuerst beide Geräte miteinander „gekoppelt“ werden. 9.1 Bluetooth-Betrieb einschalten > Wechseln Sie durch Drücken der Taste MODE in den Bluetooth-Modus. >... - Page 54 > In der Liste der gefundenen Bluetooth Geräte an Ihrem externen Gerät sollte nun der Eintrag DIGITRADIO 2 bzw. DIGITRADIO 2 S erscheinen. Tippen Sie darauf, um den Koppel-Vorgang abzuschließen. Ist der Koppelvorgang erfolgreich abgeschlossen, ertönt ein Bestätigungston aus dem Lautsprecher des DIGITRADIO.
-
Page 55: Koppelung Aufheben
Je nach Bluetooth-Protokoll Ihres externen Gerätes, können Sie die Musikwiedergabe über die Tasten des DIGITRADIO steuern. Drücken Sie die Taste OK, um die Wiedergabe zu pausieren oder fortzusetzen. Drücken Sie die Taste > um zum nächsten Titel zu springen. Drücken Sie die Tasten < um den aktuellen Titel erneut abzuspielen oder drücken Sie die Taste 2x, um zu vorherigen Titel zu springen. -
Page 56: Sleep-Timer
Alternativ können Sie die Koppelung auch an Ihrem externen Gerät aufheben. 10 Sleep-Timer Durch den Sleep-Timer schaltet das DIGITRADIO nach der eingestellten Zeit automatisch in den Standby (Netzbetrieb) oder Aus (Akkubetrieb). > Drücken Sie die Taste MENU und wählen Sie mit den Tasten < oder > den Eintrag [Sleep-timer]. -
Page 57: Equalizer
11 Equalizer Mit dem Equalizer* können Sie den Ton im DAB und UKW (FM) Modus Ihren Wünschen entsprechend anpassen. > Drücken Sie im DAB oder FM-Modus die Taste MENU und wählen Sie mit den Tasten < oder > den Eintrag [Equalizer]. >... -
Page 58: Systemeinstellungen
12 Systemeinstellungen Alle unter diesem Punkt erläuterten Einstellungen gelten sowohl im DAB+, als auch im FM-Betrieb gleichermaßen. 12.1 Uhrzeit- und Datumseinstellungen 12.1.1 Zeit/Datum manuell einstellen Je nach Einstellung der Zeitaktualisierung (Punkt 12.1.2), müssen Sie Uhrzeit und das Datum manuell einstellen. >... -
Page 59: Zeitaktualisierung
> Anschließend blinken die nächsten Ziffern (Minuten) der Uhrzeit und können ebenfalls wie zuvor beschrieben abgeändert werden. > Drücken Sie nach jeder weiteren Einstellung die Taste OK, um zur nächsten Einstellung zu springen. > Verfahren Sie bei der Datumseinstellung wie zuvor beschrieben. >... -
Page 60: Uhrzeitformat Einstellen
[Alle Quellen] (Aktualisierung über DAB+ und FM) [Update von DAB] (Aktualisierung nur über DAB+) [Update von FM] (Aktualisierung nur über UKW) [Keine Update] (Uhrzeit/Datum muss manuell eingegeben werden, siehe Punkt 12.1.1). 12.1.3 Uhrzeitformat einstellen Im Untermenü 12/24 Std. einstellen können Sie das 12 oder 24 Stunden Format aktivieren. -
Page 61: Datumsformat Einstellen
12.1.4 Datumsformat einstellen Im Untermenü Datumsformat einst. können Sie das Format zur Anzeige des Datums festlegen. > Drücken Sie die Taste MENU und wählen Sie mit den Tasten < oder > den Eintrag [Uhrzeit]. > Drücken Sie die Taste OK. >... -
Page 62: Displayhelligkeit
12.2 Displayhelligkeit Sie können die Displayhelligkeit sowohl für den Betrieb als auch für Standby (nur verfügbar, wenn das Radio mit dem Stromnetz verbunden ist) einstellen. > Drücken Sie hierzu die Taste MENU und wählen Sie mit den Tasten < oder > den Eintrag [Helligkeit]. -
Page 63: Sprache
[Auto-Dimm] dimmt das Display automatisch (bei gewählter Option [Ein]) nach 10 Sekunden ohne Bedienung des Radios, auf den Helligkeitswert Niedrig. Wird die Option [Aus] gewählt, leuchtet das Display mit der unter der Funktion [Betrieb] gewählten Helligkeit dauerhaft. Drücken Sie zum Speichern einer Einstellung die Taste OK. -
Page 64: Werkseinstellung
12.4 Werkseinstellung Wenn Sie den Standort des Gerätes verändern, z. B. bei einem Umzug, sind möglicherweise die gespeicherten Sender nicht mehr zu empfangen. Mit dem Zurücksetzen auf Werkseinstellungen können Sie in diesem Fall alle gespeicherten Sender löschen, um anschließend einen neuen Sendersuchlauf zu starten. >... -
Page 65: Sw-Version
12.5 SW-Version Unter SW-Version können Sie die aktuell installierte SW-Version abfragen. > Drücken Sie die Taste MENU und wählen Sie mit den Tasten < oder > den Eintrag [SW-Version]. > Drücken Sie die Taste OK. Es wird die aktuelle SW-Version angezeigt. 13 Reinigen Um die Gefahr eines elektrischen Schlags zu vermeiden, dürfen Sie das Gerät nicht mit einem nassen Tuch oder unter fließendem Wasser reinigen. -
Page 66: Fehler Beseitigen
Das Display nur mit einem weichen Baumwolltuch reinigen. Baumwolltuch gegebenenfalls mit geringen Mengen nicht-alkalischer, verdünnter Seifenlauge auf Wasser- oder Alkoholbasis verwenden. Mit dem Baumwolltuch sanft über die Oberfläche reiben. 14 Fehler beseitigen Wenn das Gerät nicht wie vorgesehen funktioniert, überprüfen Sie es anhand der folgenden Tabelle. -
Page 67: Technische Daten / Herstellerhinweise
15 Technische Daten / Herstellerhinweise Technische Änderungen und Irrtümer vorbehalten. Empfangswege DAB/DAB+, FM, Bluetooth Stromversorgung AC Input: 100-240V, 50/60Hz DC Output: 5V, 2A (DIGITRADIO 2 S) DC Output: 5V, 1A (DIGITRADIO 2) Akku 3,7V/1050mAh Li-Ion, Ladestrom max. 500mA Akkulaufzeit bis zu 10 Stunden... - Page 68 Betrieb max.: 9W (mit Netzteil und Akkuladung DIGITRADIO 2 S), 8W (mit Netzteil und Akkuladung DIGITRADIO 2) im Betrieb typisch: 1W (50% Lautstärke, ohne Akkuladung) Standby: <0,5W Power off: <0,4W Akkubetrieb Power off: <0,3mW Audio Ausgangsleistung 2x1W RMS DIGITRADIO 2 S 1W RMS DIGITRADIO 2...
- Page 69 Gewicht 464g DIGITRADIO 2S 365g DIGITRADIO 2 Abmessungen (BxHxT) mm 245 x 109 x 47 DIGITRADIO 2 S 175 x 109 x 47 DIGITRADIO 2...
- Page 71 Instruction Manual DIGITRADIO 2 DIGITRADIO 2 S...
-
Page 72: Illustrations
1 Illustrations 1.1 Front view / side view of DIGITRADIO 2... - Page 73 On/Standby (top) Speaker (mono) MODE button to change modes MENU for opening the menu OK button to confirm Volume +/- button (higher/lower) Shortcut button FAV button Display < / > Selection buttons / navigation Headphone jack (3.5 mm jack) DC IN USB port for external power supply...
-
Page 74: Rear
1.1.1 Rear Terminals Telescopic antenna Plastic Battery Battery guide compartment... -
Page 75: Front View Of Digitradio 2 S
1.2 Front view of DIGITRADIO 2 S... -
Page 76: Side View And Description Of Digitradio 2 S
1.2.1 Side view and description of DIGITRADIO 2 S On/Standby (top) Speaker MODE button to change modes MENU for opening the menu OK button to confirm Volume +/- button (higher/lower) Shortcut button FAV button Display < / > Selection buttons / navigation Headphone jack (3.5 mm jack) -
Page 77: Rear
1.2.2 Rear Terminals Telescopic antenna Plastic Battery Battery guide compartment... -
Page 78: Contents
2 Contents Illustrations ....................... 72 Front view / side view of DIGITRADIO 2 ................72 1.1.1 Rear ..............................74 Front view of DIGITRADIO 2 S ..................... 75 1.2.1 Side view and description of DIGITRADIO 2 S ............76 1.2.2 Rear ..............................77 Contents ........................ - Page 79 Special features of the DIGITRADIO .................98 Preparing the DIGITRADIO 2 S for operation ............. 99 5.3.1 Insert the battery (using the DIGITRADIO 2 S as an example)......99 5.3.2 Connecting the power supply unit ................. 101 5.3.3 Aligning the telescopic antenna ..................102 5.3.4 Using headphones .........................103...
- Page 80 7.2.3 Storing DAB+ stations on a memory slot ..............112 7.2.4 Retrieving DAB+ stations from a memory slot ............113 7.2.5 Overwriting/deleting a station memory slot ...............113 7.2.6 Signal strength ..........................113 7.2.7 Manual setting .......................... 114 7.2.8 Volume adjustment (DRC) ....................115 7.2.9 Deleting inactive stations ....................
- Page 81 Sleep timer ......................124 Equaliser ........................125 11.1 MyEQ .............................125 System settings ......................126 12.1 Time and date settings ......................126 12.1.1 Manually setting the time/date ..................126 12.1.2 Time update ..........................127 12.1.3 Setting the time format ......................128 12.1.4 Setting the date format ...................... 129 12.2 Display brightness ........................130 12.3...
-
Page 82: Preface
3 Preface This instruction manual will help you to use your radio device, hereinafter referred to as the DIGITRADIO or device, as intended and safely. 3.1 Target group for this instruction manual The instruction manual is intended for anyone who is installing, operating, cleaning or disposing of the device. -
Page 83: Safety
Caution - This identifies important information that must be observed to prevent device defects, data loss/misuse or undesired operation. Tip - This identifies information relating to the described function, as well as to another related function that may have to be taken into account, with reference to the corresponding section in the manual. - Page 84 In the event of extended transportation in the cold and subsequent moving to warm rooms, do not switch on immediately; wait for the temperature to equalise. Do not expose the device to dripping or splashing water. If water has penetrated the device, switch it off and inform the Service department.
- Page 85 If you detect a device defect, odour or smoke, considerable malfunctions, or damage to the housing, switch off the device and inform the Service department. The device may only be operated with the mains voltage specified on the power supply unit. Never try to operate the device with another voltage.
- Page 86 Never try to repair a faulty device yourself. Always contact one of our customer service locations. Foreign bodies, e.g. nails, coins, etc. must not be allowed to fall inside the device. Do not touch the connection contacts with metal objects or fingers. This could lead to short-circuits.
- Page 87 This device is not intended to be used by people (including children) with limited physical, sensory or mental capacities or lack of experience and/or knowledge, unless they are supervised by a person responsible for their safety or they have been instructed by them as to how to use the device. Children must be supervised to ensure that they do not play with the device.
- Page 88 Normal batteries may not be recharged. Batteries must not be reactivated by other means, not taken apart, heated or thrown into an open fire (danger of explosion!). Clean battery contacts and device contacts before inserting. If the rechargeable battery is inserted incorrectly, there is a danger of explosion! Replace only with rechargeable batteries of the correct type and model number Caution! Do not expose batteries to extreme conditions.
-
Page 89: Disposal
3.2.2 Disposal The device packaging is exclusively comprised of recyclable materials. Please sort the components appropriately, and dispose of them in line with your local waste disposal regulations. At the end of its service life, this device must not be disposed of with your regular household waste. - Page 90 Batteries/rechargeable batteries may contain poisonous substances which cause harm to health and the environment. Batteries/rechargeable batteries are subject to European Directive 2006/66/EC. They must not be disposed of with normal domestic waste. Disposal instructions: Disposal of packaging: Your new device was protected by packaging on its way to you. All materials used are environmentally friendly and recyclable.
- Page 91 Device disposal: Old devices constitute valuable waste. Valuable raw materials can be recovered through environmentally-friendly disposal. Consult your town or local authority as to the possibilities for environmentally-friendly and proper disposal of the device. Prior to disposal of the device, remove the batteries/rechargeable batteries contained therein.
-
Page 92: Legal Notices
3.2.3 Legal notices TechniSat hereby declares that the DIGITRADIO 2 and DIGITRADIO 2 S radio equipment comply with Directive 2014/53 / EU. The complete text of the EU Declaration of Conformity is available at the following web address: DIGITRADIO 2: http://konf.tsat.de/?ID=11932... - Page 93 Copying and reproduction are subject to the publisher's consent. The respective current version of the manual can be obtained in PDF format in the download area of the TechniSat homepage at www.technisat.de. DIGITRADIO 2, DIGITRADIO 2 S and TechniSat are registered trademarks of: TechniSat Digital GmbH TechniPark...
-
Page 94: Service Instructions
Technical Hotline is available: Mon. - Fri. 8:00 am - 8:00 pm on tel.: +49 (0) 3925 9220 1800. If the device needs to be sent back, please use the following address only: TechniSat Digital GmbH Service Centre Nordstr. 4a 39418 Stassfurt, Germany The names of the companies, institutions or makes referred to are trademarks or registered trademarks of the respective owners. -
Page 95: Setting Up The Device
4 Setting up the device > Place the device on a firm, secure and horizontal base. Make sure the area is well ventilated. Caution! > Do not place the radio on soft surfaces such as carpets and blankets or near to curtains and wall hangings. - Page 96 > Please note that the device footings could leave coloured marks on some types of furniture surfaces in certain situations. Place a protective layer between your furniture and the device. > Keep the DIGITRADIO away from devices which emit intense magnetic fields. >...
- Page 97 > In the event of a malfunction or the detection of smoke or odour from the housing, remove the plug from the power outlet immediately. > Remove the plug if the device is not going to be used for a prolonged period, e.g.
-
Page 98: Description Of The Digitradio
5 Description of the DIGITRADIO 5.1 Scope of delivery Before start-up, please check whether everything has been delivered. 1 x DIGITRADIO 1 x rechargeable battery 1 x power supply unit 1 x instruction manual 5.2 Special features of the DIGITRADIO The DIGITRADIO is comprised of a DAB+/FM receiver with the following functions: You can store up to 20 DAB+ and 20 FM stations. -
Page 99: Preparing The Digitradio 2 S For Operation
5.3 Preparing the DIGITRADIO 2 S for operation 5.3.1 Insert the battery (using the DIGITRADIO 2 S as an example) > Open the battery compartment on the rear of the device by pushing the battery compartment lid in the direction of the arrow (1). Then remove the lid (2). - Page 100 The rechargeable battery for the DIGITRADIO can also be bought separately in stores. > Place the battery compartment lid onto the battery compartment (1) and slide it in the opposite direction to the arrow until it clicks into place (2). The battery is charged as soon as the device is connected to the mains.
-
Page 101: Connecting The Power Supply Unit
Ensure that the operating voltage of the power supply unit matches the mains voltage before you insert it into the wall socket. After establishing the mains connection for the first time "TechniSat Digital Radio" appears on the display. You can then select the operating language. To do this, select one of the available languages using the <or >... -
Page 102: Aligning The Telescopic Antenna
5.3.3 Aligning the telescopic antenna The number and quality of the stations to be received depend on the reception conditions at the installation location. Excellent reception can be achieved with the telescopic antenna. > Align the telescopic antenna and extend it. The exact alignment of the telescopic antenna is often important, in particular on the outskirts of the DAB+ reception area. -
Page 103: Using Headphones
5.3.4 Using headphones Hearing impairment! Do not listen to the radio at high volume with headphones. Doing so can cause permanent hearing impairment. Turn down the radio volume to the lowest volume before using headphones. Only use headphones with a 3.5 mm jack plug. >... -
Page 104: General Device Functions
5.3.2. > Press the On / Standby button on the top of the unit to turn on the DIGITRADIO 2. After switching on the device for the first time, you must first set the [Language]. To do this, select one of the available languages using the < or > keys and confirm the selection by pressing the OK key. -
Page 105: Switching Off The Device
5.4.2 Switching off the device With mains operation: > By briefly pressing the On / Standby button you can switch the device to standby mode. [Standby] appears briefly on the display. The date and time are shown on the display. The display brightness in standby mode can be adjusted by following the instructions in Section 12.2. -
Page 106: Changing To Dab+/Fm/Bluetooth Mode
5.4.3 Changing to DAB+/FM/Bluetooth mode > Press the MODE button to switch between DAB+ (Digital Radio), FM and Bluetooth. 5.4.4 Adjusting the volume > Adjust the volume with the Volume +/- button. The set volume is shown on the display by way of a bar chart. Also refer to Section 5.3.4 for operation when headphones are connected. -
Page 107: Retrieving Displays
5.4.6 Retrieving displays > Press the MENU button and use the < or > buttons to select the [Display] submenu. Then press the OK button. Use the <,> and OK buttons to select a display option. You have the choice of viewing the following information: In DAB+ mode (the selected function is identified with an “*”): [Running text] (continuous text with additional information provided by broadcasters etc.), [Signal intensity], [Channel type], [Ensemble], [Frequency],... -
Page 108: Menu Operation
The display can also be changed by briefly holding down the one-touch button. 6 Menu operation The menu takes you to all functions and settings of the DIGITRADIO. Menu navigation is carried out with the MENU, <,> and OK buttons. The menu is divided into submenus and contains different menu items or activatable functions depending on the mode (DAB+ or FM). -
Page 109: Dab+ (Digital Radio) Function
The functions and buttons to be pressed are shown in bold in this instruction manual. Displays in [square brackets]. Some text (e.g. menu items, station information) may be too long to show on the display. These will be then shown as running text shortly thereafter. 7 DAB+ (digital radio) function 7.1 What is DAB+? DAB+ is a new digital format through which crystal clear sound with no noise can... -
Page 110: Data Compression
7.1.1 Data compression With this, digital radio takes advantage of the properties of human hearing. The human ear does not perceive sounds which are found under a specific minimum volume. Data which are found under the so-called audibility threshold can, therefore, be filtered out. -
Page 111: Dab+ (Digital Radio) Reception
7.2 DAB+ (digital radio) reception > Press the MODE button until [DAB] is shown on the display. If DAB+ is being started for the first time, a complete scan will be performed. After the scan is complete, the first station is played back in alphanumeric order. 7.2.1 Performing a complete scan The automatic scan (Complete scan) scans all DAB+ band III channels and thereby finds all stations being broadcast within the reception area. -
Page 112: Selecting Stations
If no station is detected, check the telescopic antenna and, if required, change the installation location (Section 5.3.3 / 3.2.1). 7.2.2 Selecting stations > By pressing the <or > buttons, the station list can be called up and you can switch between the available stations. -
Page 113: Retrieving Dab+ Stations From A Memory Slot
The station which has been stored in the FAV memory slot 1 can also be called up via the one-touch button. 7.2.4 Retrieving DAB+ stations from a memory slot > To retrieve a station that you have stored in the FAV memory slots, briefly press the FAV button and select a station slot (1 - 20) using the <, >... -
Page 114: Manual Setting
> Use the < or > buttons to select the [Signal strength] item and press OK. > Exit the menu by pressing the MENU button several times. > The display shows the signal strength using a bar graph. Stations with a signal strength below the required minimum signal intensity are not transmitting a strong enough signal. -
Page 115: Volume Adjustment (Drc)
Stations with a signal strength below the required minimum signal intensity are not transmitting a strong enough signal. Align the telescopic antenna as described in section 5.3.3 if required. 7.2.8 Volume adjustment (DRC) The Volume Adjustment menu item is used to set the compression rate, which compensates for dynamic fluctuations and the associated volume variations. -
Page 116: Deleting Inactive Stations
7.2.9 Deleting inactive stations This menu item is for removing old stations and those no longer being received from the station list. > Hold down the MENU button and use the < or > buttons to select the [Delete inactive stations] item. >... -
Page 117: Fm Reception With Rds Information
In the case of RDS stations, the station name appears. Align the telescopic antenna to improve reception (Section 5.3.3). 8.2 FM reception with RDS information RDS is a procedure for broadcasting additional information via FM stations. Broadcasters with RDS broadcast their station name or the programme type, for example. This is shown on the display. -
Page 118: Manual Station Scan
Please use the manual station scan for setting weaker stations. 8.4 Manual station scan > Briefly press the < or > buttons repeatedly to set the desired stations or frequency. The display shows the frequency in increments of 0.05 MHz. 8.5 Scan setting In this menu item it is possible to set the sensitivity of the scan. -
Page 119: Audio Settings
8.6 Audio settings > Hold down the MENU button and use the < or > buttons to select the [Audio settings] item. > Press the OK button. > Use < or > to select the [Stereo available] or [Mono only] item to play back in stereo or only in mono sound when the FM reception is weak. -
Page 120: Retrieving Fm Stations From A Memory Slot
The station which has been stored in the FAV memory slot 1 can also be called up via the one-touch button. 8.8 Retrieving FM stations from a memory slot > In order to retrieve a station that you have previously stored in the FAV memory, briefly press the FAV button and use the <, >... -
Page 121: Bluetooth
9 Bluetooth In Bluetooth mode, you can enjoy music from a connected smartphone or tablet from the DIGITRADIO's speakers. For this purpose, the two devices must first be "paired" to each other. 9.1 Switching on Bluetooth mode > Change to Bluetooth mode by pressing the MODE button. >... - Page 122 During the pairing process, both devices should be within 10 cm of each other. > DIGITRADIO 2 or DIGITRADIO 2S should now appear in the list of found Bluetooth devices on your external device. Tap on the name of the radio to complete the pairing process.
-
Page 123: Cancel Pairing
Depending on the Bluetooth protocol of your external device, you can control the music playback using the DIGITRADIO's buttons. Press the OK button to pause or continue playback. Press the > button to move to the next track. Press the < button to play the current track again or press the button twice to skip to the previous track. -
Page 124: Sleep Timer
Alternatively, you can also cancel the pairing on your external device. 10 Sleep timer The sleep timer automatically switches the DIGITRADIO to Standby (mains operation) or Off (battery power) after the set time. > Press the MENU button and use the < or > button to select [Sleep timer]. >... -
Page 125: Equaliser
11 Equaliser With the equaliser* you can adjust the sound in DAB and FM mode according to your wishes. > In DAB or FM mode, press the MENU button and use the < or > buttons to select [Equaliser]. > Press the OK button. -
Page 126: System Settings
12 System settings All the settings referred to under this item are equally applicable in DAB+ and FM mode. 12.1 Time and date settings 12.1.1 Manually setting the time/date Depending on the setting for time updates (section 12.1.2), the time and date have to be set manually. -
Page 127: Time Update
> The next time digits (minutes) start to flash and can again be changed as described above. > Press OK after every other setting in order to go to the next setting. > To set the date, proceed in the same way as described above. >... -
Page 128: Setting The Time Format
[All sources] (Update via DAB+ and FM) [Update from DAB] (Update via DAB+ only) [Update from FM] (Update via FM only) [No update] (Time/date must be entered manually, see Section 12.1.1). 12.1.3 Setting the time format In the Set 12/24 hrs. submenu you can activate the 12- or 24-hour format. >... -
Page 129: Setting The Date Format
12.1.4 Setting the date format In the Set Date Format submenu you can determine the format for displaying the date. > Press the MENU button and use the < or > button to select [Time]. > Press the OK button. >... -
Page 130: Display Brightness
12.2 Display brightness You can set the display brightness for both operation and standby (only available when the radio is connected to mains power). > To do so, press the MENU button and use the < or > button to select [Brightness]. -
Page 131: Language
[Auto Dim] dims the display automatically (with the option [On] selected) to the Low brightness value after 10 seconds without operating the radio. When the [Off] option is selected, the display will be permanently lit with the brightness selected under [Operation]. Press the OK button to apply the setting. For battery power, only the Operation and Auto-Dimming settings are relevant. -
Page 132: Factory Setting
12.4 Factory setting If you change the location of the device, e.g. when moving house, it is possible that the saved stations can no longer be received. In this case you can reset the device to factory settings to delete all the saved stations and then launch a new scan. >... -
Page 133: Software Version
12.5 Software version Under SW Version you can retrieve the currently installed software version. > Press the MENU button and use the < or > buttons to select [SW Version]. > Press the OK button. The current SW version is displayed. 13 Cleaning To prevent the risk of an electric shock, you may not clean the device using a wet cloth or under running water. -
Page 134: Troubleshooting
Only clean the display with a soft, cotton cloth. If required, use a cotton cloth with small amounts of non-alkaline, diluted, water or alcohol-based soap solution. Gently clean the surface using the cotton cloth. 14 Troubleshooting If the device does not operate as intended, check the following table for information. Symptom Possible cause/remedy The device cannot be switched on. -
Page 135: Technical Specifications / Manufacturer's Instructions
DAB/DAB+, FM, Bluetooth power supply AC Input: 100-240V, 50 / 60Hz DC Output: 5V, 2A (DIGITRADIO 2S) DC output: 5V, 1A (DIGITRADIO 2) Battery 3.7V / 1050 mAh Li-Ion, charging current max. 500 mA Battery life up to 10 hours (speaker at... - Page 136 Bluetooth (V4.1): 2.402-2.480 GHz Transmission power: Class 2 / max. +4 Display OLED Power consumption max. operation: 9W (DIGITRADIO 2 S with power supply and battery charge), 8W (DIGITRADIO 2 with power supply and battery charge) typical during operation: 1W (50% volume, without battery charge) Standby: <0.5 W...
- Page 137 Weight 464g DIGITRADIO 2S 365g DIGITRADIO 2 Dimensions (WxHxD) mm 245 x 109 x 47 DIGITRADIO 2 S 175 x 109 x 47 DIGITRADIO 2...
- Page 139 Mode d'emploi DIGITRADIO 2 DIGITRADIO 2 S...
-
Page 140: Illustrations
1 Illustrations 1.1 Vue de face/côté DIGITRADIO 2... - Page 141 Marche/veille (en haut) Haut-parleurs (mono) MODE Touche de changement de mode MENU Touche d'affichage du menu OK Touche de confirmation Volume +/- Touches de réglage du volume (élevé/bas) Touche de sélection directe FAV Touche Favoris Écran < / > Touches de sélection/navigation Prise casque (jack de 3,5 mm) Prise USB DC-IN pour l’alimentation électrique externe...
-
Page 142: Arrière
1.1.1 Arrière Contacts Antenne télescopique Glissière en Batterie Compartiment à plastique batterie... -
Page 143: Vue De Face Digitradio 2 S
1.2 Vue de face DIGITRADIO 2 S... -
Page 144: Vue De Côté Et Explication Digitradio 2 S
1.2.1 Vue de côté et explication DIGITRADIO 2 S Marche/veille (en haut) Haut-parleurs MODE Touche de changement de mode MENU Touche d'affichage du menu OK Touche de confirmation Volume +/- Touches de réglage du volume (élevé/bas) Touche de sélection directe FAV Touche Favoris Écran... -
Page 145: Arrière
1.2.2 Arrière Antenne Contacts télescopique Glissière Batterie Compartiment en plastique à batterie... -
Page 146: Sommaire
Vue de face/côté DIGITRADIO 2 ..................140 1.1.1 Arrière ............................142 Vue de face DIGITRADIO 2 S .....................143 1.2.1 Vue de côté et explication DIGITRADIO 2 S .............. 144 1.2.2 Arrière ............................145 Sommaire ........................146 Avant-propos ......................150 Groupe cible de ce mode d’emploi ................150 3.1.1... - Page 147 Caractéristiques spécifiques de la DIGITRADIO ............166 Préparation de la DIGITRADIO 2 S au fonctionnement ........167 5.3.1 Insertion de la batterie (exemple DIGITRADIO 2 S) ..........167 5.3.2 Branchement du bloc d’alimentation ................169 5.3.3 Orientation de l’antenne télescopique .................170 5.3.4 Utilisation des écouteurs ......................171 Fonctions générales de l’appareil ...................172...
- Page 148 7.2.3 Mémorisation d'une station DAB+ sur un emplacement mémoire ....180 7.2.4 Accès à une station DAB+ à partir d’un emplacement mémoire ....181 7.2.5 Écrasement/suppression d'un programme mémorisé .......... 181 7.2.6 Puissance du signal ....................... 181 7.2.7 Réglage manuel ........................182 7.2.8 Adaptation du volume (DRC) ....................183 7.2.9 Suppression des stations inactives ................
- Page 149 Minuterie de mise en veille ................192 Égaliseur ........................193 11.1 Mon EG ............................193 Réglages système ....................194 12.1 Réglages de l’heure et de la date .................. 194 12.1.1 Réglage manuel de l'heure et de la date ..............194 12.1.2 Actualisation de l’heure......................195 12.1.3 Réglage du format de l’heure ..................
-
Page 150: Avant-Propos
3 Avant-propos Ce mode d’emploi vous aide à utiliser votre poste de radio, ci-après nommé DIGITRADIO ou appareil, de manière sûre et conforme à sa destination. 3.1 Groupe cible de ce mode d’emploi Ce mode d’emploi s’adresse à toutes les personnes qui installent, utilisent, nettoient ou mettent l’appareil au rebut. -
Page 151: Sécurité
Attention - désigne une indication importante à lire attentivement, afin d’éviter toute perturbation de l’appareil, toute perte/mauvaise utilisation des données ou tout fonctionnement indésirable. Astuce - désigne une indication relative à la fonction présentée, ainsi qu’une autre fonction liée et éventuellement à respecter, avec ses références dans le manuel. 3.2.1 Sécurité... - Page 152 Lors d’un transport prolongé dans le froid et d'un passage dans des locaux chauffés, ne pas le mettre en marche immédiatement ; attendre l’équilibrage des températures. N’exposez pas l’appareil à des gouttes d’eau ou des éclaboussures. Si de l’eau pénètre dans l’appareil, arrêtez-le et contactez l’assistance technique. N'exposez pas l'appareil à...
- Page 153 Si l’appareil semble défectueux, s’il produit des odeurs ou fumées, s’il présente des dysfonctionnements importants, si le boîtier est endommagé, arrêtez immédiatement l’appareil et contactez l’assistance technique. L'appareil peut être utilisé uniquement avec la tension de secteur indiquée sur le bloc d'alimentation.
- Page 154 N’essayez jamais de réparer vous-même un appareil défectueux. Adressez-vous toujours à l'un de nos centres de service après-vente. Aucun corps étranger, p. ex. des aiguilles, pièces de monnaie, etc., ne doit tomber à l'intérieur de l'appareil. Les contacts de raccordement ne doivent pas entrer en contact avec des objets métalliques ou avec les doigts.
- Page 155 Cet appareil n’est pas destiné à être utilisé par des personnes (y compris les enfants) dont les capacités physiques, sensorielles ou mentales sont limitées ou manquant d’expérience et/ou de connaissances, sauf si elles sont surveillées par une personne responsable de leur sécurité ou si elles ont reçu les instructions nécessaires à...
- Page 156 Les piles normales ne doivent pas être rechargées. Les batteries ne doivent pas être réactivées avec d’autres moyens, ni être démontées, chauffées ou jetées au feu (risque d’explosion !). Nettoyez les contacts de la batterie et les contacts de l’appareil avant la mise en place.
-
Page 157: Élimination
3.2.2 Élimination L’emballage de votre appareil est exclusivement composé de matériaux recyclables. Merci de les remettre dans le circuit du tri sélectif. Une fois arrivé en fin de vie, ce produit ne doit pas être mis au rebut avec les déchets ménagers ordinaires. Il doit être déposé... - Page 158 Les piles/batteries peuvent contenir des substances toxiques nocives pour la santé et l’environnement. Les piles/batteries sont soumises à la directive européenne 2006/66/ CE. Celles-ci ne doivent pas être éliminées avec les déchets ménagers ordinaires. Consignes pour la mise au rebut : Mise au rebut de l’emballage : Votre nouvel appareil a été...
- Page 159 Mise au rebut de l’appareil : Les appareils usagés ne sont pas des déchets sans aucune valeur. Grâce à une mise au rebut respectueuse de l’environnement, des matières premières précieuses peuvent être récupérées. Renseignez-vous auprès des services administratifs de votre ville ou communauté de communes pour connaître les possibilités d’une mise au rebut conforme de votre appareil dans le respect de l’environnement.
-
Page 160: Mentions Légales
3.2.3 Mentions légales Par la présente, TechniSat déclare que l’installation radioélectrique DIGITRADIO 2 et DIGITRADIO 2 S est conforme à la directive 2014/53/UE. Le texte intégral de la déclaration de conformité européenne est disponible à l’adresse suivante : DIGITRADIO 2 : http://konf.tsat.de/?ID=11932... - Page 161 Toutes copies et reproductions sont soumises à l’autorisation de l’éditeur. Vous pouvez télécharger une version actuelle du manuel au format PDF dans l'espace de téléchargement du site Internet TechniSat sur www.technisat.de. DIGITRADIO 2 et DIGITRADIO 2 S et TechniSat sont des marques déposées de : TechniSat Digital GmbH TechniPark...
-
Page 162: Consignes D'entretien
8h à 20h au + 49 (0) 392 592 201 800. En cas d'éventuel retour de l'appareil, merci d'adresser votre colis uniquement à l'adresse suivante : TechniSat Digital GmbH Service-Center Nordstr. 4a 39418 Stassfurt, Allemagne Les noms de sociétés, institutions ou marques citées sont des marques ou des marques... -
Page 163: Installation De L'appareil
4 Installation de l’appareil > Posez l’appareil sur une surface solide, sûre et horizontale. Assurez une circulation d'air suffisante. Attention ! : > N’installez pas l’appareil sur des surfaces souples telles que des tapis, couvertures ou à proximité de rideaux et de tentures, sous peine d’obstruer les orifices de ventilation. - Page 164 > Tenez compte du fait que les pieds de l’appareil risquent de laisser des traces colorées sur certaines surfaces de meubles. Utilisez une protection entre vos meubles et l’appareil. > Tenez la DIGITRADIO éloignée d’appareils produisant des champs magnétiques puissants. >...
- Page 165 > Ne saisissez pas la fiche avec les mains mouillées, risque de décharge électrique ! > En cas de pannes ou de formation de fumée et d’odeur en provenance du boîtier, débranchez immédiatement la fiche de la prise secteur ! > Lorsque l’appareil ne doit pas être utilisé...
-
Page 166: Description De La Digitradio
5 Description de la DIGITRADIO 5.1 Contenu de la livraison Avant la mise en service, veuillez contrôler si le contenu de la livraison est complet : 1 x DIGITRADIO 1 x batterie 1 x bloc d’alimentation 1 x mode d’emploi 5.2 Caractéristiques spécifiques de la DIGITRADIO La DIGITRADIO se compose d’un récepteur DAB+/FM doté... -
Page 167: Préparation De La Digitradio 2 S Au Fonctionnement
5.3 Préparation de la DIGITRADIO 2 S au fonctionnement 5.3.1 Insertion de la batterie (exemple DIGITRADIO 2 S) > Ouvrez le compartiment à batterie à l'arrière de l'appareil en le poussant en direction de la flèche représentée (1). Retirez ensuite le couvercle (2). - Page 168 La batterie de la DIGITRADIO peut également être achetée individuellement dans le commerce. > Posez le couvercle du compartiment à batterie sur le compartiment à batterie (1) et poussez-le dans le sens indiqué par la flèche jusqu'à enclenchement (2) La batterie est rechargée dès que l’appareil est branché au réseau électrique. L’état de chargement s’affiche à...
-
Page 169: Branchement Du Bloc D'alimentation
à la tension réseau locale avant de le brancher dans la prise secteur murale. Suite au premier branchement réseau, « TechniSat Digitalradio » s'affiche à l’écran. Vous pouvez ensuite choisir la langue d'affichage. Pour ce faire, sélectionnez avec les touches < ou > une des langues à disposition et confirmez la sélection en appuyant sur la touche OK. -
Page 170: Orientation De L'antenne Télescopique
5.3.3 Orientation de l’antenne télescopique Le nombre et la qualité des stations reçues dépendent des conditions de réception à l’endroit où est placé l’appareil. L’antenne télescopique permet d’obtenir une excellente réception. > Orientez l’antenne télescopique et dépliez-la. L’orientation précise de l’antenne télescopique est souvent importante, en particulier dans les zones de réception DAB+ périphériques. -
Page 171: Utilisation Des Écouteurs
5.3.4 Utilisation des écouteurs Risque de lésions auditives ! N'écoutez jamais la radio avec des écouteurs à plein volume. Cela peut entraîner des lésions auditives permanentes. Avant d'utiliser des écouteurs, réglez le volume de l’appareil sur le volume minimal. Utilisez uniquement des écouteurs dotés d'une prise jack de 3,5 mm. >... -
Page 172: Fonctions Générales De L'appareil
> En appuyant sur la touche Marche/veille sur le dessus de l’appareil, vous allumez la DIGITRADIO 2. À la première mise en marche, vous devez d’abord définir la [Langue]. Pour ce faire, sélectionnez avec les touches < ou > une des langues à disposition et confirmez la sélection en appuyant sur la touche OK. -
Page 173: Arrêt De L'appareil
5.4.2 Arrêt de l’appareil Fonctionnement sur secteur : > En appuyant brièvement sur la touche Marche/veille vous pouvez mettre l’appareil en mode veille. L’indication [Veille] apparaît brièvement à l’écran. La date et l’heure s’affichent à l’écran. Vous pouvez modifier la luminosité de l’écran en mode veille comme décrit au point 12.2. -
Page 174: Commutation Mode Dab+/Fm/Bluetooth
5.4.3 Commutation mode DAB+/FM/Bluetooth > Avec la touche MODE, vous pouvez par une brève pression basculer entre DAB+ (radiodiffusion numérique), FM et Bluetooth. 5.4.4 Réglage du volume > Réglez le volume à l’aide des touches Volume +/-. Le volume réglé s’affiche à l’écran sous la forme d’un diagramme à... -
Page 175: Ouverture De L'affichage À L'écran
5.4.6 Ouverture de l’affichage à l’écran > Appuyez sur la touche MENU et sélectionnez à l’aide des touches < ou > le sous-menu [Écran]. Appuyez ensuite sur la touche OK. Sélectionnez avec les touches <, > et OK une option d'affichage. Vous avez le choix entre l’affichage des informations suivantes : En mode DAB+ (la fonction sélectionnée est marquée d’un « * ») : [Défilement de texte] (défilement de texte avec des informations... -
Page 176: Commande Du Menu
L'affichage à l'écran peut également être modifié en maintenant brièvement la touche de sélection directe. 6 Commande du menu Le menu vous permet d'accéder à toutes les fonctions et tous les réglages de la DIGITRADIO. La navigation dans le menu s'effectue avec les touches MENU, <, > et OK. Le menu est divisé... -
Page 177: Fonction Dab+ (Radiodiffusion Numérique)
Les fonctions et touches à activer sont représentées en gras dans ce mode d'emploi. Les affichages à l'écran sont indiqués entre [crochets]. Quelques textes affichés (p. ex. entrées de menu, informations sur les stations) sont éventuellement trop longs pour un affichage à l’écran. Ils s’affichent alors après un bref instant sous forme de texte défilant. -
Page 178: Compression Des Données
7.1.1 Compression des données La radiodiffusion numérique tire ici profit des effets de l'ouïe humaine. L'oreille humaine ne perçoit pas les sons en dessous d'un certain volume sonore. Les données qui se trouvent en dessous de ce qu'on appelle le seuil absolu d'audition peuvent donc être éliminées par filtrage. -
Page 179: Réception Dab+ (Radiodiffusion Numérique)
7.2 Réception DAB+ (radiodiffusion numérique) > Appuyez sur la touche MODE jusqu'à l'affichage à l'écran de [DAB]. Lorsque le DAB+ est démarré pour la première fois, une recherche de stations complète est effectuée. Une fois la recherche terminée, la première station par ordre alphanumérique est diffusée. -
Page 180: Choix De La Station
Si aucune station n’est trouvée, contrôlez l’antenne télescopique et modifiez si nécessaire l’emplacement de l’appareil (point 5.3.3/3.2.1). 7.2.2 Choix de la station > Appuyer sur les touches < ou > permet d'ouvrir la liste de stations et de naviguer entre les stations disponibles. Selon le réglage dans MENU >... -
Page 181: Accès À Une Station Dab+ À Partir D'un Emplacement Mémoire
La station enregistrée sur l’emplacement mémoire FAV 1 peut également être choisie avec la touche de sélection directe. 7.2.4 Accès à une station DAB+ à partir d’un emplacement mémoire > Pour accéder à une station mémorisée précédemment dans la mémoire des favoris (FAV), appuyez brièvement sur la touche FAV et sélectionnez un emplacement mémoire (1...20) à... -
Page 182: Réglage Manuel
> À l’aide de la touche < ou >, sélectionnez l’entrée [Puissance du signal] et appuyez sur la touche OK. > Quittez le menu en appuyant plusieurs fois sur la touche MENU. > La puissance du signal s’affiche à l’écran sous la forme d’un diagramme à barres. Les stations dont la puissance du signal se situe en dessous de la puissance de signal minimale n’émettent pas un signal suffisant. -
Page 183: Adaptation Du Volume (Drc)
Les stations dont la puissance du signal se situe en dessous de la puissance de signal minimale n’émettent pas un signal suffisant. Orientez l’antenne télescopique si nécessaire comme décrit au point 5.3.3. 7.2.8 Adaptation du volume (DRC) L'option de menu Adaptation du volume permet de régler le taux de compression, qui compense les oscillations dynamiques et les variations de volume afférentes. -
Page 184: Suppression Des Stations Inactives
7.2.9 Suppression des stations inactives Cette option de menu sert à supprimer de la liste de stations des stations anciennes qui ne peuvent plus être captées. > Appuyez sur la touche MENU et sélectionnez à l’aide des touches < ou > l’entrée [Supprimer les stations inactives]. -
Page 185: Réception Fm Avec Informations Rds
Le nom de la station s’affiche pour les stations RDS. Afin d’améliorer la réception, orientez l’antenne télescopique (point 5.3.3). 8.2 Réception FM avec informations RDS Le RDS est un service de transmission d'informations supplémentaires via les stations FM. Les stations de radio dotée du RDS fournissent p. ex. leur nom et le type de programme, qui s'affichent alors à... -
Page 186: Recherche Manuelle Des Stations
Pour le réglage de stations plus faibles, utilisez la recherche manuelle des stations. 8.4 Recherche manuelle des stations > Appuyez plusieurs fois brièvement sur les touches < ou >, pour régler la station ou la fréquence souhaitée. L’écran affiche la fréquence par paliers de 0,05 MHz. 8.5 Réglage de la recherche La sensibilité... -
Page 187: Réglage Audio
8.6 Réglage audio > Appuyez sur la touche MENU et sélectionnez à l’aide des touches < ou > l’entrée [Réglage audio]. > Appuyez sur la touche OK. > À l’aide de < ou >, sélectionnez l’entrée [Stéréo possible] ou [Uniquement mono], pour la diffusion en stéréo ou en son mono en cas de réception FM faible. -
Page 188: Accès À Une Station Fm À Partir D'un Emplacement Mémoire
La station enregistrée sur l’emplacement mémoire FAV 1 peut également être choisie avec la touche de sélection directe. 8.8 Accès à une station FM à partir d’un emplacement mémoire > Pour accéder à nouveau à une station mémorisée précédemment dans la mémoire des favoris (FAV), appuyez brièvement sur la touche FAV et sélectionnez un emplacement mémoire (1...20) à... -
Page 189: Bluetooth
9 Bluetooth En mode Bluetooth, vous pouvez diffuser la musique d'un smartphone ou d'une tablette connecté(e) via les haut-parleurs de la DIGITRADIO. Pour ce faire, vous devez d'abord « coupler » les deux appareils entre eux. 9.1 Mise en marche du mode Bluetooth >... - Page 190 > Dans la liste des appareils Bluetooth détectés sur votre appareil externe, l'entrée DIGITRADIO 2 ou DIGITRADIO 2S s'affiche. Cliquez dessus pour terminer le processus de couplage. Une fois le processus de couplage réussi, un signal sonore retentit du haut-parleur de la DIGITRADIO.
-
Page 191: Arrêt Du Couplage
Selon le protocole Bluetooth de votre appareil externe, vous pouvez commander la lecture de la musique via les touches de la DIGITRADIO. Appuyez sur la touche OK pour mettre en pause ou relancer la lecture. Appuyez sur la touche >, pour passer au titre suivant. -
Page 192: Minuterie De Mise En Veille
Ou vous pouvez également arrêter le couplage sur votre appareil externe. 10 Minuterie de mise en veille Via la minuterie de mise en veille, la DIGITRADIO se met automatiquement en veille (fonctionnement sur secteur) ou en arrêt (fonctionnement sur batterie) après un laps de temps défini. -
Page 193: Égaliseur
11 Égaliseur Avec l'égaliseur*, vous pouvez adapter le son en mode DAB et FM selon vos souhaits. > Appuyez en mode DAB ou FM sur la touche MENU et sélectionnez à l’aide des touches < ou > l’entrée [Égaliseur]. > Appuyez sur la touche OK. -
Page 194: Réglages Système
12 Réglages système Tous les réglages expliqués sous ce point sont valables à la fois en DAB+ et en mode 12.1 Réglages de l’heure et de la date 12.1.1 Réglage manuel de l'heure et de la date En fonction de l’actualisation de l’heure (point 12.1.2), vous devez régler l’heure et la date manuellement. -
Page 195: Actualisation De L'heure
> Les chiffres suivants (minutes) de l’heure clignotent ensuite et peuvent également être modifiés comme décrit précédemment. > Après chaque nouveau réglage, appuyez sur la touche OK, pour accéder à l’étape suivante. > Procédez comme décrit précédemment pour le réglage de la date. >... -
Page 196: Réglage Du Format De L'heure
[Toutes les sources] (Actualisation via DAB+ et FM) [Mise à jour via DAB] (Actualisation uniquement via DAB+) [Mise à jour via FM] (Actualisation uniquement via la FM) [Pas de mise à jour ] (L’heure/la date doit être saisie manuellement, voir le point 12.1.1). -
Page 197: Réglage Du Format De La Date
12.1.4 Réglage du format de la date Dans le sous-menu Régl. format date, vous pouvez définir le format d’affichage de la date. > Appuyez sur la touche MENU et sélectionnez à l’aide des touches < ou > l’entrée [Heure]. > Appuyez sur la touche OK. -
Page 198: Luminosité De L'écran
12.2 Luminosité de l’écran Vous pouvez régler la luminosité de l’écran aussi bien pour le fonctionnement que pour la veille (uniquement disponible lorsque la radio est branchée au réseau électrique). > Pour ce faire, appuyez sur la touche MENU et sélectionnez à l’aide des touches < ou >... -
Page 199: Langue
[Auto-Dimm] module automatiquement l’écran (uniquement avec l’option sélectionnée [Marche]) au bout de 10 secondes d’inactivité de la radio, sur la valeur de luminosité Bas. Si l’option [Arrêt] est sélectionnée, l’écran s’allume durablement dans la luminosité sélectionnée sous la fonction [Fonctionnement]. Appuyez sur la touche OK pour enregistrer un réglage. -
Page 200: Réglage D'usine
12.4 Réglage d’usine Si l’emplacement de l’appareil change, par ex. lors d’un déménagement, les stations mémorisées ne seront éventuellement plus captées. La réinitialisation aux Réglages d’usine vous permet dans ce cas de supprimer toutes les stations mémorisées et de démarrer une nouvelle recherche de stations. >... -
Page 201: Version Logicielle
12.5 Version logicielle Sous Version logicielle, vous pouvez connaître la version du logiciel actuellement installée. > Appuyez sur la touche MENU et sélectionnez à l’aide des touches < ou > l’entrée [Version logicielle]. > Appuyez sur la touche OK. La version actuelle du logiciel s'affiche. 13 Nettoyage Afin d’éviter le risque de décharge électrique, vous ne devez pas nettoyer l’appareil avec un chiffon humide, ni sous l’eau courante. -
Page 202: Dépannage
Nettoyez l’écran uniquement avec un chiffon en coton. Utilisez le chiffon en coton si nécessaire avec de faibles quantités d’eau savonneuse diluée non alcaline à base d’eau ou d’alcool. Frottez doucement la surface avec le chiffon en coton. 14 Dépannage Si l'appareil ne fonctionne pas comme prévu, vérifiez-en le fonctionnement à... -
Page 203: Données Techniques/Consignes Du Fabricant
DAB/DAB+, FM, Bluetooth Alimentation électrique Entrée CA : 100 - 240 V, 50/60 Hz Sortie CC : 5 V, 2 A (DIGITRADIO 2 S) Sortie CC : 5 V, 1 A (DIGITRADIO 2) Batterie Lithium-ion 3,7 V/1050 mAh, courant de charge max. - Page 204 En veille : < 0,5 W Power off : < 0,4 W Fonctionnement sur batterie Power off : < 0,3 mW Puissance de sortie audio 2 x 1 W RMS DIGITRADIO 2 S 1 W RMS DIGITRADIO 2...
- Page 205 Poids 464 g DIGITRADIO 2S 365 g DIGITRADIO 2 Dimensions (l x h x p) mm 245 x 109 x 47 DIGITRADIO 2 S 175 x 109 x 47 DIGITRADIO 2...
- Page 207 Istruzioni per l'uso DIGITRADIO 2 DIGITRADIO 2 S...
- Page 208 1 Immagini 1.1 Vista anteriore/laterale DIGITRADIO 2...
- Page 209 On/Standby (sopra) Altoparlanti (mono) MODE Tasto per il cambio di modalità MENU Per aprire il menu OK Tasto di conferma Tasti Volume +/-(aumenta/diminuisci) Tasto di selezione diretta Tasto FAV Display < / > Tasti di selezione/Navigazione Presa cuffie (mini-jack da 3,5 mm) Presa DC-IN USB per l'alimentazione di corrente esterna...
-
Page 210: Lato Posteriore
1.1.1 Lato posteriore Contatti Antenna telescopica Guida di Batteria Vano plastica batteria... -
Page 211: Vista Anteriore Digitradio 2 S
1.2 Vista anteriore DIGITRADIO 2 S... -
Page 212: Vista Laterale E Dichiarazione Digitradio 2 S
1.2.1 Vista laterale e dichiarazione DIGITRADIO 2 S On/Standby (sopra) Altoparlanti MODE Tasto per il cambio di modalità MENU Per aprire il menu OK Tasto di conferma Tasti Volume +/-(aumenta/diminuisci) Tasto di selezione diretta Tasto FAV Display < / > Tasti di selezione/Navigazione... -
Page 213: Lato Posteriore
1.2.2 Lato posteriore Contatti Antenna telescopica Guida di Batteria Vano plastica batteria... - Page 214 Vista anteriore/laterale DIGITRADIO 2 ................ 208 1.1.1 Lato posteriore ........................210 Vista anteriore DIGITRADIO 2 S ..................211 1.2.1 Vista laterale e dichiarazione DIGITRADIO 2 S ............212 1.2.2 Lato posteriore .........................213 Indice ........................214 Introduzione ......................218 A chi si rivolgono le presenti istruzioni per l’uso ............218 3.1.1...
- Page 215 Le funzionalità speciali della DIGITRADIO ..............234 Preparare DIGITRADIO 2 S al funzionamento ............235 5.3.1 Inserire la batteria (nell'esempio della DIGITRADIO 2 S) ........235 5.3.2 Collegare l’alimentatore ...................... 237 5.3.3 Orientare l’antenna telescopica ..................238 5.3.4 Utilizzare le cuffie ........................239 Funzioni generali dell'apparecchio ................
- Page 216 7.2.3 Salvataggio dell’emittente DAB+ su uno slot di memoria ........248 7.2.4 Apertura dell’emittente DAB+ da uno slot di memoria ........249 7.2.5 Sovrascrittura/Cancellazione di uno slot di memoria ...........249 7.2.6 Intensità del segnale ......................249 7.2.7 Impostazione manuale ......................250 7.2.8 Adattamento del volume (DRC) ..................251 7.2.9 Cancellazione emittenti non attive .................252 Modalità...
- Page 217 Sleep timer ......................260 Equalizzatore ......................261 11.1 Il mio EQ ............................261 Impostazioni di sistema ..................262 12.1 Impostazione di data e ora ....................262 12.1.1 Impostare manualmente data/ora ................262 12.1.2 Aggiornare l’ora ........................263 12.1.3 Impostazione del formato dell’ora ................264 12.1.4 Impostare il formato della data ..................265 12.2 Luminosità...
-
Page 218: Introduzione
3 Introduzione Le presenti istruzioni per l’uso illustrano all’utente l’utilizzo conforme e sicuro dell’apparecchio radio, di seguito denominato DIGITRADIO o apparecchio. 3.1 A chi si rivolgono le presenti istruzioni per l’uso Le istruzioni per l’uso sono rivolte a tutti coloro che collocano, utilizzano, puliscono o smaltiscono l'apparecchio. -
Page 219: Sicurezza
Attenzione - indica una nota importante a cui bisogna tassativamente attenersi per evitare difetti dell'apparecchio, perdite o usi illeciti di dati o un funzionamento indesiderato. Suggerimento - indica una nota inerente la funzione descritta e una funzione correlata, da osservare in determinati casi, con indicazione del punto corrispondente delle istruzioni. - Page 220 In caso di trasporto prolungato al freddo e di successivo passaggio ad ambienti caldi, non accendere immediatamente, attendere invece la compensazione della temperatura. Non esporre l'apparecchio a gocce o spruzzi d'acqua. Se l'acqua penetra nell'apparecchio, spegnerlo e avvertire il servizio di assistenza Non esporre l'apparecchio a fonti di calore che possono riscaldare l'apparecchio oltre il normale utilizzo.
- Page 221 In caso di evidenti difetti all’apparecchio, produzione di odori o fumo, malfunzionamenti gravi, danneggiamenti all’alloggiamento, spegnere l’apparecchio e contattare il servizio di assistenza. L'apparecchio deve essere azionato solo con la tensione di rete indicata sull'alimentatore. Non provare mai ad azionare l'apparecchio con una tensione diversa. L’alimentatore deve essere collegato solo dopo aver terminato correttamente l’installazione.
- Page 222 Non provare mai a riparare da soli un apparecchio difettoso. Rivolgersi sempre a uno dei nostri centri di assistenza clienti. Corpi estranei, come ad es. spilli, monete, ecc., non devono cadere all'interno dell'apparecchio. Non toccare i contatti di collegamento con oggetti metallici o con le dita.
- Page 223 Questo apparecchio non è pensato per essere utilizzato da persone (compresi i bambini) con capacità fisiche, sensoriali o intellettuali limitate o assenza di esperienza e/o conoscenze, tranne nei casi in cui queste sono supervisionate da una persona responsabile della loro sicurezza o hanno ricevuto istruzioni su come utilizzare l’apparecchio.
- Page 224 Non è consentito caricare le batterie normali. Le batterie non devono essere riattivate con altri mezzi, smontate, riscaldate o gettate in fiamme aperte (rischio di esplosione!). Pulire i contatti delle batterie e dell’apparecchio prima dell’inserimento. In caso di inserimento errato della batteria vi è rischio di esplosione! Sostituire le batterie solo con batterie del tipo corretto e del numero di modello corretto Attenzione! Non esporre le batterie a condizioni estreme.
-
Page 225: Smaltimento
3.2.2 Smaltimento L'imballaggio dell'apparecchio è composto esclusivamente da materiali riciclabili. Si prega di consegnarli al sistema di raccolta differenziata "Sistema duale" separandoli correttamente. Al termine del suo ciclo di vita, questo prodotto non può essere smaltito con i normali rifiuti domestici, ma deve essere consegnato ad un centro di raccolta per il riciclaggio di apparecchi elettrici ed elettronici. - Page 226 Le batterie e le pile possono contenere sostanze tossiche nocive per la salute e per l'ambiente. Le batterie/pile sono soggette alla direttiva europea 2006/66/CE. Non vanno smaltite con i normali rifiuti domestici. Note per lo smaltimento: Smaltimento dell'imballaggio: Nel trasporto verso l'utente, il nuovo apparecchio è stato protetto con l'imballaggio.
- Page 227 Smaltimento dell'apparecchio I vecchi apparecchi non sono rifiuti privi di valore. Uno smaltimento rispettoso dell'ambiente consente di riutilizzare materie prime preziose. Informarsi presso la propria amministrazione comunale sulle possibilità di smaltimento ecologico e conforme dell'apparecchio. Prima di procedere allo smaltimento vanno rimosse dall'apparecchio le batterie/pile.
-
Page 228: Avvertenze Legali
3.2.3 Avvertenze legali Con la presente TechniSat dichiara che i modelli di impianto radio DIGITRADIO 2 e DIGITRADIO 2 S sono conformi alla direttiva 2014/53/UE. Il testo completo della dichiarazione di conformità UE è disponibile al seguente indirizzo Internet: DIGITRADIO 2: http://konf.tsat.de/?ID=11932... - Page 229 La copia e la riproduzione sono consentite solo con il permesso dell'editore. La versione aggiornata delle istruzioni è disponibile in formato PDF nell' area di download del sito Internet TechniSat www.technisat.de. DIGITRADIO 2, DIGITRADIO 2 S e TechniSat sono marchi registrati di: TechniSat Digital GmbH TechniPark Julius-Saxler-Straße 3...
-
Page 230: Note Per L'assistenza
Lun. - ven. ore 8.00 - 20.00 al tel.: 03925/9220 1800. Qualora fosse necessario spedire l'apparecchio, utilizzare esclusivamente il seguente indirizzo: TechniSat Digital GmbH Service-Center Nordstr. 4a 39418 Staßfurt I nomi delle aziende, delle istituzioni o dei marchi menzionati sono marchi di fabbrica o... -
Page 231: Posizionamento Dell'apparecchio
4 Posizionamento dell’apparecchio > Posizionare l’apparecchio su una superficie solida, sicura e orizzontale. Provvedere ad una buona ventilazione. Attenzione! > Non posizionare l’apparecchio su superfici morbide, come tappeti, coperte o in prossimità di tende e tappezzerie. Non si devono coprire le aperture di ventilazione. - Page 232 > Tenere presente che in determinate circostanze i piedi dell’apparecchio possono lasciare impronte di colore sulle superfici dei mobili. Utilizzare una protezione tra i mobili e l’apparecchio. > Tenere DIGITRADIO lontano da apparecchi che generano forti campi magnetici. > Non collocare oggetti pesanti sull’apparecchio. >...
- Page 233 > In caso di anomalie o di formazione di rumori e odori nell’alloggiamento, tirare immediatamente la spina dalla presa! > In caso di mancato utilizzo dell'apparecchio per un periodo prolungato, ad es. prima di partire per un lungo viaggio, tirare la spina. >...
-
Page 234: Descrizione Della Digitradio
5 Descrizione della DIGITRADIO 5.1 Entità della fornitura Prima della messa in funzione controllare la presenza di tutte le parti nella confezione: 1 DIGITRADIO 1 batteria 1 alimentatore 1 manuale di istruzioni per l’uso 5.2 Le funzionalità speciali della DIGITRADIO La DIGITRADIO è... -
Page 235: Inserire La Batteria (Nell'esempio Della Digitradio 2 S)
5.3 Preparare DIGITRADIO 2 S al funzionamento 5.3.1 Inserire la batteria (nell'esempio della DIGITRADIO 2 S) > Aprire il vano batteria sulla parte posteriore dell'apparecchio, facendo scorrere il coperchio del vano nella direzione della freccia incisa (1). Quindi rimuovere il coperchio (2). - Page 236 La batteria della DIGITRADIO può essere acquistata anche singolarmente in commercio. > Porre il coperchio del vano batteria sul vano (1) e farlo scivolare nella direzione opposta a quella della freccia incisa fino a percepirne l'innesto (2) La batteria si ricarica non appena l’apparecchio viene collegato alla rete elettrica. Lo stato di carica compare sul display in formato di simbolo della batteria.
-
Page 237: Collegare L'alimentatore
Dopo la prima realizzazione del collegamento elettrico sul display compare “TechniSat Digitalradio”. Successivamente è possibile selezionare la lingua di sistema. Selezionare una delle lingue a disposizione con i tasti < o > e confermare la selezione premendo il tasto OK. -
Page 238: Orientare L'antenna Telescopica
5.3.3 Orientare l’antenna telescopica Il numero e la qualità delle emittenti ricevute dipende dalle condizioni di ricezione sul luogo d’installazione. Con l’antenna telescopica è possibile ottenere una ricezione eccezionale. > Alzare l’antenna telescopica ed estrarla interamente. Spesso è importante orientare con precisione l’antenna telescopica, in particolare nelle aree marginali di ricezione DAB+. -
Page 239: Utilizzare Le Cuffie
5.3.4 Utilizzare le cuffie Danni all'udito! Non ascoltare la radio ad alto volume con le cuffie, può causare danni permanenti all’udito. Prima di usare le cuffie, regolare al minimo il volume dell’apparecchio. Utilizzare solo cuffie con connettore jack da 3,5 millimetri. >... -
Page 240: Funzioni Generali Dell'apparecchio
Preparare al funzionamento DIGITRADIO come descritto ai punti 5.3.1 e 5.3.2. > Premendo il tasto On/Standby sul lato superiore dell’apparecchio, accendere la DIGITRADIO 2. Dopo la prima accensione si deve innanzitutto impostare la [Lingua]. Selezionare una delle lingue a disposizione con i tasti < o > e confermare la selezione premendo il tasto OK. -
Page 241: Spegnere L'apparecchio
5.4.2 Spegnere l'apparecchio In modalità ad alimentazione elettrica: > Premendo brevemente il tasto On/Standby è possibile commutare l’apparecchio in modalità di standby. Sul display compare brevemente l’indicazione [Standby]. Sul display vengono visualizzate la data e l’ora. È possibile modificare la luminosità del display in modalità... -
Page 242: Cambio Modalità Dab+/Fm/Bluetooth
5.4.3 Cambio modalità DAB+/FM/Bluetooth > Con il tasto MODE è possibile commutare tra DAB+ (Digital Radio), FM e Bluetooth. 5.4.4 Impostazione del volume > Impostare il volume con i tasti Volume +/-. Il volume impostato compare sul display in forma di diagramma a barre. Osservare anche il punto 5.3.4 per il funzionamento con cuffie collegate. -
Page 243: Attivazione Delle Visualizzazioni Del Display
5.4.6 Attivazione delle visualizzazioni del display > Premere il tasto MENU e selezionare il sottomenu [Display] con i tasti < o >. Premere quindi il tasto OK. Selezionare un’opzione con i tasti <, > e OK. È possibile selezionare la visualizzazione delle seguenti informazioni: In modalità... -
Page 244: Uso Del Menu
È possibile modificare la visualizzazione del display anche tenendo premuto brevemente il tasto di selezione diretta. 6 Uso del menu Mediante il menu si giunge a tutte le funzioni e impostazioni della DIGITRADIO. La navigazione del menu avviene mediante i tasti MENU, <, > e OK. Il menu è suddiviso in sottomenu e contiene diverse voci e funzioni attivabili che possono cambiare in base alla modalità... -
Page 245: La Funzione Dab+ (Digital Radio)
In queste istruzioni, le funzioni e i tasti da premere sono riportati in grassetto. Indicazioni del display in [parentesi quadre]. Alcune visualizzazioni di testo (ad es. voci del menu, informazioni emittenti) sono in certi casi troppo lunghe per la visualizzazione sul display. Dopo un breve lasso di tempo vengono quindi visualizzate come testo scorrevole. -
Page 246: Compressione Dei Dati
7.1.1 Compressione dei dati La radio digitale trae vantaggio dagli effetti dell'udito umano. L'orecchio umano non percepisce i suoni che sono al di sotto di un determinato limite di volume. I dati che si trovano al di sotto della cosiddetta soglia uditiva in condizioni di riposo acustico si possono così... -
Page 247: Ricezione Dab+ (Digital Radio)
7.2 Ricezione DAB+ (Digital Radio) > Premere brevemente il tasto MODE fin quando sul display viene visualizzato [DAB]. Se DAB+ viene avviato per la prima volta, viene eseguita una ricerca automatica completa delle emittenti. A ricerca automatica avvenuta, viene riprodotta la prima emittente in ordine alfanumerico. -
Page 248: Selezionare Emittente
Se non vengono trovate stazioni, controllare l'antenna e se necessario modificare il luogo di installazione (punto 5.3.3/3.2.1). 7.2.2 Selezionare emittente > Premendo i tasti < o > si può accedere all'elenco delle emittenti e ci si può spostare tra le emittenti disponibili. A seconda delle impostazioni su MENU >... -
Page 249: Apertura Dell'emittente Dab+ Da Uno Slot Di Memoria
L’emittente, memorizzata sullo slot di memoria FAV 1, può essere aperta anche mediante il tasto di selezione diretta. 7.2.4 Apertura dell’emittente DAB+ da uno slot di memoria > Per aprire un’emittente precedentemente salvata nella memoria FAV, premere brevemente il tasto FAV e selezionare una memoria emittenti (1...20) con i tasti <, >. -
Page 250: Impostazione Manuale
> Con i tasti < o > selezionare la voce [Intensità di segnale] e premere il tasto OK. > Uscire dal menu premendo più volte il tasto MENU. > Nel display l’intensità di segnale viene rappresentata da un grafico a barre. Le emittenti con un'intensità... -
Page 251: Adattamento Del Volume (Drc)
Le emittenti con un'intensità di segnale inferiore all'intensità minima richiesta non inviano un segnale sufficiente. Orientare eventualmente l’antenna telescopica come descritto al punto 5.3.3. 7.2.8 Adattamento del volume (DRC) Con la voce del menu Adattamento del volume viene impostato il tasso di compressione, il quale compensa le oscillazioni di dinamica e quindi le variazioni di volume. -
Page 252: Cancellazione Emittenti Non Attive
7.2.9 Cancellazione emittenti non attive Questa voce del menu consente di rimuovere dall’elenco le emittenti vecchie e non più ricevute. > Premere il tasto MENU e selezionare la voce [Cancellazione emittenti inattive] con i tasti < o >. > Premere il tasto OK. Con [Cancella] viene chiesto se si intendono davvero cancellare le emittenti non attive. -
Page 253: Ricezione Fm Con Informazioni Rds
Nel caso di emittenti RDS compare il nome dell'emittente. Per migliorare la ricezione, orientare l’antenna telescopica (punto 5.3.3). 8.2 Ricezione FM con informazioni RDS RDS è un processo utilizzato per la trasmissione di informazioni aggiuntive mediante emittenti FM. Con RDS le emittenti inviano ad esempio il proprio nome o il tipo di canale. Queste informazioni vengono visualizzate sul display. -
Page 254: Ricerca Manuale Emittenti
Per l’impostazione di emittenti più deboli, utilizzare la ricerca manuale delle emittenti. 8.4 Ricerca manuale emittenti > Premere più volte brevemente i tasti < o > per impostare l’emittente o la frequenza desiderate. Il display mostra la frequenza ad intervalli di 0,05 MHz. 8.5 Impostazione di ricerca automatica Da questa voce del menu è... -
Page 255: Impostazione Audio
8.6 Impostazione audio > Premere il tasto MENU e selezionare la voce [Impostazioni audio] con i tasti < o >. > Premere il tasto OK. > Con < o > selezionare la voce [Stereo possibile] o [Solo mono] per riprodurre in modalità... -
Page 256: Apertura Dell'emittente Fm Da Uno Slot Di Memoria
L’emittente, memorizzata sullo slot di memoria FAV 1, può essere aperta anche mediante il tasto di selezione diretta. 8.8 Apertura dell’emittente FM da uno slot di memoria > Per aprire un’emittente precedentemente salvata nella memoria FAV, premere brevemente il tasto FAV e selezionare una memoria emittenti (1... 20) con i tasti <, >. -
Page 257: Bluetooth
9 Bluetooth In modalità Bluetooth, dagli altoparlanti della DIGITRADIO è possibile riprodurre musica da uno smartphone o da un tablet collegati. A tal fine è necessario innanzitutto collegare tra di loro gli apparecchi. 9.1 Attivare la modalità Bluetooth > Premere il tasto MODE per passare alla modalità Bluetooth. >... - Page 258 > Nell'elenco degli apparecchi Bluetooth trovati sul proprio apparecchio esterno deve comparire la voce DIGITRADIO 2 o DIGITRADIO 2S. Premere sulla voce per concludere la procedura di collegamento. Se la procedura di collegamento è stata conclusa correttamente, dagli altoparlanti della DIGITRADIO viene emesso un suono di conferma.
-
Page 259: Sospendere Il Collegamento
A seconda del protocollo Bluetooth del proprio apparecchio esterno, è possibile controllare la riproduzione musicale mediante i tasti della DIGITRADIO. Premere il tasto OK per sospendere o proseguire la riproduzione. Premere il tasto > per saltare al titolo successivo. Premere i tasti < per riprodurre nuovamente il titolo attivo al momento o premere due volte il tasto per saltare al titolo precedente. -
Page 260: Sleep Timer
In alternativa è possibile sospendere la connessione anche sul proprio apparecchio esterno. 10 Sleep timer Mediante lo sleep timer dopo un periodo impostato la DIGITRADIO passa automaticamente in Standby (modalità ad alimentazione elettrica) oppure Off (modalità a batteria). > Premere il tasto MENU e selezionare la voce [Sleep timer] con i tasti < o >. >... -
Page 261: Equalizzatore
11 Equalizzatore Con l'equalizzatore* è possibile adattare il volume secondo le proprie preferenze nelle modalità DAB e FM. > Nella modalità DAB o FM premere il tasto MENU e selezionare la voce [Equalizzatore] con i tasti < o >. > Premere il tasto OK. -
Page 262: Impostazioni Di Sistema
12 Impostazioni di sistema Tutte le impostazioni spiegate in questo punto sono valide in modalità sia DAB+ che FM. 12.1 Impostazione di data e ora 12.1.1 Impostare manualmente data/ora A seconda della configurazione dell’aggiornamento dell’ora (punto 12.1.2), l’ora e la data devono essere impostate manualmente. -
Page 263: Aggiornare L'ora
> A lampeggiare sono adesso le cifre successive (minuti) dell’ora, che possono essere modificate come descritto in precedenza. > Dopo ogni impostazione premere il tasto OK per passare all’impostazione successiva. > Per impostare la data procedere come descritto in precedenza. >... -
Page 264: Impostazione Del Formato Dell'ora
[Tutte le sorgenti] (Aggiornamento mediante DAB+ e FM) [Update di DAB] (Aggiornamento solo mediante DAB+) [Update di FM] (Aggiornamento solo mediante FM) [Nessun aggiornamento] (l’ora e la data devono essere inserite manualmente, vedere il punto 12.1.1). 12.1.3 Impostazione del formato dell’ora Nel sottomenu Impostare 12/24 ore è... -
Page 265: Impostare Il Formato Della Data
12.1.4 Impostare il formato della data Nel sottomenu Imposta formato data è possibile definire il formato di visualizzazione della data. > Premere il tasto MENU e selezionare la voce [Ora] con i tasti < o >. > Premere il tasto OK. >... -
Page 266: Luminosità Del Display
12.2 Luminosità del display La luminosità del display può essere impostata sia in funzionamento che in standby (disponibile solo se la radio è collegata alla rete elettrica). > Premere il tasto MENU e selezionare la voce [Luminosità] con i tasti < o >. >... -
Page 267: Lingua
[Auto-Dimm] regola il display automaticamente (per l’opzione selezionata [On]) dopo 10 secondi senza utilizzare la radio, al valore di luminosità Basso. Selezionando l’opzione [Off], il display si illumina in modalità [Funzionamento] alla luminosità selezionata. Per salvare l’impostazione premere il tasto OK. Per la modalità... -
Page 268: Impostazione Predefinita
12.4 Impostazione predefinita Se cambia il punto di collocazione dell'apparecchio, ad es. in seguito a trasloco, è possibile che alcune emittenti memorizzate non vengano più ricevute. In questo caso, ripristinando le Impostazioni di fabbrica è possibile cancellare tutte le emittenti memorizzate ed avviare quindi una nuova ricerca delle emittenti. -
Page 269: Versione Sw
12.5 Versione SW In "Versione SW" è possibile consultare l'attuale versione SW installata. > Premere il tasto MENU e selezionare la voce [Versione SW] con i tasti < o >. > Premere il tasto OK. Viene visualizzata l'attuale versione SW. 13 Pulizia Al fine di evitare il rischio di scossa elettrica, non è... -
Page 270: Risoluzione Di Errori
Pulire il display solo con un panno di cotone morbido. Utilizzare un panno di cotone, eventualmente con piccole quantità di sapone non alcalino, diluito a base di acqua o alcool. Strofinare la superficie delicatamente con un panno di cotone. 14 Risoluzione di errori Se l’apparecchio non funziona come previsto, consultare la seguente tabella. -
Page 271: Dati Tecnici / Avvertenze Del Produttore
Modalità di ricezione DAB/DAB+, FM, Bluetooth l'alimentazione di corrente esterna Ingresso AC: 100-240 V, 50/60 Hz Uscita DC: 5 V, 2 A (DIGITRADIO 2 S) Uscita DC: 5 V, 1 A (DIGITRADIO 2) Batteria 3,7 V/1050 mAh Li-Ion, corrente di carica max. - Page 272 Consumo elettrico in funzionamento max.: 9 W (con alimentatore e carica batteria DIGITRADIO 2 S), 8 W (con alimentatore e carica batteria DIGITRADIO 2) in funzionamento tipicamente: 1 W (50% volume, senza carica di batteria) Standby: <0,5 W Spegnimento: <0,4 W...
- Page 273 Audio potenza in uscita 2 x 1W RMS DIGITRADIO 2 S 1W RMS DIGITRADIO 2 Peso 464 g DIGITRADIO 2S 365 g DIGITRADIO 2 Dimensioni (LxAxP) mm 245 x 109 x 47 DIGITRADIO 2 S 175 x 109 x 47 DIGITRADIO 2...
- Page 275 Handleiding DIGITRADIO 2 DIGITRADIO 2 S...
-
Page 276: Afbeeldingen
1 Afbeeldingen 1.1 Voor-/zijaanzicht DIGITRADIO 2... - Page 277 Aan/Stand-by (boven) Luidsprekers (Mono) MODUS-toets om modus te wijzigen MENU om menu op te vragen OK-toets om te bevestigen Volume +/- toetsen (hard/zacht) Snelkeuzetoets FAV-toets Display < / > selectietoetsen/navigatie Koptelefoonaansluiting (3,5mm plug) DC-IN USB-poort voor externe voedingsbron...
-
Page 278: Achterkant
1.1.1 Achterkant Contacten Uitschuifbare antenne Kunststofgeleider Batterij Batterijvak... -
Page 279: Vooraanzicht Digitradio 2 S
1.2 Vooraanzicht DIGITRADIO 2 S... -
Page 280: Zijaanzicht En Toelichting Digitradio 2 S
1.2.1 Zijaanzicht en toelichting DIGITRADIO 2 S Aan/Stand-by (boven) Luidsprekers MODUS-toets om modus te wijzigen MENU om menu op te vragen OK-toets om te bevestigen Volume +/- toetsen (hard/zacht) Snelkeuzetoets FAV-toets Display < / > selectietoetsen/navigatie Koptelefoonaansluiting (3,5mm plug) DC-IN USB-poort voor externe voedingsbron... -
Page 281: Achterkant
1.2.2 Achterkant Contacten Uitschuifbare antenne Kunststofgeleider Batterij Batterijvak... -
Page 282: Inhoudsopgave
Afbeeldingen ......................276 Voor-/zijaanzicht DIGITRADIO 2 ..................276 1.1.1 Achterkant ..........................278 Vooraanzicht DIGITRADIO 2 S ..................279 1.2.1 Zijaanzicht en toelichting DIGITRADIO 2 S ..............280 1.2.2 Achterkant ..........................281 Inhoudsopgave ..................... 282 Voorwoord ......................286 Doelgroep van deze handleiding ...................286 3.1.1... - Page 283 De bijzondere kenmerken van de DIGITRADIO ............302 DIGITRADIO 2 S gereedmaken voor gebruik.............303 5.3.1 Batterij plaatsen (met de DIGITRADIO 2 S als voorbeeld) .........303 5.3.2 Voedingsadapter aansluiten .....................305 5.3.3 Uitschuifbare antenne richten ..................306 5.3.4 Koptelefoon gebruiken ......................307 Algemene functies van het apparaat ................308 5.4.1...
- Page 284 7.2.3 Bewaar het DAB+ station op een opslaglocatie ............316 7.2.4 DAB+ station van een opslaglocatie opvragen............317 7.2.5 Overschrijven/verwijderen van een opgeslagen programmageheugen ..317 7.2.6 Signaalsterkte ........................... 317 7.2.7 Handmatig instellen .......................318 7.2.8 Volume regelen (DRC) ......................319 7.2.9 Niet-actieve stations verwijderen ..................319 FM-modus .......................
- Page 285 Sleeptimer ......................328 Equalizer ......................... 329 11.1 MyEQ ............................329 Systeeminstellingen .................... 330 12.1 Tijd- en datuminstellingen ....................330 12.1.1 Tijd/datum handmatig instellen ..................330 12.1.2 Tijd bijwerken ..........................331 12.1.3 Tijdformaat instellen ......................332 12.1.4 Datumformaat instellen ...................... 333 12.2 Helderheid van het scherm....................334 12.3 Taal ..............................
-
Page 286: Voorwoord
3 Voorwoord Deze handleiding helpt u om uw radio, hierna DIGITRADIO of apparaat genoemd, op de juiste manier en veilig te gebruiken. 3.1 Doelgroep van deze handleiding De handleiding is bedoeld voor iedereen die het apparaat installeert, bedient, schoonmaakt of afdankt. 3.1.1 Beoogd gebruik Het apparaat is ontworpen voor de ontvangst van DAB+/FM-radiouitzendingen. -
Page 287: Veiligheid
Let op - Duidt een belangrijke aanwijzing aan die strikt moet worden opgevolgd om defecten, gegevensverlies/-misbruik of onbedoeld functioneren van het apparaat te voorkomen. Tip - Geeft een aanwijzing over de beschreven functie plus een andere gerelateerde functie die wellicht nodig is met verwijzing naar het relevante gedeelte van de handleiding. - Page 288 Zet het apparaat na langdurig transport bij koud weer en daarna plaatsing in warme ruimtes niet onmiddellijk aan. Laat het eerst op temperatuur komen. Stel het apparaat niet bloot aan druipend of spattend water. Als er water in het apparaat is binnengedrongen, zet het uit en neem contact op met de serviceafdeling.
- Page 289 Zet bij een in het oog springend defect van het apparaat, het waarnemen van geur of rook, aanzienlijke functionele storingen of schade aan de behuizing, het apparaat uit en neem contact op met de serviceafdeling. Het apparaat mag uitsluitend worden gebruikt met de op de voedingsadapter vermelde netspanning.
- Page 290 Probeer nooit zelf een defect apparaat te repareren. Neem altijd contact op met een van onze servicepunten. Vreemde voorwerpen, zoals naalden, munten, enz., mogen niet in het apparaat vallen. Raak de aansluitpunten niet met metalen voorwerpen of met de vingers aan.
- Page 291 Dit apparaat is niet bedoeld voor gebruik door personen (inclusief kinderen) met beperkte fysieke, zintuiglijke of mentale capaciteiten of met gebrek aan ervaring en/of kennis, tenzij deze onder toezicht staan van iemand die verantwoordelijk is voor hun veiligheid of door deze persoon over het gebruik van het apparaat zijn geïnstrueerd.
- Page 292 Normale batterijen mogen niet worden opgeladen. Batterijen mogen niet op andere manieren worden gereactiveerd, ze mogen niet worden geopend, verwarmd of in open vuur gegooid (explosiegevaar!). Maak de batterijcontacten en apparaatcontacten schoon voordat u ze plaatst. Bij verkeerd geplaatste batterijen bestaat explosiegevaar! Vervang de batterijen alleen door batterijen van het juiste type en modelnummer Pas op! Stel de batterijen niet bloot aan extreme omstandigheden.
-
Page 293: Afdanken
3.2.2 Afdanken De verpakking van uw apparaat bestaat uitsluitend uit recyclebare materialen. Voer deze gescheiden af volgens de lokale aanwijzingen. Dit product mag aan het eind van zijn levensduur niet met het gewone huisafval worden meegegeven, maar moet bij een inzamelpunt voor het recyclen van elektrische en elektronische apparaten worden ingeleverd. - Page 294 Batterijen en accu's kunnen giftige stoffen bevatten die schadelijk zijn voor uw gezondheid en het milieu. Voor batterijen en accu's geldt de Europese richtlijn 2006/66/EG. Deze mogen niet met het normale huishoudelijke afval worden afgevoerd. Aanwijzingen voor verwijdering: Afvoer van de verpakking: Uw nieuwe apparaat werd tijdens het transport naar u toe beschermd door de verpakking.
- Page 295 Apparaat afdanken: Oude apparaten zijn geen waardeloos afval. Door milieuvriendelijke verwijdering kunnen waardevolle grondstoffen worden teruggewonnen. Informeer bij uw gemeentelijke instanties naar de mogelijkheden om het apparaat milieuvriendelijk en op de juiste manier af te voeren. Voordat u het apparaat afvoert, moet u de batterijen/accu's verwijderen.
-
Page 296: Juridische Informatie
U kunt gebruikte batterijen/accu's gratis inleveren bij uw speciaalzaak of bij speciale afvalinzamelingsstations. 3.2.3 Juridische informatie TechniSat verklaart hierbij dat de DIGITRADIO 2 en DIGITRADIO 2 S radioapparatuur voldoet aan Richtlijn 2014/53/EU. De volledige tekst van de EU- conformiteitsverklaring is beschikbaar op de volgende website: DIGITRADIO 2: http://konf.tsat.de/?ID=11932... - Page 297 Kopiëren en vermenigvuldigen alleen met toestemming van de uitgever. De huidige versie van de handleiding is beschikbaar in PDF-formaat in het downloadgedeelte op de homepage van TechniSat op www.technisat.de. DIGITRADIO 2, DIGITRADIO 2 S en TechniSat zijn geregistreerde handelsmerken van TechniSat: TechniSat Digital GmbH TechniPark Julius-Saxler-Straße 3...
-
Page 298: Service-Instructies
Ma. - vr. 8:00 - 20:00 via tel.: 03925/9220 1800 bereikbaar. Gebruik in geval van retourzending van het apparaat alleen het volgende adres: TechniSat Digital GmbH Service-center Nordstr. 4a 39418 Staßfurt Namen van de genoemde bedrijven, instellingen of merken zijn handelsmerken of... -
Page 299: Apparaat Installeren
4 Apparaat installeren > Plaats het apparaat op een stevige, veilige en horizontale ondergrond. Zorg voor goede ventilatie. Let op!: > Plaats het apparaat niet op zachte oppervlakken zoals vloerkleden en dekens of in de buurt van gordijnen en wandtapijten. De ventilatieopeningen zouden kunnen worden afgedekt. - Page 300 > Houd er rekening mee dat de poten van het apparaat mogelijk gekleurde afdrukken op bepaalde meubeloppervlakken kunnen achterlaten. Gebruik bescherming tussen uw meubels en het apparaat. > Houd de DIGITRADIO uit de buurt van apparaten die sterke magnetische velden produceren.
- Page 301 > Trek bij storingen of rook- en geurontwikkeling uit de behuizing onmiddellijk de stekker uit het stopcontact. > Koppel de stekker los als het apparaat lange tijd niet wordt gebruikt, bijvoorbeeld voor aanvang van een lange reis. > Als het apparaat gedurende langere tijd niet wordt gebruikt, verwijder dan de batterij.
-
Page 302: Beschrijving Van De Digitradio
5 Beschrijving van de DIGITRADIO 5.1 De levering Controleer voor ingebruikname of de levering compleet is: 1x DIGITRADIO 1x batterij 1x voedingsadapter 1x handleiding 5.2 De bijzondere kenmerken van de DIGITRADIO De DIGITRADIO bestaat uit een DAB+/FM-ontvanger met de volgende functies: U kunt maximaal 20 DAB+ en 20 FM-stations opslaan. -
Page 303: Digitradio 2 S Gereedmaken Voor Gebruik
5.3 DIGITRADIO 2 S gereedmaken voor gebruik 5.3.1 Batterij plaatsen (met de DIGITRADIO 2 S als voorbeeld) > Open het batterijvak aan de achterkant van het apparaat door op het deksel van het batterijvak te drukken in de richting van de pijl (1). Verwijder vervolgens het deksel (2). - Page 304 De batterij van de DIGITRADIO is ook los verkrijgbaar. > Plaats het deksel op het batterijvak (1) en schuif het tegen de richting van de pijlen in totdat het vastklikt (2). De batterij wordt opgeladen zodra het apparaat op het lichtnet is aangesloten. Het laadniveau wordt op het display aangegeven met een batterijsymbool.
-
Page 305: Voedingsadapter Aansluiten
Na de eerste keer dat de voeding op het apparaat is aangesloten, verschijnt "TechniSat Digitalradio" op het display. U kunt dan de werktaal selecteren. Gebruik de toetsen < of > om een van de beschikbare talen te selecteren en bevestig met de toets OK. -
Page 306: Uitschuifbare Antenne Richten
5.3.3 Uitschuifbare antenne richten Het aantal en de kwaliteit van te ontvangen zenders is afhankelijk van de ontvangstomstandigheden op de plaats van opstelling. Met de uitschuifbare antenne is een uitstekende ontvangst mogelijk. > Richt de uitschuifbare antenne op en trek deze in de volledige lengte uit. Vaak is de exacte uitrichting van de uitschuifbare antenne belangrijk, vooral in de randgebieden van de DAB-ontvangst. -
Page 307: Koptelefoon Gebruiken
5.3.4 Koptelefoon gebruiken Gehoorschade! Luister via de koptelefoon niet met een hoog volume naar de radio. Dit kan tot blijvende gehoorschade leiden. Stel het volume zo laag mogelijk in voordat u een koptelefoon gaat gebruiken. Gebruik alleen koptelefoons met een 3,5 mm stereo jackplug. >... -
Page 308: Algemene Functies Van Het Apparaat
Maak eerst de DIGITRADIO klaar voor gebruik zoals beschreven onder punt 5.3.1 en 5.3.2 hierboven. > Druk op de toets Aan/Stand-by boven op het apparaat om de DIGITRADIO 2 aan te zetten. Na de eerste keer inschakelen moet u eerst de [Taal] instellen. Gebruik de toetsen <of >... -
Page 309: Apparaat Uitzetten
5.4.2 Apparaat uitzetten Bij netvoeding: > Door de toets Aan/Stand-by ingedrukt te houden, kunt u het apparaat in de stand-by-modus zetten. Het display toont kort de melding [Stand-by]. Datum en tijd worden op het display weergegeven. Zie voor het aanpassen van de helderheid van het display in de stand-by-modus punt 12.2. -
Page 310: Omschakelen Dab+/Fm/Bluetooth-Modus
5.4.3 Omschakelen DAB+/FM/Bluetooth-modus > Met de toets MODE kan door kort drukken tussen DAB+ (digitale radio), FM en Bluetooth worden overgeschakeld. 5.4.4 Volume instellen > Stel het volume in met de toetsen Volume +/-. Het ingestelde volume wordt op het display weergegeven met een staafdiagram. Zie ook punt 5.3.4 over gebruik met aangesloten koptelefoons. -
Page 311: Displayweergaven Opvragen
5.4.6 Displayweergaven opvragen > Houd de toets MENU ingedrukt en selecteer met de toetsen < of > het submenu [Display]. Druk daarna op OK. Selecteer met de toetsen <, > en OK een weergaveoptie. U kunt naar keuze de volgende informatie laten zien: In de DAB+-modus (geselecteerde functie is gemarkeerd met een "*"): [Scrollende tekst] (doorlopende tekst met aanvullende informatie die evt. -
Page 312: Menubediening
Het display kan ook worden gewijzigd door de snelkeuzetoets voor direct kiezen kort ingedrukt te houden. 6 Menubediening Via het menu komt u bij alle functies en instellingen van de DIGITRADIO. De menunavigatie wordt uitgevoerd met de knoppen MENU, <, > en OK. Het menu is onderverdeeld in submenu's en bevat verschillende menuopties of activeerbare functies, afhankelijk van de modus (DAB+ of FM). -
Page 313: De Dab+ (Digital Radio)-Functie
Functies en de in te drukken knoppen worden in deze handleiding vetgedrukt weergegeven. Displayweergaven tussen [vierkante haakjes]. Sommige tekstuele weergaven (zoals menuopties, zenderinformatie) zijn mogelijk te lang om weer te geven. Deze worden dan na enige tijd weergegeven als een scrollende tekst. -
Page 314: Datacompressie
7.1.1 Datacompressie Digitale radio maakt daarbij gebruik van effecten van het menselijke gehoor. Het menselijke oor neemt geen geluiden waar die onder een bepaald volume liggen. Data die onder de zogenaamde gehoorgrens liggen, kunnen er daarom worden uitgefilterd. Dit wordt mogelijk gemaakt omdat in een digitale datastroom naar elke informatie- eenheid ook het bijbehorende relatieve volume naar andere eenheden is opgeslagen. -
Page 315: Dab+ (Digital Radio) Ontvangst
7.2 DAB+ (Digital Radio) ontvangst > Druk herhaaldelijk kort op de knop MODE tot [DAB] op het display verschijnt. Wanneer DAB voor de eerste keer wordt gestart, wordt een volledige zenderzoekopdracht uitgevoerd. Na voltooiing van de zenderscan wordt het eerste station in alfanumerieke volgorde afgespeeld. 7.2.1 Volledige scan uitvoeren De automatische scan Volledige scan scant alle DAB+ band III-kanalen en vindt dus alle zenders die in het ontvangstgebied worden uitgezonden. -
Page 316: Zender Selecteren
Controleer de uitschuifbare antenne als er geen zender wordt gevonden en wijzig indien nodig de locatie (punt 5.3.3/3.2.1). 7.2.2 Zender selecteren > Druk op de toetsen < of > om de kanaallijst weer te geven en te schakelen tussen de beschikbare zenders. Afhankelijk van de instelling onder MENU >... -
Page 317: Dab+ Station Van Een Opslaglocatie Opvragen
De op FAV-geheugenplaats 1 opgeslagen zender kan ook via de snelkeuzetoets voor direct kiezen worden opgevraagd. 7.2.4 DAB+ station van een opslaglocatie opvragen > Om een zender op te vragen die u eerder in het FAV-geheugen hebt opgeslagen, drukt u kort op de toets FAV en selecteert u met de toetsen <, > een zendergeheugen (1...20). -
Page 318: Handmatig Instellen
> Gebruik de toetsen < of > om de optie [Signaalsterkte] te selecteren en druk dan op OK. > Sluit het menu af door herhaaldelijk op MENU te drukken. > Het display toont de signaalsterkte door middel van een staafdiagram. Stations met een signaalsterkte die lager is dan de minimumsignaalsterkte zenden geen voldoende signaal uit. -
Page 319: Volume Regelen (Drc)
Stations met een signaalsterkte die lager is dan de minimumsignaalsterkte zenden geen voldoende signaal uit. Richt eventueel de uitschuifbare antenne zoals beschreven onder punt 5.3.3. 7.2.8 Volume regelen (DRC) Met de menuoptie Volume regelen kunt u de mate van compressie die dynamische fluctuaties en de bijbehorende volumevariaties compenseert instellen. -
Page 320: Niet-Actieve Stations Verwijderen
7.2.9 Niet-actieve stations verwijderen Met deze menuoptie kunt u oude en niet langer te ontvangen stations uit de zenderlijst verwijderen. > Houd de toets MENU ingedrukt en selecteer met de toetsen < of > de optie [Inactieve zender wissen] . >... -
Page 321: Fm-Ontvangst Met Rds- Informatie
Bei RDS-zenders verschijnt de naam van de zender. Om de ontvangst te verbeteren, kunt u de uitschuifbare antenne eventueel opnieuw richten (zie punt 5.3.3). 8.2 FM-ontvangst met RDS- informatie RDS is een methode voor het verzenden van aanvullende informatie via FM-zenders. Omroepen met RDS verzenden bijv. -
Page 322: Handmatige Zenderkeuze
Gebruik voor het instellen van zwakkere stations de handmatige zenderkeuze. 8.4 Handmatige zenderkeuze > Druk herhaaldelijk kort op < of > om de gewenste zender of frequentie in te stellen. Het display toont de frequentie in stappen van 0,05 MHz. 8.5 Scaninstelling In deze menuoptie kunt u de gevoeligheid van de scanfunctie instellen. -
Page 323: Audio Instellen
8.6 Audio instellen > Houd de toets MENU ingedrukt en selecteer met de toetsen < of > de optie [Audio instellen]. > Druk op OK. > Gebruik de toetsen < of >om de optie [Stereo mogelijk] of [Alleen mono] te selecteren om in stereo of alleen in mono af te spelen als de FM-ontvangst slecht is. -
Page 324: Fm-Zenders Vanaf Een Geheugenlocatie Opvragen
De op FAV-geheugenplaats 1 opgeslagen zender kan ook via de snelkeuzetoets voor direct kiezen worden opgevraagd. 8.8 FM-zenders vanaf een geheugenlocatie opvragen > Om een zender op te vragen die u eerder in het FAV-geheugen hebt opgeslagen, drukt u kort op de toets FAV en selecteert u met de toetsen <, > een zendergeheugen (1...20). -
Page 325: Bluetooth
9 Bluetooth In de Bluetooth-modus kunt u muziek afspelen vanaf een aangesloten smartphone of tablet via de luidsprekers van DIGITRADIO. Om dit te doen, moeten beide apparaten eerst aan elkaar "gekoppeld" worden. 9.1 Bluetooth inschakelen > Schakel naar de Bluetooth-modus door op de toets MODE te drukken. >... - Page 326 Tijdens het koppelingsproces moeten beide apparaten zich binnen 10 cm afstand van elkaar bevinden. > De melding DIGITRADIO 2 of DIGITRADIO 2S zou nu moeten verschijnen in de lijst van Bluetooth-apparaten op uw externe apparaat. Tik erop om het koppelingsproces te voltooien. Zodra het koppelingsproces met succes is voltooid, klinkt er een bevestigingstoon uit de DIGITRADIO-luidspreker.
-
Page 327: Koppeling Annuleren
Afhankelijk van het Bluetooth-protocol van uw externe apparaat kunt u het afspelen van muziek regelen met de knoppen DIGITRADIO. Druk op OK om het afspelen te pauzeren of te hervatten. Druk op de toets > om naar de volgende waarde te gaan. Druk op de < - toetsen om het huidige nummer opnieuw af te spelen, of druk twee keer op de toets om naar het vorige nummer te gaan. -
Page 328: Sleeptimer
Als alternatief kunt u de koppeling op uw externe apparaat annuleren. 10 Sleeptimer De slaaptimer schakelt de DIGITRADIO na de ingestelde tijdsduur automatisch naar Stand-by (netvoeding) of Uit (batterijvoeding). > Houd de toets MENU ingedrukt en selecteer met de toetsen < of > de optie [Sleep-timer] . -
Page 329: Equalizer
11 Equalizer Met de equalizer* kunt u het geluid in de DAB- en FM-modus desgewenst aanpassen. > Houd in de DAB of FM-modus de toets MENU ingedrukt en kies met de toetsen < of > de optie [Equalizer]. > Druk op OK. >... -
Page 330: Systeeminstellingen
12 Systeeminstellingen Alle instellingen die in dit punt worden uitgelegd, gelden zowel in DAB+ als in de FM- modus. 12.1 Tijd- en datuminstellingen 12.1.1 Tijd/datum handmatig instellen Afhankelijk van de instelling van de Tijd bijwerken (punt 12.1.2), moet u de tijd en datum handmatig instellen. -
Page 331: Tijd Bijwerken
> Vervolgens knipperen de volgende cijfers (minuten) van de tijd en kunnen deze ook worden gewijzigd (zie bovenstaande aanwijzingen). > Druk na iedere volgende instelling op OK om naar de volgende instelling te gaan. > Ga bij de datuminstelling volgens bovenstaande aanwijzingen te werk. >... -
Page 332: Tijdformaat Instellen
[Alle bronnen] (Bijwerken via DAB+ en FM) [Update via DAB] (update alleen via DAB+) [Update via FM] (update alleen via FM) [Geen update] (Tijd/datum moeten handmatig worden ingevoerd, zie punt 12.1.1 ). 12.1.3 Tijdformaat instellen In het submenu 12/24-uurs formaat kunt u het 12- of 24-uurs formaat instellen. >... -
Page 333: Datumformaat Instellen
12.1.4 Datumformaat instellen In het submenu Datumformaat instellen kunt u het weergaveformaat van de datum instellen. > Houd de toets MENU ingedrukt en selecteer met de toetsen < of > de optie [Tijd]. > Druk op OK. > Selecteer met de toetsen < of > [Datumformaat instellen] en druk op OK. >... -
Page 334: Helderheid Van Het Scherm
12.2 Helderheid van het scherm U kunt de helderheid van het display aanpassen voor zowel bediening als stand-by (alleen beschikbaar wanneer de radio is aangesloten). > Houd de toets MENU ingedrukt en selecteer met de toetsen < of > de optie [Helderheid]. -
Page 335: Taal
[Auto-dim] dimt het display automatisch (wanneer optie [Aan]) na 10 seconden zonder bediening van de radio, naar de helderheidswaarde Laag. Wanneer de optie [Uit] is geselecteerd, zal het display continu oplichten bij de helderheid die is geselecteerd in de functie [Werking]. Druk op de toets OK om de instelling te bevestigen. -
Page 336: Fabrieksinstelling
12.4 Fabrieksinstelling Als u de locatie van het apparaat wijzigt, bijvoorbeeld bij een verhuizing, kunt u de opgeslagen zenders mogelijk niet meer ontvangen. Door terug te keren naar de fabrieksinstellingen, kunt u alle opgeslagen stations verwijderen om een nieuwe zenderscan te starten. >... -
Page 337: Sw-Versie
12.5 SW-versie Onder SW-versie kunt u de momenteel geïnstalleerde softwareversie opvragen. > Houd de toets MENU ingedrukt en selecteer met de toetsen < of > de optie [SW- versie]. > Druk op OK. De huidige SW-versie wordt weergegeven. 13 Reinigen Maak het apparaat niet schoon met een vochtige doek of onder stromend water om het risico van een elektrische schok te vermijden. -
Page 338: Storingen Verhelpen
Maak het display alleen met een zachte katoenen doek schoon. Gebruik indien nodig een katoenen doek met een kleine hoeveelheid niet-alkalisch zeepsop op water - of alcoholbasis. Wrijf zachtjes met de katoenen doek over het oppervlak. 14 Storingen verhelpen Als het apparaat niet werkt zoals bedoeld, controleer het dan met behulp van de volgende tabellen. -
Page 339: Technische Gegevens/Instructies Van De Fabrikant
15 Technische gegevens/instructies van de fabrikant Technische wijzigingen en onjuistheden voorbehouden. Ontvangstmethoden DAB/DAB+, FM, Bluetooth voedingsbron AC-input: 100-240V, 50/60Hz DC-output: 5V, 2A (DIGITRADIO 2 S) DC-output: 5V, 1A (DIGITRADIO 2) Batterij 3,7V/1050mAh Li-Ion, oplaadstroom max. 500mA Levensduur van de batterij tot 10 uur... - Page 340 Transmissievermogen: class 2/max. +4dBm Display OLED Stroomverbruik in werking max.: 9W (met voedingsadapter en batterijlader DIGITRADIO 2 S), 8W (met voedingsadapter en batterijlader DIGITRADIO 2) typische werking: 1W (50% volume, zonder batterijlading) Stand-by: <0,5W Voeding uit: <0,4W Werking op batterij Voeding uit: <0,3mW...
- Page 341 Audio-uitgangsvermogen 2x1W RMS DIGITRADIO 2 S 1W RMS DIGITRADIO 2 Gewicht 464g DIGITRADIO 2S 365g DIGITRADIO 2 Afmetingen (bxhxd) mm 245 x 109 x 47 DIGITRADIO 2 S 175 x 109 x 47 DIGITRADIO 2...
- Page 343 Instrukcja obsługi DIGITRADIO 2 DIGITRADIO 2 S...
-
Page 344: Ilustracje
1 Ilustracje 1.1 Widok z przodu/z boku DIGITRADIO 2... - Page 345 Wł./Czuwanie (góra) Głośnik (Mono) MODE Przycisk wyboru trybu MENU Wywołanie menu OK Przycisk potwierdzenia Głośność +/- Przycisk (zwiększania/zmniejszania głośności) Przycisk wyboru bezpośredniego Przycisk FAV Wyświetlacz < / > Przyciski wyboru/nawigacji Gniazdo słuchawek (jack 3,5 mm) Gniazdo DC-IN USB do zewnętrznego zasilania elektrycznego...
-
Page 346: Tylna Strona
1.1.1 Tylna strona Styki Antena teleskopowa Akumulator Gniazdo Prowadnica z akumulatora tworzywa sztucznego... -
Page 347: Widok Z Przodu Digitradio 2 S
1.2 Widok z przodu DIGITRADIO 2 S... -
Page 348: Widok Z Boku I Wyjaśnienia Digitradio 2 S
1.2.1 Widok z boku i wyjaśnienia DIGITRADIO 2 S Wł./Czuwanie (góra) Głośnik MODE Przycisk wyboru trybu MENU Wywołanie menu OK Przycisk potwierdzenia Głośność +/- Przycisk (zwiększania/ zmniejszania głośności) Przycisk wyboru bezpośredniego Przycisk FAV Wyświetlacz < / > Przyciski wyboru/nawigacji Gniazdo słuchawek (jack 3,5 mm) Gniazdo DC-IN USB do zewnętrznego... -
Page 349: Tylna Strona
1.2.2 Tylna strona Styki Antena teleskopowa Prowadnica Akumulator Gniazdo z tworzywa akumulatora sztucznego... -
Page 350: Spis Treści
Widok z przodu/z boku DIGITRADIO 2 ................344 1.1.1 Tylna strona ..........................346 Widok z przodu DIGITRADIO 2 S ..................347 1.2.1 Widok z boku i wyjaśnienia DIGITRADIO 2 S ............348 1.2.2 Tylna strona ..........................349 Spis treści ....................... 350 Wstęp ........................354 Grupa docelowa instrukcji obsługi .................354... - Page 351 Szczególne własności urządzenia DIGITRADIO ............370 Przygotowanie DIGITRADIO 2 S do eksploatacji ............371 5.3.1 Montaż akumulatora (przykład DIGITRADIO 2 S) ............. 371 5.3.2 Podłączanie zasilacza ......................373 5.3.3 Ustawianie anteny teleskopowej ..................374 5.3.4 Korzystanie ze słuchawek ....................375 Ogólne funkcje urządzenia ....................
- Page 352 7.2.3 Przyporządkowanie stacji DAB+ do określonego miejsca w pamięci ...384 7.2.4 Wywoływanie stacji DAB+ z określonego miejsca w pamięci ......385 7.2.5 Nadpisywanie/usuwanie zawartości pamięci stacji radiowych ......385 7.2.6 Siła sygnału ..........................385 7.2.7 Ręczne ustawianie .........................386 7.2.8 Dostosowanie głośności (DRC) ..................387 7.2.9 Usuwanie nieaktywnych stacji ..................388 Tryb FM (UKF) ......................
- Page 353 Zegar drzemki ....................... 396 Korektor dźwięku ....................397 11.1 MójEQ ............................397 Ustawienia systemowe ..................398 12.1 Ustawienia godziny i daty ....................398 12.1.1 Ręczne ustawianie godziny/daty ..................398 12.1.2 Aktualizacja czasu ........................399 12.1.3 Ustawianie formatu czasu ....................400 12.1.4 Ustawianie formatu daty ....................401 12.2 Jasność...
-
Page 354: Wstęp
3 Wstęp Instrukcja obsługi zawiera informacje umożliwiające zapewnienie bezpieczeństwa eksploatacji odbiornika radiowego, zwanego dalej także urządzeniem lub DIGITRADIO, oraz jego zastosowania zgodnego z przeznaczeniem. 3.1 Grupa docelowa instrukcji obsługi Instrukcja obsługi jest skierowana do każdej osoby ustawiającej, obsługującej, czyszczącej lub utylizującej urządzenie. 3.1.1 Zastosowanie zgodne z przeznaczeniem Urządzenie jest przeznaczone do odbioru stacji radiowych DAB+/UKF. -
Page 355: Bezpieczeństwo
Uwaga — słowo to oznacza informację pozwalającą na uniknięcie uszkodzenia urządzenia, utraty/nadużycia danych oraz niezamierzonego włączenia. Wskazówka — słowo to towarzyszy opisowi funkcji i innej funkcji powiązanej w odniesieniu do danego punktu w instrukcji obsługi. 3.2.1 Bezpieczeństwo W celu zapewnienia bezpieczeństwa użytkownika przed rozpoczęciem eksploatacji DIGITRADIO konieczne jest dokładne zapoznanie się... - Page 356 Nie włączaj urządzenia od razu po wniesieniu go do ciepłego pomieszczenia, jeśli transportowane było przez dłuższy czas w niskiej temperaturze. Zaczekaj, aż urządzenie osiągnie temperaturę otoczenia. Nie dopuszczaj do zachlapania urządzenia wodą. W przypadku kontaktu urządzenia z wodą natychmiast je wyłącz i skontaktuj się z serwisem. Nie poddawaj urządzenia działaniu wysokich temperatur, które mogłyby je nagrzać...
- Page 357 W przypadku widocznego uszkodzenia urządzenia, pojawienia się nietypowego zapachu lub dymu, poważnej usterki lub uszkodzenia obudowy natychmiast wyłącz urządzenie i skontaktuj się z serwisem. Urządzenie można podłączać wyłącznie do napięcia sieciowego podanego na zasilaczu. W żadnym wypadku nie próbuj zasilać urządzenia ze źródła o innych parametrach.
- Page 358 W żadnym wypadku nie dokonuj prób naprawy urządzenia we własnym zakresie. W przypadku uszkodzenia zawsze kontaktuj się z serwisem producenta. Nie dopuść, aby ciała obce, np. igły, monety itp., przedostały się do wnętrza urządzenia. Nie dotykaj styków elektrycznych metalowymi przedmiotami lub palcami.
- Page 359 Urządzenie nie jest przystosowane do obsługi przez osoby (włącznie z dziećmi) o obniżonej sprawności psychomotorycznej lub nieposiadające odpowiedniego doświadczenia oraz/lub wiedzy. Nie dotyczy to przypadków, kiedy osoby takie znajdują się pod nadzorem osoby odpowiedzialnej za ich bezpieczeństwo lub otrzymują wskazówki dotyczące użytkowania urządzenia. Konieczne jest dopełnienie obowiązku nadzoru nad dziećmi, w celu wykluczenia możliwości ich manipulowania przy urządzeniu.
- Page 360 Nie wolno ładować zwykłych baterii. Akumulatorów nie można reaktywować za pomocą innych środków, demontować, ogrzewać ani wrzucać do otwartego ognia (niebezpieczeństwo wybuchu!). Przed zamontowaniem oczyść styki akumulatora i urządzenia. Nieprawidłowo zamontowany akumulator stwarza zagrożenie pożarowe! Wymieniać wyłącznie na akumulator odpowiedniego typu i o odpowiednim oznaczeniu modelu.
-
Page 361: Utylizacja
3.2.2 Utylizacja Opakowanie urządzenia składa się wyłącznie z materiałów przydatnych do ponownego wykorzystania. Prosimy o ich odpowiednie oznakowanie i dostarczenie do systemu utylizacji materiałów. Po zakończeniu okresu eksploatacji, produkt nie może zostać wyrzucony do odpadów gospodarczych. Należy go oddać do punktu utylizacji zużytych urządzeń... - Page 362 Baterie i akumulatory mogą zawierać substancje toksyczne szkodliwe dla zdrowia i dla środowiska naturalnego. Baterie/akumulatory podlegają zapisom dyrektywy europejskiej 2006/66/WE. Nie można wyrzucać ich wraz z odpadami gospodarczymi. Wskazówki dotyczące utylizacji: Utylizacja opakowania: Nowe urządzenie jest przesyłane do klienta w chroniącym je opakowaniu. Wszystkie zastosowane materiały są...
- Page 363 Utylizacja urządzenia: Stare urządzenia nie są bezwartościowe. Przyjazna dla środowiska naturalnego utylizacja umożliwia odzysk wielu cennych materiałów. Wszelkich informacji dotyczących przyjaznej dla środowiska naturalnego utylizacji urządzenia udzieli lokalna jednostka samorządowa lub miejska. Przed przekazaniem urządzenia do utylizacji konieczne jest wyjęcie znajdujących się w nim baterii/akumulatorów. Urządzenie jest oznaczone zgodnie z dyrektywą...
-
Page 364: Wskazówki Prawne
3.2.3 Wskazówki prawne Firma TechniSat niniejszym deklaruje, że urządzenia radiowe typu DIGITRADIO 2 oraz DIGITRADIO 2 S odpowiadają wymaganiom dyrektywy 2014/53/UE. Pełen tekst deklaracji zgodności z wymaganiami UE znajduje się na stronie internetowej... - Page 365 Powielanie i rozpowszechnianie dozwolone wyłącznie za zgodą wydawcy. Aktualną wersję instrukcji można pobrać w formacie PDF z obszaru pobierania witryny internetowej firmy TechniSat www.technisat.de. DIGITRADIO 2 oraz DIGITRADIO 2 S oraz TechniSat to zastrzeżone znaki towarowe firmy TechniSat Digital GmbH TechniPark Julius-Saxler-Straße 3...
-
Page 366: Wskazówki Serwisowe
8:00 do 20:00 pod numerem telefonu: 03925/9220 1800. W uzasadnionych przypadkach prosimy o przesłanie urządzenia na adres: TechniSat Digital GmbH Service-Center Nordstr. 4a 39418 Staßfurt Nazwy wymienionych firm, instytucji oraz marek są znakami towarowymi lub... -
Page 367: Ustawianie Urządzenia
4 Ustawianie urządzenia > Ustaw urządzenie na stabilnym, bezpiecznym i poziomym podłożu. Zapewnij dobrą wentylację. Uwaga! > Nie stawiaj urządzenia na miękkim podłożu, takim jak dywan lub koc, ani w pobliżu firanek oraz zasłon. Może to spowodować zatkanie otworów wentylacyjnych. Może to zaburzyć niezbędną cyrkulację powietrza. To z kolei może być... - Page 368 > Stopy urządzenia mogą w pewnych warunkach pozostawić kolorowe ślady na niektórych powierzchniach mebli. Zastosuj materiał ochronny pomiędzy urządzeniem a powierzchnią mebla. > Nie zbliżaj urządzenia DIGITRADIO do urządzeń generujących silne pole magnetyczne. > Nie stawiaj na urządzeniu żadnych ciężkich przedmiotów. >...
- Page 369 > Nie chwytaj wtyczki zasilania mokrymi rękoma, ponieważ może to spowodować porażenie prądem elektrycznym! > W przypadku pojawienia się usterek lub wydobywania się dymu z obudowy, natychmiast wyciągnij wtyczkę z gniazda zasilania! > Gdy urządzenie nie będzie stosowane przez dłuższy czas, np. przed rozpoczęciem długiej podróży, odłącz wtyczkę...
-
Page 370: Opis Urządzenia Digitradio
5 Opis urządzenia DIGITRADIO 5.1 Zakres dostawy Przed uruchomieniem urządzenia sprawdź, czy przesyłka jest kompletna. 1 x DIGITRADIO 1 x Akumulator 1 x Zasilacz sieciowy 1 x Instrukcja obsługi 5.2 Szczególne własności urządzenia DIGITRADIO Urządzenie DIGITRADIO składa się z odbiornika DAB+/UKF wyposażonego a następujące funkcje: Możliwy jest zapis do 20 stacji DAB+ oraz 20 stacji UKF. -
Page 371: Przygotowanie Digitradio 2 S Do Eksploatacji
5.3 Przygotowanie DIGITRADIO 2 S do eksploatacji 5.3.1 Montaż akumulatora (przykład DIGITRADIO 2 S) > Otwórz gniazdo akumulatora w tylnej części urządzenia, dociskając pokrywę gniazda akumulatora w kierunku wskazanym przez strzałkę (1). Następnie zdejmij pokrywę (2). > Zamontuj akumulator urządzenia DIGITRADIO, uwzględniając polaryzację... - Page 372 Akumulator urządzenia DIGITRADIO jest także dostępny na rynku i może zostać nabyty oddzielnie. > Załóż pokrywę gniazda akumulatora na gniazdo akumulatora (1) i przesuń ją w kierunku przeciwnym do nadrukowanej strzałki, aż do zablokowania w zatrzasku (2) Akumulator jest ładowany bezpośrednio po podłączeniu urządzenia do sieci. Stan naładowania jest przedstawiany na ekranie za pośrednictwem symbolu ładowania.
-
Page 373: Podłączanie Zasilacza
Po pierwszym podłączeniu zasilania na wyświetlaczu pojawi się komunikat „TechniSat Digitalradio”. Następnie możliwy jest wybór wersji językowej. W tym celu wybierz jedną z dostępnych wersji językowych za pomocą przycisków < lub > i potwierdź wybór, naciskając przycisk OK. Następnie wyszukane zostaną stacje nadające w paśmie DAB+. -
Page 374: Ustawianie Anteny Teleskopowej
5.3.3 Ustawianie anteny teleskopowej Liczba i jakość odbieranych stacji radiowych zależy od warunków odbioru w miejscu ustawienia. Antena teleskopowa umożliwia uzyskanie idealnego odbioru. > Ustaw antenę teleskopową i wyciągnij ją. Ważne jest precyzyjne ustawienie anteny teleskopowej, w szczególności w obszarach o słabym zasięgu DAB+. Witryna dostępna pod adresem internetowym „www.dabplus.de”... -
Page 375: Korzystanie Ze Słuchawek
5.3.4 Korzystanie ze słuchawek Uszkodzenia słuchu! Korzystając ze słuchawek, nie słuchaj muzyki lub stacji radiowych ze zbyt silną głośnością. Może to spowodować trwałe uszkodzenie słuchu. Przed wykorzystaniem słuchawek ustaw minimalną głośność odtwarzanego dźwięku. Stosuj wyłącznie urządzenia z wtyczką typu jack 3,5 mm. >... -
Page 376: Ogólne Funkcje Urządzenia
Przygotuj DIGITRADIO do eksploatacji w sposób opisany w punktach 5.3.1 i 5.3.2. > Naciskając przycisk Wł./Gotowość w górnej części urządzenia, włącz DIGITRADIO 2. Przy pierwszym włączeniu konieczne jest wybranie [wersji językowej]. W tym celu wybierz jedną z dostępnych wersji językowych za pomocą przycisków<... -
Page 377: Wyłączanie Urządzenia
5.4.2 Wyłączanie urządzenia Zasilanie sieciowe: > Krótkie naciśnięcie przycisku Wł./czuwanie umożliwia ustawienie urządzenia w trybie gotowości. Na ekranie na krótko pojawi się komunikat [Czuwanie] [tryb czuwania]. Na wyświetlaczu pojawi się także data i godzina. Zmiana intensywności podświetlenia w trybie czuwania została opisana w punkcie 12.2. >... -
Page 378: Przełączanie Trybu Dab+/Fm/Bluetooth
5.4.3 Przełączanie trybu DAB+/FM/Bluetooth > Krótkie naciśnięcie przycisku MODE umożliwia przełączanie pomiędzy trybami DAB+ (Digital Radio), FM (UKF) oraz Bluetooth. 5.4.4 Ustawianie głośności > Głośność można ustawiać za pomocą przycisków Głośność +/-. Ustawiona głośność jest widoczna na wyświetlaczu w formie wskaźnika słupkowego. W przypadku korzystania ze słuchawek uwzględnij treść... -
Page 379: Wyświetlanie Komunikatów Na Ekranie
5.4.6 Wyświetlanie komunikatów na ekranie > Naciśnij przycisk MENU i za pomocą przycisków < lub >wybierz podmenu [Wyświetlacz]. Następnie naciśnij przycisk OK. Za pomocą przycisków<, > i OK wybierz odpowiednią opcję wyświetlania. Istnieje możliwość wyboru wyświetlania następujących informacji: W trybie DAB+ (wybrana opcja jest oznaczona symbolem „*”): [Lauftext] [Ruchomy tekst przesyłany m.in. -
Page 380: Obsługa Menu
Zmiana wyświetlacza możliwa jest poprzez krótkie naciśnięcie i przytrzymanie przycisku wyboru bezpośredniego. 6 Obsługa menu Menu umożliwia dostęp do wszystkich funkcji i ustawień urządzenia DIGITRADIO. Nawigacja w menu możliwa jest za pomocą przycisków MENU, <, > oraz OK. Menu jest podzielone na podmenu i, w zależności od trybu (DAB+ lub FM) zawiera różne punkty lub dostępne funkcje. -
Page 381: Funkcja Dab+ (Digital Radio)
Funkcje i przyporządkowane do nich przyciski są w tej instrukcji obsługi oznaczone tłustą czcionką. Wskazanie wyświetlacza [przyciski kwadratowe]. Niektóre komunikaty (np. teksty menu, informacje dotyczące nadawcy) mogą być czasami zbyt długie, aby zmieścić się na wyświetlaczu. Komunikaty takie są przedstawiane jako przesuwający się tekst. 7 Funkcja DAB+ (Digital Radio) 7.1 Czym jest DAB+ DAB+ to nowy, cyfrowy format, umożliwiający odbiór krystalicznie czystego dźwięku,... -
Page 382: Kompresja Danych
7.1.1 Kompresja danych Technologia cyfrowego radia wykorzystuje naturalną charakterystykę ludzkiego ucha. Ludzki narząd słuchu nie odbiera dźwięków o głośności leżącej poniżej określonego progu. Dane opisujące dźwięki o głośności mniejszej niż granica słyszalności, mogą zostać odfiltrowane. Jest to możliwe, ponieważ w cyfrowym strumieniu danych każdej jednostce informacji przyporządkowana jest także względna głośność. -
Page 383: Odbiór Dab+ (Digital Radio)
7.2 Odbiór DAB+ (Digital Radio) > Naciskaj przycisk MODE, aż na wyświetlaczu pojawi się napis [DAB]. Po pierwszym uruchomieniu DAB+ przeprowadzone zostanie kompletne wyszukiwanie stacji radiowych. Po zakończeniu wyszukiwania urządzenie zacznie odtwarzać pierwszą stację radiową z listy ułożonej alfabetycznie. 7.2.1 Pełne wyszukiwanie stacji radiowych Funkcja automatycznego wyszukiwania skanuje wszystkie kanały pasma DAB+ III i wyszukuje wszystkie stacje odbierane na danym terenie. -
Page 384: Wybór Stacji Radiowej
Jeżeli urządzenie nie znalazło żadnej stacji, sprawdź antenę teleskopową i w razie potrzeby zmień miejsce ustawienia (punkt 5.3.3 / 3.2.1). 7.2.2 Wybór stacji radiowej > Naciśnięcie przycisków < lub > umożliwia wywołanie listy stacji nadawczych i przełączenie na jedną z dostępnych stacji. W zależności od ustawień... -
Page 385: Wywoływanie Stacji Dab+ Z Określonego Miejsca W Pamięci
Stacja radiowa zapisana pod numerem FAV 1 może zostać przywołana za pomocą przycisku szybkiego dostępu. 7.2.4 Wywoływanie stacji DAB+ z określonego miejsca w pamięci > W celu uruchomienia odtwarzania stacji zapisanej uprzednio pod określonym numerem w pamięci FAV krótko naciśnij przycisk Fav i za pomocą przycisków <, >... -
Page 386: Ręczne Ustawianie
> Za pomocą przycisków < lub > wybierz punkt [Siła sygnału] i naciśnij przycisk OK. > Wyjdź z menu, kilkukrotnie naciskając przycisk MENU. > Na wyświetlaczu pojawi się siła sygnału w formie wykresu słupkowego. Odtwarzanie stacji radiowych nadających sygnał o zbyt małej mocy nie jest możliwe. -
Page 387: Dostosowanie Głośności (Drc)
Odtwarzanie stacji radiowych nadających sygnał o zbyt małej mocy nie jest możliwe. W razie potrzeby ustaw antenę teleskopową w sposób opisany w punkcie 5.3.3. 7.2.8 Dostosowanie głośności (DRC) Punkt menu „Dostosowanie głośności” pozwala na ustawienie stopnia kompresji kompensującego wahania dynamiczne i przez to zmiany głośności. >... -
Page 388: Usuwanie Nieaktywnych Stacji
7.2.9 Usuwanie nieaktywnych stacji Ten punkt menu służy do usuwania z listy kanałów starych i niesłuchanych stacji radiowych. > Naciśnij i przytrzymaj przycisk Menu i za pomocą przycisków < lub > wybierz funkcję [inaktive Sender löschen] [usuwanie nieaktywnych stacji]. > Naciśnij przycisk OK. -
Page 389: Odbiór Fm (Ukf) Z Informacjami Rds
W przypadku stacji nadających sygnał RDS pojawi się także nazwa stacji radiowej. W celu polepszenia jakości dźwięku odpowiednio ustaw antenę teleskopową (punkt 5.3.3). 8.2 Odbiór FM (UKF) z informacjami RDS RDS to technologia przesyłu dodatkowych informacji nadawanych wraz z sygnałem stacji UKF. -
Page 390: Ręczne Wyszukiwanie Stacji
W przypadku stacji o niskiej sile sygnału skorzystaj z funkcji ręcznego wyszukiwania stacji. 8.4 Ręczne wyszukiwanie stacji > Kilkakrotnie krótko naciśnij przycisk < lub > w celu ustawienia odpowiedniej stacji radiowej lub częstotliwości. Na wyświetlaczu pojawi się częstotliwość zmieniana w kroku co 0,05 MHz. 8.5 Ustawienia wyszukiwania Ten punkt menu pozwala na ustawienie czułości operacji wyszukiwania. -
Page 391: Ustawienia Audio
8.6 Ustawienia audio > Naciśnij przycisk MENU i za pomocą przycisków < lub >wybierz punkt [Dostosowanie głośności]. > Naciśnij przycisk OK. > Za pomocą przycisku < lub >wybierz opcję [Stereo möglich] [Możliwe stereo] lub [Nur Mono] [Tylko mono], w celu odtwarzania w trybie Stereo lub Mono w przypadku niskiej mocy sygnału FM. -
Page 392: Wywoływanie Stacji Ukf Z Określonego Miejsca W Pamięci
Stacja radiowa zapisana pod numerem FAV 1 może zostać przywołana za pomocą przycisku szybkiego dostępu. 8.8 Wywoływanie stacji UKF z określonego miejsca w pamięci > W celu ponownego odtwarzania stacji zapisanej uprzednio pod określonym numerem w pamięci, krótko naciśnij przycisk FAV i za pomocą przycisków <, > wybierz numer miejsca w pamięci (1...20). -
Page 393: Bluetooth
9 Bluetooth W trybie Bluetooth możliwe jest odtwarzanie dźwięku z połączonego smartfona lub tabletu za pośrednictwem głośnika urządzenia DIGITRADIO. W tym celu konieczne jest uprzednie „sparowanie” obu urządzeń. 9.1 Uruchamianie trybu Bluetooth > Naciskając przycisk MODE, uruchom tryb Bluetooth. > Na wyświetlaczu pojawi się... - Page 394 W trakcie parowania urządzenia powinny znajdować się w odległości 10 cm od siebie. > Na liście odszukanych urządzeń Bluetooth urządzenia zewnętrznego winien pojawić się wpis DIGITRADIO 2 lub DIGITRADIO 2 S. Naciśnij odpowiedni wpis w celu zakończenia operacji parowania. Po udanym zakończeniu operacji parowania, głośnik DIGITRADIO wyda dźwięk potwierdzenia. >...
-
Page 395: Rozłączanie Urządzeń
W zależności od stosowanego protokołu Bluetooth urządzenia zewnętrznego, możliwe jest sterowanie odtwarzaniem muzyki za pomocą przycisków urządzenia DIGITRADIO. Naciśnięcie przycisku OK spowoduje wstrzymanie lub wznowienie odtwarzania. Naciśnij przycisk >, aby przeskoczyć do kolejnego tytułu. Naciśnij przycisk < w celu ponownego odtworzenia aktualnego tytułu lub naciśnij przycisk 2x w celu rozpoczęcia odtwarzania poprzedniego tytułu. -
Page 396: Zegar Drzemki
Alternatywnie, rozłączenie możliwe jest także za pośrednictwem urządzenia zewnętrznego. 10 Zegar drzemki Zegar drzemki sprawia, że po upływie ustawionego czasu urządzenie DIGITRADIO automatycznie przełącza się w tryb czuwania (zasilanie sieciowe) lub wyłącza (zasilanie akumulatorowe). > Naciśnij przycisk MENU i za pomocą przycisków < lub >wybierz pozycję [Sleep- timer]. -
Page 397: Korektor Dźwięku
11 Korektor dźwięku Korektor dźwięku* umożliwia dostosowanie barwy dźwięku w trakcie odtwarzania DAB i UKF (FM). > W trybie DAB lub FM naciśnij przycisk MENU i za pomocą przycisków < lub > wybierz punkt [Korektor dźwięku]. > Naciśnij przycisk OK. >... -
Page 398: Ustawienia Systemowe
12 Ustawienia systemowe Wszystkie opisane w poniższym punkcie ustawienia obowiązują zarówno w trybie DAB+, jak i FM. 12.1 Ustawienia godziny i daty 12.1.1 Ręczne ustawianie godziny/daty W zależności od ustawienia opcji aktualizacji czasu (punkt 12.1.2), konieczne jest ręczne ustawienie godziny i daty. >... -
Page 399: Aktualizacja Czasu
> Następnie migać zaczną kolejne cyfry (minuty) zegara. Ich ustawienie przebiega w analogiczny sposób. > Po dokonaniu ustawień ponownie naciśnij przycisk OK w celu przejścia do kolejnego ustawienia. > Zmianę daty przeprowadź w opisany powyżej sposób. > Po dokonaniu wszystkich ustawień i naciśnięciu przycisku OK na wyświetlaczu pojawi się... -
Page 400: Ustawianie Formatu Czasu
[Wszystkie źródła] (Aktualizacja za pośrednictwem DAB+ oraz FM) [Update von DAB] [Aktualizacja przez DAB] (aktualizacja tylko za pośrednictwem DAB+) [Update von FM] [Aktualizacja przez FM] (aktualizacja tylko za pośrednictwem UKF) [Kein Update] [Brak aktualizacji] (godzinę/datę należy wprowadzić ręcznie, patrz punkt 12.1.1) 12.1.3 Ustawianie formatu czasu W podmenu Ustaw tryb 12/24-godz. -
Page 401: Ustawianie Formatu Daty
12.1.4 Ustawianie formatu daty Podmenu Ustawienia formatu daty pozwala na zmianę formatu wyświetlania daty. > Naciśnij przycisk MENU i za pomocą przycisków < lub> wybierz punkt [Godzina]. > Naciśnij przycisk OK. > Za pomocą przycisków < i > wybierz funkcję [Datumsformat einst.] [Ustawienia formatu daty], a następnie naciśnij OK. -
Page 402: Jasność Ekranu
12.2 Jasność ekranu System umożliwia ustawienie jasności wyświetlacza zarówno w trybie pracy, jak i w trybie czuwania (dostępny tylko w przypadku podłączenia urządzenia do zasilania). > Naciśnij przycisk MENU i za pomocą przycisków < lub > wybierz punkt [Podświetlenie]. > Naciśnij przycisk OK. -
Page 403: Wersja Językowa
[Automatyczne przyciemnianie] powoduje automatyczne przyciemnienie wyświetlacza (po ustawieniu opcji [Wł.]) po 10 sekundach bez zmiany ustawień radia. Jasność zostaje zmieniona do ustawienia Niska. Ustawienie opcji [Wył.] włączy podświetlenie określone dla funkcji [Praca]. Naciśnij przycisk OK w celu zapisania ustawień. W przypadku zasilania akumulatorowego dostępne są tylko opcje Praca oraz Automatyczne przyciemnianie. -
Page 404: Ustawienia Fabryczne
12.4 Ustawienia fabryczne W przypadku zmiany miejsca eksploatacji urządzenia, np. przeprowadzki, odbiór zapisanych stacji może okazać się niemożliwy. Przywrócenie Ustawień fabrycznych pozwala na usunięcie wszystkich zapisanych stacji radiowych oraz uruchomienie operacji wyszukiwania stacji. > Naciśnij przycisk MENU i za pomocą przycisków < lub > wybierz punkt [Ustawienia fabryczne]. -
Page 405: Wersja Oprogramowania
12.5 Wersja oprogramowania Punkt Wersja opr. sprz. umożliwia sprawdzenie aktualnie zainstalowanej wersji oprogramowania sprzętowego. > Naciśnij przycisk MENU i za pomocą przycisków < lub > wybierz pozycję [Wersja oprogramowania]. > Naciśnij przycisk OK. Spowoduje to wyświetlenie aktualnej wersji oprogramowania. 13 Czyszczenie W celu uniknięcia porażenia prądem elektrycznym urządzenia nie można czyścić... -
Page 406: Usuwanie Usterek
Wyświetlacz czyścić można wyłącznie tkaniną bawełnianą. W razie potrzeby zwilż tkaninę bawełnianą małą ilością niealkalicznego, rozcieńczonego mydła na bazie wody lub alkoholu. Lekko przetrzyj powierzchnię bawełnianą szmatką. 14 Usuwanie usterek W przypadku nieprawidłowego działania urządzenia przeprowadź kontrolę zgodnie z poniższą tabelą. Usterka Możliwa przyczyna/naprawa Włączenie urządzenia nie jest... -
Page 407: Dane Techniczne / Wskazówki Producenta
Źródła odtwarzania DAB/DAB+, FM, Bluetooth zasilania elektrycznego Wejście AC: 100–240 V, 50/60 Hz DC Output: 5 V, 2 A (DIGITRADIO 2 S) Wyjście DC: 5 V, 1 A (DIGITRADIO 2) Akumulator 3,7 V/1050 mAh Li-Ion, prąd ładowania maks. 500 mA Czas pracy akumulatora do 10 godzin (głośnik, średnia głośność). - Page 408 Moc nadawania: Class 2/max. +4 dBm Wyświetlacz OLED Pobór prądu W trakcie pracy maks.: 9 W (z zasilaczem i akumulatorem DIGITRADIO 2 S), 8 W (z zasilaczem i akumulatorem DIGITRADIO 2) W trakcie pracy typowo: 1 W (50% głośności, bez ładowania akumulatora) Czuwanie: <0,5 W...
- Page 409 Masa 464 g DIGITRADIO 2S 365 g DIGITRADIO 2 Wymiary (szer. x wys. x gł.) mm 245 x 109 x 47 DIGITRADIO 2 S 175 x 109 x 47 DIGITRADIO 2...
- Page 411 Návod k obsluze DIGITRADIO 2 DIGITRADIO 2 S...
-
Page 412: Vyobrazení
1 Vyobrazení 1.1 Pohled zpředu/z boku DIGITRADIO 2... - Page 413 Zap/Standby (nahoře) Reproduktor (mono) MODE tlačítko pro změnu režimu MENU pro otevření nabídek OK tlačítko pro potvrzení Tlačítka hlasitosti +/- (nahlas/potichu) Tlačítko pro přímou volbu FAV tlačítko Displej < / > Výběrová tlačítka / navigace Zdířka pro sluchátka (3,5mm jack) Zdířka DC IN USB pro externí...
-
Page 414: Zadní Strana
1.1.1 Zadní strana Kontakty Teleskopická anténa Akumulátor Plastové Přihrádka pro akumulátor vodítko... -
Page 415: Pohled Zpředu Digitradio 2 S
1.2 Pohled zpředu DIGITRADIO 2 S... -
Page 416: Boční Pohled A Vysvětlivky Digitradio 2 S
1.2.1 Boční pohled a vysvětlivky DIGITRADIO 2 S Zap/Standby (nahoře) Reproduktor MODE tlačítko pro změnu režimu MENU pro otevření nabídek OK tlačítko pro potvrzení Tlačítka hlasitosti +/- (nahlas/potichu) Tlačítko pro přímou volbu FAV tlačítko Displej < / > Výběrová tlačítka / navigace Zdířka pro sluchátka (3,5mm jack) -
Page 417: Zadní Strana
1.2.2 Zadní strana Kontakty Teleskopická anténa Plastové Akumulátor Přihrádka pro vodítko akumulátor... -
Page 418: Obsah
Pohled zpředu/z boku DIGITRADIO 2 ................412 1.1.1 Zadní strana ..........................414 Pohled zpředu DIGITRADIO 2 S ..................415 1.2.1 Boční pohled a vysvětlivky DIGITRADIO 2 S .............. 416 1.2.2 Zadní strana ..........................417 Obsah ........................418 Úvod ......................... 422 Pro koho je tento návod k obsluze určen ..............422 3.1.1... - Page 419 Zvláštní vlastnosti přístroje DIGITRADIO ..............438 Příprava přístroje DIGITRADIO 2 S k používání ............439 5.3.1 Vložení akumulátoru (například DIGITRADIO 2 S) ..........439 5.3.2 Připojení napájecího zdroje ....................441 5.3.3 Nasměrování teleskopické antény ................. 442 5.3.4 Používání sluchátek .......................443 Obecné funkce zařízení ...................... 444 5.4.1...
- Page 420 7.2.3 Uložení vysílací stanice DAB+ do paměti ..............452 7.2.4 Vyvolání stanice DAB+ z paměti ..................453 7.2.5 Přepsání/smazání uloženého místa v paměti ............453 7.2.6 Síla signálu ..........................453 7.2.7 Manuální nastavení .......................454 7.2.8 Upravení hlasitosti (DRC) ....................455 7.2.9 Odstranění neaktivních stanic ..................456 Režim FM (VKV) ....................
- Page 421 Časovač vypnutí ....................464 Ekvalizér ........................465 11.1 MeinEQ ............................465 Systémová nastavení ................... 466 12.1 Nastavení času a data ......................466 12.1.1 Manuální nastavení času/data ..................466 12.1.2 Aktualizace času ........................467 12.1.3 Nastavení formátu času ......................468 12.1.4 Nastavení formátu data ......................469 12.2 Jas displeje ..........................470 12.3...
-
Page 422: Úvod
3 Úvod Tento návod k obsluze vám pomůže se správným a bezpečným používáním vašeho rádia, které je dále označováno jako DIGITRADIO nebo přístroj. 3.1 Pro koho je tento návod k obsluze určen Návod k obsluze je určen každé osobě, která přístroj instaluje, ovládá, čistí nebo likviduje. 3.1.1 Použití... -
Page 423: Bezpečnost
Pozor – označuje důležitý pokyn, který byste měli bezpodmínečně dodržovat, pokud chcete zabránit závadám přístroje, ztrátám/zneužití dat nebo nechtěnému používání. Tip – označuje pokyn k popsané funkci nebo další související funkci a případně funkci, které je třeba věnovat pozornost, s upozorněním na odpovídající bod návodu. - Page 424 Při delší přepravě v chladu a následném přechodu do teplé místnosti přístroj nezapínejte hned, ale vyčkejte na vyrovnání teplot. Přístroj nevystavujte kapající nebo stříkající vodě. Pokud se přístroj dostane do vody, vypněte jej a kontaktujte servis. Přístroj nevystavujte zdrojům tepla, které by jej zahřály nad rámec běžného používání.
- Page 425 Při zřejmé poruše přístroje, vzniku zápachu nebo kouře, podstatném chybném fungování či poškození krytu přístroj vypněte a obraťte se na servis. Přístroj se smí používat pouze se síťovým napětím uvedeným na napájecím zdroji. Nikdy se nepokoušejte přístroj provozovat s jiným napětím. Napájecí...
- Page 426 Nikdy se nepokoušejte vadný přístroj opravovat vlastními silami. Vždy se obraťte na některé z našich zákaznických středisek. Cizí tělesa, jako jsou jehly, mince atd., nesmí spadnout do vnitřku přístroje. Nedotýkejte se připojovacích kontaktů kovovými předměty nebo prsty. Mohlo by dojít ke zkratu. Na přístroj se nesmí...
- Page 427 Tento přístroj není určen k používání osobami (včetně dětí) s omezenými fyzickými, smyslovými nebo duševními schopnostmi nebo s nedostatečnými zkušenostmi a/nebo znalostmi bez dohledu osoby, která je odpovědná za jejich bezpečnost, nebo pokud nebyly touto osobou poučeny, jak se má přístroj používat.
- Page 428 Normální baterie se nesmí dobíjet. Akumulátory se nesmí reaktivovat žádnými jinými prostředky, nesmí se otevírat, zahřívat nebo vhazovat do otevřeného ohně (nebezpečí výbuchu!). Kontakty akumulátoru a kontakty přístroje před vložením očistěte. Při nesprávném vložení akumulátoru hrozí nebezpečí výbuchu! Akumulátory vyměňujte pouze za akumulátory správného typu a správného modelového čísla Upozornění! Akumulátory nevystavujte žádným extrémním podmínkám.
-
Page 429: Likvidace
3.2.2 Likvidace Obal přístroje je vyroben výhradně z recyklovatelných materiálů. Odevzdejte je prosím správně vytříděné do „duálního systému“. Po ukončení své životnosti se výrobek nesmí likvidovat do běžného domovního odpadu, ale musí se odevzdat na sběrném místě elektrických a elektronických přístrojů za účelem provedení recyklace. Upozorňuje na to symbol na výrobku, návodu k obsluze nebo na obalu. - Page 430 Baterie/akumulátory mohou obsahovat jedovaté látky, které poškozují zdraví a životní prostředí. Baterie/akumulátory podléhají evropské směrnici 2006/66/ES. Nesmí se likvidovat s běžným komunálním odpadem. Pokyny k likvidaci: Likvidace obalu: Váš nový přístroj byl pro cestu k vám chráněn obalem. Všechny použité materiály jsou šetrné...
- Page 431 Likvidace přístroje: Staré přístroje nejsou bezcenný odpad. Prostřednictvím ekologické likvidace je možné znovu získat cenné suroviny. Na možnosti ekologické a odborné likvidace přístroje se zeptejte na městském nebo obecním úřadu. Před likvidací přístroje je nutné vyjmout obsažené baterie/akumulátory. Tento přístroj je označen v souladu se směrnicí 2012/19/EU o použitých elektrických a elektronických zařízeních (WEEE).
-
Page 432: Právní Upozornění
3.2.3 Právní upozornění Společnost TechniSat tímto prohlašuje, že rádiové zařízení typu DIGITRADIO 2 a DIGITRADIO 2 S splňuje požadavky směrnice 2014/53/EU. Úplný text prohlášení o shodě EU je k dispozici na této internetové adrese: DIGITRADIO 2: http://konf.tsat.de/?ID=11932... - Page 433 Kopírování a rozmnožování pouze se souhlasem výrobce. Vždy aktuální verzi návodu ve formátu PDF získáte v sekci stahování na domovské stránce společnosti TechniSat na adrese www.technisat.de. DIGITRADIO 2, DIGITRADIO 2 S a TechniSat jsou registrované obchodní značky společnosti: TechniSat Digital GmbH TechniPark Julius-Saxler-Straße 3...
-
Page 434: Pokyny Pro Servis
Po–Pá 8:00–20:00 na tel. čísle: 03925/9220 1800. V případě nutnosti odeslání přístroje prosím použijte výhradně tuto adresu: TechniSat Digital GmbH Servisní centrum Nordstr. 4a 39418 Staßfurt, Německo Názvy uvedených firem, institucí nebo značek jsou obchodní značky nebo registrované... -
Page 435: Instalace Přístroje
4 Instalace přístroje > Přístroj postavte na pevný, bezpečný a vodorovný podklad. Zajistěte dobrou ventilaci. Pozor!: > Přístroj nestavte na měkké povrchy, jako jsou koberce či deky, nebo do blízkosti záclon, závěsů nebo nástěnných dekorací. Může dojít k zakrytí větracích otvorů. Došlo by tak k přerušení... - Page 436 > Pamatujte, že nožičky přístroje by mohly např. zanechat barevné otisky na některých površích nábytku. Mezi nábytek a přístroj vkládejte ochranu. > Přístroj DIGITRADIO uchovávejte z dosahu přístrojů, které vytvářejí silné magnetické pole. > Na přístroj nepokládejte žádné těžké předměty. >...
- Page 437 > Pří poruše nebo tvorbě kouře a zápachu z krytu přístroje ihned vytáhněte síťovou zástrčku ze zásuvky! > Síťovou zástrčku vytáhněte ze zásuvky, pokud přístroj nebudete delší dobu používat, např. před delší cestou. > Pokud přístroj nebudete delší dobu používat, akumulátor vyjměte. >...
-
Page 438: Popis Přístroje Digitradio
5 Popis přístroje DIGITRADIO 5.1 Obsah dodávky Před uvedením do provozu zkontrolujte, zda je obsah dodávky kompletní: 1 x DIGITRADIO 1 x akumulátor 1 x napájecí zdroj 1 x návod k obsluze 5.2 Zvláštní vlastnosti přístroje DIGITRADIO Součástí přístroje DIGITRADIO je přijímač DAB+/UKV s dále uvedenými funkcemi: Můžete uložit až... -
Page 439: Příprava Přístroje Digitradio 2 S K Používání
5.3 Příprava přístroje DIGITRADIO 2 S k používání 5.3.1 Vložení akumulátoru (například DIGITRADIO 2 S) > Otevřete přihrádku na akumulátor na zadní straně přístroje tak, že kryt přihrádky posunete ve směru vyražené šipky (1). Pak kryt sejměte (2). > Vložte akumulátor do přístroje DIGITRADIO a dodržte přitom orientaci pozlacených kontaktů... - Page 440 Akumulátor přístroje DIGITRADIO lze také samostatně zakoupit v obchodě. > Nasaďte kryt na přihrádku pro baterie (1) a posuňte jej proti vyraženému směru šipky, dokud nezapadne (2) Akumulátor se nabíjí, jakmile je přístroj připojen do elektrické sítě. Stav nabití ukazuje symbol baterie na displeji. Vybitý...
-
Page 441: Připojení Napájecího Zdroje
Předtím, než napájecí zdroj zapojíte do elektrické zásuvky ve zdi, se ujistěte, že provozní napětí síťového zdroje souhlasí s lokálním napětím v síti. Po počátečním přivedení síťového napájení se na displeji zobrazí „TechniSat Digitalradio“. Pak si můžete zvolit jazyk pro ovládání. K tomu pomocí tlačítek <... -
Page 442: Nasměrování Teleskopické Antény
5.3.3 Nasměrování teleskopické antény Počet a kvalita vysílače přijímaných stanic závisí na podmínkách v místě instalace. Pomocí teleskopické antény je možné dosáhnout vynikajícího příjmu. > Nasměrujte teleskopickou anténu a vytáhněte ji na plnou délku. Často je důležité přesné nasměrování teleskopické antény, především v okrajových oblastech příjmu vysílání... -
Page 443: Používání Sluchátek
5.3.4 Používání sluchátek Poškození sluchu! Neposlouchejte rádio přes sluchátka při vysoké hlasitosti. Mohlo by to vést k trvalému poškození sluchu. Před používáním sluchátek nastavte hlasitost přístroje na nejnižší stupeň. Používejte pouze sluchátka s konektorem jack 3,5 milimetru. > Konektor sluchátek zasuňte do zdířky pro sluchátka na boční straně přístroje. Přehrávání... -
Page 444: Obecné Funkce Zařízení
Přístroj DIGITRADIO nejprve připravte k používání podle popisu v bodech 5.3.1 a 5.3.2. > Stisknutím tlačítka Zap/Standby na horní straně přístroje DIGITRADIO 2 zapnete. Po prvním zapnutí musíte nejprve nastavit [Sprache] (Jazyk). K tomu pomocí tlačítek < nebo > vyberte jeden z nabízených jazyků a výběr potvrďte stisknutím tlačítka OK. -
Page 445: Vypnutí Přístroje
5.4.2 Vypnutí přístroje Při provozu ze sítě: > Krátkým stisknutím tlačítka Zap/Standby můžete přístroj přepnout do pohotovostního režimu. Na displeji se krátce zobrazí upozornění [Standby]. Na displeji se zobrazí datum a čas. Jas displeje v pohotovostním režimu můžete nastavit podle popisu v bodu 12.2. >... -
Page 446: Přepínání Režimu Dab+/Fm/Bluetooth
5.4.3 Přepínání režimu DAB+/FM/Bluetooth > Pomocí tlačítka MODE je možné přepínat mezi DAB+ (digitální rozhlas), FM (VKV) a Bluetooth. 5.4.4 Nastavení hlasitosti > Hlasitost nastavte pomocí tlačítek hlasitost +/-. Nastavená hlasitost se zobrazí na displeji prostřednictvím sloupkového diagramu. Věnujte také pozornost bodu 5.3.4 o používání... -
Page 447: Vyvolání Zobrazení Na Displeji
5.4.6 Vyvolání zobrazení na displeji > Stiskněte tlačítko MENU a pomocí tlačítek < nebo > zvolte vnořenou nabídku [Display] (Displej). Pak stiskněte tlačítko OK. Pomocí tlačítek <, > a OK zvolte možnost zobrazení. Máte možnost nechat si zobrazit tyto informace: V režimu DAB+ (zvolená funkce je označena „*“): [Lauftext] (Průběžný... -
Page 448: Obsluha Pomocí Menu
Zobrazení na displeji je možné změnit krátkým stisknutím a přidržením tlačítka pro přímou volbu. 6 Obsluha pomocí menu Z nabídky se dostanete ke všem funkcím a nastavením přístroje DIGITRADIO. Navigace v menu se provádí pomocí tlačítek MENU, <, > a OK. Nabídka je rozdělena do podnabídek a v závislosti na druhu režimu (DAB+ nebo FM) obsahuje různé... -
Page 449: Funkce Dab+ (Digitální Rádio)
Funkce a tlačítka, která je nutné stisknout, jsou v tomto návodu k obsluze zobrazeny tučně. Informace na displeji v [hranatých závorkách]. Některé texty (např. položky nabídek, informace o stanici) mohou být pro zobrazení na displeji příliš dlouhé. Tyto se pak po nějaké době zobrazí jako probíhající... -
Page 450: Komprimace Dat
7.1.1 Komprimace dat Digitální rádio přitom využívá efektů lidského sluchu. Lidské ucho nevnímá tóny, které jsou pod určitou minimální hlasitostí. Data, která se nacházejí pod tzv. absolutním prahem sluchu, tak lze odfiltrovat. Umožňuje to skutečnost, že v digitálním datovém toku je ke každé... -
Page 451: Příjem Dab+ (Digital Radio)
7.2 Příjem DAB+ (Digital Radio) > Krátce stiskněte tlačítko MODE tolikrát, dokud se na displeji nezobrazí [DAB]. Pokud spouštíte DAB+ poprvé, bude provedeno kompletní vyhledávání stanic. Po skončení vyhledávání se spustí přehrávání první stanice v pořadí podle abecedy. 7.2.1 Spuštění úplného vyhledávání Automatické... -
Page 452: Výběr Stanice
Pokud nebude nalezena žádná stanice, zkontrolujte anténu a v případě potřeby změňte polohu přístroje (bod 5.3.3 / 3.2.1). 7.2.2 Výběr stanice > Stisknutím tlačítka < nebo > je možné vyvolat seznam stanic a mezi dostupnými rozhlasovými stanicemi přepínat. V závislosti na nastavení v nabídce MENU > Senderwechsel (Změna stanice) se následně... -
Page 453: Vyvolání Stanice Dab+ Z Paměti
Stanici, která byla uložena na paměťové místo FAV 1, je možné vyvolat také pomocí tlačítka pro přímý výběr. 7.2.4 Vyvolání stanice DAB+ z paměti > Pokud chcete spustit rozhlasovou stanici, kterou jste předtím uložili do paměti FAV, stiskněte krátce tlačítko FAV a pomocí tlačítek <, > vyberte stanici v paměti (1...20). -
Page 454: Manuální Nastavení
> Pomocí tlačítek < nebo > zvolte položku [Signalstärke] (Síla signálu) a stiskněte tlačítko OK. > Nabídku opusťte opakovaným stisknutím tlačítka MENU. > Na displeji se zobrazí síla signálu pomocí sloupkového diagramu. Stanice, jejichž síla signálu je pod požadovanou minimální sílou signálu, nevysílají dostatečný... -
Page 455: Upravení Hlasitosti (Drc)
Stanice, jejichž síla signálu je pod požadovanou minimální sílou signálu, nevysílají dostatečný signál. V případě potřeby nasměrujte teleskopickou anténu tak, jak je popsáno v bodu 5.3.3. 7.2.8 Upravení hlasitosti (DRC) V položce nabídky Upravení hlasitosti se nastavuje kompresní poměr, který vyrovnává kolísání... -
Page 456: Odstranění Neaktivních Stanic
7.2.9 Odstranění neaktivních stanic Tato položka nabídky se používá k odstranění starých a již nevysílaných stanic ze seznamu. > Stiskněte tlačítko MENU a pomocí tlačítek < nebo > zvolte položku [Inaktive Sender löschen] (Odstranit neaktivní stanice). > Stiskněte tlačítko OK. Zobrazí... -
Page 457: Příjem Fm S Informacemi Rds
U stanic s RDS se zobrazí název stanice. Chcete-li zlepšit příjem, nasměrujte teleskopickou anténu (bod 5.3.3). 8.2 Příjem FM s informacemi RDS RDS je způsob přenosu dodatečných informací prostřednictvím FM stanic. Rozhlasové stanice pomocí RDS vysílají například název stanice nebo typ programu. Toto se zobrazí na displeji. -
Page 458: Manuální Vyhledávání Stanic
Pro nastavení slabších stanic použijte prosím manuální vyhledávání stanic. 8.4 Manuální vyhledávání stanic > Pokud chcete nastavit požadovanou stanici nebo frekvenci, opakovaně krátce stiskněte tlačítka < nebo >. Na displeji se zobrazuje frekvence po stupních 0,05 MHz. 8.5 Nastavení vyhledávání V tomto bodu nabídky je možné... -
Page 459: Nastavení Audio
8.6 Nastavení audio > Stiskněte tlačítko MENU a pomocí tlačítek < nebo > zvolte položku [Audio- Einstellung] (Nastavení zvuku). > Stiskněte tlačítko OK. > Pro nastavení stereofonního přehrávání, nebo pouze monofonního přehrávání při slabém příjmu FM zvolte pomocí < nebo > položku [Stereo möglich] (Stereo možné) nebo [Nur Mono] (Pouze mono). -
Page 460: Vyvolání Vysílací Stanice Fm Z Paměti
Stanici, která byla uložena na paměťové místo FAV 1, je možné vyvolat také pomocí tlačítka pro přímý výběr. 8.8 Vyvolání vysílací stanice FM z paměti > Pokud chcete spustit rozhlasovou stanici, kterou jste uložili do paměti FAV, stiskněte krátce tlačítko FAV a pomocí tlačítek <, > vyberte stanici z paměti (1...20). -
Page 461: Bluetooth
9 Bluetooth V režimu Bluetooth můžete přes reproduktory přístroje DIGITRADIO přehrávat hudbu z připojeného chytrého telefonu nebo tabletu. K tomu musí být oba přístroje nejprve mezi sebou „propojeny“. 9.1 Zapnutí režimu Bluetooth > Stisknutím tlačítka MODE přejděte do režimu Bluetooth. >... - Page 462 > V seznamu nalezených zařízení Bluetooth na vašem externím zařízení se nyní zobrazí záznam DIGITRADIO 2 resp. DIGITRADIO 2S. Pro dokončení procesu připojování na tento záznam klepněte. Pokud byl proces připojování úspěšně dokončen, zazní z reproduktoru přístroje DIGITRADIO potvrzovací tón.
-
Page 463: Zrušení Připojení
Podle Bluetooth protokolu svého externího zařízení můžete nyní přehrávání hudby ovládat pomocí tlačítek přístroje DIGITRADIO. Pro pozastavení nebo obnovení přehrávání stiskněte tlačítko OK. Pokud chcete přeskočit na další skladbu, stiskněte tlačítko >. Pro přehrávání aktuální skladby stiskněte tlačítko <, pro přehrávání předchozí skladby stiskněte toto tlačítko 2x. Přehrávání/pauza - tlačítko OK Další... -
Page 464: Časovač Vypnutí
Alternativně můžete připojení zrušit také na svém externím zařízení. 10 Časovač vypnutí Pomocí časovače vypnutí (sleep-timer) se DIGITRADIO po uplynutí nastavené doby automaticky přepne do pohotovostního režimu Standby (síťový provoz), nebo Aus (Vyp) (provoz na baterie). > Stiskněte tlačítko MENU a pomocí tlačítek < nebo > zvolte položku [Sleep-timer] (Časovač... -
Page 465: Ekvalizér
11 Ekvalizér Pomocí ekvalizéru* můžete upravit zvuk v režimu DAB a VKV (FM) podle svých potřeb. > V režimu DAB nebo FM stiskněte tlačítko MENU a pomocí tlačítek < nebo > zvolte položku [Equalizer] (Ekvalizér). > Stiskněte tlačítko OK. > Tlačítky <... -
Page 466: Systémová Nastavení
12 Systémová nastavení Všechna nastavení popsaná v tomto bodu platí stejně pro režim DAB+ i FM. 12.1 Nastavení času a data 12.1.1 Manuální nastavení času/data Podle toho, jak je nastavena aktualizace času (bod 12.1.2), musíte čas a datum nastavit manuálně. >... -
Page 467: Aktualizace Času
> Poté začnou blikat další číslice (minuty) zobrazení času a ty můžete také změnit výše popsaným způsobem. > Po každém dalším nastavení stiskněte tlačítko OK, abyste přešli k dalšímu nastavení. > Výše popsaným způsobem pokračujte s nastavením data. > Po skončení všech nastavení a posledním stisknutí tlačítka OK se na displeji zobrazí... -
Page 468: Nastavení Formátu Času
[Alle Quellen] (Všechny zdroje) (aktualizace přes DAB+ a FM) [Update von DAB] (Aktualizovat přes DAB) (aktualizace pouze přes DAB+) [Update von FM] (Aktualizovat přes FM) (aktualizace pouze přes VKV) [Kein Update] (Žádná aktualizace) (datum a čas se musí zadat manuálně, viz bod 12.1.1). -
Page 469: Nastavení Formátu Data
12.1.4 Nastavení formátu data Ve vnořené nabídce Datumsformat einst. (Nast. formátu data) můžete stanovit formát zobrazení data. > Stiskněte tlačítko MENU a pomocí tlačítek < nebo > zvolte položku [Uhrzeit] (Čas). > Stiskněte tlačítko OK. > Pomocí tlačítek < nebo > zvolte položku [Datumsformat einst.] (Nastavení formátu data) a stiskněte tlačítko OK. -
Page 470: Jas Displeje
12.2 Jas displeje Můžete nastavit jas displeje jak pro používání, tak pro pohotovostní režim (standby, k dispozici pouze v případě, že je rádio zapojené do elektrické sítě). > Stiskněte tlačítko MENU a pomocí tlačítek < nebo > zvolte položku [Helligkeit] (Jas). -
Page 471: Jazyk
[Auto-Dimm] (Automatické stmívání) automaticky ztlumí displej (při zvolení možnosti [Ein] (Zap)) po 10 sekundách bez ovládání rádia na hodnotu jasu Niedrig (Nízký). Pokud zvolíte možnost [Aus] (Vyp), svítí displej trvale s jasem, který je nastavený v části [Betrieb] (Provoz). Pro uložení nastavení stiskněte tlačítko OK. Pro provoz na akumulátor jsou relevantní... -
Page 472: Tovární Nastavení
12.4 Tovární nastavení Pokud změníte umístění přístroje, například při stěhování, může dojít k tomu, že uložené stanice již nebude možné přijímat. Obnovením na tovární nastavení můžete v takovém případě všechny uložené stanice odstranit a pak spustit nové vyhledávání stanic. > Stiskněte tlačítko MENU a pomocí... -
Page 473: Verze Sw
12.5 Verze SW V části Verze SW můžete zjistit aktuálně nainstalovanou verzi softwaru. > Stiskněte tlačítko MENU a pomocí tlačítek < nebo > zvolte položku [SW-Version] (Verze SW). > Stiskněte tlačítko OK. Zobrazí se aktuální verze SW. 13 Čištění Abyste se vyvarovali nebezpečí úrazu elektrickým proudem, nesmíte přístroj čistit mokrým hadříkem nebo pod tekoucí... -
Page 474: Odstraňování Chyb
Displej čistěte pouze měkkým bavlněným hadříkem. V případě potřeby použijte bavlněný hadřík s malým množstvím nealkalického, zředěného mýdlového roztoku na bázi vody nebo alkoholu. Bavlněným hadříkem jemně otřete povrch přístroje. 14 Odstraňování chyb Pokud přístroj nepracuje správně, zkontrolujte jej podle následující tabulky. Příznaky Možná... -
Page 475: Technické Údaje / Pokyny Výrobce
Technické změny a omyly vyhrazeny. Způsoby příjmu DAB/DAB+, FM, Bluetooth Napájení AC Input: 100–240 V, 50/60 Hz DC Output: 5 V, 2 A (DIGITRADIO 2 S) DC Output: 5 V, 1 A (DIGITRADIO 2) Akumulátor 3,7 V/1050 mAh Li-Ion, nabíjecí proud max. 500 mA Doba používání z akumulátoru až 10... - Page 476 8 W (s napájecím zdrojem a nabitím akumulátoru DIGITRADIO 2) při provozu typicky: 1 W (50% hlasitost, bez nabití akumulátoru) Pohotovostní režim: < 0,5 W Vypnutí: < 0,4 W Provoz na akumulátor, vypnutí: < 0,3 mW Výstupní zvukový výkon 2x1 W RMS DIGITRADIO 2 S 1 W RMS DIGITRADIO 2...
- Page 477 Hmotnost 464 g DIGITRADIO 2S 365 g DIGITRADIO 2 Rozměry (Š x V x H) mm 245 x 109 x 47 DIGITRADIO 2 S 175 x 109 x 47 DIGITRADIO 2...