Publicité
Liens rapides
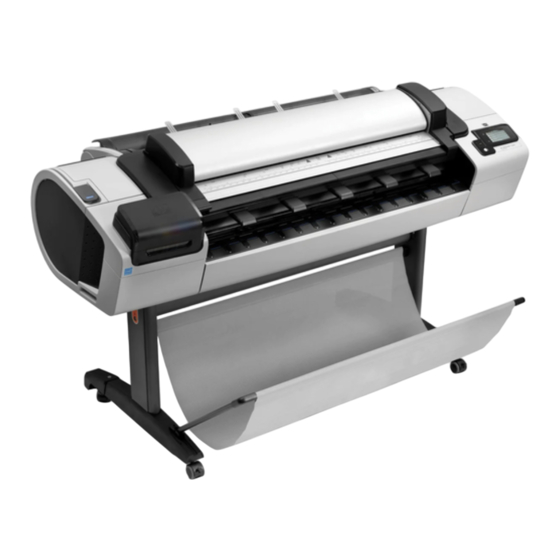
HP DESIGNJET
T2300 eMFP series
Product Assembly
EN
Instructions
Instructions d'assemblage
FR
du produit
Instrucciones de montaje
ES
del producto
Instruções de montagem
PT
do produto
© 2012 Hewlett-Packard Company
Large Format Division
Camí de Can Graells 1-21 · 08174
Sant Cugat del Vallès
Barcelona · Spain
All rights reserved
Printed in XXX
Hardware Setup:
EN
1- open the printer box
2- Stand assembly
3- Unpack more components
4- Power and network configuration
5- Printhead and cartridge setup
Software setup:
Experience HP Designjet cloud printing, using free
HP Designjet ePrint & Share. Now, it's easy to print
large-format documents from virtually anywhere,
using your laptop, printer touchscreen, iPhone®, or
iPad®.
Installation du matériel :
FR
1- Ouverture du carton de l'imprimante
2- Assemblage du support
3- Déballage des autres composants
4- Configuration réseau et alimentation
5- Installation des têtes d'impression et des
cartouches
Installation du logiciel :
Découvrez l'impression sur le Cloud HP Designjet
avec le logiciel gratuit HP Designjet ePrint & Share.
Il est désormais facile d'imprimer des documents
grand format depuis quasiment n'importe où à
l'aide d'un ordinateur portable, de l'écran tactile de
l'imprimante, d'un iPhone® ou d'un iPad®.
Instalación del hardware:
ES
1- Apertura de la caja de la impresora
2- Montaje del soporte
3- Desembalaje de más componentes
4- Configuración de red y alimentación
5- Instalación del cabezal de impresión y el
cartucho
Instalación del software:
Experimente la impresión remota de HP Designjet,
mediante la solución gratuita HP Designjet ePrint &
Share. Ahora resulta muy fácil imprimir documentos
de gran formato desde prácticamente cualquier
lugar mediante un portátil, la pantalla táctil de la
impresora, un iPhone® o un iPad®.
Configuração de hardware:
PT
1- Abra a caixa da impressora
2 - Levante a montagem
3 - Retire mais componentes da embalagem
4 - Configuração de rede e energia
5 - Configuração de cartucho de tinta e cabeçotes
de impressão
Configuração de software:
Experimente a impressão na nuvem HP Designjet
usando o
HP Designjet ePrint & Share gratuito. Agora, é
fácil imprimir documentos em grandes formatos de
praticamente qualquer lugar usando olaptop, a tela
sensível ao toque da impressora, o iPhone® ou o
iPad®.
Publicité

Manuels Connexes pour HP DESIGNJET T2300 eMFP Série


Sommaire des Matières pour HP DESIGNJET T2300 eMFP Série
- Page 1 Software setup: Instructions d’assemblage Experience HP Designjet cloud printing, using free Instalación del software: HP Designjet ePrint & Share. Now, it’s easy to print Experimente la impresión remota de HP Designjet, du produit large-format documents from virtually anywhere, mediante la solución gratuita HP Designjet ePrint &...
- Page 2 Product working area Read these instructions carefully...What you will need for this procedure Before you start unpacking, consider where you are going • Because the product is heavy, you may need three people to unpack it. When more than one to put the assembled product.
- Page 3 Open the box Ouverture du carton Apertura de la caja Abra a caixa Lift up the sides and top of the product box, Remove the accessories from the product box. Remove the stand box. To do so you may and remove them from the product. You will find the documentation and software need two people, one at each end.
- Page 4 Stand assembly Assemblage du support Montaje del soporte Levante a montagem Dismantle the bottom of the product box by dis- You will find a calibration sheet and a clean- Remove the cross-brace and the 3 pieces of engaging each corner and then folding down ing cloth (to be used for cleaning the scanner packaging material from each end of the the sides so that they are out of the way.
- Page 5 4+4=8 Place the two pieces of packaging material on A screwdriver and 22 screws are provided Attach each leg of the stand to the cross-brace, Make sure you have used 4 screws the floor, and slot in the 3rd piece to join them in the stand box: 16 screws to assemble the using two screws on the outside of the leg and in each leg.
- Page 6 180° Attach a foot to each leg, using four screws in Remove the packing tape. Remove the small Return to the main body of the product, care- Remove the small flaps from each of the foam each foot. First fit all four screws loosely, then flaps from each of the foam end pieces.
- Page 7 Remove the orange tape from the transparent Open the transparent covering and remove the Lift the stand, keeping it upside down. There is a round yellow button protruding from covering that protects the product. desiccant bag from the top of the product. the top of one stand leg, and a square green button protruding from the top of the other leg.
- Page 8 90° Place the stand on the product slowly and When the legs are correctly located on the Check that the wheels on the stand are locked. Rotate the product 90 degrees. IMPORTANT: carefully, so that the colored buttons on the product, attach them to the product using two At this point you will have two spare screws.
- Page 9 101.2kg Hold the product by the foam end pieces and Remove the foam end pieces. Remove the transparent covering from the Unlock the brake lever on each of the four by the center rear, and rotate it until it stands product.
- Page 10 Lay out the components of the basket. Fit the basket supports to the stand legs, one to Fit the two short tubes to the product’s feet, Attach the basket’s front tube to the two short each leg. one on the front of each foot. Each tube tubes on each foot.
- Page 11 Unpack more components Déballage des autres composants Desembalaje de más componentes Retire mais componentes da embalagem Rest the basket’s rear tube on the supports that The basket is now complete. Remove all the orange tape pieces from the you have just fitted to each leg of the stand. product, except for the ones coming from inside the product.
- Page 12 Press the ink cover firmly into place until you Check that the ink cover is properly placed. Raise the scanner by lifting the lever on the left You will see a cardboard support attached to hear that it clicks. hand-side of the product. the product with tape.
- Page 13 90º 90º Turn the cardboard support 90° to the right. Carefully lift the cardboard support up and out Inside the right-hand side of the product, you Remove the cardboard carefully. of the product. It will not be needed again; will see a piece of cardboard. you can discard it.
- Page 14 Power and network configuration Configuration réseau et alimentation Configuración de red y alimentación Configuração de rede e energia Connect the network cable or a certified USB If you find a USB flash drive in a plastic bag Connect the power cable to the product’s 2.0 cable to the appropriate socket on the inside the box, it contains the latest Firmware.
- Page 15 Look for a product number label and stick it at Look for the product name plate and stick it at On the front panel, the HP logo appears. switch just above the power socket. Remove the the back right-hand side of the product.
- Page 16 Printhead and cartridge setup Installation des têtes d’impression et des cartouches Instalación del cabezal de impresión y el cartucho Configuração de cartucho de tinta e cabeçotes de impressão Open the cover on the left-hand side of the Insert the ink cartridges one by one. Each The product checks for the presence of ink product.
- Page 17 When you have inserted all of the ink The cartridges must be inserted the right way Open the window and grasp the blue handle Pull the blue handle towards you as far as it around: the ink outlet in the catridge should cartridges correctly, the product must prepare of the printhead cover.
- Page 18 Lift the handle up to open the printhead cover. The setup printheads exist only to prevent the Remove and discard all orange setup print- Press the OK key on the front panel when you The front panel prompts you for the next step: escape of ink during ink cartridge installation.
- Page 19 Unwrap each printhead and remove all Insert the printheads one by one. Each Push each printhead into the slot until it clicks Pull the blue handle towards you as far as it orange parts. printhead is marked with its own colors, and into place.
- Page 20 Note: for HP Designjet ePrint & Share you will need to perform the installation with the PC connected to minutes depending on the condition of the printheads and of the environment.
- Page 21 If the blue removable stop is on the spindle, When the front panel prompts you to load pa- Push the removable stop towards the roll as far From the front of the product, place the spindle per for printhead alignment: Take the spindle, remove it.
- Page 22 Feed the leading edge of the paper into the Media load for lower roll Remove the spindle by lifting out first the right- If the blue removable stop is on the spindle, product until the product takes hold of it. Do Go to the rear of the product, and remove hand end, then the left.
- Page 23 Push the removable stop towards the roll as far From the back of the product, place the Feed the leading edge of the paper into the The product will proceed to align the print- heads. This process involves printing, and as it will go.
- Page 24 This free service makes it easy to access, view, and re-print an exact copy of projects from virtually anywhere, using smartphones or tablets. 2 - HP ePrint is a HP web service that allows you to print by simply attaching a PDF, or other print-ready file, to an email and send it to your printer’s dedicated address.
- Page 25 1 - HP Designjet ePrint & Share allows you to automatically save a copy of all your prints in a cloud. Additionally, now it is easy to access, view, and re-print an exact copy of projects from virtually anywhere, using...
- Page 26 The connectivity wizard will now start and A screen appears explaining what steps you The connectivity wizard will help you configure Your information will be verified, when take you step by step through connecting your will need to complete, click ´Continue´. your LAN and Internet connection, verify the complete, click ´OK´.
-
Page 27: Important
A conexão com a Internet será verificada. Ao pour personnaliser l’adresse électronique de A conexão com a Internet será habilitada. Ao concluir, clique em “OK”. A conectividade com o HP Designjet ePrint & l’imprimante. concluir, clique em “Continuar”. Share será verificada agora, prossiga. - Page 28 The firmware update screen will now appear, Your information will be verified, when A final confirmation screen appears, telling Any firmware updates will automatically click ´Continue´. complete, click ´OK´. you that you have completed the process, click download and install on your system. Note: If ´Continue´.
- Page 29 Note: for HP Designjet ePrint & Share you will need to perform the installation with the PC connected to Félicitations ! HP Designjet ePrint & Share et HP ePrint sont activés sur votre imprimante. Veuillez Internet.
- Page 30 (you will need the printer code and an account at the HP ePrint Center). Facultatif : Gestion de la sécurité de l’imprimante ePrinter dans ePrint Center. Lorsque vous activez les services Web, l’imprimante est en mode déverrouillé, ce qui signifie que quiconque connaissant...
- Page 31 You can now, or at some later time, color-calibrate the paper type that you intend to use in the 1. Return to home screen 2. Go back to previous screen product. Color calibration is recommended for accurate color printing. It can be started from the Product Utility program installed as part of your product software, or from the front panel’s Image 3.
- Page 32 5. Dans le serveur Web incorporé du produit, cliquez de indicar. guia Configuração e, então, Digitalizar para rede. the HP Utility, select the Settings tab and then Scan to sur l’onglet Configuration, puis sélectionnez Numériser 5. En el servidor web incorporado del producto, Como alternativa, no HP Utility, selecione a guia network.
- Page 33 Insert the HP Start Up Kit DVD into your com- Inserte el DVD del Kit de iniciación de HP en el Insira o DVD do Kit de inicialização HP no puter. Insérez le DVD du Kit de démarrage HP dans equipo.
- Page 36 Nothing herein should be construed as constituting an additional warranty. HP shall not be liable for techni- cal or editorial errors or omissions contained herein.