Publicité

Les langues disponibles

Les langues disponibles

Liens rapides

A2397-3.2 en/de/fr
Instructions for use
Gebrauchsanweisung
Instructions d'emploi
Optical strain gages
Optische Dehnungs-
messstreifen
Jauges d'extensométrie
optiques
K-OP

Publicité

Table des Matières
loading

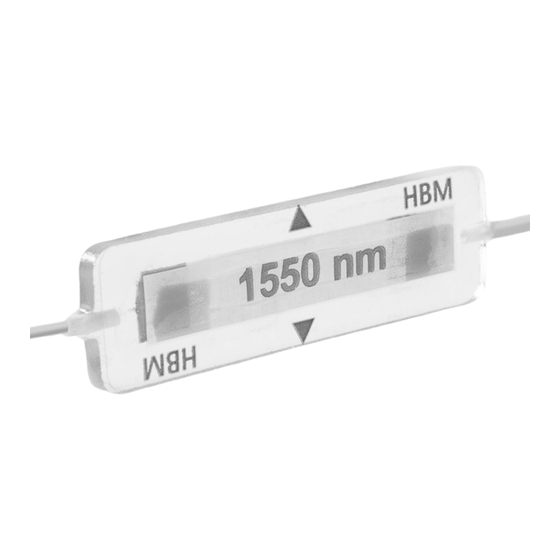
Sommaire des Matières pour HBM K-OP

  • Page 1 Instructions for use Gebrauchsanweisung Instructions d’emploi Optical strain gages Optische Dehnungs- messstreifen Jauges d’extensométrie optiques K-OP A2397-3.2 en/de/fr...
  • Page 2 English ..........Page 3 ...
  • Page 3: Table Des Matières

    Installing optical strain gages Contents Page Preparing the installation area ....... . Marking the measuring point .
  • Page 4: Preparing The Installation Area

    Installing optical strain gages NOTE Optical strain gages from HBM can be installed using the same processes and materials as for metal foil strain gages. Please comply with the ”Notes on strain gage application” document, or the instructional film, which is available on DVD.
  • Page 5 Installing optical strain gages Prepare the test object for installation using Z70 adhesive by roughening the surface using emery cloth of grain size 180...240 (figure 1.2). When using X60 adhesive, select grain size 180. Fig. 1.2: Roughening the surface of the measuring body In the next step, the roughened installation surface is cleaned with RMS1 and a non-woven pad, see Fig.
  • Page 6: Marking The Measuring Point

    Installing optical strain gages Marking the measuring point In the ideal case, an empty ball point pen cartridge is recommended for marking the installation point. The length of the marking line should be approx. 60 mm in the measurement direction. A vertical marking line, approx. 40 mm long, must be drawn starting at the center of the installation point, see Fig.
  • Page 7: Installation Of Optical Strain Gages With Potting (Standard)

    Installing optical strain gages Installation of optical strain gages with potting (Standard) 3.1 Positioning optical strain gages The optical strain gage is carefully packed in a protective wallet inside a box. Please note the following unpacking steps in order not to damage the glass fibers of the optical strain gage, see Fig.
  • Page 8 Installing optical strain gages Fig. 3.1.3: Remove both adhesive strips to take out the optical strain gage Fig. 3.1.4: Optical strain gage prior to removal from the protective A2397-3.2 en/de/fr...
  • Page 9 Installing optical strain gages Fig. 3.1.5: Unpacked optical strain gage with installation aid Fig. 3.1.6: Removing the protective film from the strain gage  Now transfer the optical strain gage with the Teflon installation aid to the measuring point, see Fig. 3.1.7. The fibers help to align the strain gage. A2397-3.2 en/de/fr...
  • Page 10 Installing optical strain gages Fig. 3.1.7: Fix the outgoing fibers to relieve the strain in a distance of approx. 20 cm After alignment, fix the outgoing fibers in place with polyimide adhesive tape (Order No. 1-Klebeband) in order to protect the fibers against mechanical influences. NOTE If the fibers form an arch when laid, the bend radius must not be less than 25 The fiber may be bent only after having been fixed with X60 superglue (see figure...
  • Page 11: Installation Of Standard Strain Gages With Z70 Superglue

    Installing optical strain gages 3.2 Installation of standard strain gages with Z70 superglue Fig. 3.2.1: Installation aid fixed in place  Have the adhesive Z70 and a hand-sized piece of Teflon film ready at hand (Order No. 1-Teflon). Use the installation aid as a hinge for the optical strain gage.
  • Page 12 Installing optical strain gages Fig. 3.2.3: Gluing on the optical strain gage  It is recommended to wait five minutes before removing the Teflon film. Subsequently, the fibers close to the optical strain gage must be fixed to the surface for strain relief with two drops X60 adhesive, see Fig. 3.2.3. Fig.
  • Page 13 Installing optical strain gages Fig. 3.2.5: Removing the adhesive strips Fig. 3.2.6: Loosening the foil A2397-3.2 en/de/fr...
  • Page 14 Installing optical strain gages  If the Teflon installation aid is stuck to the measuring body, carefully release it using a scalpel or with tweezers, see Fig. 3.2.7.  Fig. 3.2.7: Removing the Teflon installation aid Fig. 3.2.8: Completed installation of the optical strain gage A2397-3.2 en/de/fr...
  • Page 15: Installation Of Standard Strain Gages With X60 Superglue

    Installing optical strain gages 3.3 Installation of standard strain gages with X60 superglue Preparation and positioning of the optical strain gage on the measurement object are identical to the procedure described for Z70 superglue. Fig. 3.3.1: Making a hinge from adhesive tape: Fixing the optical strain gage with installation aid and adhesive tape A mask is required when applying X60 superglue.
  • Page 16 Installing optical strain gages Fig. 3.3.3: Mixing X60 adhesive Apply a generous amount of adhesive to the installation point. Fig. 3.3.4: Applying the adhesive  Use one of the enclosed small cellophane -sheets to carefully press on the adhesive. Press with a rolling motion from the center to the edges. A2397-3.2 en/de/fr...
  • Page 17 Installing optical strain gages  Fig. 3.3.5: Rolling out the adhesive with your finger. Use the enclosed cellophane as a separating layer. The adhesive escaping in the longitudinal direction fixes and secures the fiber.  You can remove the cellophane as soon as the residual adhesive in the mixing container has cured (after approx.
  • Page 18 Installing optical strain gages Fig. 3.3.7: Removing the mask The last step now is to remove the fixing. To do this, first peel off the adhesive tape as far as the edge of the adhesive. Then pull off the remaining adhesive tape at an acute angle.
  • Page 19 Installing optical strain gages  Fig. 3.3.9: Removing the Teflon installation aid with flat tweecers Installation is now complete. After about 30 minutes, you can use the measuring point, or attach installation protection. A2397-3.2 en/de/fr...
  • Page 20: Installat. Of Optical Strain Gages Without Potting (Optional)

    Installat. of optical strain gages without potting (optional) 4.1 Positioning optical strain gages HBM optical strain gages are carefully packaged. Please follow the instructions below, to avoid damaging or destroying the fiberglass of the strain gage. The strain gage is placed in a protective wallet in cardboard packaging, to protect it during transportation.
  • Page 21 Installing optical strain gages Fig. 4.1.3: Strain gage with installation aid, without protective wallet Remove the protective film from the back of the optical strain gage (Fig. 4.1.4). Fig. 4.1.4: Removing the protective film Then transfer the optical strain gage with the installation aid to the measurement object.
  • Page 22 Installing optical strain gages NOTE The fiber may be bent only after having been fixed with X60 superglue (see figure 4.2.7), however, it must not be bent at the point where the fiber protrudes from the strain gage or the splice. If the fibers form an arch when laid, the radius must be no less than 25 mm.
  • Page 23 Installing optical strain gages Fig. 4.1.6: Removing the adhesive strip in the direction of the fibers Use a scalpel to cut the adhesive tape on the strain gage close to the installation protection, as shown in Fig. 4.1.7. Fig. 4.1.7: Cutting the adhesive strip on the installation aid Now carefully remove the installation aid.
  • Page 24 Installing optical strain gages Fig. 4.1.8: Removing the installation aid Fig. 4.1.9: Removing the installation aid Make sure that you squeeze both edges of the installation aid together, so that the cut in the aid opens up (1). The aid is then easy to remove. A2397-3.2 en/de/fr...
  • Page 25: Installing Strain Gages With Z70 Superglue

    Installing optical strain gages 4.2 Installing strain gages with Z70 superglue Preparation and positioning of the optical strain gage on the measurement object are identical to the procedure described for X60 superglue. Fig. 4.2.1: Removing the installation aid Once the installation aid has been removed (see Fig. 4.2.1), a mask can be bonded on.
  • Page 26 Installing optical strain gages The superglue is now dripped onto the measurement object. Make sure that the Z70 falls onto the measurement object, to avoid inadvertent curing from pressure on the adhesive. Fig. 4.2.3: Allow about two drops of Z70 to fall onto the measurement object ...
  • Page 27 Installing optical strain gages Fig. 4.2.5: The requisite pressure is easily applied with the ball of your thumb  We recommend that you wait five minutes before removing the Teflon Immediately afterwards, use two drops of X60 to fix the fibers to protect them from mechanical influences.
  • Page 28 Now is the time to fit the protective cover. Now the hinge can be removed and installation protection fitted. As Z70, like all cyanacrylates, should be protected against moisture, HBM recommends using a protective cover. We recommend an initial layer of elastic SG250 silicone rubber (order no.: 1-SG250).
  • Page 29: Installing Strain Gages With X60 Superglue

    Installing optical strain gages 4.3 Installing strain gages with X60 superglue A mask is required when applying X60 superglue. First fix an additional  adhesive strip parallel to the optical strain gage on its Teflon installation aid. Fig. 4.3.1: Making a mask With a scalpel, cut the fixing adhesive strip close to the optical strain gage.
  • Page 30 Installing optical strain gages Fig. 4.3.3: Bonding the complete mask for the hinge from adhesive tape Mix the X60 as stated in the instructions for use. Fig. 4.3.4: Mixing X60 adhesive Apply a generous amount of adhesive to the installation point. A2397-3.2 en/de/fr...
  • Page 31 Installing optical strain gages Fig. 4.3.5: Applying the adhesive  Use one of the enclosed small cellophane -sheets to carefully press on the adhesive. Press with a rolling motion from the center to the edges.  Fig. 4.3.6: Rolling out the adhesive with your finger. Use the enclosed cellophane as a separating layer The adhesive escaping in the longitudinal direction fixes and secures the fiber.
  • Page 32 Installing optical strain gages  Fig. 4.3.7: Removing the cellophane once the adhesive has cured We recommend that you pull off the adhesive strips as soon as the  cellophane has been removed. Pull tight at an angle of 45 degrees. This will peel off the X60.
  • Page 33 Installing optical strain gages Fig. 4.3.9: Removing the fixing with flat tweezers. Note the acute angle. Installation is now complete. After about 30 minutes, you can use the measuring point, or attach installation protection. A2397-3.2 en/de/fr...
  • Page 34: Specifications

    Installing optical strain gages Specifications Design Glass fiber with Bragg grating, symmetrically embedded in modified acrylic resin Outside diameter of the glass fiber µm Core diameter of the glass fiber µm Diameter with buffer Dimensions SG with potting SG without potting (Standard) (on cust.
  • Page 35 Installation von optischen DMS Inhalt Seite Vorbereitung der Installationsfläche ......Anzeichnen der Messstelle ........Installation von optischen DMS mit Verguss (Standard) .
  • Page 36: Vorbereitung Der Installationsfläche

    Installation von optischen DMS HINWEIS Optische Dehnungsmessstreifen (DMS) von HBM lassen sich mit den gleichen Verfahren und Materialien wie Metallfolie-DMS installieren. Bitte beachten Sie hierzu die Schrift „Hinweise zum Applizieren von Dehnungsmessstreifen“ oder den Lehrfilm, der auf DVD erhältlich ist.
  • Page 37 Installation von optischen DMS Zur Vorbereitung des Werkstückes für die Installation mit dem Klebstoff Z70 muss die Oberfläche mit Schmirgelleinen der Körnung 180...240 aufgeraut werden (Bild 1.2). Soll der Klebstoff X60 verwendet werden, ist die Körnung 180 zu benutzen. Abb. 1.2: Aufrauen der Oberfläche des Messkörpers Im nächsten Schritt wird die aufgeraute Installationsfläche mit RMS1 und Vliesstoff-Pad gereinigt, siehe Abb.
  • Page 38: Anzeichnen Der Messstelle

    Installation von optischen DMS Anzeichnen der Messstelle Zum Anzeichnen der Installationsstelle wird eine im Idealfall leere Kugelschreibermine empfohlen. In Messrichtung sollte die Länge der Markierungslinie ca. 60 mm betragen. Von der Mitte der Installationsstelle aus wird senkrecht dazu eine insgesamt ca. 40 mm lange Markierungslinie gezogen, siehe Abb.
  • Page 39: Installation Von Optischen Dms Mit Verguss (Standard)

    Installation von optischen DMS Installation von optischen DMS mit Verguss (Standard) 3.1 Positionieren des optischen DMS Der optische DMS ist sorgfältig in einer Schutzmappe innerhalb eines Kartons verpackt. Bitte beachten Sie die folgenden Schritte beim Auspacken, um nicht die Glasfaser des optischen DMS zu beschädigen, siehe Abb.3.1.1 bis 3.1.4. Beispiel einer Verpackung für Ketten mit 1 oder 2 optischen DMS.
  • Page 40 Installation von optischen DMS Abb. 3.1.3: Entfernen beider Klebestreifen zur Entnahme des optischen DMS Abb. 3.1.4: Optischer DMS vor der Entnahme aus der Schutzhülle A2397-3.2 en/de/fr...
  • Page 41 Installation von optischen DMS Abb. 3.1.5: Ausgepackter optischer DMS mit Installationshilfe Abb. 3.1.6: Entfernen der Schutzfolie vom DMS  Übertragen Sie anschließend den optischen DMS mit Teflon -Installationshilfe auf die Messstelle, siehe Abb. 3.1.7. Die Faser dient dabei der Ausrichtung des DMS.
  • Page 42 Installation von optischen DMS Abb. 3.1.7: Fixieren der optischen Fasern mit Klebeband, ca 20 cm vom DMS entfernt Fixieren Sie nach dem Ausrichten die abgehenden Fasern mit Polyimid- Klebeband (Best.Nr. 1-Klebeband) um die Faser vor mechanischen Einflüssen zu schützen. HINWEIS Bei bogenförmigem Verlegen der Faser darf der Krümmungsradius nicht kleiner als 25 mm sein! Erst nach einer Fixierung mit dem Schnellklebstoff X60 (siehe Abb.
  • Page 43: Installation Der Standard-Dms Mit Schnellklebstoff Z70

    Installation von optischen DMS 3.2 Installation der Standard-DMS mit Schnellklebstoff Z70 Abb. 3.2.1: Fixierte Installationshilfe Halten Sie nun den Klebstoff Z70 und ein etwa handgroßes Stück  Teflon -Folie (Best.Nr.1-Teflon) bereit. Verwenden Sie die Installationshilfe als Scharnier für den optischen DMS. Lassen Sie 3 Tropfen des Klebstoffs Z70 auf die Messstelle unter den optischen DMS fallen, ohne mit dem Z70-Fläschchen die Oberfläche zu berühren, siehe Abb.
  • Page 44 Installation von optischen DMS Abb. 3.2.3: Ankleben des optischen DMS  Es empfiehlt sich die Teflon -Folie erst nach ca. 5 min zu entfernen. Im Anschluss sollte die Faser nahe dem optischen DMS zur Zugentlastung mit zwei Tropfen X60-Klebstoff an der Oberfläche befestigt werden, siehe Abb. 3.2.3. Abb.
  • Page 45 Installation von optischen DMS Abb. 3.2.5: Entfernen der Klebestreifen Abb. 3.2.6: Ablösen der Folie A2397-3.2 en/de/fr...
  • Page 46 Installation von optischen DMS  Sollte die Teflon -Installationshilfe an dem Messkörper haften bleiben, ist diese vorsichtig mit einem Skalpell oder Pinzette abzulösen, siehe Abb. 3.2.7.  Abb. 3.2.7: Ablösen der Teflon -Installationshilfe Abb. 3.2.8: Fertige Installation des optischen DMS A2397-3.2 en/de/fr...
  • Page 47: Installation Der Standard-Dms Mit Schnellklebstoff X60

    Installation von optischen DMS 3.3 Installation der Standard-DMS mit Schnellklebstoff X60 Die Vorbereitung und Positionierung des optischen DMS auf dem Messobjekt sind identisch mit der Vorgehensweise, wie Sie beim Schnellklebstoff Z70 beschrieben ist. Abb. 3.3.1: Herstellung eines Scharniers aus Klebeband: Fixieren des optischen DMS mittels Installationshilfe und Klebeband Zur Anwendung des Schnellklebstoffes X60 ist eine Maske erforderlich.
  • Page 48 Installation von optischen DMS Abb. 3.3.3: Mischen des Klebstoffes X60 Bringen Sie den Klebstoff in großzügiger Menge auf die Installationsstelle. Abb. 3.3.4: Auftragen des Klebstoffes  Benutzen Sie eines der beiliegenden Cellophan -Blättchen, um den Klebstoff sorgfältig anzudrücken. Hierzu rollende Bewegungen von der Mitte zu den Rändern ausführen.
  • Page 49 Installation von optischen DMS Abb. 3.3.5: Ausrollen des Klebstoffes mit dem Finger. Als Trennschicht ist das  beiliegende Cellophan zu verwenden. Der in Längsrichtung austretende Klebstoff fixiert und sichert die Faser.  Sie können das Cellophan entfernen, so bald der Klebstoffrest im Anrührgefäß...
  • Page 50 Installation von optischen DMS Abb. 3.3.7: Entfernen der Maske Als letzten Schritt ist nun die Fixierung zu entfernen. Hierzu ist zunächst das Klebeband bis zum Rand des Klebstoffes abzulösen. Das restliche Klebeband auf der Installationshilfe danach im spitzen Winkel mit einer flachen Pinzette vorsichtig abziehen.
  • Page 51 Installation von optischen DMS  Abb. 3.3.9: Entfernen der Teflon -Installationshilfe mit einer flachen Pinzette. Die Installation ist nun fertig gestellt. Nach etwa 30 Minuten kann die Messstelle benutzt, oder ein Installationsschutz angebracht werden. A2397-3.2 en/de/fr...
  • Page 52: Installation Von Optischen Dms Ohne Verguss (Optional)

    Installation von optischen DMS Installation von optischen DMS ohne Verguss (optional) 4.1 Positionieren des DMS Der optische DMS von HBM ist sorgfältig verpackt. Beachten Sie bitte folgende Hinweise, um die Glasfaser des DMS nicht zu beschädigen oder zu zerstören. Der DMS befindet sich mit seiner Schutzmappe in einer Kartonverpackung, die ihn während des Transportes schützt.
  • Page 53 Installation von optischen DMS Abb. 4.1.3: DMS mit Installationshilfe ohne Schutzmappe Entfernen Sie die Schutzfolie auf der Rückseite des optischen DMS (Abb. 4.1.4). Abb. 4.1.4: Entfernen der Schutzfolie Übertragen Sie dann den optische DMS mit der Installationshilfe auf das Messobjekt. Die Faser dient dabei der Ausrichtung des DMS. Fixieren und sichern Sie möglichst früh die abgehenden Fasern, da das Eigengewicht weiterer DMS in der Kette oder der Anschlußstecker zu Beschädigungen führen kann.
  • Page 54 Installation von optischen DMS HINWEIS Bei bogenförmigem Verlegen der Faser, darf der Radius nicht kleiner als 25 mm sein. Erst nach einer Fixierung mit dem Schnellklebstoff X60 darf die Faser gekrümmt werden, jedoch nicht am Faseraustritt des DMS bzw. am Spleiß. Fixieren Sie die Faser mit einem Klebeband o.ä.
  • Page 55 Installation von optischen DMS Abb. 4.1.6: Entfernen des Klebestreifens in Faserrichtung Mit einem Skalpell ist gemäß Abb. 4.1.7 das Klebeband am DMS in Nähe des Installationsschutzes zu schneiden. Abb. 4.1.7: Schneiden des Klebestreifens an der Installationshilfe Entfernen Sie jetzt die Installationshilfe vorsichtig. Hierzu ist die Installationshilfe wie gezeigt zusammen zudrücken.
  • Page 56 Installation von optischen DMS Abb. 4.1.8: Entfernen der Installationshilfe Abb. 4.1.9: Entfernen der Installationshilfe Es ist darauf zu achten, dass die Installationshilfe vollständig zusammen gedrückt wird, so dass der Schnitt in der Hilfe aufklappt (1). Dann lässt sich die Hilfe leicht entfernen. A2397-3.2 en/de/fr...
  • Page 57: Installation Der Dms Mit Schnellklebstoff Z70

    Installation von optischen DMS 4.2 Installation der DMS mit Schnellklebstoff Z70 Die Vorbereitung und Positionierung des optischen DMS auf dem Messobjekt sind identisch mit der Vorgehensweise, wie Sie beim Schnellklebstoff X60 beschrieben ist. Abb. 4.2.1: Entfernen der Installationshilfe Nach dem die Installationshilfe entfernt wurde (siehe Abb. 4.2.1) kann eine Maske geklebt werden.
  • Page 58 Installation von optischen DMS Jetzt wird der Schnellklebstoff auf das Messobjekt getropft. Es ist darauf zu achten, dass der Z70 auf das Messobjekt fällt, um ein ungewolltes Aushärten durch Druck auf den Klebstoff zu vermeiden. Abb. 4.2.3: Ca. zwei Tropfen Z70 auf das Messobjekt fallen lassen ...
  • Page 59 Installation von optischen DMS Abb. 4.2.5: Der nötige Druck kann einfach mit dem Handballen aufgebracht werden  Wir empfehlen fünf Minuten zu warten, dann kann das Teflon entfernt werden. Unmittelbar danach sollte die Faser mittels zweier Tropfen X60 gegen mechanische Einflüsse fixiert werden. ...
  • Page 60 Jetzt kann das Scharnier entfernt, und der Installationsschutz montiert werden. Da Z70 wie alle Cyanacrylate gegen Feuchtigkeit geschützt werden soll, empfiehlt HBM eine Schutzabdeckung. Hierzu empfehlen wir als erste Schicht den elastischen Silikongummi SG250 (Bestellnummer: 1-SG250). Als zweites kann das Abdeckband ABM75 sorgfältig aufgebracht werden.
  • Page 61: Installation Der Dms Mit Schnellklebstoff X60

    Installation von optischen DMS 4.3 Installation der DMS mit Schnellklebstoff X60 Zur Anwendung des Schnellklebstoffes X60 ist eine Maske erforderlich. Fixieren Sie hierzu zunächst einen zusätzlichen Klebestreifen parallel zum optischen DMS auf dessen Klebestreifen. Abb. 4.3.1: Anfertigen einer Maske Schneiden Sie mit einem Skalpell den fixierenden Klebestreifen eng am optischen DMS ab.
  • Page 62 Installation von optischen DMS Abb. 4.3.3: Kleben der vollständigen Maske für das Scharnier aus Klebeband Mischen Sie den X60 nach Gebrauchsanleitung. Abb. 4.3.4: Mischen des Klebstoffes X60 Bringen Sie den Klebstoff in großzügiger Menge auf die Installationsstelle. A2397-3.2 en/de/fr...
  • Page 63 Installation von optischen DMS Abb. 4.3.5: Auftragen des Klebstoffes  Benutzen Sie eines der beiliegenden Cellophan -Blättchen, um den Klebstoff sorgfältig anzudrücken. Hierzu rollende Bewegungen von der Mitte zu den Rändern ausführen. Abb. 4.3.6: Ausrollen des Klebstoffes mit dem Finger. Als Trennschicht ist das ...
  • Page 64 Installation von optischen DMS  Abb. 4.3.7: Entfernen des Cellophan nach dem Aushärten des Klebstoffes  Wir empfehlen, die Klebestreifen sofort nach Entfernen des Cellophan abzuziehen. Ziehen Sie straff in einem Winkel von 45 Grad. Hierdurch platzt der X60 ab. Abb.
  • Page 65 Installation von optischen DMS Abb. 4.3.9: Entfernen der Fixierung. Auf spitzen Winkel achten. Die Installation ist nun fertig gestellt. Nach etwa 30 Minuten kann die Messstelle benutzt, oder ein Installationsschutz angebracht werden. A2397-3.2 en/de/fr...
  • Page 66: Technische Daten

    Installation von optischen DMS Technische Daten Konstruktion in modifiziertes Acrylharz symmetrisch eingebettete Glasfaser mit Bragg-Gitter; in Kunststoff vergossen Außendurchmesser der Glasfaser µm Kerndurchmesser der Glasfaser, ca. µm Durchmesser mit Schutzhülle (Buffer), Abmessungen DMS mit Verguss DMS ohne Verguss (Standard) (auf Kundenwunsch) Länge 40"1 30"1...
  • Page 67 Installation von optischen DMS Anpressdruck bei Verwendung von X280 mit optischen DMS: 1 N/cm Erreichbare Lastwechselzahl abhängig von der Qualität der Installation und Dauerschwingfestigkeit des zu untersuchenden Bauteils. A2397-3.2 en/de/fr...
  • Page 68 Installation von optischen DMS A2397-3.2 en/de/fr...
  • Page 69 Installation de jauges optiques Sommaire Page Préparation de la surface d’installation ......Traçage du point de mesure .
  • Page 70: Préparation De La Surface D'installation

    Installation de jauges optiques REMARQUE Les jauges d’extensométrie optiques (jauges) de HBM s’installent de la même manière et avec les mêmes matériaux que les jauges métalliques. Veuillez tenir compte à ce sujet du document ”Consignes d’application de jauges d’extensométrie” ou du film d’apprentissage disponible sur DVD.
  • Page 71 Installation de jauges optiques En vue de préparer la pièce pour l’installation avec la colle Z70, la surface doit être passée à la toile émeri d’un grain compris entre 180 et 240 (fig. 1.2). En cas d’utilisation de la colle X60, le grain doit être de 180. Fig.
  • Page 72: Traçage Du Point De Mesure

    Installation de jauges optiques Traçage du point de mesure Pour tracer l’emplacement d’installation, il est conseillé d’utiliser un stylo à bille vide. La ligne repère doit mesurer env. 60 mm dans le sens de la mesure. Tracez ensuite une ligne repère d’env. 40 mm perpendiculaire à cette ligne en partant du milieu de l’emplacement d’installation (voir fig.
  • Page 73: Installation De Jauges Optiques Avec Scellement (Std.)

    Installation de jauges optiques Installation de jauges optiques avec scellement (std.) 3.1 Mise en place de la jauge optique La jauge optique est soigneusement emballée dans un carton, dans une enveloppe protectrice. Veuillez respecter les étapes suivantes lors du déballage afin de ne pas endommager les fibres de verre de la jauge optique (voir fig.
  • Page 74 Installation de jauges optiques Fig. 3.1.3: Retrait des deux bandes adhésives pour enlever la jauge optique Fig. 3.1.4: Jauge optique avant sa sortie de l’enveloppe protectrice A2397-3.2 en/de/fr...
  • Page 75 Installation de jauges optiques Fig. 3.1.5: Jauge optique déballée avec aide à l’installation Fig. 3.1.6: Retrait du film protecteur de la jauge  Installez ensuite la jauge optique avec l’aide à l’installation en téflon sur le point de mesure (voir fig. 3.1.7). La fibre sert ici à orienter la jauge. A2397-3.2 en/de/fr...
  • Page 76 Installation de jauges optiques Fig. 3.1.7: Fixation des fibres optiques à l’aide de ruban adhésif, à env. 20 cm de la jauge Après avoir positionné la jauge, fixez les fibres sortantes à l’aide de ruban adhésif polyimide (réf. 1-Klebeband) afin de protéger les fibres des sollicitations mécaniques.
  • Page 77: Installation De La Jauge Std. Avec De La Colle Rapide Z70

    Installation de jauges optiques 3.2 Installation de la jauge std. avec de la colle rapide Z70 Fig. 3.2.1: Aide à l’installation fixée  Préparez maintenant la colle Z70 ainsi qu’un film téflon de la taille d’une main environ (réf.1-Teflon). Utilisez l’aide à l’installation comme charnière pour la jauge optique.
  • Page 78 Installation de jauges optiques Fig. 3.2.3: Collage de la jauge optique  Il est conseillé de ne retirer le film téflon qu’au bout de 5 min environ. Il convient ensuite de fixer les fibres situées à proximité de la jauge optique avec deux gouttes de colle X60 afin de la décharger en traction (voir fig.
  • Page 79 Installation de jauges optiques Fig. 3.2.5: Retrait des bandes adhésives Fig. 3.2.6: Dégagement du film A2397-3.2 en/de/fr...
  • Page 80 Installation de jauges optiques  Si l’aide à l’installation en téflon devait rester collée à l’élément de mesure, elle doit être retirée prudemment à l’aide d’un scalpel ou d’une pincette (voir fig. 3.2.7).  Fig. 3.2.7: Détachement de l’aide à l’installation en téflon Fig.
  • Page 81: Installation De La Jauge Std. Avec De La Colle Rapide X60

    Installation de jauges optiques 3.3 Installation de la jauge std. avec de la colle rapide X60 La préparation et le positionnement de la jauge optique sur l’échantillon sont les mêmes que celles décrites pour la procédure avec la colle rapide Z70. Fig.
  • Page 82 Installation de jauges optiques Fig. 3.3.3: Mélange de la colle X60 Enduisez généreusement la surface d’installation de colle. Fig. 3.3.4: Application de la colle  Utilisez l’un des feuillets de cellophane fournis pour appuyer soigneusement sur la colle. Faire à cet effet des mouvements rotatoires du centre vers les bords.
  • Page 83 Installation de jauges optiques  Fig. 3.3.5: Etalement de la colle avec le doigt. Le cellophane fourni doit être utilisé en tant que couche séparatrice. La colle sortant dans la longueur fixe et bloque la fibre.  Vous pouvez retirer le cellophane dès que le résidu de colle a durci dans le récipient ayant servi à...
  • Page 84 Installation de jauges optiques Fig. 3.3.7: Retrait du masque La dernière étape consiste à enlever la fixation. A cet effet, décollez d’abord le ruban adhésif jusqu’au bord de la colle. Retirez ensuite prudemment le ruban adhésif restant sur l’aide à l’installation en angle aigu à l’aide d’une pincette plate.
  • Page 85 Installation de jauges optiques  Fig. 3.3.9: Retrait de l’aide à l’installation en téflon à l’aide d’une pincette plate. L’installation est maintenant terminée. Après 30 minutes, le point de mesure est utilisable ou une protection d’installation peut être appliquée. A2397-3.2 en/de/fr...
  • Page 86: Installation De Jauges Optiques Sans Scellement (En Opt.)

    Installation de jauges optiques sans scellement (en opt.) 4.1 Mise en place de la jauge d’extensométrie La jauge optique de HBM est soigneusement emballée. Veuillez tenir compte des consignes suivantes pour ne pas endommager ou détruire la fibre optique de la jauge.
  • Page 87 Installation de jauges optiques Fig. 4.1.3: Jauge avec aide à l’installation et sans enveloppe protectrice Retirez le film protecteur au dos de la jauge optique (fig. 4.1.4). Fig. 4.1.4: Retrait du film protecteur Transférez ensuite la jauge optique et l’aide à l’installation sur l’échantillon. La fibre sert ici à...
  • Page 88 Installation de jauges optiques REMARQUE Lors d’une pose des fibres en forme d’arc, le rayon ne doit pas être inférieur à 25 mm. Ce n’est qu’après avoir fixé les fibres avec la colle rapide X60 qu’elles peuvent être courbées, mais pas au niveau de la sortie de la fibre sur la jauge ou de l’épissure.
  • Page 89 Installation de jauges optiques Fig. 4.1.6: Retrait de la bande adhésive dans le sens des fibres A l’aide d’un scalpel, coupez le ruban adhésif au niveau de la jauge à proximité de la protection d’application (voir fig. 4.1.7). Fig. 4.1.7: Découpe de la bande adhésive au niveau de l’aide à l’installation Retirez maintenant prudemment l’aide à...
  • Page 90 Installation de jauges optiques Fig. 4.1.8: Retrait de l’aide à l’installation Fig. 4.1.9: Retrait de l’aide à l’installation Il convient de veiller à comprimer à fond l’aide à l’installation, de sorte que la découpe dans l’aide s’ouvre en se relevant (1). Cela permet de retirer aisément l’aide.
  • Page 91: Installation De La Jauge Avec De La Colle Rapide Z70

    Installation de jauges optiques 4.2 Installation de la jauge avec de la colle rapide Z70 La préparation et le positionnement de la jauge optique sur l’échantillon sont les mêmes que celles décrites pour la procédure avec la colle rapide X60. Fig.
  • Page 92 Installation de jauges optiques Mettez maintenant quelques gouttes de colle rapide sur l’échantillon. Il convient de veiller à ce que la colle Z70 tombe sur l’échantillon, afin d’éviter tout durcissement indésirable lié à une pression sur la colle. Fig. 4.2.3: Faire tomber env. 2 gouttes de Z70 sur l’échantillon ...
  • Page 93 Installation de jauges optiques Fig. 4.2.5: La pression requise peut être appliquée simplement avec la paume de la main  Nous recommandons d’attendre 5 minutes avant de retirer le téflon Immédiatement après, il faut fixer les fibres à l’aide de 2 gouttes de colle X60 afin de les protéger contre les sollicitations mécaniques.
  • Page 94 Vous pouvez à présent retirer la charnière et poser la protection d’installation. Comme la colle Z70 doit être protégée contre l’humidité, au même titre que tous les cyanoacrylates, HBM recommande l’utilisation d’un cache de protection. A cet effet, nous recommandons d’appliquer en première couche le gel silicone SG250 (référence : 1-SG250).
  • Page 95: Installation De La Jauge Avec De La Colle Rapide X60

    Installation de jauges optiques 4.3 Installation de la jauge avec de la colle rapide X60 L’utilisation de la colle rapide X60 nécessite de se servir d’un masque. Collez d’abord à cet effet une bande adhésive supplémentaire parallèle à la jauge optique sur la bande adhésive de cette dernière.
  • Page 96 Installation de jauges optiques Fig. 4.3.3: Collage du masque complet pour la charnière en ruban adhésif Mélangez la colle X60 conformément à son mode d’emploi. Fig. 4.3.4: Mélange de la colle X60 Enduisez généreusement la surface d’installation de colle. A2397-3.2 en/de/fr...
  • Page 97 Installation de jauges optiques Fig. 4.3.5: Application de la colle  Utilisez l’un des feuillets de cellophane fournis pour appuyer soigneusement sur la colle. Faire à cet effet des mouvements rotatoires du centre vers les bords.  Fig. 4.3.6: Etalement de la colle avec le doigt. Le cellophane fourni doit être utilisé...
  • Page 98 Installation de jauges optiques  Fig. 4.3.7: Retrait du cellophane à l’issue du durcissement de la colle Nous recommandons de retirer les bandes adhésives immédiatement après  le retrait du cellophane . Tirez fermement à 45 degrés. Ceci entraîne l’éclatement de la X60. Fig.
  • Page 99 Installation de jauges optiques Fig. 4.3.9: Retrait de la fixation. Veiller à l’angle aigu. L’installation est maintenant terminée. Après 30 minutes, le point de mesure est utilisable ou une protection d’installation peut être appliquée. A2397-3.2 en/de/fr...
  • Page 100: Caractéristiques Techniques

    Installation de jauges optiques Caractéristiques techniques Construction Fibres de verre en réseau de Bragg noyées de manière symétrique dans de la résine acrylique modifiée Diamètre extérieur des fibres de verre µm Diamètre du noyau des fibres de verre µm Diam. avec gaine de prot. (tampon), env. Dimensions de la jauge optique Jauge avec Jauge sans scelle-...
  • Page 101 Installation de jauges optiques Pression appliquée en cas d’utilisation de la X280 avec des jauges optiques : 1 N/cm Nombre de charges alternées pouvant être atteint en fonction de la qualité de l’installation et de la résistance à la fatigue du composant à étudier. A2397-3.2 en/de/fr...
  • Page 102 Hottinger Baldwin Messtechnik GmbH 7-2001.2397 Postfach 10 01 51, D-64201 Darmstadt Im Tiefen See 45, D-64293 Darmstadt Tel.: +49 6151 803-0 Fax: +49 6151 8039100 Email: support@hbm.com Internet: www.hbm.com A2397-3.2 en/de/fr...

Table des Matières