Horizon Hobby HANGAR 9 Tiger 30cc Manuel D'utilisation
Masquer les pouces
Voir aussi pour HANGAR 9 Tiger 30cc:
- Manuel d'utilisation (84 pages) ,
- Manuel d'utilisation (72 pages)

Manuels Connexes pour Horizon Hobby HANGAR 9 Tiger 30cc


Sommaire des Matières pour Horizon Hobby HANGAR 9 Tiger 30cc
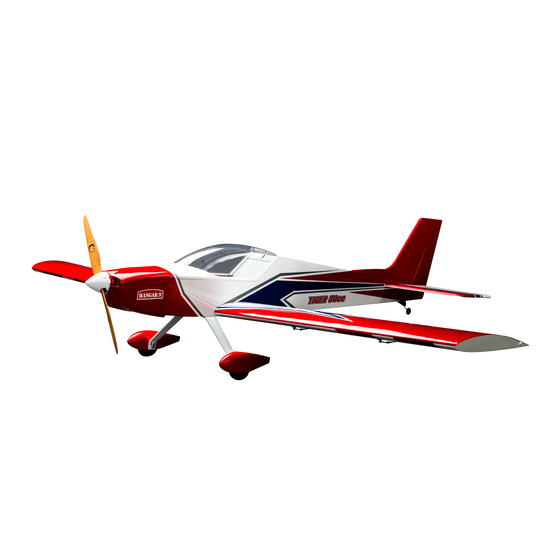
- Page 1 Tiger 30cc Instruction Manual Bedienungsanleitung Manuel d’utilisation Manuale di Istruzioni HAN2370...
-
Page 2: Notice
Horizon Hobby, LLC. This manual contains instructions for safety, operation and maintenance. It is essential to read and follow all the instructions and warnings in the manual, prior to assembly, setup or use, in order to operate IMPORTANT FEDERAL AVIATION ADMINISTRATION (FAA) INFORMATION correctly and avoid damage or serious injury. -
Page 3: Table Des Matières
TABLE OF CONTENTS REPLACEMENT PARTS Notice ..................................2 Part # Description Meaning of Special Language ..........................2 HAN237001 Fuselage Safety Warnings and Precautions ..........................2 HAN237002 Wing Set Safe Operating Recommendations ...........................2 HAN237003 Tail Set Before Starting Assembly ............................2 HAN237004 Cowling Important Federal Aviation Administration (FAA) Information ..................2 Replacement Parts ..............................3 HAN237005 Canopy Top Hatch... -
Page 4: Required For Completion, All Power Options
REQUIRED FOR COMPLETION, ALL POWER OPTIONS TOOLS REQUIRED # Required Part # Description Description SPMA3002 Heavy-Duty Servo Extension 9-inch Box or open end wrench: 10mm, 7/16-inch, 1/2-inch SPMA3004 Heavy-Duty Servo Extension 18-inch Clamps SPMAR8360T AR8360T DSMX 8-Channel AS3X & SAFE Telemetry Receiver Covering iron Cutoff wheel for rotary tool Drill... -
Page 5: Removing Wrinkles
REMOVING WRINKLES HINGING THE AILERONS The covering of your model may develop wrinkles during shipping. Use a covering iron (HAN101) with a sealing iron Use a straight edge to align the aileron to the wing tip. sock (HAN141) to remove them. Start with a lower heat setting and use caution while working around areas where the colors overlap to prevent separating the colors. - Page 6 Insert the 2-inch (51mm) long carbon pins in the holes in the 11. Apply epoxy in the holes in the aileron. fl ap. The pins will be centered, with 1-inch (25mm) of the pin exposed from the end of the fl ap. Check the fi...
-
Page 7: Aileron Servo Installation
16. Place a T-pin in the center of each hinge. This will keep the 21. Break in the hinges by fl exing the control surface through its hinges centered when they are installed. range of motion in both directions. 17. Fit the hinge in the hinge slot. Align the slot in the hinge with the hole in the wing. - Page 8 25. Thread an M2 nut on each screw. Tighten the screws using 30. Install the grommets and eyelets in the servos. Follow any a #1 Phillips screwdriver while holding the nuts with pliers. instructions included with the servo. Do not over tighten the hardware and damage the underlying wood.
- Page 9 35. Remove the screws, then apply a small amount of thin CA to 40. Use a 1/8-inch (3mm) drill bit to enlarge the hole in the servo harden the threads made in the previous step. arm. 36. After the CA has fully cured, secure the servo using the 41.
-
Page 10: Flap Servo Installation
45. Attach the ball end to the servo arm using an M3 x 15 socket 49. Adjust the linkage as necessary to align the aileron with the head cap screw, two M3 washers and an M3 locknut. fl ap. 50. Once adjusted, tighten the nut to keep the clevis from vibrating loose. -
Page 11: Stabilizer Installation
54. Route the lead for the fl ap and aileron servos through the 58. Secure the wing to the fuselage using the two 1/4-20 x 2 inch wing and out the hole in the top of the wing. nylon bolts. Tighten the bolts, securing the wing. STABILIZER INSTALLATION 59. -
Page 12: Vertical Fin Installation
63. Remove the stabilizer from the fuselage. Use a hobby knife 68. Use a felt-tipped pen to trace the outline of the fuselage on and #11 blade to remove the covering from the stabilizer both sides of the fi n. on both the top and bottom, 1/8-inch (3mm) inside the lines drawn. -
Page 13: Elevator Installation
73. Remove the fi n from the fuselage. Mix 1 ounce (30ml) of 78. Mount the two elevator servos in the fuselage. Position the 30-minute epoxy and use an epoxy brush to apply epoxy servos toward the outside of the fuselage and the servo to the exposed wood inside the rear of the fuselage. -
Page 14: Rudder Servo Installation
87. Mix a small amount of 5-minute epoxy and use it to glue the tail wheel steering tube in the rudder. Apply epoxy to the bushing. RUDDER SERVO INSTALLATION 88. Apply epoxy in the slot on the bottom of the rudder. 83. -
Page 15: Landing Gear Installation
92. Center the bracket on the fuselage and use a felt-tipped pen 97. Slide the wheel on the axle. Secure the wheel using a wheel to mark the positions for the three mounting screws on the collar and 3mm setscrew. Place a drop of thread lock on the bottom of the fuselage. -
Page 16: Electric Motor Installation
105. Attach the motor box to the fi rewall using four M5 x 25 socket head cap screws, four M5 washers and four M5 fl anged nuts. 102. Secure the receiver battery in the fuselage. 106. Draw the blind nuts into the back of the motor box using an M4 x 25 socket head cap screw and M4 washer. -
Page 17: Gas Engine Installation
109. Secure the batteries in the fuselage using the hook and loop 112. Check the fi t of the engine spacer to the standoffs on the straps. We recommend applying hook and loop tape to the engine. Note the locations of the screws. forward tray and batteries to keep the batteries from sliding when installed in the fuselage. -
Page 18: Fuel Tank Installation
116. Mount the throttle servo in the fuselage. Position the servo 121. Slide the pushrod through the tube from the front. Attach the toward the outside of the fuselage and the servo output clevis to the carburetor arm, then slide the retainer over the facing the rear of the fuselage. -
Page 19: Cowling Installation
126. Insert the clunks into the tank. Install the larger clunk, then COWLING INSTALLATION the small clunk. Mark the lines from the tank so the fuel lines can be identifi ed from outside the tank. Tighten the screw in 131. Slide the cowling over the engine. Trim the cowl using hobby scissors to fi... -
Page 20: Canopy Installation
136. Slide the cowling on the fuselage, making sure the card stock 141. Use the screws from the spinner to secure the spinner cone markers are on the outside of the cowl. Install the spinner to the back plate. Position the propeller so it does not contact backplate tightly against the engine drive washer. -
Page 21: Optional Servo Locations
146. Use canopy glue to secure the canopy to the canopy hatch. CENTER OF GRAVITY Use low-tack tape to hold the hatch securely while the An important part of preparing the aircraft for fl ight is properly balancing the model. The Center of Gravity range adhesive cures. -
Page 22: Control Throws
(iii) modifi cation of or to Right inches (50.8mm) any part of the Product, (iv) attempted service by anyone other than a Horizon Hobby authorized service center, (v) Product Rudder Left inches (25.4mm) -
Page 23: Warranty And Service Contact Information
Union D 22885 Barsbüttel, Germany Sales: Horizon Hobby GmbH +49 (0) 4121 2655 100 When sending product into Horizon, please include your RMA number, a list of the included items, and a brief summary of the problem. A copy of your original sales receipt must be included for warranty consideration. Be sure your name, address, and RMA number are clearly written on the outside of the shipping carton. -
Page 24: Academy Of Model Aeronautics National Model Aircraft Safety Code
ACADEMY OF MODEL AERONAUTICS NATIONAL MODEL AIRCRAFT SAFETY CODE Effective January 1, 2018 A model aircraft is a non-human-carrying device capable of sustained fl ight within visual line of sight of the pilot or spotter(s). It may not exceed limitations of this code and is intended exclusively for sport, recreation, education and/or competition. -
Page 25: Empfehlungen Zum Sicheren Betrieb
Halten Sie lose Gegenstände, die sich im Propeller verfangen können, immer vom Propeller fern. Dazu gehören lose Alle Anweisungen, Garantien und andere Begleitdokumente können von Horizon Hobby, LLC nach eigenem Ermessen Kleidung oder andere Gegenstände wie Stifte und Schraubendreher. Halten Sie Ihre Hände vom Propeller fern, da es zu geändert werden. -
Page 26: Ersatzteile
INHALTSVERZEICHNIS ERSATZTEILE Hinweis .................................25 Teile-Nr. Beschreibung Spezielle Bedeutungen ............................25 HAN237001 Rumpf Warnungen und Sicherheits-vorkehrungen ......................25 HAN237002 Tragfl ächen Empfehlungen zum sicheren Betrieb ........................25 HAN237003 Heck Vor dem Zusammenbau ............................25 HAN237004 Motorhaube Ersatzteile ................................26 Sonderzubehör ..............................26 HAN237005 Kabinenhaube Zur Fertigstellung erforderlich, Alle Antriebsoptionen ....................27 HAN237006 Radverkleidung Zur Fertigstellung erforderlich, Montage des Benzinmotors ..................27... -
Page 27: Zur Fertigstellung Erforderlich, Alle Antriebsoptionen
ZUR FERTIGSTELLUNG ERFORDERLICH, ALLE ANTRIEBSOPTIONEN WERKZEUGE ERFORDERLICH Erforderliche Teile-Nr. Beschreibung Beschreibung Anz. Ring- oder Maulschlüssel: 10 mm, 11 mm (7/16 Zoll), 13 mm (1/2 Zoll) SPMA3002 Servokabelverlängerung 230 mm (9 inch) Schraubzwinge SPMA3004 Servokabelverlängerung 460 mm (18 inch) Folienbügeleisen SPMAR8360T AR8360T DSMX 8-Kanal AS3X & SAFE Telemetrie-Empfänger Trennscheibe Bohrer Bohrer- und Gewindebohrersatz, metrisch... -
Page 28: Falten Entfernen
FALTEN ENTFERNEN AUFHÄNGEN DER QUERRUDER Durch den Versand können an der Abdeckung Ihres Modells Falten entstehen. Mithilfe eines Heißsiegelgeräts Eine gerade Kante zum Ausrichten des Querruders auf die (HAN101) mit Folienbügeleisen-Schutzbezug (HAN141) können Sie diese entfernen. Fangen Sie mit einer niedrigen Tragfl... - Page 29 Die 51 mm (2 Zoll) langen Verbindungsstifte aus Kohlenstoff 11. Epoxid in den Löchern im Querruder auftragen. in die Löcher der Klappe einsetzen. Die Stifte werden zentriert, wobei 25 mm (1 Zoll) des Stiffts am Ende der Klappe herausstehen. Den Sitz der Stifte im Querruder prüfen. 12.
-
Page 30: Montage Des Querruder-Servos
16. Einen T-Stift in die Mitte jeder Aufhängung platzieren. So 21. Um die Aufhängungen einzuarbeiten die Steuerfl äche über bleiben die Aufhängungen zentriert, wenn sie installiert sind. ihren gesamten Bewegungsbereich in beide Richtungen biegen. 17. Die Aufhängung in den Aufhängungsschlitz einpassen. Den Schlitz in der Aufhängung auf das Loch in der Tragfl... - Page 31 25. Eine M2 Mutter auf jeder Schraube andrehen. Die Schrauben 30. Die Hülsen und Ösen in den Servos montieren. Die dem Servo mit einem Nr. 1 Kreuzschlitzschraubendreher festziehen und beigelegten Anweisungen befolgen. dabei die Mutter mit einer Zange festhalten. Die Hardware nicht zu fest anziehen, um das darunter liegende Holz nicht zu beschädigen.
- Page 32 35. Die Schrauben entfernen, eine kleine Menge dünnen CA- 40. Mit einem 3mm (1/8 Zoll) Bohrer das Loch im Servoarm Klebstoff zum Härten der im vorangegangen Schritt erzeugten vergrößern. Gewinde auftragen. 36. Nach dem vollständigen Härten des CA-Klebstoffs, den Servo 41. Eine M2-Mutter auf das eine Ende des 140mm (5 Zoll) mit den mit dem Servo bereitgestellten Schrauben sichern.
-
Page 33: Montage Des Klappen-Servos
45. Das Gelenkkopfende am Servoarm mit einer M3 x 15 49. Das Gestänge nach Bedarf anpassen, um das Querruder auf Zylinderkopfschraube, zwei M3 Unterlegscheiben und einer die Klappe auszurichten. M3 Kontermutter anbringen. 50. Nach dem Ausrichten die Mutter festziehen, um zu verhindern, dass sich der Gabelkopf aufgrund von Vibrationen löst. -
Page 34: Montage Des Stabilisators
54. Die Leitung für die Klappen- und Querruder-Servos durch den 58. Die Tragfl äche mit zwei 1/4-20 x 2 Nylon-Flügelschrauben Flügel und das Loch in der Oberseite des Flügels führen. am Rumpf anbringen. Die Schrauben festziehen und so die Tragfl äche sichern. MONTAGE DES STABILISATORS 59. -
Page 35: Montage Des Seitenleitwerks
63. Den Stabilisator vom Rumpf entfernen. Mit einem 68. Mit einem Filzstift den Umriss des Rumpfs auf beide Seiten Hobbymesser und einer Nr. 11-Klinge die Abdeckung des Seitenleitwerks übertragen. sowohl oben als auch unten, 3 mm (1/8 Zoll), innerhalb der gezogenen Linien vom Stabilisator entfernen. -
Page 36: Montage Des Höhenruders
73. Das Seitenleitwerk vom Rumpf entfernen. 30 ml (1 oz) 77. Die Kanzelabdeckung vor- und dann hochschieben, um sie 30-minütiges Epoxid mischen und mit einer Epoxidbürste vom Rumpf zu entfernen. Die Kanzelabdeckung zur Seite auf das freigelegte Holz innerhalb der Rückseite des Rumpfs legen. -
Page 37: Montage Des Servos Des Seitenruders
82. Den Vorgang für den verbleibenden Querruder-Servo 86. Das Servo des Seitenruders in den Rumpf einpassen und wiederholen. den Servoarm befestigen. So wird die richtige Position für das Servo des Seitenruders festgestellt. Servo im Rumpf montieren. 87. Eine kleine Menge 5-minütiges Epoxid mischen und das Spornrad-Lenkrohr im Seitenruder in Position kleben. -
Page 38: Montage Des Fahrwerks
91. Den Pinnenarm von der Spornradgruppe durch das Lenkrohr 96. Eine Anschlaghülse auf die Achse schieben. Einen Tropfen führen. Die Halterung liegt fl ach auf dem Rumpf auf. Wenn Gewindesicherung auf eine 3-mm-Feststellschraube nicht, den Pinnenarm vorsichtig biegen, bis die Halterung auftragen. -
Page 39: Montage Des Empfängers
MONTAGE DES EMPFÄNGERS MONTAGE DES ELEKTROMOTORS 101. Den Empfänger im Rumpf montieren. Einen beliebigen 104. Mit einem 5mm (13/64 Zoll) Bohrer die geeigneten Löcher für Funkempfänger mit Klettband im Rumpf anbringen. die Schrauben der Motorhalterung bohren. 105. Den Motorkasten mit vier M5 x 25 Zylinderkopfschrauben, vier M5 Unterlegscheiben und vier M5 Flanschmuttern am Brandschott anbringen. -
Page 40: Montage Des Benzinmotors
108. Alle notwendigen Anschlüsse und Verlängerungen zur MONTAGE DES BENZINMOTORS Vorbereitung der Installation des Geschwindigkeitsreglers Das Modell Tiger 30cc wurde für den Einsatz einer löten. Den Geschwindigkeitsregler dort am Motorkasten Vielzahl von Antriebssystemen entwickelt. Bitte stellen anbringen, wo es keine Interferenzen mit Motorhaube oder Sie sicher, dass das ausgewählte Antriebssystem über Motorbetrieb gibt. - Page 41 113. Mit einem 5mm (13/63 Zoll) Bohrer die geeigneten Löcher für 117. Für die Montage der Verknüpfung an den Servoarm das im die Schrauben der Motorhalterung bohren. Abstand von 13 mm (1/2 Zoll) von der Mitte des Servoarms befi ndliche Loch verwenden. Mit einem Seitenschneider alle Arme entfernen, die den Betrieb des Servos beeinträchtigen können.
-
Page 42: Montage Des Kraftstofftanks
122. Vergaser und Servo auf niedrigere Gaszufuhr stellen und 126. Die Pendel in den Kraftstofftank einführen. Erst das die Feststellschraube festziehen, die das Gestänge am große Pendel und dann das kleinere Pendel montieren. Steckverbinder am Servo sichert. Mit einem Seitenschneider Markieren Sie die Leitungen vom Tank aus, sodass die den überstehenden Draht trimmen. -
Page 43: Montage Der Motorhaube
130. Den Kraftstoffbehälter mit Klettband im Rumpf sichern. Das 135. Ein Stück Karton zuschneiden, um die Rumpfkante Zündmodul und der Zünd-Akku können auch mit Klettband anzugeben. Den Karton mit Klebeband am Rumpf befestigen, montiert werden. Alle Verbindungen von Kraftstoffbehälter zu wobei die Vorderkante auf die Vorderkante des Rumpfs Motor, Füllleitungen und Überlauf herstellen. -
Page 44: Montage Der Kanzel
140. Mit einer Stufenreibahle oder einer Schraube durch Spinner- MONTAGE DER KANZEL Rückplatte und Propeller diese ausgerichtet halten, damit 145. Ein Stück Wachspapier zwischen Kanzelabdeckung und die Schraubenlöcher zum Anbringen des Propellers markiert Rumpf anbringen, um ein Ankleben der Kanzel am Rumpf werden können. -
Page 45: Schwerpunkt
148. Für das Seitenruder die 130 mm (5 Zoll) Gewindestange SCHWERPUNKT verwenden. Ein wichtiger Teil bei der Vorbereitung des Flugzeugs für den Flug ist das ordnungsgemäße Ausbalancieren des Modells. Der hier aufgeführte Schwerpunktbereich dient basierend auf Tests als Richtlinie. Abweichungen von den von uns bereitgestellten Maßen ist möglich und kann zu einem Modell führen, dass besser zum eigenen Flugstil passt. -
Page 46: Ruderausschlag
Sie alle Hinweise der Bedienungsanleitung des Modells wie auch der Fernsteuerung. Garantiezeitraum Nach oben 17.8mm Hoch Exklusive Garantie Horizon Hobby LLC (Horizon) garantiert, dass dasgekaufte Produkt frei von Material- und Nach unten 17.8mm Montagefehlern ist. Der Garantiezeitraum entspricht den gesetzlichen Bestimmung des Landes, in dem das Produkt Höhenruder Nach oben 12.7mm... -
Page 47: Garantie Und Service Kontaktinformationen
Garantieanfragen werden nur bearbeitet, wenn ein Originalkaufbeleg von einem autorisierten Fachhändler beiliegt, aus dem der Käufer und das Kaufdatum hervorgeht. Sollte sich ein Garantiefall bestätigen wird das Produkt repariert oder ersetzt. Diese Entscheidung obliegt einzig Horizon Hobby. Tiger 30cc ARF... -
Page 48: Avertissements Relatifs À La Sécurité
être utilisé par des enfants sans la surveillance directe d’un adulte. N’essayez pas de modifi er ou d’utiliser ce produit • Surveillez les fréquences utilisées à proximité. avec des composants incompatibles hors des instructions fournies par Horizon Hobby, LLC. Ce manuel comporte des • Soyez toujours courtois et respectueux des autres utilisateurs de la zone de vol. -
Page 49: Eflm4160A Eflm4180A
TABLE DES MATIÈRES PIÈCES DE RECHANGE Remarque ................................48 Référence Description Signifi cation de certains termes spécifi ques ......................48 HAN237001 Fuselage Avertissements relatifs à la sécurité ........................48 HAN237002 Ailes Consignes de sécurité concernant l’utilisation ......................48 HAN237003 Empennages Avant de commencer l’assemblage ........................48 HAN237004 Capot moteur Pièces de rechange ...............................49... -
Page 50: Requis Pour La Fi Nition, Toutes Options De Puissance
REQUIS POUR LA FINITION, TOUTES OPTIONS DE PUISSANCE OUTILS NÉCESSAIRES Nombre Référence Description Description requis Boîtier ou clé plate : 10 mm (7/16 po, 1/2 po) SPMA3002 Rallonge de servo, 230 mm Serre joint SPMA3004 Rallonge de servo, 460 mm Fer à entoiler SPMAR8360T Récepteur avec télémétrie AS3X 8 canaux DSMX AR8360T et SAFE Disque à... -
Page 51: Retrait Des Faux-Plis
RETRAIT DES FAUX-PLIS MISE EN PLACE DES CHARNIÈRES DES AILERONS Des faux-plis peuvent se former sur l’entoilage de votre modèle pendant l’expédition. Utilisez un fer d’entoilage Utilisez une règle pour aligner l’aileron et l’extrémité de l’aile. (HAN101) avec une chaussette de fer d’étanchéité (HAN141) pour les retirer. Commencez avec une température peu élevée, puis faites attention lorsque vous travaillez sur des surfaces où... - Page 52 Insérez les broches en carbone de 51 mm (2 po) dans les 11. Appliquez de la colle époxy dans les trous de l’aileron. trous du volet. Les broches seront centrées, avec 25 mm (1 po) dépassant de l’extrémité du volet. Vérifi ez l’ajustement des broches sur l’aileron. 12.
-
Page 53: Installation Du Servo De L'aileron
16. Placez une épingle en T au centre de chaque charnière. Cela 21. Rompez les charnières en pliant la gouverne dans son permettra de centrer les charnières pendant leur installation. amplitude de mouvement dans les deux sens. 17. Mettez la charnière dans la fente de charnière. Alignez la fente de la charnière avec le trou dans l’aile. - Page 54 25. Vissez un écrou M2 sur chaque vis. Serrez les vis à l’aide 30. Installez les passe-fi ls et les œillets dans les servos. Suivez d’un tournevis cruciforme n° 1 tout en maintenant les toutes les instructions fournies avec le servo. écrous avec une pince. Ne serrez pas trop la visserie et n’endommagez pas la structure en bois sous-jacente.
- Page 55 35. Retirez les vis, puis appliquez quelques gouttes de colle 40. Utilisez une mèche de 3 mm (1/8 po) pour élargir le trou dans cyanoacrylate fi ne pour durcir les fi letages mis en place à le bras de servo. l’étape précédente. 36.
-
Page 56: Installation Du Servo Du Volet
45. Fixez l’extrémité à bille au bras de servo à l’aide d’une vis 49. Ajustez la tringlerie comme nécessaire de manière à aligner d’assemblage creuse M3 x 15, de deux rondelles M3 et d’un l’aileron avec le volet. contre-écrou M3. 50. Une fois ajustée, serrez l’écrou pour empêcher la manille de se desserrer. -
Page 57: Installation Du Stabilisateur
54. Dirigez le câble pour les servos de volet et d’aileron à travers 58. Fixez l’aile au fuselage à l’aide des deux boulons en nylon l’aile et hors du trou en haut de l’aile. 1/4-20 x 2. Serrez les écrous pour fi xer l’aile. INSTALLATION DU STABILISATEUR 59. -
Page 58: Installation De La Dérive Verticale
63. Retirez le stabilisateur du fuselage. Utilisez un couteau 68. Utilisez un stylo-feutre pour tracer le contour du fuselage sur avec une lame n° 11 pour retirer l’entoilage du stabilisateur les deux côtés de la dérive. en haut et en bas, à 3 mm (1/8 po) à l’intérieur des lignes tracées. -
Page 59: Installation Des Gouvernes De Profondeur
73. Retirez la dérive du fuselage. Préparez un mélange de 30 ml 77. Faites coulisser la trappe de verrière vers l’avant, puis vers (1 once) de colle époxy 30 minutes et utilisez une brosse le haut, puis retirez-la du fuselage. Mettez la trappe de la spéciale pour appliquer la colle époxy sur la surface de bois verrière de côté. -
Page 60: Installation Du Servo De La Gouverne De Direction
82. Répétez cette procédure pour le servo de profondeur restant. 86. Placez le servo de gouverne de direction dans le fuselage et fi xez le bras de servo. Cela indiquera la position adéquate pour le servo de gouverne de direction. Installez le servo dans le fuselage. -
Page 61: Installation Du Train D'atterrissage
91. Guidez le bras de barre de l’ensemble de roue de queue à 96. Insérez une bague sur l’axe. Appliquez une goutte de frein- travers la colonne de direction. Le support va rester à plat sur fi let sur une vis de fi xation de 3 mm. Utilisez la vis de fi xation le fuselage. -
Page 62: Installation Du Récepteur
INSTALLATION DU RÉCEPTEUR INSTALLATION DU MOTEUR ÉLECTRIQUE 101. Installez le récepteur dans le fuselage. Montez tout récepteur 104. Utilisez une perceuse et une mèche de 5 mm (13/64 po) pour distant dans le fuselage à l’aide d’une sangle et d’une bande percer les trous adéquats pour les vis de montage du moteur. velcro. -
Page 63: Installation Du Moteur À Essence
108. Soudez les connecteurs et rallonges nécessaires pour INSTALLATION DU MOTEUR À ESSENCE préparer l’installation du variateur de vitesse. Fixez le Le Tiger 30cc a été conçu pour utiliser une grande variateur de vitesse au boîtier du moteur de manière à ce variété... - Page 64 113. Utilisez une perceuse et une mèche de 5 mm (13/63 po) pour 117. Utilisez le trou à 13 mm (1/2 po) du centre du bras du servo percer les trous adéquats pour les vis de montage du moteur. lors de la fi xation de la liaison rapide au bras du servo. Utilisez une pince coupante pour supprimer tout bras pouvant interférer avec le fonctionnement du servo.
-
Page 65: Installation Du Réservoir De Carburant
122. Mettez le carburateur et le servo en position de gaz faibles 126. Insérez les plongeurs dans le réservoir. Installez le grand et serrez la vis de fi xation qui fi xe la barre de liaison sur le plongeur, puis le petit plongeur. Identifi ez les lignes du connecteur au servo. -
Page 66: Installation Du Capot
130. Fixez le réservoir de carburant dans le fuselage à l’aide 135. Découpez un morceau de papier cartonné pour indiquer le d’une sangle et de bandes velcro. Le module d’allumage et la bord du fuselage. Fixez à l’aide d’un ruban adhésif le papier batterie d’allumage peuvent également être installés à... -
Page 67: Installation De La Verrière
140. Utilisez un alésoir ou un boulon échelonné à travers la plaque INSTALLATION DE LA VERRIÈRE arrière du cône et de l’hélice pour les maintenir alignés, de 145. Placez un morceau de papier ciré entre la trappe de la manière à pouvoir identifi er les trous du boulon pour attacher verrière et le fuselage pour éviter de coller la verrière au l’hélice. -
Page 68: Centre De Gravité
CENTRE DE GRAVITÉ DÉBATTEMENTS Le maintien de la maquette en équilibre est une étape importante de la préparation du vol de l’avion. La plage du Mettez l’émetteur et le récepteur de votre maquette sous tension. Vérifi ez le mouvement de la dérive à l’aide centre de gravité... -
Page 69: Checklist D'avant Vol
C’est uniquement ainsi qu’il sera possible d’éviter Garantie exclusive - Horizon Hobby, LLC (Horizon) garantit que le Produit acheté (le « Produit ») sera exempt de défauts une manipulation erronée et des accidents entraînant des blessures et des dégâts. Horizon Hobby ne saurait être tenu matériels et de fabrication à... -
Page 70: Coordonnées De Garantie Et Réparations
Hanskampring 9 D 22885 Barsbüttel, Germany service@horizonhobby.de Horizon Hobby GmbH DIRECTIVE DEEE L’étiquette de cet appareil respecte la directive européenne 2012/19/UE en matière de déchets des équipements électriques et électroniques (DEEE). Cette étiquette indique que ce produit ne doit pas être jeté... -
Page 71: Avviso
Non usare componenti non compatibili o alterare il prodotto in nessuna maniera al di fuori delle istruzioni fornite da Horizon Hobby, LLC. Questo manuale contiene le istruzioni per un funzionamento e una manutenzione sicuri. È fondamentale leggere e seguire tutte le istruzioni e le avvertenze del manuale prima di montare, confi... -
Page 72: Pezzi Di Ricambio
INDICE PEZZI DI RICAMBIO Avviso ..................................71 Pezzo # Descrizione Signifi cato dei termini particolari ..........................71 HAN237001 Fusoliera Avvertimenti E Precauzioni Per La Sicurezza ......................71 HAN237002 Set ala Raccomandazioni per operare in sicurezza ......................71 HAN237003 Set coda Prima di iniziare il montaggio ..........................71 HAN237004 Carenatura Pezzi di ricambio ..............................72... -
Page 73: Necessario Per Completamento, Tutte Le Opzioni Di Alimentazione
NECESSARIO PER COMPLETAMENTO, TUTTE LE OPZIONI DI ALIMENTAZIONE ATTREZZI NECESSARI # richiesto Pezzo # Descrizione Descrizione SPMA3002 Estensione servo 9 pollici Chiave a tubo o a forcella doppia: 10 mm, 7/16", 1/2" SPMA3004 Estensione servo 18 pollici Morsetto a C SPMAR8360T Ricevitore AR8360T DSMX 8 canali AS3X SAFE con telemetria Ferro da stiro per fi... -
Page 74: Rimozione Delle Grinze
RIMOZIONE DELLE GRINZE INCERNIERAMENTO DEGLI ALETTONI Il rivestimento del modello potrebbe sviluppare delle grinze durante la spedizione. Usare un ferro da stiro per Utilizzare un bordo dritto per allineare alettone ed estremità modellismo (HAN101) con il relativo guanto di protezione (HAN141) per rimuovere le grinze. Iniziare con una alare. - Page 75 Inserire i perni in carbonio lunghi (51 mm) nei fori nel 11. Applicare la colla nei fori dell’alettone. fl ap. I perni risulteranno centrati, fuoriuscendo di 25 mm dall’estremità del fl ap. Controllare l’inserimento dei perni nell’alettone. 12. Far scorrere i perni del fl ap nell’alettone. Regolare lo spazio tra fl...
-
Page 76: Montaggio Dei Servo Dell'alettone
16. Posizionare uno spillo a T al centro di ogni cerniera. Questo 21. Rodare le cerniere fl ettendo la superfi cie di controllo per farle servirà a mantenere centrate le cerniere una volta montate. percorrere l’intera escursione di movimento in entrambe le direzioni. - Page 77 25. Avvitare un dado M2 su ciascuna vite. Serrare le viti con 30. Installare le guarnizioni e gli occhielli nei servo. Seguire tutte un cacciavite a croce #1 mantenendo i dadi con le pinze. le istruzioni eventualmente fornite con il servo. Non serrare eccessivamente le viti per non danneggiare la struttura in legno sottostante.
- Page 78 35. Rimuovere le viti e poi applicare uno strato sottile di colla 40. Utilizzare un trapano con punta da 3 mm per allargare il foro cianoacrilica per rinforzare le fi lettature realizzate al nel braccio del servo. passaggio precedente. 36. Una volta asciugata la colla, fi ssare il servo usando le viti 41.
-
Page 79: Installazione Dei Servo Dei Fl Ap
45. Fissare lo snodo a sfera al braccio del servo con una vite a 49. Regolare il leveraggio secondo necessità in modo da allineare esagono incassato M3 x 15, due rondelle M3 e un controdato alettone e fl ap. 50. Una volta regolato, serrare il dado per evitare che la forcella lasca possa vibrare. -
Page 80: Montaggio Dello Stabilizzatore
54. Far passare il cavo dei servo di alettone e fl ap attraverso l’ala 58. Fissare l’ala alla fusoliera con due bulloni di nylon da 1/4-20 e fuori dal foro nella parte superiore dell’ala. x 2". Serrare i bulloni, fi ssare l’ala. MONTAGGIO DELLO STABILIZZATORE 59. -
Page 81: Installazione Dell'impennaggio Verticale
63. Rimuovere lo stabilizzatore dalla fusoliera. Con un taglierino 68. Con un pennarello a feltro, tracciare la sagoma della fusoliera con lama #11, rimuovere il rivestimento superiore e inferiore su entrambi i lati della deriva. dello stabilizzatore, 3 mm all’interno delle linee tracciate. Fare attenzione a tagliare solo il rivestimento, senza danneggiare la struttura sottostante. -
Page 82: Installazione Dell'equilibratore
73. Rimuovere la deriva dalla fusoliera. Mescolare 30 ml di 77. Far scorrere il portello del cupolino in avanti e poi in su per colla epossidica 30-minuti e con un pennello epossidico rimuoverla dalla fusoliera. Mettere da parte il portello del applicarla al legno esposto dentro la parte posteriore della cupolino. -
Page 83: Montaggio Del Servo Del Timone
82. Ripetere la procedura per il servo dell’altro equilibratore. 86. Inserire il servo del timone nella fusoliera e agganciare il braccio del servo. In questo modo viene individuata la posizione corretta per il servo del timone. Fissare il servo nella fusoliera 87. -
Page 84: Montaggio Del Carrello Di Atterraggio
91. Far passare il braccio della timone dal gruppo del ruotino 96. Inserire un collarino per ruota sull’assale. Applicare una di coda attraverso il tubo di sterzo. La staffa poggerà in goccia di frenafi letti su una vite di arresto da 3 mm. Serrare piano sulla fusoliera. -
Page 85: Montaggio Del Ricevitore
MONTAGGIO DEL RICEVITORE INSTALLAZIONE DEL MOTORE ELETTRICO 101. Installare il ricevitore nella fusoliera. Montare gli eventuali 104. Utilizzare un trapano con punta da 5 mm per praticare i fori ricevitori remoti nella fusoliera con del nastro a strappo. per le viti di montaggio del motore. 105. -
Page 86: Installazione Di Motori A Benzina
108. Saldare tutti i connettori e le prolunghe necessarie in INSTALLAZIONE DI MOTORI A BENZINA preparazione per l’installazione del regolatore di velocità. Il Tiger 30cc è stata progettato per essere compatibile con Fissare il regolatore di velocità alla scatola del motore dove una varietà... - Page 87 113. Utilizzare un trapano con punta da 5 mm per praticare i fori 117. Utilizzare il foro che si trova a 13 mm dal centro del braccio per le viti di montaggio del motore. del servo per fi ssare l’attacco rapido al braccio del servo. Rimuovere con un tronchesino le parti del braccio che potrebbero eventualmente interferire con il movimento del servo.
-
Page 88: Montaggio Del Serbatoio Del Carburante
122. Muovere il carburatore e il servo in posizione di potenza 127. Fissare un tubo carburante da 152 mm ai tubi di riempimento, minima e serrare il vite di fi ssaggio che fi ssa l’asta di ventilazione e pendolini del serbatoio. Fascette possono comando al connettore a livello del servo. - Page 89 137. Usare un trapano con punta da 2 mm per praticare due su PREPARAZIONE DELLA PIASTRA POSTERIORE DELL’OGI- ciascun alto della cappottatura. Posizionare i fori verso le VA PER I MOTORI A BENZINA parti superiore e inferiore del cartoncino e più vicino al bordo anteriore della fusoliera.
-
Page 90: Installazione Del Cupolino
142. Utilizzare un pennarello a feltro per segnare sull’elica la POSIZIONI OPZIONALI DEI SERVO posizione delle viti di montaggio. Se si ritiene che sia necessario aggiungere peso nel retro della fusoliera per bilanciare il Tiger 30cc, potrebbe essere preferibile riposizionare invece i servo nel retro della fusoliera. -
Page 91: Baricentro (Cg)
BARICENTRO (CG) CORSE DEI COMANDI Per preparare l’aeromodello al volo, è importante effettuare un accurato bilanciamento. La gamma di valori qui indicata Accendere la trasmittente e la ricevente del modello. Controllare il movimento del timone con il radiocomando. per il baricentro è il risultato dei test effettuati. È possibile adottare impostazioni diverse da quelle qui riportate e Quando si sposta lo stick a destra il timone si deve spostare verso destra. -
Page 92: Lista Dei Controlli Prima Del Volo
Periodo di garanzia rivenditore, che si metterà in contatto subito con Horizon per prendere una decisione che vi possa aiutare nel più breve Garanzia esclusiva - Horizon Hobby, LLC (Horizon) garantisce che il prodotto acquistato (il “Prodotto”) sarà privo di tempo possibile. -
Page 93: Contatti Per La Garanzia E L'assistenza
Hanskampring 9 D 22885 Barsbüttel, Germany service@horizonhobby.de Horizon Hobby GmbH AVVISO RAEE Questo dispositivo è marcato ai sensi della Direttiva europea 2012/19/UE riguardante i rifi uti di apparecchiature elettriche ed elettroniche (RAEE). Il simbolo indica che il prodotto non va smaltito insieme ai rifi... - Page 94 SPECIFICATIONS • SPEZIFIKATIONEN • SPÉCIFICATIONS • SPECIFICHE 90.0 in (2.28 m) 1417.5 sq in (91.45 dm2) 90.0 inches (2.28 m) 78.0 in (1.98 m) 16–18 lbs (7.25–8.16 kg) 2-Stroke Gas: 30cc Electric Power: Power 160–180 Elektro Antrieb Power: Power 160–180 Moteur électrique (EP): Power 160–180 inches Motore elettrico: Power 160–180...
- Page 95 Tiger 30cc ARF...
- Page 96 © 2021 Horizon Hobby, LLC. Hangar 9, UltraCote, IC5, EC5, AS3X and the Horizon Hobby logo are trademarks or registered trademarks of Horizon Hobby, LLC. The Spektrum trademark is used with permission of Bachmann Industries, Inc. All other trademarks, service marks and logos are the property of their respective owners.