Table des Matières

Publicité

Les langues disponibles

Les langues disponibles

Liens rapides

Digital Audio
Tape Deck
Operating Instructions
Mode d'emploi
Bedienungsanleitung
PCM-R500
PCM-R700
© 1996 by Sony Corporation
3-859-278-12(1)
EN
F
D
3-859-278-12(1)

Publicité

Table des Matières
loading

Sommaire des Matières pour Sony PCM-R500

  • Page 1 3-859-278-12(1) Digital Audio Tape Deck Operating Instructions Mode d’emploi Bedienungsanleitung PCM-R500 PCM-R700 © 1996 by Sony Corporation 3-859-278-12(1)
  • Page 2 Sony Corporation Printed in Japan 3-859-278-12(1)
  • Page 3 INSERTED TO PREVENT BLADE located on the rear of the unit. EXPOSURE. Record the serial number in the space provided below. Refer to them whenever you call upon your Sony dealer regarding this product. Model No. PCM-R500/PCM-R700 Serial No. 3-859-278-11(1)
  • Page 4: Table Des Matières

    Rack Mounting 4 manual thoroughly and retain it for Hooking Up the System 5 future reference. Digital Interface 6 The PCM-R500 and PCM-R700 have the Setting the Clock 8 following common and distinguishing features. Playing a Tape Common features Recording on a Tape •...
  • Page 5: Unpacking

    Getting Started Getting Started Unpacking Rack Mounting Check that you have received the following supplied You can install your deck in a 19-inch 3U-size rack. Be items: sure to disconnect the deck from the wall outlet before • AC power cord (1) you install it.
  • Page 6: Hooking Up The System

    Getting Started Analog connections Hooking Up the System For connections through the ANALOG(BALANCE) IN/OUT connectors This section describes how to hook up your deck to an Use XLR balanced cables. amplifier, stereo mixer, or other digital audio components. Be sure to turn off the power to each ANALOG(BALANCE) IN/OUT pin polarity component before making the connections.
  • Page 7: Digital Interface

    Getting Started Other connections Digital Interface To connect a switch box through the REMOTE 1 connector Refer to “Remote Control Function Using a Parallel Remote Digital input and output connectors Connector” on page 28. • The following table shows signal formats that To connect the optional remote through the REMOTE 2 correspond to the input and output connectors on connector...
  • Page 8 Only when connected to the PCM-2600, PCM-2800, PCM- R500 or PCM-R700. When the connected decks consist of a PCM-R500 or PCM-R700, select “on” in the “AES S-ID” menu of the playback deck. d) Only when connected to the PCM-2300, PCM-2700, or PCM-2700A.
  • Page 9: Setting The Clock

    When the battery starts to run down, the clock will stop time of the tape during playback at a later time. operating normally. When this occurs, have the battery replaced (for a fee) at your dealer or nearest Sony Service Center . MENU...
  • Page 10: Playing A Tape

    Basic Operations Basic Operations Playing a Tape INPUT ANALOG DIGITAL MODE ANALOG INPUT UNBALANCE BALANCE POWER COUNTER RESET REC MODE Ø ON ø OFF STANDARD LONG MARGIN RESET REMOTE WIRED WIRELESS 44.1k SHUTTLE DATA PREVIOUS NEXT REC MUTE MENU REC LEVEL CH-1(L) •...
  • Page 11: Basic Operations

    Basic Operations Recording on a Tape INPUT ANALOG DIGITAL MODE ANALOG INPUT UNBALANCE BALANCE POWER COUNTER RESET REC MODE Ø ON ø OFF STANDARD LONG REMOTE MARGIN RESET WIRED WIRELESS 44.1k SHUTTLE DATA PREVIOUS NEXT REC MUTE MENU REC LEVEL CH-1(L) •...
  • Page 12 Basic Operations Locate the position where you want to start recording. To record from the beginning of the tape Press REW 0 to rewind the tape to its beginning. To record from the end of the recorded portion 1 Press REW 0 to rewind the tape to its beginning. 2 Press FF ).
  • Page 13: Advanced Recording Operations

    Advanced Recording Operations Advanced Recording Operations For accurate recording of absolute time codes Things You Should Know • If the tape is blank, make sure to start recording from the beginning of the tape. Before Recording • Use the Record Muting function (see page 14) to insert spaces between tracks.
  • Page 14: Setting The Recording Mode

    Advanced Recording Operations The counter in long-play mode Setting the Recording Mode The displayed tape running time, absolute time and remaining time on the tape are for standard-play mode. Double the time to obtain the corresponding times for You can select between two recording modes, standard long-play mode.
  • Page 15: Locating The End Of The Recorded Portion (End Search)

    Advanced Recording Operations Locating the End of the Inserting a Sound-Muted Recorded Portion (End Search) Section While Recording (Record Muting) When recording from the middle of a tape, use End Search to locate the end of the recorded portion. This Use Record Muting to insert a space of about 0.5 to 9.5 will prevent the creation of a blank section on the tape.
  • Page 16: Monitoring The Recorded Sound (Record Monitoring) (Pcm-R700 Only)

    Advanced Recording Operations Monitoring the Recorded Fade-in/Fade-out Recording Sound (Record Monitoring) (Fader) (PCM-R700 Only) (PCM-R700 Only) You can use the fader to fade-in the beginning of a recording or fade-out the end of a recording. It’s useful You can compare the recorded sound with the sound when you want to start or end a recording in the of the program source while recording.
  • Page 17: Advanced Playback Operations

    Advanced Playback Operations Advanced Playback Operations The playing time of the track will not be displayed About the Display when the “P-TMDISP” menu is set to “--” (see page 25). The date and time of recording and the current date and time will not be displayed when the “DATEDISP”...
  • Page 18: Locating A Track (Ams/Direct Access)

    Advanced Playback Operations Locating a Track (AMS*/Direct Locating a Point (Shuttle Play/ Access) Mark & Locate) You can locate the tracks in a number of ways, but only You can locate a specific point by playing back at a after you have recorded start IDs on the tape (see pages different speed or recording the absolute time code at 19 to 23).
  • Page 19: Playing Tracks Repeatedly (Repeat Play)

    Advanced Playback Operations Playing Tracks Repeatedly Playing Tracks Skipping (Repeat Play) Specific Portions During Playback (Skip Play) You can play a specific track or all the tracks on the tape repeatedly. Please note that skip IDs (see page 19) must be written on the tape before you can use Skip Play.
  • Page 20: Fade-In/Fade-Out Playback (Fader) (Pcm-R700 Only)

    Writing Sub Codes Advanced Playback Operations Advanced Playback Operations Fade-in/Fade-out Playback About Sub Codes (Fader) (PCM-R700 only) In the DAT format, control codes, or sub codes, such as start IDs, skip IDs, and end ID can be recorded on the You can use the fader to fade-in the beginning of tape with the audio signal.
  • Page 21: Writing Start Ids During Recording

    Writing Sub Codes Writing program numbers during recording Writing Start IDs During Program numbers occupy the same positions as the Recording start IDs and are determined by depending on the following conditions: START ID AUTO START ID WRITE When a program number is displayed INPUT The next program number rises by one above when the next ANALOG...
  • Page 22: Writing Skip Ids During Recording

    Writing Sub Codes Writing Skip IDs During Writing Sub Codes During Recording Playback You can write start IDs or skip IDs during playback. INPUT ANALOG DIGITAL MODE ANALOG INPUT UNBALANCE BALANCE POWER COUNTER RESET REC MODE Ø ON ø OFF STANDARD LONG REMOTE...
  • Page 23: Adjusting The Position Of An Existing Start Id

    Writing Sub Codes When writing a start ID Adjusting the Position of an Position where the Existing Start ID REHEARSAL button is pressed in step 1. ↓ You can adjust the position of previously recorded 3 seconds Repeated portion start IDs. START ID REHEARSAL Movement with each press of FF )
  • Page 24: Erasing Sub Codes

    Writing Sub Codes Erasing Sub Codes Renumbering the Program Numbers Automatically You can erase any start ID or skip ID. (Renumbering Function) START ID ERASE The Renumbering function searches for each start ID from the beginning of the tape and assigns a new INPUT ANALOG DIGITAL...
  • Page 25: Menu Operations

    Menu Operations Menu Operations REC MUTE (RECord MUTE duration) Menu Operations Sets the duration if the blank space created between tracks by the Record Muting function. Setting range: 0.5 to 9.5 seconds (in units of 0.5 second) You can make various settings through menu Factory setting: 4 seconds operations.
  • Page 26 BB-FS (FS in lead-in area) R500 or PCM-R700. Sets the lead-in area with the frequency of the signals to be When the connected decks consist of a PCM-R500 or PCM- recorded. R700, select “on” in the “AES S-ID” menu of the playback Settings: 48kHz, 44kHz, 32kHz deck.
  • Page 27: Operations Using The Optional Remote

    Operations Using the Optional Remote Operations Using the Optional Remote Checking the track order The Optional Remote RM-D750 You can check the order of tracks in your program by pressing the RMS CHECK button. Each time you press the RMS CHECK button, the track numbers appear in the order You can do the following operations using serial they were programmed.
  • Page 28: Writing And Erasing An End Id

    Operations Using the Optional Remote After repositioning the beginning of the end ID, Writing and Erasing an End ID press END ID WRITE. “ID WRITE” appears for a few seconds and the end ID is written on the tape after a duration of about 9 seconds after the end of the the repeated portion.
  • Page 29: Additional Information

    Additional Information Additional Information Notes Remote Control Function Using • When using MODE 2, use pin number 1 for GND. • By keeping the input to pin number 1 constant at either H- a Parallel Remote Connector level or L-level determines whether pin numbers 2 to 8 are in MODE 1 (playback) or MODE 2 (recording).
  • Page 30: Precautions

    To obtain the best possible recording and playback sound, voltage is indicated on the nameplate at the rear of the we recommend that you use the Sony DT-10CL cleaning unit. cassette (not supplied) to clean the head after every ten •...
  • Page 31: Display Messages

    The following table explains the various messages that while using the deck, use this section as a guide to appear in the display. remedy the problem. Should any problem persist, consult your nearest Sony dealer. Message Meaning BLANK The deck is searching for the beginning of the The cassette holder does not close.
  • Page 32 / The record-protect hole on the cassette is open. Slide the record-protect tab to close the hole / The battery in the deck is weak. Have the battery replaced by Sony service (see page 11). personnel (entails a service fee).
  • Page 33: Specifications

    × 14 inches) +4 dBs to –12 dBs (not including rack mount adaptor) Maximum analog (BALANCE) output level Weight PCM-R500: Approx 7.2kg (15 lb 14 oz) +24 dBs PCM-R700: Approx 7.3kg (16 lb 2 oz) Remote commander RM-D757 (supplied) Remote switch connectors...
  • Page 34 Index Index I, J S, T, U, V, W, X, Y, Z Index Inserting batteries into the SBM function 13 remote 4 Serial Copy Management System 6 Setting the recording mode 13 About the display 16 Key Protect Function 28 the clock 8 Absolute time 16 Shuttle Play 17...
  • Page 35 Index Switches ANALOG INPUT 10, 30 DIGITAL IN/OUT 5, 10, 30 INPUT 10, 13, 30 KEY PROTECT 9, 10, 28 POWER 9, 10 REC MODE 7, 13 REMOTE 4, 26, 31 SBM 13, 31, 33 Connectors ANALOG (BALANCE) IN/ OUT 5, 6, 10, 24, 32 ANALOG (UNBALANCE) IN/OUT 5, 6, 10, 24, 32 DIGITAL AES/EBU IN/OUT...
  • Page 36: Index

    Index 3-859-278-11(1)
  • Page 37: Pour La Clientèle Au Canada

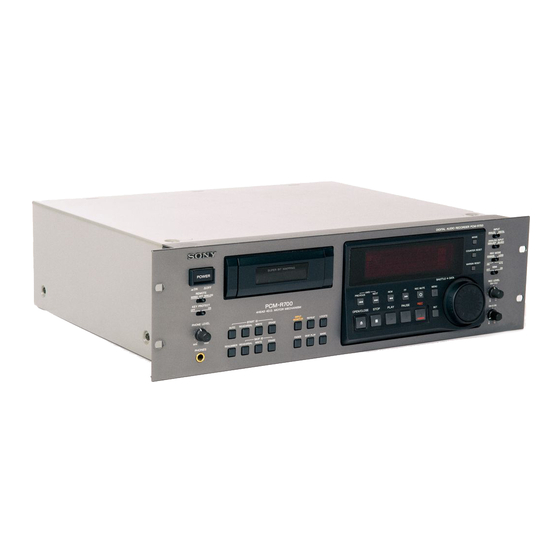
    PCM-R700. La plupart des illustrations la pluie ou à l’humidité. le conserver pour toute référence. de ce manuel représentent le modèle PCM-R500 excepté dans les cas où il est Les caractéristiques communes et Afin d’écarter tout risque indiqué que l’illustration représente le particulières à...
  • Page 38 ABLE DES MATIÈRES Préparatifs Déballage 4 Installation dans un rack 4 Raccordements 5 Interface numérique 6 Réglage de l’horloge 8 Lecture d’une cassette Enregistrement sur une cassette Fonctions élaborées pour l'enregistrement Ce que vous devez savoir avant de commencer à enregistrer 12 Réglage du mode d'enregistrement 13 Utilisation de la fonction SBM (Super Bit Mapping) 13 Localisation de la fin de l’enregistrement précédent (recherche de fin)
  • Page 39: Préparatifs

    Préparatifs Préparatifs Déballage Installation dans un rack Vérifiez que les accessoires suivants se trouvent dans La platine peut s’installer dans un rack 3U de 19 l’emballage: pouces. N’oubliez pas de déconnecter la platine de la • Cordon d’alimentation secteur (1) prise murale avant de l’installer.
  • Page 40: Raccordements

    Préparatifs Connexions analogiques Raccordements Pour les connexions via les connecteurs ANALOG(BALANCE) IN/OUT Cette section décrit comment raccorder la platine à un Utilisez les câbles XLR symétriques. amplificateur, un mixeur stéréo ou d’autres appareils audionumériques. N’oubliez pas de mettre tous les Polarité...
  • Page 41: Interface Numérique

    Préparatifs Autres raccordements Information sur la copie pendant l’enregistrement Pour raccorder un bornier via le connecteur REMOTE 1 • L’information sur la copie inscrite sur la bande Voir “Fonction de la télécommande utilisant un connecteur pendant l’enregistrement varie selon le connecteur de télécommande parallèle”...
  • Page 42: Inscription Automatique D'identifiants De Début Pendant L'enregistrement

    Des identifiants de saut DAT sont automatiquement inscrits de la même manière. c) Seulement quand raccordé au PCM-2600, PCM-2800, PCM-R500 ou PCM-R700. Quand les platines raccordées comprennent un PCM-R500 ou PCM-R700, sélectionnez “on” au menu “AES S-ID” de la platine de lecture.
  • Page 43: Réglage De L'horloge

    épuisée, l’horloge n’indique plus l’heure correctement. A quand vous regardez la cassette. ce moment, faites remplacer la pile (service payant) par un revendeur ou dans un centre de service après-vente Sony. MENU SHUTTLE INPUT...
  • Page 44: Lecture D'une Cassette

    Opérations de base Opérations de base Lecture d’une cassette INPUT ANALOG DIGITAL MODE ANALOG INPUT UNBALANCE BALANCE POWER COUNTER RESET REC MODE Ø ON ø OFF STANDARD LONG MARGIN RESET REMOTE WIRED WIRELESS 44.1k SHUTTLE DATA PREVIOUS NEXT REC MUTE MENU REC LEVEL CH-1(L)
  • Page 45: Opérations De Base

    Opérations de base Enregistrement sur une cassette INPUT ANALOG DIGITAL MODE ANALOG INPUT UNBALANCE BALANCE POWER COUNTER RESET REC MODE Ø ON ø OFF STANDARD LONG MARGIN RESET REMOTE WIRED WIRELESS 44.1k SHUTTLE DATA PREVIOUS NEXT REC MUTE MENU REC LEVEL CH-1(L) •...
  • Page 46 Opérations de base Localisez l’endroit où vous souhaitez commencer l’enregistrement. Pour enregistrer depuis le début de la bande Appuyez sur REW 0 pour rebobiner la bande jusqu’à son début. Si “UNLOCK” apparaît dans Pour commencer à enregistrer à la fin de l’enregistrement l’affichage L’appareil de source de précédent...
  • Page 47: Fonctions Élaborées Pour L'enregistrement

    La pause d’enregistrement est automatiquement annulée et la platine entre en mode d’arrêt pour la protection de la bande. “SOURCE” apparaît sur l’affichage du PCM-R500. Pour poursuivre l’enregistrement, appuyez sur la touche REC r. La platine entre en pause d’enregistrement.
  • Page 48: Réglage Du Mode D'enregistrement

    Fonctions élaborées pour l’enregistrement Le temps d’enregistrement en mode longue durée Réglage du mode (sélecteur REC MODE sur LONG) est deux fois plus long qu’en mode standard. d’enregistrement Vous avez le choix entre deux modes d’enregistrement, Compteur en mode longue durée standard ou longue durée, dans les cas suivants.
  • Page 49: Localisation De La Fin De L'enregistrement Précédent (Recherche De Fin)

    Fonctions élaborées pour l’enregistrement Localisation de la fin de Création d’un passage en l’enregistrement précédent sourdine pendant (recherche de fin) l’enregistrement (silencieux d’enregistrement) Quand vous commencez à enregistrer au milieu d’une cassette, utilisez cette fonction pour localiser la fin de Utilisez le silencieux d’enregistrement pour insérer un l’enregistrement précédent afin de ne pas laisser espace d’environ 0,5 à...
  • Page 50: Contrôle Du Son Enregistré (Contrôle D'enregistrement)

    Fonctions élaborées pour l’enregistrement Contrôle du son enregistré Enregistrement avec (Contrôle d’enregistrement) ouverture/fermeture en fondu (PCM-R700 seulement) (Fader) (PCM-R700 seulement) Vous pouvez comparer le son enregistré avec le son de Vous pouvez utiliser l’atténuateur pour une ouverture la source pendant l’enregistrement. en fondu au début de l’enregistrement ou une fermeture en fondu en fin d’enregistrement.
  • Page 51: Fonctions Élaborées Pour La Lecture

    Fonctions élaborées pour la lecture Fonctions élaborées pour la lecture Le temps de lecture de la plage ne sera pas affiché quand A propos de l’affichage l’item de menu “P-TMDISP” est réglé à “--” (voir la page 25). Vous pouvez utiliser l’affichage pour indiquer le temps ** La date et l’heure de l’enregistrement et la date et l’heure de défilement de la bande, le temps absolu, le temps de courantes ne seront pas affichées sur l’item de menu...
  • Page 52: Localisation D'une Plage (Ams/Accès Direct)

    Fonctions élaborées pour la lecture Localisation d’une plage (AMS*/ Localisation d’un point accès direct) (Shuttle Play/Mark & Locate) Vous pouvez localiser les plages de diverses manières Vous pouvez localiser un point spécifique en lisant à mais auparavant vous devez enregistrer des codes ID de une vitesse différente ou en enregistrant le code de départ sur la bande (voir les pages 19 à...
  • Page 53: Répétition De Plages (Lecture Répétée)

    Fonctions élaborées pour la lecture Répétition de plages Lecture des plages avec omission (lecture répétée) de certains passages (lecture à saut) Vous pouvez répéter la lecture d’une plage ou de toutes les plages. Vous devez d’abord inscrire des codes ID de saut (voir la page 19) avant de pouvoir utiliser la lecture à...
  • Page 54: Lecture Avec Ouverture/Fermeture En Fondu (Fader)

    Inscription de sous-codes Fonctions élaborées pour la lecture Fonctions élaborées pour la lecture Lecture avec ouverture/ Utilisation des sous-codes fermeture en fondu Le format DAT permet d’enregistrer des codes comme (Fade-in/Fade-out) (Fader) les identifiant de début et les identifiant de saut en même temps que le signal audio sur la bande.
  • Page 55: Inscription D'identifiants De Début Pendant L'enregistrement

    Inscription de sous-codes Inscription de numéros de programme Inscription d’identifiants de pendant l’enregistrement début pendant l’enregistrement Les numéros de programme occupent la même position que les identifiants de début, et sont déterminés en fonction des conditions suivantes. START ID AUTO START ID WRITE Quand un numéro de programme est affiché...
  • Page 56: Inscription D'identifiants De Saut Pendant L'enregistrement

    Inscription de sous-codes Inscription d’identifiants de Inscription de sous-codes saut pendant l’enregistrement pendant la lecture Vous pouvez inscrire des codes ID de départ ou de INPUT ANALOG DIGITAL MODE saut pendant la lecture. ANALOG INPUT UNBALANCE BALANCE POWER COUNTER RESET REC MODE Ø...
  • Page 57: Changement De La Position D'un Identifiant De Début Préenregistré

    Inscription de sous-codes Lors de l’inscription d’un identifiant de début Changement de la position Position où vous avez appuyé sur la touche d’un identifiant de début REHEARSAL à l’étape 1. ↓ préenregistré 3 secondes Passage répété Vous pouvez changer la position d’un identifiant de début préenregistré...
  • Page 58: Effacement De Sous-Codes

    Inscription de sous-codes Effacement de sous-codes Renumérotation automatique des numéros de programme Vous pouvez effacer n’importe quel identifiant de début ou de saut. Avec cette fonction, la platine recherche tous les identifiants de début depuis le début de la bande et START ID ERASE attribue un nouveau numéro à...
  • Page 59: Opérations De Menu

    Opérations de menu Opérations de menu REC MUTE (RECord MUTE duration) Opérations de menu Règle la durée si l’espace vierge créé entre les plages par la fonction sourdine d’enregistrement. Plage de réglage: 0,5 à 9,5 secondes (par incréments de Vous pouvez faire divers réglages par l’intermédiaire 0,5 seconde) d’opérations de menu.
  • Page 60 Réglage usine: -- ** Seulement quand il est raccordé à un PCM-2600, PCM- Page de référence: 12 2800, PCM-R500 ou PCM-R700. Quand les platines BB-FS (FS in lead-in area) raccordées comprennent un PCM-R500 ou PCM-R700, Règle la zone d’amorçage avec la fréquence des signaux à...
  • Page 61: Opérations Avec La Télécommande En Option

    Opérations avec la télécommande en option Opérations avec la télécommande en option Contrôle de l’ordre des plages La télécommande RM-D750 en Vous pouvez contrôler l’ordre des plages de votre programme en appuyant sur la touche RMS CHECK. option A chaque pression, les numéros de plage apparaissent dans leur ordre de programmation.
  • Page 62: Inscription Et Effacement D'un Identifiant De Fin

    Opérations avec la télécommande en option Après le repositionnement du début de Inscription et effacement d’un l’identifiant de fin, appuyez sur END ID WRITE. “ID WRITE” s’affiche quelques secondes et identifiant de fin l’identifiant de fin est inscrit sur la bande après un temps d’environ 9 secondes après la fin de la partie répétée.
  • Page 63: Informations Supplémentaires

    Informations supplémentaires Informations supplémentaires Remarques Fonction de la télécommande • En MODE 2, utilisez la broche numéro 1 pour la masse. • Le maintien de l’entrée de la broche numéro 1 constante utilisant un connecteur de au niveau H ou au niveau L détermine si les broches télécommande parallèle numéro 2 à...
  • Page 64: Précautions

    Pour toute question ou problème concernant cet • Avant la mise en service de l’appareil, vérifiez que la appareil, veuillez consulter votre revendeur Sony. tension de fonctionnement correspond à celle du courant secteur local. La plaque signalétique indiquant la tension de fonctionnement se trouve à...
  • Page 65: Messages Sur L'affichage

    Si vous rencontrez des difficultés lors de l’utilisation de l’affichage sont expliqués dans le tableau suivant. la platine, consultez ce guide de dépannage pour essayer de remédier au problème. Si le problème persiste, consultez votre revencleur Sony. Message Signification La platine recherche le début d’un passage BLANK vierge sur la bande.
  • Page 66 18 secondes (36 secondes en mode / La pile est faible. Faites remplacer la pile par longue durée) après l’identifiant de début un technicien Sony (service payant). précédent. Laissez un intervalle de 18 secondes au moins (36 secondes en mode longue durée) Après l’identifiant de début la pression sur REW 0/FF...
  • Page 67: Spécifications

    (adaptateurs pour installation dans un Connecteur DIN (8 broches, parallèle) rack non compris) Miniprise monaurale (série) Poids PCM-R500: Env. 7,2 kg (15 li. 14 on.) PCM-R700: Env. 7,3 kg (16 li. 2 on.) Caractéristiques audio Réponse en fréquence Standard: 20-22.000 Hz (±0,5 dB) Télécommande RM-D757 (fournie)
  • Page 68: Index

    Index Index I, J, K Index Identifiant de début 19-21 Raccordements analogiques 5 Inscription automatique des Raccordements numériques 5 identifiants de début pendant Recherche de fin 14 l’enregistrement 20 Réglage Inscription d’identifiants de horloge 8 Accentuation 12, 17 début pendant menu 24 Accès direct 17 l’enregistrement 20...
  • Page 69 Index START ID AUTO (inscription Nomenclature automatique de code ID de départ) 20 Touches START ID ERASE (effacement CLEAR (annulation) 20, 26 de code ID de départ) 23 START ID REHEARSAL COUNTER RESET (lecture d’essai de code ID de (réinitialisation du compteur) départ) 21, 22 START ID WRITE (inscription END ID ERASE (effacement...
  • Page 70 Index 3-859-278-11(1)
  • Page 71: Zu Dieser Anleitung

    Um Feuergefahr und die Wir beglückwünschen Sie zum Kauf Die Anleitung behandelt die Modelle Gefahr eines elektrischen dieses Sony DAT-Decks. Bevor Sie das PCM-R500 und PCM-R700. Die Deck in Betrieb nehmen, lesen Sie diese Abbildungen zeigen normalerweise das Schlages zu vermeiden, darf Anleitung bitte sorgfältig durch, und...
  • Page 72 nhaltsverzeichnis Vorbereitungen Nach dem Auspacken 4 Gestellmontage 4 Anschlüsse 5 Digitale Schnittstelle 6 Einstellen von Uhrzeit und Datum 8 Wiedergabe Aufnahme Fortgeschrittener Aufnahmebetrieb Wissenswertes zur Aufnahme 12 Einstellen des Aufnahmemodus 13 Verwendung der Super-Bit-Mapping-Funktion (SBM) 13 Verwendung der Ende-Suchfunktion14 Einfügen einer Leerstelle während der Aufnahme (Record Mute) 14 Mithören des gerade aufgenommenen Signals (Aufnahme- Monitorbetrieb) (nur PCM-R700) 15 Ein- und Ausblenden der Aufnahme (Fader) (nur PCM-R700) 15...
  • Page 73: Vorbereitungen

    Vorbereitungen Vorbereitungen Nach dem Auspacken Gestellmontage Vergewissern Sie sich, daß die folgenden Teile Das Deck kann in ein 19-Zoll-Gestell (3 U) eingebaut vollständig vorhanden sind: werden. Vor dem Einbauen ist unbedingt der • Netzkabel (1) Netzstecker zu ziehen. • Fernbedienung RM-D757 (1) •...
  • Page 74: Anschlüsse

    Vorbereitungen Analoge Anschlüsse Anschlüsse Für Anschluß über die ANALOG (BALANCE) IN/OUT- Buchsen In diesem Abschnitt wird der Anschluß des Decks an Symmetrische XLR-Kabel verwenden. einen Verstärker, einen Stereomischer oder ein anderes digitales Audiogerät behandelt. Schalten Sie stets alle ANALOG (BALANCE) IN/OUT Stiftbelegung Geräte aus, bevor Sie die Kabel anschließen.
  • Page 75: Digitale Schnittstelle

    Vorbereitungen Weitere Anschlüsse Aufzeichnung von Kopierschutz- Informationen Anschluß eines Schalters über die REMOTE 1-Buchse • Die bei der Aufnahme aufgezeichneten Siehe „Fernbedienung über eine parallele Kopierschutz-Informationen sind je nach benutztem Fernbedienungsbuchse“ auf Seite 28. Eingang und dem jeweiligen Signalformat Anschluß der Fernbedienung (Sonderzubehör) über die unterschiedlich (siehe nachstehende Tabelle).
  • Page 76 DAT-Sprungcodes werden automatisch in gleicher Weise gesetzt. c) Nur bei Anschluß an das PCM-2600, PCM-2800, PCM- R500 oder PCM-R700. Bei Anschluß eines PCM-R500 oder PCM-R700 wählen Sie im „AES S-ID”-Menü des Zuspielgeräts „on”. d) Nur bei Anschluß an das PCM-2300, PCM-2700 oder PCM-2700A.
  • Page 77: Einstellen Von Uhrzeit Und Datum

    INPUT mehr einwandfrei. Lassen Sie die Batterie dann von der ANALOG DIGITAL MODE ANALOG INPUT UNBALANCE BALANCE POWER COUNTER RESET REC MODE nächsten Sony Kundendienststelle auswechseln (das Ø ON ø OFF STANDARD LONG REMOTE MARGIN RESET WIRED WIRELESS 44.1k SHUTTLE DATA Auswechseln ist kostenpflichtig).
  • Page 78: Wiedergabe

    Grundlegende Bedienung Grundlegende Bedienung Wiedergabe INPUT ANALOG DIGITAL MODE ANALOG INPUT UNBALANCE BALANCE POWER COUNTER RESET REC MODE Ø ON ø OFF STANDARD LONG MARGIN RESET REMOTE WIRED WIRELESS 44.1k SHUTTLE DATA PREVIOUS NEXT REC MUTE MENU REC LEVEL CH-1(L) •...
  • Page 79: Grundlegende Bedienung

    Grundlegende Bedienung Aufnahme INPUT ANALOG DIGITAL MODE ANALOG INPUT UNBALANCE BALANCE POWER COUNTER RESET REC MODE Ø ON ø OFF STANDARD LONG REMOTE MARGIN RESET WIRED WIRELESS 44.1k SHUTTLE DATA PREVIOUS NEXT REC MUTE MENU REC LEVEL CH-1(L) • PHONE LEVEL •...
  • Page 80 Grundlegende Bedienung Suchen Sie die Bandstelle auf, an der die Aufnahme beginnen soll. Für Aufnahme ab Bandanfang Drücken Sie REW 0, um das Band zum Anfang zurückspulen zu lassen. Aufnahme ab Ende des letzten bespielten Bandabschnitts Falls „UNLOCK“ im Display angezeigt wird 1 Drücken Sie REW 0, um das Band zum Anfang In diesem Falle ist die...
  • Page 81: Fortgeschrittener Aufnahmebetrieb

    Nach zehn Minuten schaltet das Deck zur Bandschonung automatisch von Aufnahme-Pause in den Stoppzustand und SOURCE erscheint im Display des PCM-R500. Soll die Aufnahme fortgesetzt werden, drücken Sie die REC r-Taste, um das Deck wieder auf Aufnahme- Pause zu schalten.
  • Page 82: Einstellen Des Aufnahmemodus

    Fortgeschrittener Aufnahmebetrieb Zähleranzeige im Longplay-Modus Einstellen des Aufnahmemodus Im Longplay-Modus müssen die angezeigten Zählerdaten (Laufzeit, Absolutzeit und Restzeit) In folgenden Fällen kann zwischen dem verdoppelt werden. Der Zähler zeigt unabhängig vom Aufnahmemodus Standardplay und Longplay gewählt gewählten Modus die Daten für den Standardplay- werden.
  • Page 83: Verwendung Der Ende-Suchfunktion14

    Fortgeschrittener Aufnahmebetrieb Verwendung der Ende- Einfügen einer Leerstelle Suchfunktion während der Aufnahme (Record Mute) Wenn die Aufnahme am Ende eines bereits existierenden Aufnahmeteils fortgesetzt werden soll, Mit der Record Muting-Funktion können mühelos suchen Sie das Ende mit der Ende-Suchfunktion auf. Leerstellen (Stummstellen) von ca.
  • Page 84: Mithören Des Gerade Aufgenommenen Signals (Aufnahme-Monitorbetrieb) (Nur Pcm-R700)

    Fortgeschrittener Aufnahmebetrieb Mithören des gerade Ein- und Ausblenden der aufgenommenen Signals Aufnahme (Fader) (Aufnahme-Monitorbetrieb) (nur PCM-R700) (nur PCM-R700) Mit der Fader-Funktion kann eine Aufnahme am Anfang allmählich ein- und am Ende allmählich Die Qualität des aufgenommenen Signals kann bereits ausgeblendet werden. Dies ist vor allem praktisch, während der Aufnahme mit der des Eingangssignals wenn die Aufnahme nicht am Anfang oder Ende eines verglichen werden.
  • Page 85: Fortgeschrittener Wiedergabebetrieb

    Fortgeschrittener Wiedergabebetrieb Fortgeschrittener Wiedergabebetrieb Die Titelspielzeit wird nicht angezeigt, wenn „P- Über das Display TMDISP“ im Menü auf „--“ eingestellt ist (siehe Seite 25). ** Datum und Uhrzeit der Aufnahme und das aktuelle Datum sowie die aktuelle Uhrzeit werden nicht Im Display können Sie die Bandlaufzeit, Absolutzeit, angezeigt, wenn „DATEDISP“...
  • Page 86: Titelsuche (Ams/Direktsuche)

    Fortgeschrittener Wiedergabebetrieb Titelsuche (AMS*/Direktsuche) Ansteuern einer Bandstelle (Shuttle Play/Mark & Locate) Die im folgenden beschriebenen Titelsuchfunktionen arbeiten nur, wenn Startcodes (siehe Seite 19 bis 23) auf Sie können eine Bandstelle durch Variieren der dem Band vorhanden sind. Voraussetzung zu einer Wiedergabegeschwindigkeit oder durch Aufzeichnung Direktsuche ist, daß...
  • Page 87: Wiederholspielbetrieb (Repeat-Funktion)

    Fortgeschrittener Wiedergabebetrieb Wiederholspielbetrieb Überspringen von markierten (Repeat-Funktion) Bandteilen (Skip Play- Funktion) Es kann unter „Wiederholen aller Titel“ und „Wiederholen eines einzelnen Titels“ gewählt werden. Ein durch Sprungcodes (siehe Seite 19) markierter Bandteil kann wie folgt übersprungen werden. REPEAT INPUT INPUT ANALOG DIGITAL ANALOG...
  • Page 88: Ein- Und Ausblenden Der Wiedergabe (Fader) (Nur Pcm-R700)

    Setzen von Subcodes Fortgeschrittener Wiedergabebetrieb Fortgeschrittener Wiedergabebetrieb Ein- und Ausblenden der Die verschiedenen Subcodes Wiedergabe (Fader) Neben den Audiosignalen können auf der DAT- (nur PCM-R700) Cassette verschiedene Subcodes (wie Start-, Sprung- und Endcodes) aufgezeichnet werden. Die Subcodes Mit der Fader-Funktion kann die Wiedergabe zu werden getrennt von den Audiosignalen aufgezeichnet Anfang allmählich ein- und am Ende allmählich und beeinflussen diese nicht.
  • Page 89: Setzen Von Startcodes Während Der Aufnahme

    Setzen von Subcodes Aufzeichnung von Programmnummern Setzen von Startcodes während der Aufnahme während der Aufnahme Programmnummern werden an der gleichen Stelle wie die Startcodes aufgezeichnet. Für Programmnummern gelten folgende Bedingungen: START ID AUTO START ID WRITE INPUT ANALOG DIGITAL MODE Wenn eine Programmnummer angezeigt ist ANALOG INPUT UNBALANCE BALANCE...
  • Page 90: Setzen Von Sprungcodes Während Der Aufnahme

    Setzen von Subcodes Setzen von Sprungcodes Setzen von Subcodes während während der Aufnahme der Wiedergabe Auch während der Wiedergabe können wie folgt Start- oder Sprungcodes auf das Band aufgezeichnet werden. INPUT ANALOG DIGITAL MODE ANALOG INPUT UNBALANCE BALANCE POWER COUNTER RESET REC MODE Ø...
  • Page 91: Feinkorrektur Der Position Eines Existierenden Startcodes

    Setzen von Subcodes Startcode-Aufzeichnung Feinkorrektur der Position Drückzeitpunkt der REHEARSAL-Taste (Schritt 1) eines existierenden Startcodes ↓ 3 Sekunden Wiederholpassage Bereits auf dem Band aufgezeichnete Startcodes können nachträglich noch geringfügig vor- oder zurückverschoben werden. Verschiebung bei jedem 0,3 s Drücken von FF ) Verschiebung bei START ID REHEARSAL jedem Drücken von...
  • Page 92: Löschen Von Subcodes

    Setzen von Subcodes Löschen von Subcodes Automatische Neunumerierung der Programmnummern Auf dem Band vorhandene Start- oder Sprungcodes (Renumber-Funktion) können wie folgt gelöscht werden: START ID ERASE Mit der Renumber-Funktion können alle Startcodes ab Bandanfang beginnend mit Nummer 1 neu numeriert INPUT werden.
  • Page 93: Menü-Steuerung

    Menü-Steuerung Menü-Steuerung REC MUTE (RECord MUTE duration) Menü-Steuerung Zum Einstellen der Stummaufnahmedauer für das Einfügen von Leerstellen mit der Record Muting-Funktion. Einstellbereich: 0,5 bis 9,5 Sek. (in 0,5-Sek.-Schritten) Durch Aufrufen von Menüs ist eine Reihe Werkseinstellung: 4 Sek. verschiedener Einstellungen möglich. Die in den Referenzseite: 14 Menüs vorgenommenen Einstellungen bleiben auch L-SY TH (Level-SYnc THreshold)
  • Page 94 ** Nur bei Anschluß an das PCM-2600, PCM-2800, PCM- Definiert die Frequenz des aufzuzeichnenden Signals im R500 oder PCM-R700 Einlaufbereich. Bei Anschluß eines PCM-R500 oder PCM-R700 wählen Sie Einstellungen: 48 kHz, 44 kHz, 32 kHz im „AES S-ID” -Menü des Zuspielgerätes „on”. Werkseinstellung: 48 kHz...
  • Page 95: Benutzung Der Fernbedienung (Sonderzubehör)

    Benutzung der Fernbedienung (Sonderzubehör) Benutzung der Fernbedienung (Sonderzubehör) Überprüfen einer Titelfolge Fernbedienung RM-D750 Mit der RMS CHECK-Taste kann die programmierte Titelfolge kontrolliert werden. Mit jedem Drücken der Taste (Sonderzubehör) erscheint der jeweils nächste Titel im Programm. Bei Verwendung der optionalen Fernbedienung RM- Hinweis D750, entweder durch Anschluß...
  • Page 96 Benutzung der Fernbedienung (Sonderzubehör) Drücken Sie END ID WRITE, wenn der Endcode- Setzen und Löschen eines Anfang wunschgemäß positioniert ist. Im Display erscheint einige Sekunden lang „ID Endcodes WRITE“ und der Endcode wird nach dem Ende der wiederholten Passage aufgezeichnet. Dies dauert ca.
  • Page 97: Zusatzinformationen

    Zusatzinformationen Zusatzinformationen Hinweise Fernbedienung über eine • Bei MODE 2 legen Sie Stift-Nr. 1 auf Masse. • Über Stift-Nr. 1 (H- oder L-Pegel) wird festgelegt, ob sich parallele Fernbedienungsbuchse die anderen Stifte (Nr. 2 bis 8) im MODE 1 (Wiedergabe) oder MODE 2 (Aufnahme) befinden.
  • Page 98: Zur Besonderen Beachtung

    Um bestmögliche Aufnahme- und Zur Aufstellung Wiedergabequalität zu gewährleisten, sollte nach jeweils • Stellen Sie das Gerät an einen Platz, an dem ausreichende etwa zehn Betriebsstunden eine Reinigung mit der Sony Luftzirkulation gewährleistet ist. Reinigungscassette DT-10CL (nicht mitgeliefert) • Folgende Aufstellungsplätze sind ungeeignet: vorgenommen werden.
  • Page 99: Meldungen Im Display

    In der folgenden Tabelle sind die Meldungen und ihre Bei Problemen mit dem Deck gehen Sie die folgende Bedeutung zusammengestellt: Liste durch. Wenn das Problem nicht behoben werden kann, wenden Sie sich bitte an den nächsten Sony- Fachhändler. Bedeutung Meldung...
  • Page 100 Stromversorgung nicht richtig. gesetzt werden. / Die im Deck eingebaute Batterie muß ausgewechselt werden. Die Batterie von einem Sony-Fachmann Der gewünschte Titel kann nicht gefunden werden. auswechseln lassen (kostenpflichtig). / Die eingegebene Programmnummer ist nicht auf dem Band vorhanden. Durch Drücken von RENUMBER eine Neunumerierung ausführen...
  • Page 101: Technische Daten

    +4 dBs bis –12 dBs ca. 482 × 145 × 355 mm (B/H/T), Abmessungen Maximaler analoger (BALANCE) Ausgangspegel ausschl. Gestellmontagehalter +24 dBs Gewicht PCM-R500: ca. 7,2 kg Fernbedienungsschalter-Anschlüsse PCM-R700: ca. 7,3 kg DIN-Buchse (8pol, parallel) Mono-Minibuchse (seriell) Fernbedienung RM-D757 (mitgeliefert) Audio characteristics Prinzip Infrarot-Übertragung...
  • Page 102 Stichwortverzeichnis Stichwortverzeichnis Stichwortverzeichnis Fader 15, 19 Serial Copy Management Fernbedienung System 6 (Sonderzubehör) 26 Shuttle Play 17 Fernbedienungsfunktion 28 Skip Play 18 Sprungcode (Skip ID) 19, 21 - Absolutzeitcode 12 G, H, I, J AMS (Automatic Music Sensor) Setzen von Sprungcodes Gestellmontage 4 während der Aufnahme 21 Analoge Anschlüsse 5...
  • Page 103: Bezeichnung Der Bedienungselemente

    Stichwortverzeichnis Bezeichnung der Regler ANALOG (BALANCE) IN/ Bedienungselemente OUT 5, 6, 10, 24, 32 ANALOG (UNBALANCE) IN/ Tasten OUT 5, 6, 10, 24, 32 CLEAR 20, 26 DIGITAL AES/EBU IN/OUT 5, 6, 10, 24, 25, 32 COUNTER RESET 16 DIGITAL COAXIAL IN/OUT END ID ERASE 27 5, 6, 10, 24, 25, 32 END ID REHEARSAL 27...
  • Page 104: Stichwortverzeichnis

    Stichwortverzeichnis 3-859-278-11(1)

Ce manuel est également adapté pour:

Pcm-r700

Table des Matières