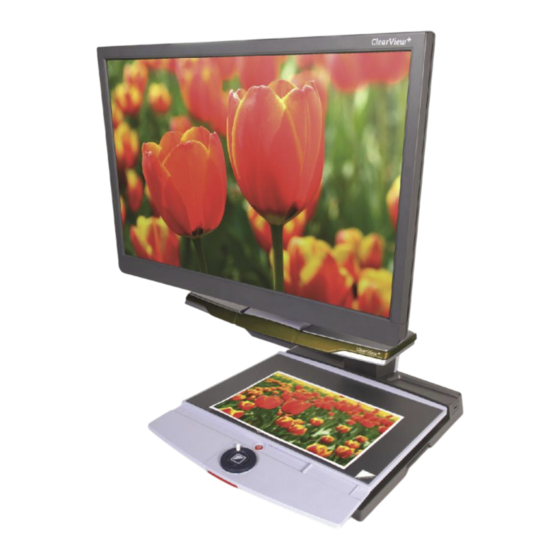
Optelec ClearView+ Manuel D'utilisation
Téléagrandisseur de bureau
Masquer les pouces
Voir aussi pour ClearView+:
- Guide de l'utilisateur (78 pages) ,
- Mode d'emploi (16 pages)
Table des Matières
Publicité
Les langues disponibles
Les langues disponibles
Liens rapides
Publicité
Chapitres
Table des Matières
Dépannage

Manuels Connexes pour Optelec ClearView+


Sommaire des Matières pour Optelec ClearView+
- Page 3 Italiano Manual del usuario Español 取扱説明書 日本語 使用手冊 繁體中文 Version 7.1.5 Copyright 2016 Optelec, the Netherlands All rights reserved Optelec P.O. Box 399 2993 LT Barendrecht The Netherlands Telephone: +31 (0)88 6783 444. Fax +31 (0)88 6783 400 E-mail: info@optelec.nl...
- Page 5 Optelec ClearView ClearView User Manual Optelec, part of Tieman Group, was founded in 1975 in Rockanje, the Netherlands. Since 1975, Optelec has been developing and producing innovative products to assist vision-impaired people with their daily activities to maintain and regain independence.
-
Page 6: Table Des Matières
Optelec ClearView Index Introduction ............... 6 Safety and Care ............8 Unpacking, Installation and Setup ......10 Operation ..............12 Operation – Switching ON / OFF ......12 Adjusting the magnification ........13 Choosing viewing modes ........12 Auto-focus lock ............13 Object lighting ON /OFF ......... - Page 7 Optelec ClearView PC units with the Feature Pack Advanced ... 22 Semi–color combinations ........22 Pointer (position locator) ........22 Activating line markers / window shades ....23 Switching between the ClearView and computer / external source ............23 Sizing the line markers / window shades & Picture-in- Picture image ............
-
Page 8: Introduction
However it may be possible that your model does not support some of the functions or features described in this manual. If you have any questions or suggestions concerning the use of this product, please contact your Optelec distributor English... - Page 9 Optelec ClearView or Optelec’s headquarters by consulting the contact information page found at the end of this manual. Your feedback is greatly appreciated. We hope you enjoy working with your ClearView English...
-
Page 10: Safety And Care
If you have difficulty operating the CV safely, please seek assistance or contact your Optelec distributor. Contact your Optelec distributor to service this device if necessary. Do not open your CV ; this will void the warranty. - Page 11 Optelec ClearView When moving the ClearView to another location, remove the monitor from the base unit for safe and easy transportation. Carry the ClearView base unit by using the two grips located on either side of the base unit table mid-way between the front and back of the unit at table level.
-
Page 12: Unpacking, Installation And Setup
7. These monitors may only be fitted as an integrated part of the unit. - Feature Packs (optional) for additional ClearView functionality. Optelec offers four feature packs: Feature Pack Basic (with Semi-color, Find and Pointer functions) - Page 13 Please note that if your ClearView system was delivered to you in separate modules, unpack each module carefully before proceeding with installation, and consult the accompanying installation guide to install the different modules. Please contact your Optelec distributor for further instructions if required. English...
-
Page 14: Operation
Optelec ClearView 4. Operation When using the ClearView , place your hands on the wrist support at the front of the table for easier access to the control buttons, and for steady table movement. If you are using the ClearView with the Zero Button Feature Pack, please refer to the paragraph "Feature Pack –... -
Page 15: Choosing Viewing Modes
Optelec ClearView Choosing viewing modes Pressing this button will cycle you through 3 different viewing modes: Please note: If the default grey scale setting is enabled on your ClearView this button will also include a fourth viewing mode which shows the image in grey scale (true black and white). -
Page 16: Object Lighting On /Off
Optelec ClearView Object lighting ON /OFF Pressing this button for four seconds turns off the object lighting. You can choose this option to make it easier to read glossy articles such as magazines and photos. Pressing the button once will advance the viewing mode by one position and will turn the lights back on;... -
Page 17: Locking The Reading Table
Optelec ClearView Locking the reading table Lift the red lever located at the front of the table to lock the table in a stable position. This is very useful when writing, painting and doing hobbies and crafts. Unlock the table by simply lifting the lever once again. -
Page 18: Feature Packs
ClearView 5. Feature Packs Feature Packs provide increased functionality to the ClearView . Optelec offers four Feature Packs: Advanced, Basic, Auto Zoom and Zero Button. The Feature Pack Basic provides increased functionality to the Monochrome, Color and Color HD units. -
Page 19: Find Function (Position Locator)
Optelec ClearView Press this button in photo mode to toggle between the full color and the grey scale modes. Please note: This function is unavailable on the monochrome unit. If the default grey scale setting is changed on the ClearView , this button will not work in photo mode. -
Page 20: Feature Pack Advanced
Optelec ClearView 5.2 Feature Pack Advanced The Feature Pack Advanced contains all the features of the Feature Pack Basic and adds the line marker, window shade and PC-switch functions. For a description of the semi-colors and position locator functions, please refer to section 5.1 Feature Pack Basic. -
Page 21: Activating Line Markers / Window Shades
Optelec ClearView computer image. The split-screen image cannot be resized or repositioned. The other ClearView monitors and the ClearView unit do not support the split-screen image function. Activating line markers / window shades Pressing this button cycles you through the line markers, window shades and full screen camera image modes. -
Page 22: Horizontal / Vertical Button
Optelec ClearView Horizontal / vertical button Pressing this button allows you to switch the line markers / windows from the vertical to the horizontal position. 5.3 Zero Button Feature Pack The Zero Button Feature Pack makes reading effortless thanks to the unique Auto Zoom fixed font technology. -
Page 23: Auto Zoom On/Off
Optelec ClearView position locator functions, please refer to section 5.1 “Feature Pack Basic”. Auto Zoom ON/OFF Press this button to activate the Auto Zoom function. The Auto Zoom function will automatically display the text that is placed on the reading table in your preferred fixed font size regardless of the original document font size. -
Page 24: Semi-Color Combinations
Optelec ClearView 6. The Feature Pack Advanced Semi–color combinations Pressing this button in high contrast reading modes cycles you through 7 different foreground and background color combinations. You may choose to display text in a selection of color combinations when additional contrast is needed, or when a different set of color combination provides increased visibility. -
Page 25: Activating Line Markers / Window Shades
Optelec ClearView Activating line markers / window shades Pressing this button cycles you through line markers, window shades and full-screen camera image. Line markers are used as guides to make reading text easier. The window shades function may be used to block a part of an... -
Page 26: Horizontal / Vertical Button
Optelec ClearView Positioning line markers When line markers or window shades are activated, turning this button will change the position of the line markers or window shades. Positioning can either be modified horizontally or vertically by pressing this button Horizontal / vertical button... -
Page 27: Adjusting The Monitor
90° making column reading possible. When rotating the monitor, the image will automatically switch to portrait viewing mode. The automatic image rotation can be enabled or disabled by your Optelec distributor. To place the monitor in your preferred position, firmly grip the flat panel on both sides by the surrounding frame, and move, tilt or rotate it as required. -
Page 28: Troubleshooting
Optelec ClearView 8. Troubleshooting Manufacturer’s default settings If you experience any difficulty operating the system, you can reset the factory default settings. Switch the ClearView off and wait 3 seconds. Then press and hold the On / Off button till the red ring light starts flashing. - Page 29 Optelec ClearView The computer image is not displaying - Check to see if the Advanced Feature Pack is installed. - Verify the computer’s video (VGA) connection to the base unit (do not connect the PC directly to the monitor). - Check the status of the button.
-
Page 30: Contacting Product Support
Optelec reserves the right to repair or replace any purchased ClearView with a similar or improved product. In no event shall Optelec or its suppliers be held liable for any indirect or consequential damages. The original user’s remedies are limited to replacement of ClearView modules. -
Page 31: Compliance
Optelec ClearView 11. Compliance This product complies with safety requirements under the following directives: MDD: EN 12182 FCC part 15 Class B EN 60601-1-2 (EMC) EN 60601-1 (safety) C-Tick CISPR 22 EMC: EN 50081-1 Safety EN 55022 UL 60950 EN 55024... -
Page 32: Specifications
Optelec ClearView 12. Specifications Focus : Auto-focus with focus lock Magnification – Monochrome, Color and PC units : 2.6 X – 50 X on a 17” screen Magnification – Color HD units : 1 X – 50 X on a 17” screen... - Page 33 Optelec ClearView ClearView Bedienungsanleitung Optelec ist Teil der Tieman-Gruppe und wurde 1975 in Rockanje in den Niederlanden gegründet. Seit 1975 entwickelt und produziert Optelec innovative Produkte, die sehbehinderten blinden Menschen Alltag erleichtern. Ausführlichere Informationen über die Produkte Optelec erhalten Website www.optelec.com.
- Page 34 Optelec ClearView INHALT Einleitung ..............34 Sicherheit und Pflege ..........36 Auspacken, Aufbau und Inbetriebnahme ..... 38 Bedienung ............... 40 Ein- und Ausschalten ..........40 Wahl des Ansichtsmodus ........40 Einstellung der Vergrößerung......... 41 Ausschalten des Autofokus ........41 Ein- und Ausschalten der Objektbeleuchtung ..42 Einstellen der Bildkontrolle ........
- Page 35 Optelec ClearView 5.4 Erweiterungssatz für automatisches Zoomen 50 AutoZoom Ein-/Ausschalten ........51 Den AutoZoom einstellen ........51 PC-Einheit mit Komfort-Erweiterungssatz .... 52 Lesefarben ............. 52 Lichtzeiger (Positionsanzeiger) ......53 Einschalten von Leselinien und Bildabdeckungen.. 53 Umschalten zwischen integrierter Kamera PC/externer Quelle ..........53 Abstand von Leselinien/Bildabdeckungen/Bild-in-Bild ................
-
Page 36: Einleitung
Sie den ClearView benutzen. Sollten Sie Fragen oder Anregungen zur Nutzung dieses Produktes haben, wenden Sie sich bitte an Ihren Händler oder direkt an Optelec. Die entsprechenden Kontaktdaten finden Sie auf der letzten Seite dieser Bedienungsanleitung. Wir freuen uns über Ihre Rückmeldung und wünschen Ihnen viel Spaß... - Page 37 Optelec ClearView erhältlichen Modelle. Ausstattung und Funktionen können über verschiedene Module/Bausteine hinzugefügt oder entfernt werden. Daher ist es möglich, dass Ihr ClearView manche Funktionen, die in dieser Anleitung beschrieben werden, nicht unterstützt (z.B. 22” TFT-Bildschirm, elektronische Box für HD-Einheiten oder die knopflose Bedienung).
-
Page 38: Sicherheit Und Pflege
Optelec ClearView 2. Sicherheit und Pflege Lesen Sie diese Anleitung sorgfältig, bevor Sie das Gerät in Betrieb nehmen. Bitte heben Sie die Bedienungsanleitung für zukünftige Fragen auf. Benutzen Sie den ClearView nur in geschlossenen Räumen. Setzen Sie das Gerät keinen hohen oder schnell wechselnden Temperaturen oder Feuchtigkeiten aus. - Page 39 Optelec ClearView Gerätes haben, holen Sie sich bitte Rat oder kontaktieren Sie Ihren Händler. Zur Wartung des Gerätes wenden Sie sich bitte an Ihren Händler. Öffnen Sie keins der Bauteile, da ansonsten die Garantieansprüche verloren gehen. Wenn Sie den ClearView...
-
Page 40: Auspacken, Aufbau Und Inbetriebnahme
Position zu bringen, lesen Sie bitte Kapitel 7. Alle Monitore können nur als integrierter Teil der Einheit genutzt werden. - Erweiterungssatz (optional) für Sonderfunktionen des ClearView . Optelec bietet vier Erweiterungssätze an: Erweiterungssatz 1 - Basis Modul Erweiterungssatz 2 - Komfort Modul Erweiterungssatz 3 –... - Page 41 Optelec ClearView Für den vollen Bedienungsumfang der PC-Einheit benötigen Sie den Erweiterungssatz 2. Wie man die Erweiterungssätze in Betrieb nimmt, entnehmen Sie bitte Kapitel 5. - Fußschalter (optional), um zwischen dem Bild der eingebauten Kamera und externen Quellen, z. B. PC- Bild, umzuschalten.
-
Page 42: Bedienung
Optelec ClearView 4. Bedienung Legen Sie während der Nutzung des ClearView die Hände auf die Handauflage an der Tischfront. Gleichzeitig können Sie die Bedienelemente einfach erreichen und zudem den Lesetisch verschieben. Wenn Sie den ClearView mit dem Erweiterungssatz 3 oder 4 für die „AutoZoom“... -
Page 43: Einstellung Der Vergrößerung
Optelec ClearView 1 Fotomodus mit Echtfarben (nicht möglich Monochrom- Einheiten bzw. -Monitoren). 2 Lesemodus: Dieser Modus erhöht Kontrast zwischen Vorder- und Hintergrund. Bilder und Texte werden in Schwarz/Weiß dargestellt. Falls Sie ein Erweiterungssatz mit Lesefarben benutzen, kann die Farbkombination für Vorder- und Hintergrund geändert werden. -
Page 44: Ein- Und Ausschalten Der Objektbeleuchtung
Optelec ClearView Durch Drücken der Autofokus-Taste können Sie das automatische Scharfstellen ausschalten. Dies ist sinnvoll, wenn Sie schreiben, zeichnen oder basteln wollen. Wenn der automatische Fokus ausgeschaltet ist, leuchtet ein rotes Lämpchen an der Kontrolltaste (Modus/Zoom). Um den Autofokus wieder anzuschalten, drücken Sie die Taste erneut. -
Page 45: Feststellen Des Lesetisches
Optelec ClearView Anzeige Systeminformationen Bildschirm Sie können sich den Vergrösserungsfaktor und die Systemkon-figuration auf dem Bildschirm anzeigen lassen. Halten Sie dazu die Autofokus-Taste vier Sekunden lang gedrückt. Um diese Informationen wieder auszublenden, drücken Sie die Taste erneut vier Sekunden lang. - Page 46 Optelec ClearView Achtung: Falls die Farbeinheit mit einem 55cm (22 Zoll) TFT Bildschirm ausgestattet ist, können Sie mit Fußschalter zwischen Bild integrierten Kamera, einem vertikal geteilten Bildschirm und einer externen Quelle umschalten. Deutsch...
-
Page 47: Erweiterungssatz
Optelec ClearView 5. Erweiterungssatz Erweiterungssätze sind optional. Die Erweiterungssätze liefern Ihnen weitere Funktionen für den ClearView Optelec bietet Ihnen vier Erweiterungssätze: Basis- Erweiterungssatz, Komfort-Erweiterungssatz, Erweiterungssatz für das vollautomatische Arbeiten ohne Bedientasten Erweiterungssatz für vollautomatische Zoomen mit Kontrolltasten. Der Basis-Erweiterungssatz erweitert die Funktionen der Monochrom-, Farb- und HD-Elektroniken. -
Page 48: Übersichtsmodus (Positionsanzeiger)
Optelec ClearView Sie können einstellen, dass der Text in zwei auswählbaren Farben dargestellt wird, wenn Sie einen größeren Kontrast benötigen oder andere Farbkombinationen besser lesbar sind. Halten Sie die Taste zwei Sekunden lang gedrückt, um wieder normalen Modus Schwarz Weiß... -
Page 49: Lichtzeiger (Positionsanzeiger)
Optelec ClearView Lichtzeiger (Positionsanzeiger) Wenn Sie diese Taste drei Sekunden lang drücken, erscheint ein LED-Licht in der Mitte des Lesetisches. Es zeigt Ihnen die Mitte der Abbildung auf dem Bildschirm an. Halten Sie einen Stift in den Lichtzeiger auf dem Lesetisch, und er wird in der Mitte des Bildschirms abgebildet. -
Page 50: Einschalten Von Leselinien Und Bildabdeckungen
Optelec ClearView Um das PC-Bild an Ihrem ClearView -Bildschirm korrekt anzeigen zu können, stellen Sie sicher, dass die Auflösung an Ihrem Computer dazu passend eingestellt ist: 18“ TFT-Flachbildschirm muss - Bei einem ClearView die Auflösung auf 1366 x 768 eingestellt werden. -
Page 51: Platzierung Von Leselinien/Bildabdeckungen
Optelec ClearView Hilfe Bildabdeckungen können Teile Bildes ausblenden, wenn Bildschirmhelligkeit unangenehm ist. Platzierung von Leselinien/Bildabdeckungen Wenn Leselinien oder Bildabdeckungen ausgewählt haben, können Sie über diese Taste die Position der Leselinien und Bildabdeckungen auf dem Bildschirm ändern. Sie können die Leselinien und Bildabdeckungen über die Taste... -
Page 52: Ein-/Ausschalten
Optelec ClearView Ein-/Ausschalten Drücken Sie den Ein-/Ausschalter auf der linken Seite der Handablage, um das Gerät und den Monitor einzuschalten. Ein Monitor, der nicht zu dem ClearView Modulsystem gehört, muss separat ein- bzw. ausgeschaltet werden. AutoZoom-Funktion Das vollautomatische Arbeiten ohne Knöpfe und Tasten... -
Page 53: Autozoom Ein-/Ausschalten
Optelec ClearView Auto Zoom Ein-/Ausschalten Drücken Sie diese Taste um den AutoZoom zu aktivieren. Der AutoZoom wird den Text auf dem Lesetisch, unabhängig von der Schriftgröße des Textes, in Ihrer gewünschten Schriftgröße Ihrem gewünschten Darstellungsmodus auf dem Monitor abbilden. Wenn Sie den AutoZoom eingeschaltet haben, können Sie die... -
Page 54: Lesefarben
Optelec ClearView 6. Der Komfort-Erweiterungssatz Lesefarben Durch Drücken dieser Taste im kontrastreichen Lesemodus können Sie zwischen sieben verschiedenen Farbkombinationen für Vorder- und Hintergrund wählen. Sie können einstellen, dass der Text in zwei auswählbaren Farben dargestellt wird, wenn Sie einen größeren Kontrast benötigen oder andere Farbkombinationen besser lesbar... -
Page 55: Lichtzeiger (Positionsanzeiger)
Optelec ClearView Lichtzeiger (Positionsanzeiger) Wenn diese Taste drücken, erscheint ein LED-Licht in der Mitte des Lesetisches. Es zeigt Ihnen die Mitte der Abbildung auf dem Bildschirm an. Halten Sie den Stift in den Lichtzeiger auf dem Lesetisch und er wird in der Mitte des Bildschirms abgebildet. -
Page 56: Platzierung Von Leselinien/Bildabdeckungen/Bild-In-Bild
Optelec ClearView Abstand von Leselinien/ Bildabdeckungen Wenn Leselinien oder Bildabdeckungen ausgewählt haben, können Sie über diese Taste den Abstand zwischen Kanten Leselinien/Bildabdeckungen Bildschirm verändern. Das Verändern des Abstandes kann entweder horizontal oder vertikal erfolgen. Dies hängt von dem Status der Horizontal/Vertikal-Taste ab... -
Page 57: Einstellung Des Monitors
Optelec ClearView 7. Einstellung des Monitors Die speziellen 45cm (18 Zoll)-TFT Bildschirme von ClearView können in der Höhe und im Betrachtungswinkel so angepasst werden, dass Sie eine optimale Sitzposition beim Lesen haben. Außerdem werden Blendungen vermieden. Fassen Sie den Monitorhalter fest an beiden Seiten an und bringen Sie ihn in die gewünschte Position. -
Page 58: Problembehandlung
Optelec ClearView 8. Problembehandlung Fabrikeinstellungen Falls bei der Bedienung Probleme auftreten, können Sie das Gerät auf die Fabrikeinstellungen zurücksetzen. Schalten Sie dazu das Gerät aus, warten Sie drei Sekunden und halten Sie anschließend den Ein- /Ausschalter drei Sekunden lang gedrückt. Ihr ClearView... - Page 59 Optelec ClearView - Falls Sie keinen original ClearView -Monitor benutzen, ändern Sie die Helligkeit bzw. die Einstellungen für den Kontrast separat an Ihrem Monitor. Computerbild wird nicht angezeigt - Prüfen Sie, ob der Erweiterungssatz installiert ist. - Prüfen Sie, ob der VGA-Ausgang des Computers mit...
-
Page 60: Kontakt/Beratung
Optelec behält sich das Recht vor, jedes ClearView -Gerät zu reparieren oder durch ein ähnliches oder besseres Gerät zu ersetzen. In keinem Fall haftet Optelec für indirekte oder daraus resultierende Schäden. Rechtsmittel sind auf den Austausch von ClearView -Baugruppen beschränkt. Die Garantie ist nur gültig bei unversehrten Siegeln und wenn das Gerät in... -
Page 61: Einhaltung Von Sicherheitsanforderungen
Optelec ClearView 11. Einhaltung von Sicherheitsanforderungen Dieses Produkt erfüllt die Sicherheits- und EMV-relevanten Richtlinien: MDD: FCC: EN 12182 FCC Teil 15 Klasse B EN 60601-1-2 (EMV) EN 60601-1 (Sicherheit) C-Tick: CISPR 22 EMV: EN 50081-1 Sicherheit: EN 55022 UL 60950... -
Page 62: Technische Angaben
Optelec ClearView 12. Technische Angaben Fokus: Autofokus mit Sperre Vergrößerung – Schwarz/Weiß-Elektronik 2,6-fach – 50-fach auf einem 43cm Bildschirm Vergrößerung – Farb-Elektronik 2,6-fach – 50-fach auf einem 43cm Bildschirm Vergrößerung – HD-Elektronik: 1-fach – 50-fach auf einem 43cm Bildschirm Maße der Grundfläche Basiseinheit : 44 x 50 cm Stromversorgung: 110 –... - Page 63 La société Optelec, antérieurement Tieman, a été fondée en 1975 à Rockanje, aux Pays-Bas. Depuis 1975, la société Optelec développe et met au point des produits novateurs à l’intention des personnes aveugles et malvoyantes, afin qu’elles puissent réaliser ses activités quotidiennes.
- Page 64 Optelec ClearView TABLE DES MATIÈRES Introduction ............. 63 Mesures de sécurité et entretien ......65 Déballage, installation et réglage ......67 Fonctionnement ............69 Interrupteur On / Off ..........69 Sélection du mode de visualisation ......69 Réglage du grossissement ........70 Verrouillage de la fonction mise au point automatique ................
-
Page 65: Introduction
12. Caractéristiques techniques du ClearView ..89 1. Introduction Nous vous félicitons d’avoir choisi le ClearView+ d’Optelec, le téléagrandisseur de bureau avec mise au point automatique. Le ClearView+ vous permet de lire, d’écrire, de regarder des photos, de faire du bricolage et plus encore. - Page 66 Si vous avez des questions ou des suggestions à propos de l’utilisation de ce produit, veuillez communiquer avec votre distributeur ou avec le siège social d’Optelec en consultant la liste des coordonnées des différents bureaux d’Optelec présentée à la dernière page du manuel. Vos commentaires sont grandement appréciés.
-
Page 67: Mesures De Sécurité Et Entretien
Optelec ClearView 2. Mesures de sécurité et entretien Il est recommandé de lire attentivement les instructions ci- dessous avant de procéder au réglage du produit. Il est également conseillé de conserver le présent manuel en vue d'une consultation ultérieure. Le ClearView s'utilise à... - Page 68 Optelec ClearView bouts de vêtements venaient à se coincer dans les mécanismes en mouvement. Si vous éprouvez des difficultés à manipuler l'appareil, surtout n'hésitez pas à vous faire aider, ou à communiquer avec votre fournisseur. Si nécessaire, contactez votre distributeur pour assurer l'entretien de votre appareil.
-
Page 69: Déballage, Installation Et Réglage
Optelec ClearView 3. Déballage, installation et réglage est un système modulaire muni d’une sortie Le ClearView VGA standard, qui vous permet de connecter le ClearView à n’importe quel moniteur VGA compatible, ou à un téléviseur. L’appareil ClearView comprend: - L’unité de base avec un plateau de lecture muni d’un panneau de commande intégré;... - Page 70 Optelec ClearView - Les modules de fonctions (offerts en option) vous permettent de rajouter au ClearView des fonctions supplémentaires. Quatre types de modules de fonctions vous sont proposés: Le module de fonctions de base Le module de fonctions avancées ...
-
Page 71: Fonctionnement
Optelec ClearView 4. Fonctionnement Pour permettre un accès facile aux boutons de contrôle, et pour assurer la stabilité au plateau de lecture lorsque vous utilisez le ClearView , veuillez placer vos mains sur le repose-poignets situé devant le plateau de lecture. -
Page 72: Réglage Du Grossissement
Optelec ClearView de l’arrière-plan. Les textes et les images seront affichés en noir et blanc. Si vous avez acheté le Module de fonctions avec des combinaisons de couleur (offert en option), les combinaisons de couleur d’avant et d’arrière- plan peuvent ainsi être modifiées. -
Page 73: Éclairage On / Off
Optelec ClearView automatique, il suffit d'appuyer de nouveau sur la même touche, et le voyant lumineux rouge s'éteindra. Éclairage On / Off Pour éteindre l’éclairage, appuyez sur cette touche pendant 4 secondes. Cela peut facilité la lecture de documents et de magazines en format papier glacé. -
Page 74: Verrouillage Du Plateau De Lecture
Optelec ClearView configuration du système. Si vous appuyez sur cette touche de nouveau, l’écran reprendra son fonctionnement habituel. Verrouillage du plateau de lecture Soulevez légèrement le levier rouge situé sur le devant du plateau afin d’y empêcher tout mouvement. Cette... -
Page 75: Les Modules De Fonctions
5. Les modules de fonctions Les modules de fonctions vous permettent d’optimiser les fonctions du ClearView . Optelec vous propose quatre types de module de fonctions : le module de fonctions avancées, le module de fonctions de base, le module de fonction Auto Zoom et le module de fonction Zero Button. -
Page 76: Fonction Rechercher (Indicateur De Position)
Optelec ClearView rapidement au mode noir et blanc, appuyez sur la touche de nouveau. Pour revenir rapidement à la dernière sélection de combinaison de couleur, appuyez de nouveau sur cette touche, et maintenez-la enfoncée pendant 2 secondes. Lorsque vous appuyez sur cette touche en mode photo, vous pouvez basculer entre le mode couleur et le mode échelle de gris. -
Page 77: Indicateur De Position
Optelec ClearView Indicateur de position Cette touche vous permet d’activer une lumière LED, qui s’allume dans le plateau de lecture. Ce point lumineux se trouve au centre du plateau de lecture, et sert à indiquer l’endroit où se trouve le centre de l’image affichée. Pour... -
Page 78: Activation Des Lignes Et Des Caches
Optelec ClearView Afin de faire afficher correctement l’image de l’ordinateur sur l’écran du moniteur ClearView , assurez-vous de bien vouloir régler la résolution de votre ordinateur selon les indications suivantes: à écran plat de 18”, vous Pour le moniteur ClearView ... -
Page 79: Positionnement Des Lignes Et Des Caches
Optelec ClearView pour faciliter la lecture de texte. Les caches servent à bloquer une partie de l’image lorsque la luminosité de l’écran est gênante. Positionnement des lignes et des caches Lorsque les lignes et les caches sont activés (voir plus loin), le fait de tourner le bouton illustré... -
Page 80: Module De Fonction Zero Button
Optelec ClearView 5.3 Module de fonction Zero Button Le module de fonction Zero Button vous permet de lire confortablement, grâce à la fonction réglage automatique de la taille de police à valeur fixe, une technologie unique en son genre. Interrupteur On / Off Pour allumer le système et son moniteur, appuyez... -
Page 81: Zoom Automatique On/Off
Optelec ClearView Zoom automatique ON/OFF Appuyez sur la touche Auto Zoom pour activer la fonction zoom automatique. Cette fonction vous permet de grossir et de faire afficher automatiquement le texte qui est placé sur le plateau de lecture, tout en tenant compte de vos préférences de grossissement, peu importe... -
Page 82: Avancées
Optelec ClearView 6. Le module de fonctions avancées Combinaisons de couleur touche illustrée ci-contre vous permet sélectionner parmi 7 combinaisons de couleur différentes d'avant et d'arrière-plan. Vous pouvez faire afficher du texte en deux couleurs différentes lorsque plus de contraste s’avère nécessaire, ou lorsque des combinaisons de... -
Page 83: Activation Des Lignes Et Des Caches
Si votre ClearView est connecté à un ordinateur ou à une autre source externe d’Optelec, appuyez sur cette touche, ou utilisez la pédale, pour basculer entre l'image de la caméra interne et l’image de la source externe ou de l’ordinateur. Dans tout autre cas, l’image s’affichera en plein écran lorsque vous appuyez sur cette... -
Page 84: Sens Des Lignes Et Des Caches Et Mode Picture-On-Picture
Optelec ClearView dans le sens vertical, selon l'état du bouton horizontal / vertical. Sens des lignes et des caches et mode Picture- on-Picture Lorsque les modes lignes et caches sont activés, le fait de tourner le bouton illustré ci-contre vous permet de modifier la position des lignes, des caches et de l’image sur image à... -
Page 85: Réglage Du Moniteur
Optelec ClearView 7. Réglage du moniteur La hauteur ainsi que l’angle de visualisation des moniteurs spéciaux à écran de 18” peuvent être réglés, ClearView afin de prévenir les éblouissements et les reflets de lumière, ainsi que pour permettre à l’utilisateur une posture confortable. -
Page 86: Dépannage
Optelec ClearView 8. Dépannage Aucune image n'apparaît sur le moniteur du ClearView après sa mise en fonction: - Vérifiez que le système est bien branché (bouton rouge sur le panneau de commande). - Vérifiez que tous les câbles et toutes les connexions des dispositifs sont bien en place. - Page 87 Optelec ClearView L'image de l'ordinateur ne s'affiche pas - Vérifiez si vous avez installé le Module de fonctions avancées (vérifiez également avec la pédale). - Vérifiez que les câbles de connexion vidéo (VGA) de l'ordinateur sont bien connectés à l'unité centrale (ne branchez pas le PC directement au moniteur).
-
Page 88: Coordonnées Et Soutien
à communiquer avec votre distributeur ClearView ou le siège Optelec le plus proche. Vous trouverez à la dernière page de ce manuel une liste complète des adresses Optelec. Votre distributeur ClearView Français... -
Page 89: Conditions De Garantie
Cette garantie ne peut être cédée et ne s'applique pas aux groupes, utilisateurs multiples ou agences. Le ClearView est conçu pour être employé par l'utilisateur final / acheteur individuel chez lui ou au bureau. Optelec se réserve le droit de réparer le ClearView ou de le remplacer par un produit similaire ou supérieur. -
Page 90: Conformité
Optelec ClearView 11. Conformité Ce produit est conforme aux normes de sécurité et aux normes CEM des décrient ci-dessous: MDD: EN 12182 FCC part 15 Class B EN 60601-1-2 (EMC) EN 60601-1 (sécurité) C-Tick CISPR 22 EMC: EN 50081-1 Sécurité... -
Page 91: Caractéristiques Techniques Du Clearview
Optelec ClearView 12. Caractéristiques techniques du ClearView Foyer: Autofocus avec verrouillage foyer Grossissement – Moniteurs monochrome, couleur et PC: 2,6X à 50X pour un écran de 17” Grossissement – Moniteur haute définition: 1X à 50X pour un écran de 17”... - Page 92 Optelec ClearView ClearView+ Gebruikershandleiding Optelec, onderdeel van de Tieman Groep, is opgericht in 1975 in Rockanje, Nederland. Sinds 1975 ontwikkelt en produceert Optelec innovatieve producten die blinden en slechtzienden helpen bij dagelijkse activiteiten. Bezoek de Optelec website op www.optelec.nl voor een overzicht van alle Optelec producten en diensten.
- Page 93 Optelec ClearView INHOUD Introductie ............... 93 Veiligheid en onderhoud ........95 Uitpakken en installatie .......... 97 Gebruik ..............99 Aan / uit schakelaar ..........99 Verschillende leesstanden instellen ....... 99 Vergroting regelen ..........100 Focus toets/Autofocus blokkering ......100 Object verlichting aan/uit ........101 Beeldkwaliteit/contrast aanpassen .......
- Page 94 Optelec ClearView PC systemen met Uitgebreid Pluspakket ... 110 Verschillende voor- en achtergrond kleuren instellen ................110 Pointer (positie bepalen op het beeldscherm) ..110 Activeren van lijnen en beeldafdekking ....110 Schakelen tussen camerabeeld en PC beeld / externe bron ..............
-
Page 95: Introductie
Optelec ClearView 1. Introductie Gefeliciteerd met de aanschaf van uw ClearView , een automatisch scherpstellende beeldschermloep, ontwikkeld door Optelec slechtzienden ondersteunen. ClearView kan gebruikt worden bij lezen, schrijven, het bekijken van foto’s en uitvoeren van hobby’s. Met eenvoudige bediening vergroot u teksten en objecten in meerdere kleuren. - Page 96 Optelec ClearView aanwezig is (bijvoorbeeld een andere monitor, monitor plaat of Pluspakket). Nederlands...
-
Page 97: Veiligheid En Onderhoud
Indien u een andere monitor dan een specifieke Optelec monitor op de ClearView plaatst, mag deze monitor niet zwaarder zijn dan 16 kg. Het monitor plateau is berekend op monitoren niet zwaarder dan 16 kg. - Page 98 Optelec ClearView Neem contact op met uw leverancier voor onderhoud of reparatie van dit systeem indien nodig. Maak het apparaat niet open, hiermee vervalt de garantie. Dit systeem bevat geen door de gebruiker te vervangen delen. Wanneer u de ClearView verplaatst, maak dan alle bekabeling los en neem de monitor van zijn plaats.
-
Page 99: Uitpakken En Installatie
Optelec ClearView 3. Uitpakken en installatie De ClearView is een modulair systeem met een standaard VGA uitgang. Dit betekent dat u uw ClearView op vrijwel iedere computer monitor of TV kunt aansluiten, als de monitor of TV een VGA aansluiting heeft. - Page 100 Optelec ClearView kleurensysteem. Optelec biedt verschillende pluspakketten: Basis Pluspakket Uitgebreid Pluspakket Zero Button Pluspakket met fixed font technologie Auto Zoom Pluspakket met fixed font technologie. Het uitgebreide Pluspakket is noodzakelijk bij een PC systeem. - Voetschakelaar (optioneel, alleen te gebruiken bij kleuren- en computersystemen).
-
Page 101: Gebruik
Optelec ClearView 4. Gebruik Leg uw handen op de polssteunen, welke zich aan de voorzijde van het leesplateau bevinden, wanneer u de ClearView gebruikt. Hierdoor zijn de toetsen altijd binnen handbereik en kunt u de tafel eenvoudig bewegen. Indien u de ClearView... -
Page 102: Vergroting Regelen
Optelec ClearView Zwart / wit is hierbij de standaard weergave. Wanneer een Pluspakket is geïnstalleerd, kunnen de voor- en achtergrond kleuren worden veranderd. 3- Hoog contrast Tekststand negatief. In deze leesstand wisselen (inverteren) de voor- en achtergrond kleuren. Ook in deze stand wordt het contrast van de voor- en achtergrond verhoogd en kunnen de voor- en achtergrond kleuren worden aangepast. -
Page 103: Objectverlichting Aan/Uit
Optelec ClearView Objectverlichting aan/uit Door vier seconden op deze toets te drukken, wordt de objectverlichting uitgeschakeld. Deze weergave maakt het mogelijk glossy magazines / documenten te lezen. Door vier seconden weer op deze toets te drukken andere leesstand kiezen, wordt objectverlichting terug ingeschakeld. -
Page 104: Blokkeren Van De Beweegbare Leestafel
Optelec ClearView systeem. Druk de toets nogmaals gedurende vier seconden in om deze informatieweergave uit te schakelen. Blokkeren van de beweegbare leestafel Duw de rode greep aan de voorzijde onder de leestafel kort omhoog om de beweging van de tafel te blokkeren. In de geblokkeerde stand worden taken als schrijven en schilderen onder de camera vereenvoudigd. -
Page 105: Pluspakketten
Optelec ClearView 5. Pluspakketten Het Pluspakket vergroot het aantal functies van de ClearView . Optelec biedt een keuze uit vier verschillende Pluspakketten; Basis versie Uitgebreide versie Zero Button versie Auto Zoom versie Het Basis Pluspakket vergroot het aantal functies van een monochroom-, kleuren- of HD systeem. -
Page 106: Zoekfunctie (Positie Bepalen Op Het Beeldscherm)
Optelec ClearView meer contrast nodig is of wanneer alternatieve kleuren een beter overzicht geven. Door de toets twee seconden ingedrukt te houden, keert u versnelt terug naar de zwart / wit stand. Door de toets opnieuw twee seconden ingedrukt te houden, keert u versnelt terug naar de laatste geselecteerde voor- en achtergrond kleur. -
Page 107: Pluspakket - Uitgebreid
Optelec ClearView Plaats een pen op het papier in de lichtmarkering. Op het beeldscherm ziet u de pen direct terug in het midden van uw beeldscherm. 5.2 Pluspakket - Uitgebreid Het Uitgebreid Pluspakket beschikt over functies voor het instellen van verschillende voor- en achtergrond kleuren,... -
Page 108: Activeren Van Lijnen En Beeldafdekking
Optelec ClearView Voor een correcte weergave van het PC beeld op de ClearView monitor stelt u de resolutie van uw PC als volgt 18” TFT monitor 1366 x 768 Met een ClearView 22” TFT monitor 1680 x 1050 Met een ClearView ... -
Page 109: Positie Aanpassen Van Lijnen En Beeldafdekking
Optelec ClearView Positie aanpassen van lijnen en beeldafdekking Wanneer lijnen of beeldafdekking zijn geactiveerd kan, door middel van het draaien van deze knop, de afstand tussen de delen van de beeldafdekking en de lijnen worden vergroot of verkleind. Het veranderen van... -
Page 110: Auto Zoom Functie Met Fixed Font Technologie
Optelec ClearView Auto Zoom functie met fixed font technologie Het Zero Button Pluspakket biedt de unieke Auto Zoom functionaliteit met fixed font technologie. Deze functie zorgt ervoor dat tekst die u op het leesplateau legt automatisch op de voor u juiste vergroting en leesstand wordt weergegeven op het scherm. -
Page 111: Auto Zoom Aanpassen
Optelec ClearView functies, zoals het instellen van verschillende voor- en achtergrondkleuren, Pointer/Zoekfunctie aanpassen van de helderheid, blijven actief. Druk de Auto Zoom knop opnieuw in om naar de handmatige zoom modus terug te keren. Nu is de vergrotingsknop in het midden van de tafel weer actief. -
Page 112: Pointer (Positie Bepalen Op Het Beeldscherm)
Optelec ClearView 6. Het Uitgebreid Pluspakket Verschillende voor- achtergrondkleuren instellen Door op deze toets te drukken kunnen 8 kleurencombinaties worden geselecteerd (7 verschillende voor- en achtergrond- kleurencombinaties en een fotostand met grijstinten). U kiest deze kleuren wanneer meer contrast nodig is of wanneer alternatieve kleuren een beter overzicht geven. -
Page 113: Schakelen Tussen Camerabeeld En Pc Beeld / Externe Bron
Schakelen tussen camerabeeld en PC beeld / externe bron Wanneer een PC of andere externe Optelec video bron is aangesloten op de ClearView kan door deze toets of de voetschakelaar in te drukken achtereenvolgens... -
Page 114: Aanpassen Van Horizontale Naar Verticale
Optelec ClearView Het veranderen van de positie kan zowel horizontale verticale richting, afhankelijk van de instelling van de horizontaal/ verticaal knop Aanpassen horizontale naar verticale leesondersteuning Door deze knop in te drukken, schakelt u tussen geactiveerde lijnen beeldafdekking horizontaal naar verticaal. -
Page 115: Het Verstellen Van De Monitor
Optelec ClearView 7. Het verstellen van de monitor 18” TFT monitor kan zowel in De speciale ClearView hoogte als in kijkhoek worden versteld en garandeert zodoende optimaal kijkgemak minimale lichtreflecties. Om het scherm in de gewenste positie te plaatsen, pakt u het scherm aan beide zijden vast en beweegt u het scherm voorzichtig omhoog of omlaag. -
Page 116: Problemen Oplossen
Optelec ClearView 8. Problemen oplossen Er is geen beeld - Controleer of het apparaat is ingeschakeld (rode knop op de X-Y tafel) - Controleer of alle modulen correct zijn aangesloten - Controleer of alle stroomkabels goed zijn aangesloten - Controleer, indien u geen ClearView... - Page 117 Optelec ClearView - Controleer alle aansluitingen tussen computer en Basis unit (verbindt de computer via de Basis unit aan de monitor) - Controleer de status van de toets - Sluit de monitor rechtstreeks aan op de computer en controleer of deze beeld geeft - Indien u een voetschakelaar gebruikt: controleer of het uitgebreid Pluspakket is geïnstalleerd...
-
Page 118: Contact En Service
Optelec behoudt het recht om een te repareren ClearView te vervangen door een identiek apparaat. In geen geval is Optelec of een van haar distributeurs verantwoordelijk voor gebreken als gevolg van verkeerd gebruik. Garantie is alleen geldig in het land van aankoop en met intacte garantie zegels. -
Page 119: Richtlijnen
Optelec ClearView 11. Richtlijnen Dit product voldoet aan de bepalingen en EMC standaard van de richtlijnen: MDD: EN 12182 FCC part 15 Class B EN 60601-1-2 (EMC) EN 60601-1 (safety) C-Tick CISPR 22 EMC: EN 50081-1 Safety EN 55022 UL 60950... -
Page 120: Specificaties Van De Clearview
Optelec ClearView 12. Specificaties van de ClearView Scherpstellen: Auto focus met blokkering Vergroting – Monochroom, Kleuren, PC systeem: 2.6 X – 50 X op een 17” beeldscherm Vergroting – HD systeem: 1 X – 50 op een 17” beeldscherm Oppervlak van Basis unit: 44 x 50 cm 110-240 Volt AC –... - Page 121 Optelec ClearView ClearView Manuale Utente Optelec, parte di Tieman Group, è stata fondata nel 1975 a Rockanje, in Olanda. Dal 1975, Optelec sviluppa e produce soluzioni innovative per aiutare ciechi e ipovedenti nelle loro attività quotidiane. Visitate il sito web di Optelec all’indirizzo www.optelec.com per ulteriori informazioni sui prodotti e i servizi Optelec.
- Page 122 Optelec ClearView SOMMARIO Introduzione ............122 Sicurezza e manutenzione ........123 Apertura della confezione, installazione accensione ............125 Funzionamento ............. 127 Accensione/Spegnimento ........127 Differenti modalità di ..........127 visualizzazione ............. 127 Regolazione dell’ingrandimento ......128 Blocco della messa a fuoco automatica (Auto-focus) ................
- Page 123 Optelec ClearView Tecnologia per dimensione carattere fissa con Auto Zoom ..............136 5.4 Feature Pack – Auto Zoom ........ 136 Auto Zoom ON/OFF ..........136 Regolazione dell’Auto Zoom ........ 137 Feature Pack Advanced ........137 Combinazioni colore ..........137 Puntatore (indicatore di posizione) ....... 137 Attivazione dei marcatori di righe / finestre ...
-
Page 124: Introduzione
ClearView 1. Introduzione Congratulazioni per l’acquisto di ClearView , un sistema elettronico ingrandente da tavolo, progettato da Optelec. ClearView permette di leggere, scrivere, vedere fotografie, eseguire lavoretti manuali e molte altre attività. Attraverso semplici comandi, è possibile ingrandire testi ed oggetti in differenti colori, con luminosità... -
Page 125: Sicurezza E Manutenzione
Optelec ClearView 2. Sicurezza e manutenzione Leggere attentamente queste istruzioni prima di utilizzare il sistema. Conservare questo Manuale Utente per poterlo consultare anche in seguito. Utilizzare ClearView solo in ambienti interni. Non esporre l’apparecchio a cambiamenti rapidi di temperatura o di umidità. - Page 126 Optelec ClearView Contattare il distributore nel caso divenga necessario un intervento di manutenzione. Non aprire l’apparecchio per nessun motivo, perché in tal caso decadrebbe la garanzia. Questo apparecchio non contiene alcuna parte interna su cui l’utente possa intervenire. Nel caso sia necessario spostare ClearView , scollegare il Monitor dalla Base per garantire un trasporto sicuro.
-
Page 127: Apertura Della Confezione, Installazione E Accensione
Optelec ClearView 3. Apertura della confezione, installazione e accensione è un sistema modulare con un’uscita standard di ClearView tipo VGA. Ciò significa che è possibile collegare ClearView+ a tutti i monitor compatibili VGA, siano essi schermi catodici (CRT) o schermi piatti a cristalli liquidi (TFT) o ad un apparecchio TV. - Page 128 Optelec ClearView - Feature Pack (kit opzionale) permette di aggiungere ulteriori funzioni a ClearView . Sono disponibili quattro tipi di Feature Pack: Feature Pack Basic Feature Pack Advanced Feature Pack Automatico per la grandezza fissa del carattere Feature Pack Auto Zoom per la grandezza fissa ...
-
Page 129: Funzionamento
Premere il pulsante On / Off per accendere/spegnere sia il sistema che il monitor. ClearView+ si avvierà nella stessa modalità colori in cui si trovava al momento del suo ultimo spegnimento. Un monitor non Optelec dovrà essere acceso/spento separatamente. Differenti modalità di... -
Page 130: Regolazione Dell'ingrandimento
Optelec ClearView 2 - Modalità lettura: questa modalità migliora il contrasto tra primo piano e sfondo. Le immagini e i testi verranno visualizzati in bianco e nero. Se è stato acquistato un Feature Pack con la funzione combinazioni colore, i colori di sfondo e primo piano possono essere modificati. -
Page 131: Illuminazione Oggetto On /Off
Optelec ClearView Per riattivare la funzione di messa a fuoco automatica, premere nuovamente il pulsante Auto Focus. L’indicatore luminoso rosso si spegnerà. Illuminazione oggetto ON /OFF Premendo questo pulsante per quattro secondi, potete spegnere l’illuminazione sull’oggetto che volete ingrandire. Questo permette di facilitare la lettura di riviste e documenti su carta patinata. -
Page 132: Blocco Del Piano Di Lettura
Optelec ClearView secondi per visualizzare queste informazioni. Premerlo nuovamente per quattro secondi per rimuoverle. Blocco del piano di lettura Sollevare leggermente verso l’alto la levetta rossa posta al centro del piano di lettura, per bloccare il movimento del piano stesso. Tale posizione facilita la scrittura o la pittura sul piano di lettura. -
Page 133: Feature Pack
5. Feature Pack Attenzione: i Feature Pack sono opzionali. l Feature Pack aumentano le funzionalità di ClearView Optelec offre quattro tipi di Feature Pack: Basic, Advanced, Automatico e Auto Zoom. Il Feature Pack Basic estende le funzioni delle unità monocromatiche, a colori e HD. -
Page 134: Funzione Trova (Indicatore Di Posizione)
Optelec ClearView maggior contrasto, scegliendo una certa coppia di colori, oppure combinazioni di colori che garantiscano una migliore visualizzazione. Tenere premuto questo pulsante per due secondi per ritornare alla modalità nero su bianco. Premere il pulsante di nuovo per due secondi per tornare alla combinazione precedente. -
Page 135: Puntatore (Indicatore Di Posizione)
Optelec ClearView Puntatore (indicatore di posizione) Premendo questo pulsante per tre secondi si attiva un indicatore a LED al centro del piano di lettura. Se si posiziona ad esempio penna sull’indicatore luminoso del piano di lettura, si vedrà la penna stessa visualizzata al centro dello schermo. -
Page 136: Attivazione Dei Marcatori Di Righe / Finestre
Optelec ClearView Per visualizzare al meglio l’immagine del PC sul monitor ClearView , accertarsi che la risoluzione del PC sia impostata correttamente: 18” TFT la risoluzione deve Con un monitor ClearView essere impostata a 1366 x 768. 22” TFT la risoluzione deve Con un monitor ClearView ... -
Page 137: Posizionamento Di Righe / Finestre
Accensione / Spegnimento Premere il pulsante On/Off posizionato a sinistra sul poggia-polsi per accendere/spegnere sia il sistema che il monitor. Un monitor non Optelec dovrà essere acceso/spento separatamente. Italiano... -
Page 138: Tecnologia Per Dimensione Carattere Fissa Con Auto Zoom
Optelec ClearView Tecnologia per dimensione carattere fissa con Auto Zoom Il Feature Pack Automatico integra una funzione unica che permette di convertire e visualizzare il testo con la dimensione dei caratteri fissa e nella modalità preferita, senza dover continuamente agire sui comandi. -
Page 139: Regolazione Dell'auto Zoom
Optelec ClearView Regolazione dell’Auto Zoom La dimensione fissa del carattere che si vuole ottenere, può essere regolata ruotando il pulsante Auto Zoom. Ruotatelo senso orario aumentare la dimensione del carattere e in senso antiorario per diminuirla. 6. Feature Pack Advanced Combinazioni colore Premendo questo pulsante nelle modalità... -
Page 140: Attivazione Dei Marcatori Di Righe / Finestre
Optelec ClearView schermo. Se si posiziona ad esempio una penna sull’indicatore luminoso del piano di lettura, si vedrà la penna stessa visualizzata al centro dello schermo. Premere ancora il pulsante per disattivare la luce a LED. Attivazione dei marcatori di righe / finestre Premendo questo pulsante si attiveranno in sequenza le modalità... -
Page 141: Dimensione Righe
Optelec ClearView Dimensione righe Quando sono attivati i marcatori di righe o finestre, ruotando questo pulsante, si modificherà la distanza tra i marcatori di righe o tra i bordi delle finestre sullo schermo. Questa modifica potrà essere eseguita sia orizzontalmente sia verticalmente, a seconda dello stato del... - Page 142 Optelec ClearView 22” e 24” TFT includono un braccio I monitor ClearView ultra flessibile multi direzionale (Ultra Flexible TFT Arm), che permette di regolare il monitor nella posizione preferita. Il monitor può essere spostato verso il basso e verso l’alto, in avanti e all’indietro, verso destra e verso sinistra, per la...
-
Page 143: Risoluzione Dei Problemi
Optelec ClearView 8. Risoluzione dei problemi Non compare alcuna immagine sullo schermo di , una volta acceso l’apparecchio: ClearView - Verificare che l’apparecchio sia stato acceso (con il pulsante rosso di accensione sul piano di lettura). - Verificare tutte le connessioni dei cavi e delle parti hardware. - Page 144 Optelec ClearView - Verificare i cavi di connessione video (VGA) dal computer verso la Base (non collegare il computer direttamente al monitor). - Verificare lo stato del pulsante - Con l’interruttore a pedale: verificare l’installazione del Feature Pack Advanced. - Verificare eventuali malfunzionamenti del computer, collegando direttamente il PC al monitor.
-
Page 145: Contatti / Assistenza Tecnica
ClearView acquistato, con un prodotto simile o migliore. In nessun caso Optelec o i suoi distributori potranno essere ritenuti responsabili per danni indiretti o consequenziali. Le eventuali azioni risolutive si limiteranno alla sostituzione dei moduli che compongono ClearView . -
Page 146: Conformità
Optelec ClearView 11. Conformità Questo prodotto è conforme alle seguenti direttive per la sicurezza e per la Compatibilità Elettro Magnetica (EMC): MDD: EN 12182 FCC parte 15 Classe B EN 60601-1-2 (EMC) EN 60601-1 (sicurezza) C-Tick CISPR 22 EMC: EN 50081-1... -
Page 147: Specifiche Tecniche Di Clearview
Optelec ClearView 12. Specifiche tecniche di ClearView Messa a fuoco: messa fuoco automatica relativo blocco Ingrandimento – Unità monocromatica, colore, PC: da 2,6 a 50 X (17” monitor) Ingrandimento – Unità HD: da 1 a 50 X (17” monitor) Dimensioni Base:... - Page 148 Si desea obtener más información sobre todos los productos y servicios de Optelec, haga el favor de dirijirse a la página web de Optelec: www.optelec.com Hemos hecho todo lo posible para asegurarnos de que la información contenida en este manual fuera correcta al...
- Page 149 Optelec ClearView ÍNDICE Felicitaciones por su ClearView ......148 Seguridad y cuidado ..........150 Desembalaje, instalación y configuración ..152 Operación .............. 154 Botón On / Off (encendido / apagado) ....154 Diversos modos de visualización ......155 Ajuste de la amplificación ........155 Bloqueo del auto-foco ..........
-
Page 150: Felicitaciones Por Su Clearview
Optelec ClearView Regular el zoom automático ......... 165 Módulo de funciones avanzadas ......166 Semi colores............166 Puntero (localizador de posición) ......166 Activación de marcadores de línea / tonos de ventanas ............... 166 Alternar entre cámara interna y PC / fuente externa ................ - Page 151 Optelec ClearView Es fácil y simple de operar y permite ampliar textos y objetos en diferentes colores, con brillo y contraste regulables. Debido a su diseño “slim” y a su amplia funcionabilidad, ClearView proporciona ayuda práctica en el hogar, en el trabajo y en la escuela.
-
Page 152: Seguridad Y Cuidado
Optelec ClearView 2. Seguridad y cuidado Lea atentamente las instrucciones antes de armar, configurar y usar su sistema. Conserve este manual como guía para eventual referencia futura. No use el ClearView a la intemperie. No exponga el sistema a cambios extremos o rápidos de temperatura o humedad. - Page 153 Optelec ClearView Cuando sea necesario reparar o dar servicio a su sistema, póngase en contacto con su proveedor. No lo abra, ni intente hacerlo usted mismo porque esto invalidaría la garantía. El sistema ClearView no contiene ninguna pieza que pueda ser reparada por el usuario ni a la cual éste pueda darle servicio.
-
Page 154: Desembalaje, Instalación Y Configuración
Los monitores solo pueden utilizarse como una parte integrada a la unidad. - Un módulo de funciones (optativo) para proporcionar funcionalidades adicionales al ClearView . Optelec ofrece cuatro módulos de funciones: El módulo de funciones básicas, el módulo de funciones avanzadas, ... - Page 155 Optelec ClearView el módulo de función Auto Zoom, con tecnología de fuente fija. La unidad de PC requiere el módulo de funciones avanzadas. Para obtener información sobre el funcionamiento de los módulos de funciones, consulte los capítulos 5 y 6.
-
Page 156: Operación
Optelec ClearView 4. Operación Cuando utilice el ClearView , para facilitar el acceso a los botones de control y permitir un movimiento estable del tablero, ubique las manos sobre el apoya muñecas, en la parte frontal del tablero. Si está utilizando el ClearView con el módulo de función... -
Page 157: Diversos Modos De Visualización
Optelec ClearView Diversos modos visualización Presionar este botón completará un ciclo con 3 diversos modos de visualización: 1 - Modo de la foto a todo color (solamente en sistemas del color y sistemas avanzados de la PC y con un monitor de color). -
Page 158: Bloqueo Del Auto-Foco
Optelec ClearView Bloqueo del auto-foco Para bloquear/desactivar la unidad de auto-foco continuo se debe presionar el botón “Auto Focus”. Cuando se llevan a cabo tareas como escribir a mano, pintar o realizar artesanías se puede prescindir del auto- foco, por lo tanto es muy útil que éste se pueda desactivar. -
Page 159: Mostrar La Informacion De Sistema En Pantalla
Optelec ClearView Mostrar la informacion de sistema en pantalla Es posible visualizar el factor de zoom y la configuración del sistema (módulos del sistema) en pantalla. Presione el botón “Auto Focus” durante cuatro segundos para mostrar esta información. Vuelva a presionarlo una vez más durante cuatro segundos para quitar esta información. - Page 160 Optelec ClearView Nota: Si su unidad ClearView color está equipada con un monitor TFT de 22”, el pedal alterna entre la imagen de la cámara interna, una pantalla vertical dividida y una fuente externa. Español...
-
Page 161: Módulos De Funciones
5. Módulos de funciones Los módulos de funciones aumentan la funcionalidad del ClearView . Optelec ofrece cuatro módulos de funciones: avanzadas, básicas, Auto Zoom y Zero Button. El módulo de funciones básicas amplía las funcionalidades de las unidades monocromo, color y HD. -
Page 162: Función Buscar (Localizador De Posición)
Optelec ClearView seleccionables cuando o más contraste es necesario o cuando las combinaciones de color alternas proporcionan una mejor visibilidad. Presionando este botón en modo de la foto accionará la palanca de usted entre el modo de la escala a todo color y escala de grises. -
Page 163: Módulo De Funciones Avanzadas
Cambie entre la cámara y la PC interna/la fuente externa Si la PC o la otra fuente de Optelec del external está conectada con el ClearView , presione este botón, o el interruptor de pie, para accionar la palanca entre la imagen interna de la cámara, o una imagen de plena pantalla de la... -
Page 164: Activación De Marcadores De Línea / Tonos De Ventanas
Optelec ClearView Con un monitor TFT de 22” ClearView , la resolución debe ser de 1680 x 1050 Con un monitor TFT de 24” ClearView , la resolución debe ser de 1920 x 1080 Nota: Si su unidad ClearView color está... -
Page 165: Posición De Líneas / Ventanas
Optelec ClearView Posición de líneas / ventanas Si los marcadores de líneas o ventanas están activados (ver más abajo) y se quiere cambiar su posición en la pantalla, se hace girar la perilla cuyo ícon aquí se representa. Los marcadores de línea y las ventanas se pueden visualizar en posición... -
Page 166: Encendido Y Apagado
Optelec ClearView Encendido y apagado Presione el botón ON / OFF (encendido/apagado) ubicado en la parte izquierda superior del apoya muñecas para encender el sistema y el monitor. Un monitor que no sea ClearView+ deberá encenderse y apagarse de manera independiente. -
Page 167: Zoom Automático (Encendido/Apagado)
Optelec ClearView Zoom automático (encendido/apagado) Oprima este botón para activar la función de zoom automático. La función de zoom automático mostrará automáticamente el texto ubicado en el tablero de lectura en su tamaño de fuente fija preferido sin importar el tamaño de fuente original del texto impreso. -
Page 168: Módulo De Funciones Avanzadas
Optelec ClearView 6. Módulo de funciones avanzadas Semi colores Presionar este botón en modos de lectura del alto contraste le completa un ciclo con diversas combinaciones de color de fondo del primero plano 7 y. Usted puede elegir exhibir el texto en un par de colores seleccionables cuando o más contraste es necesario o cuando las combinaciones... -
Page 169: Alternar Entre Cámara Interna Y Pc / Fuente Externa
La función de ventana se puede usar para anular parte de la imagen, cuando la luminosidad de la pantalla molesta al usuario. Alternar entre cámara interna y PC / fuente externa Si un PC u otra fuente Optelec externa está conectada ClearView+, presione botón aquí... -
Page 170: Botón Horizontal / Vertical
Optelec ClearView Los marcadores de línea se pueden visualizar en posición horizontal o vertical, según el sentido de este botón . Botón horizontal / vertical Presionando este botón se cambian las líneas y las ventanas de la posición vertical a la posición horizontal. -
Page 171: Ajuste De La Pantalla Del Monitor
Optelec ClearView 7. Ajuste de la pantalla del monitor Es posible regular la altura y el ángulo de visualización del monitore TFT especiale de 18” ClearView . Regular el monitor permite evitar todo reflejo. Sujete firmemente el panel plano de ambos lados para ubicarlo en su posición preferida. -
Page 172: Problemas Eventuales Y Su Solución
Optelec ClearView 8. Problemas eventuales y su solución No hay imagen en el monitor ClearView después de encenderlo: - Verifique que la unidad esté encendida (botón rojo “Power” en el tablero X / Y) y que haya corriente. - Controle todos los contactos y las conexiones tanto de cables como de hardware. - Page 173 Optelec ClearView - Controle los cables de contacto del vídeo (VGA) del ordenador a la unidad básica (no conecte la PC directamente al monitor). - Controle la posición del botón - Verifique que no haya desperfectos en el ordenador, conectando la PC directamente con el monitor.
-
Page 174: Contacto / Soporte Al Producto
Si tiene preguntas sobre cómo armar, operar, usar o instalar su sistema, le rogamos se ponga en contacto con el distribuidor, su proveedor o con la oficina de Optelec más cercana a su domicilio. Consulte la última página de este manual donde se incluye una lista completa de direcciones de las oficinas de Optelec en el mundo. -
Page 175: Condiciones De Garantía
El ClearView+ ha sido diseñado para el usuario final / comprador individual, para su uso en entornos domésticos y de oficina. Optelec se reserva el derecho a reparar o reemplazar cualquier ClearView comprado, por un producto similar o mejor. -
Page 176: Conformidad Con Disposiciones De Seguridad
Optelec ClearView 11. Conformidad con disposiciones de seguridad Este producto está en conformidad con las exigencias de seguridad y EMC (compatibilidad electromagnética) de las directivas: MDD: EN 12182 FCC part 15 Class B EN 60601-1-2 (EMC) EN 60601-1 (seguridad) C-Tick... -
Page 177: Especificaciones Del Clearview
Optelec ClearView 12. Especificaciones del ClearView Foco: Auto foco automático continuo con posibilidad de bloqueo de enfoque (auto-focus) Magnificación – Unidad monocromo, color y PC: 2,6 X – 50 X en una pantalla de 17”. Magnificación – Unidad HD: 1 X – 50 en una pantalla de 17”. - Page 178 Optelec ClearView Clear View+ クリアビュープラス 19 インチモニタモデル 22 インチモニタモデル 取扱説明書 Ver.1204 日本語...
- Page 179 Optelec ClearView この度はクリアビュープラスをお買い上げいただき ありがとうございました。 本機はロービジョンの方 々をサポートするためにオプテレック社が開発した卓 上型拡大読書器です。 簡単な操作で、見たいものや文章をモニタにカラー 、白黒、白黒反転のモード表示し、明るさやコントラ ストを調節できます。 読書や筆記など、いろいろな 場面で役立ちます。 本機を組み立てる前に、この取扱説明書を最後まで 読んでください。 ご質問やご不明な点は、お客様相 談室(28 ページ)もしくはご購入いただいた販売店 にお問い合わせください。 日本語...
- Page 180 Optelec ClearView 目 次 安全なご使用のために ・・・・・・・・・・・・・・180 安全上のご注意・・・・・・・・・・・・・・・・・・181 1. 本機の組み立て手順・・・・・・・・・・・・188 2. 本機の構成・・・・・・・・・・・・・・・・191 3. 本機を起動する・・・・・・・・・・・・・・192 電源スイッチ・・・・・・・・・・・・・・・・192 倍率調整・・・・・・・・・・・・・・・・・・193 モード変更・・・・・・・・・・・・・・・・・193 照明の消灯/点灯・・・・・・・・・・・・・・193 焦点固定・・・・・・・・・・・・・・・・・・194 画面調整・・・・・・・・・・・・・・・・・・195 テーブルブレーキ・・・・・・・・・・・・・・195 テーブルグリップ・・・・・・・・・・・・・・196 4. オプション品の説明・・・・・・・・・・・・・196 フットスイッチ・・・・・・・・・・・・・・・196 オプションパックアドバンス・・・・・・・・・196 セミカラーボタン・・・・・・・・・・・・・・197 ポインタ(位置表示)ボタン・・・・・・・・・197 ライン・マスキングボタン・・・・・・・・・・198 ライン・マスキング縦横変更ボタン・・・・・・198 映像切 替・ 1 99 ラ イン ・マ スキ ング 位置 変更...
- Page 181 Optelec ClearView 7. お客様相談窓口とサポートについて・・・・・202 8. 仕様・・・・・・・・・・・・・・・・・・・203 日本語...
- Page 182 Optelec ClearView (ア) モニタアームを調節する時には、しっかりとモニタを両 手で持って操作してください。モニタを上から押さえたり、 反時計回りに回したりしないで下さい。また機器の転倒を防 ぐため、XYテーブルを上から力を加えて押さえないように 、十分注意して下さい。 日本語...
- Page 183 Optelec ClearView 日本語...
- Page 184 Optelec ClearView 日本語...
- Page 185 Optelec ClearView 日本語...
- Page 186 Optelec ClearView 日本語...
- Page 187 Optelec ClearView 日本語...
- Page 188 Optelec ClearView 日本語...
- Page 189 Optelec ClearView 日本語...
- Page 190 Optelec ClearView 日本語...
- Page 191 Optelec ClearView 1. 本機の組み立て手順 (ア) 本体、液晶モニタ、アーム、小箱のACアダプター 、電源ケーブル、背面カバー、テーブルグリップを取 り出します ご注意:本体を持ち上げる場合は、テーブル底 部の両側中央付近にあるくぼみに手を入れて持 ち上げてください。ライト部分などを持って持 ち上げると破損の原因となります。 ②本体上部の四角いカバーを外して、アームの下部 を差し込み装着してください ③(22 インチモデルのみ)モニタは、背面の取付部 にアームの取付金具を下から滑り込ませて接続して ください ② ③ ※19 インチモデルは、モニタをアームに接続した 状態で出荷されます ④(22 インチモデルのみ)アームから出ている映像コネ クタと電源コネクタを、モニタ背面中央のそれぞれの 接続口に上方向に差し込みます 日本語...
- Page 192 Optelec ClearView ※19 インチモデルは、モニタをアームに接続し た状態で出荷されます ⑤本体背面上部右側の Dsub15 ピンの接続口に、映像 コネクタを、上部中央の電源接続口に電源コネクタを 接続します。 ⑥本体背面下部の電源接続口にACアダプタのコネクタ を下方向に差し込みます。 ⑤ ⑥ ⑦ACアダプタにつないだ電源プラグをコンセントに差し 込みます ⑧2本テーブルグリップを下テーブルの左右側面の ネジ穴にそれぞれネジ込み取り付けてください。 日本語...
- Page 193 Optelec ClearView ⑨最後に背面のカバーを装着します 2.本機の構成 ● ベースユニット・・・コントロールパネル、XY テーブルとカメラ、照明、入出力端子を内蔵する エレクトロニクスボックスで構成されています ● アーム・・・モニタを上下させることができます。 22 インチモデルは、さらに左右(各20度)、前後、90 度回転(横長・たて長)ができます。 ● モニタ・・・19 インチもしくは 22 インチワイド モニタ ※19 インチモデルはモニタをアームに取り付けた状 態で出荷されます ● ACアダプタ、電源ケーブル ● 取扱説明書、保証関係書類 日本語...
- Page 194 Optelec ClearView 3.本機を起動する 電源プラグをコンセントに接続すると、XYテ ーブル手前の中央にある大きなボタンの周囲が、 約 30 秒間赤く点灯します。 電源スイッチ テーブルの手前中央部の赤い電源ボタンを押し て電源を入れてください。 約 10 秒後に、モニタに映像が映し出されます。 照明は、電源を入れてから約1分後に最も明るい状 態になります。 電源を入れると、前回電源を切る際のモード、 拡大率で映像が表示されます。 倍率調整 電源ボタンの手前にある大きなツマミが、倍率 調整ツマミです。 このボタンを時計方向に回す 日本語...
- Page 195 Optelec ClearView と、映像が拡大され、時計と反対方向に回すと、 映像は縮小されます。 モード変更 倍率調整ボタンの中心にあるボタンが、モード 変更ボタンです。 このボタンを押すと、カラー 、白黒、白黒反転の3段階でカ ラーモードを変更できます。 照明の消灯/点灯 倍率調整ボタンの中心にあるボタンを約4秒間押し 続けると、照明が消えます。携帯電話の画面や光沢 のある雑誌などで照明の反射光が気になるときに、 見やすい映像になります。 もう一度、ボタンを約4秒間押し続けると、照明が 点灯します。 焦点固定 XY テーブルの手前左側のスライドカバーを開け ると、3つのボタンがあり、右端が焦点固定ボタ ンです。 日本語...
- Page 196 Optelec ClearView クリアビューは電源を入れるとフルタイムオートフ ォーカス機能が働きます。フルタイムオートフォー カス機能のメリットは大きいのですが、文字を書く ときに対象物ではなく手や筆記用具に焦点があって しまうことがあります。本機は焦点固定ボタンを押 すことで、オートフォーカスを止めることができま す。 手をカメラの撮影範囲に入れる前に、焦点固 定ボタンを押すと、焦点が固定され、カラーモード 変更ボタンの周りが赤く点滅します。この状態では 、対象物に焦点が固定されています。 フルタイムオートフォーカスに戻すためには、再度 焦点固定ボタンを押してください。 カラーモード 変更ボタンの周りの赤い点滅が消えます。 画面調整 XY テーブルの手前左側のスライドカバーを開け ると、3つのボタンがあり、左側の2つが画面調 整ボタンです。 白黒モード、白黒反転モードでは、左の『三日月 マーク』、右の『太陽マーク』で画質を調整でき ます。 を押したまま、『三日月マーク』もしくは 『太陽マーク』を押すと、すべてのモードで画面 の明るさを調節できます。 日本語...
- Page 197 Optelec ClearView テーブルブレーキ XYテーブル手前の下面には、赤いブレーキレバ ーがついています。 このレバーを軽く握ると、 ブレーキが作動し、テーブルは動かなくなります 。 ブレーキを解除するときは、再度ブレーキレ バーを軽く握ります。 ※本体の電源を切ると、自動的にブレーキが掛か ります。 テーブルグリ ップ 本機にはYテーブル(下側のテーブル)にグリップ がついております。 たて書きの文章を読むために、 この左右のグリップを持ち、テーブルを前後にスライ ドさせてください。 ※ このグリップは、たて書きの文章を拡大読書器で 読むと、乗り物酔いのような不快感を感じる主原因 である“テーブルの横揺れ・蛇行”を防ぐための機 構です。世界で唯一のたて書き言語である日本語の ための日本専用仕様です。 日本語...
- Page 198 Optelec ClearView 4.オプション品の説明 フットスイッチ パソコンの画面をクリアビュープラスのモニタ に表示させる場合、オプション品の足踏みの“フ ットスイッチ”を使うと、クリアビュープラスの 映像と本体に接続されているパソコンやVGAの 機器の画像とを切り替えることができます。 19 インチモニタモデルは、交互に表示します。 22 インチタイプは、 「拡大読書器」→「画面 分割(左:パソコン、右:拡大読書器)」→「パソ コン」の順に切り替わります。 “フットスイッチ”は本体背面のカバーの中にある 接続口にコネクタを差し込んでください。 【フットスイッチ】【本体背面の接続口】 ※接続コネクタにジャック部分を差し込んでください。 オプションパックアドバンス 日本語...
- Page 199 Optelec ClearView オプションパックアドバンスでは、以下の機能が追 加されます。 セミカラーボタン セミカラーボタンを押すと、7種類のカラーとその 反転の中から見やすいモードを選ぶことができます 。 2秒間ボタンを押し続けることで、白黒・白黒 反転モードに戻すことができます。 ポインタ(位置表示ライト)ボタン ポインタボタンを押すと、テーブルの中央が照 らされます。 これはカメラがどこを写している かを示すライトで、ライトが指し示す部分がモニ タの中心に写し出されます。 ライトが示した部 分にペンを差し込むと、画面の真ん中にそのペン が写ります。 日本語...
- Page 200 Optelec ClearView ライン・マスキングボタン このボタンを押すと、ライン、マスキング、ラ インやマスキングのない標準画面の3パターンを 順番に切り替えることができます。 ライン機能は、画面に2本 線を入れる機能です。 この 機能は、画面のどこを読んでいるかの確認に役立 ちます。 マスキング機能は画面の一部のみを表示し、残りの 部分を隠してしまう機能です。 この機能は、画面 がまぶしく感じる方が、まぶしさを抑えるために役 立ちます。 また、このボタンを左右に回すことにより、ライン やマスキングの幅を調節することができます。 ライン・マスキング縦横変更ボタン このボタンを押すと、ラインやマスキングの縦 、横を切り替えることが できます。 日本語...
- Page 201 Optelec ClearView ライン・マスキング位置変更/映像切替 このボタンを左右に回すことにより、ラインやマスキ ングの位置を調節することができます。 また、パソコンなどのAV機器を本体に接続している 場合、このボタンを押すことで読書器の映像と、接 続されている機器の映像とを切り替えることができ ます。さらに 22 インチタイプは画面分割が可能で す。 「拡大読書器→画面分割(左:パソコン 右:拡大 読書器)→パソコン」 本体にAV機器が接続されていない場合、このボタン を押すと、ラインやマスキングなどのない標準画面 に戻ります。 5.モニタとアームについて 液晶モニタとモニタアームは液晶モニタを上下 、前後、さらに左右に各 20 度調節することができ 、画面を右に 90 度回転させることができます。 モニタを調節する際は、両手でモニタをしっかり と持ち、動かすようにしてください。 6.『故障かな?』と思ったら ●電源を入れても映像が映らない 日本語...
- Page 202 Optelec ClearView * 電 源 が 入 っ て い る か を 確 認 し て く だ さ い (電源ボタンはテーブル中央手前にある、赤い小 さなボタン) * 全てのケーブル、本体と周辺機器が正しく接続さ れているかを確認してください ●焦点が合わない * 焦点固定ボタンが作動していないかを確認してく ださい。 焦点固定ボタンが作動している場合、 カラーモード変更ボタンの周りが赤く点滅してい ます。焦点固定ボタンをもう一度押すとフルタイ ムオートフォーカスに切り替わります * カメラレンズを、メガネ拭き用の布のようなやわ らかい布で、拭いてください * モニタ画面を、メガネ拭き用の布のようなやわら かい布で、拭いてください...
- Page 203 Optelec ClearView * パソコンと本体が正しく接続されているかを確認 してください。 * 映像切り替えボタンを押しているかを確認してく ださい * パソコンをモニタに直接接続して、画像が正しく 出るかを確認してください (この時、画像が出なければ、パソコンに問題が あります) ●XYテーブルが動かない * XYテーブル手前下面にある、テーブルレバーを 握って、ブレーキを解除してください * テーブルに動きを阻害する物体が挟まっていない かを確認してください 日本語...
- Page 204 Optelec ClearView ※初期設定に戻す もし操作が困難になった場合は、初期設定に戻 すことができます。 本体の電源を切り、3秒待 ってから再度電源ボタンを3秒間押し続けてから 、指を離してください。 これで初期設定に戻り 、問題が解決する場合があります。 7.お客様相窓室とサポートについて クリアビュープラスの操作方法やアフターサー ビスについては、下記のお客様相談室またはご購入 いただいた販売店にお問い合わせください。 お客様相談窓室: 0120-886610 平日 9:00~17:30 (土曜・日曜・祝日は休み) 日本語...
- Page 205 Optelec ClearView 8.仕様 フォーカス オートフォーカス (焦点固定可能) 2.8~54 倍(19 インチ) 倍率 3.3~63 倍(22 インチワイド) モニタサイズ 19 インチ:420mm×360mm 22 インチワイド:510mm×350mm 本体サイズ 幅 426mm×奥行 485mm 高さ 19 インチ:530~690mm 22 インチワイド 500~665mm テーブルサイズ 440mm×500mm 電源 110-240V AC、12V/8.3A MAX 周波数 50-60Hz 使用可能温度 5~35℃ 使用可能湿度 70%未満 結露なきこと...
- Page 206 Optelec ClearView ※ 仕様は予告なく変更する場合がありますので、予 めご了承下さい。 製造元 : Optelec 輸入・販売元 : 株式会社タイムズコーポレーション 日本語...
- Page 207 使用手冊 Optelec ClearView 使用手冊 ClearView Optelec為Tieman集團成員之一,於1975年成立於荷蘭之 Rockanje 自1975 年以來,Optelec已經發展並生產出許多輔 助盲人及視障者日常活動之創新產品 有關更多Optelec之產品 及服務資訊,請參閱Optelec網站:www.optelec.com 在本使用手冊發行時,本公司已盡力確保手冊中所含資訊是 正確無誤的 Optelec及其代理商對於錯誤使用本手冊說明而造 成之任何錯誤或損害不負擔法律責任 Optelec 一直持续努力改进产品及其功能。因此, 或许你的这本产品手册不是最新版本的。请登录 www.optelec.com 在支持部分下载最新版本的手册。 繁體中文...
- Page 208 使用手冊 Optelec ClearView 目錄 產品介紹 ..............206 安全注意事項 ............210 拆封、安裝及設定 ........... 212 操作 ................ 214 開啟電源 ............... 214 選擇您的觀看模式 ..........215 調整影像大小 ............215 自動對焦功能 ............215 主燈源 開啟 / 關閉 ..........216 調整影像之對比 ............ 216 調整影像之亮度 ............ 216 將系統資訊顯示在螢幕上...
- Page 209 使用手冊 Optelec ClearView 5.3 功能面板 – 零按鍵式(Zero Button) ..... 222 開啟電源 ............... 222 自動倍率調整及字體修正之功能 ......223 5.4 功能面板 – 自動倍率調整式(Auto Zoom) ..223 自動倍率調整功能 開啟 / 關閉 ......223 調整自動倍率之大小 ..........224 在電腦型擴視機使用之進階式功能面板介紹 ... 225 半彩模式按鍵介紹 ..........225 指示器 (定位指示) ..........225 啟動定位線...
- Page 210 使用手冊 Optelec ClearView 1. 產品介紹 恭喜您購買了克莉兒系列擴視機,ClearView 是由Optelec設 計之一種桌上型自動對焦影像擴視機,用以幫助視力不良者 進行閱讀與觀看。ClearView 可以讓 您充分享受閱讀、寫 作、欣賞照片、製作手工藝品及更多其他的活動樂趣。 經由簡單的操作,您就可以在不同的顏色並調整對比與亮度 下,獲得文字或物體的放大影像。ClearView 能夠在您於家 居、工作或學校中提供有效的幫助。 具有很多獨特的功能。在強調符合人體工學的設 ClearView 計下,操作面板與 閱讀平台是整合在一起的, 這項特色提 供了獨一無二的操作方便性。自動對 焦功能是每一台 擴視機型號都具有的基本功能。客製化的 ClearView 螢幕可以隨意調整角度以避免反光,也可以提供 ClearView 較舒適之觀看位置 本手冊將讓您熟悉ClearView 基本及進階的功能操作,在設 定及使用您的擴視機前,請先完整閱讀本手冊。 若你在使用本產品後有任何進一步的問題與需求,請立刻連 絡您當地的經銷商。非常感激您的反應,也希望您盡情地使 用本產品。 繁體中文...
- Page 211 使用手冊 Optelec ClearView ** ClearView 是一台模組化的擴視機,由各種不同的模組所 組合而成。本使用 手冊包含了所有ClearView 目前擴視機型 號的使用說明。任一擴視機的功能都有可能被加入或移除, 您所購買的擴視機型號可能並不支援本手冊中提及的某項功 能,或不具有某項模組(例如:22吋液晶螢幕、HD專用電路元 件盒、或是 Zero Button 的功能面板) 繁體中文...
-
Page 212: 安全注意事項
使用手冊 Optelec ClearView 2. 安全注意事項 在設定或使用您的擴視機前,請先仔細閱讀以下說明。請保 存此使用手冊以供未來參考使用 • 請在室內使用ClearView 。 請 勿 將 本 擴 視 機 曝 露 於 溫 度 或 濕 度 強 烈 變 化 的 環 境 中 。 請 勿 將 ClearView 置放於靠近散熱器或加熱器附近,亦勿 放置於陽光直射... - Page 213 使用手冊 Optelec ClearView • 若需將ClearView 移動至他處,請先將螢幕與基座分離 ,以確保運送方便與安全。請使用基座兩側凹入的握把 處抬起擴視機 。 • 在不使用擴視機時,請關閉電源。 • 在進行清潔前,請先拔掉插頭。進行外部清潔時請使用 軟性的濕布。請勿使用清潔劑或磨砂劑,以避免損傷您 的擴視機。 • 請僅使用產品所附的電源變壓器。 繁體中文...
-
Page 214: 拆封、安裝及設定
使用手冊 Optelec ClearView 3. 拆封、安裝及設定 是 一 個 具 有 標 準 VGA 輸 出 端 子 的 模 組 化 系 統 ClearView 。您可以將您的 ClearView 連接至任何VGA相容的的電 腦螢幕或電視螢幕。 您的 ClearView 包含: - 基座 ,具有閱讀平台及整合的控制面板; - 電路元件盒,具有攝影機模組、光源及輸出入連接埠。您 可以選擇購買: 黑白型擴視機 彩色型擴視機... - Page 215 使用手冊 Optelec ClearView 基本式功能面板 進階式功能面板 零按鍵式(Zero Button)功能面板 附加字體修正 技術 自動倍率調整(Auto Zoom)功能面板 附加字體 修正技術 操作電腦型擴視機必須具備進階式功能面板。 進階式功能面板操作方法請參閱本手冊第5及第6章 。 - 腳踏開關 可切換 擴視機 / 電腦 及 擴視機 / 外接鏡頭 之間 的畫面。 - 電源供應器及電源線,用以將 ClearView 連接至電源插座 。 - 本使用手冊及安裝簡易說明。 ** 若 您 的 ClearView 擴視機是以各別分開的模組寄送給您...
-
Page 216: 開啟電源
使用手冊 Optelec ClearView 4. 操作 為了能更輕易地按壓控制開關及穩定地移動閱讀平台,請在 使用ClearView 時,將您的雙手置於平台前端之手臂置放軟 墊上。 如果您的擴視機使用是零按鍵式(Zero Button)之功能面板 ,請參照第五章”功 能面板-零按鍵式” 之章節。 開啟電源 按 下 開 / 關 按 鈕 可 以 同 時 打 開 擴 視 機 及 螢 幕 。 在開啟與關閉時會顯示在相同的彩色模式 ClearView 。攝影機將花費約十秒鐘的時間進行啟動程序,始能 顯示影像。約1分鐘內,ClearView 的光源將會達到... -
Page 217: 選擇您的觀看模式
使用手冊 Optelec ClearView 選擇您的觀看模式 按下此按鈕將可以循環選擇三種不同的觀看模式。 1- 全彩相片模式 (在黑白機型及 螢幕下無法使用此模式) 2- 正片閱讀模式 :此模式下,前景與 背景的對比會加強。圖片及文字將以黑 白的方式顯示。 若您購買並使用功能面板,經由半彩按鈕可選擇多種背景 與前景色彩的組合效果。 3- 負片 閱讀模式:此模式下,會使所選擇的色彩組合相反。 此模式亦會加強背景與前景之對比。 注意:如果灰階照片模式已被設定開啟的話,當您壓按模式 按鈕時,將會包含四種不同觀看模式可循環選擇: 4- 灰階照片模式 調整影像大小 順時針轉動位於平台中央的縮放按鈕可以增加放大倍率,而 逆時針轉動時則可以減少放大倍率。 自動對焦功能 具有自動對焦功能以隨時提供清晰的影 ClearView 像。當ClearView 被開啟時,擴視機將會自動操作 於 自 動 對 焦 模 式 下 。 按 下 自 動 對 焦 鈕 將 會 停 止... -
Page 218: 主燈源 開啟 / 關閉
使用手冊 Optelec ClearView 時,位於閱讀平台中央之模式/放大控制按鈕上的紅 燈會亮起。 要重新開啟自動對焦,只要再次按下 自動對焦按鈕即可。此時紅燈會熄 滅。 主燈源 開啟 / 關閉 壓按此按鍵約四秒,可將主燈源關閉。當您閱讀有亮 面印刷之雜誌及文章時,可選擇關閉主燈源,以避免燈源反 光造成閱讀的困難。再次壓按此按鍵四秒,可將主燈源開啟 。如遇上述閱讀的問題,可在任何模式下隨時開啟或關閉主 燈源。 調整影像之對比 壓住此太陽圖案之按鈕不放可以提高螢幕影像之對 比。壓住此月亮圖案之按鈕不放則可以減少螢幕影 像之對比。 注意:當在半彩模式閱讀時,可使用調整影像及對比的模式 ,讓文章內容顯示更清晰及方便閱讀。 調整影像之亮度 先按住自動對焦按鈕,再壓住太陽圖案之按鈕 不放可以提高螢幕影像之亮度。同樣壓住月亮圖案之按鈕則 可以減少螢幕影像之亮度。 注意:當在全彩照片模式閱讀時,可使用調整影像及對比的 模式,讓照片顯示更清晰。 將系統資訊顯示在螢幕上 您可以將放大倍率、系統版本及顯示頻率等資訊顯示 繁體中文... -
Page 219: 閱讀平台之鎖定
使用手冊 Optelec ClearView 在螢幕上。只要您按住自動對焦按鈕四秒鐘即可顯示其畫面 ,再次按住自動對焦按鈕四秒鐘即可取消畫面。 閱讀平台之鎖定 壓按平台前端的紅色按鈕,即可 以輕輕地將平台鎖定在固定的位 置。這有助於進行手寫或繪圖的 工作。再次壓按紅色按鈕即可放開。 注意:當電源關閉時,制動裝置將自動被啟動 (鎖定位置)。 當電源開啟時,制動裝置將被關閉 (放開位置)。請在關閉電 源前確定閱讀平台已位於正確位置。 使用腳踏開關 腳踏開關 (選購) 使用於電腦型擴視機,可以在擴視機畫面 、電腦或其他如外接攝影機及VGA影像來源之間進行切換 。腳踏開關使用於黑白型、彩色型或HD型擴視機,僅能在擴 視機畫面與外接攝影機影像之間進行切換。 注意:如果腳踏開關使用於彩色型擴視機搭配22吋TFT平面液 晶螢幕,擴視機畫面及外接影像僅能作垂直左右兩邊分割畫 面顯示。 繁體中文... -
Page 220: 功能面板介紹
Optelec ClearView 5. 功能面板介紹 加裝功能面板可以增加ClearView+的功能。 Optelec提供了 四種功能面板:基 本 式 、 進 階 式 、 自 動 倍 率 調 整 式 與 零 按 鍵 式 。 基 本 式 功 能 面 板 可 加 裝 在 黑 白 型 、 彩 色 型 及 H D 型 之... -
Page 221: 尋跡功能 (定位指示)
使用手冊 Optelec ClearView 色彩組合來顯示文字,以獲得更強的對比或更佳的視覺效果 。壓住此按鈕兩秒即可從半彩模式回復成黑白模式 ,再次壓 按兩秒又可回到先前使用之半彩模式。按下此按鈕亦可切換 彩色或灰階之照片模式。 注意:此按鈕在黑白型擴機或黑白螢幕是無作用的。若您在 照片模式下也是無法使用此功能,僅能 切換彩色或灰階之照 片模式 。 尋跡功能 (定位指示) 尋跡功能是一個非常有用的工具,它提供您在閱讀文章時, 可以方便及快速地透過此功能找到文章的位置所在。 壓按此按鍵不放,此時將會啟動尋跡功能。當尋跡功能被啟 動後,擴視機的螢幕會自動縮小至最小倍數,螢幕的中心位 置上會顯示一十字框線,您可以將想要閱讀的文章放置於閱 讀平台,然後移動XY-托盤將文章的開頭移至中心點,確定位 置後放掉按鍵,此時螢幕會回復至原來觀看的倍數。 LED 指示器 (定位指示) 按下此鈕三秒後將會開啟一個LED燈,顯示 於閱讀平台之中央。它會標出螢幕畫面中央 的位置。 在閱讀平台上指示器燈光中置放一支筆可以 看到筆的影像被顯示於螢幕中央。再按壓三秒鐘,可取消定 位指示器功能。 繁體中文... -
Page 222: 功能面板-進階式
使用手冊 Optelec ClearView 5.2 功能面板–進階式 進階式功能面板包含有可選擇之半彩色按鈕、定位指示功能 、電腦畫面及定位線 / 視窗遮蔽等功能切換。有關半彩色按 鈕及定位指示功能之詳細介紹,請參閱第 5.1 章「功能面板- 基本式」。 擴視機畫面與電腦畫面 / 外接影像之切換 若將電腦或其他外接影像源連接至ClearView 擴視機 ,按下此鈕或是腳踏開關可 切換擴視機畫面及電腦 / 外 接影像之全螢幕顯示效果。 為了確保電腦畫面完整呈現於擴視機螢幕上,請依照下列之 指示設定您電腦的解析度: 如果您的擴視機螢幕是 17 吋或 19 吋的 TFT 平面液晶 螢幕,請將電腦解析度設定為:1280 X 1024. 繁體中文... -
Page 223: 啟動定位線 / 視窗遮蔽功能
使用手冊 Optelec ClearView 如果您的擴視機螢幕是 18 吋的 TFT 平面液晶螢幕,請 將電腦解析度設定為:1366 X 768. • 如果您的擴視機螢幕是22吋TFT平面液晶螢幕,請將電 腦解析度設定為:1680 X 1050 注意: 如果您的彩色型擴視機是搭配22吋TFT平面液晶螢幕 , 按下此鈕能切換擴視機畫面、擴視機及電腦畫面之垂 直左右兩邊分割畫面(顯示擴視機與電腦兩者畫面於同 一螢幕上)及電腦畫面。 分割畫面無法改變其大小及位 置。 其他 ClearView+螢幕及 HD型擴視機不提供畫面分 割的功能。 啟動定位線 / 視窗遮蔽功能 按下此鈕可以循環選擇定位線、視窗遮蔽或全螢幕 觀 看 功 能 。 定 位 線 是 用 於 引 導 閱 讀... -
Page 224: 定位線/視窗大小之調整
使用手冊 Optelec ClearView 定位線/視窗大小之調整 當定位線或視窗遮蔽功能被啟動時 ,轉動此鈕可以改變螢幕上定位線兩端或 視窗邊緣之距離。定位線及視窗可以切換 以水平或垂直的方向顯示,壓按 按鈕作改變。 水平 / 垂直按鈕 按下此鈕可以進行定位線/視窗之水平 、垂直方向的切換。 5.3 功能面板 – 零按鍵式(Zero Button) 零按鍵式功能面板藉由獨特的自動倍率調整及字體修正之功 能,提供使用者最容易的閱讀方式 開啟電源 按下位於閱讀平台左側下方之開 / 關按鈕,可以同 時打開擴視機及螢幕。若使用非ClearView 之獨立螢幕,您 必需另行開關螢幕之電源。 繁體中文... -
Page 225: 自動倍率調整及字體修正之功能
使用手冊 Optelec ClearView 自動倍率調整及字體修正之功能 零按鍵功能面板結合了獨特的自動放大功能系統。此功能會 參照您先前的設定值,辨識您放置於閱讀平台的文件或照片 ,而自動改變您的閱讀模式及倍數,充分地表達及闡述了”零 按鍵”的境界。更多有關零按鍵功能面板操作之資訊,請參照 零按鍵功能面板之操作手冊。 5.4 功能面板 – 自動倍率調整式(Auto Zoom) 自動倍率調整式功能面板包含有可選擇之半彩色按鈕、定位 指示功能、自動倍率調整及字體修正功能切換。有關半彩色 按鈕及定位指示功能之詳細介紹,請參閱第 5.1 章「功能面 板-基本式」。 自動倍率調整功能 開啟 / 關閉 壓按此按鍵可開啟自動倍率調整功能。開啟此功能, 擴視機會自動將您放置於閱讀平台之文件字體調整放大 / 縮 小其倍率,符合您原先設定最舒適的閱讀文字格式。 繁體中文... -
Page 226: 調整自動倍率之大小
使用手冊 Optelec ClearView 當自動倍率調整功能開啟時,位於閱讀平台下方中央位置之 調整影像旋鈕將會失效,而其他功能按鍵還是可以正常運作, 如:閱讀模式、半彩模式、定位指示或亮度/對比之調整等功 能。 再次壓按此按鍵關閉自動倍率調整功能,回到手動倍率調整 模式。 調整自動倍率之大小 自動倍率調整功能之倍數大小是可以被調整的,只要 將旋鈕順時針轉動可以增加放大倍率,而逆時針轉動 時則可以減少放大倍率。 繁體中文... -
Page 227: 在電腦型擴視機使用之進階式功能面板介紹
使用手冊 Optelec ClearView 6. 在電腦型擴視機使用之進階式功能面板介紹 本進階式功能面板必需搭配電腦型擴視機使用。 半彩模式按鍵介紹 在正片閱讀模式或負片的閱讀模式,按下此按鈕可以循環選 擇七種不同的前景及背景色彩之半彩色組合 。您可以選擇一 對色彩組合來顯示文字,以獲得更強的對比或更佳的視覺效 果。壓住此按鈕兩秒即可立即回復成黑白模式。 在照片模式 ,按下此按鈕可以切換彩色或灰階之照片模式。 注意:此按鈕在黑白型擴機或黑白螢幕是無作用的。若您在 照片模式下也是無法使用此功能,僅能 切換彩色或灰階之照 片模式 。 指示器 (定位指示) 按下此鈕將會開啟一個LED燈,顯示於閱讀 平台之中央。它會標出螢幕畫面中央的位置 繁體中文... -
Page 228: 啟動定位線 / 視窗遮蔽功能
使用手冊 Optelec ClearView 。 在閱讀平台上指示器燈光中置放一支筆可以看到筆的影像被 顯示於螢幕中央。再按壓三秒鐘,可取消定位指示器功能。 啟動定位線 / 視窗遮蔽功能 按下此 鈕 可 以 循 環 選 擇 定 位 線 、 視 窗 遮 蔽 或 全 螢 幕 觀 看 功 能 。 定 位 線 是 用 於 引 導 閱 讀 位 置 而... -
Page 229: 定位線 / 視窗遮蔽及子母畫面位置之調整
使用手冊 Optelec ClearView 或視窗邊緣之距離及子母畫面之大小。定位線及視窗可以切 換以水平或垂直的方向顯示,壓按 按鈕作改變。當子母 畫面被啟動時,轉動此鈕可改變子母畫面之大小。壓按 按鈕切換水平或垂直的方向調整。 定位線 / 視窗遮蔽及子母畫面位置 之調整 當定位線、視窗遮蔽或子母畫面之功能被啟 動時,轉動此鈕可以改變螢幕上定位線、視 窗或子母畫面之位置。 定位線、視窗及子母畫面可以切換 以水平或垂直的方向顯示,按 按鈕作改變。 水平 / 垂直按鈕 按下此鈕可以進行定位線/視窗之水平 、垂直方向的切換。 繁體中文... -
Page 230: 螢幕之調整
使用手冊 Optelec ClearView 7. 螢幕之調整 特製的 ClearView+ 17吋及18吋TFT平面液晶螢幕可以調整高 度及視角,以取得最佳閱讀位置,亦可以避免反光。用雙手 抓緊液晶螢幕兩側,將其調整至您想要的位置。 特製的 ClearView 19吋及22吋TFT平面液晶螢幕裝配在專用 5向 “超活動螢幕支架”上,可將螢幕調整至任何您喜好的位置 及角度。螢幕可往前、往後、往上、往下、往左、往右或傾 斜角度,直到您調整到最佳的閱讀位置。另有提供螢幕旋轉 閱讀功能,只要將螢幕順時鐘旋轉90度,畫面會自動調整為 直式(中文)閱讀模式,方便您閱讀直式的報章雜誌,以獲 得最佳的閱讀視野。輕輕地將螢幕逆時鐘轉回90度,畫面就 會自動調整回原來的閱讀模式。 有關螢幕之安裝及支架調整,請參照於螢幕箱內之安裝指南 。 請勿在螢幕前或附近放置任何磁性或金屬物體,以免對螢幕 造成損害。 繁體中文... -
Page 231: 疑難排解
使用手冊 Optelec ClearView 8. 疑難排解 在打開電源後, ClearView 螢幕上無任何影像 - 檢查電源是否開啟(閱讀平台上的紅色電源按鈕)。 - 檢查所有電源連接線是否接妥。 - 當連接非ClearView+之螢幕時,檢查螢幕之電源是否開啟。 影像未對焦 - 檢查自動對焦鎖 (圍繞Mode按鈕的紅色圓燈是否顯示對焦 功能已鎖住)。按下對焦功能鈕以回復至自動對焦功能。 - 使用平滑布面小心擦拭攝影機之鏡面。 - 使用平滑布面擦拭螢幕。 圖片及文字呈現灰暗或對比很低 - 按下Mode按鈕切換至高對比閱讀模式。 - 使用控制面板調整亮度。 - 若您使用的是非ClearView 螢幕:改變螢幕之亮度及對比 設定。 電腦影像未顯示 - 檢查進階型功能面板是否已安裝。 - 檢查電腦與基座間的影像(VGA)連接 (勿直接將電腦連接於 螢幕). - 檢查... - Page 232 使用手冊 Optelec ClearView 子母畫面產生閃爍的現象 (僅適用於電腦型擴視機) - 確定影像模式被設定於掃瞄頻率在 60。 - 確定電腦的影像解析度被設定於 640 x 480 及1280 x 1024 之間。 閱讀平台無法移動,或是移動不平順 - 壓按平台前端下方之按鈕以放開平台。 - 檢查滑軌上是否有灰塵或是其他異物。 原廠設定 若您遇到操作上的問題,您可以重新設定回原廠設定。將擴 視機關閉,等待三秒鐘後,再按住開 / 關 按鈕三秒不放。如 此,您的ClearView 就會以原廠設定的狀態開啟。 繁體中文...
-
Page 233: 產品支援與連絡資訊
使用手冊 Optelec ClearView 9. 產品支援與連絡資訊 若您在操作、使用或安裝您的系統上有任何問題,請連絡您 的經銷商或最近的Optelec 服務據點。請參閱本 ClearView 手冊最後一頁所列之Optelec服務據點地址。 您的 ClearView+ 經銷商: 10. 保固條款 自產品送達日期後在 材 料 及 製 造 上 Optelec保證ClearView 沒 有 任 何 故 障 缺 陷 。 繁體中文... - Page 234 使用手冊 Optelec ClearView 此保證不可轉讓且不適用於團體、多重使用者或代理商。 之產品設計係為了個人使用者在家庭或辦公環境 ClearView 使用。Optelec保留修理或以類似或更優良產品替換使用者已 購得產品之權利。 在任何情形下, Optelec或其經銷商不負擔間接或隨之發生 的損害賠償責任。原始使用者請求補償之權利僅限於要求替 換ClearView+ 的元件模組。此項保證僅在原購買地國家且產 品封條未被拆解之情況下有效。欲在保固期限中或之後取得 額外的保固服務或條件,請向您的經銷商冾詢。 Optelec對於本手冊未說明的其他產品使用方式不負擔任何法 律責任。 繁體中文...
-
Page 235: 相關法規
使用手冊 Optelec ClearView 11. 相關法規 本產品符合以下指令所要求 MDD: EN 12182 FCC part 15 Class B EN 60601-1-2 (EMC) EN 60601-1 (safety) C-Tick CISPR 22 EMC: EN 50081-1 Safety EN 55022 UL 60950 EN 55024 醫療電子設備在關於電磁輻射上有特別的要求而必需依照 EMC指導原則進行安裝與運作服務。 警告: 使用非ClearView 製造商所規定或販售之配件、變壓器 及電源線做為元件之替代可能導致ClearView+的電磁輻射增 加或防電磁輻射的效果減弱。... -
Page 236: Clearview + 詳細規格
Optelec ClearView 詳細規格 12. ClearView 對焦 : 自動對焦(具對焦鎖定功能) 放大倍率 – 黑白型、彩色型及電腦型: 倍率為 2.6 X – 50 X(17吋螢幕) 放大倍率 – HD型: 倍率為 1 X – 50 X(17吋螢幕) 基座尺寸 : 44 x 50 公分 : 110 - 240 Volt AC. – 12 Volt / 8.3A 電源供應... - Page 237 Optelec ClearView Optelec Offices Worldwide | Optelec Kantoren | Les Bureaux Internationaux d’Optelec | Optelec en el Mundo | Optelec Weltweit Optelec Europe Optelec U.S. Breslau 4 11800 31 Court North 2993 LT Barendrecht, St. Petersburg, FL 33716 The Netherlands U.S.A.
- Page 238 Optelec ClearView UDC-02109 Rev: B...