Table des Matières
Publicité
Les langues disponibles
Les langues disponibles
Liens rapides
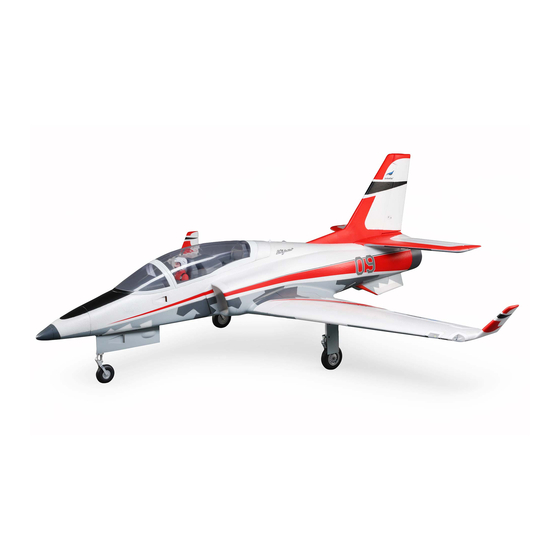
Viper 90mm EDF
Scan the QR code and select the Manuals and Support quick links from
the product page for the most up-to-date manual information.
Scannen Sie den QR-Code und wählen Sie auf der Produktseite
die Quicklinks Handbücher und Unterstützung, um die aktuellsten
Informationen zu Handbücher.
Scannez le code QR et sélectionnez les liens rapides Manuals and Support
sur la page du produit pour obtenir les informations les plus récentes
sur le manuel.
Scannerizzare il codice QR e selezionare i Link veloci Manuali e Supporto
EFL17750
dalla pagina del prodotto per le informazioni manuali più aggiornate.
EFL17770
Instruction Manual
Bedienungsanleitung
Manuel d'utilisation
Manuale di Istruzioni
Publicité
Chapitres
Table des Matières
Dépannage

Manuels Connexes pour Horizon Hobby E-Flite Viper 90mm EDF


Sommaire des Matières pour Horizon Hobby E-Flite Viper 90mm EDF
- Page 1 Viper 90mm EDF Scan the QR code and select the Manuals and Support quick links from the product page for the most up-to-date manual information. Scannen Sie den QR-Code und wählen Sie auf der Produktseite die Quicklinks Handbücher und Unterstützung, um die aktuellsten Informationen zu Handbücher.
-
Page 2: Safety Precautions And Warnings
This product is not intended for use by children without direct adult supervision. Do not use with incompatible components or alter this product in any way outside of the instructions provided by Horizon Hobby, LLC. This manual contains instructions for safety, operation and maintenance. -
Page 3: Table Des Matières
Box Contents Quick Start Information Set up your transmitter Transmitter Setup using the transmitter setup chart Low Rate High Rate Aileron: Measured at p = 11mm p = 16mm the inboard end q = 11mm q = 16mm Elevator: Measured p = 10mm p = 14mm Dual Rates... -
Page 4: Safe ® Select Technology (Bnf Basic)
SAFE Select Technology (BNF Basic) ® The BNF Basic version of this airplane includes SAFE Select technology which can SAFE Select can be configured three ways: offer an extra level of protection in flight. Use the following instructions to make the •... - Page 5 Ventral Fin Installation 1. Fit the left ventral fin into the fuselage and slide aft to secure. TIP: The gray side should face in, and the detailed side should face out. 2. Fit the right ventral fin into the fuselage and slide aft to secure. Vertical Stabilizer Installation 1.
-
Page 6: Receiver Installation (Arf Plus)
Receiver Installation (ARF Plus) The Spektrum AR637T receiver is recommended for ths airplane. If you choose to install another receiver, ensure that it is at least a 6-channel full range (sport) receiver. Refer to your receiver manual for correct installation and operation instructions. Installation (AR637T shown) 1. -
Page 7: Battery Installation And Esc Arming
Battery Installation and ESC Arming Battery Selection A 6S 4000–7000mAh LiPo battery is required. The Spektrum 5000mAh 22.2V 6S 30C LiPo battery (SPMX50006S30) is recommended. Refer to the Optional Parts List for other recommended batteries. If using a battery other than those listed, the battery should be within the range of capacity, dimensions and weight of the Spektrum Li-Po battery packs to fit in the fuselage. -
Page 8: General Binding Tips And Failsafe
General Binding Tips and Failsafe • The included receiver has been specifically programmed for operation of this • Once bound, the receiver will retain its bind settings for that transmitter until aircraft. Refer to the receiver manual for correct setup if the receiver is replaced. you re-bind. -
Page 9: Safe ® Select Switch Designation
SAFE Select Switch Designation ® SAFE Select technology can be assigned to any open switch (2 or 3 position) Assigning a switch ® Mode 1 and 2 transmitters controlling a channel (5–9) on your transmitter. Once assigned to a switch, SAFE 1. -
Page 10: Control Surface Direction
Control Surface Direction Switch on the transmitter and connect the battery. Use the transmitter to operate the aileron, elevator, and rudder controls. View the aircraft from the rear when Aileron Stick checking the control directions. Ailerons 1. Move the aileron stick to the left. The right aileron should move down and the left aileron up, which will cause the aircraft to bank left. -
Page 11: Dual Rates And Control Throws
Dual Rates and Control Throws Program your transmitter to set the rates and control throws based on your Low Rate High Rate experience level. These values have been tested and are a good starting point to 11mm (7/16") p 16mm (5/8") p achieve a successful first flight. -
Page 12: Flying Tips And Repairs
Flying Tips and Repairs Consult local laws and ordinances before choosing a flying location. If landing on grass, it is best to hold full up elevator after touchdown and when taxiing to prevent the nose from digging in. Once on the ground, avoid sharp turns Getting Started until the plane has slowed enough to prevent scraping the wingtips. -
Page 13: Power System Installation And Service
Power System Installation and Service Installing the Power System (ARF Plus) The recommended power system components are given in the Specifications table at the beginning of this manual. 1. Remove the two screws from the fan unit cover and pull the cover out of the fuselage. -
Page 14: Troubleshooting Guide As3X
Troubleshooting Guide AS3X Problem Possible Cause Solution Damaged rotor or nose cone Replace rotor or nose cone Imbalanced rotor Balance the rotor Motor vibration Replace parts or correctly align fan unit or other parts and tighten fasteners as needed Oscillation Loose receiver Align and secure receiver in fuselage Loose aircraft controls... -
Page 15: Replacement Parts
Replacement Parts Part Number Description Part Number Description EFL17774 Wing Set, Left: Viper 90mm EDF EFL17791 Lighting Set: Viper 90mm EDF EFL17776 Wing Set, Right: Viper 90mm EDF EFL17792 Pilot: Viper 90mm EDF EFL17777 Fuselage: Viper 90mm EDF EFLA9012DF 90mm EDF Ducted Fan Unit EFL17778 Vertical Stabilizer: Viper 90mm EDF EFLA9012H... -
Page 16: Ama National Model Aircraft Safety Code
Product, (iv) attempted service by anyone other Service Request submission process found on our website or call Horizon to obtain a than a Horizon Hobby authorized service center, (v) Product not purchased from an au- Return Merchandise Authorization (RMA) number. Pack the Product securely using a thorized Horizon dealer, (vi) Product not compliant with applicable technical regulations, shipping carton. -
Page 17: Contact Information
- Amending 2011/65/EU Annex II 2015/863. EU Importer of Record: Horizon Hobby, GmbH EFL Smart Viper EDF BNF-B (EFL17750): Hereby, Horizon Hobby, LLC declares Hanskampring 9 that the device is in compliance with the following: EU Radio Equipment Directive 22885 Barsbüttel Germany 2014/53/EU, RoHS 2 Directive 2011/65/EU, RoHS 3 Directive - Amending 2011/65/ EU Annex II 2015/863. -
Page 18: Sicherheitshinweise Und Warnungen
Grundfähigkeiten. Wird dieses Produkt nicht auf eine sichere und verantwortungsvolle Weise betrieben, kann dies zu Verletzungen oder Schäden am Produkt oder anderen Sachwerten führen. Versuchen Sie nicht ohne Genehmigung durch Horizon Hobby, LLC, das Produkt zu zerlegen, es mit inkompatiblen Komponenten zu verwenden oder auf jegliche Weise zu erweitern. - Page 19 Packungsinhalt Schnellstartanleitung Zum Einstellen Ihres Senders Senderkonfiguration benutzen Sie das Setup Diagramm Niedrige Ge- Hohe Ge- schwindigkeit schwindigkeit Querruder: p = 11mm p = 16mm Gemessen am q = 11mm q = 16mm Innenbordende Duale Höhenruder: Geschwindigkeit p = 10mm p = 14mm Gemessen am q = 10mm...
-
Page 20: Vor Dem Flug
SAFE Select-Technologie (BNF Basic) Die BNF Basic-Version dieses Flugzeugs verfügt über die SAFE Select-Technologie, während des Bindevorgangs aktiviert oder deaktiviert, oder es kann über die die im Flug einen zusätzlichen Schutz bietet. Verwenden Sie die folgenden Anweisun- Vorwärtsprogrammierung aktiviert werden. Die AS3X-Technologie bleibt zu jeder gen, um das SAFE Select-System zu aktivieren und einem Switch zuzuweisen. -
Page 21: Montage Des Seitenleitwerks
Montage der Stabilisierungsflosse 1. Setzen Sie die link stabilisierungsflosse in den Rumpf ein und schieben Sie sie zur Sicherung nach hinten. TIPP: Die graue Seite sollte nach innen und die detaillierte Seite nach außen zeigen. 2. Setzen Sie die rechte stabilisierungsflosse in den Rumpf ein und schieben Sie sie zur Sicherung nach hinten. -
Page 22: Einbau Des Empfängers (Arf Plus)
Einbau des Empfängers (ARF Plus) Der Spektrum AR637T Empfänger wird für dieses Flugzeug empfohlen. Wird ein anderer Empfänger montiert, sicherstellen, dass es sich dabei mindestens um einen Full-Range 6-Kanal-(Sport-) Empfänger handelt. Zur korrekten Montage und Bedienung, siehe Empfängeranleitung. Installation (Abbildung AR637T) 1. -
Page 23: Montage Des Akkus Und Aktivierung Des Geschwindigkeitsreglers
Montage des Akkus und Aktivierung des Geschwindigkeitsreglers Wahl des Akkus Es wird ein 6S 4000–7000mAh LiPo-Akku benötigt. Empfohlen wird der Spektrum 5000 mAh 6S 22,2 V 30C LiPo-Akku (SPMX50006S30). Siehe Optionale Teileliste zu weiteren empfohlenen Akkus. Wird ein anderer als die aufgeführten Akkus ver- wendet, dann sollte der Akku in Leistung, Abmessungen und Gewicht dem Spekt- rum Li-Po-Akkupack entsprechen, damit er in den Rumpf passt. -
Page 24: Failsafe Und Allgemeine Tipps Für Die Binding
Failsafe und allgemeine Tipps für die Binding • Der mitgelieferte Sender wurde speziell für den Betrieb dieses Fluggeräts • Nach erfolgter Bindung behält der Empfänger seine Bindungseinstellungen für programmiert. Nach dem Austausch des Empfängers sind die Anweisungen zur den Empfänger bei, bis eine neue Bindung erfolgt. ordnungsgemäßen Einrichtung dem Empfängerhandbuch zu entnehmen. -
Page 25: Schalterbelegung Von Safe Select
Schalterbelegung von SAFE Select Die SAFE Select-Technologie kann jedem offenen Schalter (2 oder 3 Position) Zuweisen eines Schalters Mode 1 and 2 transmitters zugewiesen werden, der einen Sender (5–9) auf dem Sender steuert. Nach dem 1. Das Fluggerät für die Wahl Zuweisen zu einer Taste verfügt das eingeschaltete SAFE Select über die Flexibilität des eingeschalteten SAFE zur Wahl der SAFE-Technologie oder dem AS3X-Modus während des Flugs. -
Page 26: Steuerrichtungstests
Steuerrichtungstests Den Sender einschalten und den Akku anschließen. Den Sender zum Steuern Querruder-Hebel der Querruder- und Höhenrudersteuerungen verwenden. Beim Prüfen der Steuerungsrichtungen das Fluggerät von hinten ansehen. Querruder 1. Den Querruder-Hebel nach links bewegen. Das rechte Querruder sollte sich nach unten und das linke Querruder nach oben bewegen, sodass sich das Fluggerät nach links neigt. -
Page 27: Duale Geschwindigkeiten Und Ruderausschlag
Duale Geschwindigkeiten und Ruderausschlag Den Sender programmieren, um die Geschwindigkeiten und Ruderausschläge Niedrige Geschwindigkeit Hohe Geschwindigkeit entsprechend dem Erfahrungsstand einzurichten. Diese Werte wurden getestet und 11mm (7/16") p 16mm (5/8") p sind ein guter Ausgangspunkt, um einen erfolgreichen ersten Flug durchzuführen. Querruder 11mm (7/16") q 16mm (5/8") q... -
Page 28: Flugtipps Und Reparaturen
Flugtipps und Reparaturen Vor der Wahl des Flugstandorts die örtlichen Gesetze und Verordnungen konsultieren. Bei der Landung im Gras sollte am besten nach der Landung und während des Rol- lens das Höhenruder vollständig oben sein, um ein Vornüberkippen zu verhindern. Erste Schritte HINWEIS: Steht ein Absturz unmittelbar bevor, die Gaszufuhr senken und kom- Vor dem Fliegen einen Reichweitentest für das Funksystem durchführen. -
Page 29: Installation Des Stromsystem Und Bedienung
Installation des Stromsystem und Bedienung Installieren des Stromversorgungssystems (ARF Plus) Die empfohlenen Bauteile des Power Systems werden in der Spezifikationstabelle am Anfang dieses Handbuchs aufgeführt. 1. Die zwei Schrauben von der Abdeckung der Gebläseeinheit entfernen und die Abdeckung aus dem Rumpf ziehen. 2. -
Page 30: As3X Fehlerbehebung
AS3X Fehlerbehebung Problem Mögliche Ursache Lösung Beschädigter Propeller oder Spinner Propeller oder Spinner ersetzen Propeller im Ungleichgewicht Propeller ausbalancieren Motorvibrationen Bauteile ersetzen oder alle Bauteile korrekt ausrichten und Befestiger festziehen, je nach Bedarf Oszillation Loser Empfänger Empfänger im Rumpf ausrichten und sichern Lose Flugzeugsteuerungen Bauteile (Servo, Arm, Gestänge, Horn und Steueroberfläche) festziehen oder anderweitig sichern Verschlissene Bauteile... -
Page 31: Ersatzteile
Ersatzteile Teilenummer Beschreibung Teilenummer Beschreibung EFL17774 Tragflächen Linker: Viper 90 mm EDF EFL17791 Beleuchtungssatz: Viper 90 mm EDF EFL17776 Tragflächen Rechter: Viper 90 mm EDF EFL17792 Pilot: Viper 90 mm EDF EFL17777 Rumpf: Viper 90 mm EDF EFLA9012DF 90 mm EDF Impeller-Einheit EFL17778 Seitenleitwerk: Viper 90 mm EDF EFLA9012H... -
Page 32: Haftungsbeschränkung
Kaufdatum hervorgeht. Sollte sich ein Garantiefall bestätigen wird das Produkt Unfälle, Betrieb, Service oder Reparaturversuche, die nicht von Horizon ausgeführt repariert oder ersetzt. Diese Entscheidung obliegt einzig Horizon Hobby. wurden aus. Kostenpflichtige Reparaturen—Liegt eine kostenpflichtige Reparatur vor, erstel- Ausgeschlossen sind auch Fälle die bedingt durch (vii) eine Nutzung sind, die gegen... -
Page 33: Garantie Und Service Kontaktinformationen
Adresse Horizon Technischer Service service@horizonhobby.de Hanskampring 9 Europäische Union D 22885 Barsbüttel, Germany Sales: Horizon Hobby GmbH +49 (0) 4121 2655 100 Konformitätshinweise für die Europäische Union WEEE-HINWEIS: EU Konformitätserklärung EFL Smart Viper ARF (EFL17770): Horizon LLC erklärt hiermit, dass Dieses Gerät ist gemäß... -
Page 34: Précautions Et Avertissements Liés À La Sécurité
REMARQUE Toutes les instructions, garanties et autres documents de garantie sont sujets à la seule discrétion de Horizon Hobby, LLC. Veuillez, pour une littérature produits bien à jour, visiter www.horizonhobby.com ou www.towerhobbies.com et cliquer sur l’onglet de support de ce produit. -
Page 35: Informations De Démarrage Rapide
Contenu de la boîte Informations de démarrage rapide Configuration de Configurez votre émetteur à l’aide du l’émetteur tableau de configuration de l’émetteur Petit Grand débattement débattement Aileron : Mesuré au p = 11mm p = 16mm niveau de l’extrémité q = 11mm q = 16mm intérieure Doubles... -
Page 36: Technologie Safe Select (Bnf Basic)
Technologie SAFE Select (BNF Basic) La version BNF Basic de cet avion intègre la technologie SAFE Select, qui peut offrir avec SAFE Select activée, un commutateur peut être attribué pour basculer un niveau de protection supplémentaire en vol. Utilisez les instructions suivantes entre l’activation et la désactivation de SAFE Select. -
Page 37: Installation De La Dérive Ventrale
Installation de la dérive ventrale 1. Insérez l’ailette ventrale gauche dans le fuselage et faites-la glisser vers l’arrière pour la fixer. CONSEIL : Le côté gris doit être tourné vers l’intérieur et le côté détaillé doit être tourné vers l’extérieur. 2. -
Page 38: Installation Du Récepteur (Arf Plus)
Installation du récepteur (ARF Plus) Le récepteur Spektrum AR637T est recommandé sur cet appareil. Si vous souhaitez installer un autre récepteur, assurez-vous qu’il s’agit au moins d’un récepteur à 6 canaux de pleine portée (sport). Consultez le manuel du récepteur pour les bonnes instructions sur l’installation et le fonctionnement. Installation (AR637T en illustration) 1. -
Page 39: Installation De La Batterie Et Armement Du Variateur Esc
Installation de la batterie et armement du variateur ESC Choix de la batterie Une batterie 6S de 4 000–7 000 mAh Li-Po est requise. La batterie Spektrum 5 000 mAh 22,2 V 6S 30 C Li-Po (SPMX50006S30) est recommandée. Consul- tez la liste des pièces disponibles en option pour connaître les autres batteries recommandées. -
Page 40: Failsafe Et Conseils Généraux Pour Affectation
Failsafe et Conseils généraux pour affectation • Le récepteur inclus a été spécifiquement programmé pour être utilisé avec • Une fois affecté, le récepteur conservera ses réglages d’affectation pour cet cet appareil. Reportez-vous au manuel du récepteur pour la configuration émetteur jusqu’à... -
Page 41: Désignation Du Commutateur Safe Select
Désignation du commutateur SAFE Select Assignation d’un commutateur La technologie SAFE Select peut être assignée à n’importe quel commutateur libre Émetteurs en mode 1 et 2 (2 ou 3 positions) qui contrôle un canal (5 à 9) sur votre émetteur. Une fois attribué 1. -
Page 42: Test De Contrôle De La Direction
Test de contrôle de la direction Allumez l’émetteur et raccordez la batterie. Utilisez l’émetteur pour commander l’aileron et la gouverne de profondeur. Mettez-vous derrière l’appareil pour vérifier Manche de l’aileron les gouvernes. Ailerons 1. Déplacez le manche de l’aileron vers la gauche. L’aileron droit s’abaisse et l’aileron gauche s’élève, pour faire pencher l’appareil vers la gauche. -
Page 43: Doubles Débattements Et Contrôle
Doubles débattements et contrôle Programmez votre émetteur pour configurer les débattements et les coudes de Petit débattement Grand débattement commande selon votre niveau d'expérience. Ces valeurs ont été testées et sont un 11mm (7/16") p 16mm (5/8") p bon point de départ pour réussir à voler pour la première fois. Aileron 11mm (7/16") q 16mm (5/8") q... -
Page 44: Conseils De Vol Et Réparations
Conseils de vol et réparations Consultez les lois et ordonnances locales avant de choisir un espace de vol. REMARQUE : En cas de chute imminente, réduisez complètement les gaz et le trim (la compensation). Le non-respect de cette procédure risquerait d’endommager Avant de commencer davantage la structure de vol, ainsi que le variateur ESC et le moteur. -
Page 45: Installation Et Entretien Du Système D'alimentation
Installation et entretien du système d’alimentation Installation du système d’alimentation (ARF Plus) Les composants recommandés du système d'alimentation sont indiqués dans le tableau de spécifications disponible au début de ce manuel. 1. Retirez les deux vis du cache de la soufflante et retirez le cache du fuselage. 2. -
Page 46: Guide De Dépannage As3X
Guide de dépannage AS3X Problème Cause Possible Solution Hélice ou cône endommagé Remplacez l’hélice ou le cône Hélice déséquilibrée Équilibrez l’hélice Vibration du moteur Remplacez les pièces endommagées et contrôlez le serrage et l'alignement des pièces Oscillations Récepteur mal fixé Réalignez et refixez le récepteur Commandes desserrées Resserrez et vérifiez l'état des pièces (servos, palonniers, tringleries, guignols et gouvernes) -
Page 47: Pièces De Rechange
Problème Cause Possible Solution Effectuez les essais de direction des commandes et réglez les commandes sur Commandes inversées Les réglages de l’émetteur sont inversés l’émetteur en fonction des résultats Le contrôleur utilise la Coupure par tension faible (LVC) Rechargez la batterie de vol ou remplacez la batterie qui ne donne plus les par défaut performances prévues L’alimentation moteur... -
Page 48: Garantie Et Réparations
C’est uniquement ainsi qu’il sera possible d’éviter une manipulation produits achetés chez un revendeur Horizon agréé. Les ventes faites à des tiers ne erronée et des accidents entraînant des blessures et des dégâts. Horizon Hobby ne sont pas couvertes par cette garantie. Les revendications en garantie seront acceptées saurait être tenu responsable d’une utilisation ne respectant pas les lois, les règles ou ... -
Page 49: Informations Ic
2015/863. afin de permettre sa récupération et son recyclage. EFL Smart Viper EDF (EFL17750) : Par la présente, Horizon Hobby, LLC déclare Fabricant officiel pour l’UE : que cet appareil est conforme aux directives suivantes : Directive CEM 2014/30/UE,... - Page 50 VVISO Tutte le istruzioni, le garanzie e gli altri documenti pertinenti sono soggetti a cambiamenti a totale discrezione di Horizon Hobby, LLC. Per una documentazione aggiornata sul prodotto, visitare il sito horizonhobby.com o towerhobbies.com e fare clic sulla sezione Support del prodotto.
- Page 51 Contenuto Guida introduttiva rapida Impostazione della Configurare la trasmittente seguendo la tabella trasmittente Corsa corta Corsa lunga Alettone: Misurato p = 11mm p = 16mm all’estremità interna q = 11mm q = 16mm Equilibratore: p = 10mm p = 14mm Dual Rate Misurato all’estremità...
-
Page 52: Tecnologia Safe Select (Bnf Basic)
Tecnologia SAFE Select (BNF Basic) La versione base di BNF di questo aereo include la tecnologia SAFE Select che viene associato alla trasmittente con SAFE Select attivo, è possibile assegnare un può offrire un livello extra di protezione in volo. Utilizzare le seguenti istruzioni per interruttore per accendere e spegnere la funzione SAFE Select. - Page 53 Installazione delle alette ventrali 1. Montare le alette ventrali sinistra nella fusoliera e far scorrere a poppa per fissarla. CONSIGLIO: il lato grigio deve essere rivolto verso l’interno e il lato dettagliato deve essere rivolto verso l’esterno. 2. Montare le alette ventrali destra nella fusoliera e far scorrere a poppa per fissarla.
-
Page 54: Installazione Del Ricevitore (Arf Plus)
Installazione del ricevitore (ARF Plus) Per questo aeromodello si consiglia il ricevitore Spektrum AR637T. Se si sceglie di montare un altro ricevitore, assicurarsi che si tratti di un modello a piena portata (sport) con almeno 6 canali. Consultare il manuale del ricevitore per le istruzioni di installazione e uso. -
Page 55: Installare La Batteria E Armare L'esc
Installare la batteria e armare l’ESC Scelta della batteria È richiesta una batteria 6S 4000–7000 mAh LiPo. Si consiglia una batteria Spektrum 5000 mAh 22,2 V 6S 30C L-Po (SPMX50006S30). Consultare l’elenco delle parti opzionali per le altre batterie consigliate. Se si usano batterie diverse da quelle elencate, queste devono avere capacità, peso e dimensioni analoghe a quelle della batteria Spektrum LiPo consigliata, per consentirne l’alloggiamento in fusoliera. -
Page 56: Failsafe E Suggerimenti Generali Per Binding
• In caso di problemi, consultare la guida alla risoluzione dei problemi o, se • Il LED arancione sul ricevitore inizia a lampeggiare rapidamente quando il necessario, contattare il servizio di assistenza di Horizon Hobby. ricevitore entra in modalità di binding. -
Page 57: Assegnazione Interruttore Safe Select
Assegnazione interruttore SAFE Select Assegnazione di un La tecnologia SAFE Select può essere assegnata a un qualsiasi interruttore Trasmittente in modalità 1 e 2 libero (posizione 2 o 3) che controlla un canale (5-9) sulla trasmittente. Una volta interruttore assegnata a un interruttore, SAFE Select ON assicura la flessibilità di scegliere la tecnologia SAFE o la modalità... -
Page 58: Test Di Controllo Della Direzione
Test di controllo della direzione Accendere il trasmettitore e collegare la batteria. Usare il trasmettitore per far funzionare l’alettone e i comandi dell’elevatore. Visualizzare il velivolo dal retro Stick dell’alettone quando si controlla le direzioni dei comandi. Alettoni 1. Spostare lo stick dell’alettone a sinistra. L’alettone destro dovrebbe spostarsi verso il basso e l’alettone sinistro verso l’alto, causando l’inclinazione verso sinistra del velivolo. -
Page 59: Duale Rate (Riduttori Di Corsa) E Corsa Dei Comandi
Duale Rate (riduttori di corsa) e corsa dei comandi Programmare la trasmittente per impostare i ratei e le corse dei comandi in Corsa corta Corsa lunga funzione al proprio livello di esperienza. Tali valori sono stati verificati e sono un 11mm (7/16") p 16mm (5/8") p Alettone... -
Page 60: Consigli Per Il Volo E Le Riparazioni
Consigli per il volo e le riparazioni AVVISO: nell’imminenza di un impatto, togliere completamente trim e motore. In Consultare leggi e normative locali prima di scegliere il punto di involo del modello. caso contrario, il rischio di danni a cellula, ESC e motore aumenta. Per iniziare AVVISO: dopo un impatto, verificare che il ricevitore sia rimasto al suo posto in Prima di andare in volo è... -
Page 61: Installazione E Manutenzione Del Sistema Di Propulsione
Installazione e manutenzione del sistema di propulsione Installazione del sistema di propulsione (ARF Plus) I componenti del sistema di propulsione consigliato sono indicati nella tabella delle specifiche all’inizio del manuale. 1. Rimuovere le due viti dal coperchio del gruppo ventola ed estrarre il coperchio dalla fusoliera. -
Page 62: Guida Alla Risoluzione Dei Problemi Con L'as3X
Guida alla risoluzione dei problemi con l’AS3X Problema Possibile causa Soluzione Ogiva o elica danneggiate Sostituire l’ogiva o l’elica Elica non bilanciata Bilanciare l’elica Motore con vibrazioni Sostituire le parti interessate o allineare tutte le parti stringendo gli elementi di fissaggio secondo necessità. Oscillazioni Ricevente allentata Allineare e fissare la ricevente alla fusoliera... -
Page 63: Parti Di Ricambio
Guida alla risoluzione dei problemi Problema Possibile caus Soluzione Comandi invertiti Le impostazioni sulla trasmittente sono invertite Eseguire una verifica sulla direzione dei comandi e apportare le opportune modifiche Si è attivata la funzione LVC dell’ESC Ricaricare la batteria o sostituirla se non più performante La temperatura ambientale potrebbe essere troppo bassa Rimandare il volo aspettando che la temperatura si alzi Il motore pulsa... -
Page 64: Garanzia
Garanzia Periodo di garanzia—Garanzia esclusiva - Horizon Hobby, LLC (Horizon) garantisce Indicazioni di sicurezza—Questo è un prodotto sofisticato di hobbistica e non è che il prodotto acquistato (il “Prodotto”) sarà privo di difetti relativi ai materiali e di un giocattolo. Esso deve essere manipolato con cautela, con giudizio e richiede delle eventuali errori di montaggio alla data di acquisto. -
Page 65: Dichiarazione Di Conformità Per L'unione Europea
Il prodotto deve essere consegnato agli appositi centri di raccolta per consentirne il recupero e il riciclaggio. EFL Smart Viper EDF (EFL17750): Con la presente, Horizon Hobby, LLC dichiara che il dispositivo è conforme a quanto segue: Direttiva europea sulla compatibilità... - Page 66 Viper 90mm EDF...
- Page 68 E-flite, AS3X, DSM, DSM2, DSMX, EC5, IC5, Avian, Spektrum Airware, Bind-N-Fly, BNF, the Bind-N-Fly logo, SAFE, the SAFE logo, ModelMatch, and the Horizon Hobby logo are trademarks or registered trademarks of Horizon Hobby, LLC. The Spektrum trademark is used with permission of Bachmann Industries, Inc.