
Manuels Connexes pour Horizon Hobby E-flite Bind-N-Fly UMX FPV RADIAN


Sommaire des Matières pour Horizon Hobby E-flite Bind-N-Fly UMX FPV RADIAN
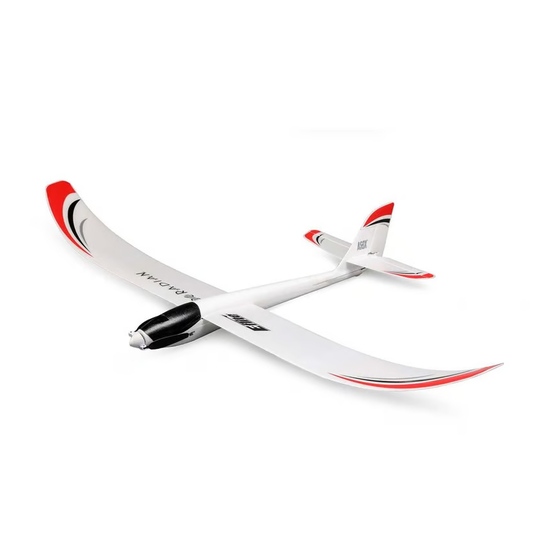
- Page 1 ® ™ FPV RADIAN Instruction Manual Bedienungsanleitung Manuel d’utilisation Manuale di Istruzioni...
-
Page 2: Meaning Of Special Language
Do not use with incompatible components or alter this product in any way outside of the instructions provided by Horizon Hobby, LLC. This manual contains instructions for safety, operation and maintenance. It is essential to read and follow all the instructions and warnings in the manual, prior to assembly, setup or use, in order to operate correctly and avoid damage or serious injury. -
Page 3: Table Des Matières
Table of Contents Prefl ight Checklist ..........4 First Person View (FPV) System instructions ..12 Charger Warnings ..........4 Caring for the Video Transmitter Antenna ....12 Battery Charging ............5 Ultra Micro FPV Troubleshooting ......12 Wing Installation ............5 Flying Tips and Repairs ........13 Transmitter and Receiver Binding ......6 Flying Tips Continued ...........14 Flight Battery Installation and ESC Arming....7... -
Page 4: Prefl Ight Checklist
Prefl ight Checklist 1. Charge fl ight battery. 7. Perform AS3X Control Direction Test with aircraft. 2. Fully assemble aircraft. 8. Set dual rates. 3. Install fl ight battery in aircraft (once it has been fully charged). 9. Adjust center of gravity. 4. -
Page 5: Battery Charging
Battery Charging LED Indications CHARGING ......(Solid Red) MAX CHARGE ........(off) SOLID RED LED –Charging USB Li-Po LED OFF Charger –Charge Complete DC Input:5.0V 350mA DC Output:4.2V 300mA EFLC1008 CAUTION: Never exceed the recommended charge rate. CAUTION: Charge only batteries that are cool SOLID RED LED to the touch and are not damaged. -
Page 6: Transmitter And Receiver Binding
Transmitter and Receiver Binding Binding is the process of programming the receiver to recognize the GUID (Globally Unique Identifi er) ™ code of a single specifi c transmitter. You need to ‘bind’ your chosen Spektrum DSM2/DSMX technology equipped aircraft transmitter to the receiver for proper operation. Any full range Spektrum DSM2/DSMX transmitter can bind to the DSM2/DSMX receiver. -
Page 7: Flight Battery Installation And Esc Arming
Flight Battery Installation and ESC Arming Lower throttle and Arming the ESC also occurs after binding as throttle trim to previously described, but subsequent connection lowest settings. of a fl ight battery requires the following steps. It is normal for linear servos to make noise. Noise Power ON the is not an indication of a faulty servo. -
Page 8: Center Of Gravity (Cg)
Center of Gravity (CG) The CG location is 29mm back from the leading edge at the wing root. This CG location has been determined with the included 1S 150mAh 3.7V Li-Po battery installed towards the rear of the battery cavity located on the bottom of the aircraft. -
Page 9: Control Direction Tests Continued
Control Direction Tests Continued Aircraft AS3X Reaction Movement ® AS3X Control Direction Test This test ensures that the ® AS3X control system is functioning properly. 1. Advance the throttle to 25% to activate the AS3X system. 2. Fully lower the throttle. -
Page 10: Control Centering
Control Centering Before the fi rst fl ights, or in the event of an accident, make sure the fl ight control surfaces are centered. Adjust the linkages mechanically if the control surfaces are not centered. Use of the transmitter sub-trims may not correctly center the aircraft control surfaces due to the mechanical limits of linear servos. -
Page 11: First Person View (Fpv) Camera Installation
First Person View (FPV) Camera Installation 1. Carefully pull the receiver’s FPV power connector out of the hole of the aircraft’s canopy. 2. Align the wire colors and connect the FPV power connector to the camera unit. 3. Connect a flight battery to the aircraft, then remove the lens cap and test the FPV system. -
Page 12: First Person View (Fpv) System Instructions
First Person View (FPV) System instructions Using the Ultra Micro FPV System NOTICE: We do not recommend using the ultra micro FPV system in low light. Consult local laws and ordinances before operating FPV equipment. In some areas, FPV operation may be limited or prohibited. -
Page 13: Flying Tips And Repairs
Flying Tips and Repairs We recommend fl ying your aircraft outside in calm With practice, you will fi nd it easier to locate and conditions. Always avoid fl ying near houses, trees, anticipate the movement of thermals. Although wires and buildings. You should also be careful to thermals cannot be seen, you can see dust, insects avoid fl... -
Page 14: Flying Tips Continued
Flying Tips Continued Low Voltage Cutoff (LVC) Repairs Low Voltage Cutoff (LVC) pulses the power to the Repair the aircraft using foam-compatible CA motor when the voltage gets low. When the motor (cyanoacrylate adhesive) or clear tape. Only use power pulses, land the aircraft immediately and foam-compatible CA, as other types of glue can recharge the fl... -
Page 15: Power Components Service
Power Components Service CAUTION: DO NOT handle propeller parts while the fl ight battery is connected. Personal injury could result. Disassembly 1. Disconnect the camera, then the battery from the ESC/receiver. 2. Carefully cut the tape and/or decals on the side of the fuselage to remove the top half of the fuselage. -
Page 16: Troubleshooting Guide
Troubleshooting Guide AS3X Problem Possible Cause Solution Control surfaces not at Control surfaces may not have been Center control surfaces mechanically by neutral position when mechanically centered from factory adjusting the U-bends on control linkages transmitter controls are Aircraft was moved after the fl ight battery Disconnect and reconnect the fl... -
Page 17: Troubleshooting Guide (Continued)
What this Warranty Covers (vi) Product not compliant with applicable technical regulations. Horizon Hobby, LLC (“Horizon”) warrants to the original purchaser that the product purchased (the “Product”) will OTHER THAN THE EXPRESS WARRANTY ABOVE, HORIZON be free from defects in materials and workmanship at the MAKES NO OTHER WARRANTY OR REPRESENTATION, AND date of purchase. - Page 18 exclusive remedy shall be that Horizon will, at its option, you will be asked to provide your complete name, street either (i) service, or (ii) replace, any Product determined address, email address and phone number where you can by Horizon to be defective. Horizon reserves the right to be reached during business hours.
-
Page 19: Warranty And Service Information
Compliance Information for the European Union EU Compliance Statement: Horizon Hobby, LLC hereby declares that this product is in compliance with the essential requirements and other relevant provisions of the R&TTE and EMC Directive. -
Page 20: Zusätzliche Sicherheitsvorkehrungen Und Warnhinweise
HINWEIS Alle Anweisungen, Garantien und anderen zugehörigen Dokumente können im eigenen Ermessen von Horizon Hobby, LLC. jederzeit geändert werden. Die aktuelle Produktliteratur fi nden Sie auf www. horizonhobby.com unter der Registerkarte „Support“ für das betreffende Produkt. Spezielle Bedeutungen: Die folgenden Begriffe werden in der gesamten Produktliteratur verwendet, um auf unterschiedlich hohe Gefahrenrisiken beim Betrieb dieses Produkts hinzuweisen: HINWEIS: Wenn diese Verfahren nicht korrekt befolgt werden, können sich möglicherweise Sachschäden... - Page 21 Inhaltsverzeichnis Vorbereitung für den Erstfl ug .......22 Richten der Antenne ..........30 Warnungen zum Laden ........22 Ultra Micro FPV Problemlösung ......30 Laden des Akkus ..........23 Tipps zum Fliegen und Reparieren .......31 Montage der Tragfl ächen ........23 Tipps zum Fliegen Fortsetzung ......32 Bindung von Sender und Empfänger ....24 Checkliste nach dem Flug ........32 Einsetzen des Flugakkus und Armieren...
-
Page 22: Vorbereitung Für Den Erstfl Ug
Vorbereitung für den Erstfl ug 1. Laden Sie den Flugakku. 7. Führen Sie mit dem Sender den AS3X- Steuerrichtungstest durch. 2. Montieren Sie das Modell. 8. Stellen Sie die Dual Rates ein. 3. Setzen Sie den vollständig geladenen Flugakku in das Modell ein. 9. -
Page 23: Laden Des Akkus
Laden des Akkus LED Indikatoren LADEN ......(leuchtet Rot) LADEVORGANG FERTIG ....(Aus) SOLID RED LED –Charging USB Li-Po LED OFF Charger –Charge Complete DC Input:5.0V 350mA DC Output:4.2V 300mA EFLC1008 ACHTUNG: Überschreiten Sie niemals den empfohlenen Ladestrom. ACHTUNG: Laden Sie ausschließlich Akkus SOLID RED LED die kalt genug zum Anfassen und nicht beschädigt –Charging... -
Page 24: Bindung Von Sender Und Empfänger
Bindung von Sender und Empfänger Die Bindung ist der Prozess, bei dem der Empfänger des Steuergeräts darauf programmiert wird, den GUID-Code (global eindeutigen Kenncode) eines einzelnen, spezifi schen Senders zu erkennen. Damit ein ordnungsgemäßer Betrieb möglich ist, müssen Sie Ihren gewählten Flugzeugsender mit Spektrum DSM2/ DSMX-Technologie an den Empfänger binden. -
Page 25: Einsetzen Des Flugakkus Und Armieren Des Reglers
Einsetzen des Flugakkus und Armieren des Reglers Gashebel und Das AS3X System wird auch nach dem Binden Gastrimmung initialisiert, für nachfolgende Flüge und dem auf niedrigste Anschließen des Flugakkus folgen Sie bitte den Einstellung stellen. erforderlichen Schritten wie unten beschrieben. Es ist normal, dass die Linearservos Geräusche Sender einschalt- von sich geben. -
Page 26: Der Schwerpunkt
Der Schwerpunkt Der Schwerpunkt befi ndet sich 29mm hinter der Vorderkante der Tragfl äche an der Flügelwurzel gemessen. Der Schwerpunkt wurde mit dem im hinteren Teil des Akkufachs eingesetzten 1S 150mAh 3.7V Li-Po Akku gemessen. Balancieren Sie das Modell zur Bestimmung des 29mm Schwerpunktes auf der Kante eines Stahllineals. -
Page 27: Steuerrichtungstest Fortsetzung
Steuerrichtungstest Fortsetzung Flugzeugbe- AS3X Reaktion wegung AS3X Kontrolltest Dieser Test soll sicher stellen dass das AS3X System einwandfrei funktioniert. 1. Geben Sie über 25% Gas um das AS3X zu aktivieren. 2. Gehen Sie mit dem Gas vollständig auf Leerlauf. 3. Bewegen Sie das gesamte Flugzeug wie abgebildet und überprüfen ob sich... -
Page 28: Zentrieren Der Kontrollen
Zentrieren der Kontrollen Vor dem ersten Flug oder nach einem Absturz müssen Sie sicherstellen, dass die Ruder zentriert sind. Stellen Sie das Gestänge mechanisch ein, wenn die Ruder nicht zentriert sind. Wenn Sie die Anpassung nur über die Sendertrimmungen inklusive Sub Trims vornehmen, werden die Ruder aufgrund mechanischer Beschränkungen der Linearservos möglicherweise nicht korrekt zentriert. -
Page 29: Montage Der Fpv Kamera
Montage der FPV Kamera 1. Ziehen Sie vorsichtig den FPV Stromanschluss durch die Öffnung auf der Kabinenhaube. 2. Richten Sie die Kabelfarben passend aus und verbinden den Stromanschluss. 3. Schließen Sie den Flugakku an, nehmen den Objektivdeckel ab und testen das FPV System. FPV Systemtest •... -
Page 30: First Person View (Fpv) System Anweisungen
First Person View (FPV) System Anweisungen Betrieb des Ultra Micro FPV System HINWEIS: Wir empfehlen das Ultra Micro FPV System nicht bei schlechten Lichtverhältnissen zu Bitte beachten Sie vor Inbetriebnahme von FPV nutzen. Systemen die örtlichen Vorschriften und Gesetze. In bestimmten Orten oder Gegenden kann der Betrieb von FPV Systemen verboten oder eingeschränkt sein. -
Page 31: Tipps Zum Fliegen Und Reparieren
Tipps zum Fliegen und Reparieren Beachten Sie lokale Vorschriften und Gesetze Gelegentlich treiben die Thermikblasen mit dem bevor Sie sich einen Platz zum Fliegen suchen. Wir Wind. So ist es am einfachsten sie gegen den Wind empfehlen, das Sie ihre Radian nur bei leichtem zu suchen und ihnen dann mit dem Wind zu folgen. -
Page 32: Tipps Zum Fliegen Fortsetzung
Tipps zum Fliegen Fortsetzung Niederspannungsabschaltung (LVC) Reparaturen Bevor die Akkuladung zu stark absinkt, trennt die Reparieren Sie die Radian mit für Schaumstoff Niederspannungsabschaltung die Stromversorgung geeignetem Sekundenkleber oder klarem vom Motor. Die Stromversorgung des Motors Klebeband. Verwenden Sie nur Sekundenkleber, pulsiert schnell, was zeigt, dass etwas Akkuladung der für Schaumstoff geeignet ist, da andere für die Flugsteuerung und sichere Landung... -
Page 33: Wartung Der Antriebskomponenten
Wartung der Antriebskomponenten ACHTUNG: Hantieren Sie nicht mit dem ist. Verletzungen könnte die Folge sein. Demontage 1. Trennen Sie die Kamera, dann den Akku vom Regler/ Empfänger. 2. Schneiden Sie vorsichtig das Klebeband oder den Dekorbogen auf der Seite des Rumpfes ein um die obere Hälfte des Rumpfes abnehmen zu können. -
Page 34: Problemlösung
Problemlösung AS3X Problem Mögliche Ursache Lösung Ruder sind nicht neutral Ruder sind im Werk mechanisch nicht Zentrieren Sie die Ruder mechanisch durch wenn Senderkontrollen zentriert worden anpassen der U Bögen neutral stehen Flugzeug wurde nach dem Anschließen Trennen Sie den Flugakku und schließen ihn der Akkus bewegt bevor die Sensoren sich wieder an. -
Page 35: Problemlösung Fortsetzung
Problemlösung Fortsetzung Problem Mögliche Ursache Lösung LED auf dem Empfänger Sie haben weniger als 5 Sekunden nach Lassen Sie den Sender eingeschaltet, trennen blinkt schnell, Flugzeug dem Einschalten des Senders den Flugakku Sie den Flugakku und verbinden ihn wieder reagiert nicht auf den angeschlossen Sender (nach dem Flugzeug ist an einen anderen Speicherplatz... -
Page 36: Garantie Und Service Informationen
Modells wie auch der Fernsteuerung. kommerzielle Verluste, die in irgendeinem Garantiezeitraum Zusammenhang mit dem Produkt stehen Exklusive Garantie ¬ Horizon Hobby LLC verantwortlich, unabhängig ab ein Anspruch im (Horizon) garantiert, dass das gekaufte Produkt Zusammenhang mit einem Vertrag, der Garantie frei von Material- und Montagefehlern ist. -
Page 37: Garantie Und Service Kontakt Informationen
Sie sich entweder an Ihren Fachhändler Kaufdatum hervorgeht. Sollte sich ein Garantiefall oder direkt an Horizon. bestätigen wird das Produkt repariert oder ersetzt. Diese Entscheidung obliegt einzig Horizon Hobby. Rücksendungen / Reparaturen werden nur mit einer von Horizon vergebenen RMA Nummer Kostenpfl ichtige Reparaturen bearbeitet. -
Page 38: Précautions Et Avertissements De Sécurité
Horizon Hobby, LLC. Ce manuel comporte des instructions relatives à la sécurité, au fonctionnement et à l’entretien. Il est capital de lire et de respecter la totalité des instructions et avertissements du manuel avant l’assemblage, le réglage et l’utilisation, ceci afi... -
Page 39: Caractéristiques
Table des matières Check-list de préparation au vol ......40 Maintenance de l’antenne ........48 Avertissements relatifs à la batterie .....40 Guide de dépannage FPV ........48 Charge de la batterie ...........41 Conseils de vol et réparations ......49 Installation de l’aile ..........41 Conseils de vol et réparations Suite .....50 Affectation de l’émetteur et du récepteur .....42 Vérifi... -
Page 40: Check-List De Préparation Au Vol
Check-list de préparation au vol 1. Chargez la batterie 7. Effectuez le test de l’AS3X 2. Assemblez le modèle 8. Programmez les débattements 3. Installez la batterie dans l’avion (une 9. Réglez le centre de gravité fois qu’elle est totalement chargée) 10. -
Page 41: Charge De La Batterie
Charge de la batterie LED Indications CHARGE ......... (Rouge fi xe) CHARGE MAX ........(off) SOLID RED LED –Charging USB Li-Po LED OFF Charger –Charge Complete DC Input:5.0V 350mA DC Output:4.2V 300mA EFLC1008 ATTENTION : Ne jamais dépasser l’intensité de charge recommandée. ATTENTION : Chargez uniquement des SOLID RED LED batteries froides au toucher et non... -
Page 42: Affectation De L'émetteur Et Du Récepteur
Affectation de l’émetteur et du récepteur L’affectation est le processus qui programme le récepteur pour qu’il reconnaisse le code (appelé GUIDGlobally Unique Identifi er) d’un émetteur spécifi que. Vous devez affecter l’émetteur Spektrum pour avions à technologie DSM de votre choix au récepteur afi n d’assurer un fonctionnement correct. Veuillez vous rendre sur le site www.bindnfl... -
Page 43: Installation De La Batterie Et Armement Du Contrôleur
Installation de la batterie et armement du contrôleur L’armement du contrôleur se produit à la suite de Placez le manche l’aff ectation décrite précédemment, cependant les et le trim des gaz prochains branchements de la batterie nécessitent en position basse. de suivre les étapes suivantes. -
Page 44: Réglage Du Centre De Gravité (Cg)
Réglage du centre de gravité (CG) Le CG est situé 29mm en arrière du bord d’attaque au niveau de l’emplanture de l’aile. L’emplacement du CG a été déterminé en installant la batterie Li-Po 1S 3.7V 150mA vers l’arrière du compartiment à batterie situé sous le fuselage. Placez le modèle sur l’arrête d’une règle métallique pour trouver son équilibre. -
Page 45: Test De Contrôle De La Direction Suite
Test de contrôle de la direction Suite Mouvement de Réaction de l’AS3X l’avion Essai de la réponse l’AS3X Ce test permet de s’assurer du fonctionnement du système AS3X. 1. Activez l’AS3X en plaçant le manche des gaz à 25%. 2. Placez le manche des gaz en position basse. -
Page 46: Centrage Des Commandes
Centrage des commandes Avant vos premiers vols ou en cas d’accident, vérifi ez le centrage des gouvernes de vol. Si les surfaces de contrôle ne sont pas centrées, ajustez les liaisons mécaniquement. Il se peut que les trims de l’émetteur ne permettent pas de centrer correctement les surfaces de contrôle de l’avion à... -
Page 47: Installation De La Caméra Fpv
Installation de la caméra FPV 1. Sortez délicatement la prise d’alimentation du système FPV de l’ouverture située au sommet de la verrière 2. Connectez le câble au module caméra FPV en respectant les polarités. 3. Connectez une batterie à l’appareil, retirez le capuchon de lentille et testez le système FPV. -
Page 48: Maintenance De L'antenne
Installation de la caméra FPV Utilisation de l’Ultra Micro système FPV REMARQUE: N’utilisez pas l’Ultra Micro Sytème FPV par faible luminosité. Consultez les réglementations locales avant d’effectuer un vol en immersion (FPV). Dans certaines zones, le vol en immersion est limité ou interdit. -
Page 49: Conseils De Vol Et Réparations
Conseils de vol et réparations Nous vous recommandons d’utiliser votre avion à de profondeur jusqu’à atteindre la vitesse limite l’extérieur que par vent modéré au maximum, ou de décrochage (vitesse minimale de descente). à l’intérieur d’un grand gymnase. Évitez de le faire Lorsque vous avez trouvé... -
Page 50: Conseils De Vol Et Réparations Suite
Conseils de vol et réparations Suite Coupure par tension faible (LVC) Réparations Le moteur émet des pulsations quand le seuil de Réparez le Radian à l’aide de colle cyanoacrylate tension faible est atteint. Quand le moteur émet des compatible mousse ou de ruban adhésif pulsations, atterrissez l’avion immédiatement et transparent. -
Page 51: Maintenance De La Motorisation
Maintenance de la motorisation ATTENTION: NE JAMAIS manipuler l’hélice quand la batterie est branchée. Risque de blessures corporelles. Démontage 1. Déconnectez la caméra, puis la batterie du module Rx/Variateur. 2. Découpez délicatement les adhésifs ou autocol- lants pour retirer la partie supérieure du fuselage. IMPORTANT: Si vous tentez de décoller les adhésifs, vous risquez d’endommager la peinture du fuselage. -
Page 52: Guide De Dépannage
Guide de dépannage AS3X Problème Cause possible Solution Les gouvernes ne sont Les tringleries ne sont pas correctement Effectuez un réglage mécanique en serrant pas au neutre alors que réglées ou desserrant les “U” des tringleries les manches sont au L’avion a été... -
Page 53: Guide De Dépannage Suite
Guide de dépannage Suite Problème Cause possible Solution La DEL du récepteur Moins de 5 secondes se sont écoulées entre En laissant l’émetteur allumé, déconnectez la clignote rapidement et l’allumage de l’émetteur et la connexion de batterie de vol, puis reconnectez-la l’avion ne répond pas à... -
Page 54: Garantie Et Réparations
Horizon n’exerce aucune infl uence sur Garantie exclusive - Horizon Hobby, LLC (Horizon) garantit le montage, l’utilisation ou la maintenance du produit ou que le Produit acheté (le « Produit ») sera exempt de sur d’éventuelles combinaisons de produits choisies par... -
Page 55: Garantie Et Réparations Suite
Informations de conformité pour l’Union européenne Déclaration de conformité de l’union européenne : Horizon Hobby, LLC déclare par la présente que ce produit est en conformité avec les exigences essentielles et les autres dispositions de la RTTE et Directive CEM. -
Page 56: Ulteriori Precauzioni Per La Sicurezza E Avvertenze
Non usare componenti non compatibili o alterare il prodotto in nessuna maniera al di fuori delle istruzioni fornite da Horizon Hobby LLC. Questo manuale contiene istruzioni relative a sicurezza, utilizzo e manutenzione del prodotto. È... -
Page 57: Necessario Per Completare
Indice Avvertenze per la carica delle batterie....58 Istruzioni First Person View (FPV) ......66 Caricare la batteria ..........59 Sistemare l’antenna del trasmettitore video ..66 Installazione dell’ala ..........59 Risoluzione dei problemi per l’FPV Ultra Micro..66 Binding del trasmettitore e del ricevitore ....60 Consigli per il volo e riparazioni ......67 Installare la batteria di bordo e armare Consigli per il volo e riparazioni Continuazione ..68... -
Page 58: Preparazione Al Primo Volo
Preparazione al primo volo 1. Caricare la batteria di volo. 7. Eseguire con l’aereo una prova per verificare la direzione dei comandi con 2. Montare completamente l’aeromodello. l’AS3X. 3. Installare la batteria di volo sull’aereo, 8. Impostare i dual rates. dopo averla caricata completamente. -
Page 59: Caricare La Batteria
Caricare la batteria Indicazioni del LED IN CARICA ......(rosso fi sso) CARICA MAX ......(spento) SOLID RED LED –Charging USB Li-Po LED OFF Charger –Charge Complete DC Input:5.0V 350mA DC Output:4.2V 300mA EFLC1008 ATTENZIONE: non superare mai la corrente di carica consigliata. -
Page 60: Binding Del Trasmettitore E Del Ricevitore
Binding del trasmettitore e del ricevitore Il binding è il processo di programmazione del ricevitore dell’unità di controllo per il riconoscimento del codice GUID (Globally Unique Identifi er) di uno specifi co trasmettitore. Per il funzionamento corretto, è necessario eseguire il “binding” tra il trasmettitore Spektrum con tecnologia DSM dell’aeromodello e il ricevitore. -
Page 61: Installare La Batteria Di Bordo E Armare Il Regolatore (Esc)
Installare la batteria di bordo e armare il regolatore (ESC) Dopo aver fatto la connessione descritta Portare comple- precedentemente, si deve armare anche il tamente in basso regolatore (ESC) e nei successivi collegamenti lo stick motore e della batteria di bordo bisogna seguire la il suo trim. -
Page 62: Regolazione Del Baricentro (Cg)
Regolazione del baricentro (CG) La posizione del baricentro (CG) si trova a 29 mm dietro al bordo di entrata dell’ala alla sua radice. Il baricentro è stato defi nito con la batteria LiPo 1S 150mAh 3,7V inclusa, montata verso il posteriore della sua sede in fondo all’aereo. -
Page 63: Test Direzionale Dei Comandi Continuazione
Test direzionale dei comandi Continuazione Movimento Risposta AS3X aereo Prova della direzione dei controlli per l’AS3X Questa prova serve per accertare che il sistema di controllo dell’AS3X funzioni correttamente. 1. Avanzare il comando motore oltre al 25% per attivare il sistema AS3X. -
Page 64: Test Di Controllo
Test di controllo Prima del primo volo o in caso di incidente, accertarsi che le superfi ci di controllo del volo siano centrate. Se le superfi ci di controllo non sono centrate, regolare i leveraggi meccanicamente. L’utilizzo dei trim del trasmettitore potrebbe non consentire di centrare correttamente le superfi... -
Page 65: Installazione Videocamera First Person View (Fpv)
Installazione Videocamera First Person View (FPV) 1. Tirare fuori con attenzione il connettore di alimentazione FPV dall’apertura nella capottina. 2. Allineare i fili con lo stesso colore e collegare il connettore di alimentazione dell’FPV alla videocamera. 3. Collegare la batteria di bordo all’aereo, togliere la copertura dell’obiettivo per provare il sistema FPV. -
Page 66: Istruzioni First Person View (Fpv)
Istruzioni First Person View (FPV) Usare il sistema FPV Ultra Micro AVVISO: Sconsigliamo di usare il sistema FPV ultra micro con luce scarsa. Prima di operare con l’attrezzatura FPV (visualizzazione diretta), consultare le leggi e le ordinanze locali. In alcune zone, l’uso del sistema FPV potrebbe essere limitato o proibito. -
Page 67: Consigli Per Il Volo E Riparazioni
Consigli per il volo e riparazioni Si raccomanda di volare con l’aeromodello Con la pratica, si vedrà che non è diffi cile all’esterno con condizioni calme. Bisogna comunque individuare e anticipare i movimenti delle termiche. evitare di volare vicino a case, alberi, fi li dell’alta Anche se le termiche non si possono vedere, si tensione o stabilimenti. -
Page 68: Consigli Per Il Volo E Riparazioni Continuazione
Consigli per il volo e riparazioni Continuazione Taglio di bassa tensione (LVC) Riparazioni Prima che la carica della batteria scenda troppo, Per le riparazioni di questo aereo bisogna usare la funzione di taglio a bassa tensione (LVC) toglie solo colla cianoacrilica (CA) compatibile con i l’alimentazione al motore. -
Page 69: Manutenzione Del Motore
Manutenzione del motore ATTENZIONE: NON maneggiare parti dell’elica quando la batteria di volo è collegata. Quest’operazione potrebbe causare lesioni personali. Smontaggio 1. Scollegare la videocamera e poi la batteria dall’unità ESC/ricevente. 2. Tagliare attentamente il nastro adesivo e/o le decalcomanie che si trovano al lato della fusoliera per poter rimuovere la parte superiore della fusoliera. -
Page 70: Guida Alla Risoluzione Dei Problemi
Guida alla risoluzione dei problemi AS3X PROBLEMA POSSIBILE CAUSA Soluzione Quando i comandi sono È possibile che le superfi ci di controllo non Centrare meccanicamente i comandi al centro le superfi ci di siano state centrate meccanicamente in piegando le U sulle barrette di comando controllo non lo sono fabbrica L’aereo e stato mosso dopo aver collegato... -
Page 71: Guida Alla Risoluzione Dei Problemi Continuazione
Guida alla risoluzione dei problemi Continuazione Problema Possible Causa Soluzione Il LED sul ricevitore Meno di 5 secondi di attesa fra la Lasciare il trasmettitore acceso, lampeggia velocemente prima recensione del trasmettitore e il disconnettere e riconnettere la batteria di e il velivolo non si collegamento della batteria di volo al volo al velivolo... -
Page 72: Garanziá
Garanziá Periodo di garanzia Limiti di danno La garanzia esclusiva - Horizon Hobby, LLC, Horizon non si riterrà responsabile per danni (Horizon) garantisce che i prodotti acquistati (il speciali, diretti, indiretti o consequenziali; perdita “Prodotto”) sono privi di difetti relativi ai materiali di profi... -
Page 73: Informazioni Per I Contatti
GmbH Informazioni sulla conformità per l’Unione Europea Dichiarazione di Conformità EU: Horizon Hobby, LLC con la presente dichiara che il prodotto è conforme ai requisiti essenziali e ad altre disposizioni rilevanti del R&TTE è direttiva EMC). Una copia della dichiarazione di conformità per l’Unione Europea è disponibile a: http://www.horizonhobby. -
Page 74: Pezzi Di Ricambio
Replacement Parts – Ersatzteile – – Pièces de rechange – Pezzi di ricambio – Part # • Nummer Description Beschreibung Description Descrizione Numéro • Codice Spinner Set (3): Ultra Micro Radian: Jeu de cônes (3) : Ultra Set ogiva (3): Ultra EFLU2903 Ultra Micro Radian Spinner Set... -
Page 75: Pièces Optionnelles Et Accessoires
– Optional Parts and Accessories – – Optionale Bauteile und Zubehörteile – – Pièces optionnelles et accessoires – – Pezzi opzionali e accessori – Part # • Nummer Description Beschreibung Description Descrizione Numéro • Codice Hook and Loop Set Parkzone: Klettband Ultras Micros Set fascette a PKZ1039... - Page 76 © 2015 Horizon Hobby, LLC. E-fl ite, Radian, AS3X, UMX, DSM, DSM2, DSMX, ModelMatch, Bind-N-Fly, Celectra and the Horizon Hobby logo are trademarks or registered trademarks of Horizon Hobby, LLC. The Spektrum trademark is used with permission of Bachmann Industries, Inc.