
Manuels Connexes pour Pioneer XR-MR7


Sommaire des Matières pour Pioneer XR-MR7
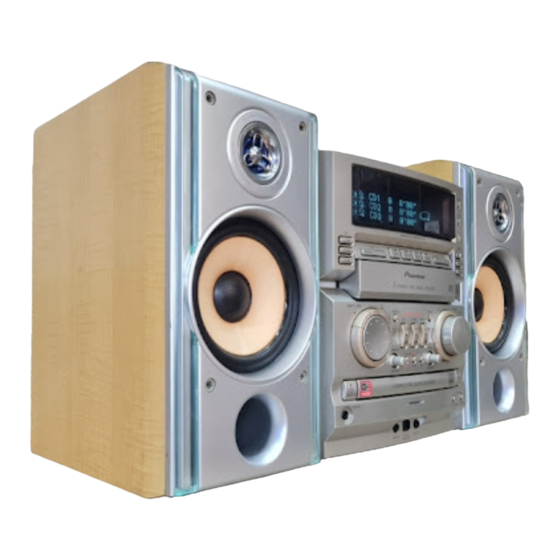
- Page 1 All manuals and user guides at all-guides.com STEREO CD/CD-R RECEIVER AMPLI-TUNER PLATINE CD/CD-R STEREO XR-MR7 SPEAKER SYSTEM ENCEINTES ACOUSTIQUES S-MR7 Operating Instructions Mode d’emploi...
-
Page 2: Important
Pour toute réparation, s’adresser à un person- LASER PRODUCT nel qualifié. Nous vous remercions pour cet achat d’un produit Pioneer. ATTENTION: Nous vous demandons de lire soigneusement ce mode d’emploi ; AFIN DE PREVENIR TOUS vous serez ainsi à même de faire fonctionner l’appareil RISQUES DE CHOC ELECTRIQUE OU D‘INCENDIE, NE PAS... -
Page 3: Features
All manuals and user guides at all-guides.com Features Caractéristiques 1. Record and playback CD-R and 1. Enregistrement et lecture de CD-RW discs disques CD-R et CD-RW Both CD-R and CD-RW type recordable discs can be recorded. Il est possible d’enregistrer sur des disques de type CD-R et CD- CD-RW discs can be erased and re-used;... -
Page 4: Table Des Matières
All manuals and user guides at all-guides.com Contents PREPARATION Features ..........3 Numbering Tracks ....... 78 Connections .......... 7 Setting and Clearing Skip IDs ..... 80 Controls & Displays ......16 About the CD Recorder Display ..82 Setting the Clock ......... 22 Finalizing a Disc ........84 Erasing a CD-RW Disc...... - Page 5 All manuals and user guides at all-guides.com Table des matières PREPARATIONS Pour réaliser manuellement un enregistrement numérique ....74 Caractéristiques ........3 Enregistrement analogique ....76 Branchements ........7 Numérotation des plages ..... 78 Commandes et affichages ....16 Pose et annulation des Réglage de l’horloge ......
-
Page 6: Preparation
All manuals and user guides at all-guides.com PREPARATION PREPARATIONS Please check to see you have Vérifiez la présence des received the included accessoires fournis ci-dessous. accessories STANDBY SLEEP VOLUME MONO TAPE LINE FM/AM CD SELECT PLAY MODE DISPLAY P.BASS SKIP ID REC MENU FINALIZE CLEAR... -
Page 7: Connections
All manuals and user guides at all-guides.com Connections Branchements •Be sure to connect the antennas. •N’oubliez pas de brancher les antennes. •Be sure the power cord is disconnected before making •Prenez soin de débrancher le cordon d’alimentation any connections or changing existing connections. avant d’effectuer des branchements ou de les modifier. - Page 8 All manuals and user guides at all-guides.com Connections Branchements Assemble the AM loop Préparez l’antenne cadre antenna as shown AM comme suit Insert in the direction of the arrow until a clicking sound is heard. Insérez dans le sens de la flèche jusqu’à entendre un déclic. Attaching the AM loop antenna to a wall: Use a screw or thumbtack Fixation de l’antenne cadre AM sur une paroi: Servez-vous d’une vis as shown to fasten the antenna to a wall or other suitable surface.
-
Page 9: Connect The Speakers
All manuals and user guides at all-guides.com Connections Branchements Connect the Speakers Branchez les haut-parleurs While twisting, pull off the plastic En tournant, retirez la gaine de covers on the end of the wires. plastique au bout des fils. [ speaker terminals Push away the tabs and insert the [ bornes de haut- Écartez les ergots et insérez le... -
Page 10: Points À Retenir Lors Des Branchements
All manuals and user guides at all-guides.com Connections Branchements Points to remember when Points à retenir lors des connecting up... branchements Connecting the antenna Branchement des antennes The earth (grounding) mark by the antenna socket indicates earthing for Le symbole “terre” à côté de la prise d’antenne indique une mise à la sound quality purposes. - Page 11 All manuals and user guides at all-guides.com Connections Branchements Connecting the speakers Branchement des haut-parleurs •Don’t connect this speaker to any amplifier other than the one •Ne branchez pas ces haut-parleurs à un amplificateur autre que supplied with this system. Connection to any other amplifier may celui qui est fourni avec cette chaîne.
-
Page 12: Branchement De Composants Analogiques Externes
All manuals and user guides at all-guides.com Connections Branchements Connecting External Analog Branchement de composants Components analogiques externes Connecting additional external components (cassette deck, CD player, Il est possible de raccorder des composants analogiques externes etc.) to this unit is possible. You can then use this unit to listen to or (platine-cassette, lecteur CD, etc.) sur cet appareil. -
Page 13: Branchement De Composants Numériques Externes
Check the power cord once in a while. If you find it écrasés. Un câble abîmé peut présenter un risque d’incendie ou de damaged, ask your nearest Pioneer authorized service center or your choc électrique. Vérifier le câble d’alimentation de temps en temps. -
Page 14: Front Panel Connections
All manuals and user guides at all-guides.com Connections Branchements Front Panel Connections Branchements sur le panneau avant Take off the cover as shown in the diagram to get to LINE 2 IN/ OPTICAL DIGITAL OUT/ LINE 2 OUT. Using these jacks you can easily hook up a Comme illustré... - Page 15 All manuals and user guides at all-guides.com Connections Branchements 3 The jacks marked “TAPE REC OUT” on the main unit should be 3 Les prises marquées “TAPE REC OUT” sur l’unité principale connected to the jacks marked “REC” on the cassette deck. Be doivent être raccordées aux prises marquées “REC”...
-
Page 16: Controls & Displays
DISPLAY RECORDING (DEMO) CD–RW FINALIZE STEREO MONO TUNED RDM ALL RPT-1 SFC P.BASS SKIP ON A.TRACK D.VOL A.VOL DIG ANA [ 32 44 48 ] STEREO CD/CD-R RECEIVER XR-MR7 TUNING ¡ LINE FM/AM TAPE CD 1 CD 2 CD 3... - Page 17 All manuals and user guides at all-guides.com Controls & Displays Commandes et affichages 0 FM/AM 8 Interrupteur Attente/Mise sous tension Press to select the radio; each press cycles (STANDBY/ON) between FM and AM band. Appuyez une fois pour mettre l’appareil sous TAPE tension.
-
Page 18: Remote Control
All manuals and user guides at all-guides.com Controls & Displays Commandes et affichages Remote Control Télécommande 1 SLEEP 1 Touche de temporisateur (SLEEP) 2 STANDBY/ON 2 Interrupteur Attente/Mise sous tension (STANDBY/ON) Press once to turn power on. A second press puts the Appuyez une fois pour mettre receiver in standby mode l’appareil sous tension. -
Page 19: Putting The Batteries In The Remote
All manuals and user guides at all-guides.com Controls & Displays Commandes et affichages Putting the batteries in the Insertion des piles dans la remote télécommande Turn over the remote control, then press Retournez la télécommande, puis and slide the battery compartment cover pressez et faites glisser le couvercle du off. -
Page 20: Souvenez-Vous Des Points Suivants Lorsque Vous Utilisez La Télécommande
• Remote operation may become unreliable if STEREO MONO TUNED RDM ALL RPT-1 SFC P.BASS SKIP ON A.TRACK D.VOL A.VOL DIG ANA [ 32 44 48 ] • La télécommande risque de ne pas bien STEREO CD/CD-R RECEIVER XR-MR7 TUNING ¡ LINE FM/AM... - Page 21 All manuals and user guides at all-guides.com Controls & Displays Commandes et affichages 7 Lights when program play mode. 7 Il s’allume en mode de lecture programmée. 8 Light during random play mode. 8 Il s’allume en mode de lecture aléatoire. 9 When all disc play mode is up for CD,this 9 Il s’allume quand le mode de lecture Tous indicator lights.
-
Page 22: Setting The Clock
All manuals and user guides at all-guides.com Setting the Clock Réglage de l’horloge 4 ¢ TIMER/CLOCK ADJ (same function as the MULTI JOG on the unit) (même fonction que la bague MULTI JOG de l’appareil) ENTER SKIP ID REC MENU CLEAR FINALIZE ¡... -
Page 23: Using The Fm/Am Radio
FM/AM STEREO MONO TUNED RDM ALL RPT-1 SFC P.BASS SKIP ON A.TRACK D.VOL A.VOL DIG ANA [ 32 44 48 ] MONO TAPE LINE FM/AM STEREO CD/CD-R RECEIVER XR-MR7 TUNING ¡ LINE FM/AM TAPE CD SELECT CD 1 CD 2... -
Page 24: Tuning Directly To A Station
MONO TAPE LINE FM/AM STEREO MONO TUNED RDM ALL RPT-1 SFC P.BASS SKIP ON A.TRACK D.VOL A.VOL DIG ANA [ 32 44 48 ] CD SELECT STEREO CD/CD-R RECEIVER XR-MR7 TUNING FM/AM ¡ LINE FM/AM TAPE CD 1 CD 2... -
Page 25: Entrée Directe Des Stations Fm
All manuals and user guides at all-guides.com Pour syntoniser directement une Tuning Directly to a Station station Inputting FM/AM Stations Entrée directe des stations FM/ Directly You can program this unit to remember up to 30 stations. Un maximum de 30 stations peuvent être mémorisées par cet appareil. -
Page 26: Mémorisation Des Stations Émettrices
All manuals and user guides at all-guides.com Pour syntoniser directement une Tuning Directly to a Station station Listening in MONO Pour écouter la radio en mode MONO If the signal in an FM broadcast is weak you can use the MONO setting to enable stronger reception. -
Page 27: Using Rds
“JAZZ”. Vous trouverez ci-dessous les divers music, news, sport, talk shows, financial information and so on. genres de programmes, tels que musique, informations, sports, The XR-MR7 gives you access to three kinds of RDS information: Radio finances, etc. Text, Program Service Name and Program Type. - Page 28 All manuals and user guides at all-guides.com Using RDS Utilisation du RDS The XR-MR7 can search for and display the following program types: Le XR-MR7 peut rechercher et afficher les types de programme suivants: NEWS News NEWS Informations AFFAIRS Current affairs AFFAIRS Actualités...
-
Page 29: Displaying Rds Information
All manuals and user guides at all-guides.com Using RDS Utilisation du RDS Displaying RDS information Affichage des informations RDS You can access three kinds of RDS information and can freely switch Vous pouvez avoir accès à 3 types d’informations RDS et, à votre gré, between them. -
Page 30: Cd Changer
MONO TAPE LINE FM/AM CD SELECT STEREO MONO TUNED RDM ALL RPT-1 SFC P.BASS SKIP ON A.TRACK D.VOL A.VOL DIG ANA [ 32 44 48 ] STEREO CD/CD-R RECEIVER XR-MR7 TUNING ¡ LINE FM/AM TAPE CD 1 CD 2 CD 3... -
Page 31: Avance Rapide Et Recul Rapide
TAPE LINE FM/AM CD SELECT CD SELECT STEREO MONO TUNED RDM ALL RPT-1 SFC P.BASS SKIP ON A.TRACK D.VOL A.VOL DIG ANA [ 32 44 48 ] STEREO CD/CD-R RECEIVER XR-MR7 TUNING PLAY MODE DISPLAY P.BASS ¡ LINE FM/AM TAPE 1 ¡... -
Page 32: Sélection D'une Plage Donnée
All manuals and user guides at all-guides.com Listening to the 3 CD Changer Ecoute du changeur à 3 CD Selecting Individual Tracks Sélection d’une plage donnée Using the Remote Control Servez-vous de la télécommande. Press CD SELECT of the disc you want Appuyez sur la touche CD SELECT, to hear. -
Page 33: Choosing A Play Mode
ENTER PLAY MODE STEREO MONO TUNED RDM ALL RPT-1 SFC P.BASS SKIP ON A.TRACK D.VOL A.VOL DIG ANA [ 32 44 48 ] TAPE LINE FM/AM STEREO CD/CD-R RECEIVER XR-MR7 TUNING ¡ LINE FM/AM TAPE CD SELECT CD 1 CD 2... -
Page 34: Programming The Track Order
All manuals and user guides at all-guides.com Programming the Track Programmation de Order l’ordre des plages MONO TAPE LINE FM/AM CD SELECT CD SELECT PLAY MODE DISPLAY P.BASS SKIP ID REC MENU FINALIZE CLEAR ¡ ¢ ENTER MENU PGM (PROGRAM) PGM RANDOM REPEAT Number buttons Touches numériques... -
Page 35: Pour Confirmer Le Contenu D'un Programme
All manuals and user guides at all-guides.com Programmation de l’ordre des Programming the Track Order plages Repeat steps 2 & 3 to input next disc Répétez les étapes 2 et 3 pour programmer and track you want. le disque suivant et la plage souhaitée. In the example, press CD SELECT 2, and Number button 3. -
Page 36: Pour Effacer Toutes Les Plages Programmées
All manuals and user guides at all-guides.com Programmation de l’ordre des Programming the Track Order plages To delete a single track within the program Pour effacer une plage donnée dans un programme While the CD is stopped press CLR (CLEAR). Le CD étant à... -
Page 37: Using Random Play
All manuals and user guides at all-guides.com Utilisation de la Using Random Play lecture aléatoire ¡ ¡ ¢ ¢ ENTER ENTER MENU MENU PGM RANDOM REPEAT PGM RANDOM REPEAT RANDOM REPEAT 10/0 >10 10/0 >10 ÷ The unit will arrange the tracks randomly and play them each once. ÷... -
Page 38: Using Repeat Play
SKIP ID FINALIZE REC MENU CLEAR FINALIZE STEREO MONO TUNED RDM ALL RPT-1 SFC P.BASS SKIP ON A.TRACK D.VOL A.VOL DIG ANA [ 32 44 48 ] STEREO CD/CD-R RECEIVER XR-MR7 TUNING ¡ ¡ LINE FM/AM TAPE CD 1 CD 2... -
Page 39: Affichage En Mode D'arrêt
All manuals and user guides at all-guides.com A propos de l’affichage du About the CD Changer Display Changeur de CD Display in stop mode Affichage en mode d’arrêt The selected disc is ready to play Le disque sélectionné est prêt pour la lecture. No disc is in the tray Aucun disque sur le plateau. -
Page 40: Listening To The Cd Recorder
All manuals and user guides at all-guides.com Listening to the CD Lecture par Recorder l’Enregistreur CD 1 ¡ MONO TAPE LINE FM/AM CD SELECT 1 ¡ STEREO CD/CD-R RECEIVER XR-MR7 TUNING ¡ LINE FM/AM TAPE CD 1 CD 2 CD 3 PHONO PLAY MODE DISPLAY P.BASS COMPACT DISC MULTI CHANGER R·D·S... - Page 41 All manuals and user guides at all-guides.com Listening to the CD Recorder Lecture par l’Enregistreur CD Fast Forward and Fast Reverse Avance rapide et Recul rapide You can fast forward and fast reverse while listening to a disc. Using Vous pouvez avancer ou reculer rapidement sur un disque pendant son these features you can easily find the part of the disc you want to hear.
-
Page 42: Pour Sauter Les Plages Indésirables
REC MENU CLEAR FINALIZE ENTER STEREO MONO TUNED RDM ALL RPT-1 SFC P.BASS SKIP ON A.TRACK D.VOL A.VOL DIG ANA [ 32 44 48 ] ¡ STEREO CD/CD-R RECEIVER XR-MR7 TUNING ¡ LINE FM/AM TAPE MENU/NO CD 1 CD 2 CD 3 ¢... -
Page 43: Mise Hors Service De La Lecture À Saut
All manuals and user guides at all-guides.com Listening to the CD Recorder Lecture par l’Enregistreur CD Switching off Skip Play Mise hors service de la Lecture à saut You can hear the tracks that are programmed to be skipped if you so choose. -
Page 44: Programming The Track Order
All manuals and user guides at all-guides.com Programming the Track Programmation de Order l’ordre des plages SKIP ID REC MENU CLEAR FINALIZE 4 ¢ ¡ ¢ ENTER MENU PGM RANDOM REPEAT PGM (PROGRAM) Number buttons Touches numériques CLR (CLEAR) 10/0 >10 REMOTE CONTROL UNIT ÷... - Page 45 All manuals and user guides at all-guides.com Programmation de l’ordre des Programming the Track Order plages If you make a mistake while programming the Si vous faites une erreur pendant la tracks programmation des plages Press CLR (CLEAR). Appuyez sur la touche CLR (annulation). Each time the button is pressed the programmed track will be canceled, A chaque poussée sur cette touche, une plage programmée est effacée beginning with the last programmed track and working backwards.
-
Page 46: Using Random Play
All manuals and user guides at all-guides.com Utilisation de la lecture Using Random Play aléatoire ¡ ¡ ¢ ¢ ENTER ENTER MENU MENU PGM RANDOM REPEAT PGM RANDOM REPEAT RANDOM REPEAT 10/0 >10 10/0 >10 ÷ The unit will arrange the tracks randomly and play them each once. ÷... -
Page 47: About Cd, Cd-R And Cd-Rw Discs
All manuals and user guides at all-guides.com About CD, CD-R and A propos des disques CD-RW Discs CD, CD-R et CD-RW Playing CD-R and CD-RW discs Lecture des disques CD-R et in the 3 CD changer CD-RW dans le changeur à 3 CD ÷... -
Page 48: Storing Discs
This recorder is designed for use with conventional, fully circular CDs only. Use of shaped CDs is not recommended for this product. Pioneer disclaims all liability arising in connection with the use of shaped CDs. Cet enregistreur est conçu uniquement pour l’emploi des CD conventionnels entièrement circulaires. -
Page 49: A Propos Des Disques Cd, Cd-R
Hitachi Maxell, Ltd. • Verbatim Corporation • Mitsui Chemicals, Inc. • Pioneer Corporation • Taiyo Yuden Co., Ltd. Sample discs from the following makers have also been checked for • TDK Corporation compatibility (as of November 1999), although at the time of writing •... -
Page 50: About Cd, Cd-R And Cd-Rw Discs
All manuals and user guides at all-guides.com A propos des disques CD, CD-R et About CD, CD-R and CD-RW Discs CD-RW Broadcast programs, CDs, other recorded media (cassettes, vinyl Les émissions de radio, les CD, les autres supports enregistrés records, etc.) and musical performances are all protected by copyright (cassettes, disques en vinyle etc.) et les exécutions musicales en public laws. -
Page 51: Points To Remember When Recording
All manuals and user guides at all-guides.com Points to Remember Points à noter à when Recording l’enregistrement Recording CDs Enregistrement de CD This recorder is designed to let you make extremely high quality digital Cet enregistreur est prévu pour vous permettre d'effectuer des recordings onto recordable compact discs. - Page 52 All manuals and user guides at all-guides.com Points to Remember when Recording Points à noter à l’enregistrement Digital recording from DAT Enregistrement numérique d’un DAT If you’re recording a DAT tape that was recorded using the DAT Si vous enregistrez une cassette DAT qui a été enregistrée avec la machine’...
-
Page 53: About Scms
All manuals and user guides at all-guides.com About SCMS A propos de SCMS STEREO CD/CD-R RECEIVER XR-MR7 TUNING ¡ LINE FM/AM TAPE CD 1 CD 2 CD 3 PHONO COMPACT DISC MULTI CHANGER R·D·S MULTI JOG VOLUME P.BASS DIRECT REC SELECT... -
Page 54: Setting The Digital Recording Levels
L’enregistrement continue si la copie est à nouveau autorisée. Setting the Digital Réglage des niveaux Recording Levels d’enregistrement numérique STEREO CD/CD-R RECEIVER XR-MR7 TUNING ¡ LINE FM/AM TAPE CD 1... - Page 55 All manuals and user guides at all-guides.com Réglage des niveaux Setting the Digital Recording Levels d’enregistrement numérique Use REC PAUSE mode with digitally Utilisation du mode REC PAUSE avec input components. des composants d’entrée numérique. When making a manual digital recording, adjust the digital Lorsque vous effectuez manuellement un enregistrement recording level in step 4 (see page 74).
-
Page 56: Quick Copying
VOLUME STEREO MONO TUNED RDM ALL RPT-1 SFC P.BASS SKIP ON A.TRACK D.VOL A.VOL DIG ANA [ 32 44 48 ] P.BASS DIRECT REC SELECT FINALIZE ERASE STEREO CD/CD-R RECEIVER XR-MR7 TUNING 1 TRACK 1st TRACK ¡ LINE FM/AM TAPE... -
Page 57: Copie Rapide
(DEMO) CD–RW FINALIZE STEREO MONO TUNED RDM ALL RPT-1 SFC P.BASS SKIP ON A.TRACK D.VOL A.VOL DIG ANA [ 32 44 48 ] servant comme source CD 1.* STEREO CD/CD-R RECEIVER XR-MR7 TUNING ¡ LINE FM/AM TAPE CD 1 CD 2... -
Page 58: Recording Automatically Using The Menu Functions
All manuals and user guides at all-guides.com Recording Automatically Using the Menu Functions Using the chart below you can figure how to do the type of recording you want (see page 60-61). If you’re trying to record a CD-R or CD-RW and get the message “Can’t COPY” try changing to an analog input for the source (see page 72-73). Source A f t e r r e c o r d i n g M e m o... -
Page 59: Enregistrement Automatique À L'aide Des Fonctions De Menu
All manuals and user guides at all-guides.com Enregistrement automatique à l’aide des fonctions de Menu En observant ce tableau, vous comprendrez comment réaliser le type d’ enregistrement que vous souhaitez (voir pages 60-61). Si le message “Can’t COPY” (copie impossible) apparaît alors que vous essayez d’enregistrer un CD-R ou un CD-RW, essayez de passer à une entrée analogique comme source (voir pages 72-73). - Page 60 REC MENU MONO STEREO MONO TUNED RDM ALL RPT-1 SFC P.BASS SKIP ON A.TRACK D.VOL A.VOL DIG ANA [ 32 44 48 ] TAPE LINE FM/AM STEREO CD/CD-R RECEIVER XR-MR7 TUNING CD SELECT ¡ LINE FM/AM TAPE CD 1 CD 2...
- Page 61 All manuals and user guides at all-guides.com Recording Automatically Using the Enregistrement automatique à Menu Functions l’aide des fonctions de Menu Choose the CD to be recorded with the Choisissez le CD à enregistrer au moyen MULTI JOG. de la bague MULTI JOG. CD 1 Enregistre le CD du plateau 1 CD 2...
-
Page 62: Making A Digital Synchro Recording
All manuals and user guides at all-guides.com Making a Digital Pour réaliser un Synchro- Synchro Recording enregistrement numérique 1 track recording Enregistrement d’une plage When a source signal is detected, recording starts automatically and Lorsqu’un signal de source est détecté, l’enregistrement commence stops after one track has finished. -
Page 63: Enregistrement De Plages Sélectionnées
All manuals and user guides at all-guides.com Pour réaliser un Synchro- Making a Digital Synchro Recording enregistrement numérique Selected tracks recording Enregistrement de plages sélectionnées Program synchro recording lets you make a recording of a programmed playlist containing your favourite tracks from up to 3 CDs. Recording Le Synchro-enregistrement programmé... -
Page 64: Pour Réaliser Un Synchroenregistrement D'une Plage
All manuals and user guides at all-guides.com Pour réaliser un Synchro- Making a Digital Synchro Recording enregistrement numérique ENTER MONO TAPE LINE FM/AM STEREO CD/CD-R RECEIVER XR-MR7 TUNING CD SELECT ¡ LINE FM/AM TAPE CD 1 CD 2 CD 3... - Page 65 All manuals and user guides at all-guides.com Pour réaliser un Synchro- Making a Digital Synchro Recording enregistrement numérique Press ENTER. Appuyez sur la touche ENTER. Choose “1 TRACK” with the MULTI JOG. Choisissez “1 TRACK” au moyen de la bague MULTI JOG. Press ENTER.
-
Page 66: Pour Réaliser Un Synchroenregistrement De Toutes Les Plages
All manuals and user guides at all-guides.com Pour réaliser un Synchro- Making a Digital Synchro Recording enregistrement numérique ENTER MONO TAPE LINE FM/AM STEREO CD/CD-R RECEIVER XR-MR7 TUNING CD SELECT ¡ LINE FM/AM TAPE CD 1 CD 2 CD 3... - Page 67 All manuals and user guides at all-guides.com Pour réaliser un Synchro- Making a Digital Synchro Recording enregistrement numérique Press ENTER. Appuyez sur la touche ENTER. Choose “ALL TRACK” with the MULTI Choisissez “ALL TRACK” au moyen de JOG. la bague MULTI JOG. Press ENTER.
-
Page 68: Pour Réaliser Un Synchroenregistrement Des Plages Choisies
All manuals and user guides at all-guides.com Pour réaliser un Synchro- Making a Digital Synchro Recording enregistrement numérique ENTER MONO TAPE LINE FM/AM STEREO CD/CD-R RECEIVER XR-MR7 TUNING CD SELECT ¡ LINE FM/AM TAPE CD 1 CD 2 CD 3... - Page 69 All manuals and user guides at all-guides.com Pour réaliser un Synchro- Making a Digital Synchro Recording enregistrement numérique Choose “SYNCHRO REC” with the Choisissez “SYNCHRO REC” au moyen MULTI JOG. de la bague MULTI JOG. Press ENTER. Appuyez sur la touche ENTER. Choose “ALL TRACK”...
-
Page 70: Pour Finaliser Automatiquement Un Synchro-Enregistrement
All manuals and user guides at all-guides.com Pour réaliser un Synchro- Making a Digital Synchro Recording enregistrement numérique ENTER MONO TAPE LINE FM/AM STEREO CD/CD-R RECEIVER XR-MR7 TUNING CD SELECT ¡ LINE FM/AM TAPE CD 1 CD 2 CD 3... - Page 71 All manuals and user guides at all-guides.com Pour réaliser un Synchro- Making a Digital Synchro Recording enregistrement numérique Press ENTER. Appuyez sur la touche ENTER. Choose “ALL TRACK FN” with the Choisissez “ALL TRACK FN” au moyen MULTI JOG. de la bague MULTI JOG. Press ENTER.
-
Page 72: Switching Between Analog And Digital Recording
Digital Recording analogique et numérique MENU/NO ENTER STEREO MONO TUNED RDM ALL RPT-1 SFC P.BASS SKIP ON A.TRACK D.VOL A.VOL DIG ANA [ 32 44 48 ] STEREO CD/CD-R RECEIVER XR-MR7 TUNING CD SELECT ¡ LINE FM/AM TAPE CD 1... - Page 73 All manuals and user guides at all-guides.com Switching between Analog and Changement entre enregistrements Digital Recording analogique et numérique Press ENTER. Appuyez sur la touche ENTER. During recording from a digital component “DIG” appears in Pendant un enregistrement depuis un composant numérique, the display.
-
Page 74: Making A Digital Recording Manually
All manuals and user guides at all-guides.com Making a Digital Pour réaliser manuellement un Recording Manually enregistrement numérique LINE 2 STEREO CD/CD-R RECEIVER XR-MR7 TUNING ¡ LINE FM/AM TAPE CD 1 CD 2 CD 3 PHONO COMPACT DISC MULTI CHANGER R·D·S... - Page 75 All manuals and user guides at all-guides.com Making a Digital Recording Pour réaliser manuellement un Manually enregistrement numérique When you want to stop in the middle of Pour arrêter l’enregistrement en cours: a recording. Appuyez sur la touche REC 7. Lorsque le voyant “PMA REC”...
-
Page 76: Analog Recording
All manuals and user guides at all-guides.com Analog Recording Enregistrement analogique LINE2 LINE1 STEREO CD/CD-R RECEIVER XR-MR7 TUNING ¡ LINE FM/AM TAPE CD 1 CD 2 CD 3 PHONO COMPACT DISC MULTI CHANGER R·D·S REC 6 MULTI JOG VOLUME P.BASS... - Page 77 All manuals and user guides at all-guides.com Analog Recording Enregistrement analogique Set the recording levels at a suitable Réglez les niveaux d’enregistrement à level for the recording. une valeur appropriée. Set the recording levels as high as you can without going into Réglez les niveaux d’enregistrement le plus haut possible, the overload area.
-
Page 78: Numbering Tracks
All manuals and user guides at all-guides.com Numérotation des Numbering Tracks plages COMPACT DISC MULTI CHANGER R·D·S MULTI JOG VOLUME P.BASS DIRECT REC SELECT FINALIZE ERASE 1 TRACK 1st TRACK EACH ANALOG DIGITAL – ¶ – REC LEVEL REC LEVEL COMPACT DISC DIGITAL RECORDER STANDBY/ON PHONES... -
Page 79: Durée Minimale D'enregistrement
All manuals and user guides at all-guides.com Numbering Tracks Numérotation des plages CAUTION! ATTENTION When digitally recording DAT and DCC sources, be sure to start Lors de l’enregistrement du signal numérique fourni par un recording on the CD-R after pausing the source at the beginning support tel qu’une cassette DAT ou DCC, veillez à... -
Page 80: Setting And Clearing Skip Ids
All manuals and user guides at all-guides.com Setting and Clearing Pose et annulation des Skip IDs codes ID de saut MONO TAPE LINE FM/AM CD SELECT SKIP ID SET SKIP ID CLEAR PLAY MODE DISPLAY P.BASS SKIP ID REC MENU FINALIZE CLEAR ¡... -
Page 81: Annulation Du Code Id De Saut D'une Plage
All manuals and user guides at all-guides.com Pose et annulation des codes ID de Setting and Clearing Skip IDs saut The selected tracks play back repeatedly. When SKIP ID Les plages sélectionnées sont lues de façon répétée. Si la touche CLEAR is pressed during the setting operation, the setting SKIP ID CLEAR est actionnée pendant la pose d’un code, le mode is canceled. -
Page 82: About The Cd Recorder Display
SKIP ID FINALIZE REC MENU CLEAR FINALIZE STEREO MONO TUNED RDM ALL RPT-1 SFC P.BASS SKIP ON A.TRACK D.VOL A.VOL DIG ANA [ 32 44 48 ] STEREO CD/CD-R RECEIVER XR-MR7 TUNING ¡ ¡ LINE FM/AM TAPE CD 1 CD 2... -
Page 83: Affichage Pendant L'enregistrement
All manuals and user guides at all-guides.com A propos de l’affichage de About the CD Recorder Display l’enregistreur CD Display when recording Affichage pendant l’enregistrement The displays below appear when auto-recording from CD 1 to the CD-R. Source After recording Les affichages suivants apparaissent lors d’un auto-enregistrement du Elapsed track playing time CD 1 vers le CD-R. -
Page 84: Finalizing A Disc
All manuals and user guides at all-guides.com Finalizing a DISC Finalisation d’un disque ENTER MONO TAPE LINE FM/AM STEREO CD/CD-R RECEIVER XR-MR7 TUNING CD SELECT ¡ LINE FM/AM TAPE CD 1 CD 2 CD 3 PHONO FINALIZE PLAY MODE DISPLAY P.BASS... - Page 85 All manuals and user guides at all-guides.com Finalizing a DISC Finalisation d’un disque MEMO RAPPEL ¶ None of the controls on the player or the remote have any effect ¶ Aucune commande du lecteur ou de la télécommande n’agit during finalization. pendant la finalisation.
-
Page 86: Erasing A Cd-Rw Disc
All manuals and user guides at all-guides.com Effacement d’un disque Erasing a CD-RW Disc CD-RW ENTER STEREO CD/CD-R RECEIVER XR-MR7 TUNING ¡ LINE FM/AM TAPE CD 1 CD 2 CD 3 PHONO ERASE COMPACT DISC MULTI CHANGER R·D·S MULTI JOG VOLUME P.BASS... -
Page 87: Effacement De La Derniere Plage
All manuals and user guides at all-guides.com Erasing a CD-RW Disc Effacement d’un disque CD-RW LAST TRACK ERASE EFFACEMENT DE LA DERNIERE PLAGE This option erases the last track, or tracks, from a non-finalized. You erase from any track, but always to the end of the disc. The operation Cette option permet d’effacer la dernière plage d’un disque non finalisé. -
Page 88: Effacement D'un Disque Cd-Rw
All manuals and user guides at all-guides.com Erasing a CD-RW Disc Effacement d’un disque CD-RW TOC ERASE EFFACEMENT DE TOC (TABLE DES MATIERES) Returns a finalized disc to a non-finalized state. Cette opération rétablit un disque finalisé à l’état non finalisé. Load the CD–RW you want to erase. -
Page 89: Disc Erase
All manuals and user guides at all-guides.com Erasing a CD-RW Disc Effacement d’un disque CD-RW DISC ERASE EFFACEMENT DU DISQUE To complete this operation takes the full length of the disc plus about 5 Cette opération prend la durée enregistrable du disque et 5 minutes minutes. -
Page 90: Listening To The Optional Ct-Is21 Cassette Deck
All manuals and user guides at all-guides.com Listening to the Optional Ecoute de la platine-cas- CT-IS21 Cassette Deck sette CT-IS21 en option TAPE TAPE STEREO CD/CD-R RECEIVER XR-MR7 TUNING STANDBY SLEEP VOLUME ¡ LINE FM/AM TAPE CD 1 CD 2... - Page 91 All manuals and user guides at all-guides.com Listening to the Optional CT-IS21 Ecoute de la platine-cassette CT-IS21 Cassette Deck en option Press 6 or TAPE to start playback. Appuyez sur la touche 6 ou sur la touche TAPE pour lancer la lecture. After loading a cassette, playback starts in the forwards direction, otherwise it starts in the direction that the deck was Après installation d’une cassette, la lecture commence dans...
-
Page 92: Utilisation Des Commandes D'avance/Rebobinage Rapide
Listening to the Optional CT-IS21 Ecoute de la platine-cassette CT-IS21 Cassette Deck en option 1 ¡ MONO TAPE LINE FM/AM CD SELECT STEREO CD/CD-R RECEIVER XR-MR7 TUNING ¡ LINE FM/AM TAPE CD 1 CD 2 CD 3 PHONO PLAY MODE DISPLAY P.BASS... -
Page 93: Ecoute D'une Bande Sur D'autres Platines-Cassettes
All manuals and user guides at all-guides.com Listening to the Optional CT-IS21 Ecoute de la platine-cassette CT-IS21 Cassette Deck en option Using 'music search' Utilisation de la fonction “Re- cherche musicale” You can use this feature to either return to the start of the current track, or advance to the start of the next. -
Page 94: Automatic Recording Using The Ct-Is21
All manuals and user guides at all-guides.com Automatic Recording Using the CT-IS21 Various recording possibilities are shown on this and the following page. Pages 98–103 show you how to actually make the recording. Source A f t e r r e c o r d i n g M e m o Tape Record a CD in tray... - Page 95 All manuals and user guides at all-guides.com Automatic Recording Using the CT-IS21 The first few seconds of a cassette tape is not recordable so please wind on about 5 seconds of tape before starting. Also, you can't record on a tape that has had the erase-protect tab broken.
-
Page 96: Enregistrement Automatique Utilisant La Ct-Is21
All manuals and user guides at all-guides.com Enregistrement automatique utilisant la CT-IS21 Sur cette page et la suivante, les diverses possibilités d’enregistrement sont illustrées, tandis que les pages 98 à 103 expliquent comment effectuer l’enregistrement proprement dit. Source Après l’enregistrement Remarques Bande Enregistre sur une... - Page 97 All manuals and user guides at all-guides.com Enregistrement automatique utilisant la CT-IS21 Comme il n’est pas possible d’enregistrer sur l’amorce d’une cassette, faites défiler la bande pendant 5 secondes environ avant de commencer l’enregistrement. Notez aussi qu’il n’est pas possible d’enregistrer sur une cassette dont les taquets anti-effacement sont brisés. Source Après l’enregistrement Remarques...
-
Page 98: Enregistrement Automatique D'un Cd Sur Une Cassette
All manuals and user guides at all-guides.com Automatic Recording Using Enregistrement automatique the CT-IS21 utilisant la CT-IS21 ENTER REC MENU MULTI JOG VOLUME P.BASS DIRECT REC SELECT FINALIZE ERASE MENU/NO 1 TRACK 1st TRACK EACH PLAY MODE DISPLAY P.BASS ANALOG DIGITAL SKIP ID REC MENU... - Page 99 All manuals and user guides at all-guides.com Automatic Recording Using Enregistrement automatique the CT-IS21 utilisant la CT-IS21 Use the MULTI JOG to select the CD Servez-vous de la bague MULTI JOG you want to record. pour sélectionner le CD que vous souhaitez enregistrer.
-
Page 100: Enregistrement Automatique D'un Cd-R/Rw Sur Une Cassette
All manuals and user guides at all-guides.com Automatic Recording Using Enregistrement automatique the CT-IS21 utilisant la CT-IS21 ENTER REC MENU MULTI JOG VOLUME P.BASS MENU/NO DIRECT REC SELECT FINALIZE ERASE 1 TRACK 1st TRACK EACH PLAY MODE DISPLAY P.BASS ANALOG DIGITAL SKIP ID REC MENU... - Page 101 All manuals and user guides at all-guides.com Automatic Recording Using Enregistrement automatique the CT-IS21 utilisant la CT-IS21 Press ENTER on the front panel. Appuyez sur la touche ENTER du panneau avant. Press ENTER again. Appuyez à nouveau sur la touche Recording begins.
-
Page 102: Automatically Recording A Cassette Tape To Cd-R/Rw
CD-R/RW ENTER REC MENU TAPE STEREO MONO TUNED RDM ALL RPT 1 SFC P.BASS SKIP ON A.TRACK D.VOL A.VOL DIG ANA [ 32 44 48 ] STEREO CD/CD-R RECEIVER XR-MR7 TUNING PLAY MODE DISPLAY P.BASS ¡ LINE FM/AM... - Page 103 All manuals and user guides at all-guides.com Automatically Recording a Cassette Enregistrement automatique d’une Tape to CD-R/RW cassette sur un CD-R/RW If you're using the remote control, press Si vous utilisez la télécommande, REC MENU. appuyez sur la touche REC MENU. If you're using the front panel controls, Si vous utilisez les commandes du press the MENU/NO;...
-
Page 104: Recording To Cassette Tape (Manual Recording)
All manuals and user guides at all-guides.com Recording to Cassette Enregistrement (manuel) Tape (Manual Recording) sur cassette OPEN/CLOSE 0 DOLBY NR ¶8 If recording a CD: A l’enregistrement d’un CD: Installez le(s) CD(s) à enregistrer. Appuyez sur la touche 7 Load the CDs you want to record. - Page 105 All manuals and user guides at all-guides.com Recording to Cassette Tape Enregistrement (manuel) sur (Manual Recording) cassette Press 2 3 to start recording. Appuyez sur la touche 2 3 pour commencer l’enregistrement. Play the component you chose in step 1. Mettez en service le composant, choisi à...
-
Page 106: Timer
All manuals and user guides at all-guides.com SleepTimer Chronorupteur STANDBY SLEEP VOLUME MONO TAPE LINE FM/AM SLEEP CD SELECT PLAY MODE DISPLAY P.BASS SKIP ID REC MENU FINALIZE CLEAR ÷ Using the sleep timer function, the unit automatically stops ÷ Grâce au chronorupteur, l’appareil s’arrête et se met operation and turns off after the set time has elapsed. -
Page 107: Combinaison Du Chronorupteur Et De La Minuterie De Réveil
All manuals and user guides at all-guides.com SleepTimer Chronorupteur Combining sleep timer and Combinaison du chronorupteur wakeup timer operation et de la minuterie de réveil For example, the sleep timer could be used to allow you to listen to a Par exemple, vous pouvez programmer le chronorupteur pour vous CD while you go to sleep, then wake up the next morning to an FM endormir en écoutant un CD, puis vous réveiller le lendemain matin en... -
Page 108: Wakeup Timer Operation
All manuals and user guides at all-guides.com Wakeup Timer Utilisation de la Operation minuterie de réveil ENTER STEREO CD/CD-R RECEIVER XR-MR7 TUNING ¡ LINE FM/AM TAPE CD 1 CD 2 CD 3 PHONO COMPACT DISC MULTI CHANGER R·D·S VOLUME TIMER/CLOCK ADJ... - Page 109 All manuals and user guides at all-guides.com Wakeup Timer Operation Utilisation de la minuterie de réveil Set the “hour” of timer with the MULTI Choisissez “WAKE-UP SET” par la JOG. bague MULTI JOG. In this example, it is set to “7”. Appuyez sur la touche ENTER.
-
Page 110: Pour Interrompre Le Réglage De La Minuterie En Cours
All manuals and user guides at all-guides.com Wakeup Timer Operation Utilisation de la minuterie de réveil To interrupt the timer setting operation midway Appuyez sur la touche ENTER. Le voyant de minuterie apparaît sur l’affichage. Press 7. Appuyez sur l’interrupteur STANDBY/ To reset the wakeup timer operation the next time, begin from the first ON pour couper l’alimentation. -
Page 111: Unattended Recording
All manuals and user guides at all-guides.com Enregistrement sans Unattended Recording présence ENTER STEREO CD/CD-R RECEIVER XR-MR7 TUNING ¡ LINE FM/AM TAPE CD 1 CD 2 CD 3 PHONO COMPACT DISC MULTI CHANGER R·D·S TIMER/CLOCK ADJ MULTI JOG VOLUME P.BASS... - Page 112 All manuals and user guides at all-guides.com Unattended Recording Enregistrement sans présence Réglez le chiffre des “heures” de la minu- Set the “hour” of timer with the MULTI terie au moyen de la bague MULTI JOG. JOG. Dans notre exemple, réglez sur “7”. In this example, it is set to “7”.
- Page 113 All manuals and user guides at all-guides.com Unattended Recording Enregistrement sans présence Use the MULTI JOG to select the Servez-vous de la bague MULTI JOG component to record from. pour sélectionner le composant à enregistrer. o r f Pour enregistrer depuis un disque o r f e t t CD-R ou CD-RW.
-
Page 114: Changing The Tone
DISPLAY RECORDING (DEMO) CD–RW FINALIZE STEREO MONO TUNED RDM ALL RPT-1 SFC P.BASS SKIP ON A.TRACK D.VOL A.VOL DIG ANA [ 32 44 48 ] STEREO CD/CD-R RECEIVER XR-MR7 TUNING PLAY MODE DISPLAY P.BASS ¡ LINE FM/AM TAPE CD 1... -
Page 115: Changing The Brightness
All manuals and user guides at all-guides.com Changing the Changement de la Brightness luminosité You can set the display to 3 different levels of brightness. Vous pouvez choisir entre 3 niveaux de luminosité pour l’affichage. Press MENU/NO. Appuyez sur la touche MENU/NO. Choose “DIMMER”... -
Page 116: Setting The Input For A Turntable
All manuals and user guides at all-guides.com Setting the Input for a Réglage de l’entrée Turntable pour une platine-disque If you plan to use a turntable with this system, you should switch the Si vous souhaitez utiliser une platine tourne-disque avec ce système, LINE 1 input to the PHONO setting. -
Page 117: Using The Attenuator
MONO STEREO MONO TUNED RDM ALL RPT-1 SFC P.BASS SKIP ON A.TRACK D.VOL A.VOL DIG ANA [ 32 44 48 ] TAPE LINE FM/AM CD SELECT STEREO CD/CD-R RECEIVER XR-MR7 TUNING ¡ LINE FM/AM TAPE CD 1 CD 2 CD 3... -
Page 118: Understanding Display Messages
All manuals and user guides at all-guides.com Understanding Display Messages Below is a list of messages you’ll see during normal operation with a brief explanation of what they mean. If you need more information, turn to the page indicated. Message Description Page OPEN... -
Page 119: Troubleshooting
If your trouble cannot be recovered after checking the following list, please call you nearest PIONEER service center or station. Below is a list of error messages you may see during playback or recording, with possible causes and remedies. If you need more information, turn to the page indicated. - Page 120 All manuals and user guides at all-guides.com Troubleshooting Message Cause Remedy Page REPAIR The recorder was switched While "REPAIR" is displayed, the off/unplugged after recording recorder automatically examines without ejecting the disc. The the recorded area of the disc and recorder could not write updates the track numbers and essential recording...
- Page 121 All manuals and user guides at all-guides.com Troubleshooting Symptom Source of Problem Remedy No sound Power plug is disconnected. Connect power plug correctly. function Cord or cords not connected correctly. Connect all cords properly (p. 7-15). Source function not selected correctly. Select playback function desired.
-
Page 122: Compréhension Des Messages Affichés
All manuals and user guides at all-guides.com Compréhension des messages affichés Voici ci-dessous la liste des messages que vous verrez pendant le fonctionnement normal du XR-MR7 avec une brève explication de leur signification. Consultez la page indiquée pour obtenir plus de détails. -
Page 123: Guide De Dépannage
Si, en dépit de ces contrôles, vous n’êtes pas en mesure d’obtenir un fonctionnement satisfaisant, consultez le centre d’entretien PIONEER ou le distributeur. Voici la liste des messages principalement liés aux problèmes de lecture et d’enregistrement, une brève explication et la page de référence où... -
Page 124: Messages Affichés Liés À La Lecture
All manuals and user guides at all-guides.com Guide de dépannage Affichage Cause probable Mesure corrective Référence REPAIR L’enregistreur a été mis hors Quand “REPAIR” est affiché, tension/débranché après l’enregistreur examine automa- l’enregistrement sans éjection tiquement la zone enregistrée du du disque. L’enregistreur n’a disque, et met le nombre de plages et pas pu inscrire des informations les données de temps... -
Page 125: Dépannage De L'enregistrement Synchro Numérique
All manuals and user guides at all-guides.com Guide de dépannage Symptôme Source du problème Correction Toute Absence de Le cordon d’alimentation est débranché Branchez correctement le cordon d’alimentation. fonction Les cordons ne sont pas raccordés Branchez correctement tous les cordons (p. 7- 15). -
Page 126: Specifications
Channels ............2 (stereo) Frequency Response........4 Hz to 20 kHz Published by Pioneer Corporation. Signal-to-Noise Ratio ......... 100 dB (EIAJ) Copyright © 1999 Pioneer Corporation. All rights reserved. Wow and Flutter ......Limit of measurement (0.001 %) or less (EIAJ) -
Page 127: Section Amplificateur
Disques utilisables ......Disques compacts Canaux .............. 2 (stéréo) Réponse en fréquence......... 4 Hz à 20 kHz Publication de Pioneer Corporation. © 1999 Pioneer Corporation. Rapport signal sur bruit ......100 dB (EIAJ) Tous droits de reproduction et de traduction réservés. -
Page 128: Demo Mode
Haven 1087, Keetberglaan 1, 9120 Melsele, Belgium TEL: 03/570.05.11 PIONEER ELECTRONICS AUSTRALIA PTY. LTD. 178-184 Boundary Road, Braeside, Victoria 3195, Australia, TEL: [03] 9586-6300 PIONEER ELECTRONICS DE MEXICO S.A. DE C.V. San Lorenzo Num 1009 3er piso Desp. 302 Col. Del Valle, Mexico D.F. C.P. 03100 TEL: 5-688-52-90 Printed in Japan / Imprimé...