JVC FS-V30 Manuel D'instructions
Table des Matières
Les langues disponibles
Les langues disponibles
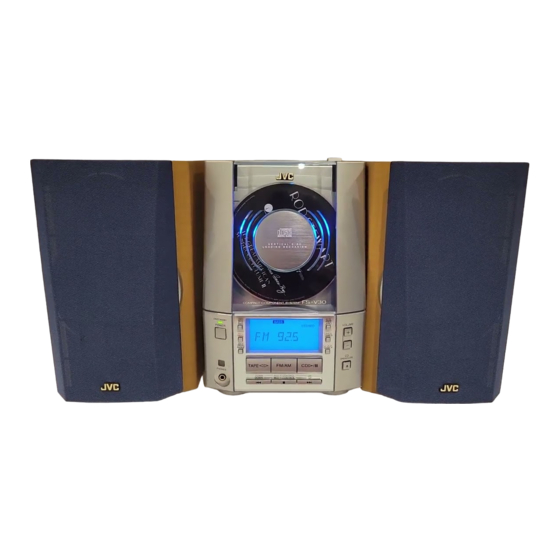
COMPACT COMPONENT SYSTEM
SYSTEME DE COMPOSANTS COMPACT
FS-V30
REMOTE CONTROL RM-RXFSV5
POWER
DIMMER
SLEEP
DISPLAY
FM MODE
MD/AUX
AUTO
AHB PRO
PRESET
CD
PROGRAM RANDOM
REPEAT
BASS
TREBLE
CANCEL
UP
SET
DOWN
TAPE
TUNER
CD
BAND
VOLUME
AUTO T APE SELECTOR
AUTO REVERSE
COMPACT
DIGITAL AUDIO
VERTICAL DISC
LOADING MECHANISM
FS-V30
COMPACT COMPONENT SYSTEM
STANDBY/ON
MD/
AUX
POWER
REC
REV.
MODE
TAPE
FM/AM
CD
PHONES
DOWN
MULTI CONTROL
UP
INSTRUCTIONS
MANUEL D'INSTRUCTIONS
T APE
AHB
PRO
VOLUME
TIMER
CLOCK
CD
OPEN/CLOSE
For Customer Use:
Enter below the Model No. and Serial No.
which are located either on the rear, bot-
tom or side of the cabinet. Retain this
information for future reference.
Model No.
Serial No.
GVT0032-001A
[J(C)]
Chapitres
Table des Matières

Manuels Connexes pour JVC FS-V30


Sommaire des Matières pour JVC FS-V30
-
Page 27: Caractéristiques
Les commandes et les opérations ont été revues pour les rendre plus faciles encore, vous laissant juste le plaisir de la musique. • Grâce à la fonction COMPU PLAY de JVC, vous pouvez mettre la chaîne sous tension et démarrer automatiquement la radio, la platine à cassettes ou le lecteur CD en activant une seule touche. -
Page 28: Pour Commencer
Dirigez la télécommande vers le capteur situé sur la face avant de la chaîne. AUTO T APE SELECTOR AUTO REVERSE T APE COMPACT DIGITAL AUDIO VERTICAL DISC LOADING MECHANISM FS-V30 COMPACT COMPONENT SYSTEM STANDBY/ON POWER VOLUME TIMER REV. MODE CLOCK Capteur de télécommande... -
Page 29: Raccordement De L'antenne Am
ATTENTION: Effectuez tous les raccordements avant de brancher la chaîne dans une prise secteur. Raccordement de l’antenne FM Utilisation du fil d’antenne fourni Panneau arrière de l’appareil Fil d’antenne FM (fourni) Utilisation du raccord du type coaxial (en option) Une antenne de 75 Ω avec un raccord du type coaxial (IEC ou DIN 45325) OPTICAL DIGITAL OUT doit être raccordée à... -
Page 30: Raccordement Des Haut-Parleurs
ATTENTION: Effectuez tous les raccordements avant de brancher la chaîne dans une prise secteur. Raccordement des haut-parleurs Pour chaque haut-parleur, raccordez une extrémité du câble aux bornes de sortie des haut-parleurs situées au dos de la chaîne. 1. Ouvrez chacune des bornes et introduisez fermement les câbles des haut-parleurs, puis refermez les bornes. 2. -
Page 31: Raccordement Du Cordon D'alimentation Secteur
COMPU PLAY La fonction COMPU PLAY de JVC permet de commander les fonctions les plus utilisées de la chaîne à l’aide d’une seule touche. Les opérations à une seule touche permettent d’écouter un CD ou une cassette, d’allumer la radio, ou d’écouter des appareils externes en appuyant simplement sur la touche de lecture correspondant à... -
Page 32: Opérations Communes
Opérations communes REMOTE CONTROL RM-RXFSV5 POWER DIMMER SLEEP DIMMER POWER DISPLAY FM MODE MD/AUX DISPLAY AUTO AHB PRO PRESET AHB PRO PROGRAM RANDOM REPEAT Témoin STANDBY/ON STANDBY/ON BASS BASS TREBLE CANCEL AHB PRO POWER VOLUME POWER TREBLE TIMER VOLUME +, – CLOCK MODE CLOCK... -
Page 33: Accentuation Des Sons Graves (Ahb Pro)
Affichage de l’horloge Accentuation des sons graves (AHB PRO) En mode Standby, l’horloge numérique apparaît en même temps sur l’affichage. Vous pouvez à présent accentuer les sons graves pour conserver toute leur richesse à un faible volume (cet effet est uniquement Lorsque la chaîne est allumée, vous pouvez afficher l’horloge disponible pour la lecture): numérique à... -
Page 34: Utilisation Du Tuner
Utilisation du tuner REMOTE CONTROL RM-RXFSV5 DIMMER SLEEP POWER STANDBY/ON DISPLAY FM MODE MD/AUX FM MODE VOLUME POWER AUTO TIMER AHB PRO PRESET AUTO PRESET MODE CLOCK PROGRAM RANDOM REPEAT OPEN/CLOSE BASS TREBLE CANCEL TAPE FM/AM PHONES FM/AM DOWN MULTI CONTROL ¢... -
Page 35: Changement Du Mode De Réception Fm
4 Appuyez sur la touche UP, DOWN, > ou < Changement du mode de dans les 5 secondes qui suivent pour réception FM sélectionner le numéro de présélection. Touche UP ou >: Augmente le numéro de présélection Lorsque vous écoutez une émission FM en stéréo, le témoin d’une unité. -
Page 36: Utilisation Du Lecteur Cd
Utilisation du lecteur CD VERTICAL DISC LOADING MECHANISM Tiroir de CD FS-V30 COMPACT COMPONENT SYSTEM REMOTE CONTROL RM-RXFSV5 POWER DIMMER SLEEP STANDBY/ON POWER VOLUME DISPLAY FM MODE MD/AUX POWER TIMER RANDOM CD 0 AUTO AHB PRO PRESET CLOCK MODE CD OPEN/... -
Page 37: Programmation De L'ordre De Lecture Des Plages
3 Appuyez sur la touche 7 pour arrêter le Utilisation du Lecteur CD — disque CD. Lecture normale 4 Appuyez sur la touche PROGRAM. L’appareil se met en mode de programmation et le témoin Lecture d’un CD –––––––––––––––––––––– PROGRAM s’allume. 1 Placez un CD dans le tiroir. -
Page 38: Répétition Des Plages
Lecture en ordre quelconque Lorsque ce mode est utilisé, les plages sont lues dans un ordre totalement aléatoire. Appuyez sur la touche RANDOM de la télécommande. L’indicateur RANDOM s’allume sur l’affichage et les plages sont reproduites dans un ordre aléatoire. Pour sauter une plage pendant la lecture, appuyez sur la touche ¢... -
Page 39: Utilisation De La Platine À Cassettes (Ecoute D'une Cassette)
Utilisation de la platine à cassettes (Ecoute d’une cassette) STANDBY/ON POWER VOLUME REMOTE CONTROL RM-RXFSV5 Porte- DIMMER SLEEP POWER TIMER cassettes CLOCK MODE DISPLAY FM MODE MD/AUX REV. MODE AUTO OPEN/CLOSE AHB PRO PRESET TAPE FM/AM TAPE @ # AUTO TAPE SELECTOR PHONES PROGRAM RANDOM REPEAT... -
Page 40: Utilisation De La Platine À Cassettes (Enregistrement)
Utilisation de la platine à cassettes (Enregistrement) REMOTE CONTROL RM-RXFSV5 STANDBY/ON POWER DIMMER SLEEP POWER VOLUME DISPLAY FM MODE MD/AUX TIMER AUTO AHB PRO PRESET CLOCK Témoin de sens de MODE REV. MODE PROGRAM RANDOM REPEAT OPEN/CLOSE déroulement de la bande TAPE @ # TAPE FM/AM... -
Page 41: Enregistrement Direct De Cd
Remarques concernant l’utilisation du Pour arrêter l’enregistrement à tout moment, appuyez sur la touche 7. La cassette s’arrête au bout de 4 secondes. Reverse mode pour l’enregistrement Lors de l’enregistrement en Reverse mode, la chaîne s’arrête automatiquement lorsque la cassette arrive à la fin du sens Reverse Remarque: Lorsque vous programmez la minuterie Bonsoir 2. -
Page 42: Utilisation D'appareils Externes
Utilisation d’appareils externes REMOTE CONTROL RM-RXFSV5 POWER DIMMER SLEEP DISPLAY FM MODE MD/AUX MD/AUX AUTO AHB PRO AHB PRO PRESET PROGRAM RANDOM REPEAT BASS BASS TREBLE CANCEL STANDBY/ON TREBLE AHB PRO POWER VOLUME MD/AUX TIMER VOLUME +, – MODE CLOCK DOWN OPEN/CLOSE TAPE... -
Page 43: Utilisation Des Minuteries
Utilisation des minuteries REMOTE CONTROL RM-RXFSV5 DIMMER SLEEP POWER SLEEP POWER Témoin de la minuterie DISPLAY FM MODE MD/AUX STANDBY/ON AUTO AHB PRO PRESET VOLUME POWER SLEEP SLEEP POWER TIMER TIMER PROGRAM RANDOM REPEAT OFF CLOCK CLOCK MODE CLOCK CLOCK BASS TREBLE CANCEL... -
Page 44: Réglage De La Minuterie D'enregistrement
ATTENTION: 4 Sélectionnez de la source de musique. Si la chaîne est débranchée ou si une coupure de 1. Appuyez sur la touche TIMER de l’appareil. courant se produit, la minuterie est annulée. Vous L’indication “TUNER” clignote sur l’affichage. 2. Appuyez sur la touche ¢ ou 4 pour sélectionner la devrez alors remettre l’horloge à... -
Page 45: Réglage De La Minuterie Bonsoir
2. Appuyez sur la touche ¢ ou 4 de l’appareil pour ATTENTION: régler l’heure à laquelle l’appareil doit s’éteindre. Si la chaîne est débranchée ou si une coupure de Appuyez sur la touche ¢ pour avancer l’heure et sur la courant se produit, la minuterie est annulée. -
Page 46: Entretien - Divers
Entretien - Divers Prenez soin de vos CD afin d’assurer leur bon et long • S’il y a des traces de doigts, etc., sur la lentille, essuyez-les fonctionnement. soigneusement avec un coton-tige. Disques compacts • N’utilisez que les CD portant la marque ci- contre avec cet appareil. -
Page 47: Dépistage Des Défaillances
Dépistage des défaillances • Si votre chaîne présente certaines défaillances, vérifiez la liste ci-dessous pour y trouver un remède possible avant d’appeler votre revendeur. • Si vous ne parvenez pas à résoudre le problème avec ces indications, ou si la chaîne a été endommagée, demandez l’intervention technique d’une personne qualifiée, comme votre revendeur. -
Page 48: Caractéristiques
Caractéristiques FS-V30 (CA-FSV30 et SP-UXV30) Amplificateur 25 W par canal, efficacité min. sous 4 Ω, de 80 Hz à 15 kHz, avec une distorsion Puissance harmonique totale maximum de 10% (aux Etats-Unis) 44 W (22 W + 22 W) à 4 Ω (Max.) (pour le Canada) Sensibilité/Impédance d’entrée (1 kHz) - Page 51 VICTOR COMPANY OF JAPAN, LIMITED EN, FR 0400MWMMDWJEM...