JVC FS-G5 Manuel D'instructions

Manuels Connexes pour JVC FS-G5


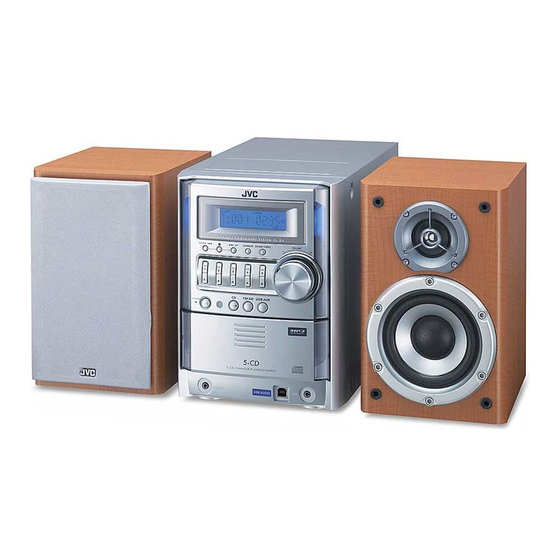
Sommaire des Matières pour JVC FS-G5
- Page 27 Table des matières Introduction............2 Précautions................2 Comment lire ce manuel............. 2 Pour démarrer............ 3 Étape 1: Déballage.............. 3 Étape 2: Préparation de la télécommande......3 Étape 3: Connexions ............4 Avant d’utiliser la chaîne ........7 Opérations quotidiennes—Lecture ....8 Écoute de la radio ..............
-
Page 28: Introduction
Introduction • Si vous n’avez pas l’intention d’utiliser la chaîne pendant une Précautions période prolongée, débranchez le cordon d’alimentation secteur de la prise murale. Installation En cas de problème, débranchez le cordon d’alimentation • Installez la chaîne dans un endroit plat, sec, et ni trop chaud, secteur et consultez votre revendeur. -
Page 29: Pour Démarrer
Pour démarrer Étape : Déballage Étape 1 :Déballage et vérification des accessoires. Après le déballage, vérifiez que tous les éléments suivants sont présents. Le nombre entre parenthèse indique la quantité de chaque pièce fournie. • Antenne FM (1) • Antenne cadre AM (1) •... -
Page 30: Étape 3 : Connexions
Étape : Connexions Si vous avez besoin d’informations plus détaillées, voir page 6. Les illustrations des prises d’entrée/sortie ci-dessous sont des exemples typiques. Quand vous connectez d’autres appareils, référez-vous aussi à leurs modes d’emploi car le nom des prises imprimé au dos de l’appareil peut varier. - Page 31 Antenne FM (fournie) Étendez-la de façon à obtenir la meilleure réception Antenne cadre AM (fournie) possible. Tournez-la jusqu’a que vous obteniez la meilleure réception possible. E X T L O O P G N D Band noire Sans bande...
- Page 32 Pour assembler et connecter l’antenne cadre AM Pour connecter l’antenne cadre AM Assurez-vous de connecter le fil correctement: l’extrémité Pour assembler l’antenne cadre AM blanche à AM EXT et l’extrémité noire à GND. Maintenez 2 Insérez 3 Relâchez • Si les fils de l’antenne cadre AM ou des cordons d’enceinte sont recouverts de vinyle, retirez-le pour mettre à...
-
Page 33: Avant D'utiliser La Chaîne
Avant d’utiliser la chaîne Les indications sur l’affichage vous donnent beaucoup d’informations pendant l’utilisation de la chaîne. Avant d’utiliser la chaîne, familiarisez-vous avec les indicateurs, et en particulier, quand et comment ils s’allument sur l’affichage. 1 Indicateurs de plateau à disque •... -
Page 34: Opérations Quotidiennes-Lecture
Opérations quotidiennes —Lecture Mise sous tension de l’appareil. Le témoin STANDBY s’éteint sur l’appareil. • Sans appuyer sur STANDBY/ON , la chaîne se met sous tension quand vous appuyez sur une des Touches touches de sélection de source à l’étape suivante. numériques Sélection de la source. -
Page 35: Écoute De La Radio
Écoute de la radio Remote Pour prérégler les stations ONLY Pour choisir la bande (FM ou AM) Vous pouvez préréglez 30 stations FM et 15 stations AM. Accordez la station que vous souhaitez prérégler. Mettez en service le mode d’entrée de numéro de préréglage. -
Page 36: Pour Accorder Une Station Préréglée
Pour accorder une station Pour choisir le disque à reproduire Remote ONLY préréglée CD 1 CD 2 CD 3 Choisissez une bande (FM ou AM). CD 4 CD 5 Pour Pour faire une pause: Pour arrêter: démarrer: Choisissez un numéro de préréglage pour la station à mémoriser. -
Page 37: Lecture À Partir De L'ordinateur
Lecture à partir de l’ordinateur Pour la lecture MP3... En fonction du mode de lecture MP3, 4/1 / Cette chaîne est munie d’une prise USB sur le panneau avant ¡/¢ ou les touches numériques fonctionnent pour de l’appareil principal. Vous pouvez connecter votre la sélection de groupe ou la sélection de plage. -
Page 38: Lecture À Partir D'un Autre Appareil
Les pilotes USB sont installés automatiquement. Lecture à partir d’un autre appareil • Si les pilotes USB ne sont pas installés automatiquement, installez les pilotes USB en suivant Connexion d’un autre appareil les instructions sur le moniteur de l’ordinateur. En utilisant un cordon à mini fiche stéréo (non fourni), vous Vérifiez que les pilotes sont installés correctement. -
Page 39: Opérations Quotidiennes
Opérations quotidiennes —Ajustement du son et autres ajustements Ajustement du volume Télécommande Vous pouvez ajuster le niveau de volume du niveau 0 (VOL-MIN) au niveau 31 (VOL-MAX). Télécommande: Appareil: VOLUME CANCEL VOLUME CLOCK/ DISPLAY TIMER Remote ONLY 4/1, Pour couper le volume momentanément PRESET UP, 7,¡/¢... -
Page 40: Modification De La Luminosité De L'affichage-Dimmer
Si une coupure de courant se produit Modification de la luminosité de Le réglage de l’horloge est perdu et réinitialisé à l’affichage —DIMMER “AM 12:00.” Vous devez régler l’horloge à nouveau. Vous pouvez réduire la luminosité de la fenêtre d’affichage. Mise hors tension de l’appareil DIMMER DIMMER-1 DIMMER-2... -
Page 41: Opérations Avancées Des Disques
Opérations avancées des disques Programmation de l’ordre de lecture Télécommande Remote —Lecture programmée ONLY Vous pouvez arranger l’ordre de lecture des plages (32 maximum) avant de démarrer la lecture. • Vous ne pouvez pas utiliser la lecture programmée pour les disques MP3. -
Page 42: Lecture Dans Un Ordre Aléatoire-Lecture Aléatoire
Pour vérifier le contenu programmé Lecture dans un ordre aléatoire Pendant que l’indicateur PRGM apparaît sur l’affichage et Remote —Lecture aléatoire avant la lecture... ONLY Vous pouvez reproduire toutes les plages sur disque choisi Dans l’ordre programmé. de façon aléatoire. •... -
Page 43: Répétition De La Lecture-Lecture Répétée
Répétition de la lecture Interdiction de l’éjection du disque Main Unit ONLY Remote —Lecture répétée —Verrou parental ONLY Vous pouvez répéter la lecture. Vous pouvez verrouiller les plateaux à disque de façon que personne ne puisse éjecter le disque en place. Pour les CD: •... -
Page 44: Utilisation De La Minuterie
Utilisation de la minuterie Réglage de la minuterie Remote ONLY Télécommande En utilisant la minuterie quotidienne, vous pouvez vous réveiller au son de musique, etc. • Vous pouvez mémoriser trois réglages de minuterie quotidienne; cependant, vous ne pouvez mettre en service qu’une seule de ces minuteries quotidiennes en même STANDBY/ON temps. -
Page 45: Pour Mettre La Minuterie Hors Service Une Fois Le Réglage Effectué
Pour mettre la minuterie hors service une fois le Effectuez le réglage de la minuterie comme vous le souhaitez. réglage effectué 1 Réglez les heures puis les minutes de l’heure de Puisque la minuterie quotidienne se met en service à la mise en service. -
Page 46: Informations Additionnelles
Informations additionnelles Opérations quotidiennes—Ajustement du son et Pour en savoir plus sur cette chaîne autres ajustements (voir pages 13 et 14) Opérations quotidiennes—Lecture (voir pages 8 Ajustement du volume: à 12) • Assurez-vous de réduire le volume avant de connecter un casque ou de vous le mettre sur les oreilles. -
Page 47: Guide De Dépannage
Le son d’un disque est discontinu. Guide de dépannage Le disque est rayé ou sale. Si vous des problèmes avec votre chaîne, cherchez d’abord Le plateau à disque ne s’ouvre ou ne se ferme pas. une solution dans cette liste avant d’appeler un réparateur. Le cordon d’alimentation secteur n’est pas branché. -
Page 48: Spécifications
Spécifications Nomenclature Section de l’amplificateur Référez-vous aux pages indiquées pour savoir comment utiliser les touches et les commandes. Puissance de sortie: 90 W par canal, min. RMS, entraîné sur 6 Ω à 1 kHz avec moins de 10% de distorsion harmonique totale. Télécommande Enceintes impédance: 6 Ω...