Table des Matières

Publicité

Les langues disponibles

Les langues disponibles

Liens rapides

X - 01 D2
Super Audio CD/CD Player
Owner's Manual
Manuel du Propriétaire
Bedienungsanleitung
2
. . . . . . . . . . . . . . . . . . . .
27
. . . . . . . . . . .
51
. . . . . . . . . . . . . .
D00942621A

Publicité

Table des Matières
loading

Sommaire des Matières pour Esoteric X-01 D2

  • Page 1 D00942621A X - 01 D2 Super Audio CD/CD Player Owner’s Manual ....Manuel du Propriétaire ... Bedienungsanleitung .
  • Page 2: Important Safety Instructions

    < Do not expose this apparatus to drips or splashes. < Do not place any objects filled with liquids, such as vases, on the apparatus. < Do not install this apparatus in a confined space such as a book case or similar unit. CAUTION: TO REDUCE THE RISK OF ELECTRIC SHOCK, <...
  • Page 3: Table Des Matières

    1 laser product. There is not hazardous invisible laser radiation during operation because invisible laser radiation Thank you for choosing Esoteric. Read this manual emitted inside of this product is completely confined in the carefully to get the best performance from this unit.
  • Page 4: Features

    To achieve the high-speed rotation with superior stability that circuits for each. is required of a Super Audio CD player, the X-01 D2 is • The front 2-channel audio board is mounted with the right equipped with a duralumin turntable. A specially developed channel in one board and the left channel in another board.
  • Page 5: Before Use

    Before Use What’s in the box Placement of the unit Please confirm that the following accessories are in the box High-quality hardened tool steel is used for the pin-point feet, when you open it. securely attached to the bottom of the player. Although the cover feet may appear loose, the weight of the unit causes Remote control unit x 1 them to be firm and secure, and the design effectively damps...
  • Page 6: Discs

    Copy-protected discs, DualDiscs and other discs that do not conform to the CD standard may not play back correctly in this player. If you use such discs in this unit, TEAC ESOTERIC COMPANY cannot be responsible for any consequences or <...
  • Page 7: Remote Control Unit

    Remote Control Unit Restoring factory settings How to insert the batteries If you have made a lot of changes to the setup, and want to restart from a known set of options, restore the unit to the Remove the end cover of the remote control unit with a factory settings as follows: screwdriver.
  • Page 8: Connection

    Connection Master clock generator (G-0s etc.) WORD SYNC OUT Stereo amplifier Surround amplifier AUDIO IN i.LINK (AUDIO) SUBWOOFER CENTER SURROUND FRONT DIGITAL IN (COAXIAL) Wall socket 5.1CH AUDIO IN Surround amplifier D/A Converter Balanced XLR DIGITAL IN (OPTICAL) pin assignment Digital audio device (CD recorder, MD deck, etc.)
  • Page 9 < The optical terminal is covered by a shutter. Make sure that < Use only the supplied Esoteric power cord. Use of other the cable is firmly inserted, but do not force the cable when power cords may result in fire or electric shock. Unplug the...
  • Page 10: Front Panel Features

    Front panel features Front Panel Display POWER Use this button to turn the unit on and off. When the unit is on, the ring surrounding the button lights up. The equipment draws nominal non-operating power from the AC outlet with its POWER switch in the off position. MODE Disc type indicator Use this button to change settings of Word sync, DAC,...
  • Page 11: Understanding The Remote Control Unit

    Understanding the remote control unit Number buttons Use these buttons for selecting tracks by number, etc. 2CH/MULTI Use this button to switch between two-channel (stereo) and multi-channel surround audio output. PLAY AREA Use this button to select the playback area of Super Audio CDs.
  • Page 12: Stopping Playback

    Playback Press the PLAY button to start playback. Pausing playback Turn the unit on. Each press of the POWER button turns the unit on and off. The ring surrounding the POWER button and the display light up when the unit is turned on. Press the OPEN/CLOSE button.
  • Page 13: Skipping Playback

    Skipping playback Fast scanning Press the MUSIC SKIP button (. or /) repeatedly until When playing back, use the SCAN button (m or ,) to the desired track is found. The selected track will be played move backwards and forwards. Press PLAY to restart playback from the beginning.
  • Page 14: Programmed Playback

    Programmed playback Programmed playback allows up to 30 tracks to be played Clearing the last track from the list back in the order you decide. Press the CLEAR button to clear the last track from the list. Press the PROGRAM button (either when playing back or stopped).
  • Page 15: Display Dimming

    Repeat mode Display dimming Use the REPEAT button to select the repeat mode for The display on the main unit can be dimmed to suit the playback. Repeated presses of the REPEAT button cycle environment in which you listen to music. There are three levels between the following options: and an “off”...
  • Page 16: Changing The Display Mode

    Changing the display mode MODE During playback, it is possible to change the display as shown Repeatedly press the MODE button to select the menu here. item to be changed. < The DISPLAY button doesn’t work during programmed playback. WORD LAYER (normal display) Currently playing track...
  • Page 17: Setting The Word Sync, Dac, Priority Playback Area, And I.link Output

    Use this feature to lock your entire system to a single sync Inc.) signal (clock) by connecting this unit to the Esoteric G-0s or • Multi-bit DAC for PCM signals (PCM1704 from Burr-Brown) similar device that outputs a sync signal.
  • Page 18 Setting the Word sync, DAC, priority playback area, and i.LINK output (2) LAYER (priority playback area) i.LINK There are two types of Super Audio CDs, regular ones that Used to select an i.LINK output setting. contain 2-channel stereo and multi-channel stereo, and When using the i.LINK terminal, select “60958”...
  • Page 19: Settings (Introduction)

    Settings (introduction) Turn on the main unit. When a option marked with “>” is displayed, use the up or down cursor buttons to change the setting, and press the ENTER button to confirm the entry. < When a numerical value (such as speaker distance) is Press the SETUP button to enter the setup menu.
  • Page 20: Setup Menu Chart

    Settings (Setup Menu Chart ) AudioSetup GeneralSet Analog Out options SP Setup SP Size L/R Size options DigitalOut options C Size options CD Direct options SR/SL Size options SW ON/OFF options Distance L/R *.*m options C *.*m options SR/SL *.*m options SP Level LR ***.*dB...
  • Page 21: Analog Output (Analog Out)

    Settings (Audio Setup) Analog output (Analog Out) Digital output (DigitalOut) When a option marked with “>” is displayed, use the up or When a option marked with “>” is displayed, use the up or down cursor buttons to change the setting, and press the down cursor buttons to change the setting, and press the ENTER button to confirm the entry.
  • Page 22: Speaker Size (Sp Size)

    Settings (Speaker Setup for the i.LINK and the 5.1ch analog audio output terminal) Use these speaker setup menus when the i.LINK Speaker Size (SP Size) (AUDIO) terminal or the 5.1ch analog audio output Select the size (Large or Small) independently for the L/R terminals are connected to a surround sound amplifier, (front pair of speakers), the C (center speaker) and the SR/SL and when you don’t use the speaker menus of the...
  • Page 23: Speaker Distance (Distance)

    Speaker distance (Distance) Speaker levels (SP Level) This setup is effective in the following case only: Use this to set the relative levels of the speakers. You can set Set the DAC mode to “M.bit” or “1bit”, play Super Audio the L/R pair together, and the center, and surround rear pair CDs, and output sound from the 5.1ch analog output independently, as well as the subwoofer.
  • Page 24: I.link (Ieee 1394)

    i.LINK (IEEE 1394) The i.LINK is also known as IEEE 1394, an international How to connect multiple i.LINK-capable specification. devices This unit is i.LINK (AUDIO) ready. By connecting an i.LINK (AUDIO)-capable device to the i.LINK Daisy chain connection (AUDIO) terminal on this unit using an i.LINK cable, you can transmit Super Audio CD multi-channel signals that could not be You can daisy chain up to 17 devices including this unit.
  • Page 25: Troubleshooting

    Troubleshooting In case you experience any problem with this unit, please take Overall volume is low, or balance between speakers is the time to look through this chart and see if you can solve the strange. problem yourself before you call your dealer. e A speaker’s level (or that of a pair of speakers) has been set up too low or too high in the speaker setup.
  • Page 26: Specifications

    Specifications General System ........... . Super Audio CD and CD Power supply Europe model .
  • Page 27 ATTENTION < N’exposez pas cet appareil au ruissellement ni aux éclaboussures. Nous vous remercions pour l’achat d’un appareil Esoteric. < Ne placez aucun objet contenant du liquide, tel qu’un vase, Lire ce manuel avec attention pour obtenir les meilleures sur l’appareil.
  • Page 28: Caractéristiques

    Pour obtenir une rotation à haute vitesse avec la stabilité • Connexion i.LINK (compatible avec le contrôle de débit). supérieure requise par un lecteur de Super Audio CD, le X-01 D2 est équipé d’une platine en duralumin. Une technologie de Convertisseurs audio N/A (DAC) traitement spécialement développée a été...
  • Page 29: Avant Utilisation

    Avant utilisation Contenu du carton NE BOUGEZ PAS L’APPAREIL DURANT LA LECTURE Durant la lecture, le disque tourne à haute vitesse. L’appareil Veuillez vérifier que les accessoires suivants sont bien présents à ne doit PAS être soulevé ni bougé durant la lecture. Cela l’ouverture du carton.
  • Page 30: Types De Disques Lisibles Par Ce Système

    être correctement reproduits par ce lecteur. Si vous < N’employez pas de disque de forme particulière (octogonal, utilisez de tels disques dans cet appareil, TEAC ESOTERIC en forme de cœur, de taille carte de visite, etc.). Ce type de COMPANY ne pourra être tenu pour responsable d’aucune...
  • Page 31: Télécommande

    Télécommande Restauration des réglages d’usine Comment insérer les piles Si vous avez apporté beaucoup de changements à la configuration, et si vous désirez revenir à des réglages connus, Retirez le capuchon de la télécommande avec un tournevis. ramenez l’appareil aux réglages d’usine comme suit : Après avoir vérifié...
  • Page 32: Connexions

    Connexions Générateur d’horloge maître (G-0s etc.) WORD SYNC OUT Amplificateur stéréo Amplificateur surround AUDIO IN i.LINK (AUDIO) SUBWOOFER CENTER SURROUND FRONT DIGITAL IN (COAXIAL) Prise secteur 5.1CH AUDIO IN Amplificateur surround Convertisseur N/A Brochage d’une XLR DIGITAL IN (OPTICAL) symétrique Appareil audio numérique (enregistreur de CD, platine MD, etc.)
  • Page 33: Prises De Sortie Audio Analogique

    COAXIAL: Utilisez un câble audio numérique cinch (RCA) OPTICAL: Utilisez un câble audio numérique optique (TOS) < N’utilisez que le cordon d’alimentation fourni par Esoteric. L’emploi de tout autre cordon pourrait entraîner un incendie < La prise optique est protégée par un obturateur. Assurez- ou un choc électrique.
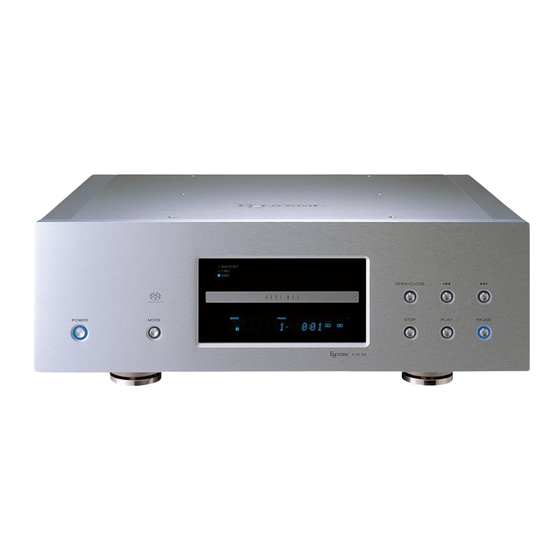
  • Page 34: Description De La Face Avant

    Description de la face avant Face avant Afficheur POWER Utilisez cet interrupteur d’alimentation pour allumer et éteindre l’appareil. Quand l’appareil est en service, le pourtour de l’interrupteur est allumé. Cet équipement tire un courant nominal non fonctionnel de la prise secteur quand l’interrupteur POWER est en position off. Indicateur de type de disque MODE Affiche le type de disque actuellement chargé.
  • Page 35: Comprendre La Télécommande

    Comprendre la télécommande PLAY AREA Utilisez cette touche pour sélectionner la zone de lecture des Super Audio CD. SCAN (m/,) Utilisez ces touches pour une recherche rapide durant la lecture. STOP Utilisez cette touche pour stopper la lecture. PLAY Utilisez cette touche pour lancer la lecture. Touches curseur et ENTER Utilisez ces touches dans le menu de configuration (setup).
  • Page 36: Mise En Pause De La Lecture

    Lecture Appuyez sur la touche PLAY pour lancer la lecture. Mise en pause de la lecture Mettez l’appareil sous tension. Chaque pression de l’interrupteur POWER allume et éteint l’appareil. Le pourtour de l’interrupteur POWER et l’afficheur s’allument quand l’appareil est sous tension. Appuyez sur la touche OPEN/CLOSE.
  • Page 37: Saut De Lecture

    Saut de lecture Recherche rapide Appuyez répétitivement sur la touche MUSIC SKIP . ou Pendant la lecture, utilisez la touche SCAN (m ou ,) / ) jusqu’à obtention de la plage désirée. La plage pour vous déplacer en avant et en arrière. Appuyez sur PLAY sélectionnée sera lue depuis son début.
  • Page 38: Lecture Programmée

    Lecture programmée La lecture programmée permet de reproduire 30 plages Effacement de la dernière plage de la liste dans l’ordre que vous aurez choisi. Appuyez sur la touche CLEAR pour effacer la dernière plage de la liste. Appuyez sur la touche PROGRAM (durant la lecture ou à l’arrêt).
  • Page 39: Mode Repeat (Lecture En Boucle)

    Mode Repeat (lecture en boucle) Atténuation de l’afficheur Utilisez la touche REPEAT pour sélectionner le mode de L’afficheur de l’appareil peut être atténué pour convenir à lecture en boucle. Appuyer répétitivement sur la touche l’environnement dans lequel vous écoutez la musique. Il existe REPEAT passe en revue les options suivantes: trois niveaux et un réglage d’extinction (off).
  • Page 40: Changement Du Mode D'affichage

    Changement du mode d’affichage MODE Appuyez répétitivement sur la touche MODE pour Durant la lecture, il est possible de changer l’affichage comme sélectionner le paramètre de menu à changer. indiqué ici. < La touche DISPLAY ne fonctionne pas durant la lecture programmée.
  • Page 41: Réglage De La Synchro Word, Du Dac, De La Zone À Lecture Prioritaire Et De La Sortie I.link

    Ce réglage vous permet de déterminer quel DAC sera système sur un seul signal (horloge) de synchronisation en sélectionné pour la lecture. reliant cet appareil au G-0s Esoteric ou à un dispositif similaire produisant un signal de synchronisation. REF. (Référence) Les options «...
  • Page 42 Réglage de la synchro word, du DAC, de la zone à lecture prioritaire et de la sortie i.LINK (2) LAYER (zone à lecture prioritaire) i.LINK Il existe deux types de Super Audio CD, les normaux qui Utilisé pour sélectionner un réglage de sortie i.LINK. contiennent des données de stéréo 2 canaux et de stéréo Quand vous utilisez la prise i.LINK, sélectionnez «...
  • Page 43: Réglages

    Réglages (introduction) Mettez l’appareil sous tension. Quand une option marquée d’un « > » est affichée, utilisez les touches curseur Haut ou Bas pour changer le réglage et appuyez sur la touche ENTER pour confirmer votre choix. Appuyez sur la touche SETUP pour entrer dans le menu de configuration.
  • Page 44: Réglages (Tableau Du Menu De Configuration)

    Réglages (Tableau du menu de configuration) AudioSetup GeneralSet Analog Out options SP Setup SP Size L/R Size options DigitalOut options C Size options CD Direct options SR/SL Size options SW ON/OFF options Distance L/R *.*m options C *.*m options SR/SL *.*m options SP Level LR ***.*dB...
  • Page 45: Sortie Analogique (Analog Out)

    Réglages (Configuration audio) Sortie analogique (Analog Out) Sortie numérique (DigitalOut) Quand une option marquée d’un « > » est affichée, utilisez Quand une option marquée d’un « > » est affichée, utilisez les touches curseur Haut ou Bas pour changer le réglage et les touches curseur Haut ou Bas pour changer son réglage et appuyez sur la touche ENTER pour confirmer votre choix.
  • Page 46: Taille D'enceinte (Sp Size)

    Réglages (Configuration d’enceintes pour les prises i.LINK et de sortie audio analogique 5.1) Utilisez ces menus de configuration d’enceintes quand Taille d’enceinte (SP Size) la prise i.LINK (AUDIO) ou les prises de sortie audio Sélectionnez indépendamment la taille (Large pour grande ou analogique 5.1 sont reliées à...
  • Page 47: Distance Des Enceintes (Distance)

    Distance des enceintes (Distance) Niveaux des enceintes (SP Level) Cette configuration n’agit que dans le cas suivant: Utilisez ce paramètre pour régler le niveau relatif des Réglez le mode DAC sur « M.bit » ou « 1bit », lisez des Super enceintes.
  • Page 48: Taux De Transfert Des Données

    i.LINK (IEEE 1394) voulez brancher avant de faire toute connexion. La liaison i.LINK est aussi connue sous le nom IEEE 1394, une Comment connecter plusieurs appareils norme internationale. compatibles i.LINK Cet appareil est compatible i.LINK (AUDIO). En branchant un appareil compatible i.LINK (AUDIO) à la prise i.LINK (AUDIO) de cette unité...
  • Page 49: Guide De Dépannage

    Guide de dépannage Si vous rencontrez un quelconque problème avec cet appareil, Pas de sortie audio multicanal veuillez prendre le temps de lire ce qui suit et voyez si vous e Réglez le paramètre Analog Out sur « Multi ch ». pouvez résoudre le problème vous-même avant d’appeler votre e Changez si nécessaire la configuration des enceintes.
  • Page 50: Généralités

    Spécifications Généralités Système ........... . Super Audio CD et CD Alimentation Modèle Europe.
  • Page 51 Inhalt Vielen Dank für den Kauf dieses Esoteric-Geräts. Bitte lesen Sie diese Anleitung sorgfältig durch, um die Leistungs-fähigkeit dieses Geräts optimal nutzen zu können. Ausstattungsmerkmale ............52 Vor der ersten Inbetriebnahme .
  • Page 52: Ausstattungsmerkmale

    Schlittens, wodurch er stets exakt und optimal positioniert wird. Stabiles Chassis mit drei punktgelagerten Standfüßen Der X-01 D2 besitzt eine stabile 5 mm starke stählerne Grundplatte. Sein gesamter Aufbau ist in drei logische Gruppen aufgeteilt, so dass eine gegenseitige, störende Beeinflussung der einzelnen Komponenten durch Interferenz nahezu ausgeschlossen werden kann.
  • Page 53 Zustand ist die Schubladenmechanik an der Frontplatte gesichert. Gebürstetes Aluminium unterstreicht die Konstruktionsqualität Die Front-, Seiten- und die Deckplatte des X-01 D2 bestehen aus einer massiven, gebürsteten Aluminiumplatte. Diese qualitativ hochwertige und luxuriöse Ausführung entspricht dem Gesamtkonzept, dass voll und ganz auf Qualität ausgerichtet ist. Dies zeigt sich auch in Details, wie der beleuchteten Umrandung der Bedienelemente, dem Logo und der Disc-Schublade aus gefrästem Aluminium.
  • Page 54: Lieferumfang

    < Achten Sie bitte darauf, dass die Netzspannung, mit der Sie den Netzstecker von der Wandsteckdose. Bewegen Sie den X- den X-01 D2 betreiben möchten, mit der auf dem Label an 01 D2 niemals, wenn sich eine Disc in der Disc-Schublade der Geräterückseite angegebenen Betriebsspannung...
  • Page 55: Wiederherstellen Der Werkseinstellungen

    Wiederherstellen der Werkseinstellungen Aufstellen des X-01 D2 Falls Sie viele Einstellungen des X-01 D2 verändert haben und die Originaleinstellungen wieder herstellen möchten, führen Sie bitte Die aus gehärtetem Werkzeugstahl gefertigten, spitz die folgenden Bedienschritte durch: zulaufenden Standpins sind fest mit dem Gehäuseboden verbunden.
  • Page 56: Discs

    Zur Wiedergabe mit dem X-01 D2 geeignete Folgende Disc-Formate sind zur Wiedergabe Disc-Formate mit dem X-01 D2 nicht geeignet: Der X-01 D2 eignet sich zur Wiedergabe von Discs, die eines der • DVD, CD-G, der Datenteil einer CD-EXTRA, PHOTO-CD, CD- folgenden Logos: ROM und DVD-ROM •...
  • Page 57 Einwirkung von Heizkörpern oder elektrischen Geräten mit erhöhter Wärmeentwicklung ausgesetzt sind. < Bedruckbare Discs sind nicht zu empfehlen, da deren Labelseite mit einem Film überzogen ist, der den X-01 D2 beschädigen kann. < Kleben Sie keine Papiere oder Schutzfolien auf die CDs, und verwenden Sie keine Sprays zum Aufbringen einer Schutzschicht.
  • Page 58: Anschlüsse

    Anschlüsse Master Clock Generator (G-0s o. ä.) WORD SYNC OUT Stereoverstärker A/V-Surround-Verstärker AUDIO IN i.LINK (AUDIO) SUBWOOFER CENTER SURROUND FRONT DIGITAL IN (COAXIAL) Wandsteckdose 5.1CH AUDIO IN A/V-Surround-Verstärker D/A-Konverter Symmetrische Belegung DIGITAL IN (OPTICAL) von XLR-Anschlüssen DigitalAudio-Komponente (CD-Rekorder, MD-Deck, usw.)
  • Page 59: Analoge Audioausgänge

    < Vergewissern Sie sich bitte, dass sämtliche Verbindungen Verstärkers. korrekt und sicher vorgenommen wurden. Zur Vermeidung von Brummen und Rauschen sollten Audiosignalkabel Verwenden Sie zum Anschließen des X-01 D2 an einen niemals verdrillt oder parallel zu Netz- sowie geeigneten Verstärker ein handelsübliches sechspoliges Lautsprecherkabeln verlegt werden.
  • Page 60: Fernbedienung

    Fernbedienung und Sensor am X-01 D2 keine Hindernisse befinden. < Direkte Sonneneinstrahlung oder eine andere helle Lichtquelle, die direkt auf den Remote-Sensor am X-01 D2 scheint, kann Störungen bei der Übermittlung der Infrarotsignale verursachen. < Bei anderen Geräten, die ebenfalls mittels Infrarot- Fernbedienung gesteuert werden können, können aufgrund...
  • Page 61: Bedienelemente Auf Der Gerätevorderseite

    Bedienelemente auf der Gerätevorderseite POWER STOP Diese Taste dient zum Ein- oder Ausschalten des X-01 D2. Im Hiermit können Sie die Wiedergabe beenden. Nach dem eingeschalteten Zustand leuchtet die Umrandung der Taste. Betätigen der STOP-Taste leuchtet deren Umrandung. Auch wenn sich der POWER-Schalter in der OFF-Position...
  • Page 62: Verwenden Der Fernbedienung

    Verwenden der Fernbedienung Zifferntasten Verwenden Sie die Zifferntasten zur direkten Eingabe einer Titel-, Kapitelnummer usw. 2CH/MULTI dient zum Umschalten zwischen Zweikanal- (Stereo) und Mehrkanal-Surround-Wiedergabe. PLAY AREA (Wiedergabebereich) Mittels dieser Taste können Sie den gewünschten Wiedergabebereich einer Super Audio CD auswählen. SCAN (m/,) Wenn Sie eine dieser Tasten während der Wiedergabe betätigen, wird die im Laufwerk befindliche Disc in der jeweils...
  • Page 63: Display

    Display FL DIMMER Mittels dieser Taste können Sie die Helligkeit des Frontdisplay ändern. REPEAT Mittels dieser Taste wählen Sie die gewünschte Wiedergabewiederholungsfunktion aus. Disc-Typ PROGRAM zeigt den Typ der momentan im Laufwerk befindlichen Disc Diese Taste dient zum Programmieren einer Titelfolge. TRACK MUSIC SKIP (.//) signalisiert, dass Titelnummern angezeigt werden.
  • Page 64: Wiedergabe

    Öffnen und Schließen der Disc-Schublade < Um etwaige Fehlfunktionen oder Beschädigung der Disc, der Schublade oder des X-01 D2 zu vermeiden, achten Sie bitte darauf, dass Sie die Disc stets zentriert in die dafür vorgesehene Aussparung in der Schublade einlegen.
  • Page 65: Verwenden Der Skip-Tasten

    Titel vorwärts oder rückwärts überspringen. q Wiedergabe (normale Geschwindigkeit) < Wenn Sie die SKIP-Tasten betätigen, während sich der X-01 < Alternativ können Sie auch die SKIP-Tasten am X-01 D2 D2 im Pause- oder Stoppmodus befindet, beginnt die verwenden. Betätigen Sie zum Starten der Suchlauffunktion Wiedergabe erst nach Betätigen einer der Tasten (PAUSE oder...
  • Page 66: Wiedergabe Einer Programmierten Titelfolge

    Wiedergabe einer programmierten Titelfolge Bei einer programmierten Titelfolge können Sie bis zu 30 Löschen des letzten Titels einer Liste Titel in der von Ihnen gewünschten Reihenfolge Betätigen Sie die CLEAR-Taste, um den letzten Titel einer Liste wiedergeben. zu löschen. Betätigen Sie die PROGRAM-Taste (während der Wiedergabe oder im Stoppmodus).
  • Page 67: Wiedergabewiederholung

    Wiedergabewiederholung Einstellen der Display-Helligkeit Verwenden Auswahl Die Helligkeit der Displayanzeige am X-01 D2 kann in drei Stufen Wiedergabewiederholungsfunktion die REPEAT-Taste. Durch eingestellt oder komplett ausgeschaltet werden. wiederholtes Betätigen der REPEAT-Taste können Sie jeweils Mittels FL DIMMER-Taste können Sie zwischen diesen zwischen den folgenden Optionen umschalten: Einstellungen umschalten.
  • Page 68: Ändern Der Displayanzeige

    Sekunden keine Taste). Durch Betätigen der STOP-Taste können Sie den Einstellmodus ebenfalls verlassen. < Ein Ausschalten des X-01 D2, ohne vorheriges Verlassen des Einstellmodus, kann Probleme verursachen und ist daher zu vermeiden. < Die jeweiligen Einstellungen bleiben im X-01 D2 auch nach dem Ausschalten und selbst bei unterbrochener Spannungsversorgung erhalten.
  • Page 69: Einstellen Von Word Sync, Dac, Des Bevorzugten Wiedergabebereichs Sowie Der I.link-Schnittstelle

    ähnlichen Clock-Generators, die ein entsprechendes Sync- Signal ausgeben, zur Synchronisierung Ihres kompletten REF. (Referenz) Audiosystems verwenden. Der X-01 D2 wählt automatisch den für die jeweils aktuell im Die verfügbaren Einstellmöglichkeiten sind „ON“ oder „OFF“. Laufwerk befindliche Disc am besten geeigneten D/A- Wandler.
  • Page 70 < Die hier getroffene LAYER-Einstellung hat grundsätzlich Vorrang. Wenn Sie mittels PLAY AREA-Taste den < Bei Wiedergabe einer Super Audio CD besteht zwischen den Wiedergabebereich (Schicht) wechseln, wählt der X-01 D2 Formaten 60958 und PCM kein Unterschied. beim Laden einer anderen Disc die voreingestellte Schicht erneut als erste zur Wiedergabe aus.
  • Page 71: Einstellungen

    Einstellungen (Einleitung) Schalten Sie den X-01 D2 ein. Verwenden Sie zum Einstellen der Werte von Menüpunkten, die durch das „>“-Symbol markiert sind, die Auf- oder Abwärts-Cursortasten. Bestätigen Sie Ihre Einstellungen durch Betätigen der ENTER-Taste. Betätigen Sie zum Aufruf des Setup-Menüs die SETUP- <...
  • Page 72 Einstellungen (Setup-Menü-Diagramm) AudioSetup GeneralSet Analog Out Option SP Setup SP Size L/R Size Option DigitalOut Option C Size Option CD Direct Option SR/SL Size Option SW ON/OFF Option Distance L/R *.*m Option C *.*m Option SR/SL *.*m Option SP Level LR ***.*dB Option C ***.*dB...
  • Page 73: Analogausgang (Analog Out)

    < Zum Auswählen von „2ch“ oder „Multi ch“ können Sie Schnittstelle oder an den 5.1ch-Analogausgängen ein alternativ auch die 2CH/MULTI-Taste auf der Fernbedienung Surround Sound A/V-Verstärker angeschlossen sein. verwenden. Betätigen Sie die 2CH/MULTI-Taste, wenn sich der X-01 D2 im Stoppmodus befindet.
  • Page 74: Abmessungen Der Lautsprecherboxen (Sp Size)

    Lautsprechereinstellungen des Verstärkers verwenden. In diesen Fällen sollten Sie die werkseitig voreingestellten Werte Large (groß) dieses X-01 D2-Menüs verwenden. Wählen Sie diese Einstellung, wenn Sie großvolumige Boxen verwenden, die alle Bassfrequenzen wiedergeben können. < Diese Einstellungen wirken sich auf die über die i.LINK Small (klein) (AUDIO) Schnittstelle und die analogen Audioausgänge...
  • Page 75: Abstand Der Lautsprechersysteme Zur Hörposition (Distance)

    Cursortaste werden jeweils 0,1m zu den angezeigten Werten hinzuaddiert, und durch Betätigen der Abwärts-Cursortaste < Der X-01 D2 gibt kein Testtonsignal aus, wenn sich im werden 0,1m von den Werten subtrahiert. Laufwerk eine Super Audio CD befindet (oder befand). In Alle Entfernungsangaben sind in Metern.
  • Page 76: I.link (Ieee 1394)

    Serienschaltung Übertragung des digitalen Mehrkanal-Audiosignals einer Super Audio CD. Dies war bisher nur analog möglich. Zusätzlich wird Inklusive des X-01 D2 können Sie bis zu 17 Komponenten in die Übertragung von linearen PCM-Datenströmen sowie Serie schalten. komprimierten, mehrkanaligen Audiosignalen unterstützt.
  • Page 77: Technische Daten

    Technische Daten Allgemein System ........... . Super Audio CD und CD Spannungsversorgung Europa-modell .
  • Page 78: Hilfe Bei Funktionsstörungen

    Tonaussetzer bei der Wiedergabe sollten, nehmen Sie sich bitte ein wenig Zeit, um die folgende e Stellen Sie den X-01 D2 auf einer ebenen, stabilen Fläche Auflistung durchzulesen. In den meisten Fällen werden Sie das auf. Vermeiden Sie Vibrationen und Erschütterungen.
  • Page 79: Pflege Und Wartung

    Geräte erhalten Vermeiden Sie Kondensationsbildung Sie auf Anfrage bei ihrem zuständigen Stadtbüro, der Wenn der X-01 D2 (oder eine CD) von einer kalten in eine Abfallentsorgungsgesellschaft oder dem Händler, bei dem warme Umgebung transportiert wird oder nach einer Sie das Gerät ursprünglich erworben haben.
  • Page 80 TEAC ESOTERIC COMPANY 3-7-3, Nakacho, Musashino-shi, Tokyo 180-8550, Japan Phone: (0422) 52-5132 e-mail: eso-os@tec.teac.co.jp TEAC AMERICA, INC. 7733 Telegraph Road, Montebello, California 90640 Phone: (323) 726-0303 TEAC CANADA LTD. 5939 Wallace Street, Mississauga, Ontario L4Z 1Z8, Canada Phone: (905) 890-8008 TEAC MEXICO, S.A.

Table des Matières