Chapitres
Table des Matières
Dépannage

Manuels Connexes pour Esoteric X-01


Sommaire des Matières pour Esoteric X-01
- Page 1 D00816700C Super Audio CD/CD Player Owner’s Manual ....Manuel du Propriétaire ... Bedienungsanleitung .
-
Page 2: Important Safety Instructions
WARNING: TO PREVENT FIRE OR SHOCK HAZARD, DO NOT EXPOSE THIS APPLIANCE TO RAIN OR MOISTURE. CAUTION: TO REDUCE THE RISK OF ELECTRIC SHOCK, CAUTION DO NOT REMOVE COVER (OR BACK). NO USER- < DO NOT REMOVE THE EXTERNAL CASES OR CABINETS TO SERVICEABLE PARTS INSIDE. -
Page 3: Table Des Matières
This product has been designed and manufactured according to Contents FDA regulations “title 21, CFR, chapter 1, subchapter J, based on the Radiation Control for Health and Safety Act of 1968”, and is classified as class 1 laser product. There is not hazardous invisible laser radiation during operation because invisible laser radiation Thank you for choosing TEAC. -
Page 4: Features
Playback of Super Audio CDs requires high-speed rotation and The X-01 is truly the most advanced Super Audio CD player to a high degree of precision, and the X-01 accordingly uses a date. Separation of power supplies for each major function magnesium turntable. -
Page 5: Before Use
Before Use What’s in the box Placement of the unit Please confirm that the following accessories are in the box High-quality hardened tool steel is used for the pin-point feet, when you open it. securely attached to the bottom of the player. Although the cover feet may appear loose, the weight of the unit causes them Remote control unit x 1 to be firm and secure, and the design effectively damps and... -
Page 6: Discs
Discs Type of Discs That Can be Played on This < Always place the disc on the disc tray with the label side uppermost. (Compact discs can be played or recorded only on System one side.) This player can playback discs bearing any of the following logos: <... -
Page 7: Remote Control Unit
Remote Control Unit Restoring factory settings How to insert the batteries If you have made a lot of changes to the setup, and want to restart from a known set of options, restore the unit to the Remove the cover of the remote control unit with a factory settings as follows: screwdriver. -
Page 8: Connections
Connections CAUTION: < Switch off the power to all equipment before making connections. < Read the instructions of each component you intend to use with this unit. < Be sure to insert each plug securely. To prevent hum and noise, avoid bundling the signal interconnection cables together with the AC power cord or speaker cables. - Page 9 Analog audio output terminals Word sync connector Use either the XLR or RCA (pin) FRONT terminals for analog This allows the use of an externally-generated word clock stereo output. connection, using a commercially available BNC coaxial If your amplifier has balanced XLR analog audio inputs, cable.
-
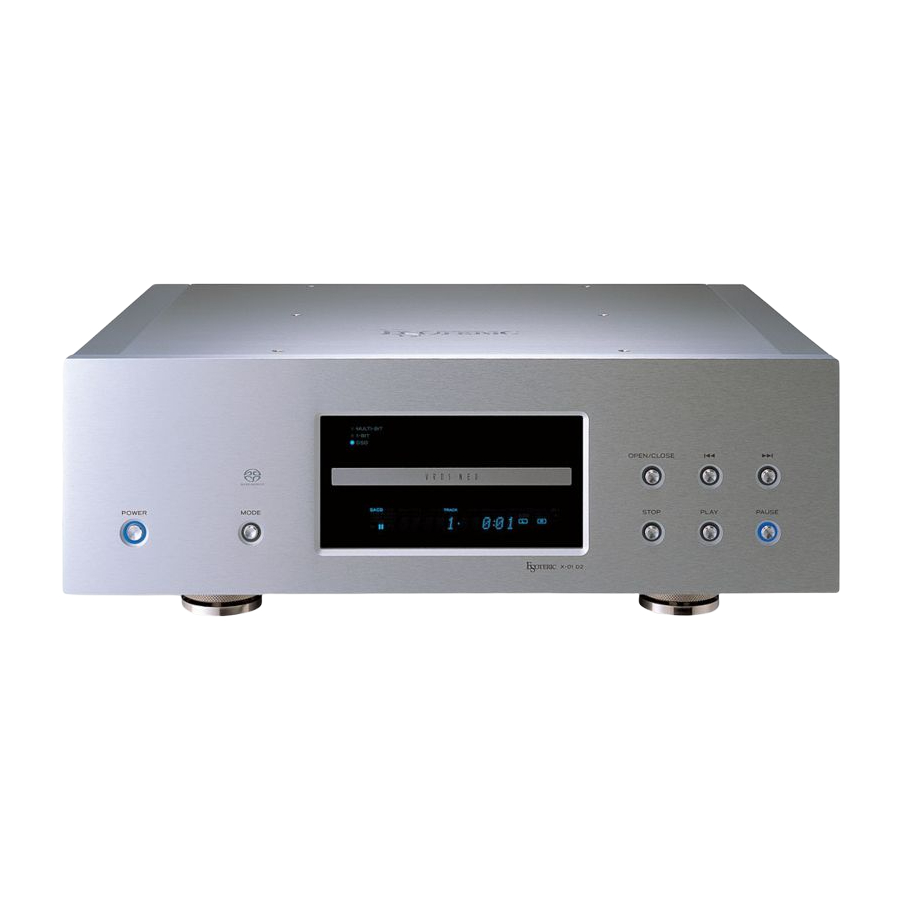
Page 10: Front Panel Features
Front panel features Front Panel Display POWER Use this to turn the unit on and off. When the unit is on, the ring surrounding the button lights up. The equipment draws nominal non-operating power from the AC outlet with its POWER switch in the OFF position. CLOCK MODE Use this to select an external word sync source connected to Disc type indicator... -
Page 11: Understanding The Remote Control Unit
Understanding the remote control unit Number buttons Use these for selecting tracks by number, etc. 2CH/MULTI Use this to switch between two-channel (stereo) and multi- channel surround audio output. PLAY AREA Use this to select the playback area of Super Audio CDs. SCAN (m/,) Use these for fast scanning during playback. -
Page 12: Stopping Playback
Playback Press the PLAY button to start playback. Pausing playback Turn on the power using the POWER button on the main unit. The button and the display light. Press the PAUSE button to pause playback (the ring Press the OPEN/CLOSE button. surrounding the PAUSE button on the main unit lights). -
Page 13: Skipping Playback
Skipping playback Fast scanning Press the MUSIC SKIP button (. or /) repeatedly until When playing back, use the SCAN button (m or ,) to the desired track is found. The selected track will be played move backwards and forwards. Press PLAY to restart playback from the beginning. -
Page 14: Programmed Playback
Programmed playback Programmed playback allows up to 30 tracks to be played Clearing the last track from the list back in the order you decide. Push the CLEAR button to clear the last track from the list. Press the PROGRAM button (either when playing back or stopped). -
Page 15: Repeat Mode
Repeat mode Display dimming Use the REPEAT button to select the repeat mode for The display on the main unit can be dimmed to suit the playback. Repeated presses of the REPEAT button cycle environment in which you listen to music. There are three levels between the following options: and an “off”... -
Page 16: Changing The Display Mode
During playback, it is possible to change the display as shown For highly accurate playback, you can use the word clock here. (sync) output of an external unit such as the Esoteric D-70 or G-0 to synchronize your whole audio system. < The DISPLAY button doesn’t work during programmed playback. -
Page 17: Settings (Introduction)
Settings (introduction) Turn on the main unit. When a option marked with “>” is displayed, use the up or down cursor buttons to change the setting, and press the ENTER button to confirm the entry. < When a numerical value (such as speaker distance) is Press the SETUP button to enter the setup menu. - Page 18 Settings (introduction) AudioSetup GeneralSet Analog Out options SP Setup SP Size L/R Size options DigitalOut options C Size options CD Direct options SR/SL Size options SW ON/OFF options Distance L/R *.*m options C *.*m options SR/SL *.*m options SP Level LR ***.*dB options C ***.*dB...
-
Page 19: Audio Setup
Settings (Audio Setup) Settings (Speaker Setup 1) Analog output settings (Analog Out) Use these speaker setup menus when connecting an AV amplifier with analog outputs, using the 5.1 multi-channel When a option marked with “>” is displayed, use the up or setting (there is no need for this setup when not using multi- down cursor buttons to change the setting, and press the channel analog connections). -
Page 20: Speaker Distance
Settings (Speaker Setup 2) Speaker distance Speaker levels (SP Level) Ideally, the speakers should be placed so that they are all the Use this to set the relative levels of the speakers. You can set same distance from the listening position. If this is not the L/R pair together, and the center, and surround rear pair possible, you should use this method described here to adjust independently, as well as the subwoofer. -
Page 21: Troubleshooting
Troubleshooting In case you experience any problem with this unit, please take There is no sound or only a very low-level sound is heard. the time to look through this chart and see if you can solve the e Check that the amplifier and speakers are connected problem yourself before you call your dealer or a TEAC service securely. -
Page 22: Specifications
Specifications General Word Synchronization input format System ..... . . Super Audio CD and CD Jack ......... BNC Power supply Input level . -
Page 23: Sommaire
Sommaire Nous vous remercions pour l’achat d’un appareil TEAC. Lire ce manuel avec attention pour obtenir les meilleures performances possibles de cet appareil. Sommaire ........23 Caractéristiques . -
Page 24: Caractéristiques
Un design et des caractéristiques jamais surpassées La lecture des disques Super Audio CD requiert une rotation Le X-01 est vraiment le lecteur Super Audio CD le plus avancé à haute vitesse et un haut degré de précision. à ce jour. -
Page 25: Contenu De L'emballage
Avant utilisation Contenu de l’emballage NE JAMAIS DEPLACER L’APPAREIL LORSQUE CELUI-CI FONCTIONNE Vérifiez que les accessoires suivants se trouvent bien dans le Lorsque l’appareil fonctionne, le disque tourne très carton. rapidement. NE PAS soulever ou déplacer l’appareil en cours Télécommande x 1 d’utilisation, ceci risquant de détériorer le disque. -
Page 26: Type De Disques Utilisables Sur Ce Système
Disques Type de disques utilisables sur ce système < Placer toujours le disque sur le plateau, la face imprimée sur le dessus (les disques compacts ne sont enregistrés que sur une Ce lecteur permet de lire tous les disques portant les logos seule face.) suivants: <... -
Page 27: Télécommande
Télécommande Restauration des réglages usine Mise en place des piles Si vous avez fait beaucoup de modifications au système, et voulez repartir d’options connues, restaurez les réglages usine Retirez le couvercle de la télécommande à l’aide d’un comme suit: tournevis. Après avoir vérifié la polarité (+/_) des deux piles AA, insérez les piles, remettez le couvercle en place puis replacez les deux vis 1. -
Page 28: Raccordement
Raccordement PRÉCAUTION: < Coupez l’alimentation de tous les appareils avant d’effectuer les raccordements. < Lisez les instructions qui accompagnent chaque appareil que vous avez l’intention d’utiliser en association avec cet appareil-ci. < Veillez à ce que chaque fiche soit soigneusement insérée. Pour éviter les ronflements et les bruits parasites, évitez d’attacher les câbles d’interconnexion parcourus par les signaux avec le cordon d’alimentation secteur ou les câbles de liaison aux enceintes. -
Page 29: Prises De Sortie Audio Analogiques
Prises de sortie audio analogiques Connecteur mot de synchro Utilisez soit les prises XLR ou RCA FRONT (avant) pour la Ceci permet de se connecter à une horloge externe de sortie analogique stéréo. synchronisation, par le biais d’un câble coaxial BNC du Si votre amplificateur a des entrées audio analogiques XLR, commerce. -
Page 30: Caractéristiques De La Face Avant
Caractéristiques de la face avant POWER Afficheur Pour allumer ou éteindre l’appareil. Lorsque l’appareil est sous tension, l’anneau autour du bouton s’illumine. L’appareil tire de la prise secteur une puissance faible mais non nulle lorsque l’interrupteur POWER est sur la position OFF. -
Page 31: Comprendre La Télécommande
Comprendre la télécommande Touches numériques Pour sélectionner les plages par leur numéro, etc. 2CH/MULTI Pour basculer entre les modes audio stéréo deux canaux et son multicanal (surround). PLAY AREA Pour sélectionner l’aire de lecture sur les disques Super Audio SCAN (m/,) Pour le balayage en lecture. -
Page 32: Arrêter La Lecture
Lecture Appuyez sur le bouton PLAY pour démarrer la lecture. Mettre en pause Allumez l’appareil en appuyant sur son bouton POWER. Le bouton et l’affichage s’illuminent. Appuyez sur le bouton OPEN/CLOSE. Appuyez sur le bouton PAUSE pour mettre la lecture en pause (l’anneau entourant le bouton PAUSE de l’appareil principal s’illumine). -
Page 33: Sauts En Lecture
Sauts en lecture Lecture accélérée Appuyez sur le bouton MUSIC SKIP (. ou / ) à En lecture, utilisez la touche SCAN (m ou ,) pour répétition jusqu’à ce que la plage désiré soit trouvé. avancer et reculer. Appuyez sur PLAY pour redémarrer en La plage sélectionné... -
Page 34: Lecture Programmée
Lecture programmée La lecture programmée vous permet de lire 30 plages dans Effacer la dernière plage de la liste l’ordre que vous décidez. Appuyez sur la touche CLEAR pour effacer le dernier plage de la liste. Appuyez sur la touche PROGRAM (soit en lecture soit à l’arrêt). -
Page 35: Mode Lecture A Répétition
Mode lecture a répétition Atténuation de la luminosité de l’afficheur Utilisez la touche REPEAT pour sélectionner le mode de La luminosité de l’affichage de l’appareil principal peut être lecture à répétition. atténuée pour s’adapter à l’environnement où vous écoutez la A chaque pression sur la touche REPEAT les fonctions se musique. -
Page 36: Changement Du Mode D'affichage
Changement du mode d’affichage Mot de synchro En lecture, Il est possible de changer l’affichage comme Word sync montré ici. Pour une lecture de haute précision, vous pouvez utiliser la sortie word clock (sync) d’un appareil externe tel que D-70 ou <... -
Page 37: Réglage
Réglage Mettez l’appareil principal sous tension. Lorsqu’une option marquée d’un “>” est affichée, utilisez les curseurs haut et bas pour changer le réglage, et appuyez sur la touche ENTER pour confirmer l’entrée. < Lorsqu’une valeur numérique (telle qu’une distance Appuyez sur la touche SETUP pour entrer dans le menu d’enceinte) est changée la valeur est confirmée sans appuyer de configuration. - Page 38 Réglage AudioSetup GeneralSet Analog Out option SP Setup SP Size L/R Size option DigitalOut option C Size option CD Direct option SR/SL Size option SW ON/OFF option Distance L/R *.*m option C *.*m option SR/SL *.*m option SP Level LR ***.*dB option C ***.*dB option...
-
Page 39: Réglage Audio
Réglage (audio) Réglage (réglage des enceintes 1) Réglages sortie analogique (Analog Out) Utilisez ces menus de réglages des enceintes lorsque vous raccordez un amplificateur AV pourvue sorties analogiques, Lorsqu’une option marquée d’un “>” est affichée, utilisez les en utilisant le réglage son multicanal 5.1 (c’est inutile quand curseurs haut et bas pour changer le réglage, et appuyez sur vous n’utilisez pas des raccordements analogiques pour son la touche ENTER pour confirmer l’entrée. -
Page 40: Distance Des Enceintes (Distance)
Réglage (réglage des enceintes 2) Distance des enceintes (Distance) Niveaux Enceintes (SP Level) Idéalement, les enceintes devraient être placées de telle façon Utilisez ce réglage pour fixer les niveaux relatifs des enceintes. qu’elles soient toutes à la même distance de la position Vous pouvez fixer la paire L/R ensemble, et la voie centrale, et d’écoute. -
Page 41: L'appareil Émet Un Bourdonnement Ou Un Bruit Sourd
Dépannage 1 En cas de problème avec l’appareil, prenez le temps de lire ce Les réglages sont effacés. tableau et de voir si vous pouvez résoudre le problème tout seul e Lorsque l’alimentation est soudain coupée en raison d’une avant de faire appel à votre revendeur ou au centre d’assistance panne de courant ou si le cordon a été... -
Page 42: Entretien
Dépannage 2 Le volume global est faible, ou la balance Risque de condensation entre les enceintes est étrange En cas de déplacement de l’appareil (ou d’un disque) d’un endroit froid vers un endroit chaud, ou en cas d’utilisation e Le niveau d’une enceinte (ou celui d’une paire d’enceintes) a après un changement de température brutale, il y a un risque été... -
Page 43: Spécifications
Spécifications Généralités Système ......Super Audio CD et CD Sortie audio (numérique) Alimentation OPTICAL ..Prise numérique optique x 1, –15 à –21 dBm Modèle Europe . - Page 44 Laufwerk der neuesten Generation jegliche Eigenvibration der Konstruktionsqualität CD. Gleichzeitig werden Fertigungsfehler und Verformungen Die Front- und Seitenteile sowie die Deckplatte des X-01 der Disc eliminiert, wodurch der Lesewinkel vom optischen bestehen aus massiven Platten aus gebürstetem Aluminium. Abtastsystem zu den Pits (optischen Vertiefungen) auf der Diese qualitativ hochwertige und luxuriöse Ausführung...
-
Page 45: Inhalt
Schneller Suchlauf........54 Gewicht des X-01 fest und sicher fixiert. Dieser Aufbau trägt Auswählen des Wiedergabebereichs . -
Page 46: Pflege Und Wartung
Darstellungen abweichen. Vermeiden Sie Kondensationsbildung Vor der ersten Inbetriebnahme Wenn der X-01 (oder eine CD) von einer kalten in eine warme < Da der X-01 sich während des Betriebs erwärmen kann, Umgebung transportiert wird oder nach einer Veränderung sorgen Sie bitte dafür, daß... -
Page 47: Medien
Zusatzinformationen entnehmen Sie bitte der jeweiligen werden, an dem sie direkter Sonneneinstrahlung, der Softwaredokumentation.) Einwirkung von Heizkörpern oder elektrischen Geräten mit < Nicht finalisierte CD-R/CD-RWs können mit dem X-01 nicht erhöhter Wärmeentwicklung ausgesetzt sind. wiedergegeben werden. < Bedruckbare CD-R sowie CD-RW Discs sind nicht zu empfehlen, da deren Labelseite mit einem Film überzogen ist,... -
Page 48: Anschluss An Einen Verstärker, Usw
< Bevor Sie die einzelnen Komponenten Ihrer HiFi-Anlage miteinander verbinden, schalten Sie diese bitte aus. < Lesen Sie bitte auch die Bedienungsanleitungen der jeweiligen Komponenten, die Sie am X-01 anschließen möchten. < Vergewissern Sie sich bitte, daß sämtliche Verbindungen korrekt und sicher vorgenommen wurden. Zur Vermeidung von Brummen und Rauschen sollten Audio- sowie Videoanschlußkabel niemals verdrillt oder parallel zu Netz- und... -
Page 49: Analoge Audioausgänge
KOAXIAL: mittels geeignetem koaxialen Cinchkabel vorgenommen haben, schließen Sie bitte das mitgelieferte OPTISCH: mittels optischem (TOS) Leiter Netzkabel am Netzanschluss des X-01 an und stecken den am Kabel befindlichen Netzstecker in eine Netz- < Der optische Ausgang ist durch Verschluss gesichert. Achten Wandsteckdose. -
Page 50: Bedienelemente Auf Der Gerätevorderseite
Bedienelemente auf der Gerätevorderseite POWER Display Hiermit schalten Sie den X-01 ein und aus. Bei eingeschaltetem Gerät leuchtet die Umrandung der Taste. Auch wenn der POWER-Schalter auf OFF gestellt ist, d.h., die Ausrüstung nicht in Betrieb ist, verbraucht sie eine kleine Strommenge. -
Page 51: Verwendung Der Fernbedienung
Wiedergabebereich einer Super Audio CD auswählen. SCAN (m/,) hiermit aktivieren Sie die Zeitraffer-Funktion (schnelle Wiedergabe). STOP entspricht dem Betätigen der STOP-Taste am X-01. PLAY entspricht dem Betätigen der PLAY-Taste am X-01. Cursor-Tasten und ENTER Diese Tasten benötigen Sie zum Navigieren und Bestätigen Ihrer Einstellungen im Setupmodus. -
Page 52: Fernbedienung
Einsetzen der Batterien Falls Sie mit einheitlichen Einstellungen neu beginnen möchten, nachdem Sie zuvor eine Vielzahl an Änderungen vorgenommen Lösen Sie bitte die zwei Schrauben des Batteriefachdeckels hatten, können Sie den X-01 auf die werkseitig voreingestellten Fernbedienung mittels eines passenden Werte zurücksetzen. -
Page 53: Wiedergabe
Wiedergabe Betätigen Sie zum Starten der Wiedergabe die PLAY- Taste. Unterbrechen der Wiedergabe (Pause) Schalten Sie den X-01 mittels POWER-Taste an der Komponente ein. Die Umrandung der Taste und das Display leuchten. Betätigen Sie die OPEN/CLOSE-Taste. Betätigen Sie die PAUSE-Taste, um die Wiedergabe kurzzeitig zu unterbrechen (die Umrandung der PAUSE-Taste am X-01 leuchtet). -
Page 54: Verwenden Der Skip-Tasten
Betätigen der entsprechenden Taste können Sie somit mehrere Titel vorwärts oder rückwärts überspringen. < Alternativ können Sie auch die SKIP-Tasten am X-01 verwenden. Betätigen Sie zum Starten der Suchlauffunktion (oder zum < Wenn Sie die SKIP-Tasten betätigen, während sich der X-01 Ändern der Suchlaufgeschwindigkeit) die SKIP-Taste und halten... -
Page 55: Wiedergabe Einer Programmierten Titelfolge
Wiedergabe einer programmierten Titelfolge Bei einer programmierten Titelfolge können Sie bis zu 30 Betätigen Sie zum Beenden der Programmierung einer Titel in der von Ihnen gewünschten Reihenfolge Titelfolge die PLAY-Taste. wiedergeben. Die Wiedergabe der programmierten Titelfolge beginnt (falls die Disc bereits wiedergegeben wurde, als Sie mit der Betätigen Sie die PROGRAM-Taste (während der Programmierung begonnen haben, ist ein nochmaliges Wiedergabe oder im Stoppmodus). -
Page 56: Wiedergabewiederholung
Einstellen der Display-Helligkeit Verwenden Auswahl Wiedergabe- Die Helligkeit der Displayanzeige am X-01 kann in drei Stufen wiederholungsfunktion die REPEAT-Taste. Durch wiederholtes eingestellt oder komplett ausgeschaltet werden. Betätigen der REPEAT-Taste können Sie jeweils zwischen den Mittels FL DIMMER-Taste können Sie zwischen diesen folgenden Optionen umschalten: Einstellungen umschalten. -
Page 57: Ändern Der Displayanzeige
Außerordentlich präzise Wiedergabequalität erzielen Sie, DISPLAY-Taste die Anzeige im Display wie folgt: indem Sie das Word Clock-Signal (Sync) einer externen Komponente, wie etwa dem Esoteric D-70 oder G-0 dazu < Die DISPLAY-Taste kann während der Wiedergabe einer verwenden, um Ihr komplettes Audiosystem zu programmierten Titelfolge nicht verwendet werden. -
Page 58: Einstellungen
Einstellungen (Einleitung) Schalten Sie die Hauptkomponente ein. Verwenden Sie zum Einstellen der Werte von Menüpunkten, die durch das „>“-Symbol markiert sind, die Auf- oder Abwärts-Cursortasten. Bestätigen Sie Ihre Einstellungen durch Betätigen der ENTER-Taste. Betätigen Sie zum Aufruf des Setupmenüs die SETUP- <... - Page 59 AudioSetup GeneralSet Analog Out Option SP Setup SP Size L/R Size Option DigitalOut Option C Size Option CD Direct Option SR/SL Size Option SW ON/OFF Option Distance L/R *.*m Option C *.*m Option SR/SL *.*m Option SP Level LR ***.*dB Option C ***.*dB Option...
-
Page 60: Einstellungen (Audio)
(SP Size) Multi Channel (Mehrkanal) Abhängig von den Abmessungen der verwendeten Verwenden Sie diese Einstellung, wenn der X-01 an einem Lautsprechersysteme können Sie hier die jeweils individuelle AV-Verstärker/-Receiver mit 5.1 Surround Sound Boxengröße (Large* oder Small) auswählen und zwar für das Analogeingängen betrieben wird. -
Page 61: Abstand Der Lautsprechersysteme Zur Hörposition (Distance)
Abstand der Lautsprechersysteme zur Lautsprecher-Wiedergabepegel (SP Level) Hörposition (Distance) Hiermit können Sie die relativen Lautstärkepegel der angeschlossenen Lautsprechersysteme einstellen, wobei für Idealerweise sollten die Lautsprechersysteme so aufgestellt das vordere Boxenpaar ein gemeinsamer Pegel und für die werden, dass sie alle im gleichen Abstand zur Hörposition Centerbox, das Surround-Boxenpaar und den Subwoofer aufweisen. -
Page 62: Hilfe Bei Funktionsstörungen
Die Tonwiedergabe hat Aussetzer sich bitte die Zeit, um die folgende Auflistung durchzugehen. In den e Stellen Sie den X-01 auf einer ebenen, stabilen Fläche auf. meisten Fällen werden Sie das Problem selbst lösen können, ohne dass Vermeiden Sie Vibrationen und Erschütterungen. -
Page 63: Technische Daten
Gewicht ........25 kg Abmessungen (BxHxT) ....442 x 153 x 353 mm Der X-01 erkennt und kann zu folgenden, von einem externen Gerät generierten Frequenzen synchronisiert Betriebstemperatur . - Page 64 TEAC ESOTERIC COMPANY 3-7-3, Nakacho, Musashino-shi, Tokyo 180-8550, Japan Phone: (0422) 52-5132 e-mail: eso-os@tec.teac.co.jp TEAC AMERICA, INC. 7733 Telegraph Road, Montebello, California 90640 Phone: (323) 726-0303 TEAC CANADA LTD. 5939 Wallace Street, Mississauga, Ontario L4Z 1Z8, Canada Phone: (905) 890-8008 TEAC MEXICO, S.A.