Table des Matières

Publicité

Les langues disponibles

Les langues disponibles

Liens rapides

K - 07
Super Audio CD/CD Player
OWNER'S MANUAL .................... 5
MODE D'EMPLOI ...................... 35
MANUAL DEL USUARIO ........... 65
D01163921B

Publicité

Table des Matières
loading

Sommaire des Matières pour Esoteric K-07

  • Page 1 K - 07 Super Audio CD/CD Player OWNER’S MANUAL ....5 MODE D’EMPLOI ...... 35 MANUAL DEL USUARIO ... 65 D01163921B...
  • Page 3: Important Safety Precautions

    IMPORTANT SAFETY PRECAUTIONS (1) For U.S.A. This equipment has been tested and found to comply with the limits for a Class B digital device, pursuant to Part 15 of the FCC Rules. These limits are designed to provide reasonable protection against harmful interference in a residential installation.
  • Page 4: Important Safety Instructions

    IMPORTANT SAFETY PRECAUTIONS (2) IMPORTANT SAFETY INSTRUCTIONS This product has been designed and manufactured according to FDA 1) Read these instructions. 2) Keep these instructions. regulations “title 21, CFR, chapter 1, subchapter J, based on the 3) Heed all warnings. Radiation Control for Health and Safety Act of 1968”, and is classified as 4) Follow all instructions.
  • Page 5 For European Customers Disposal of electrical and electronic equipment (a) All electrical and electronic equipment should be disposed of separately from the municipal waste stream via collection facilities designated by the government or local authorities. (b) By disposing of electrical and electronic equipment correctly, you will help save valuable resources and prevent any potential negative effects on human health and the environment.
  • Page 6: Table Des Matières

    Contents What’s in the box Thank you for choosing Esoteric. Read this manual carefully Check to be sure the box includes all the supplied accessories to get the best performance from this unit. shown below. Please contact the store where you purchased this unit if any of these accessories are missing or have been damaged during What’s in the box .
  • Page 7: Before Use

    CD standard might not play correctly in this player. If you functioning. If this occurs, turn this unit’s power off. use such discs in this unit, ESOTERIC company and its subsidiar- ies will not be responsible for any consequences or guarantee the quality of reproduction.
  • Page 8 Discs (2) CAUTION Maintenance Do not play any disc that is warped, deformed or damaged. If a disc becomes dirty, wipe its surface radially from the center Playing such discs could cause irreparable harm to the playing hole outward towards the outer edge with a soft, dry cloth. mechanisms.
  • Page 9: Remote Control Unit

    Remote control unit The included remote control allows this unit to be operated from a Battery Installation distance. Point the remote control unit at the main unit’s remote sensor within 23 feet/7 meters of the main unit. Remote sensor 23 feet/7 m Remove the cover from the back of the remote control and insert two AAA batteries with their ¥/^ oriented as shown in the case.
  • Page 10: Making Connections

    Making connections Q Precautions when making connections Make all connection before plugging in the power cord. Carefully read the operation manuals of the other equipment and follow their instructions when connecting them. Ampli er or digital Ampli er or digital recording device recording device (CD recorder, MD...
  • Page 11 They can receive up to 24-bit signals with sampling frequencies of 32–192 kHz. Q Do not use any power cord other than an authentic Esoteric product. Doing so could cause fire or electric shock. Use commercially available cables for connections.
  • Page 12: Names And Functions Of Parts (Main Unit)

    Names and functions of parts (main unit) A POWER button G Tray OPEN/CLOSE button Press to turn the power on and off. Press to open and close the disc tray. When the power is on, the ring around the button lights blue. When the power is off, the ring is unlit.
  • Page 13: Names And Functions Of Parts (Display)

    Names and functions of parts (display) Disc indicator Message display area This shows the type of disc that is loaded. This shows the playback time and a variety of messages. Super Audio CD: SACD Standard audio CD: CD DOWN MIX indicator If a DVD-Video (DVD-V), DVD-Audio (DVD-A) or video CD (VCD) When playing back the multichannel audio of a Super Audio CD, is loaded, the indicator will light, but the disc cannot be played...
  • Page 14: Names And Functions Of Parts (Remote Control)

    Names and functions of parts (remote control) When the main unit and the remote control both have buttons with the same functions, this manual explains how to use the but- ton on the main unit. The corresponding remote control button can be used in the same manner.
  • Page 15 (see p.29). back and external input sources. When set to external input, the Use these to adjust the volume of an Esoteric amplifier. unit can be used as a D/A converter (see p.21).
  • Page 16: Playback

    Playback Press the OPEN/CLOSE button. Turn the power on. The disc tray will close. Be careful not to let a finger or any item get caught in it. Disc-loading may take some time depending on the amount of information on the disc being loaded. When the disc is loaded, the type of disc, the number of tracks it contains and the total time of those tracks will appear on the The ring around the POWER button lights blue.
  • Page 17: Pausing Playback

    Pausing playback Opening and closing the disc tray Press the OPEN/CLOSE button once to open the tray, and press it During playback, press the PAUSE button to pause playback. When again to close the tray. paused, the PLAY indicator on the main unit flashes. If you press the OPEN/CLOSE button during disc playback, several Press the PLAY button or press the PAUSE button again to restart seconds will pass before the tray opens.
  • Page 18: Selecting Tracks

    Selecting tracks Searching forward/backward (scanning) Skipping To scan forward/backward, press and hold the skip ( . / / ) During playback, press a skip button ( . / / ) on the main unit button on the main unit or the remote control (for more than one or the remote control to skip to the previous or next track and start second) during playback.
  • Page 19: Using Repeat Playback

    Using repeat playback Using program playback (1) You can program up to 30 tracks in the order that you want to listen to them. When stopped or during playback, press and hold the REPEAT button. If a track is playing, it will become the first track in the program. During playback, press the REPEAT button to cycle through the following repeat modes.
  • Page 20 Using program playback (2) When you have finished adding tracks to the Adding a track to the end of the program program, press the play/pause button ( y / J ). When stopped or during playback, use the number buttons to select the number of the track that you want to add.
  • Page 21: Changing The Display

    Changing the display D/A converter mode This unit can be used as a D/A converter. When a disc is playing or paused, press the DISPLAY button to change what is shown on the display in the order shown below. When stopped, press the MODE button to show the current source name.
  • Page 22: Connecting A Computer And Playing Back Audio Files

    Download the dedicated driver software from our website. If the proper connection has been made, you should be able to select “ESOTERIC USB HS AUDIO” as the computer's audio output. HIGH SPEED 2 mode In setting mode, select USB>HS_2.
  • Page 23 Connect this unit to a computer using a USB Start playback of an audio file on the computer. cable. Better sound quality can be achieved by setting the volume on the computer to the maximum level and using the amplifier con- Use a cable with a connector that matches that of this unit.
  • Page 24: Setting Mode

    Setting mode (1) COAX in or OPT in source Changing settings UPCONV> DF> CLK> USB source UPCONV> DF> When stopped or during playback, press USB> and hold the MODE button for 2 or more CLK> seconds. o Depending on the operation status, some items might not appear. Setting mode will end automatically if nothing is done for 10 sec- onds, and the CD status message will reappear.
  • Page 25: Upconversion Setting

    Upconversion setting D/A converter digital filter setting Display: UPCONV>*** Display: DF>*** This setting can be made for each input. This setting can be made for each input. During Super Audio CD playback, the DSD signal is sent directly to During Super Audio CD playback or during conversion to DSD for- the D/A converter.
  • Page 26 When set to OFF, the remote control VOLUME and MUTING but- that can be input is 22.5792 MHz. tons are disabled. When using this unit together with an ESOTERIC When the input is USB (HS_2), the master clock sync frequency amplifier, set this to OFF.
  • Page 27 USB input setting XLR output gain setting Display: USB>*** Display: XLR>*** When set to use a HIGH SPEED mode, dedicated driver software +6dB must be installed on the computer. Download the driver software Set the XLR output level to double the RCA output level (+6 dB). from our website.
  • Page 28: Using The Dimmer

    Setting mode (3) Using the dimmer Automatic display (FL) off setting Display: FLaOFF>*** In CD/SACD mode, if playback is stopped and no operation is con- ducted for 15 minutes, the display automatically turns off. In D/A converter mode, after input has been locked for at least 15 minutes, the display automatically turns off.
  • Page 29: Adjusting The Volume

    Adjusting the volume Muting the output You can adjust the volume of the analog audio outputs with this unit. Press the remote control MUTE button to temporarily mute the This is convenient when connecting the unit directly to a power sound.
  • Page 30: Troubleshooting

    Troubleshooting No sound from speakers or sound is distorted. If you experience a problem with the unit, please take a moment to review the following information before requesting service. Moreover, e Check the amplifier and speaker connections (see p.10). the problem might be caused by something other than this unit. e Adjust the volume of the amplifier and other devices.
  • Page 31: Beware Of Condensation

    Restoring factory default settings USB connections with a computer Computer does not recognize this unit. e This unit can be connected with computers running the follow- ing operating systems. Windows XP 32-bit Windows Vista 32/64-bit POWER STOP Windows 7 32/64-bit Mac OS X 10.6.4 or later (32/64-bit) Operation with other operating systems cannot be guaranteed.
  • Page 32: Specifications

    Specifications Compatible disc types (playback) Clock sync input format Super Audio CD, CD (including CD-R and CD-RW ) Connector ..............BNC Supported input frequencies CD/SACD .
  • Page 33: Rear Panel

    Rear panel...
  • Page 35: Q Précautions Concernant Les Piles

    INSTRUCTIONS DE SÉCURITÉ IMPORTANTES N'exposez pas cet appareil aux gouttes ni aux éclaboussures. Ne placez pas d'objet rempli de liquide sur l'appareil, comme par exemple un vase. N’installez pas cet appareil dans un espace confiné comme une bibliothèque ou un meuble similaire. Pour les consommateurs européens L’appareil tire un courant nominal de veille de la prise secteur quand son interrupteur POWER ou STANDBY/ON n’est pas en...
  • Page 36: Contenu De L'emballage

    Sommaire Contenu de l'emballage Nous vous remercions d’avoir choisi Esoteric. Lisez ce mode Vérifiez que vous disposez bien de tous les accessoires représentés d'emploi avec attention pour tirer les meilleures performances ci-dessous. de cette unité. Veuillez contacter le magasin dans lequel vous avez acheté cette unité...
  • Page 37: Avant L'utilisation

    Si vous utilisez de tels disques l’unité ni du téléviseur. Si cela se produit, éteignez cette unité. dans cette unité, la société ESOTERIC et ses filiales ne pourront être tenues pour responsables des conséquences quelles qu'elles soient ni garantir la qualité...
  • Page 38 Disques (2) ATTENTION Entretien Ne faites pas lire de disque gondolé, déformé ou endommagé. Si un disque est sale, essuyez sa surface d'un mouvement radial (du La lecture de tels disques pourrait causer des dommages trou central vers le bord externe) avec un chiffon sec et doux. irréparables aux mécanismes de lecture.
  • Page 39: Boîtier De Télécommande

    Boîtier de télécommande La télécommande fournie permet la commande à distance de cette Mise en place des piles unité. Pointez la télécommande vers le capteur de l'unité principale à moins de 7 mètres de cette dernière. Capteur de télécommande 7 m Ouvrez l'arrière de la télécommande et insérez deux piles AAA avec leurs pôles ¥/^ orientés comme indiqué...
  • Page 40: Faire Les Branchements

    Faire les branchements Q Précautions lors des branchements Faites tous les branchements avant de raccorder le cordon d'alimentation. Lisez attentivement les modes d'emploi des autres équipements et suivez leurs instructions quand vous les branchez. Amplificateur ou Amplificateur ou enregistreur numérique enregistreur numérique (enregistreur de CD, (enregistreur de CD,...
  • Page 41: Prise D'entrée D'horloge De Synchronisation

    RCA ou XLR (la polarité des XLR peut être réglée pour que le point chaud soit sur la broche 2 ou sur la broche 3) ou être désactivée Chez Esoteric, nous utilisons des câbles ESOTERIC MEXCEL 8N/7N (OFF, voir p.57).
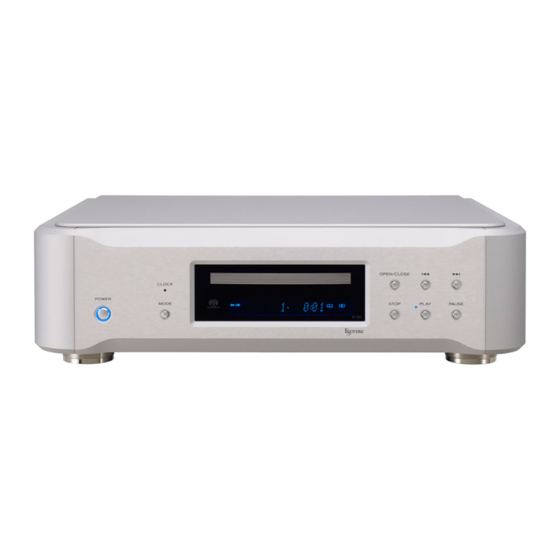
  • Page 42: Nomenclature Et Fonctions Des Parties (Unité Principale)

    Nomenclature et fonctions des parties (unité principale) A Touche POWER G Touche d'ouverture/fermeture de tiroir Appuyez pour mettre sous ou hors tension. Appuyez pour ouvrir et fermer le tiroir de disque. Quand l'unité est sous tension, le pourtour de la touche est allumé...
  • Page 43: Nomenclature Et Fonctions Des Parties (Écran)

    Nomenclature et fonctions des parties (écran) Indicateur de disque Zone d'affichage de message Affiche le type du disque chargé. Affiche le temps de lecture et une variété de messages. Super Audio CD : SACD CD audio standard : CD Indicateur DOWN MIX Si un DVD vidéo (DVD-V), un DVD audio (DVD-A) ou un CD vidéo Quand l'audio multicanal d'un Super Audio CD est lu, il subit (VCD) est chargé, l'indicateur s'allume mais le disque ne peut pas...
  • Page 44: Nomenclature Et Fonctions Des Parties (Télécommande)

    Nomenclature et fonctions des parties (télécommande) Quand l'unité principale et la télécommande ont toutes les deux des touches ayant les mêmes fonctions, ce mode d'emploi explique comment utiliser la touche de l'unité principale. La touche correspondante sur la télécommande peut s'utiliser de la même façon.
  • Page 45: Touches Numériques

    À l'arrêt, appuyez sur ces touches pour alterner entre la lecture ces touches peuvent servir à régler le volume (voir p.59). du disque et les sources d'entrée externes. Quand une entrée Utilisez-les pour régler le volume d'un amplificateur Esoteric. externe est sélectionnée, l'unité peut servir de convertisseur N/A (voir p.51).
  • Page 46: Lecture

    Lecture Appuyez sur la touche OPEN/CLOSE (ouvrir/ fermer le tiroir). Mettez sous tension. Le tiroir de disque se fermera. Veillez à ne pas vous faire pincer un doigt ni à coincer un objet quelconque. Le chargement du disque peut prendre un certain temps en fonction de la quantité...
  • Page 47: Mise En Pause De La Lecture

    Mise en pause de la lecture Ouverture et fermeture du tiroir de disque Appuyez une fois sur la touche OPEN/CLOSE pour ouvrir le tiroir, et Durant la lecture, appuyez sur la touche PAUSE pour mettre la réappuyez dessus pour fermer le tiroir. lecture en pause.
  • Page 48: Sélection Des Pistes

    Sélection des pistes Recherche avant/arrière (balayage) Saut Pour rechercher en avant/arrière, maintenez pressée une touche Durant la lecture, appuyez sur une touche de saut ( . / / ) sur de saut ( . / / ) sur l'unité principale ou sur la télécommande l'unité...
  • Page 49: Lecture En Boucle

    Lecture en boucle Lecture de programme (1) Vous pouvez programmer jusqu'à 30 pistes dans l'ordre dans lequel vous voulez les écouter. À l'arrêt ou durant la lecture, maintenez pressée la touche REPEAT. Si une piste est en cours de lecture, elle deviendra la première piste du programme.
  • Page 50: Ajout D'une Piste À La Fin Du Programme

    Lecture de programme (2) Quand vous avez fini d'ajouter des pistes au Ajout d'une piste à la fin du programme programme, appuyez sur la touche Lecture/ À l'arrêt ou durant la lecture, utilisez les touches numériques pour Pause ( y / J ). sélectionner le numéro de la piste que vous voulez ajouter.
  • Page 51: Changement D'affichage

    Changement d'affichage Mode convertisseur N/A Cette unité peut servir de convertisseur N/A. Quand un disque est en lecture ou en pause, appuyez sur la touche DISPLAY pour changer ce qui est affiché à l'écran selon l'ordre À l'arrêt, appuyez sur la touche MODE pour afficher le nom de la ci-dessous.
  • Page 52: Branchement D'un Ordinateur Et Lecture De Fichiers Audio

    Téléchargez le pilote logiciel dédié depuis notre site web. Si la bonne connexion a été faite, vous devez pouvoir sélectionner « ESOTERIC USB HS AUDIO » comme sortie audio de l'ordinateur. Mode HIGH SPEED 2 (haute vitesse 2) En mode de réglage, sélectionnez USB>HS_2.
  • Page 53: Appuyez Sur La Touche D'alimentation

    Branchez cette unité à l'ordinateur à l'aide d'un Lancez la lecture d'un fichier audio sur câble USB. l'ordinateur. Utilisez un câble ayant une fiche qui correspond à la prise de cette Une meilleure qualité sonore peut être obtenue en réglant au unité.
  • Page 54: Mode De Réglage

    Mode de réglage (1) Source COAX in ou OPT in Changement des réglages UPCONV> DF> CLK> Source USB UPCONV> DF> À l'arrêt ou durant la lecture, maintenez la USB> touche MODE pressée au moins 2 secondes. CLK> o Selon le statut de fonctionnement, certains paramètres peuvent ne pas apparaître.
  • Page 55: À Propos Des Filtres Numériques Du Convertisseur N/A

    Réglage de conversion ascendante Réglage du filtre numérique du convertisseur N/A Affichage : UPCONV>*** Affichage : DF>*** Ce réglage peut se faire pour chaque entrée. Ce réglage peut se faire pour chaque entrée. Durant la lecture de Super Audio CD, le signal DSD est directement Durant la lecture de SACD ou la conversion au format DSD, ce filtre envoyé...
  • Page 56 Quand l'entrée est un CD/SACD, la fréquence de synchronisation sont désactivées. Si vous utilisez cette unité avec un amplificateur d'horloge maître recevable est de 22,5792 MHz. ESOTERIC, réglez ce paramètre sur OFF. Quand l'entrée est l'USB (HS_2), la fréquence de synchronisation d'horloge maître recevable dépend de la fréquence d'échantillonnage de la source.
  • Page 57 Réglage d'entrée USB Réglage de gain de la sortie XLR Affichage : USB>*** Affichage : XLR>*** En cas de réglage en mode à haute vitesse (HIGH SPEED), le pilote +6dB logiciel dédié doit être installé sur l'ordinateur. Téléchargez le pilote Règle le niveau de la sortie XLR au double du niveau de la sortie logiciel depuis notre site web.
  • Page 58: Emploi De L'atténuateur De Luminosité

    Mode de réglage (3) Emploi de l'atténuateur de luminosité Réglage d'extinction automatique de l'écran Affichage : FLaOFF>*** En mode CD/SACD, si la lecture est arrêtée et si aucune opération n'a été effectuée durant 15 minutes, l'écran s'éteint automatiquement. En mode convertisseur N/A, après que l'entrée ait été verrouillée durant au moins 15 minutes, l'écran s'éteint automatiquement.
  • Page 59: Réglage Du Volume

    Réglage du volume Coupure du son en sortie Cette unité peut contrôler le volume des sorties audio analogiques. Appuyez sur la touche MUTE de la télécommande pour C'est pratique quand vous branchez directement l'unité à un temporairement couper le son. Appuyez à nouveau pour restaurer amplificateur de puissance sans préamplificateur.
  • Page 60: Guide De Dépannage

    Guide de dépannage Si vous rencontrez un problème avec l'unité, veuillez prendre un e Vérifiez les branchements de l'amplificateur et des enceintes (voir moment pour lire les informations suivantes avant de solliciter une p.40). réparation. Par ailleurs, cette unité n'est peut-être pas la cause du e Réglez le volume de l'amplificateur et des autres appareils.
  • Page 61: Attention À La Condensation

    Restauration des réglages d’usine Connexions USB avec un ordinateur L'ordinateur ne reconnaît pas cette unité. e Cette unité peut être branchée à des ordinateurs ayant les systèmes d'exploitation suivants. Windows XP 32 bits Windows Vista 32/64 bits Windows 7 32/64 bits POWER STOP Mac OS X 10.6.4 ou ultérieur (32/64 bits)
  • Page 62: Caractéristiques Techniques

    Caractéristiques techniques Types de disque compatibles (lecture) Format d'entrée de synchronisation d'horloge Super Audio CD, CD (CD-R et CD-RW compris) Connecteur ............. . BNC Fréquences d'entrée prises en charge CD/SACD .
  • Page 63: Face Arrière

    Face arrière...
  • Page 65 INSTRUCCIONES IMPORTANTES DE SEGURIDAD Para consumidores europeos No exponga este aparato a salpicaduras ni goteras. No coloque objetos que contengan líquidos, como por ejemplo Deshacerse de aparatos eléctricos y electrónicos vasos, sobre el aparato. No instale este aparato en lugares cerrados tales como estante- (a) Todos los aparatos eléctricos y electrónicos deben ser elimina- rías o similares.
  • Page 66: Qué Hay En La Caja

    Índice Qué hay en la caja Gracias por elegir Esoteric. Lea este manual atentamente para Asegúrese de que la caja incluye todos los accesorios suministrados obtener el mejor rendimiento de esta unidad. que se enumeran a continuación. Por favor, póngase en contacto con el establecimiento donde haya comprado la unidad en caso de que falte alguno de estos accesorios Qué...
  • Page 67: Antes De Su Utilización

    Si utiliza dichos discos en de televisión, podrían aparecer interferencias en las pantallas de esta unidad, la compañía ESOTERIC y sus subsidiarias no se res- televisiones cercanas cuando la unidad está encendida. Esto no ponsabilizarán de las consecuencias ni garantizan la calidad de indica ni que la unidad ni que la televisión estén funcionando mal.
  • Page 68 Discos (2) PRECAUCIÓN Mantenimiento No reproduzca ningún disco que esté doblado, deformado o Si un disco se ensucia, limpie su superficie con un paño suave y dañado. La reproducción de tales discos puede causar daños irre- seco describiendo círculos de dentro hacia afuera. parables en los mecanismos de reproducción.
  • Page 69: Mando A Distancia

    Mando a distancia El mando a distancia incluido permite el control remoto de esta unidad. Instalación de las pilas Dirija el mando a distancia hacia el sensor de control remoto de la unidad principal siempre dentro de un radio de alcance máximo de 7 metros de distancia de la unidad principal.
  • Page 70: Realizar Las Conexiones

    Realizar las conexiones Q Precauciones al realizar las conexiones Haga todas las conexiones antes de enchufar el cable de corriente. Lea atentamente los manuales de instrucciones de los demás componentes del equipo y siga sus instrucciones al conectarlos. Amplificador o Amplificador o dispositivo de dispositivo de...
  • Page 71 Q No utilice ningún otro cable de corriente que no sea un pro- audio apropiados. Pueden recibir señales de hasta 24-bits con frecuencias de mues- ducto Esoteric genuino. Si lo hace podría originar fuego o treo de 32–192 kHz. una descarga eléctrica.
  • Page 72: Nombres Y Funciones De Las Partes (Unidad Principal)

    Nombres y funciones de las partes (unidad principal) A Botón POWER G Botón de apertura/cierre de la bandeja OPEN/CLOSE Pulse este botón para encender y apagar la unidad. Cuando la unidad está encendida, el anillo alrededor del botón se Púlselo para abrir y cerrar la bandeja de disco. ilumina en azul.
  • Page 73: Nombres Y Funciones De Las Partes (Pantalla)

    Nombres y funciones de las partes (pantalla) Indicador de disco Área de mensajes Muestra el tipo de disco que está cargado. Muestra el tiempo de reproducción y otra serie de mensajes. Super Audio CD: SACD CD de audio estándar: CD Indicador de mezcla DOWN MIX Si se carga un DVD-Vídeo (DVD-V), un DVD-Audio (DVD-A) o un Cuando se reproduce el audio multicanal de un Super Audio CD,...
  • Page 74: Nombres Y Funciones De Las Partes (Mando A Distancia)

    Nombres y funciones de las partes (mando a distancia) Cuando la unidad principal y el mando a distancia tienen ambos botones con las mismas funciones, este manual explica cómo uti- lizar el botón de la unidad principal. El correspondiente botón en el mando a distancia se puede usar de la misma manera.
  • Page 75 (ver página 89). Este botón se desactiva cuando la función del atenuador se ha Utilice este botón para silenciar un amplificador Esoteric. puesto en OFF (desactivada) en el modo de configuración. Úselo para hace ajustes de configuración en un amplificador Esoteric.
  • Page 76: Reproducción

    Reproducción Pulse el botón OPEN/CLOSE. Encienda la unidad. La bandeja de disco se cerrará. Lleve cuidado de que al cerrarse no le pille los dedos ni ningún otro objeto. La carga del disco puede llevar un cierto tiempo dependiendo de la cantidad de información que contenga el disco que se está cargando.
  • Page 77: Poner En Pausa La Reproducción

    Poner en pausa la reproducción Abrir y cerrar la bandeja de disco Pulse el botón OPEN/CLOSE una vez para abrir la bandeja y vuelva Durante la reproducción, pulse el botón PAUSE para poner en a pulsarlo otra vez para cerrar la bandeja. pausa la reproducción.
  • Page 78: Selección De Pistas

    Selección de pistas Buscar hacia delante/hacia atrás (exploración) Saltar Para explorar hacia delante/hacia atrás, pulse y mantenga pulsado Durante la reproducción, pulse uno de los botones de salto uno de los botones de salto ( . / / ) en la unidad principal o ( .
  • Page 79: Usar La Reproducción Repetida

    Usar la reproducción repetida Usar la reproducción programada (1) Usted puede programar hasta un total de 30 pistas en el orden que desee escucharlas. Durante la reproducción o con ella parada, pulse y mantenga pulsado el botón REPEAT. Si hay una pista reproduciéndose, se convertirá en la primera pista del programa.
  • Page 80 Usar la reproducción programada (2) Cuando haya terminado de añadir pistas al Añadir una pista al final del programa programa, pulse el botón de reproducción/ Durante la reproducción o con la reproducción parada, utilice los pausa ( y / J ). botones numéricos para seleccionar el número de pista que desee añadir.
  • Page 81: Cambiar La Pantalla

    Cambiar la pantalla Modo de convertidor D/A Esta unidad se puede usar como convertidor D/A. Cuando un disco se esté reproduciendo o esté en pausa, pulse el botón DISPLAY para cambiar la información que aparece en la pantalla Con la reproducción parada, pulse el botón MODE para mostrar el en el orden que se muestra a continuación.
  • Page 82: Conexión A Un Ordenador Y Reproducción De Archivos De Audio

    Si la conexión se ha hecho correctamente, podrá seleccionar "ESOTERIC USB HS AUDIO" como la salida de audio del ordenador. Modo HIGH SPEED 2 (alta velocidad 2) En el modo de configuración, seleccione USB>HS_2.
  • Page 83 Conecte esta unidad a un ordenador usando Comience la reproducción de un archivo de un cable USB. audio en el ordenador. Utilice un cable con el conector adecuado para esta unidad. La mejor calidad de sonido se consigue ajustando el volumen en el ordenador al máximo nivel y usando el amplificador conec- tado a esta unidad para ajustar el volumen.
  • Page 84: Modo De Configuración

    Modo de configuración (1) Fuente de entrada "COAX in" u "OPT in" Cambiar los ajustes UPCONV> DF> CLK> Fuente de entrada USB UPCONV> DF> Durante la reproducción o con la reproduc- USB> ción parada, pulse y mantenga pulsado el CLK> botón MODE durante 2 o más segundos.
  • Page 85 Ajuste de conversión ascendente Ajuste del filtro digital del convertidor D/A Pantalla: UPCONV>*** Pantalla: DF>*** Este ajuste se puede hacer para cada entrada. Este ajuste se puede hacer para cada entrada. Durante la reproducción de un Super Audio CD, la señal DSD es Durante la reproducción de un disco Super Audio CD o durante la enviada directamente al convertidor D/A.
  • Page 86 MUTING del mando a distancia están inactivos. Cuando utilice esta Cuando la entrada es CD/SACD, la frecuencia de sincronización unidad junto con un amplificador ESOTERIC, ponga este parámetro del reloj maestro que puede ser introducida es 22.5792 MHz. en OFF.
  • Page 87 Ajuste de entrada USB Ajuste de ganancia de la salida XLR Pantalla: USB>*** Pantalla: XLR>*** Cuando se configure en un modo HIGH SPEED (alta velocidad), se +6dB deberá instalar en ordenador el software del "driver" controlador Configura el nivel de salida XLR en el doble que el nivel de salida específico.
  • Page 88: Usar El Atenuador De Pantalla

    Modo de configuración (3) Usar el atenuador de pantalla Ajuste de apagado automático de la pantalla (FL) Pantalla: FLaOFF>*** En el modo de CD/SACD, si se detiene la reproducción y no se lleva a cabo ninguna operación durante 15 minutos, la pantalla se apa- gará...
  • Page 89: Ajuste Del Volumen

    Ajuste del volumen Silenciar la salida Usted puede ajustar el volumen de las salidas de audio analógico con Pulse el botón MUTE en el mando a distancia para silenciar tem- esta unidad. poralmente el sonido. Vuelva a pulsarlo otra vez para restaurar el Esto es práctico cuando conecte la unidad directamente a una etapa ajuste de volumen anterior.
  • Page 90: Solución De Posibles Fallos

    Solución de posibles fallos No hay sonido procedente de los altavoces o el sonido está Si tiene un problema con esta unidad, por favor dedique un momento a revisar la información que le proporcionamos a continuación antes distorsionado. de solicitar servicio técnico. Es más, el problema podría estar causado e Compruebe las conexiones del amplificador y los altavoces (ver por algún motivo ajeno a esta unidad.
  • Page 91: Cuidado Con La Condensación

    Restablecer los ajustes originales de fábrica Conexiones USB con un ordenador El ordenador no reconoce esta unidad. e Esta unidad se puede conectar con ordenadores que corran bajo los siguientes sistemas operativos. Windows XP 32 bits Windows Vista 32/64 bits POWER STOP Windows 7 32/64 bits...
  • Page 92: Especificaciones

    Especificaciones Tipos de discos compatibles (reproducción) Formato de entrada de sincronización de reloj Super Audio CDs, CDs (incluyendo CD-Rs y CD-RWs ) Terminal ..............BNC Frecuencias de entrada soportadas CD/SACD .
  • Page 93: Panel Posterior

    Panel posterior...
  • Page 96 Liegnitzer Straße 6, 82194 Gröbenzell, Germany Phone: +49-8142-4208-141 This appliance has a serial number located on the rear panel. Please record the serial number and retain it for your records. 1012 . MA- 18 09B Model name: K-07 Serial number...

Table des Matières