Publicité

Les langues disponibles
  • FR

Les langues disponibles

Liens rapides

Publicité

Table des Matières
loading

Sommaire des Matières pour auna DS-2

  • Page 3: Technische Daten

    Sehr geehrter Kunde, wir gratulieren Ihnen zum Erwerb Ihres Gerätes. Lesen Sie die folgenden Hinweise sorgfältig durch und befolgen Sie diese, um möglichen Schäden vorzubeugen. Für Schäden, die durch Missachtung der Hinweise und unsachgemäßen Gebrauch entstehen, übernehmen wir keine Haftung. Scannen Sie den folgenden QR-Code, um Zugriff auf die aktuellste Bedienungsanleitung und weitere Informationen rund um das Produkt zu erhalten...
  • Page 4 WARNUNG VORSICHT: DAS GEHÄUSE NICHT ÖFFNEN, UM EINEN STROMSCHLAG UND ERNSTE PERSONENVERLETZUNGEN ZU VERMEIDEN. IM INNEREN KEINE VOM KUNDEN ZU WARTENDEN KOMPONENTEN. WENDEN SIE SICH AUSSCHLIESSLICH AN QUALIFIZIERTE FACHLEUTE. WARNUNG. UM DIE GEFAHR EINES BRANDS ODER EINES STROMSCHLAGS ZU VERRINGERN, DAS GERÄT NICHT IN WASSER, REGEN ODER FEUCHTIGKEIT AUSZUSETZEN.
  • Page 5: Sicherheitshinweise

    SICHERHEITSHINWEISE Allgemeine Hinweise • Blitzschlag - Wenn Sie das Gerät länger nicht benutzen oder es ein Gewitter gibt, ziehen Sie den Stecker aus der Steckdose oder trennen Sie das Gerät vom Antennenanschluss. Dadurch werden Schäden am Gerät durch Blitzschlag und Überspannung vermieden. •...
  • Page 6 Besondere Hinweise zur Bedienung • Kinder ab 8 Jahren, psychisch, sensorisch und körperlich eingeschränkte Menschen dürfen das Gerät nur benutzen, wenn sie vorher von einer für sie verantwortlichen Aufsichtsperson ausführlich mit den Funktionen und den Sicherheitsvorkehrungen vertraut gemacht wurden und die damit verbundenen Risiken verstehen.
  • Page 7: Geräteübersicht

    GERÄTEÜBERSICHT Staubschutzabdeckung Sender/VOR-Taste ZURÜCK-Taste AUFNAHME-Taste CD-Fach öffnen/schliessen Betriebs-LED Ein/Aus-Taste Standby-LED CD-Fach Fernbedienungssensor 3.5 mm Kopfhöreranschluss 3.5 mm AUX Eingang USB Steckplatz SD/MMC Kartenschacht STOP-Taste BAND/PLAY/PAUSE-Taste Ordner/Sender Vor-Taste Speicher/Uhr einstellen Taste Equalizer-Taste Funktions-Taste 20 Lautstärke-Tasten LCD Display 22 Schallplattenadapter 23 33/45 RPM Geschwindigkeitsregler 24 Tonarm-Halter 25 Cinch Ausgang (L/R)
  • Page 8 Fernbedienung...
  • Page 9 Fernbedienung ON/STANDBY: Drücken Sie diese Taste, um das Gerät einzuschalten. FUNCTION: Drücken Sie diese Taste, um die Funktionen zu wählen (TUNER/CD/USB/SD/PHON/AUX). DISPLAY: Drücken Sie diese Taste, um die Uhrzeit anzuzeigen (wenn das Gerät eingeschaltet ist). : Im CD/MP3-Modus : Vorheriger/nächster Titel. Im Radio-Modus: eine Frequenz vor/zurück.
  • Page 10 INSTALLATION UND INBETRIEBNAHME Installation • Entpacken Sie alle Teile und entfernen Sie die Verpackungsmaterialien. • Verbinden Sie das Gerät nicht mit dem Stromnetz, bevor Sie die Spannung geprüft haben und alle andern Komponenten angeschlossen sind. • Verdecken Sie keine Belüftungsöffnungen und stellen Sie sicher, dass einige Zentimeter Platz um das Gerät verbleiben, um die Belüftung zu gewährleisten.
  • Page 11 RADIOFUNKTIONEN Automatische Sendersuche 1. Drücken Sie die Funktionstaste (19), um den Radiomodus zu aktivieren. 2. Drücken und halten Sie die Taste „SCAN“ gedrückt. Der UKW- Radiosuchlauf startet und speichert automatisch alle empfangenen Sender (max. 30 UKW-Sender). 3. Stellen Sie den gewünschten Sender ein, indem Sie die Taste „Zurück “...
  • Page 12: Cd-Wiedergabe

    • Wenn das Stereo-Signal empfangen wird, wird der Stereo-Indikator “ ” auf dem Display angezeigt, um zu signalisieren, dass Sie das Programm nun in Stereo empfangen. Hinweise zum besten Empfang Der Empfänger hat eine eingebaute Kabelantenne (26) an der Gehäuserückseite hängend. Dieses Kabel sollte für optimalen Empfang komplett abgewickelt sein.
  • Page 13: Repeat Track

    Für MP3-CDs • Nach dem Einlesen der CD wird die Anzahl der Titel und Alben, auf dem Display angezeigt. • Drücken Sie die Taste „Ordner/Sender Vor “ (16) um das jeweilige Album zu wählen. • Drücken Sie die Taste „Titel Vor “...
  • Page 14 MP3-CD/Datei Reihenfolge der Modi: REPEAT 1 (Titel wiederholen) > REPEAT 1 FOLDER (Ordner wiederholen) > REPEAT ALL TRACKS (alle Titel wiederholen) > RANDOM (Zufall) > OFF MODE (Wiederholen/Zufall aus) Modus Displayanzeige REPEAT TRACK REPEAT SINGLE FOLDER REPEAT ALL RANDOM OFF MODE Wiederholfunktion (REPEAT) Mit dieser Funktion können Sie den gewünschten Titel oder Ordner wiederholt anhören.
  • Page 15 Nachdem die Programmliste durchgelaufen ist, drücken Sie Taste „Titel Vor  “ oder „Titel Zurück ” (2), um die Liste der programmierten Titel anzusehen. Wenn Sie die Taste „STOP “ (14) im Stop-Modus drücken, können Sie die gesamte Playliste löschen. Für MP3-CD/Dateien drücken Sie die Taste „Ordner/Sender Vor“...
  • Page 16 Hinweise zur Umwandlung: • Die Aufnahmegeschwindigkeit ist 1:1 und ist von der Spielzeit des CD- Titels abhängig. • Das Gerät erstellt einen „AUDIO“-Ordner und speichert den umgewandelten Titel darin. • Das Aufnahmeformat ist voreingestellt auf: MP3-Bitrate : 128 kbps, Samplingrate: 44,1 kHz. •...
  • Page 17 4. Drücken Sie nach Abschluss der Aufnahme die Taste „STOP “ (14), bis der Text auf dem Display nicht mehr blinkt und das Gerät wieder im Radio-Modus ist. Hinweise zur Radio Umwandlung: • Wenn der Radioempfang nicht stark genug ist, kann das Gerät den Umwandlungsvorgang nicht starten und der Text “NO GOOD“...
  • Page 18 1. Setzen Sie das Gerät in den „PHON/AUX“-Modus (19) und bleiben Sie im STOP-Modus. 2. Drücken Sie die „INFO“-Funktion und auf dem Display wird die voreingestellte Bitrate angezeigt (128 kbps). 3. Drücken Sie die Taste „Titel Vor ” oder „Titel Zurück ”...
  • Page 19 SCHALLPLATTE ABSPIELEN Vor dem Abspielen • Entfernen Sie den Schutz von der Schallplattennadel. • Stellen Sie sicher, dass der Tonarm vor der Bedienung von der Tonarmhalterung gelöst ist, und sichern Sie ihn wieder nach Gebrauch. Platte abspielen 1. Stellen Sie den Funktionsschalter (19) auf „PHON/AUX”. 2.
  • Page 20: Weitere Funktionen

    WEITERE FUNKTIONEN Sleep-Funktion 1. Drücken Sie die Taste „SLEEP” und der Sleep-Indikator „ “ wird im Display angezeigt. 2. Drücken Sie die Taste wiederholt, um den Sleep-Timer einzustellen (90 > 75 >60….15 Minuten). 3. Nach Ablauf der eingestellten Zeit stoppt das Gerät und begibt sich in den Standby-Modus.
  • Page 21 Timer aktivieren/deaktivieren • Um den Alarm zu aktivieren, drücken Sie auf der Fernbedienung einmal die Taste „TIMER”, bis der Timer-Indikator “ ” auf dem Display erscheint. • Um die Timer-Funktion zu deaktivieren, drücken Sie die Taste „TIMER” erneut, und der Timer-Indikator wird auf dem Display ausgeblendet. Voreingestellter Equalizer Das Gerät bietet vier verschiedene Klangvariationen, um den Hörgenuss zu steigern.
  • Page 22 SPEZIELLE ENTSORGUNGSHINWEISE FÜR VERBRAUCHER IN DEUTSCHLAND Entsorgen Sie Ihre Altgeräte fachgerecht. Dadurch wird gewährleistet, dass die Altgeräte umweltgerecht verwertet und negative Auswirkungen auf die Umwelt und menschliche Gesundheit vermieden werden. Bei der Entsorgung sind folgende Regeln zu beachten: • Jeder Verbraucher ist gesetzlich verpflichtet, Elektro- und Elektronikaltgeräte (Altgeräte) sowie Batterien und Akkus getrennt vom Hausmüll zu entsorgen.
  • Page 23 • Bei einem Vertrieb unter Verwendung von Fernkommunikationsmitteln ist die unentgeltliche Abholung am Ort der Abgabe auf Elektro- und Elektronikgeräte der Kategorien 1, 2 und 4 gemäß § 2 Abs. 1 ElektroG, nämlich „Wärmeüberträger“, „Bildschirmgeräte“ (Oberfläche von mehr als 100 cm²) oder „Großgeräte“ (letztere mit mindestens einer äußeren Abmessung über 50 Zentimeter) beschränkt.
  • Page 24: Konformitätserklärung

    HINWEISE ZUR ENTSORGUNG Wenn es in Ihrem Land eine gesetzliche Regelung zur Entsorgung von elektrischen und elektronischen Geräten gibt, weist dieses Symbol auf dem Produkt oder auf der Verpackung darauf hin, dass dieses Produkt nicht im Hausmüll entsorgt werden darf. Stattdessen muss es zu einer Sammelstelle für das Recycling von elektrischen und elektronischen Geräten gebracht werden.
  • Page 25: Technical Data

    Dear Customer, Congratulations on purchasing this device. Please read the following instructions carefully and follow them to prevent possible damages. We assume no liability for damage caused by disregard of the instructions and improper use. Scan the QR code to get access to the latest user manual and more product information.
  • Page 26 WARNING Triangle with lightning plus explanation as follows: DANGEROUS VOLTAGE: The lightning flash with arrowhead symbol within the equilateral triangle is intended to alert the user to the presence of uninsulated dangerous voltage within the product’s enclosure that may be of sufficient magnitude to constitute a risk of electric shock to persons.
  • Page 27: Safety Instructions

    SAFETY INSTRUCTIONS General instructions • Lightning - If you are not going to use the unit for a longer period of time or if there is a thunderstorm, pull the plug out of the socket or disconnect the unit from the antenna connection. This will prevent damage to the unit due to lightning and overvoltage.
  • Page 28 Special notes on operation • Children from the age of 8, mentally, sensory and physically impaired persons may only use the appliance if they have been familiarised in detail with the functions and safety precautions by a supervisor responsible for them beforehand and understand the risks involved. •...
  • Page 29: Product Description

    PRODUCT DESCRIPTION Dust cover Tuning/skip up Skip down Record button CD door open/close Power led indicator Power on/standby button Standby LED indicator CD door Remote sensor 3.5 mm headphone jack 3.5 mm aux in jack USM socket SD/MMC card slot Stop button Band/play/pause...
  • Page 30 Remote Control...
  • Page 31 Fernbedienung ON/STANDBY: Press to switch on/standby the system. FUNCTION: Press to select the functions (TUNER/CD/USB/SD/PHON/ AUX). DISPLAY: At power on: Press to display current time. : In CD/MP3 mode to select previous/next track. In tuner mode press to step up/down of frequency. : In tuner mode press to select radio band.
  • Page 32 INSTALLATION AND OPERATION Installation • Unpack all parts and remove protective material. • Do not connect the unit to the mains before checking the mains voltage and before all other connections have been made. • Do not cover any vents and make sure that there is a space of several centimeters around the unit for ventilation.
  • Page 33: Radio Functions

    RADIO FUNCTIONS Auto tuning 1. Press function button (19) to select tuner mode. 2. Press and hold the SCAN button. The FM radio search starts and stores all received stations automatically (max. 30 FM stations). 3. Tune to the desired station by pressing the SKIP DOWN or SKIP UP button.
  • Page 34: Getting Started

    PLAYING CD Getting started 1. Press function button (19) to select “CD” mode. 2. Press “CD door open/close” button (4) to open the CD door (8). 3. Place a CD with the printed side facing up inside the tray and then close the CD door.
  • Page 35: Repeat Track

    ID3 (track/album title) function (by remote handset) Press the INFO button until the LCD display (21) shows “FILE - …”. During playback of MP3 file, the song title/artist name/album name is being displayed in sequence. Press the INFO button again to disable the function. Remark: In that case of no name had been assigned for the track, “NO TITLE ...
  • Page 36 Repeat play You can listen the desired tracks or folder repeatedly by this function. Random play You can listen all the tracks or folder in a random order by this function. CD/MP3 disc programming Up to 40 tracks can be programmed for disc play in any order. Before use, be sure to press the STOP button (14).
  • Page 37 ENCODING OF CD/PHONO INTO MP3 FILE The system is able to encode normal CD or turntable to MP3 format and recording at memory media with USB connecting port. Before starting the encoding, please insert the memory media (USB pen drive) to the system and make sure it had adequate free memory size for recording.
  • Page 38 • Recording will be completed only entire song being encoded, if terminate the encoding process intermediately, there is no track being recorded nor stored to the USB drive. Copying of MP3 file If putting an MP3 disc instead of a CD disc, the system will copy the files to the USB or SD/MMC card if press the REC button (3).
  • Page 39 Aux-in encoding Connect another audio device, e. g. (portable) CD player, MP3 player, (portable) cassette player, iPod, etc. to this system via a cord with 3.5 mm dia. jack plugs (not supplied). Connect one end of this cord to the 3.5 mm dia.
  • Page 40 FILE DELETE AT USB (BY REMOTE CONTROL) The system is able to erase the file stored inside the USB pen drive by following: Single file delete (by remote handset) 1. Preset at “USB“ mode. 2. Press the DELETE button and the LCD display (21) will show "DEL ---001". 3.
  • Page 41 PLAY RECORD Getting started • Remove the stylus protector. • Be sure that the tone arm is being detached from the tone arm rest before operating and re-secured again afterwards. Playing phono 1. Select to “PHON/AUX” function from function selector (19) 2.
  • Page 42: Other Features

    OTHER FEATURES 1. Press SLEEP button and sleep indicator “ “ will be shown on the LCD display (21). 2. Keep pressing the button to adjust the sleep timer in the order of 90 > 75 > 60….15 minutes. 3. System will stop and go to standby mode automatically after the selected timing.
  • Page 43 Pre-set EQ function (by remote control) This unit provides 4 different sound modes to enhance your listening experience. You can select the desired effect by pressing the PRESET EQ button repeatedly at following sequence: flat > classic > rock > pop > jazz. Display function (by remote handset) Press to indicate the current time when the systems is operating by any mode of all functions.
  • Page 44: Disposal Considerations

    DISPOSAL CONSIDERATIONS If there is a legal regulation for the disposal of electrical and electronic devices in your country, this symbol on the product or on the packaging indicates that this product must not be disposed of with household waste. Instead, it must be taken to a collection point for the recycling of electrical and electronic equipment.
  • Page 45: Fiche Technique

    Cher client, chère cliente, Toutes nos félicitations pour l’acquisition de ce nouvel appareil. Veuillez lire attentivement et respecter les instructions de ce mode d’emploi afin d’éviter d’éventuels dommages. Nous ne saurions être tenus pour responsables des dommages dus au non-respect des consignes et à...
  • Page 46 MISE EN GARDE ATTENTION  : N'OUVREZ PAS LE BOÎTIER POUR ÉVITER UN CHOC ÉLECTRIQUE ET DES BLESSURES GRAVES. L'APPAREIL NE CONTIENT AUCUNE PIÈCE RÉPARABLE PAR L'UTILISATEUR. ADRESSEZ-VOUS EXCLUSIVEMENT À UN PERSONNEL QUALIFIÉ. MISE EN GARDE. POUR RÉDUIRE LES RISQUES D'INCENDIE OU DE CHOC ÉLECTRIQUE, N'EXPOSEZ PAS CET APPAREIL À...
  • Page 47: Consignes De Sécurité

    CONSIGNES DE SÉCURITÉ Consignes générales • Foudre - Si vous prévoyez de ne pas utiliser l'appareil pendant une longue période ou en cas d'orage, retirez la fiche de la prise ou débranchez l'antenne de l'appareil. Cela empêchera la foudre et les surtensions d'endommager l'appareil.
  • Page 48 Remarques importantes sur l'utilisation • Les enfants à partir de 8 ans et les personnes souffrant de handicaps mentaux, sensoriels et physiques ne peuvent utiliser l'appareil que s'ils ont été parfaitement familiarisés avec les fonctions et les précautions de sécurité par une personne responsable et s'ils comprennent les risques associés.
  • Page 49: Aperçu De L'appareil

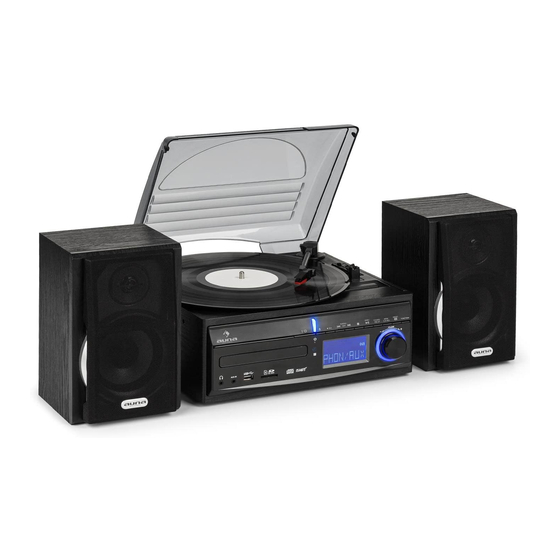
    APERÇU DE L'APPAREIL Cache-poussière Touche station/SUIVANT Touche PRÉCÉDENT Touche ENREGISTREMENT Ouverture/fermeture du compartiment CD LED de fonctionnement Touche de marche/arrêt LED de veille Compartiment pour CD Capteur de télécommande Prise casque de 3,5 mm Entrée AUX 3,5 mm Port USB Fente pour carte SD/MMC Touche STOP Touche BAND/PLAY/PAUSE...
  • Page 50 Télécommande...
  • Page 51: Télécommande

    Télécommande ON/STANDBY : Appuyez sur cette touche pour allumer l'appareil. FUNCTION : Appuyez sur cette touche pour sélectionner les fonctions (TUNER/CD/USB/SD/PHON/AUX). DISPLAY : Appuyez sur cette touche pour afficher l'heure (lorsque l'appareil est allumé). : En mode CD/MP3 : Piste précédente/suivante. En mode radio : une fréquence en avant/en arrière.
  • Page 52: Installation Et Mise En Service

    INSTALLATION ET MISE EN SERVICE Installation • Déballez toutes les pièces et retirez les matériaux d'emballage. • Ne connectez pas l'appareil au secteur avant d'avoir vérifié la tension et d'avoir connecté tous les autres composants. • Ne couvrez pas les ouvertures de ventilation et veillez à laisser quelques centimètres d'espace autour de l'appareil pour assurer la ventilation.
  • Page 53: Fonctions Radio

    FONCTIONS RADIO Recherche automatique de stations 1. Appuyez sur la touche de fonction (19) pour activer le mode radio. 2. Appuyez sur la touche « SCAN », et maintenez-la enfoncée. Le balayage de la radio FM commence et mémorise automatiquement toutes les stations reçues (30 stations FM maximum).
  • Page 54: Lecture D'un Cd

    Consignes pour une réception optimale Le récepteur est équipé d'une antenne à câble intégrée (26) qui pend à l'arrière du boîtier. Ce câble doit être complètement déroulé pour une réception optimale. LECTURE D'UN CD Premiers pas 1. Appuyez sur la touche de fonction pour sélectionner le mode CD. 2.
  • Page 55: Repeat Track

    • Appuyez sur la touche « Dossier/Station Suivant » (16) pour sélectionner l'album correspondant. • Appuyez sur la touche « Piste suivante » ou « Piste précédente » (2) pour sélectionner le numéro de piste. • Lorsque l'album et le titre souhaités ont été sélectionnés, appuyez sur la touche «...
  • Page 56 CD/Fichier MP3 Ordre des modes : REPEAT 1 (répétition des pistes) > REPEAT 1 FOLDER > REPEAT ALL TRACKS > RANDOM > OFF MODE (répétition/aléatoire désactivée) Mode Indication de l'affichage REPEAT TRACK REPEAT SINGLE FOLDER REPEAT ALL RANDOM OFF MODE Fonction de répétition (REPEAT) Cette fonction vous permet d'écouter la piste ou le dossier souhaité...
  • Page 57 Après avoir parcouru la liste des programmes, appuyez sur la touche « Piste suivante  » ou « Piste précédente » ( 2), pour afficher la liste des pistes programmées. Si vous appuyez sur la touche « STOP » (14) en mode arrêt, vous pouvez effacer toute la liste de lecture. Pour les CD/fichiers MP3, appuyez sur la touche «...
  • Page 58 Consignes sur la conversion : • La vitesse d'enregistrement est de 1:1 et dépend de la durée de lecture de la piste du CD. • L'appareil crée un dossier « AUDIO » et y stocke le titre converti. • Le format d'enregistrement est préréglé sur : Débit binaire MP3 : 128 kbps, taux d'échantillonnage : 44,1 kHz.
  • Page 59 4. Lorsque l'enregistrement est terminé, appuyez sur la touche « STOP » (14) jusqu'à ce que le texte sur l'écran cesse de clignoter et que l'appareil revienne en mode radio. Notes sur la conversion radio : • Si la réception radio n'est pas assez forte, l'appareil ne peut pas lancer le processus de conversion et le texte «...
  • Page 60: Supprimer Un Fichier Sur Usb (Via Fb)

    1. Mettez l'appareil en mode « PHON/AUX » (19) et restez en mode STOP 2. Appuyez sur la fonction « INFO » et l'écran affiche le débit binaire préréglé (128 kbps). 3. Appuyez sur la touche « Piste suivante » ou « Piste précédente »...
  • Page 61: Jouer L'enregistrement

    JOUER L'ENREGISTREMENT Avant la lecture • Retirez la protection de l'aiguille du disque. • Assurez-vous que le bras de lecture est détaché de son support avant de l'utiliser, et fixez-le à nouveau après utilisation. Jouer le disque 1. Placez le commutateur de fonction (19) sur « PHON/AUX ». 2.
  • Page 62: Autres Fonctions

    AUTRES FONCTIONS Fonction veille 1. Appuyez sur la touche « SLEEP » et l'indicateur de sommeil « » apparaît à l'écran. 2. Appuyez plusieurs fois sur la touche pour régler le Sleep-Timer (90 > 75 >60..15 minutes). 3. Une fois le temps programmé écoulé, l'appareil s'arrête et passe en Mode veille.
  • Page 63: Activer/Désactiver La Minuterie

    Activer/désactiver la minuterie • Pour activer l'alarme, appuyez sur la touche « TIMER » de la télécommande une fois jusqu'à ce que l'indicateur de la minuterie « » apparaisse sur l'écran • Pour désactiver la fonction de minuterie, appuyez à nouveau sur la touche «...
  • Page 64: Informations Sur Le Recyclage

    INFORMATIONS SUR LE RECYCLAGE S‘il existe une réglementation pour l‘élimination ou le recyclage des appareils électriques et électroniques dans votre pays, ce symbole sur le produit ou sur l‘emballage indique que cet appareil ne doit pas être jeté avec les ordures ménagères. Vous devez le déposer dans un point de collecte pour le recyclage des équipements électriques et électroniques.
  • Page 65: Datos Técnicos

    Estimado cliente: Le felicitamos por la adquisición de este producto. Lea atentamente las siguientes instrucciones y sígalas para evitar posibles daños. No asumimos ninguna responsabilidad por los daños causados por el incumplimiento de las instrucciones y el uso inadecuado. Escanee el siguiente código QR para obtener acceso a la última guía del usuario y más información sobre el producto.
  • Page 66 ADVERTENCIA PRECAUCIÓN: NO ABRA LA CARCASA DEL APARATO, ASÍ EVITARÁ DESCARGAS ELÉCTRICAS Y LESIONES PERSONALES GRAVES. EL APARATO NO CONTIENE PIEZAS EN SU INTERIOR QUE EL USUARIO PUEDA REPARAR. REMÍTASE ÚNICAMENTE A UN SERVICIO TÉCNICO CUALIFICADO. ADVERTENCIA. PARA REDUCIR EL RIESGO DE INCENDIO O DESCARGA ELÉCTRICA, NO EXPONGA ESTE APARATO AL AGUA, LA LLUVIA O LA HUMEDAD.
  • Page 67: Indicaciones De Seguridad

    INDICACIONES DE SEGURIDAD Indicaciones generales • Relámpago - Si va a utilizar el aparato durante un periodo largo de tiempo o si hay una tormenta eléctrica, desenchufe el aparato y desconecte la antena. De este modo, protegerá el aparato de los daños que pueden ocasionar los relámpagos y la sobretensión.
  • Page 68 Indicaciones especiales sobre el manejo • Los niños mayores de 8 años y las personas con discapacidad física, sensorial o psíquica pueden utilizar el aparato si han sido previamente instruidos por una persona responsable sobre el funcionamiento del mismo y conocen las funciones, las indicaciones de seguridad y los riesgos asociados.
  • Page 69: Vista General Del Aparato

    VISTA GENERAL DEL APARATO Cubierta Tecla de emisora/anterior Botón ATRÁS Botón de grabación Abrir/cerrar la bandeja del CD LED de funcionamiento Tecla de encendido/apagado LED de standby Compartimento de CD Sensor del mando a distancia 3.5 mm Kopfhöreranschluss Entrada AUX 3.5 mm Entrada de USB Entrada de SD/MMC Tecla STOP...
  • Page 70 Mando a distancia...
  • Page 71: Mando A Distancia

    Mando a distancia ON/STANDBY:Pulse el botón STAND-BY/ON para encender el aparato. FUNCIÓN: Pulse este botón para seleccionar las funciones (TUNER/CD/ USB/SD/PHON/AUX). DISPLAY: Pulse este botón para mostrar la hora (cuando la unidad está encendida). : En modo CD/MP3 : Pista anterior/siguiente. En modo radio: una frecuencia hacia delante/atrás.
  • Page 72: Instalación Y Puesta En Marcha

    INSTALACIÓN Y PUESTA EN MARCHA Instalación • Saque la unidad y retire todos los materiales del embalaje. • No conecte el aparato a la red eléctrica hasta que haya comprobado la tensión y conectado todos los demás componentes. • No cubra las aberturas de ventilación y asegúrese de dejar unos centímetros de espacio alrededor de la unidad para garantizar la ventilación.
  • Page 73 FUNCIONES RADIO Búsqueda automática de emisoras 1. Pulse la tecla de función (19) para activar el modo radio. 2. Mantenga pulsado el botón "SCAN". La exploración de la radio FM se inicia y almacena automáticamente todas las emisoras recibidas (máx. 30 emisoras FM).
  • Page 74 Notas sobre la mejor recepción El receptor lleva incorporada una antena de cable (26) que cuelga de la parte posterior de la carcasa. Este cable debe estar completamente desenrollado para una mejor recepción. REPRODUCCIÓN DE CD Primeros pasos 1. Pulse la tecla de función (19) para activar el modo radio. 2.
  • Page 75 • Pulse el botón "Carpeta/Estación siguiente " (16) para seleccionar el álbum correspondiente. • Pulse el botón "Pista siguiente " o "Pista anterior " (2) para seleccionar el número de pista. • Una vez seleccionados el álbum y la pista deseados, pulse el botón "BAND/ "...
  • Page 76 MP3-CD/Datos Orden de los modos: REPEAT 1 (repite las pistas) > REPEAT 1 FOLDER > REPEAT ALL TRACKS (repite todas las pistas) > RANDOM (aleatorio) > OFF MODE (repite/aleatorio) Modo Indicación de la pantalla REPETIR PISTA REPETIR UNA CARPETA REPETIR TODO TODO RANDOM RANDOM...
  • Page 77 "Folder/Station Next" (16) para seleccionar directamente la primera pista de la siguiente carpeta. La programación finaliza automáticamente si no se pulsa la tecla "Guardar/ajustar reloj" (17) en 10 segundos. GRABAR CD Y VINILO La unidad puede convertir CDs o discos normales en archivos MP3 y grabarlos y guardarlos en soportes de almacenamiento en la conexión USB.
  • Page 78 • No se graban los títulos de las canciones durante la conversión. • Para detener la grabación, pulse el botón "STOP " (14) durante la conversión. • La grabación sólo se asume por completo cuando se ha convertido toda la canción. Si el proceso se interrumpe mientras tanto, el título no se graba ni se guarda en el medio de almacenamiento USB.
  • Page 79 • La calidad de la grabación y el rendimiento para la conversión de radio varía debido a las interferencias, en la recepción de radio. Esto no es un mal funcionamiento de la unidad. • Durante la conversión, el modo de radio cambia de estéreo a mono. •...
  • Page 80 BORRAR DATOS DE USB (PER FB) La unidad puede borrar los archivos de una memoria USB de la siguiente manera: Eliminar un solo archivo 1. Ponga la unidad en modo USB. 2. Pulse la tecla "DELETE" y la pantalla mostrará "DEL ---001". 3.
  • Page 81 REPRODUCIR VINILOS Antes de la reproducción • Retire la protección de la aguja del disco. • Asegúrese de que el brazo está separado del soporte antes del funcionamiento y asegúrelo de nuevo después del uso. Reproducir el disco 1. Ponga el conmutador de funciones (19) en "PHON/AUX". 2.
  • Page 82: Otras Funciones

    OTRAS FUNCIONES Función dormir 1. Pulse la tecla "SLEEP" y el indicador de sueño " " aparecerá en la pantalla. 2. Pulse el botón repetidamente para ajustar el temporizador de apagado (90 > 75 >60..15 minutos). 3. Una vez transcurrido el tiempo establecido, el aparato se detiene y pasa al modo de espera.
  • Page 83: Activación/Desactivación Del Temporizador

    Activación/desactivación del temporizador • Para activar la alarma, pulse una vez la tecla "TIMER" del mando a distancia hasta que aparezca el indicador de temporizador " " en la pantalla. • Para desactivar la función del temporizador, pulse de nuevo la tecla "TIMER"...
  • Page 84: Indicaciones Sobre La Retirada Del Aparato

    INDICACIONES SOBRE LA RETIRADA DEL APARATO Si en su país existe una disposición legal relativa a la eliminación de aparatos eléctricos y electrónicos, este símbolo estampado en el producto o en el embalaje advierte que no debe eliminarse como residuo doméstico. En lugar de ello, debe depositarse en un punto de recogida de reciclaje de aparatos eléctricos y electrónicos.
  • Page 85: Dati Tecnici

    Gentile cliente, La ringraziamo per aver acquistato il dispositivo. La preghiamo di leggere attentamente le seguenti istruzioni per l’uso e di seguirle per evitare possibili danni. Non ci assumiamo alcuna responsabilità per danni scaturiti da una mancata osservazione delle avvertenze di sicurezza e da un uso improprio del dispositivo.
  • Page 86 AVVERTIMENTO ATTENZIONE: NON APRIRE L’ALLOGGIAMENTO, IN MODO DA EVITARE SCOSSE ELETTRICHE E SERIE LESIONI. ALL’INTERNO NON CI SONO COMPONENTI CHE NECESSITANO DELLA MANUTENZIONE DA PARTE DELL’UTENTE. RIVOLGERSI ESCLUSIVAMENTE A TECNICI QUALIFICATI. AVVERTIMENTO PER RIDURRE IL RISCHIO DI INCENDI E SCOSSE ELETTRICHE, NON ESPORRE IL DISPOSITIVO A PIOGGIA, ACQUA O UMIDITÀ.
  • Page 87: Avvertenze Di Sicurezza

    AVVERTENZE DI SICUREZZA Avvertenze generiche • Colpo di fulmine - Se non si usa più il dispositivo o se ci sono temporali, staccare la spina dalla presa elettrica o scollegare il dispositivo dall'antenna. In questo modo si evitano danni al prodotto dovuti a colpi di fulmine e sovratensione.
  • Page 88 Note importanti sull'utilizzo • I bambini a partire da 8 anni e le persone con limitate capacità fisiche, psichiche e sensoriali possono utilizzare il dispositivo solo se sono stati istruiti da una persona responsabile della loro sicurezza sulle modalità d'uso e sulle procedure di sicurezza e se questi comprendono i rischi associati.
  • Page 89: Descrizione Del Dispositivo

    DESCRIZIONE DEL DISPOSITIVO Copertura di protezione dalla polvere Emittente/AVANTI INDIETRO REGISTRAZIONE Aprire/chiudere il vano CD LED di funzionamento Tasto on/off LED di standby Vano CD Sensore del telecomando Connessione cuffie da 3,5 mm Ingresso AUX da 3,5 mm Ingresso USB Slot per schede SD/MMC STOP BANDA/PLAY/PAUSA...
  • Page 90 Telecomando...
  • Page 91 Telecomando ON/STANDBY: premere questo tasto per accendere il dispositivo. FUNCTION: premere questo tasto per selezionare le funzioni (TUNER/ CD/USB/SD/PHON/AUX). DISPLAY: premere questo tasto per visualizzare l'ora (a dispositivo acceso). : In modalità CD/MP3: titolo precedente/successivo. In modalità radio: frequenza successiva/precedente. : in modalità...
  • Page 92: Installazione E Messa In Funzione

    INSTALLAZIONE E MESSA IN FUNZIONE Installazione • Togliere tutti i componenti dalla confezione e rimuovere tutto il materiale d’imballaggio. • Collegare il dispositivo alla rete elettrica solo dopo aver controllato la tensione e aver collegato tutti gli altri componenti. • Non coprire le aperture di ventilazione e assicurarsi di lasciare qualche centimetro di spazio intorno al dispositivo per assicurare la circolazione d'aria.
  • Page 93: Funzioni Radio

    FUNZIONI RADIO Ricerca automatica delle emittenti 1. Premere il tasto delle funzioni (19) per attivare la modalità radio. 2. Tenere premuto "SCAN". Inizia la ricerca sulla banda FM e tutte le emittenti trovate vengono salvate automaticamente (massimo 30 emittenti FM). 3.
  • Page 94 Informazioni per ottenere la migliore ricezione Il ricevitore ha un'antenna a cavo (26) integrata, che è appesa sul retro dell'alloggiamento. Questo cavo deve essere srotolato completamente per avere una ricezione ottimale. RIPRODUZIONE CD Primi passaggi 1. Premere il tasto delle funzioni per selezionare la modalità CD. 2.
  • Page 95: Repeat Track

    • Una volta selezionato l'album o il titolo desiderato, premere "BAND/  " (15) per avviare la riproduzione. Funzione ID3 (nome del titolo/dell'album) (sul telecomando) Premere "INFO" fino a quando compare "FILE - ..." sul display. Durante la riproduzione di file MP3 vengono mostrati in sequenza il titolo del brano, il nome dell'artista e il nome dell'album.
  • Page 96 CD MP3/File Ordine delle modalità: REPEAT 1 (ripetere un titolo) > REPEAT 1 FOLDER (ripetere una cartella) > REPEAT ALL TRACKS (ripetere tutti i titoli) > RANDOM (casuale) > OFF MODE (Ripetizione/Riproduzione casuale spenta) Modalità Indicazione del display REPEAT TRACK REPEAT SINGLE FOLDER REPEAT ALL RANDOM...
  • Page 97 REGISTRARE DA CD E VINILI Il dispositivo può convertire normali CD o dischi in file MP3 e registrarli e salvarli su supporti esterni collegati via USB. Prima di iniziare, inserire il supporto nella connessione USB e assicurarsi che ci sia spazio sufficiente per la registrazione.
  • Page 98 • La registrazione viene completamente portata a termine solo dopo la conversione dell'intero brano. Se si interrompe la procedura, il brano non viene né registrato né salvato sul supporto USB. Copiare file MP3 Se si inserisce un CD MP3 invece che un CD audio, il dispositivo copia i file sul supporto USB se si preme "...
  • Page 99 Conversione da AUX-IN Collegare un dispositivo esterno (ad es. un lettore CD portatile, un lettore MP3, un mangiacassette, un iPod o similari) al dispositivo con un cavo jack da 3,5 mm (non incluso in consegna). Collegare un'estremità all'ingresso AUX e l'altra all'uscita per le cuffie del dispositivo esterno. Quando i dispositivi sono collegati in questo modo, è...
  • Page 100 1. Mettere il dispositivo in modalità "PHON/AUX" (19) e restare in modalità STOP. 2. Premere "INFO" e sul display compare il bitrate predefinito (128 kbps). 3. Premere "Titolo successivo " o "Titolo precedente " (2) per impostare il bitrate desiderato. 4.
  • Page 101 RIPRODURRE VINILI Prima della riproduzione • Togliere la protezione della puntina. • Assicurasi che il braccio del pick-up sia sganciato dal supporto prima dell'uso e fissarlo sempre dopo l'utilizzo. Riprodurre vinili 1. Mettere l'interruttore delle funzioni (19) su "PHON/AUX". 2. Mettere l'interruttore di selezione della velocità sulla posizione corretta per riprodurre il vinile.
  • Page 102: Ulteriori Funzioni

    ULTERIORI FUNZIONI Funzione notturna 1. Premere "SLEEP " e sullo schermo compare l'indicatore Sleep " ". 2. Premere ripetutamente il tasto per impostare il timer di autospegnimento (90 > 75 > 60... 15 minuti). 3. A tempo scaduto, il dispositivo passa in standby. 4.
  • Page 103 Attivare/disattivare il timer • Per attivare il timer, premere "TIMER" una volta sul telecomando, fino a quando compare l'indicatore corrispondente " ". • Per disattivare la funzione timer, premere di nuovo "TIMER" e l'indicatore scompare. Equalizzatore predefinito Il dispositivo mette a disposizione diverse variazioni sonore per ottimizzare l'ascolto.
  • Page 104: Dichiarazione Di Conformità

    AVVISO DI SMALTIMENTO Se nel proprio paese si applicano le regolamentazioni inerenti lo smaltimento di dispositivi elettrici ed elettronici, questo simbolo sul prodotto o sulla confezione segnala che questi prodotti non possono essere smaltiti con i rifi uti normali e devono essere portati a un punto di raccolta di dispositivi elettrici ed elettronici.

Ce manuel est également adapté pour:

10004797

Table des Matières