Publicité

Les langues disponibles
  • FR

Les langues disponibles

Liens rapides

VARICOOK NEO
Induktionskochfeld
Induction Hob
Table de cuisson à induction
Placa de inducción
Piano cottura a induzione
10033036
www.klarstein.com

Publicité

Table des Matières
loading

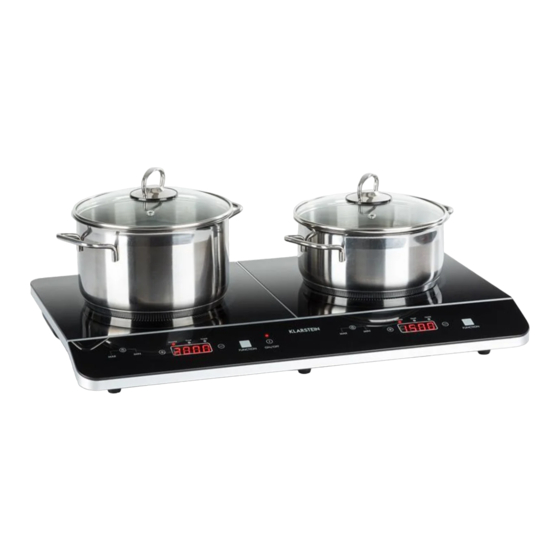
Sommaire des Matières pour Klarstein VARICOOK NEO

  • Page 1 VARICOOK NEO Induktionskochfeld Induction Hob Table de cuisson à induction Placa de inducción Piano cottura a induzione 10033036 www.klarstein.com...
  • Page 3: Table Des Matières

    Sehr geehrter Kunde, wir gratulieren Ihnen zum Erwerb Ihres Gerätes. Lesen Sie die folgenden Hinweise sorgfältig durch und befolgen Sie diese, um möglichen Schäden vorzubeugen. Für Schäden, die durch Missachtung der Hinweise und unsachgemäßen Gebrauch entstehen, übernehmen wir keine Haftung. Scannen Sie den folgenden QR-Code, um Zugriff auf die aktuellste Bedienungsanleitung und weitere Informationen rund um das Produkt zu erhalten:...
  • Page 4: Sicherheitshinweise

    SICHERHEITSHINWEISE Stromschlagrisiko • Ziehen Sie den Netzstecker des Geräts aus der Steckdose, bevor Wartungen oder Reparaturen am Gerät durchgeführt werden. • Die Verbindung zu einen geerdeten Stromanschluss ist erforderlich und vorgeschrieben. • Veränderungen am Stromanschluss dürfen nur von einem hierfür qualifi zierten Elektriker durchgeführt werden.
  • Page 5: Hinweise Zu Bedienung Und Wartung

    • Warnung: Schalten Sie das Gerät zur Reduzierung der Stromschlaggefahr sofort aus, wenn die Oberfl äche (Kochfeldoberfl äche aus Glaskeramik oder ähnlichem Material die stromführende Teile schützt) Risse aufweist. • Legen Sie keine Metallobjekte, wie beispielsweise Messer, Gabeln, Löffel und Topfdeckel auf das Kochfeld, da diese dort sehr heiß...
  • Page 6 VORSICHT Verbrennungsgefahr! Während der Verwendung werden die für den Nutzer zugänglichen Geräteteile so heiß, dass sie Verbrennungen verursachen können. Achten Sie darauf, dass ihr Körper, ihre Kleidung und andere Materialien als Kochutensilien die Kochplatte erst dann berühren dürfen, wenn diese vollständig abgekühlt ist. •...
  • Page 7 • Kinder oder Personen mit eingeschränkten geistigen Fähigkeiten sollten von einer für sie verantwortlichen Person bei der Verwendung des Geräts angeleitet werden um sicherzustellen, dass diese das Gerät verwenden können ohne sich selbst oder andere dadurch in Gefahr zu bringen. •...
  • Page 8: Bedienfelder Und Einstellungen

    BEDIENFELDER UND EINSTELLUNGEN Linke Platte 6 Leistungsstufen: • 500 W (unterbrochenes Heizen) • 800 W (unterbrochenes Heizen) • 1200 W • 1500 W • 1800 W • 2000 W Rechte Platte 6 Leistungsstufen: • 500 W (unterbrochenes Heizen) • 800 W (unterbrochenes Heizen) •...
  • Page 9: Bedienung

    BEDIENUNG Inbetriebnahme Stecken Sie den Stecker ein. Es ertönt ein Signalton und der Herd befindet sich im Standby-Modus. Einschalten • Drücken Sie nach dem Einstecken 2 Sekunden lang die Taste ON/OFF, um den Herd einzuschalten. • Drücken Sie die Taste FUNCTION, um ein oder beide Kochfelder auszuwählen. •...
  • Page 10 Funktionsauswahl Drücken Sie die Taste FUNCTION, um eine der folgenden Funktionen auszuwählen: Leistung > Temperatur > Timer > Power-Timer > Temp-Timer. Leistung einstellen (Power) Linke Seite (2000 W) Drücken Sie die Taste FUNCTION und wählen Sie LEISTUNG (Power). Das Display zeigt [1200] und das Gerät arbeitet mit 1200 W.
  • Page 11: Kochtipps

    KOCHTIPPS WARNUNG Brandgefahr! Lassen Sie beim Frittieren besondere Vorsicht walten, da Öl und Fett sich sehr schnell erhitzen. Bei sehr hohen Temperaturen können Öl und Fett sich spontan entzünden und sie stellen deshalb ein enormes Brandrisiko dar. Tipps für das Kochen •...
  • Page 12 Steak anbraten Zur Zubereitung saftiger, aromatischer Steaks: 1. Lassen Sie das Fleisch für ungefähr 20 Minuten bei Raumtemperatur ruhen. 2. Erhitzen Sie eine Pfanne. Reiben Sie beide Seiten des Steaks mit Öl ein. Träufeln Sie etwas von dem Öl in die heiße Pfanne und legen Sie anschließend das Steak hinein.
  • Page 13: Reinigung Und Pflege

    REINIGUNG UND PFLEGE Hinweis: Ziehen Sie vor der Reinigung immer den Stecker aus der Steckdose und lassen Sie das Gerät abkühlen. Wichtig! Tägliche Ver- 1 Schalten Sie die Kochplatte • Wenn die Kochplatte unreinigungen aus. ausgeschaltet ist erlischt auf dem Glas 2 Sprühen Sie einen die „Heiße Oberfläche“...
  • Page 14 Wichtig! Übergekochte, Entfernen Sie den Schmutz • Entfernen Sie die Flecken geschmolzene mit einem Teppichmesser, und Spritzer umgehend, oder heiße, einer Rasierklinge oder einem da sie sich schlechter zuckerhaltige Kratzer für Keramikkochplatten entfernen lassen, wenn Rückstände und aber passen Sie auf, dass Sie erstmal kalt geworden Spritzer auf dem Sie sich nicht an der heißen...
  • Page 15: Fehlerbehebung

    FEHLERBEHEBUNG Problem Mögliche Ursachen Mögliche Lösung Die Kochplatte Kein Strom. Versichern Sie sich, dass die lässt sich nicht Kochplatte ans Stromnetz einschalten. angeschlossen und eingeschaltet ist. Überprüfen Sie ob möglicherweise eine Sicherung umgelegt oder kaputt ist. Falls das Problem weiterhin besteht wenden Sie sich an einen qualifizierten Techniker.
  • Page 16 Problem Mögliche Ursachen Mögliche Lösung Das Gerät gibt Der in das Gerät Das ist normal und Bedarf Ventilatoren- eingebaute Ventilator hat keinem Handeln. Schalten Sie geräusche von sich eingeschaltet, um ein den Strom der Wandsteckdose sich. Überhitzen der Elektronik nicht ab, wenn der Ventilator zu verhindern.
  • Page 17: Hinweise Zur Entsorgung

    HINWEISE ZUR ENTSORGUNG Wenn es in Ihrem Land eine gesetzliche Regelung zur Entsorgung von elektrischen und elektronischen Geräten gibt, weist dieses Symbol auf dem Produkt oder auf der Verpackung darauf hin, dass dieses Produkt nicht im Hausmüll entsorgt werden darf. Stattdessen muss es zu einer Sammelstelle für das Recycling von elektrischen und elektronischen Geräten gebracht werden.
  • Page 19 Dear Customer, Congratulations on purchasing this equipment. Please read this manual carefully and take care of the following hints to avoid damages. Any failure caused by ignoring the items and cautions mentioned in the instruction manual is not covered by our warranty and any liability. Scan the QR code to get access to the latest user mannual and other information about the product CONTENT...
  • Page 20: Safety Instructions

    SAFETY INSTRUCTIONS Electrical Shock Hazard • Disconnect the appliance from the mains electricity supply before carrying out any work or maintenance on it. • Connection to a good earth wiring system is essential and mandatory. • Alterations to the domestic wiring system must only be made by a qualifi ed electrician.
  • Page 21: Instructions On Use And Maintenance

    • If the surface is cracked, switch off the appliance to avoid the possibility of electric shock, for hob surfaces of glass-ceramic or similar material which protect live parts • Metallic objects such as knives, forks, spoons and lids should not be placed on the hob surface since they can get hot.
  • Page 22 CAUTION Risk of burns! During use, accessible parts of this appliance will become hot enough to cause burns. Do not let your body, clothing or any item other than suitable cookware contact the Induction glass until the surface is cool. •...
  • Page 23 • Children or persons with a disability which limits their ability to use the appliance should have a responsible and competent person to instruct them in its use. The instructor should be satisfied that they can use the appliance without danger to themselves or their surroundings.
  • Page 24: Control Panels And Settings

    CONTROL PANELS AND SETTINGS Left plate 6 power settings: • 500 W (intermitted heating) • 800 W (intermitted heating) • 1200 W • 1500 W • 1800 W • 2000 W Right Plate 6 power settings: • 500 W (intermitted heating) •...
  • Page 25: Operation

    OPERATION Initial operation Plug in the plug. An acoustic signal sounds and the cooker is in standby mode. Power up • Press the ON/OFF button for 2 seconds after inserting the stove to switch it on. • Press the FUNCTION button to select one or both hobs. •...
  • Page 26 Function selection Press the FUNCTION button to select one of the following functions: Power > Temperature > Timer > Power-Timer > Temp-Timer. Adjusting power (Power) Left side (2000 W) Press the FUNCTION button and select POWER. The display shows [1200] and the unit operates at 1200 W.
  • Page 27: Cooking Guidelines

    COOKING GUIDELINES WARNING Take care when frying as the oil and fat heat up very quickly. At extremely high temperatures oil and fat will ignite spontaneously and this presents a serious fi re risk. Cooking Tips • When food comes to the boil, reduce the temperature setting. •...
  • Page 28 Searing steak To cook juicy flavorsome steaks: 1. Stand the meat at room temperature for about 20 minutes before cooking. 2. Heat up a heavy-based frying pan. 3. Brush both sides of the steak with oil. Drizzle a small amount of oil into the hot pan and then lower the meat onto the hot pan.
  • Page 29: Care And Cleaning

    CARE AND CLEANING Note: Before any maintenance or cleaning work is carried out, disconnect the appliance from electricity supply and ensure the appliances is completely cool. What? How? Important! Boilovers, melts, Remove these immediately with • Remove stains left by and hot sugary a fish slice, palette knife or melts and sugary food...
  • Page 30 What? How? Important! Boilovers, melts, Remove these immediately with • Remove stains left by and hot sugary a fish slice, palette knife or melts and sugary food spills on the razor blade scraper suitable for or spillovers as soon as glass ceramic glass cooktops, but possible.
  • Page 31: Troubleshooting

    TROUBLESHOOTING Problem Possible causes What to do The cooktop No power. Make sure the cooktop is cannot Be connected to the power supply turned on. and that it is switched on. Check whether there is a power outage in your home or area. If you’ve checked everything and the problem persists, call a qualified technician.
  • Page 32 Problem Possible causes What to do Fan noise com- A cooling fan built into your This is normal and needs no ing from induction hob has come on to action. Do not switch the power the induction prevent the electronics from to the induction hob off at the hob.
  • Page 33: Hints On Disposal

    HINTS ON DISPOSAL If there is a legal regulation for the disposal of electrical and electronic devices in your country, this symbol on the product or on the packaging indicates that this product must not be disposed of with household waste. Instead, it must be taken to a collection point for the recycling of electrical and electronic equipment.
  • Page 35 Chère cliente, cher client, Toutes nos félicitations pour l’acquisition de ce nouvel appareil. Veuillez lire attentivement et respecter les instructions de ce mode d’emploi afin d’éviter d’éventuels dommages. Nous ne saurions être tenus pour responsables des dommages dus au non-respect des consignes et à la mauvaise utilisation de l’appareil.
  • Page 36: Consignes De Sécurité

    CONSIGNES DE SÉCURITÉ Risque de choc électrique • Débranchez l‘appareil du secteur avant d‘en effectuer l‘entretien ou la réparation. • Le branchement sur une ligne électrique avec mise à la terre est nécessaire et obligatoire. • Les modifi cations apportées au système de câblage électrique ne doivent être effectuées que par un électricien qualifi é.
  • Page 37: Consignes D'utilisation Et De Maintenance

    • Mise en garde : Afi n de réduire le risque de choc électrique, éteignez immédiatement l‘appareil si la surface présente des fi ssures (surface en vitrocéramique ou matériau similaire protégeant les éléments conducteurs). • Ne placez pas d‘objets métalliques, tels que des couteaux, des fourchettes, des cuillères et des casseroles sur la table de cuisson, car ils pourraient devenir très chauds.
  • Page 38 ATTENTION Risque de brûlure ! Pendant l‘utilisation, les parties accessibles à l‘utilisateur deviennent chaudes au point qu‘elles peuvent causer des brûlures. Assurez-vous que votre corps, vos vêtements et tous objets autres que les ustensiles de cuisine ne touchent pas la plaque de cuisson tant qu‘elle ne s‘est pas complètement refroidie.
  • Page 39 • Les enfants ou les personnes ayant des capacités mentales limitées doivent être guidés par une personne responsable de leur sécurité avant d‘utiliser l‘appareil afin d‘assurer qu‘ils peuvent utiliser l‘appareil sans danger pour eux-mêmes ni autrui. • Ne réparez ou ne remplacez aucune pièce de l‘appareil, à moins que cela ne soit explicitement recommandé...
  • Page 40: Panneaux De Commande Et Réglages

    PANNEAUX DE COMMANDE ET RÉGLAGES Plaque de gauche • 6 niveaux de puissance : • 500 W (chauffage par intermittence) • 800 W (chauffage par intermittence) • 1200 W • 1500 W • 1800 W • 2000 W Plaque de droite 6 niveaux de puissance : •...
  • Page 41: Utilisation

    UTILISATION Mise en marche Branchez la fiche. Un bip retentit et la table de cuisson est en mode veille. Pour allumer l‘appareil • Après avoir branché l‘appareil, appuyez sur la touche ON/OFF pendant 2 secondes pour allumer la table de cuisson. •...
  • Page 42 Sélection de fonction Appuyez sur la touche FUNCTION pour sélectionner l‘une des fonctions suivantes : Puissance > Température > Minuterie > Minuterie d‘arrêt > Minuterie de température. Réglage de la puissance (Power) Côté gauche (2000 W) Appuyez sur la touche FUNCTION et choisissez PUISSANCE (Power). L‘écran affiche [1200] et l‘appareil fonctionne à...
  • Page 43: Conseils De Cuisson

    CONSEILS DE CUISSON MISE EN GARDE Risque d‘incendie ! Faites très attention lorsque vous faires de la friture car l‘huile et la graisse chauffent très rapidement. À très haute température, l‘huile et la graisse peuvent s‘enfl ammer spontanément et représentent donc un risque d‘incendie important. Conseils de cuisson •...
  • Page 44 Pour saisir un steak Pour préparer des steaks juteux et pleins de saveur : 1. Faites reposer la viande pendant environ 20 minutes à température ambiante. 2. Faites chauffer une casserole. 3. Frottez les deux côtés du steak avec de l‘huile. Mettez un peu d‘huile dans la poêle chaude et mettez-y le steak.
  • Page 45: Nettoyage Et Entretien

    NETTOYAGE ET ENTRETIEN Remarque : Débranchez toujours l‘appareil avant de le nettoyer et laissez l‘appareil refroidir. Quoi Comment Important ! Taches de 1 Éteignez la table de cuisson. • Lorsque la plaque tous les jours 2 Vaporisez un nettoyeur de chauffante est éteinte, sur le verre table de cuisson pendant...
  • Page 46 Quoi Comment Important ! Restes sucrés Retirez les restes avec un • Enlevez les taches trop cuits, couteau, une lame de rasoir ou et les éclaboussures fondus ou un grattoir en céramique, mais immédiatement, car ils ne chauds, et faites attention de ne pas vous seront pas plus faciles à...
  • Page 47: Résolution Des Problèmes

    RÉSOLUTION DES PROBLÈMES Problème Causes possibles Solution possible Impossible Pas de courant. Vérifiez que la table de cuisson d'allumer est bien branchée et allumée. la table de Vérifiez si un fusible a sauté cuisson. ou est endommagé. Si le problème persiste, contactez un technicien qualifié.
  • Page 48 Problème Causes possibles Solution possible L'appareil fait Le ventilateur intégré s'est Ceci est normal et ne nécessite un bruit de allumé pour éviter la surchauffe aucune action. Ne coupez ventilateur. de l'électronique. Il se peut pas l'alimentation de la prise que le ventilateur continue murale tant que le ventilateur à...
  • Page 49: Informations Sur Le Recyclage

    INFORMATIONS SUR LE RECYCLAGE S‘il existe une réglementation pour l‘élimination ou le recyclage des appareils électriques et électroniques dans votre pays, ce symbole sur le produit ou sur l‘emballage indique que cet appareil ne doit pas être jeté avec les ordures ménagères.
  • Page 51 Estimado cliente, Le felicitamos por la adquisición de este producto. Lea atentamente el siguiente manual y siga cuidadosamente las instrucciones de uso con el fin de evitar daños posibles. La empresa no se responsabiliza de los daños ocasionados por un uso indebido del producto o por haber desatendido las indicaciones de seguridad.
  • Page 52: Indicaciones De Seguridad

    INDICACIONES DE SEGURIDAD Riesgo de descarga eléctrica • Desenchufe el aparato de la toma de corriente antes de darle servicio o repararlo. • Se requiere y prescribe la conexión a una toma de corriente conectada a tierra. • Sólo un electricista cualifi cado puede realizar modifi caciones en la conexión eléctrica.
  • Page 53 • Advertencia: Para reducir el riesgo de descarga eléctrica, apague el aparato inmediatamente si la superfi cie (superfi cie de la placa vitro-cerámica o material similar que protege las partes activas) está agrietada. • No coloque objetos metálicos, como cuchillos, tenedores, cucharas o tapas de ollas, sobre la placa, ya que podrían calentarse mucho.
  • Page 54 PRECAUCIÓN Peligro de quemaduras! Durante el uso, los componentes del aparato accesibles para el usuario se calientan tanto que pueden provocar quemaduras. Asegúrese de que su cuerpo, ropa y materiales que no sean utensilios de cocina no toquen la placa de cocción hasta que se haya enfriado completamente.
  • Page 55 • Los niños o las personas con capacidades mentales reducidas deben ser supervisados por una persona responsable de ellos en el uso del producto para asegurarse de que pueden usar el dispositivo sin poner ellos mismos o a otros en riesgo.
  • Page 56: Paneles De Control Y Ajustes

    PANELES DE CONTROL Y AJUSTES Placa de cocción izquierda 6 niveles de potencia: • 500 W (calentamiento interrumpido) • 800 W(calentamiento interrumpido) • 1200 W • 1500 W • 1800 W • 2000 W Placa de cocción derecha 6 niveles de potencia: •...
  • Page 57: Utilización

    UTILIZACIÓN Puesta en funcionamiento Inserte el enchufe. Suena un pitido y la placa está en modo de espera. Encender • Después de insertar el enchufe, pulse y mantenga pulsado el botón ON/OFF por 2 segundos para encender el aparato. • Pulse el botón FUNCTION para seleccionar una o ambas placas de cocción. •...
  • Page 58 Selección de funciones Pulse el botón FUNCTION para seleccionar una de las siguientes funciones: Potencia > Temperatura > Temporizador > Power-Temporizador> Temp.-Temporizador Ajuste de la potencia (Power) Lado izquierdo (2000 W) Pulse el botón FUNCTION y seleccione POWER. La pantalla muestra «1200» y la unidad funciona a 1200 W.
  • Page 59: Consejos De Preparación

    CONSEJOS DE PREPARACIÓN ADVERTENCIA ¡Peligro de incendio! Tenga especial cuidado al freír, ya que el aceite y la grasa se calientan muy rápido. A temperaturas muy altas, el aceite y la grasa pueden infl amarse de manera espontánea, por lo que presentan un enorme riesgo de incendio.
  • Page 60 Freír Bistec Para la preparación de jugosos y aromáticos bistecs: Deje reposar la carne a temperatura ambiente durante unos 20 minutos. Caliente una sartén. Frote ambos lados del bistec con aceite. Vierta un poco de aceite en la sartén caliente y luego coloque el bistec en ella. Dé...
  • Page 61: Limpieza Y Cuidado

    LIMPIEZA Y CUIDADO Nota: Desenchufe siempre el aparato de la toma de corriente antes de limpiarlo y deje que se enfríe. Qué Como ¡Importante! Contaminación 1 Apague la placa de • Cuando la plancha está diaria del cocción. apagada, el indicador vidrio (huellas 2 Rocíe un limpiador de «Superficie caliente»...
  • Page 62 Qué Como ¡Importante! Residuos y Retire la suciedad con un • Elimine las manchas salpicaduras cuchillo para alfombras, y salpicaduras de azúcares una cuchilla de afeitar o un inmediatamente, ya hervidos, raspador para placas de que son más difíciles de fundidos o cocción de cerámica, pero eliminar una vez que se...
  • Page 63: Detección Y Reparación De Anomalías

    DETECCIÓN Y REPARACIÓN DE ANOMALÍAS Problema Causas posibles Soluciones posibles La placa de No hay energía. Asegúrese de que el enchufe cocción no se de alimentación del aparato puede conectar. esté conectado a la toma de corriente y de que ésta funcione.
  • Page 64 Problema Causas posibles Soluciones posibles El aparato El ventilador incorporado en la Esto es normal y no necesita emite ruido de unidad se ha encendido para ninguna acción. No ventilador. evitar el sobrecalentamiento de desconecte la alimentación de las partes electrónicas. Puede la toma de corriente mientras ocurrir que el ventilador siga el ventilador del aparato esté...
  • Page 65: Retirada Del Aparato

    RETIRADA DEL APARATO Si en su país existe una disposición legal relativa a la eliminación de aparatos eléctricos y electrónicos, este símbolo estampado en el producto o en el embalaje advierte que no debe eliminarse como residuo doméstico. En lugar de ello, debe depositarse en un punto de recogida de reciclaje de aparatos eléctricos y electrónicos.
  • Page 67 Gentile Cliente, La ringraziamo per aver acquistato il dispositivo. La preghiamo di leggere attentamente le seguenti istruzioni per l’uso e di seguirle per evitare possibili danni tecnici. Non ci assumiamo alcuna responsabilità per danni scaturiti da una mancata osservazione delle avvertenze di sicurezza e da un uso improprio del dispositivo.
  • Page 68: Avvertenze Di Sicurezza

    AVVERTENZE DI SICUREZZA Rischio di scosse elettriche • Staccare la spina dalla presa di corrente prima di realizzare manutenzione o riparazioni sul dispositivo. • Il collegamento a un sistema con messa a terra è necessario e obbligatorio. • Modifi che alla canalizzazione elettrica devono essere realizzate da un elettricista qualifi cato.
  • Page 69: Avvertenze Su Utilizzo E Manutenzione

    • Attenzione: se la superfi cie presenta delle crepe (superfi cie di cottura in vetroceramica o materiale simile che protegge componenti che trasportano corrente), spegnere immediatamente il dispositivo per ridurre il rischio di folgorazioni. • Non poggiare oggetti metallici, come coltelli, forchette, cucchiai o coperchi delle pentole sul piano cottura, in quanto potrebbero diventare estremamente caldi.
  • Page 70 ATTENZIONE Pericolo di ustione! Durante l’utilizzo, alcuni componenti accessibili all’utente diventano così caldi da poter causare ustioni. Assicurarsi che parti del corpo, abiti o altri materiali che non sono utensili da cucina entrino in contatto con il piano cottura solo dopo il completo raffreddamento.
  • Page 71 • I bambini e le persone con limitate capacità fisiche e psichiche che utilizzano il dispositivo devono essere stati precedentemente istruiti in modo esaustivo sull’utilizzo, per assicurarsi che non rappresentino un pericolo per loro stessi o altri. • Non riparare o sostituire componenti del dispositivo, a meno che non sia esplicitamente suggerito nel manuale d’uso.
  • Page 72: Pannello Di Controllo E Impostazioni

    PANNELLO DI CONTROLLO E IMPOSTAZIONI Piastra sinistra 6 livelli di potenza: • 500 W (riscaldamento ininterrotto) • 800 W (riscaldamento ininterrotto) • 1200 W • 1500 W • 1800 W • 2000 W Piastra destra 6 livelli di potenza: • 500 W (riscaldamento ininterrotto) •...
  • Page 73: Utilizzo

    UTILIZZO Messa in funzione Collegare la spina. Viene emesso un segnale acustico e il piano cottura si trova in modalità standby. Accensione • Dopo aver collegato la spina, premere ON/OFF per 2 secondi per accendere il piano cottura. • Premere FUNCTION per selezionare un fornello o entrambi i fornelli. •...
  • Page 74 Selezionare una funzione Premere FUNCTION per selezionare una delle seguenti funzioni: Potenza > Temperatura > Timer > Timer-Potenza > Timer-Temperatura Impostare la potenza (Power) Lato sinistro (2000 W) Premere FUNCTION e selezionare POTENZA (Power). Il display mostra (1200) e il dispositivo lavora con 1200 W.
  • Page 75: Consigli Per Cucinare

    CONSIGLI PER CUCINARE AVVERTENZA Pericolo d’incendio! Prestare particolare attenzione quando si frigge, dato che olio e grassi si scaldano molto rapidamente. A temperature molto elevate, olio e grassi possono prendere fuoco spontaneamente e rappresentano un serio rischio d’incendio. Consigli per cucinare •...
  • Page 76 Cucinare una bistecca Per preparare bistecche succose e ricche di aroma: Lasciar riposare la bistecca a temperatura ambiente per 20 minuti. Scaldare una padella. Spalmare dell’olio su entrambi i lati della bistecca. Versare un po’ d’olio nella padella e metterci la bistecca. Quando si cucina una bistecca, girarla una sola volta.
  • Page 77: Pulizia E Manutenzione

    PULIZIA E MANUTENZIONE Nota: staccare sempre la spina e far raffreddare il dispositivo prima di procedere alla pulizia. Cosa Come Importante! Sporco 1 Spegnere il fornello. • Quando il fornello quotidiano sul 2 Spruzzare un detergente viene spento, scompare vetro (impronte per piani cottura a fornello l’indicazione “Superficie delle dita,...
  • Page 78 Cosa Come Importante! Residui bruciati, Rimuovere i resti con un • Rimuovere macchie e sciolti, bollenti taglierino, un rasoio o un spruzzi immediatamente, contenenti raschietto per piani cottura dato che una volta zucchero o in vetroceramica, facendo raffreddati sono molto spruzzi sul vetro.
  • Page 79: Ricerca E Correzione Degli Errori

    RICERCA E CORREZIONE DEGLI ERRORI Problema Possibile causa Possibile soluzione Il piano cottura Non c’è corrente. Assicurarsi che il piano cottura non si accende. sia collegato alla rete elettrica e sia acceso. Controllare se è scattato un fusibile o se è guasto. Se il problema persiste, contattare un tecnico qualificato.
  • Page 80 Problema Possibile causa Possibile soluzione Il dispositivo La ventola integrata nel Questo è normale e non è emette il rumore di dispositivo si è accesa per necessario intervenire. Non una ventola. evitare il surriscaldamento staccare la spina del dispositivo dei componenti elettronici. se la ventola è...
  • Page 81: Smaltimento

    SMALTIMENTO Se nel proprio paese si applicano le regolamentazioni inerenti lo smaltimento di dispositivi elettrici ed elettronici, questo simbolo sul prodotto o sulla confezione segnala che questi prodotti non possono essere smaltiti con i rifiuti normali e devono essere portati a un punto di raccolta di dispositivi elettrici ed elettronici.

Ce manuel est également adapté pour:

10033036

Table des Matières