Table des Matières

Publicité

Les langues disponibles
  • FR

Les langues disponibles

  • FRANÇAIS, page 19

Liens rapides

BEURER GmbH Söflinger Str. 218 89077 Ulm (Germany)
Tel.: +49 (0) 731 / 39 89-144 Fax: +49 (0) 731 / 39 89-255
www.beurer.de Mail: kd@beurer.de
BM 19
Gebrauchsanleitung
Sprechendes Oberarm-Blutdruckmessgerät ...........(2 – 10)
Instruction for Use
Speaking upper arm blood pressure monitor ........ (11 – 18)
Mode d'emploi
Tensiomètre parlant pour bras ................................ (19 – 27)
Instrucciones para el uso
Tensiómetro para brazo con voz ............................. (28 – 36)
Instruzioni per l'uso
Sfigmomanometro parlante da braccio .................. (37 – 45)
Kullanma Talimatı
Konușan üst koldantansiyon ölçüm cihazı ............. (46 – 53)
RUS
Instrukcja obsługi
Mówiący ciśnieniomierz na ramię ........................... (64 – 72)
.. (54 – 63)
0344

Publicité

Table des Matières
loading

Sommaire des Matières pour Beurer Bm 19

  • Page 1 .. (54 – 63) Instrukcja obsługi Mówiący ciśnieniomierz na ramię ......(64 – 72) BEURER GmbH Söflinger Str. 218 89077 Ulm (Germany) Tel.: +49 (0) 731 / 39 89-144 Fax: +49 (0) 731 / 39 89-255 www.beurer.de Mail: kd@beurer.de 0344...
  • Page 2: Kennenlernen

    Die von Ihnen selbst ermittelten Messwerte können nur zu Mit freundlicher Empfehlung Ihrer Information dienen – sie ersetzen keine ärztliche Unter- Ihr Beurer-Team suchung! Besprechen Sie Ihre Messwerte mit dem Arzt, begründen Sie daraus auf keinen Fall eigene medizinische Entscheidungen (z.B. Medikamente und deren Dosierungen)! 1.
  • Page 3 Drücken Sie nicht auf Tasten, solange die Manschette nicht währleistet. angelegt ist. Reparaturen dürfen nur vom Beurer Kundenservice oder Falls das Gerät über einen längeren Zeitraum nicht benutzt autori sierten Händlern durchgeführt werden. Prüfen Sie wird, wird empfohlen die Batterien zu entfernen.
  • Page 4: Gerätebeschreibung

    3. Gerätebeschreibung 8. Uhrzeit und Datum 9. Nummer des Speicherplatzes 10. Symbol Puls 11. Ermittelter Pulswert 12. WHO - Einstufung 1. Manschettenschlauch 2. Manschette 3. Manschettenstecker 4. Anschluss für Manschettenstecker (linke Seite) 5. Speichertaste M 6. Ein/Aus-Taste 4. Messung vorbereiten 7.
  • Page 5: Blutdruck Messen

    Danach können Sie die Lautstärke der ausgewählten Wenn die Batteriewechselanzeige dauerhaft erscheint, Sprache einstellen: Vol 3 = laut, Vol 2 = mittel, Vol 1 = leise. ist keine Messung mehr möglich und Sie müssen alle Batterien Bestätigen Sie Ihre Wahl wieder mit der Memory Taste (M). erneuen.
  • Page 6 Legen Sie nun das freie Ende der Speicher wählen Man schette eng, aber nicht zu Schalten Sie das Gerät mit der Taste ein. Im ausgeschal- stramm um den Arm und schließen teten Zustand wird nur die Uhr im Display angezeigt. Nach der Sie den Klettverschluss.
  • Page 7 Kapitel Fehlermeldung/Fehlerbehebung in dieser Gebrauchs- mittel im Übermaß, Stress oder Mangel an Schlaf herrühren. anleitung und wiederholen Sie die Messung. Arrhythmie kann nur durch eine Untersuchung bei Ihrem Arzt Das Gerät schaltet nach 1 Minute automatisch ab. festgestellt werden. Wiederholen Sie die Messung, wenn das Symbol nach der Warten Sie vor einer erneuten Messung mindestens 5 Minuten! Messung auf dem Display angezeigt wird.
  • Page 8: Messwerte Speichern, Abrufen Und Löschen

    Möchten Sie den Benutzerspeicher ändern, beachten Sie diese. Kapitel „Speicher wählen“. 9. Technische Angaben 7. Gerät reinigen und aufbewahren Modell-Nr. BM 19 Reinigen Sie Gerät und Manschette vorsichtig nur mit einem Messmethode Oszillometrisch, nicht invasive Blut- leicht angefeuchteten Tuch. druckmessung am Oberarm Verwenden Sie keine Reinigungs- oder Lösungsmittel.
  • Page 9 8 mmHg /diastolisch 8 mmHg Eingang 100-240V, 50-60Hz Speicher 2 x 60 abspeicherbare Datenzeilen Ausgang 6V DC, 1150mA, nur in Verbindung mit Beurer Abmessungen L 147 mm x B 104 mm x H 66 mm Blutdruckmessgeräten Gewicht Ungefähr 310 g Hersteller Friwo Gerätebau GmbH...
  • Page 10: Garantie

    Garantiezeit ist durch den Kunden der Nachweis des Kaufes zu führen. Die Garantie ist innerhalb eines Zeitraumes von 3 Jahren ab Kaufdatum gegenüber der Beurer GmbH, Söflinger Straße 218, 89077 Ulm, Germany geltend zu machen. Der Kunde hat im Garantiefall das Recht zur Reparatur der Ware bei unseren eigenen oder bei von uns autorisierten Werkstätten.
  • Page 11: Getting To Know Your Instrument

    Best regards, culatory disorders, dysrhythmia and other preexisting diseases. Your Beurer Team Only use the instrument on persons whose upper arm has the 1. Getting to know your instrument right circumference for the instrument.
  • Page 12: Unit Description

    We can no longer guarantee perfect functioning if you do. away from any radio systems and mobile phones. Repairs may only be performed by Beurer Customer Service – Only ever use the cuffs provided with the monitor or origi- or authorized dealers. However, always check the batteries nal replacement cuffs.
  • Page 13: Prepare Measurement

    4. Prepare measurement Icons in the display: 1. “Change battery” icon Inserting battery 4xAA(LR6) 1,5 V 2. Error icon Remove the battery cover from 3. Systolic pressure the back of the monitor. 4. Cardiac arrhythmia icon Insert four AA 1.5 V alkaline 5.
  • Page 14: Measuring Blood Pressure

    5. Measuring blood pressure The time is shown in 24 hour format. The device also has five languages. The device is set to German on delivery. Proceed Positioning cuff as follows to set the date, time and language: Fit the cuff round your bare left up- Press the memory key (M) for over 5 seconds.
  • Page 15 Correct posture ment begins. During inflation the device already determines measured values used to estimate the required inflation pressure. If this pressure is insufficient, the device automati- cally inflates by another 40 mmHg (Real Fuzzy Logic). Then the pressure in the cuff is slowly released and the pulse is measured.
  • Page 16: Saving, Retrieving And Deleting Results

    of stimulants, stress or lack of sleep. Arrhythmia can only be on the test results may be dangerous. It is vital to follow your ascertained through examination by your doctor. doctor‘s instructions. Repeat the measurement if the flashing icon is displayed WHO classification: after the measurement.
  • Page 17: Error Messages / Troubleshooting

    9. Specifications Accessories With storage pouch, instruction Model No. BM 19 manu al, 4 pcs “AA” battery Method of Measurement Oscillometric, non-invasive blood Classification Application part Type BF pressure measurement on the upper Protection class...
  • Page 18 (non-invasive blood pressure monitors, Part 3: Supplemen- Output 6V DC, 1150mA, only in connection with tary Requirements for Electromechanical Blood Pressure beurer blood pressure monitor Measure ment Systems). Supplier Friwo Gerätebau GmbH If you are using the instrument for commercial or economic...
  • Page 19: Premières Expériences

    (par exemple auto-médication)! Avec nos sentiments dévoués En cas de circulation sanguine limitée sur un bras du fait de Beurer et son équipe maladies circulatoires chroniques ou aiguës (entre autres des vasoconstrictions), la précision de la mesure au poignet 1.
  • Page 20 Au cas où vous ne vous servez pas de l’appareil pendant Les réparations doivent être effectuées uniquement par le une longue période, nous vous recommandons de retirer les service après-vente de Beurer ou des revendeurs agréés. piles. Cependant avant de faire une réclamation, contrôlez d‘abord les piles et changez-les, le cas échéant.
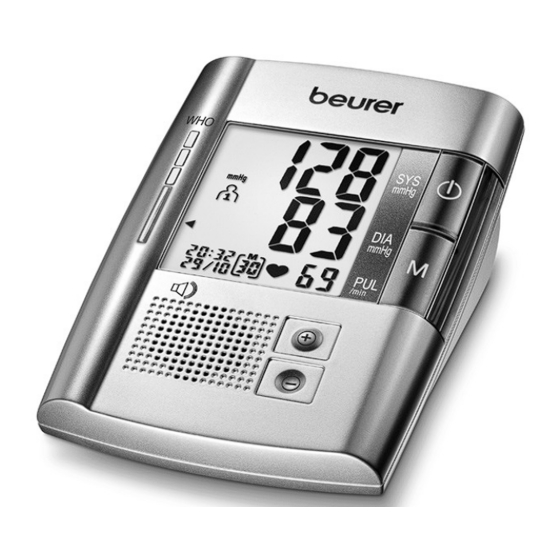
  • Page 21: Description De L'appareil

    3. Description de l‘appareil 8. Heure et date 9. Numéro d’enregistrement 10. Symbole pouls 11. Pouls obtenu 12. Classe OMS 1. Flexible du brassard 2. Brassard 3. Fiche du brassard 4. Prise pour fiche du brassard (côté gauche) 5. Touche mémoire M 6.
  • Page 22: Mesure De La Tension Artérielle

    Les touches + et - du volume permettent de choisir parmi les Quand l'icône du témoin de changement de piles reste langues suivantes : L1 = allemand, L2 = anglais, L3 = français, allumé, il n'est plus possible d'effectuer une mesure ; toutes L4 = espagnol, L5 = russe, L0 = fonction vocale désactivée.
  • Page 23 Placez le brassard de telle sorte que il est important de rester tranquille durant la mesure et de ne son bord inférieur se situe 2 à 3 cm pas parler. au-dessus du coude et au-dessus de Pour ne pas fausser le résultat de la mesure, il est important l’artère.
  • Page 24 Pendant l’annonce, vous pouvez régler le volume avec les bioélectrique commandant les battements du cœur, le rythme touches + et -. cardiaque est anormal. Les symptômes (battements du cœur Pour interrompre la mesure à tout moment, appuyez sur le anarchiques ou précoces, pouls lent ou trop rapide) peuvent bouton entre autres être dus à...
  • Page 25: Enregistrement, Appel Et Suppression Des Valeurs Mesurées

    Si la valeur de systole et de diastole figure dans deux plages Ne tenir en aucun cas l'appareil sous l'eau, car du liquide OMS différentes (par exemple systole dans la plage Elevée à rentrerait dans l'appareil et l'endommagerait. normale et diastole dans la plage Normale), la répartition gra- Quand vous conservez l'appareil, ne posez pas d'objets phique de l’OMS sur l’appareil vous montre toujours la plage lourds sur celui-ci.
  • Page 26: Fiche Technique

    9. Fiche technique Durée de service des piles Pour 250 mesures environ, selon la tension arérielle, à savoir la pression N° de modèle BM 19 de gonflage Méthode de mesure Mesure de la pression artérielle Accessoires Avec étui de protection, mode oscillométrique, invasive au bras...
  • Page 27 Assurez-vous que les piles ont bien été Si l’appareil est utilisé à des fins professionnelles ou com- retirées du boîtier avant d’utiliser merciales, conformément à « l’ordonnance sur les produits l’adaptateur. médicaux », des contrôles techniques réguliers doivent être effectués. Y compris en cas d’utilisation privée, nous vous Isolé...
  • Page 28: Conocer El Aparato

    Vd. propias decisiones médicas basadas en los valores Les saluda cordialmente medidos (por ejemplo, medicamentos a tomar y sus dosifi- Su equipo Beurer caciones); consulte previamente a su médico respecto a los valores medidos. 1. Conocer el aparato Es posible que los valores medidos sean erróneos en casos...
  • Page 29 De lo contrario los valores medidos serán Las reparaciones deben ser llevadas a cabo exclusivamente erróneos. por el servicio postventa de Beurer o bien por sus agentes No presionar los botones mientras el brazalete no esté colo- autorizados. Antes de gestionar cualquier reclamación, con- cado.
  • Page 30: Descripción Del Aparato

    3. Descripción del aparato 8. Hora y fecha 9. Número del lugar de memorización 10. Símbolo de pulso 11. Valor determinado del pulso 12. Clasificación WHO 1. Manguera de brazalete 2. Brazalete 3. Enchufe de brazalete 4. Conexión para el enchufe de brazalete (lado izquierdo) 5.
  • Page 31: Medir La Presión Sanguínea

    Cerrar cuidadosamente el compartimiento de las pilas con la Con las teclas de volumen + y - puede seleccionar los si- tapa. guientes idiomas: L1 = alemán, L2 = inglés, L3 = francés, L4 = español, L5 = ruso, L0 = idioma off. Confirme su selec- Cuando el de cambio de pilas permanece encendido ción con el botón de memorización (M).
  • Page 32 El manguito se debe colocar de a la altura del corazón. Para evitar resultados erróneos, man- tal manera, que el margen inferior tenga el brazo quieto durante la medición y procure no hablar. quede a unos 2 ó 3 centímetros más Para evitar obtener resultados de medición erróneos, es im- arriba de la flexura del codo y de la portante mantenerse tranquilo y no hablar durante la medición.
  • Page 33 Durante el aviso el volumen puede modificarse con + y -. corazón. Los síntomas (latidos suprimidos o prematuros del Vd. puede interrumpir en cualquier momento la medición con corazón, pulso lento o demasiado rápido) pueden deberse, el botón entre otros, a cardiopatías, edad, predisposición corporal, con- El símbolo aparece cuando la medición no pudo sumo excesivo de estimulantes, estrés o sueño insuficiente.
  • Page 34: Almacenar, Activar Y Borrar Valores De Medición

    (M) y después de la selección del usuario. 9. Especificaciones técnicas Si desea modificar la memoria de usuario, consulte el capítulo Modelo No. BM 19 Seleccionar memoria. Método de medición Medición oscilométrica, no invasiva, de 7. Limpiar y guardar el aparato la presión presión sanguínea en el brazo...
  • Page 35 Longitud 147 mm; Anchura 104 mm; Salida 6V DC, 1150 mA solamente en combinaci- aparato Altura 66 mm ón con los tensiómetros Beurer Peso Aproximadamente 310 g Fabricante Friwo Gerätebau GmbH Tamaño del brazalete: brazalete para diámetros de brazo de Protección...
  • Page 36 Carcasa y La carcasa del adaptador actúa como cubierta protección frente a las partes sometidas, o protectora que pueden verse sometidas, a la corriente (dedo, agujas, gancho de seguridad). El usuario no debe tocar de inmediato ni el paciente ni la clavija de salida del adapta- dor de CA.
  • Page 37: Avvertenze Importanti

    Mantenere un intervallo di circa 5 minuti fra due misurazioni! Cordiali saluti I valori misurati dall’utente possono servire solo a titolo Il Suo team Beurer informativo – essi non sostituiscono le visite mediche! Analiz- zare i valori misurati con il proprio medico e non prendere in nessun caso decisioni mediche (ad es.
  • Page 38 Le riparazioni devono essere eseguite esclusivamente dal Non premere pulsanti finché il bracciale non è ben allacciato servizio assistenza di Beurer o da ri-venditori autorizzati. al polso. Prima di ogni reclamo verificare in primo luogo lo stato delle Si consiglia di rimuovere le batterie quando l’apparecchio batterie e sosti-tuirle, se necessario.
  • Page 39: Descrizione Dell'apparecchio

    3. Descrizione dell’apparecchio 7. Pressione diastolica 8. Ora esatta e data 9. Numero della locazione memoria 10. Simbolo del polso 11. Valore del battito cardiaco rilevato 12. Classificazione dell’OMS 1. Tubo flessibile del bracciale 2. Bracciale 3. Spina del bracciale 4.
  • Page 40: Misurazione Della Pressione Sanguigna

    Ora si può impostare il volume della lingua selezionata: Quando appare l’indicazione di cambio batterie , non è Vol 3 = alto, Vol 2 = medio, Vol 1 = basso. Confermare la più possibile eseguire misurazioni ed è necessario sostituire scelta premendo nuovamente il pulsante Memory.
  • Page 41 teria. Il flessibile dovrà essere rivolto per non influenzarne il risultato, è importante rimanere tran- verso il centro del palmo della mano. quilli e non parlare. Applicare quindi l’estremità libera Per non falsare il risultato della misurazione, è importante del bracciale intorno al braccio, in mantenere un atteggiamento calmo e non parlare durante la maniera ben aderente ma non troppo misurazione.
  • Page 42 Durante l’annuncio è possibile variare il volume con +/-. frequenza lenta o accelerata dei battiti) possono essere causati È possibile interrompere la misurazione in qualunque tra l’altro da malattie cardiache, età, predisposizione genetica, momento premendo il pulsante ingerimento spropositato di dolciumi, stress o sonno insuffi- L’indicazione appare quando la misurazione non è...
  • Page 43: Salvataggio, Richiamo E Cancellazione Dei Valori Misurati

    7. Pulizia e custodia dell’apparecchio La grafica a barre sul display e la scala sull’apparecchio indi- cano il campo in cui si trova la pressione sanguigna misurata. Pulire l’apparecchio con cautela utilizzando solo un panno Inoltre, viene effettuata una valutazione vocale della misurazione leggermente inumidito.
  • Page 44: Dati Tecnici

    9. Dati tecnici Accessori borsa di custodia, libretto di istruzioni per l’uso, 4 batterie “AA” LR6 Modello N° BM 19 Classificazione parte applicativa tipo BF Metodo di misurazione misurazione oscillante e non invasiva Classe di protezione: alimentazione interna, IPXO, nessuna...
  • Page 45 Involucro e L’involucro dell’adattatore protegge dal coperture protettive contatto con parti che potrebbero essere messe sotto tensione (dita, aghi, ganci di controllo). L’utente non deve toccare contempora- neamente il paziente e il connettore di uscita dell’adattatore AC. Questo apparecchio è conforme alla norma europea EN60601-1-2 ed è...
  • Page 46: Önemli Bilgiler

    Ölçüm değerle- Dostane tavsiyelerimizle rinizi doktorunuzla gözden geçiriniz, bu değerlere istinaden Beurer Müessesesi kesinlikle herhangi bir tıbbi karara varmayınız (örn. ilaçlar ve ilaçların dozu)! 1. Tanıtım Kalp ve kan dolașım sistemi rahatsızsa, hatalı ölçüm söz konusu olabilir;...
  • Page 47 Eğer cihaz uzun bir süre kullanmayacaksa, pillerin çıkarılması çalıșması garanti edilemez. tavsiye edilir. Onarımlar sadece Beurer yetkili servisi veya yetkili satıcılar tarafından yapılmalıdır. Fakat her reklamasyondan önce, yine Piller ile ilgili bilgiler de ilk olarak pilleri kontrol ediniz ve gerekirse bunları değiști- Pillerin yutulması...
  • Page 48: Cihazın Tarifi

    3. Cihazın tarifi 8. Saat ve tarih 9. Bellek yeri numarası 10. Nabız sembolü 11. Tespit edilen nabız değeri 12. WHO sınıflandırması 1. Manset hortumu 2. Manset 3. Manset fisi 4. Manset fisi için baglanti (sol taraf) 5. Belleğe kayıt tușu M 6.
  • Page 49: Tansiyonun Ölçülmesi

    mesi gerekir. Piller aletten çıkarıldığı anda, saat ayar yeniden Bilgi: Lisan kapalı (L0) demek, sesli çıkıș veya bildiri yoktur ve yapılmalıdır. Belleğe kaydedilmiș ölçüm sonuçları kaybolur. böylelikle de herhangi bir akustik bildiri yapılmaz demektir. Kullanılmıș piller ev çöpleriyle atılmamalıdır. Eski pilleri ilgili Elektrikle Çalıștırma elektronik cihaz satıcınız veya yerel toplama merkezleri üze- Bu aleti, elektrikle de çalıștırabilirsiniz.
  • Page 50 daha iki parmak sığacak biçimde kolu Tansiyon ölçme ișleminin uygulanması sarmalıdır. Manșeti, yukarıda açıklandığı gibi takınız ve ölçümü yapmak Manșetin hortumunu, manșetteki istediğiniz pozisyona geçiniz. yerine takınız. Tansiyon ölçme ișlemini tușuna basarak bașlatınız. Ekranda tüm sayılar yanarak yapılan ekran kontrolünden sonra, manșete hava pompalanır ve manșet otomatik olarak Dikkat: Cihaz sadece orijinal manșet ile kullanılmalıdır.
  • Page 51: Ölçüm Değerlerinin Belleğe Kaydı, Çağrılması Ve Silinmesi

    Bu durum, aritmi hastalığı için bir belirti olabilir. Aritmi, kalp dinlenmeye ve ölçme ișlemi esnasında konușmamaya veya atıșını kontrol eden biyoelektriksel sistemdeki hatalardan hareket etmemeye lütfen dikkat ediniz. Bu sembol sık sık dolayı, kalp ritminin anormal olduğu bir hastalıktır. Septomların görünürse, lütfen doktorunuza bașvurunuz.
  • Page 52: Teknik Bilgiler

    9. Teknik bilgiler Kullanıcı belleğini değiștirmek istiyorsanız, „Bellek seçilmesi“ Model numarası BM 19 bölümüne dikkat ediniz. Ölçme metodu Üst kol üzerinden, osilometrik, vücut içine 7. Cihazın temizlenmesi ve muhafaza edilmesi yayılma göstermeyen tansiyon ölçme Cihazı...
  • Page 53 Bu cihaz, tıbbi ürünler AB direktifine, tıbbi ürün yasasına ve Giriș 100-240V, 50-60Hz EN1060-1 Avupa standartlarına (vücudun dıșından uygu- Çıkıș 6V DC, 1150mA, sadece Beurer tansiyon lanan tansiyon ölçme cihazları bölüm 1: Genel talepler) ve ölçme cihazı ile birlikte kullanılır EN1060-3 Avrupa standartlarına (vücudun dıșından uygula- Üretici Friwo Gerätebau GmbH...
  • Page 56 4xAA(LR6) 1,5 V 10. WHO-LED...
  • Page 60 > = 180 > = 110 160 – 179 100 – 109 140 – 159 90 – 99 130 – 139 85 – 89 120 – 129 80 – 84 < 120 < 80...
  • Page 64: Ważne Wskazówki

    (np.: leków i ich dozo- wania)! Z poważaniem, Możliwe są błędne pomiary w przypadku zachorowań syste- Zespół firmy Beurer mu krążeniowo-naczyniowego, także w przypadku niskiego ciśnienia, zaburzeń dopływu krwi i zaburzeń rytmu, a także 1. Zapoznanie innych schorzeń...
  • Page 65 W innym przypadku uzyskuje się błędne dane Naprawy mogą być przeprowadzane jedynie przez serwis pomiarowe. firmy Beurer lub autoryzowany serwis dystrybutora sprzętu. Nie naciskać na przycisk, jeśli opaska nie jest nałożona. Przed złożeniem reklamacji sprawdzić najpierw baterie i w Jeśli urządzenie nie będzie przez dłuższy czas używane,...
  • Page 66: Opis Urządzenia

    3. Opis urządzenia 8. Data i godzina 9. Numer miejsca pamięci 10. Symbol pulsu 11. Zmierzona wartość pulsu 12. Kwalifikacja wg WHO 1. Wężyk opaski 2. Opaska 3. Wtyczka opaski 4. Gniazdo dla wtyczki opaski (lewa strona) 5. Przycisk pamięci M 4.
  • Page 67: Pomiar Ciśnienia Krwi

    terii z urządzenia natychmiast powoduje konieczność nowego Następnie można ustawić głośność wybranego języka. ustawienia godziny. Zapamiętane wyniki pomiarów zostają Vol 3 = głośno, Vol 2 = średnio głośno, Vol 1 = cicho. utracone. Zużytych baterii nie wolno wyrzucać do zwykłych Ponownie potwierdź...
  • Page 68 Wolny koniec mankietu owinąć wąsko Wybór miejsca pamięci wokół ramienia, ale nie za sztywno i Włącz urządzenie przyciskiem . W stanie wyłączonym na zaczepić na rzep. Mankiet należy za- wyświetlaczu pojawia się tylko wskazanie godziny. Po komu- łożyć w taki sposób, aby można było nikacie słownym można wybrać...
  • Page 69 Jeżeli pomiar nie został prawidłowo przeprowadzony, na wy- wolniejszy lub za szybki puls) mogą występować z powodu świetlaczu pojawia się symbol . Przejdź do rozdziału m.in. chorób serca, wieku, skłonności organizmu, używek w „Komunikaty o błędach/Usuwanie błędów” w instrukcji nadmiarze, stresu lub braku snu. Arytmia może zostać zdia- obsługi i powtórz pomiar.
  • Page 70: Urządzenie Czyścić I Przechowywać

    7. Urządzenie czyścić i przechowywać Wykres słupkowy na wyświetlaczu oraz skala na urządzeniu podają, w jakim zakresie znajduje się zmierzone ciśnienie Urządzenie i mankiet należy czyścić ostrożnie lekko zwilżoną krwi. Dodatkowo ocena pomiaru sygnalizowana jest sygnałem ściereczką. dźwiękowym. Nie wolno stosować żadnych środków czyszczących, ani Jeżeli wartości ciśnienia skurczowego i rozkurczowego rozpuszczalników.
  • Page 71: Dane Techniczne

    9. Dane techniczne Żywotność baterii Na ok. 250 pomiarów, zależnie od wysokości ciśnienia krwi lub ciśnie- Nr modelu BM 19 nia napompowywania Metoda pomiaru oscylometryczna, nieinwazyjny pomiar Akcesoria Etui do przechowywania, instrukcja ciśnienia krwi na ramieniu obsługi, 4 baterie AA typu LR6 Zakres pomiaru Ciśnienie 0 –...
  • Page 72 Posiada izolację ochronną / Klasa ochronna 2 Obudowa Obudowa adaptera chroni przed kontaktem i pokrywa z częściami, które przewodzą wzgl. mogłyby ochronna przewodzić prąd (palce, igły, hak testowy). Użytkownikowi nie wolno jednocześnie dotykać pacjenta i wtyczki wyjściowej adaptera AC. To urządzenie jest zgodne z normą europejską EN60601-1-2 i podlega szczególnym środkom ostrożności w aspekcie kompatybilności elektromagnetycznej.

Table des Matières