
Sommaire des Matières pour JCLASS Electronic control
- Page 1 Electronic control Installazione, uso e manutenzione Installation, use and maintenance handbook Installation, Gebrauch und Wartung Installation, usage et entretien Instalación, uso y mantenimiento COD: 5561323 Rev: 4 0312...
- Page 2 GERÄTEKENNZEICHNUNG Modell Speisespannung Kühlgasmenge MARCATURA Klasse DELL’APPARECCHIO Gesamtaufnahme Modello Frequenz Tensione di alimentazione Matrikelnummer MANUFACTURER Quantità di gas refrigerante Konstruktionsjahr- Monat Classe WATER COOLERS PLAQUETTE SIGNALETIQUE Assorbimento totale Frequenza Modèle Mod....Numero di matricola Tension d’alimentation Anno-mese di costruzione Quantité de gaz réfrigérant ..V ..Hz ..W...
- Page 3 BEFORE USING THE APPLIANCE WARNINGS GENERAL PRECAUTIONS AND SUGGESTIONS Before carrying out any maintenance or cleaning operation, In order to use your appliance to its best, we advise reading these remove the plug from the mains socket. instructions carefully as they contain useful information. •...
- Page 4 PRIMA DI USARE L’APPARECCHIO scollegare immediatamente la macchina dalla presa di corrente e contattare l’inosservanza di una qualsiasi norma di sicurezza potrebbe cau- il locale rivenditore o il servizio di assistenza tecnica. sare incendi, scosse elettriche o danneggiare la macchina L’utilizzo della macchina in queste condizioni potrebbe causare incendi o • LuoGo Di iNSTALLAZioNE scosse elettriche.
- Page 5 • Regelmäßig den Netzstromanschluss der Maschine unterbrechen und schen Teilen in der Maschine treten, könnten diese Brand oder Stromschlag mit einem trockenen Tuch den Stecker und die Steckdose reinigen. verursachen. Sollte die Maschine an einem staubreichen, rauchigen oder sehr feuchten •...
- Page 6 JE1610-010 DISIMBALLO • Ponete l’apparecchio nel punto d’installazione (cap. 5- iNSTALLAZioNE). • Tagliare le reggette R e sfilate il cartone C, il polistirolo F e il sacco in plastica esterno S. • Eliminate subito i sacchi in plastica S e i polistiroli F i quali possono rappresentare pericolo per i bambini. •...
- Page 7 ENTFERNUNG DER VERPACKUNG • Transportieren Sie das Gerät an die Stelle, wo es aufgestellt werden soll. (s. Kap. 5, AuFSTELLuNG). • Die Bänder R durchschneiden und den Karton C, das Polystyrol F und den äußeren Plastiksack S entfernen. • Die Plastiksäcke S und das Polystyrol F sofort entfernen, da diese eine potentielle Gefahr für Kinder darstellen. •...
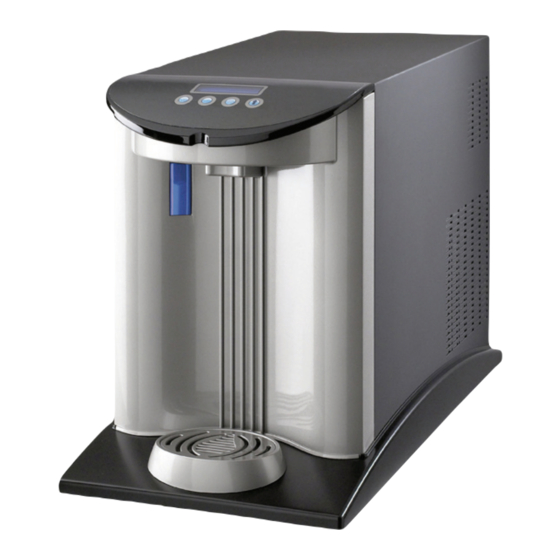
- Page 8 Beccuccio di erogazione La versione EC (Electronic control) è dotata di un sistema elettronico per la gestione posizionato in zona protetta dell’erogazione e per il controllo di tutte le principali funzioni del refrigeratore.
- Page 9 GERÄTEBESCHREIBUNG Diese Trinkwasserkühler dienen der Bereitung von großen Mengen an gekühltem Gehäuse stillen oder CO -haltigem, sowie 95°C heißem Wasser. leicht abnehmbar, um problemlos zu den Innenteilen zu gelangen. “Die Version des ECs (Electronic Controls) verfügt über ein elektronisches System Auslassschnabel zur Handhabung des Zapfens und zur Kontrolle aller Hauptfunktionen des Kühlers.”...
- Page 10 CARATTERISTICHE TECNICHE TECHNICAL CHARACTERISTICS TECHNISCHE EIGENSCHAFTEN CARACTERISTIQUES TECHNIQUES CARACTERÍSTICAS TéCNICAS Dimensioni Dimensions Abmessungen Dimensions Dimensiones (mm)
- Page 11 30 WG EC 45 WG EC UV 30 WG EC UV 45 WG EC Produzione acqua Lt/h Water production Trinkwasserproduktion Production d’eau Producción de agua usg/h 7,93 11,90 Temp. uscita acqua °C 3 ÷ 10 3 ÷ 10 Water outlet temperature Temperatur des gespendeten Wassers Temperature sortie de l’eau Temp.
- Page 12 0701-010 JEtsilver and black INSTALLAZIONE 5.1 POSA DELL’APPARECCHIO N.B: la pressione é importante sopratutto per macchine Ponete l’apparecchio nel punto di installazione, lontano da fonti di calore e con dispositivo di gasatura. protetto dai raggi diretti del sole. È sconsigliata inoltre l’installazione all’aperto e in ambienti molto umidi - L’apparecchio deve essere posizionato in modo da lasciare uno spazio •...
- Page 13 INSTALLATION INSTALLATIONSORT Stellen Sie Ihr Gerät am gewünschten Installationsort auf. Achten Sie darauf, NB: Der korrekte Druck ist insbesondere für die mit dass sich keine Wärmequellen in unmittelbarer Nähe befinden und dass einer das Gerät keiner direkten Einwirkung von Sonnenstrahlen ausgesetzt wird. Kohlensäure-Anreicherungsvorrichtung versehenen Stellen Sie ihr Gerät nicht im Freien und auch nicht in besonders feuchten geräte, von erheblicher Bedeutung.
- Page 14 FILL ICE BANK JE1610-070x JE1610-0021 5.3.1 COLLEGAMENTO IDRAULICO il collegamento alla rete idrica viene effettuato con l’ausilio del tubo T in dota- Spingete il tubo T nell’attacco 11 esercitando la dovuta pressione. zione (diametro 8 mm) e del terminale A (3/8M) per tubo Ø8mm. Per il collegamento idraulico, rimuovendo l’attacco 11 è...
- Page 15 5.3.1 WATER CONNECTION Connection to the water mains is done using the T tube provided (8 mm dia- meter) and by terminal A (3/8M) for 8 mm pipe. Push pipe onto coupling 11 exerting the correct amount of pressure. The end piece A (3/8”) should be connected to the water mains using a stop For the water connection, you may also use the 3/4M fitting provided with the cock R.
- Page 16 JE0206-080c AVVIAMENTO COLLEGAMENTO ELETTRICO Attenzione! Prima di utilizzare la macchina procedere alla sanifi- cazione (vedi paragrafo relativo) Il collegamento alla rete elettrica avviene collegando la spina ad una presa di rete. La presa di corrente predisposta deve essere munita di efficente presa di Attenzione! Se l’apparecchio é stato coricato o capovolto, occorre terra e deve essere dimensionata al carico dell’apparecchio (vedi caratte- attendere almeno 8 ore prima di avviarlo.
- Page 17 STARTING ELECTRICITY CONNECTION Warning! Before using the machine proceed with the sanitation Connection to the mains electricity supply is carried out by connecting the (see relative paragraph) plug to a mains socket. The supply socket must be equipped with an efficient earth plate and it Warning! If the appliance has been laid down or turned upside must be sized for the load of the appliance (see technical characteristics).
- Page 18 • impostazione delle oRE LAVAGGio: serve un adeguato scarico di servizio e PANORAMICA DELLE FUNZIONI fa sì che la macchina esegua un risciacquo del circuito idraulico ad intervalli ELETTRONICHE prefissati, per limitare la proliferazione batterica (programmazione avanzata • impostazione delle dosi SMALL e LARGE, su ogni uscita (Ambiente, Fredda 7.9).
- Page 19 PANORAMIQUE DES FONCTIONS • Configuration des oRE LAVAGGio (HEuRES DE LAVAGE): une évacuation LECTRONIQUES de service est indispensable et fait en sorte que la machine effectue un rin- çage du circuit hydraulique à intervalles prédéfinis, pour limiter la prolifération • Configuration des doses SMALL et LARGE, sur chaque sortie (Ambiente, bactérienne (programmation avancée 7.9).
- Page 20 + ... °C SET -03°C ENJOY Tasto Gassata - Indietro (-)* VIDEATA INIZIALE Tasto Ambiente - Avanti (+)* Tasto acqua fredda - Conferma * Valore di temperatura rilevato dalla sonda all’interno dell’ICE BANK Tasto Menù - Seleziona * Messaggio di inizio Valore di temperatura da impostare all’interno dell’ICE BANK (*) In modalità...
- Page 21 GESTIONE MACCHINA MODALITA’ SELEZIONE DOSI SETUP DOSI PROGRAMMAZIONE LARGE / SMALL LARGE / SMALL AVANZATA come come come attivarla? attivarla? attivarla? Premere questo tasto Premere questo Mantenere per un istante tasto a lungo premuto questo e rilasciarlo tasto per quando compare la almeno 12 secondi e lettera “D”...
- Page 22 WATER COOLER OPERATION ADVANCED SELECT LARGE/SMALL LARGE/SMALL DOSES DOSES SETUP PROGRAMMING MODE to access to access to access Press this button briefly Press and hold Press and hold this button until this button for the letter “D” at least 12 appears, meaning that seconds - Do not release you have accessed the...
- Page 23 GERÄTESTEUERUNG MODALITÄT DOSIS-WAHL SETUP DOSIS FORTGESCHRITTENE LARGE / SMALL LARGE / SMALL PROGRAMMIERUNG Wie ist es zu Wie ist es zu Wie ist es zu aktivieren? aktivieren? aktivieren? Diese Taste kurz Die Taste Diese Taste drücken drücken und mindestens 12 sie nur dann Sekunden lang loslassen, wenn der...
- Page 24 GESTION DE LA MACHINE MODALITES DE SELECTION DES DOSES SELECTION DES DOSES PROGRAMMATION LARGE / SMALL LARGE / SMALL AVANCEE Comment Comment Comment l’activer? l’activer? l’activer? Appuyer sur cette Maintenir cette Maintenir touche pendant un touche appuyée appuyée cette instant puis la relâcher touche pendant lorsque la lettre “D”...
- Page 25 GESTIÓN DE LA MÁQUINA MODALIDAD SELECCIÓN DOSIS SETUP DOSIS PROGRAMACIÓN LARGE / SMALL LARGE / SMALL AVANZADA ¿Cómo ¿Cómo ¿Cómo se activa? se activa? se activa? Presione este botón por Presione este Mantenga un instante botón por un presionado tiempo largo y este botón suéltelo cuando aparece por 12 segundos...
- Page 26 TIPO DI ALLARME SOLUZIONE ALLARM MESSAGE SOLUTION VERiFiCARE: MAKE SURE: - la presenza di acqua di rete - that there is water in the mains - il corretto collegamento dei tubi - that the hydraulic circuit is del circuito idrico, On WG versions a safety system properly connected - la presenza di un filtro otturato...
- Page 27 ALARMTYPEN ABHILFE TyPE D’ALARME SOLUTION ÜBERPRÜFEN: VERiFiER: - d a s V o r h a n d e n s e i n v o n - la présence d’eau de réseau Leitungswasser - que les tuyaux du circuit hydrique Bei den Modellen WG, wenn - die korrekte Verbindung der Pour les modèles WG, lorsque le...
- Page 28 TIPO DE ALARMA SOLUCIÓN CONTROLAR: - la presencia de agua de red - la correcta conexión de los tubos En los modelos WG, cuando la del circuito hídrico, - la presencia de un filtro atascado bomba de carbonatación funciona - que la sonda de nivel del de manera continuada por más de 4 minutos, un sistema de seguridad la carbonatador esté...
- Page 29 Fili Fili Fili Fili JE0701-112 NI1604-170 NI1604-160 AVVIAMENTO ACQUA GASSATA COLLEGAMENTO DELLA BOMBOLA DEL GAS CO (ANIDRIDE CARBONICA) • La bombola viene posizionata all’esterno dell’apparecchio. Per le bombole del tipo RICARICABILE (B-RIC) procedere come segue: • Collegate il riduttore di pressione P al raccordo 13. •...
- Page 30 SETTING UP THE SPARKLING WATER GAS CYLINDER CONNECTION (CARBON DIOXIDE) • The cylinder is positioned outside the appliance. With rechargeable cylinders (B-RIC), proceed as follows: • Connect the pressure reducer P to the fitting 13 • Paying special attention to the seal, screw the pipe union on the pressure With disposable cylinders (non-rechargeable), proceed as follows: reduction valve Q to the connector on the cylinder.
- Page 31 Consigli di utilizzo per l’acqua gassata AVVERTENZE Per garantire il buon funzionamento nel tempo della pompa è necessario che la ATTENZIONE! PER IL TRASPORTO, LO STOCCAGGIO E L’USO DI BOMBOLE macchina funzioni sempre con presenza di acqua nel circuito di raffreddamento. CARICHE DI CO SEGUIRE LE NORME LOCALI VIGENTI. Se viene a mancare l’acqua di rete, un sistema di protezione interviene e •...
- Page 32 Attenzione: per questa operazione di manutenzione, come per altre che comportano l’a- pertura dell’involucro macchina, usare guanti protettivi per prevenire il pericolo di bordi taglienti delle lamiere Attention: to carry out this or any other maintenance operation requiring the machine casing to be opened, use protective gloves to avoid being cut by the sharp edges of the sheet steel Achtung: für diesen Wartungseingriff müssen, wie für alle, die ein Öffnen des Maschi- nengehäuses erfordern, Schutzhandschuhe getragen werden, um der gefahr, sich an den scharfen Rändern der Bleche zu schneiden, vorzubeugen.
- Page 33 When installing the appliance, or if the water cooler has no water left inside HYGIENIC CLEANING it, a few air bubbles may enter the carbonation device. • once you have checked that the appliance operates correctly, proceed These air bubbles could diminish the quality of the carbonation process, and with the “internal cleaning and hygienic cleaning”...
- Page 34 Le operazioni di manutenzione devono essere compiute da personale qualificato. Si deve inoltre prestare attenzione a non danneggiare il circuito dell’impianto frigorifero Maintenance operations should be carried out by a qualified professional. Be careful also not to damage the refrigerator system circuit. Die Wartungsarbeiten dürfen nur durch Fachpersonal durchgeführt werden. Außerdem muss darauf geachtet werden, dass der Kühlkreislauf der Anlage nicht beschädigt wird. Les opérations d’entretien doivent être effectuées par du personnel qualifié. Il convient également de faire attention à ne pas endommager le circuit de l’installation frigorifique Las operaciones de mantenimiento deben ser ejecutadas por personal calificado. También se debe prestar atención a no dañar el circuito de la instalación frigorífica. MANUTENZIONE ORDINARIA Oggetto Operazione Periodicita’ Pulizia filtro meccanico acqua • Smontate il raccordo in ingresso e rimuovete eventuali impurità. - Mensile (fig.24) Pulizia esterna...
- Page 35 ROUTINE MAINTENANCE Object How often Cleaning the mechanical water filter • Disassemble the fitting on the water inlet and remove any impurities. - Montly (fig.24) Clening the outside of the appliance • Clean the external part with a damp cloth, do not use solvents or abrasive de- tergents.
- Page 36 Le operazioni di manutenzione devono essere compiute da personale qualificato. Maintenance operations should be carried out by a qualified professional. Die Wartungsarbeiten dürfen nur durch Fachpersonal durchgeführt werden. Les opérations d’entretien doivent être effectuées par du personnel qualifié. Las operaciones de mantenimiento deben ser ejecutadas por personal calificado.
- Page 37 geräteteil Vorgehensweise Häufigkeit Wasserwechsel im Eisvitrinenbehälter. • Gerät ausschalten und ca. 1 Stunde warten, bis es abgetaut hat. - Falls die Maschine lange Zeit nicht • Das Wasser durch das Abfluss- und Nivellierungsrohr P ablaufen lassen (s. in Funktion war Abschnitt 5.3.2.).
- Page 38 Attenzione! Se nella macchina é installato un kit Le operazioni di manutenzione devono essere compiute filtrante, questo deve essere rimosso da personale qualificato. Maintenance operations should be carried out by a warning: If a filtering kit is fitted on the appliance, it should be excluded from the hygienic cleaning qualified professional.
- Page 39 INTERNAL CLEANING/ HYGIENIC CLEANING WARNING! Considering that the products used for the hygienic cleaning are acid and alkali corrosive substances, disposable gloves must be used as well as glasses to protect your eyes. When this hygienic cleaning is carried out, you must keep to the product reaction times, percentages of hygienic detergent and quantity of water necessary for rinsing.
- Page 40 JE1610-3254 JE1610-0001 JE1610-0002 JE1610-0003 JE1610-0004 Attenzione: per questa operazione di manutenzione, come per altre che comportano l’apertura dell’in- volucro macchina, usare guanti protettivi per prevenire il pericolo di bordi taglienti delle lamiere Attention: to carry out this or any other maintenance operation requiring the machine casing to be opened, use protective gloves to avoid being cut by the sharp edges of the sheet steel Achtung: für diesen wartungseingriff müssen, wie für alle, die ein Öffnen des Maschinengehäuses erfordern, Schutzhandschuhe getragen werden, um der gefahr, sich an den scharfen Rändern der Bleche zu schneiden, vorzubeugen.
- Page 41 HOW TO REPLACE THE UV LAMP How to replace the lamp: The lamp must be replaced every 6000 hours of working • Remove the external casing (fig. 26) by removing the rear screws. (about 8 months) • unscrew the two screw fasteners on the box (fig. 27) •...
- Page 42 DIFETTI E RIMEDI Attenzione! Le operazioni devono essere compiute da personale qualificato DIAGNOSTICA E ANOMALIE DI FUNZIONAMENTO in questa sezione vengono esposte le anomalie tipo che possono verificarsi. Molti di questi problemi non sono causati dal refrigeratore, ma potrebbero essere causati dall’alimentazione elettrica o da un uso non corretto del refrigeratore. Nella colonna ANOMALIE sono elencati i problemi che possono arrivare dal cliente.
- Page 43 FAULTS AND REMEDIES warning! The operations should be carried out by a qualified professional. DIAGNOSIS AND OPERATING ANOMALIES This section includes the typical anomalies that could occur. Many of these problems are not caused by the cooler, but they could be brought about by the electricity supply or by an incorrect use of the water cooler. In the ANOMALY column, the problems reported by the customer are listed.
- Page 44 BETRIEBSFEHLER UND ABHILFE Achtung! Diese Eingriffe dürfen nur durch Fachpersonal durchgeführt werden. DIAGNOSE UND BETRIEBSANOMALIEN In diesem Abschnitt werden die typischen, eventuell auftretenden Anomalien behandelt. Viele dieser Anomalien sind nicht immer dem Kühlgerät zuzuschreiben, sondern könnten auch durch die Stromversorgung oder durch einen unsachgemäßen Einsatz des Kühlgerätes verursacht werden.
- Page 45 DEFAUTS ET REMEDES Attention! Les opérations doivent être effectuées par du personnel qualifié. DIAGNIOSTIC ET ANOMALIES DE FONCTIONNEMENT Vous trouverez dans cette partie les anomalies type que peuvent se produire. Nombre de ces problèmes ne sont pas causés par le refroidisseur mais pourraient dépendre de l’alimentation électrique ou d’un mauvais emploi du refroidisseur. La colonne ANOMALIES énumère les problèmes signalés par les clients.
- Page 46 DESPERFECTOS Y REMEDIOS ¡Atención! Estas operaciones deben ser ejecutadas por personal calificado. DIAGNÓSTICO Y ANOMALÍAS DE FUNCIONAMIENTO En esta sección se ilustran las anomalías tipo que pueden verificarse. Muchos de estos problemas no son causados por el refrigerador sino que pueden ser causados por la alimentación eléctrica o por un uso incorrecto del refrigerador mismo. En la columna ANOMALÍAS se indican los problemas que pueden verificarse.