Lenz Digital plus LH101 Mode D'emploi
Masquer les pouces
Voir aussi pour Digital plus LH101:
- Mode d'emploi (101 pages) ,
- Mode d'emploi (32 pages)

Manuels Connexes pour Lenz Digital plus LH101


Sommaire des Matières pour Lenz Digital plus LH101
- Page 1 LH101 Bedienungsanleitung Version 2.1 1. Auflage 05 21 Art. Nr. 21101 B.B.10.0039-02...
- Page 2 Wenn Sie noch Fragen haben, auf die Sie auch nach Durcharbeit dieser Information keine Antwort finden, so helfen wir Ihnen gerne weiter. Auf vier verschiedene Arten können Sie mit der Lenz Elektronik GmbH Kontakt aufnehmen: Postanschrift: Lenz Elektronik GmbH...
-
Page 3: Table Des Matières
Wichtige Hinweise, bitte zuerst lesen! Inhalt Wichtige Hinweise, bitte zuerst lesen! ..............7 Der Funktionsumfang des LH101 ................9 Erste Schritte ......................11 Anschluss und Inbetriebnahme ..............11 3.1.1 Anschluss an die Zentrale LZ100/LZV100/LZV200 ........11 3.1.2 Einstellen der XpressNet - Adresse ............11 Ihre erste Fahrt ..................12 3.2.1 Lokadresse aufrufen: .................12 3.2.2 Lok steuern: ....................12... - Page 4 Bedienungsanleitung LH101 6.1.2 Einsatz rückmeldefähiger Weichendecoder ..........34 Fahrstraßen anlegen, bearbeiten und löschen............37 Eine neue Fahrstraße anlegen ..............38 Eine Fahrstraße bearbeiten ..............39 7.2.1 Einen Schritt in einer Fahrstraße ändern ........... 41 7.2.2 Einen Schritt aus einer Fahrstraße löschen ..........42 7.2.3 Einen Schritt zu einer Fahrstraße hinzufügen ...........
- Page 5 Wichtige Hinweise, bitte zuerst lesen! 13.2.2 Welche Lokdecoder können mit PoM in ihren Eigenschaften verändert werden? ..................68 13.2.3 Können mit PoM Werte aus Cvs ausgelesen werden? ......69 13.2.4 Programmieren eines Zahlenwertes in eine CV - schrittweises vorgehen: ....................69 13.2.5 Auslesen von CVs mit der Adressanzeige LRC120 ........71 13.2.6 Setzen und Löschen von Bits (Schaltern) mittels PoM - schrittweises vorgehen ....................72 13.3...
- Page 6 Bedienungsanleitung LH101 15.1 Modellzeit stellen ..................103 15.2 "AUTO" Modus ein- und ausschalten ............106 15.2.1 Verhalten des Systems bei eingeschaltetem "AUTO"-Modus....107 15.3 Versionsnummer des Systems (der Zentrale) anzeigen ......107 15.4 Lokadressen aus dem Zentralenspeicher löschen ........108 15.5 Service Variable lesen / schreiben ............
-
Page 7: Wichtige Hinweise, Bitte Zuerst Lesen
Wichtige Hinweise, bitte zuerst lesen! Wichtige Hinweise, bitte zuerst lesen! ® Ihr Handregler LH101 ist eine Komponente des Digital plus by Lenz Systems und wurde vor Auslieferung einem intensiven Test unterzogen. Lenz Elektronik GmbH garantiert für einen fehlerfreien Betrieb, wenn Sie die folgenden Hinweise beachten:... - Page 8 Bedienungsanleitung LH101 Alle beschriebenen Bedienschritte setzen voraus, dass der ® Handregler am Digital plus by Lenz System mit Version 3.6 angeschlossen und dieses eingeschaltet ist. Darstellung von Anzeigen und Tasten im Text: In den meisten Fällen wird die Anzeige des LH101 als Bild dargestellt, ebenso die Tasten.
-
Page 9: Der Funktionsumfang Des Lh101
Der Funktionsumfang des LH101 Der Funktionsumfang des LH101 Dieser Abschnitt gibt Ihnen einen kurzen Überblick über den wichtigsten Funktionsumfang des LH101 in der Version 2.10. Die Anwendung wird weiter hinten ausführlich beschrieben, Sie finden jeweils einen Verweis auf die entsprechende Seite. Der LH101 verfügt über ein großes, hinterleuchtetes LCD Display Display. - Page 10 Bedienungsanleitung LH101 Mehrere Lokomotiven werden mit einer gemeinsamen Mehrfachtraktion (MTR) Adresse gleichzeitig gesteuert. (S. 54) Weichen und Signale Mit dem Handregler LH101 können Sie bis zu 1024 Weichen, Signale oder andere Magnetartikel schalten. schalten (S. 33) Sie können 16 Fahrstraßen mit je 16 Schritten im LH101 Fahrstraßen speichern.
-
Page 11: Erste Schritte
In den Abschnitten weiter unten werden dann sämtliche Funktionen des LH101 detailliert erklärt. Anschluss und Inbetriebnahme Der LH101 kann an folgende Komponenten des Digital plus by ® Lenz Systems angeschlossen werden: LZ100 oder LZV100 ab Version 3.6 LZV200 ab Version 3.8 Wie bei allen pressNet Geräten können Sie Ihren LH101 während... -
Page 12: Ihre Erste Fahrt
Bedienungsanleitung LH101 können bis zu 31 Geräte an das XpressNet angeschlossen werden. Jeder Handregler LH101 ist werkseitig auf die Geräteadresse 04 eingestellt. Wenn Sie bereits ein anderes XpressNet Gerät auf dieser Adresse betreiben, so müssen Sie an Ihrem LH101 eine andere Adresse einstellen. -
Page 13: Fahrtrichtung Ändern
Erste Schritte Drehen gegen den Uhrzeigersinn vermindert die Fahrstufe, … … ggf. bis zum Stillstand. 3.2.3 Fahrtrichtung ändern: Bringen Sie zum Wechseln der Fahrtrichtung die Fahrstufe auf 0" Danach können Sie die Richtung der Lok ändern: Aktion Display Erläuterung Der Druck auf den Drehknopf ändert die Richtung der Lokomotive. -
Page 14: Notaus
Bedienungsanleitung LH101 3.2.4 Notaus Aktion Display Erläuterung Drücken Sie auf den Drehknopf und halten Sie ihn gedrückt bis "AUS" im Display erscheint. Gleisspannung ausgeschaltet. Um die Gleisspannung wieder einzuschalten, drücken Sie erneut auf die Mitte des Drehknopfs … … bis die Lokadresse wieder angezeigt wird. Alternativ können Sie einstellen, dass statt des Abschaltens der Spannung am Gleis alle Loks per Befehl sofort angehalten werden. -
Page 15: Grundlegendes Zur Bedienung Des Lh101
Grundlegendes zur Bedienung des LH101 Grundlegendes zur Bedienung des LH101 In erster Linie ist dient der LH101 dem Steuern von Lokomotiven, also Geschwindigkeit Richtung ändern sowie Funktionen Lokdecodern schalten. Daher befindet er sich nach dem Einschalten immer in der Betriebsart Lok steuern. Die weiteren Funktionen, wie Mehrfachtraktion oder Weichen und Signale schalten, erreichen Sie über das Menü. -
Page 16: Das Lcd-Display Des Lh101
Bedienungsanleitung LH101 Das LCD-Display des LH101 Der LH101 verfügt über ein zweizeiliges, hinterleuchtetes LCD Display. Je nachdem, in welchem Betriebszustand Sie sich gerade befinden, ist die Darstellung des Display unterschiedlich. Die Anzeige der Lokadresse erfolgt immer vierstellig, ggf. werden Nullen vorangestellt. -
Page 17: Beispiele Typischer Anzeigen Beim Loksteuern
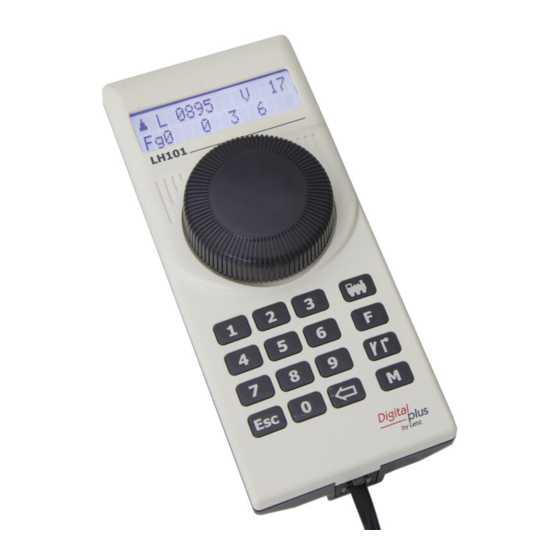
Grundlegendes zur Bedienung des LH101 Beispiele typischer Anzeigen beim Loksteuern: Die einzelne Lok (L) mit der Adresse 0003 wird gesteuert. Fahrtrichtung ist vorwärts. Fahrstufe ist 16 von 28. Gewählt ist Funktionsgruppe 0, die Funktionen F0 und F1 sind aktiv. Gleiche Lok, gleiche Geschwindigkeit, hier mit der Anzeige der Modellzeit. -
Page 18: Lokomotiven Steuern
Bedienungsanleitung LH101 Lokomotiven steuern Steuern Lokomotiven gehört Ändern Geschwindigkeit und der Fahrtrichtung sowie das Schalten von Funktionen in Lokomotiven (Licht, Kupplung etc,). In diesem Abschnitt erfahren Sie: wie Sie auf drei verschiedene Arten Lokadressen auswählen (aufrufen) können. näheres über die Steuerung von Geschwindigkeit und Fahrtrichtung. -
Page 19: Lokadressen Aus Dem Stack Des Lh101 Auswählen
Lokomotiven steuern Wenn Sie sich vertippen, können Sie mit die letzte Ziffer löschen. Fahren Sie fort bis zur letzten Ziffer. Abschluss der Eingabe. Die Informationen über Funktion, Richtung und Fahrstufe zur Lokadresse werden Zentrale abgefragt und angezeigt. Blinkt die Anzeige nach dem Aufrufen der Lokadresse, so ist die Lokomotive schon auf einem anderen Handregler aufgerufen. -
Page 20: Eine Lokadresse Aus Dem Zentralenspeicher Auswählen
Bedienungsanleitung LH101 Im Display bekommen Sie den jeweiligen Stackplatz (hier: "Stack3") und die darin abgelegte Lokadresse (hier: "0003") angezeigt. So geht das weiter bis zum letzten . . . Stackplatz Durch Druck auf den Drehknopf wählen Sie den Stackplatz und damit die dort abgelegte Lokadresse aus. -
Page 21: Übernehmen Einer Lok Von Einem Auf Einen Anderen Handregler
Lokomotiven steuern Drehen Sie den Knopf bis zur Anzeige der Option "Zentralen-Speicher" Bestätigen Sie die Auswahl. Es wird die erste Zentralenspeicher abgelegte Adresse angezeigt. Durch Drehen am Drehknopf blättern Sie durch den Zentralenspeicher. Am Buchstaben vor der Adresse erkennen Sie, ob es sich um eine Lok in einer Mehrfachtraktion (kleines "m")…... -
Page 22: Geschwindigkeit Und Richtung Der Lok Ändern
Bedienungsanleitung LH101 Möchten Sie die Lokomotive jedoch nicht auf Ihren Handregler übernehmen, so wechseln Sie mit der 'Esc' Taste zur zuvor gesteuerten Lok zurück oder wählen eine andere Lokadresse aus. Geschwindigkeit und Richtung der Lok ändern Zur Steuerung von Richtung und Geschwindigkeit stehen Ihnen zwei Methoden zur Verfügung: der Normalmodus (Werkseinstellung): In diesem Modus können Sie mit dem Drehknopf bis auf... -
Page 23: Der Lokspezifische Nothalt
Lokomotiven steuern Aktion Display Erläuterung Drehen im Uhrzeigersinn erhöht die Fahrstufe Drehen gegen den Uhrzeigersinn vermindert die Fahrstufe, … … ggf. bis zum Stillstand. Bei Fahrstufe 0 ändert Druck auf den Drehknopf die Fahrtrichtung. 5.2.1.1 Der lokspezifische Nothalt Aktion Display Erläuterung Ist die Fahrstufe einer Lok nicht 0 und Sie drücken... -
Page 24: Rangiermodus
Bedienungsanleitung LH101 Der lokspezifische Nothalt ist im Rangiermodus nicht verfügbar. Wenn Sie auf den Drehknopf drücken hält die Lokdecoder eingestellten Brems- verzögerung an. 5.2.2 Rangiermodus Im Rangiermodus regeln Sie mit dem Drehknopf bis zur Fahrstufe 1 zurück. Angehalten wird die Lok durch Druck auf den Drehknopf. Lassen Sie die Lok also bis zur gewünschten Stelle "herankriechen"... -
Page 25: Funktionen In Lokempfängern Aktivieren
Lokempfänger besitzen eine oder mehrere Zusatzfunktionen. Die Funktionen sind nummeriert, die Zählweise ® beginnt bei 0. Insgesamt kann das Digital plus by Lenz System bis zu 69 Funktionen (F0 bis F68) in Lokempfängern ansprechen. Die Nutzung von 69 Funktionen setzt den Einsatz einer LZV200 ab Version 4.0 voraus. -
Page 26: Umschalten Der Funktionsgruppen
Bedienungsanleitung LH101 In Abhängigkeit der gewählten Funktionsgruppe (0 – 6) werden dabei folgende Funktionen geschaltet: Taste: Funktionsgruppe 0: Funktionsgruppe 1: 10 11 12 13 15 16 17 18 Funktionsgruppe 2 20 21 22 23 25 26 27 28 Funktionsgruppe 3 30 31 32 33 35 36... -
Page 27: Lokdecoderfunktionen Konfigurieren
Lokomotiven steuern Funktionsgruppe 6. In diesem Beispiel sind die Funktionen 61, 66 und 68 aktiv. Ein weiterer Druck auf die Taste 'F' zeigt wieder Funktionsgruppe Fg0 an. Nach einem längeren Druck auf die Taste "F" kann man eine Funktionsgruppe zurückschalten. Bei der ersten Inbetriebnahme des LH101 ist die Funktionsgruppe 0 aktiviert. -
Page 28: Refresh Von Funktionen Konfigurieren
Bedienungsanleitung LH101 Drücken Sie die Taste 'F' und halten Sie sie gedrückt bis die Anzeige wechselt. Lassen Sie die 'F'-Taste los und drehen Sie ggf. am Drehknopf bis zu dieser Anzeige. Drücken Sie den Drehknopf, es wird die Konfiguration der Funktion 1 angezeigt. Drehen Sie zur Anzeige der Funktion, die Sie auf Dauer- oder Momentbetrieb einstellen wollen. - Page 29 Lokomotiven steuern Verzögerung zu reduzieren, die sich aus der Summe der je Übertragung notwendigen Zeit (typisch 8 ms) ergibt. Sie können deshalb selbst einstellen, welche Funktionsinformationen zyklisch wiederholt gesendet werden sollen und welche nicht. In der Werkseinstellung der LZV100 werden die Funktionen 0 bis 8 zyklisch gesendet.
-
Page 30: Anzeigen Und Ändern Des Fahrstufenmodus
Bedienungsanleitung LH101 Bestätigen Sie Ihre Auswahl durch Drücken des Drehknopfes. Anzeigen und Ändern des Fahrstufenmodus Der Bereich vom Stillstand bis zur maximalen Geschwindigkeit eines Fahrzeuges ist in Fahrstufen aufgeteilt. Je mehr Stufen vorhanden sind, um so feiner ist diese Aufteilung. LH101 können verschiedene... -
Page 31: Notaus
Lokomotiven steuern Nach Druck auf den Drehknopf wird der gegenwärtig eingestellte Fahrstufenmodus angezeigt. Durch Drehen werden die zur Verfügung stehenden Fahrstufenmodi angezeigt. Um einen bestimmten Fahrstufenmodus der Lokadresse zuzuordnen, drücken Sie auf den Drehknopf. Im Modus "128 Fahrstufen" werden die Fahrstufe "0" und der "Nothalt"... - Page 32 Bedienungsanleitung LH101 Um die Gleisspannung wieder einzuschalten, drücken Sie erneut auf die Mitte des Drehknopfs bis in der Anzeige wieder die Lokadresse erscheint.
-
Page 33: Weichen Und Signale Schalten
Signale oder z.B. Relais digital schalten. Diese Einrichtungen müssen hierzu an Schaltempfänger (z.B: LS100/LS150 ® des Digital plus by Lenz Systems oder an andere kompatible Bausteine) angeschlossen sein. Insgesamt können ® Digital plus by Lenz System 1024 Weichen, Signale und andere Magnetartikel geschaltet werden. -
Page 34: Anzeige Der Weichenstellung
Bedienungsanleitung LH101 Mit der '<=' Taste können Sie eine andere Weichenadresse eingeben… …oder… mit der "Esc" Taste das Schalten von Weichen und Signalen beenden. Während des Schaltens von Weichen und Signalen ist es weiterhin möglich, die Geschwindigkeit und Fahrtrichtung der angezeigten Lok mit dem Drehknopf zu steuern. Somit können Sie Rangiermanöver, bei denen Sie Weichen stellen möchten, konfortabel durchführen. - Page 35 Weichen und Signale schalten Nehmen wir an, die Weiche Nr. 18 ist endabgeschaltet und korrekt an einen Schaltempfänger LS100 angeschlossen. Geben Sie die Nummer der Weiche ein (s.o.). Der Handregler bekommt von der Zentrale die Mitteilung, dass es sich um einen rückmeldefähigen Schaltempfänger handelt und stellt nun folgendes dar: Anzeige der Weichenstellung Die Anzeige "Rm"...
- Page 36 Bedienungsanleitung LH101 mit der "Esc" Taste das Schalten von Weichen und Signalen beenden. Informationen über die Anzeige des Zustands an Rückmeldern finden Sie im Abschnitt "Rückmeldungen anzeigen" ( S. 63)
-
Page 37: Fahrstraßen Anlegen, Bearbeiten Und Löschen
Fahrstraßen anlegen, bearbeiten und löschen Fahrstraßen anlegen, bearbeiten und löschen Fahrstraßen sind eine Folge von mehreren Schaltbefehlen für Weichen/Signale, die Sie mit wenigen Bedienschritten abrufen können. Mit solchen Fahrstraßen können Sie die für einen bestimmten Fahrweg notwendigen Weichenstellungen wenig Aufwand durchführen. -
Page 38: Eine Neue Fahrstraße Anlegen
Bedienungsanleitung LH101 Eine neue Fahrstraße anlegen Sie eine Fahrstraße anlegen, sollten Sie sich die EVOR betreffenden Weichennummern sowie benötigte Stellung notieren. Im Anhang ( S. 114) finden Sie ein Formblatt, welches Sie zu diesem Zweck kopieren können. Im Downloadbereich unserer Website finden Sie ebenfalls ein Formblatt als PDF. -
Page 39: Eine Fahrstraße Bearbeiten
Fahrstraßen anlegen, bearbeiten und löschen Erneutes Drücken Taste 'Weichen/Signale' bestätigt Ihre Eingabe. Hinter der Adresse der Weiche erscheint nun ein + oder - als Kennzeichen für die Stellung. Mit der Taste 'M' können Sie die gewünschte Stellung der Weiche / des Signals eingeben. Bei jedem Druck auf die Taste 'M' wird ein entsprechender Schaltbefehl zur Weiche / zum Signal geschickt. - Page 40 Bedienungsanleitung LH101 Aktion Display Erläuterung Wie immer gehen Sie vom Loksteuern aus. Mit der Taste 'Weichen/Signale' wechseln Sie in das Menü zum Schalten von Weichen und Signalen. Drücken der Taste 'M' wechselt zum Anlegen (oder Ändern / Löschen) von Fahrstraßen Wählen Sie mit dem Drehknopf "Fahrstrasse bearbeiten".
-
Page 41: Einen Schritt In Einer Fahrstraße Ändern
Fahrstraßen anlegen, bearbeiten und löschen 7.2.1 Einen Schritt in einer Fahrstraße ändern Gehen Sie zunächst wie unter "Eine Fahrstraße bearbeiten", Seite 39 vor und wählen Sie die Option "Schritt ändern" Der erste Schritt in der zur Änderung ausgewählten Fahrstraße wird angezeigt. Scrollen Sie zu dem Schritt, den Sie ändern wollen. -
Page 42: Einen Schritt Aus Einer Fahrstraße Löschen
Bedienungsanleitung LH101 … einen anderen Schritt zur Bearbeitung auswählen … …oder… … "Esc" Taste Menü "Fahrstraßen bearbeiten" verlassen und zum Loksteuern zurück kehren. 7.2.2 Einen Schritt aus einer Fahrstraße löschen Gehen Sie zunächst wie unter "Eine Fahrstraße bearbeiten", Seite 39 vor. -
Page 43: Einen Schritt Zu Einer Fahrstraße Hinzufügen
Fahrstraßen anlegen, bearbeiten und löschen … mit der "Esc" Taste das Löschen des Schritts abbrechen und zur Auswahl eines Schritts zurück kehren. 7.2.3 Einen Schritt zu einer Fahrstraße hinzufügen Die Option "Schritt neu" erscheint nur, wenn die maximale Anzahl an Schritten in einer Fahrstraße noch nicht erreicht ist!. -
Page 44: Eine Fahrstraße Löschen
Bedienungsanleitung LH101 Eine Fahrstraße löschen Aktion Display Erläuterung Wie immer gehen Sie vom Loksteuern aus. Mit der Taste 'Weichen/Signale' wechseln Sie in das Menü zum Schalten von Weichen und Signalen. zweiter Druck Taste 'Weichen/Signale' wechselt zum Anlegen (oder Ändern / Löschen) von Fahrstraßen Wählen Sie mit dem Drehknopf "Fahrstrasse löschen". -
Page 45: Fahrstraßen Stellen
Fahrstraßen stellen Fahrstraßen stellen Bevor Fahrstraßen stellen können, müssen Fahrstraßen im LH101 angelegt sein. Das Anlegen, Ändern und Löschen von Fahrstraßen ist ab S. 37 beschrieben. Das Stellen einer Fahrstraße ist dem Stellen von Weichen und Signalen sehr ähnlich. Die Bedienung beginnt daher mit den gleichen Schritten: Aktion Display... - Page 46 Bedienungsanleitung LH101 Dabei werden Fahrstraße gespeicherten Weichenadressen Stellungen … … der Reihe nach angezeigt. Ist die Fahrstraße fertig gestellt, erscheint die Bestätigung. Sie können nun … … durch erneutes Drehen am Drehknopf können Sie nun die nächste Fahrstraße auswählen. …oder… Mit der '<=' Taste Adresseingabe einer einzelnen Weiche wechseln.
-
Page 47: Modellzeit
Modellzeit Modellzeit In der Zentrale LZV200 ist eine Modelluhr integriert. Sie können den Wochentag, die Stunden und Minuten einstellen, sowie den Zeitfaktor. Ist der Zeitfaktor = 0, ist die Zeit ausgeschaltet, Faktor 1 ist "normale" Geschwindigkeit, Faktor 2 doppelte Geschwindigkeit usw. bis zum Faktor 31. -
Page 48: Modellzeit Starten / Anhalten
Bedienungsanleitung LH101 Modellzeit starten / anhalten Mit diesem Menüpunkt können Sie die Modellzeit anzeigen, anhalten oder neu starten. Gegebenenfalls müssen Sie zuerst in den Systemeinstellungen die Modellzeit einstellen. Drehen Sie den Knopf bis zur Anzeige der Option "Setup LH101"" Die aktuelle Zeit wird angezeigt. Mit der '<=' Taste können Sie die Modellzeit stoppen …... -
Page 49: Doppeltraktion
Doppeltraktion Doppeltraktion Mit dem LH101 können Sie auf einfache Weise zwei Lokomotiven zu einer Doppeltraktion zusammenstellen und dann wie eine einzelne Lok steuern. In diesem Abschnitt erfahren Sie: was eine Doppeltraktion ist welche Voraussetzungen für eine Doppeltraktion erfüllt sein müssen wie eine Doppeltraktion zusammenstellen wie Sie zwischen den beiden Loks in der Doppeltraktion wechseln wie Sie eine Doppeltraktion wieder trennen... -
Page 50: So Stellen Sie Zwei Lokomotiven Zu Einer Doppeltraktion Zusammen
Bedienungsanleitung LH101 Die konventionelle Lok (Adresse 0) kann nicht in eine Doppeltraktion eingebunden werden! Beim Versuch erhalten Sie eine Fehlermeldung ( S. 53). 10.3 So stellen Sie zwei Lokomotiven zu einer Doppeltraktion zusammen: Rufen Sie zuerst die erste Lokomotive (z.B. die Lok Nr. 24) auf, und fahren Sie sie an die Stelle Ihrer Anlage, wo sie diese Lok mit der zweiten zusammenkuppeln wollen. -
Page 51: Zusammenstellung Von Lokomotiven Mit Unterschiedlicher Fahrstufenanzahl Zu Einer Doppeltraktion
Doppeltraktion Sie können nun die Adresse der Lok mit den Zifferntasten eingeben oder durch Drehen eine Lokadresse aus dem Stack wählen Nach Abschluss der Eingabe oder Auswahl wird die Adresse 78 als Doppeltraktion "D" angezeigt. Beide Lokomotiven können nun durch Drehen des Drehknopfs gleichzeitig gesteuert werden. -
Page 52: Trennen Einer Doppeltraktion
Bedienungsanleitung LH101 10.5 Trennen einer Doppeltraktion Um Loks, die sich in einer Doppeltraktion befinden wieder zu trennen führen Sie die folgenden Schritte durch: Aktion Display Erläuterung Rufen Sie eine der beiden Lokomotiven, die in einer Doppeltraktion zusammengebunden sind, auf Ihrem Handregler auf. Drücken Sie die Taste 'M' Drehen Sie den ggf. -
Page 53: Fehlermeldungen Beim Zusammenstellen Einer Doppeltraktion
Doppeltraktion 10.6 Fehlermeldungen beim Zusammenstellen einer Doppeltraktion Haben Sie bei der Zusammenstellung der Doppeltraktion einen Fehler gemacht, werden Sie durch das Display darauf hingewiesen: Die Adresse der Lok wurde vor dem Einfügen in eine Doppeltraktion nicht in den Stack eingegeben oder die Lok im Stack wurde noch nicht gefahren oder Sie haben versucht, eine konventionelle Lok (Adresse 0) in eine Doppeltraktion einzubinden... -
Page 54: Mehrfachtraktion (Mtr)
Bedienungsanleitung LH101 Mehrfachtraktion (MTR) Mit dem LH101 können Sie (in Abhängigkeit der Softwareversion der Ihnen eingesetzten Zentrale) Mehrfachtraktionen steuern, zusammenstellen und löschen. In diesem Abschnitt erfahren Sie: was eine Mehrfachtraktion ist wie eine Mehrfachtraktion zusammengestellt und wieder gelöscht wird wie Sie die Funktionen einer Lok in einer Mehrfachtraktion schalten können 11.1 Was ist eine Mehrfachtraktion? Bei einer Mehrfachtraktion werden mehrere Lokomotiven mit einer... -
Page 55: Voraussetzungen Für Eine Mehrfachtraktion
Mehrfachtraktion (MTR) 11.2 Voraussetzungen für eine Mehrfachtraktion: Mehrfachtraktionen können Sie mit allen Lokdecodern aus dem ® Digital plus by Lenz Programm einrichten, die ab Ende 1996 produziert wurden. Ebenfalls können Sie DCC-Decoder anderer Hersteller verwenden, sofern diese die Eigenschaft MTR unterstützen. - Page 56 Bedienungsanleitung LH101 Drehen Sie den Knopf bis zur Anzeige der Option "Mehrfachtraktion". Ist die gerade gesteuerte Lok die Analoglok (Adresse 0), wird die Option "Mehrfachtraktion" nicht angezeigt. Drücken auf den Drehknopf wählt die Option aus. Drehen Sie den Knopf bis zur Anzeige "Lok einfügen".
-
Page 57: Steuern Einer Mehrfachtraktion
Mehrfachtraktion (MTR) Durch Drehen können Sie nun weitere Loks aus dem Stack auswählen, die Sie zur MTR hinzufügen möchten. Durch Drücken auf den Drehknopf fügen Sie die gerade angezeigte Adresse in die MTR ein. Fahren Sie so fort, bis Sie alle gewünschten Loks zur MTR hinzugefügt haben und …... -
Page 58: Geschwindigkeit Und Fahrtrichtung Der Mtr
Bedienungsanleitung LH101 Die Mehrfachtraktion mit der Adresse 33 wird gesteuert. 11.4.1 Geschwindigkeit und Fahrtrichtung der MTR Sie können die MTR mit dem Drehknopf wie eine "normale" Lok steuern. Änderungen von Geschwindigkeit und Richtung mit dem Drehknopf wirken auf alle Loks in der MTR gleichzeitig. Es spielt also zum Steuern der MTR keine Rolle, ob die MTR-Adresse (Kennzeichen: grosses "MTR") oder die Adresse einer Lok in der MTR (Kennzeichen: kleines "m") angezeigt wird. -
Page 59: Löschen Einer Einzelnen Lok Aus Einer Mehrfachtraktion
Mehrfachtraktion (MTR) Drücken auf den Drehknopf wählt die Option aus. Drehen Sie ggf. den Drehknopf bis zur Anzeige "MTR Loks anzeigen". Drücken Sie auf den Drehknopf, nun wird die erste der Loks in der MTR angezeigt. Durch Drehen des Knopfs blättern Sie durch die in der MTR vorhandenen Loks. - Page 60 Bedienungsanleitung LH101 Aktion Display Erläuterung Rufen Sie eine Lok in der MTR oder die MTR-Adresse selbst auf Drücken Sie die Taste 'M'. Da Sie eine MTR oder eine Lok in einer MTR ausgewählt haben, wird Ihnen sofort Option "Mehrfachtraktion" angeboten. Drücken auf den Drehknopf wählt die Option aus.
-
Page 61: Löschen Einer Kompletten Mtr
Mehrfachtraktion (MTR) 11.7 Löschen einer kompletten MTR Statt einzelner Loks können Sie auch die komplette Mehrfachtraktion löschen. Beim Löschen einer kompletten MTR müssen alle Loks, die sich in der MTR befinden, auf dem Gleis stehen! Nur so können die speziellen MTR-Befehle, die über das Gleis gesendet werden, die Lokdecoder auch erreichen! Erreicht der Löschbefehl den Lokdecoder nicht (durch schlechten Kontakt, oder weil Sie die Lok vom Gleis... -
Page 62: Fehlermeldungen Bei Mehrfachtraktion
Bedienungsanleitung LH101 11.8 Fehlermeldungen bei Mehrfachtraktion Haben Sie bei der Zusammenstellung der Mehrfachtraktion einen Fehler gemacht, werden Sie durch das Display darauf hingewiesen: Error 24: Die Lokomotive wurde vor dem Einfügen in eine MTR nicht aufgerufen oder es wurde ihr kein Fahrbefehl erteilt. Sie haben versucht, eine konventionelle Lok (Adresse 0) in eine MTR einzubinden Error 25:... -
Page 63: Rückmeldungen Anzeigen
Rückmeldungen anzeigen Rückmeldungen anzeigen Mit dieser Funktion des Handreglers LH101 können Sie den Zustand der Eingänge an Rückmeldebausteinen LR100/101 und LRB08 anzeigen. Aktion Display Erläuterung Drücken Sie die Taste 'M'. Es wird Ihnen die zuletzt verwendete Option angeboten, hier im Beispiel Mehrfachtraktion gewesen.. - Page 64 Bedienungsanleitung LH101 … mit der Taste 7 zum vorherigen Melder gehen. … oder … … mit der Taste '9' zum nächsten Melder gehen. … oder … … Sie kehren durch Drücken von 'Esc' wieder zum Steuern der Lok zurück. Wenn Sie eine Rückmeldeadresse eingeben, aber kein Rückmeldebaustein dieser Adresse...
-
Page 65: Einstellen (Programmieren) Und Auslesen Von Decodereigenschaften
Einstellen (Programmieren) und Auslesen von Decodereigenschaften Einstellen (Programmieren) und Auslesen von Decodereigenschaften In diesem umfangreichen Abschnitt erfahren Sie: ® was "Programmieren" bei Digital plus by Lenz eigentlich ist welche Eigenschaften durch Programmieren verändert werden können welche verschiedenen Methoden zum Programmieren verwendet werden können... - Page 66 Voreinsendung eines frankierten Briefumschlages (Format C5) bei der Lenz Elektronik GmbH beziehen. Ob immer alle möglichen Zahlen aus dem Wertebereich 0 bis 255 erlaubt sind, hängt von der Eigenschaft ab. Für die Eigenschaft "Basisadresse", CV1, ist der Wertebereich von 1 bis 99 zugelassen.
-
Page 67: Unterschied Zwischen "Programmieren Während Des Betriebes" Und "Programmieren Auf Dem Programmiergleis
Programmiergleis? Immer dann, wenn Sie die Adresse eines Lokdecoders ändern wollen. ® Außerdem gab es Digital plus by Lenz Decoder, die das Verfahren "Programmieren während des Betriebes (PoM)" nicht beherrschen. Dies sind zum einen Lokdecoder, die entwickelt wurden bevor diese Eigenschaft durch die Normung der NMRA festgelegt wurde, zum anderen Schaltempfänger, bei denen diese Funktionalität nicht... -
Page 68: Programmieren Während Des Betriebes - Pom
Im praktischen Betrieb werden Sie vermutlich die CVs für die Anfahr- und Bremsverzögerung am häufigsten verändern. 13.2.2 Welche Lokdecoder können mit PoM in ihren Eigenschaften verändert werden? Alle Digital plus by Lenz Lokdecoder ab der XF- und XS-Serie beherrschen PoM. Wenn... -
Page 69: Können Mit Pom Werte Aus Cvs Ausgelesen Werden
Auch das Auslesen von Werten in CVs per PoM ist unter folgenden Voraussetzungen möglich: Der verwendete Decoder unterstützt PoM Lesen per RailCom (alle aktuellen Digital plus by Lenz – Decoder) Es wird eine LZV200 ab Version 3.8 eingesetzt ... - Page 70 Bedienungsanleitung LH101 Geben Sie die Nummer der CV mit den Tasten ein… (mit der Taste können Sie ein falsch eingetipptes Zeichen löschen) … und beenden Sie die Eingabe mit Druck auf die 'Lok-Taste'. Sofern die unter Abschnitt 13.2.3 "Können mit PoM Werte aus Cvs ...
-
Page 71: Auslesen Von Cvs Mit Der Adressanzeige Lrc120
Es ist möglich, mittels PoM auch die Werte von CVs während des Betriebes auszulesen. Voraussetzung hierzu sind: Verwendung eines RailCom-fähigen Lokdecoders (alle aktuellen Digital plus by Lenz Lokdecoder) die betreffende Lok befindet sich in einem von der Adressanzeige LRC120 überwachten Gleisabschnitt. -
Page 72: Setzen Und Löschen Von Bits (Schaltern) Mittels Pom - Schrittweises Vorgehen
Bedienungsanleitung LH101 Drücken auf den Drehknopf wählt die Option "PoM" aus. Sie sehen nun die Aufforderung zur Eingabe der CV, die Sie per PoM verändern wollen. Geben Sie die Nummer der CV mit den Tasten ein… … und beenden Sie die Eingabe mit Druck auf den Drehknopf. - Page 73 Einstellen (Programmieren) und Auslesen von Decodereigenschaften Aktion Display Erläuterung Rufen Sie die Lok auf, deren Eigenschaften Sie mit PoM ändern wollen Drücken Sie die 'Lok' - Taste. Drücken Sie die Taste 'M'. Es wird Ihnen die zuletzt verwendete Option angeboten, hier im Beispiel Einstellung Fahrstufenmodus gewesen..
- Page 74 Bedienungsanleitung LH101 Starten Programmierung durch Drücken. Während des Programmierens erscheint diese Anzeige. Mit 'Esc' kehren Sie zur Auswahl des Bit zurück, … … ein weiterer Druck auf 'Esc' geht zur Auswahl der CV. Wählen Sie nun eine andere CV, die Sie verändern wollen oder …...
-
Page 75: Programmieren Auf Dem Programmiergleis
Einstellen (Programmieren) und Auslesen von Decodereigenschaften 13.3 Programmieren auf dem Programmiergleis Wie schon weiter oben erläutert, verstehen wir unter Programmieren das Verändern der Eigenschaften von Decodern. Je nachdem welche Eigenschaft eines Decoders Sie verändern wollen, gibt es zwei Menüs im LH101 um die Bedienung so leicht wie möglich zu gestalten: Programmieren Adresse Dies ist die einfachste Art die Adresse eines Decoders festzustellen... -
Page 76: Was Ist Ein Programmiergleis
Bedienungsanleitung LH101 13.3.1 Was ist ein Programmiergleis? Beim "Programmieren auf dem Programmiergleis" ist es nicht nötig, die Adresse des Empfängers zu wissen. Bei diesem Verfahren erhält der Decoder z.B. den Befehl: "Schreibe in CV4 den Wert 15!" Damit Sie sicherstellen können, dass nur ein bestimmter Decoder den Programmierbefehl empfängt, müssen Sie dafür sorgen, dass beim Programmieren auf dem Programmiergleis nur genau dieser eine De- coder erreicht wird. -
Page 77: Sie Können Nun Mit
Einstellen (Programmieren) und Auslesen von Decodereigenschaften Drehen Sie ggf. den Knopf bis zur Anzeige "Programmieren Lokadresse" … … und bestätigen Sie Ihre Wahl. Die Lokadresse wird nun sofort ausgelesen. Dies dauert einige Sekunden. Konnte die Adresse erfolgreich gelesen werden, so wird sie nun angezeigt. Trat beim Auslesen ein Fehler auf, so sehen Sie eine Fehlermeldung (S. -
Page 78: Auslesen Und Programmieren Einer Cv
Bedienungsanleitung LH101 2-stellige Lokadressen (1-99) werden im Digital plus Lokdecoder gespeichert, 4-stellige Lokadressen (100-9999) in den CV17 und CV18. Bei Verwendung des Menüs "Programmieren Lokadresse" brauchen Sie sich darüber keine Gedanken zu machen. Alle notwendigen, unterschiedlichen Einstellungen werden automatisch vorgenommen! Erhalten Sie beim Auslesen der Adresse die Anzeige so ist in den Lokdecoder mit der Adresse 5678 die Mehrfachtraktionsadresse 33 einprogrammiert und die... - Page 79 Einstellen (Programmieren) und Auslesen von Decodereigenschaften Drehen Sie ggf. den Knopf bis zur Anzeige "Programmieren CV" … … und bestätigen Sie Ihre Wahl. Sie sehen nun die Aufforderung zur Eingabe der CV, deren Wert Sie lesen oder verändern wollen. Geben Sie die Nummer der CV mit den Tasten ein…...
-
Page 80: Binäre (Bitweise) Anzeige Des Cv-Wertes Und Änderung
Bedienungsanleitung LH101 Rückkehr zum Loksteuern. 13.3.4.1 Binäre (bitweise) Anzeige des CV-Wertes und Änderung Sie haben zwei Möglichkeiten, den gewünschten Wert in die CV einzugeben (oder anzuzeigen): Dezimal oder Bitweise (binär). Welche Methode Sie wählen ist Ihnen frei gestellt, jedoch gibt es CVs bei denen die bitweise Eingabe einfacher ist, bei anderen empfiehlt sich die dezimale Eingabe. -
Page 81: Auslesen Und Programmieren Eines Registers
Einstellen (Programmieren) und Auslesen von Decodereigenschaften Dezimale Anzeige Bitweise Anzeige Sie haben nun folgende Möglichkeiten: Auswahl einer anderen CV. oder Rückkehr zum Loksteuern. Beachten Sie bei der Eingabe des Zahlenwerts in die CV, dass Sie den erlaubten Wertebereich des Empfängers nicht überschreiten! Sehen Sie ggf. in der Betriebsanleitung des Empfängers nach. - Page 82 Bedienungsanleitung LH101 Drehen Sie ggf. den Knopf bis zur Anzeige "Programmieren Register" … … und bestätigen Sie Ihre Wahl. Sie sehen nun die Aufforderung zur Eingabe des Registers, dessen Wert Sie lesen oder verändern wollen. Geben Sie die Nummer des Registers mit den Tasten ein…...
-
Page 83: Fehlermeldungen Beim Programmieren Auf Dem Programmiergleis
Einstellen (Programmieren) und Auslesen von Decodereigenschaften Beachten Sie bei der Eingabe des Zahlenwerts in das Register, dass Sie den erlaubten Wertebereich nicht überschreiten! Sehen Sie ggf. in der Betriebsanleitung des Empfängers nach. 13.4 Fehlermeldungen beim Programmieren auf dem Programmiergleis Ist beim Programmieren oder Auslesen ein Fehler aufgetreten, werden Sie durch das Display darauf hingewiesen: Beim Programmieren oder Auslesen eines Empfängers wurde eine Error 1... -
Page 84: Setup Lh101 - Geräteeinstellung
Bedienungsanleitung LH101 Setup LH101 - Geräteeinstellung Dieser Abschnitt beschreibt die Einstellungen, die Sie am LH101 vornehmen können. Diese Einstellungen werden im LH101 dauerhaft gespeichert. 14.1 Fahrmodus einstellen Zur Steuerung von Richtung und Geschwindigkeit stehen Ihnen zwei Methoden zur Verfügung: der Normalmodus: In diesem Modus (Werkseinstellung) können Sie mit dem Drehknopf bis auf Fahrstufe 0 zurückregeln. -
Page 85: Clubmodus Einstellen
Setup LH101 - Geräteeinstellung Drücken auf den Drehknopf wählt diese Option aus. Drehen Sie den Knopf bis zur Anzeige der Option "Fahrmodus einstellen" und drücken Sie auf den Drehknopf. Die gerade aktive Einstellung wird angezeigt. (Werkseinstellung ist "Normal") Durch Drehen wählen Sie die gewünschte Einstellung aus …... -
Page 86: Clubmodus 1 Oder 2 Einstellen
Bedienungsanleitung LH101 Modus 2: Es ist nur möglich, die eingestellte Lok zu steuern sowie die Funktionen 0 bis 9 zu schalten. Alle anderen Bedienoptionen des LH101 sind gesperrt. Modus 0: Dies ist die Werkseinstellung. Der gesamte Bedienumfang des LH101 ist zugelassen. Modus 1 und Modus 2 werden beim Aktivieren durch ein Passwort (eine vierstellige Zahl) abgesichert. -
Page 87: Modus 0 Einstellen
Setup LH101 - Geräteeinstellung Drücken auf den Drehknopf wählt diese Option aus. Sie können nun zwischen "Clubmodus 1" und " Clubmodus 2" wählen. (Befindet sich der LH101 im Modus 1 oder 2, ist dieser Menüpunkt nicht erreichbar) Drücken auf den Knopf wählt den Clubmodus aus. -
Page 88: Zählweise Bitdarstellung
Bedienungsanleitung LH101 … "Passwort?" in der Anzeige erscheint. Wenn loslassen können Passwort eingeben, das Sie hoffentlich noch wissen ;-) . Wenn Sie das Passwort korrekt eingegeben haben, wird Hinweis Clubmodus 0 angezeigt … … danach kehrt der LH101 zum Loksteuern zurück, es wird die Lokadresse oder die Fahrstufe angezeigt. -
Page 89: Helligkeit Display
Setup LH101 - Geräteeinstellung Drehen Sie den Knopf bis zur Anzeige der Option "Setup LH101"" Drücken auf den Drehknopf wählt diese Option aus. Drehen Sie den Knopf bis zur Anzeige der Option "Zählweise Bitdarstellung" Drücken auf den Drehknopf wählt diese Option aus, die aktuelle Einstellung wird angezeigt Durch Drehen wählen Sie zwischen den... - Page 90 Bedienungsanleitung LH101 … drücken Sie die Taste 'M' Drehen Sie den Knopf bis zur Anzeige der Option "Setup LH101"" Drücken auf den Drehknopf wählt diese Option aus. Drehen Sie den Knopf bis zur Anzeige der Option "Helligkeit Display"" Drücken auf den Drehknopf wählt diese Option aus.
-
Page 91: Kontrast Display
Setup LH101 - Geräteeinstellung 14.5 Kontrast Display Aktion Display Erläuterung Ausgehend vom Loksteuern … … drücken Sie die Taste 'M' Drehen Sie den Knopf bis zur Anzeige der Option "Setup LH101"" Drücken auf den Drehknopf wählt diese Option aus. Drehen Sie den Knopf bis zur Anzeige der Option "Kontrast Display""... -
Page 92: Versionsnummer Anzeigen
Bedienungsanleitung LH101 14.6 Versionsnummer anzeigen Aktion Display Erläuterung Ausgehend vom Loksteuern … … drücken Sie die Taste 'M' Drehen Sie den Knopf bis zur Anzeige der Option "Setup LH101"" Drücken auf den Drehknopf wählt diese Option aus. Drehen Sie den Knopf bis zur Anzeige der Option "Versionsnummer anzeigen"... -
Page 93: Xpressnet Adresse Einstellen
Setup LH101 - Geräteeinstellung 14.7 XpressNet Adresse einstellen Alle am XpressNet angeschlossenen Eingabegeräte müssen zur korrekten Abwicklung des Informationsaustausches mit der Zentrale eine eigene Geräteadresse haben. Sie müssen daher sicherstellen, dass alle angeschlossenen Geräte verschiedene Geräteadressen haben. Es können zurzeit bis zu 31 Geräte an das XpressNet angeschlossen werden, d.h. -
Page 94: Rücksetzen Auf Werkseinstellung
Bedienungsanleitung LH101 Drücken des Drehknopfs speichert den gerade angezeigten Wert, … ... Sie sind wieder im Menü "XpressNet Adresse einstellen". Mit Drücken der 'Esc' Taste gehen Sie zurück zum Loksteuern. 14.8 Rücksetzen auf Werkseinstellung Aktion Display Erläuterung Ausgehend vom Loksteuern … …... -
Page 95: Fahrstraßenzeit
Setup LH101 - Geräteeinstellung … dann startet das Gerät neu. Fahrstraßen Im LH101 gespeicherte Fahrstraßen bleiben auch beim Rücksetzen auf Werkseinstellung erhalten. 14.9 Fahrstraßenzeit Mit dieser Einstellung legen Sie fest, mit welchem zeitlichen Abstand die Schaltbefehle einer Fahrstraße an die Zentrale gesendet werden. Es ist ein Bereich von 250ms (0,25s) bis 1500ms (1,5s) einstellbar. -
Page 96: Sprachauswahl
Bedienungsanleitung LH101 Nach Drücken auf den Drehknopf wird die aktuelle Einstellung angezeigt (Werkseinstellung ist 500ms). Mit Drehen am Knopf stellen Sie die gewünschte Zeit ein. Es sind Zeiten zwischen 250ms und 1500ms einstellbar. Bestätigen Sie die Wahl durch Druck auf dem Drehknopf. -
Page 97: Beleuchtungszeit (Ab Version 2.1)
Setup LH101 - Geräteeinstellung Drücken auf den Drehknopf wählt diese Option aus. Drehen Sie den Knopf bis zur Anzeige der Option "Sprachauswahl" Drücken auf den Drehknopf wählt diese Option aus. Drehen Sie am Drehknopf bis zur Anzeige der gewünschten Sprache. Drücken Drehknopf wählt die... - Page 98 Bedienungsanleitung LH101 Sobald Sie eine Taste drücken oder am Drehknopf drehen, wird die Hinterleuchtung automatisch wieder eingeschaltet. Einstellbar sind Zeiten zwischen 10 und 900 Sekunden in Schritten von 10 Sekunden. Werkseinstellung ist 30 Sekunden. Insbesondere beim LH101R hilft eine kurze Beleuchtungszeit den Batterieverbrauch zu reduzieren.
-
Page 99: Anhaltebedingung (Ab Version 2.1)
Setup LH101 - Geräteeinstellung … mit 2x Drücken von 'Esc' … … zum Loksteuern zurückkehren. 14.12 Anhaltebedingung (ab Version 2.1) Mit der Anhaltebedingung legen Sie die Reaktion des LH101 fest, wenn Sie den Drehknopf drücken und gedrückt halten. Notaus: Schaltet die Spannung am Gleis ab (alle fahrenden Loks halten an) Notstop: Hält die zuletzt mit dem LH101R gesteuerte Lok per... -
Page 100: F29-F68 Modus
Bedienungsanleitung LH101 Drehen Sie den Knopf um die gewünschte Anhaltebedingung zu wählen. Drücken Drehknopfs speichert gewählte Einstellung. Sie können nun eine andere Setup-Option wählen oder … … mit 2x Drücken von 'Esc' … … zum Loksteuern zurückkehren. 14.13 F29-F68 Modus Nach der RailCommunity-Norm RCN-212 (bzw. -
Page 101: Einstellen Der Maximalen Funktionsgruppe
Setup LH101 - Geräteeinstellung Drehen Sie den Knopf bis zur Anzeige der Option "F29-F68 Modus" und drücken Sie auf den Drehknopf. aktuell eingestellte Modus wird angezeigt. Drehen am Drehknopf ändert die Einstellung. Drücken Drehknopfs wählt engezeigten Modus aus. … mit 2x Drücken von 'Esc' … …... - Page 102 Bedienungsanleitung LH101 Drücken auf den Drehknopf wählt diese Option aus. Drehen Sie den Knopf bis zur Anzeige der Option "max.Funkt-Gruppe" und drücken Sie auf den Drehknopf. Es wird die Funktionsgruppe angezeigt, die maximal mit der F-Taste gewählt werden kann (Werkseinstellung Fg6) Drehen Sie den Drehknopf bis zur Anzeige der von Ihnen gewünschten maximalen Funtkionsgruppe.
-
Page 103: Systemeinstellungen (Setup System)
Systemeinstellungen (Setup System) Systemeinstellungen (Setup System) Unter Systemeinstellungen verstehen wir solche, die nicht nur bestimmte Loks, sondern das gesamte Digitalsystem betreffen. Diese Einstellungen werden in der Zentrale (LZ100 / LZV100 / LZV200) dauerhaft gespeichert. 15.1 Modellzeit stellen Diese Option ist ab Zentralen Version 3.8 (LZV200) verfügbar. In der Zentrale LZV200 ist eine Modelluhr integriert. - Page 104 Bedienungsanleitung LH101 Drehen Sie ggf. den Drehknopf bis die Option "Zeit stellen" sichtbar ist. Mit Drücken auf den Drehknopf wählen Sie die Option aus. Die aktuelle Einstellung der Modelluhr wird angezeigt (das Bild links zeigt den Zustand in der Werkseinstellung oder nach einem Reset der Zentrale).
- Page 105 Systemeinstellungen (Setup System) … und drücken Sie den Drehknopf. Stellen Sie die gewünschte Minute ein … … und bestätigen Sie durch Druck auf den Drehknopf. Wählen Drehknopf Einstellung des Zeitfaktors aus. Drücken Sie den Drehknopf, … … stellen Sie den gewünschten Zeitfaktor ein …...
-
Page 106: Auto" Modus Ein- Und Ausschalten
LZ100 / LZV100 / LZV200. Ist er eingeschaltet, so "merkt" sich die Zentrale auch nach dem Ausschalten die Geschwindigkeiten der ® aufgerufenen Loks. Schalten Sie Ihr Digital plus by Lenz System wieder ein, so fahren alle Loks mit ihrer letzten Geschwindigkeit wieder los. -
Page 107: Verhalten Des Systems Bei Eingeschaltetem "Auto"-Modus
Systemeinstellungen (Setup System) 15.2.1 Verhalten des Systems bei eingeschaltetem "AUTO"- Modus Wenn Sie Ihre LZ100/LZV100/LZV200 bei eingeschaltetem "AUTO"- Modus wieder in Betrieb nehmen, so sehen Sie auf dem LH101 diese Anzeige: Wenn Ihre Loks jetzt mit der "alten" Geschwindigkeit anfahren sollen, so drücken Sie einfach auf den Drehknopf. -
Page 108: Lokadressen Aus Dem Zentralenspeicher Löschen
Bedienungsanleitung LH101 Drehen Sie den Knopf bis zur Anzeige der Option "Versionsnummer anzeigen" 15.4 Lokadressen aus dem Zentralenspeicher löschen Die Zentrale (LZ100/LZV100/LZV200) sendet an alle in ihrem Speicher abgelegten Lokadressen wiederholt die Fahrdaten. Um nicht mehr Adressen als nötig zu senden (und damit die Reaktionszeit zu optimieren) können Sie für den Fahrbetrieb nicht benötigte Lokadressen aus dem Speicher löschen. - Page 109 Systemeinstellungen (Setup System) Drücken auf den Drehknopf wählt diese Option aus. Drehen Sie den Knopf bis zur Anzeige der Option "Lokadresse aus Zentralenspeicher löschen" Drücken auf den Drehknopf wählt die Option aus, erste Zentralenspeicher wird angezeigt. Wählen Sie die Lokadresse, die Sie löschen möchten durch Drehen aus …...
-
Page 110: Service Variable Lesen / Schreiben
Bedienungsanleitung LH101 Verwenden Sie das Löschen einer Lokadresse aus dem Zentralenspeicher mit Vorsicht. Ist eine Adresse gelöscht, so sendet die Zentrale diese Daten nicht mehr zur Lok. Bei einer Stromunterbrechung kann also die betreffende Lok die Informationen verlieren. 15.5 Service Variable lesen / schreiben Service Variablen sind Einstellungen, die in der LZV200 vorgenommen werden können. - Page 111 Systemeinstellungen (Setup System) Bestätigen Sie die Zahleneingabe mit der 'Lok'-Taste. aktuelle Einstellung wird angezeigt. Eingabe eines anderen Wertes in die SV. oder zur vorherigen SV gehen, diese wird sofort gelesen. oder zur nächsten CV gehen, diese wird sofort gelesen. oder Wechseln zur binären Anzeige (und Änderung des Wertes).
-
Page 112: Anhang
Bedienungsanleitung LH101 Anhang In diesem Anhang haben wir Informationen für Sie gesammelt, die für den erfahrenen Benutzer interessant sein können oder Ihnen bei Problemen weiterhelfen sollen. 16.1 Fehlermeldungen auf dem Display Der LH101 zeigt immer eine Meldung an, wenn Sie irgend etwas getan haben, was zu diesem Zeitpunkt nicht zulässig ist. - Page 113 Befehl an die Zentrale nicht die erwartete Antwort bekommen. Ursache kann eine Störung auf dem XpressNet sein. Überprüfen Sie, ob alle Kabel korrekt verbunden sind. Weiterhin ist ein Defekt an der Zentrale oder am Handregler möglich. Wenden Sie sich ggf. an Ihren Fachhändler oder die Fa. Lenz.
-
Page 114: Fahrstraßen - Formblatt
Bedienungsanleitung LH101 16.2 Fahrstraßen - Formblatt Fahrstraße Nr._____ Fahrstraße Nr._____ Schritt Adresse + / - Schritt Adresse + / -... -
Page 115: Hilfe Bei Störungen
Anhang 16.3 Hilfe bei Störungen Störung mögl. Ursache Korrektur Lokomotive fährt nicht Falsche Lokadresse im Geben Sie die richtige (S. 18) Lokadresse ein. Display Lokadresse wird im Sie befinden sich in der Drücken Sie die 'Enter'-Taste. Display angezeigt, Adressauswahl des Drücken der Fahrtasten Zentralenspeichers, zeigt jedoch keine... - Page 116 Bedienungsanleitung LH101 Auf dem Display Es wurde von einem Beenden Sie den NOTHALT erscheint "STOP" anderen Handregler der durch Drücken des blinkend NOTHALT ausgelöst. Drehknopfs. Auf dem Display Es wurde von einem Beenden Sie den NOTAUS erscheint "AUS" anderen Handregler der durch Drücken des blinkend NOTAUS ausgelöst.
-
Page 117: Baumstruktur Der Optionen Des Lh101
Anhang 16.4 Baumstruktur der Optionen des LH101 Lokadresse aus Stack des LH101 wählen Lokadresse aus Zentralenspeicher wählen Fahrstufenmodus wählen Funktionsgruppe ändern Lange drücken: Funktionen konfigurieren Refresh von Funktionen konfigurieren Dauer / Momentfunktion einstellen Weichen / Signale schalten Fahrstraßen abrufen Fahrstraßen anlegen und bearbeiten Anzeige der Modellzeit Doppeltraktion Mehrfachtraktion... - Page 118 Bedienungsanleitung LH101 Helligkeit Display Kontrast Display Versionsnummer anzeigen XpressNet Adresse einstellen Rücksetzen auf Werkseinstellung Fahrstraßenzeit Sprachauswahl Beleuchtungszeit Anhaltebedingung F29-F68 Modus max. Funkt-Gruppe Setup System Zeit stellen "AUTO"-Modus Versionsnummer System anzeigen Lokadresse aus Speicher löschen Service Variable lesen/schreiben...
- Page 119 Anhang...
- Page 120 Betrieb mit nicht für Modellbahnen zugelassenen, umgebauten oder schadhaften Transformatoren bzw. sonstigen elektrischen Geräten, eigenmächtigen Eingriff, Gewalteinwirkung, Überhitzung, Feuchtigkeitseinwirkung u.ä. ist ausgeschlossen; außerdem erlischt der Gewährleistungsanspruch. Vogelsang 14 35398 Giessen Hotline: 06403 900 133 Fax: 06403 900 155 www.lenz-elektronik.de support@lenz-elektronik.de Diese Betriebsanleitung bitte für späteren Gebrauch aufbewahren!
- Page 121 LH101 Operating Manual Version 1.0 Edition 02 22 Art. no. 21101 B.B.10.0040...
- Page 122 Welcome! We would like to congratulate you on your acquisition of the LH101 ® manual control by Digital plus by Lenz . We hope you will enjoy this model railway control. The LH101 manual control is the universal input device in the ®...
- Page 123 Important advice, please read first! Connection and initial operation ..............10 3.1.1 Connection to the LZ100/LZV100 command station ........10 3.1.2 Setting the XpressNET address ..............10 Operating your first train ................11 3.2.1 Calling up a locomotive address: ..............11 3.2.2 Controlling a locomotive: ................11 3.2.3 Changing the direction of travel: ..............12 3.2.4...
- Page 124 Operating manual LH101 7.2.3 Adding a step to a route ................40 Deleting a route .................... 40 Setting routes ......................42 Double traction ...................... 44 What is a double traction? ................45 Requirements for a double traction ............... 45 Assembling two locomotives in a double traction: ......... 46 Assembling locomotives with different speed steps into a double traction ......................
- Page 125 Important advice, please read first! 12.3.4.1 Binary (bitwise) displaying and changing of the CV value ....... 75 12.4 Error messages while programming on the programming track .....79 12.4.1 Display of other connected manual controls ..........79 13 LH101 setup (device setting)..................80 13.1 Setting the speed step mode ................80 13.2...
-
Page 126: Important Advice, Please Read First
Relevant information is contained in the beginning of each section. ® The LH101 may only be operated with Digital plus by Lenz system components. Any use other than that described in this operating manual is not permitted, and all guarantees will become invalid if the LH101 is used inappropriately. - Page 127 Important advice, please read first! In most cases, the LH101 display and the keys are shown as illustrations. If the text makes reference to displays, these are put in double quotes: "L 0001" If the text makes reference to keys, these are put in single quotes: Cross references: ...
- Page 128 Operating manual LH101 Function overview of the LH101 This section provides a short overview of the functions of the LH101 in Version 2.1. The new features added to the previous version are shown in italics. The use of these functions is described further below. Cross references refer you to the corresponding page in this operating manual.
- Page 129 Function overview of the LH101 signals signals and other magnetic articles. (p. 31) Additional operating options have been integrated for convenient switching of turnouts. Routes You can save up to 16 routes with 16 steps each in the LH101. (p. 34) The LH101 is capable of two so-called “club modes“...
-
Page 130: Connection And Initial Operation
3.1 Connection and initial operation The LH101 may be connected to the following components of the ® Digital plus by Lenz system: LZ100 or LZV100 command station from version 3.6 onwards. As is the case with all XpressNET devices, the LH101 can be disconnected and reconnected during operation. -
Page 131: Operating Your First Train
First steps control is set to device address 04. If you already operate another XpressNET device on this address, you must set your LH101 to a different address. Information on setting the XpressNET address can be found in the section "Setting the XpressNet "... -
Page 132: Changing The Direction Of Travel
Operating manual LH101 … down to a standstill. 3.2.3 Changing the direction of travel: To change the direction of travel, first set the speed step to “0”. You can now change the direction of travel Action Display Explanation Press the rotary knob to change the direction of travel of the locomotive. -
Page 133: Switching The Light Function Of The Locomotive Decoder
First steps 3.2.5 Switching the light function of the locomotive decoder: Action Display Explanation Use the '0' key to switch function 0 (usually the direction-dependent head light of the locomotive) on and off. If this function is enabled, this is shown in the bottom line of the display. -
Page 134: Basic Operating Instructions For The Lh101
Operating manual LH101 Basic operating instructions for the LH101 First and foremost, the LH101 serves to control locomotives, i. e. to change the speed and the direction of the locomotive and to switch functions in locomotive decoders. Therefore, after being turned on, the LH101 is always set to the operating mode “Controlling locomotive”. -
Page 135: The Lh101 Lcd Display
Basic operating instructions for the LH101 4.3 The LH101 LCD display The LH101 has a two-line luminous LCD display. Depending on the operating mode you are in, the display will look different. The locomotive address is displayed using 4 digits. If needed, zeros are added in front of the address. -
Page 136: The Rotary Knob Of The Lh101
Operating manual LH101 A single locomotive (L) with address 0003 is being controlled. The direction of travel is forward. The speed step is 16 of 28. Function group 0 has been selected; functions F0 and F1 are enabled. A single locomotive (L) with address 0260 is being controlled. -
Page 137: Controlling Locomotives
Controlling locomotives Controlling locomotives Controlling locomotives means changing the speed and the direction of locomotives and switching functions in locomotive decoders (lighting, coupling etc.). In this section, you will learn: three different ways to select (i. e. call up) locomotive addresses. more information on controlling the speed and direction. -
Page 138: Choosing Locomotive Addresses From The "Stack" Of The Lh101
Operating manual LH101 Continue to enter the address. After have entered complete locomotive address, the information about function, direction and speed step associated with this locomotive address is queried from the command station and displayed. If the display flashes after you have called up the locomotive address, the locomotive has already been called up by another manual control. -
Page 139: Selecting A Locomotive Address From The Command Station Memory
Controlling locomotives Continue until you have reached the . . . last stack slot. Press the rotary knob to select the stack slot and the locomotive address placed therein. If you need more than 8 stack slots, you can use another LH101 and save other locomotive addresses in its stack. -
Page 140: Taking Over Control Of A Locomotive From Another Manual Control
Operating manual LH101 Confirm your selection. The address saved first in the command station memory is displayed. Turn the rotary knob to scroll through the command station memory. The letter in front of the address indicates whether you are dealing with a locomotive that operates in a multiple traction ("m")…... -
Page 141: Changing The Locomotive`s Speed And Direction
Controlling locomotives If you do not want to take over the locomotive Press the 'Esc' key to change back to the locomotive controlled before or select another locomotive address. 5.2 Changing the locomotive`s speed and direction To control the speed and direction, two methods are available: the standard mode (ex-factory setting): In this mode, use the rotary knob to decrease the speed step to The shunting mode:... -
Page 142: Locomotive-Specific Emergency Stop
Operating manual LH101 Action Display Explanation A clockwise turn increases the speed step. A counter clockwise turn decreases the speed step … … down to a standstill. Press the rotary knob while in speed step 0 to change the direction of travel. 5.2.1.1 Locomotive-specific emergency stop Action... - Page 143 Controlling locomotives The locomotive-specific emergency stop is not available in the shunting mode. If you press the rotary knob, the locomotive stops with the braking delay set in the locomotive decoder. 5.2.2 Shunting mode While in shunting mode, use the rotary knob to decrease the speed step to 1.
-
Page 144: Shunting Mode
F68) functions in locomotive decoders. The use of 69 functions requires the use of an LZV200 from version 4.0. Older versions of Lenz control panels support up to 29 functions. For the LH101, these 69 functions are divided into 7 function groups (Fg0 bis Fg6). -
Page 145: Changing Function Groups
Controlling locomotives Function group 1: 11 12 13 14 16 17 18 19 Function group 2 21 22 23 24 26 27 28 29 Function group 3 31 32 33 34 36 37 38 39 Function group 4 41 42 43 44 46 47 48 49... -
Page 146: Configuring Locomotive Decoder Functions
Operating manual LH101 5.3.2 Configuring locomotive decoder functions Functions F1 to F28 can be set to permanent or temporary operation. Function F0 is always set to permanent operation. Permanent operation Temporary operation Press the key to enable the Press the key to enable the function;... -
Page 147: Configuring The "Refresh" Of Functions
Controlling locomotives … or end the configuration process by pressing 'F' … or 'Esc'. Configuring the “refresh“ of functions 5.3.3 By “refreshing” functions we mean the following: In defined regular intervals, the command station sends function information via the track to all decoders located on the track. -
Page 148: Displaying And Changing The Speed-Step Mode
Operating manual LH101 Turn the rotary knob to select another “refresh setting”: Functions F0 to F12 are transmitted cyclically. Functions F0 to F20 are transmitted cyclically. Functions F0 to F28 are transmitted cyclically. Functions F0 to F4 are transmitted cyclically. Press the rotary knob to confirm your selection. - Page 149 Controlling locomotives Make sure that the locomotive is set to speed step “0”. Otherwise, the speed step mode can be displayed but not changed. Press the 'locomotive' key. Change to locomotive settings. Turn the rotary knob to display the option "Fahrstufenmodus/Speed step mode"...
-
Page 150: Emergency Off
Operating manual LH101 5.5 Emergency off Action Display Explanation Press the rotary knob and keep it pressed until "OFF" is displayed. The track voltage is now turned off. To turn the track voltage back on, press the centre of the rotary knob again until the locomotive address is displayed again. -
Page 151: Switching Points And Signals
(e. g. to the LS100/LS150 of the Digital ® plus by Lenz system or to other compatible modules). You can switch a total of 1024 points, signals and other magnetic articles using ® the Digital plus by Lenz system. Action Display Explanation Proceed from „Controlling locomotive“. -
Page 152: Displaying The Point Setting
Operating manual LH101 …or… press the 'Esc' key to complete the switching of points and signals. While switching points and signals, it is still possible to control the speed and direction of the displayed locomotive using the rotary knob. This allows you to switch points during shunting manoeuvres. - Page 153 Switching points and signals Display of the point setting ‘Rm’ indicates that you have called up a point number of a feedback- capable LS100 switch decoder. When calling up the point, the position + may be displayed. If you now key to switch the point, the display changes to –...
-
Page 154: Creating, Editing And Deleting Routes
Operating manual LH101 Creating, editing and deleting routes Routes are a series of switch commands for points/signals that can be called up with just a few operating steps. Routes serve to effect the point settings required for a certain path with little effort. -
Page 155: Creating A New Route
Creating, editing and deleting routes 7.1 Creating a new route you create a route, note down the respective point EFORE number as well as the required setting. The Annex ( 110) includes a form that you can copy for this purpose. The download area on our website also contains a PDF form that you can use. -
Page 156: Editing A Route
Operating manual LH101 Press the 'M' key to enter the desired point/signal setting. Press the 'M' key again to send a corresponding switch command to the point/signal. This way you can verify if you have selected the correct point and the correct setting. Press the 'point/signal' key to confirm the entries relating to this step. - Page 157 Creating, editing and deleting routes Turn the rotary knob to select "Fahrstrasse bearbeiten/Edit route". Press the key to confirm your selection and … … use the rotary knob to select the route that you want to edit. Press the rotary knob to confirm your selection.
-
Page 158: Editing A Step In A Route
Operating manual LH101 7.2.1 Editing a step in a route Proceed initially as described in the section "Editing a route", page 36 and select the option "Change step". The first step in the route selected for changing is displayed. Scroll to the step that you want to change. If you only want to change the point setting, proceed with (2) =>... -
Page 159: Deleting A Step From A Route
Creating, editing and deleting routes … select another step for editing … …or… … press the ‘Esc‘ key to leave the menu "Fahrstraßen bearbeiten/Edit routes" and return to “Controlling locomotive”. 7.2.2 Deleting a step from a route Proceed initially as described in the section "Editing a route", page 36. Select the option "Schritt löschen/Delete step"... -
Page 160: Adding A Step To A Route
Operating manual LH101 … press the 'Esc' key to cancel the deletion process and return to selecting a step. 7.2.3 Adding a step to a route The option " New step" is displayed only if the maximum amount of steps in a route has not yet been reached! Proceed initially as described in the section "Editing a route", page 36. - Page 161 Creating, editing and deleting routes Use the rotary knob to select "Fahrstrasse löschen/Delete route". Press the key to confirm your selection and … select the route that you want to delete. Press the key again to confirm the deletion. The selected route is deleted. You are now back in the routes menu.
-
Page 162: Setting Routes
Operating manual LH101 Setting routes Before you can set routes, you have to create routes in the LH101. The creating, editing and deleting of routes is described from page 34 onward. The setting of a route is similar to the setting of points and signals: Action Display Explanation... - Page 163 Setting routes When the route has been created, a confirmation is displayed. You can now … … turn the rotary knob again to select the next route. …or… press the '<=' key to go back up a level so you can switch individual points. …or…...
- Page 164 Operating manual LH101 Displaying the fast clock This feature can only be used when using the LZV200 central unit. Before you can use the time display, you must set the model time and the desired factor in the "Setup System" of the LZV200 central unit.
-
Page 165: Double Traction
Double traction 10 Double traction The LH101 allows you to add two locomotives to a double traction and to control them as if they were one locomotive. In this section, you will learn: what a double traction is the requirements for a double traction how to assemble a double traction how to switch between the two locomotives in a double traction how to disassemble a double traction... -
Page 166: Assembling Two Locomotives In A Double Traction
Operating manual LH101 10.3 Assembling two locomotives in a double traction: Call up the first locomotive (e. g. locomotive no. 24) and drive it to the location on your layout where you want to couple it to the second locomotive. Now, call up the second locomotive (e. -
Page 167: Assembling Locomotives With Different Speed Steps Into A Double Traction
Double traction Both locomotives can now be controlled simultaneously by turning the rotary knob. You can stop or change the direction of travel as if you were controlling one locomotive. You can now control the assembled double traction as if it was one locomotive. -
Page 168: Error Messages When Assembling A Double Traction
Operating manual LH101 Press the 'M' key. Turn the rotary knob until you reach the option "Doppeltraktion/Double traction". Press the rotary knob to select the option. A security query is displayed. Press the 'Esc' key to cancel the process. Press the key again to disassemble the double traction;... - Page 169 Double traction One of the two locomotives that you wanted to add to the double reaction has already been called up by another manual control. One of the two locomotives that you wanted to add to the double traction is already part of another double traction. The speed step of one of the two locomotives was not 0.
-
Page 170: Multiple Traction (Mtr)
11.2 Requirements for a multiple traction: You can assemble multiple tractions with all locomotive decoders of ® the Digital plus by Lenz programme that were produced as of the end of 1996. You can also use DCC decoders of other manufacturers... -
Page 171: Assembling A Multiple Traction (Mtr)
Multiple traction (MTR) provided they support the MTR function. Further information can be obtained from the manufacturers of these decoders. All locomotives that you want to add to an MTR must be located on the layout! Only then can the locomotive decoders receive the special MTR commands sent over the track! The addresses of all locomotives that you want to add to a... - Page 172 Operating manual LH101 If the locomotive currently controlled is a conventional analogue locomotive (address 0), the option "multiple traction" is not available. Press the rotary knob to select the option. Turn the rotary knob to display "Lok einfügen/Add locomotive". Press the rotary knob to select the option. You are asked to enter the multiple traction address.
-
Page 173: Controlling A Multiple Traction
Multiple traction (MTR) Press the rotary knob to add the displayed address to the MTR. Continue until you have added all desired locomotives to the MTR and … … complete the assembly process. Locomotives from the LH101`s stack that are already part of a double traction or a multiple traction are not available. -
Page 174: Displaying The Members Of An Mtr And Switching Between Locomotives In An Mtr
Operating manual LH101 11.4.2 Switching functions in the MTR The keys that turn functions on or off affect only that locomotive in the MTR whose address is displayed (indicted by a lower case “m”). If the MTR address (indicted by an upper case “M”) is displayed, you cannot switch functions and no functions are displayed. -
Page 175: Deleting A Locomotive From A Multiple Traction
Multiple traction (MTR) Turn the rotary knob to scroll through the locomotives that are part of the MTR. Press the rotary knob to select the desired locomotive. 11.6 Deleting a locomotive from a multiple traction You can delete any locomotive that is part of an MTR at any time. When deleting a locomotive from an MTR, this locomotive must be located on the layout! Only then can the locomotive decoders receive the special MTR commands... - Page 176 Operating manual LH101 Turn the rotary knob until "MTR Loks löschen/Delete locomotives" displayed. Press rotary knob to display the locomotives in the MTR. Turn the rotary knob to select the locomotive address that you want to delete from the MTR. Press the rotary knob to confirm your selection.
-
Page 177: Deleting A Complete Mtr
Multiple traction (MTR) 11.7 Deleting a complete MTR You can also delete the complete multiple traction. When deleting a complete MTR, all locomotives in the MTR must be located on the layout! Only then can the locomotive decoders receive the special MTR commands sent over the track! If a command to delete does not reach the locomotive decoder (due to bad contact or because you have... -
Page 178: Error Messages Relating To Multiple Tractions
Operating manual LH101 11.8 Error messages relating to multiple tractions If you made an error when assembling the multiple traction, you receive one of the following messages: The locomotive was not called up before it was added to the MTR or Error 24: the locomotive was not given an operating command. -
Page 179: Displaying Feedback
Displaying feedback 12 Displaying feedback Use this function to display the status of inputs of LR100/101 feedback modules. Action Display Explanation Press the 'M' key. You are offered the option last selected, e. g. multiple traction. Turn rotary knob display "Rückmeldungen anzeigen/Display feedback". - Page 180 Operating manual LH101 If you enter a feedback address, but no feedback module with that address is connected to the feedback bus, you see the following display: Press the '<=' key to enter the address of another feedback module … The valid feedback address range is 1 to 128.
-
Page 181: Configuring (Programming) Decoder Settings
CV3 is always the starting delay, and CV4 is always the braking delay. A description of the available CVs and their settings is contained in Digital plus by Lenz® locomotive decoder manuals or in the " Handbuch Lokdecoder (Art. -
Page 182: Difference Between "Programming In Operational Mode" And "Programming On The Programming Track
Operating manual LH101 There are also “index cards” that contain the entered numeric value in another way of writing to facilitate use. This other way of writing is called binary writing. Here, the numeric value is not displayed using the digits 0,1,2,3,4,5,6,7,8,9, but using only the digits 0 and 1. It is easier to imagine those CVs as a series of 8 switches that can be switched on or off. - Page 183 Whenever you want to change the address of a locomotive decoder. ® There are also Digital plus by Lenz decoders that are not capable of "Programming in operational mode", e. g. locomotive decoders that were developed before this feature became an NMRA standard, or e.
-
Page 184: Programming In Operational Mode - Pom
13.2.2 Which locomotive decoders can have their settings changed using PoM? All Digital plus by Lenz locomotive decoders from the XF and XS series onwards are capable of PoM. If you use locomotive decoders from other manufacturers, please refer to their manuals to check if these are capable of PoM. - Page 185 Configuring (programming) decoder settings • If the decoder from which PoM values are to be read out is not within the supply range of the LZV200, an LV103 must be used as amplifier. 13.2.4 Programming a numeric value into a CV — step by step approach: In the following example, we will change the starting delay of the locomotive with address 3 using PoM...
- Page 186 Operating manual LH101 In this example, the value "006" was read from CV 3. Delete the displayed value to enter a new value or turn the knob to change the value. If the CV cannot be read out via Railcom, you can enter the desired value directly: …...
- Page 187 Configuring (programming) decoder settings 13.2.5 Reading out CVs using the LRC120 address display It is possible to read out CV values via PoM during operation. Requirements: • use of a RailCom-capable locomotive decoder • the locomotive is located in a track section monitored by the LRC120 address display •...
- Page 188 Operating manual LH101 Whenever you enter the number of a CV, a PoM read command is sent to the decoder which sends the content of the respective CV via RailCom. The LRC120 address display receives this information and displays it for approx. 3 seconds. 13.2.6 Setting and deleting bits (switches) using PoM —...
- Page 189 Configuring (programming) decoder settings Use the keypad to enter the number of the CV … … and press the 'locomotive' key to complete the entry process. Press the 'M' key. Use the rotary knob to select the bit that you want to change.
- Page 190 Operating manual LH101 … return to “Controlling locomotive”.
-
Page 191: Programming On The Programming Track
Configuring (programming) decoder settings 13.3 Programming on the Programming track As explained above, programming means changing the settings of decoders. Depending on the decoder setting that you want to change, two menus are available to facilitate handling: Programming Address This is the easiest way to determine or change a decoder address. You do not need to know in which CVs the values for the address have to be entered, the process is the same for all addresses. - Page 192 Operating manual LH101 13.3.2 Where to connect the programming track/the decoder? The Digital plus command stations LZ100, LZV100 and LZV200 have special connection terminals for the programming track (or the decoder). These connections are labelled P and Q. More information can be found in the operation manual of the respective command station.
- Page 193 Configuring (programming) decoder settings Press the 'locomotive' key to complete the entry process. The desired address is now entered into the locomotive decoder. The locomotive address is displayed. If an error occurred during the entry process, you will receive an error message (p. 79). Now, press to enter another locomotive address to move one step upwards in the...
-
Page 194: Reading Out And Programming A Cv
Operating manual LH101 If you see this display while reading out the address, multiple traction address 33 is programmed in the locomotive decoder with address 5678 and the locomotive is set to operate with the MTR address 33. If you enter a new address, the MTR address will be deleted! 13.3.4 Reading out and programming a CV Action... -
Page 195: Binary (Bitwise) Displaying And Changing Of The Cv Value
Configuring (programming) decoder settings … press the 'locomotive' key to complete the entry process. The CV is read out and the result displayed. Now, you have the following options: Enter another value in the CV change to the binary display (and changing the value) select another CV return to “Controlling locomotive”. - Page 196 Operating manual LH101 After the result is displayed, change to the bitwise (binary) display of the decimal numeric value. The bottom line of the display indicates which bits are set. For decimal value 10 these are bits 2 and 4 (counting starts at 1). If you want to make changes, press the corresponding number keys.
- Page 197 Configuring (programming) decoder settings Make sure you do not exceed the valid value range of the decoder when entering the numeric value in the CV! If needed, refer to the operating manual of the decoder. CV7 (version number) and CV8 (manufacturer identification) can only be read out, but not entered.
- Page 198 Operating manual LH101 … and the result is displayed. You now have the following options: Enter another value in the register. Switch to binary display (and change the value). The procedure is the same as for programming a CV. Selection of another register. Return to locomotive control.
-
Page 199: Error Messages While Programming On The Programming Track
Configuring (programming) decoder settings 13.4 Error messages while programming on the programming track If an error occurred during programming or reading out process, you will receive an error message: While programming or reading out a decoder, a power overload (short Error 1 circuit) was detected. -
Page 200: Lh101 Setup (Device Setting)
Operating manual LH101 14 LH101 setup (device setting) This section describes the possible settings of the LH101. These are permanently saved in the LH101. 14.1 Setting the speed step mode To control direction and speed, two methods are available: Standard mode: In this mode (ex-factory setting) you can decrease the speed step to 0 using the rotary knob. -
Page 201: Setting The Club Mode
LH101 setup (device setting) Press the rotary knob to select this option. Turn the rotary knob until the option "Fahrmodus einstellen/Setting speed step mode" is displayed and press the rotary knob. The current setting is displayed. (ex-factory setting is "standard"). Turn the rotary knob to select the desired setting …... -
Page 202: Setting Club Mode 1 Or 2
Operating manual LH101 Mode 2: It is possible to control the locomotive set and to switch functions 0 to 9. All other operating options are blocked. Mode 0: This is the ex-factory setting. The entire range of operating options is available. Mode 1 and mode 2 are secured by a password (a four-digit number). -
Page 203: Setting Mode 0
LH101 setup (device setting) Press the rotary knob to select this option. You can now choose between "Clubmodus 1/Club mode 1" and " Clubmodus 2/Club mode 2”. (If the LH01 is in mode 1 or 2, this menu is not available). Press the rotary knob to select the desired club mode. -
Page 204: Counting Method For Bit Representation
Operating manual LH101 … "Passwort?/Password?" is displayed. Release the button to enter the password (which we hope you remember ☺). If you have entered the correct password, "Clubmodus 0 aktiviert/Club mode 0 enabled" is displayed. “Controlling LH101 returns locomotive”. The locomotive address or the speed step are displayed. -
Page 205: Display Brightness
LH101 setup (device setting) Press the rotary knob to select this option. Turn the rotary knob until the option "Zählweise Bitdarstellung/Counting method bit representation" is displayed. Press the rotary knob to select this option. The current setting is displayed. Turn the rotary knob to select an option … …... - Page 206 Operating manual LH101 Turn the rotary knob until the option "Setup LH101/LH101 setup" is displayed. Press the rotary knob to select this option. Turn the rotary knob until the option "Helligkeit Display/Display brightness" displayed. Press the rotary knob to select this option. Turn the rotary knob to set the display brightness.
-
Page 207: Display Contrast
LH101 setup (device setting) 14.5 Display contrast Action Display Explanation Select the locomotive address that is to be operated in club mode 1 or 2. Press the 'M' key. Turn the rotary knob until the option "Setup LH101/LH101 setup" is displayed. Press the rotary knob to select this option. -
Page 208: Displaying The Version Number
Operating manual LH101 14.6 Displaying the version number Action Display Explanation Select the locomotive address that is to be operated in club mode 1 or 2. Press the 'M' key. Turn the rotary knob until the option "Setup LH101/LH101 setup" is displayed. Press the rotary knob to select this option. -
Page 209: Setting The Xpressnet Address
LH101 setup (device setting) 14.7 Setting the XpressNet address All input devices connected to the XpressNET must have their own device address to ensure the correct exchange of information with the command station. You must therefore make sure that all connected devices have different device addresses. -
Page 210: Reset To Ex-Factory Setting
Operating manual LH101 Press the rotary knob to save the displayed value. Return to the menu "XpressNet Adresse einst./Setting the XpressNet address". Press the 'Esc' key to return to “Controlling locomotive”. 14.8 Reset to ex-factory setting Action Display Explanation Select the locomotive address that is to be operated in club mode 1 or 2. -
Page 211: Route Interval
LH101 setup (device setting) … the device restarts. Routes Routes saved in the LH101 will be available even after a reset to the ex-factory setting. 14.9 Route interval This setting determines the time lag with which switch commands of a route are sent to the command station. - Page 212 Operating manual LH101 Turn the rotary knob to set the desired interval. Times between 250ms and 1500ms can be set. Press the rotary knob to confirm your selection. You receive a confirmation. Press the 'Esc' key to move up one level in the menu …...
- Page 213 LH101 setup (device setting) Turn the knob until the "Sprachauswahl" option is displayed. Choose this option by pressing the rotary knob. Turn the rotary knob until the "English" language is displayed. Press the rotary knob to select the language. You will see this display for a few seconds, after which the LH101 will automatically switch back to locomotive control.
- Page 214 Operating manual LH101 ... press the 'M' key Turn the knob until the option "Setup LH101" is displayed. Pressing the knob selects this option. Turn the knob until the "Illumination time" option is displayed and press the knob. The currently set lighting time is displayed. Turning the knob changes the setting.
- Page 215 LH101 setup (device setting) Notaus: Switches off the voltage on the track (all moving locomotives stop). Notstop: Stops the locomotive last controlled with the LH101R by command. Action Display Explanation The starting point is locomotive control … ... press the 'M' key Turn the knob until the option "Setup LH101"...
- Page 216 Operating manual LH101 14.13 F29-F68 Mode According to the RailCommunity standard RCN-212 (or S-9.2.1 of the NMRA), two different technical procedures are possible for the control of the functions F29 to F68: The mode "function group" and the mode "binary states". The factory setting is the "function group"...
- Page 217 LH101 setup (device setting) Pressing rotary knob selects displayed mode..by pressing 'Esc' twice ..return to locomotive control. 14.14 Setting the maximum function group If you do not want to use all functions, you can set up to which function group is switched with the F key.
- Page 218 Operating manual LH101 Turn the knob until the maximum function group you want is displayed. Pressing the button saves your selection, this is briefly shown in the display. You can now select another setup option or ..by pressing 'Esc' twice ..
-
Page 219: System Setup
System setup 15 System setup System settings are settings that do not only affect individual locomotives but the entire digital system. These settings are saved permanently in the command station (LZ100/LZV100/LZV200). 15.1 Setting the fast clock This option is available from LZV200 version 3.8. A fast clock is integrated in the LZV200 command station. - Page 220 Operating manual LH101 The current setting of the model watch is displayed (the picture on the left shows the status in the factory setting or after a reset of the control unit) Press the Rotary encoder to select the day of the week setting.
-
Page 221: Enabling And Disabling The "Auto" Mode
System setup Set the desired minute ..and press the rotary knob. Use the rotary knob to select the setting of the time factor. Press the rotary knob, ..set the desired time factor ..and confirm by pressing the rotary knob. Press the 'M' key to save the settings in the LZV200 command station. -
Page 222: System Behaviour With "Auto" Mode Enabled
Operating manual LH101 the speed of called-up locomotives even after turnoff. After turnon, all locomotives will start with their previous speed. To enable the mode: Action Display Explanation Proceed from “Controlling a locomotive”. Change to the general menu. Turn the rotary knob until the option "Setup System/System Setup"... -
Page 223: Displaying The System Version Number
System setup If you want your locomotives to accelerate at their previous speed, press the rotary knob. If you don’t, turn the rotary knob and confirm the setting. Now, the speed information saved in the LZ100/LZV100/LZV200 command station is deleted. direction function information is saved. -
Page 224: Deleting Locomotive Addresses From The Command Station Memory
Operating manual LH101 15.4 Deleting locomotive addresses from the command station memory The LZ100/LZV100/LZV200 command station repeatedly sends operating data to all locomotive addresses contained in its memory. To avoid sending more addresses than necessary (and to optimise the reaction time), you can delete locomotive addresses from the memory that are not required for operation. - Page 225 System setup Press the rotary knob to select this option. The first locomotive in the command station memory is displayed. Turn the rotary knob to select the locomotive address that you want to delete … … press the rotary knob to confirm your selection.
- Page 226 Operating manual LH101 15.5 Read / write service variables (SV) Service variables are settings that can be made in the LZV200. For example, the baud rate of the interface integrated in the LZV200 can be set. Which service variables are available and what they are used for is described in the operating manual of the LZV200.
- Page 227 System setup Complete the entry with the 'Loco' key. With 'Esc' you can return to the input of another CV ... … or … … step by step … … return to locomotive control.
-
Page 228: Error Messages On The Display
If this error appears repeatedly, the battery in the LZ100/LZV100 command station may be dead. Please contact your model railway dealer or Lenz Elektronik for replacement. The command sent from the manual control to the command station is Error 98 not available in its list of commands. - Page 229 The cause may be interference on the XpressNET. Please check if all wires are connected correctly. If this does not solve the problem, it is possible that the command station or the manual control are defective. Please contact your model railway dealer or Lenz Elektronik.
-
Page 230: Routes Form
Operating manual LH101 16.2 Routes form Route no._____ Route no._____ Step Address Step Address... -
Page 231: Trouble Shooting
Appendix 16.3 Trouble shooting Problem Possible cause Solution Locomotive does not run Wrong locomotive address Enter correct locomotive on the display address (p. 17) Locomotive address on You are in the address Press 'Enter'. the display, but pressing selection mode of the operating keys yields no command station memory, indicated by an “A”... - Page 232 Operating manual LH101 display. initiated by another manual cancel the emergency stop. control. An emergency off was Press the rotary knob to “OFF” flashes on the initiated by another manual cancel the emergency off. display. control. Remove the short circuit. In An amplifier has triggered case of a power overload, an emergency off due to a...
-
Page 233: Tree Structure Of Options Of The Lh101
Appendix Tree structure of options of the LH101 16.4 Select locomotive address from the LH101 stack Select locomotive address from the command station memory Select speed step mode Change function group Press longer: Configure functions Configure “refresh” of functions Set permanent/temporary operation Switch points/signals Call up routes Create and edit routes... - Page 234 Operating manual LH101 Contrast display Display version number Set XpressNet address Reset to exfactory setting Set XpressNet address Route interval Select language Illumination time Stopping condition F29-F68 Mode Maximum function group System setup "AUTO" mode Display system version number Delete locomotive address from memory...
- Page 235 Furthermore, in all such cases guarantees become invalid. Vogelsang 14 35398 Giessen Hotline: 06403 900 133 Fax: 06403 900 155 www.lenz-elektronik.de support@lenz-elektronik.de Keep this operating manual for later use!
- Page 236 LH101 Mode d’emploi Version 1.0 2. édition 05 22 Art. n° 21101 B.B.10.0041-02...
- Page 237 Bienvenue ! Nous vous félicitons pour l'acquisition de ce régulateur LH101 Digital plus by Lenz ® et vous souhaitons beaucoup de plaisir dans l'utilisation de ce mode de pilotage. Le régulateur LH101 est l’appareil de commande universel du système Digital plus by Lenz ®.
- Page 238 Remarques importantes, à lire avant tout ! Table des matières Remarques importantes, à lire avant tout ! .............. 7 Vue d'ensemble des fonctionnalités du LH101 ............9 Vos premiers pas ....................11 Connexion et mise en service ..............11 3.1.1 Connexion à la centrale LZ100/LZV100 .............11 3.1.2 Réglage de l'adresse du bus XpressNet ............11 Votre première conduite ................12...
- Page 239 Mode d’emploi LH101 6.1 Affichage de la position des aiguillages ..........33 6.1.1 Utilisation de décodeurs de commutation sans rétrosignalisation ....33 6.1.2 Utilisation de décodeurs de commutation avec rétrosignalisation ....33 Créer, éditer et supprimer des itinéraires ............... 36 Créer un nouvel itinéraire ................
- Page 240 Remarques importantes, à lire avant tout ! 13.2.2 Quels décodeurs peut-on modifier dans ses propriétés avec la PoM ? ..66 13.2.3 Peut-on utiliser PoM pour lire les valeurs de Cvs ? ........66 13.2.4 Programmation d’une valeur de nombre dans une CV - procédure pas à...
- Page 241 Mode d’emploi LH101 15.5 Service Variable lire / écrire ..............108 16 Appendice ......................110 16.1 Annonces d'erreur sur l'écran ..............110 16.2 Itinéraires – Formulaire ................112 16.3 Aide en cas de panne ................113 16.4 Structure arborescente des options du LH101......... 115...
-
Page 242: Remarques Importantes, À Lire Avant Tout
Remarques importantes, à lire avant tout ! Le régulateur LH101 est un composant du système Digital plus by Lenz ®. Il a subi des tests intensifs avant sa mise en service. Lenz Elektronik GmbH garantit un fonctionnement correct si vous tenez compte des remarques suivantes. - Page 243 Mode d’emploi LH101 Toutes les étapes décrites supposent que vous avez raccordé le régulateur au système Digital plus by Lenz ® et que celui-ci est électriquement branché. Représentation des annonces et touches dans le texte : Dans la plupart des cas, l'affichage du LH101 est représenté...
-
Page 244: Vue D'ensemble Des Fonctionnalités Du Lh101
Vue d'ensemble des fonctionnalités du LH101 Vue d'ensemble des fonctionnalités du LH101 Cette section vous donne un bref aperçu des caractéristiques du LH101 en version 2.0, les nouvelles fonctionnalités ajoutées à la version précédente sont indiquées en italique. Vous trouverez plus loin des informations détaillées au sujet de son utilisation et, à... - Page 245 Mode d’emploi LH101 Double traction (DTR) Deux locomotives peuvent être facilement assemblées en une double traction et pilotées ensemble (page 46). Plusieurs locomotives peuvent être assemblées en une Traction multiple (MTR) multitraction et pilotées simultanément sous une même adresse (page 52). Commutation Avec le régulateur LH101, vous pouvez commuter jusqu'à...
-
Page 246: Vos Premiers Pas
LH101. Connexion et mise en service Le LH101 peut être raccordé aux composants du système Digital plus by Lenz ® : LZ100 ou LZV100 à partir de la version 3.6. Comme avec tous les appareils XpressNet, vous pouvez débrancher votre LH101 et le rebrancher ailleurs pendant l’exploitation. -
Page 247: Votre Première Conduite
Mode d’emploi LH101 tous les appareils raccordés possèdent bien chacun une adresse personnelle différente de celle des autres appareils. Conformément à la centrale utilisée, vous pouvez raccorder jusqu’à 31 appareils au bus XpressNet. Chaque régulateur LH101 est réglé en usine sur l’adresse 04. Si vous avez déjà... -
Page 248: Pilotage De La Locomotive
Vos premiers pas 3.2.2 Pilotage de la locomotive: Vous commandez la vitesse et le sens de marche de la locomotive au moyen du curseur rotatif. Action Ecran Explication Tournez le curseur dans le sens horaire pour augmenter la vitesse. Tournez le curseur dans le sens antihoraire pour diminuer la vitesse, …... -
Page 249: Arrêt D'urgence
Mode d’emploi LH101 3.2.4 Arrêt d'urgence : Action Ecran Explication Pressez le curseur rotatif et maintenez la pression jusqu'à ce que "! ETEINT !" soit affiché. Le courant est maintenant coupé sur la voie. Pour rebrancher le courant, pressez à nouveau le milieu du curseur rotatif …... -
Page 250: Bases De L'utilisation Du Lh101
Bases de l’utilisation du LH101 Bases de l’utilisation du LH101 premier lieu, nous étudierons avec le LH101 le pilotage des locomotives, c’est-à-dire le réglage de la vitesse et du sens de marche ainsi que la commutation des fonctions d'un décodeur de locomotive. Après la mise en marche, c'est donc toujours le mode de fonctionnement Pilotage de locomotive qui est affiché. -
Page 251: L'écran À Cristaux Liquides (Lcd) Du Lh101
Mode d’emploi LH101 L'écran à cristaux liquides (LCD) du LH101 Le LH101 dispose d'un écran à diodes rétroéclairé comportant deux lignes. En fonction du statut d'exploitation dans lequel vous vous trouvez, la représentation de l’écran est différente. L'affichage de l'adresse de la locomotive est toujours à quatre chiffres, le cas échéant avec un ou des zéros en premier lieu. -
Page 252: Le Curseur Rotatif Du Lh101
Bases de l’utilisation du LH101 Exemples d'affichages typiques lors du pilotage de locomotive : La locomotive seule (L) portant l'adresse 0003 est pilotée. Le sens de marche est en avant. Le cran de vitesse est 16 sur 28 crans. Le groupe de fonctions sélectionné est 0 et les fonctions F0 et F1 sont activées. -
Page 253: Pilotage De Locomotives
Mode d’emploi LH101 Pilotage de locomotives Le pilotage de locomotives comprend la modification de la vitesse et du sens de marche ainsi que la commutation des fonctions dans les locomotives (feux de signalisation, dételeur, etc.). Dans ce chapitre-ci, vous apprendrez : •... -
Page 254: Sélection D'une Adresse De Locomotive Dans La Pile D'adresses Du Lh101
Pilotage de locomotives Action Ecran Explication Pressez la touche 'Locomotive'. Commencez à encoder l'adresse. Si vous vous trompez, effacez le dernier chiffre entré à l’aide touche Continuez à encoder les autres chiffres. l’encodage. informations concernant les fonctions, le sens de marche et le cran de vitesse sont demandées à... -
Page 255: Feuilletage De La Pile
Mode d’emploi LH101 5.1.2.1 Feuilletage de la pile Action Ecran Explication Pressez la touche 'Locomotive'. En tournant le curseur rotatif, vous feuilletez la pile. Si vous tournez dans le sens horaire, vous feuilletez en avant et, si vous tournez dans le sens contraire, vous feuilletez en arrière. - Page 256 Pilotage de locomotives locomotive, s’inscrivent l’adresse de celle-ci et les données correspondantes (cran de vitesse, état des fonctions). Une alternative à l'encodage direct d'une adresse de locomotive ou d'une sélection hors de la pile du régulateur consiste aussi à sélectionner une locomotive dans cette mémoire de la centrale. Action Ecran Explication...
-
Page 257: Transfert D'une Locomotive D'un Régulateur À Un Autre
Mode d’emploi LH101 consultant le chapitre "Suppression d'adresses de locomotive dans la mémoire de la centrale" ( page 106). Précision valable pour la version logicielle 3.6 du LZ100/LZV100 : jusqu'à 100 adresses de locomotive à 2 chiffres et jusqu'à 128 adresses de locomotive à... -
Page 258: Mode Normal
Pilotage de locomotives la locomotive à la vitesse minimale jusqu'à l'endroit désiré sans danger qu'elle s'arrête trop tôt. Comment activer ou désactiver le mode normal ou le mode manœuvre est décrit dans le chapitre "Réglage du mode de pilotage" à partir de la page 82 . Ne confondez pas le mode manœuvre du LH101 avec la fonction manœuvre qui est encodé... -
Page 259: L'arrêt D'urgence Spécifique À Une Locomotive
Mode d’emploi LH101 5.2.1.1 L'arrêt d'urgence spécifique à une locomotive Action Ecran Explication Si le cran de vitesse n'est pas 0 et que vous pressez brièvement le curseur, … … un arrêt d'urgence se déclenche pour la locomotive concernée. La locomotive s'arrête sans aucune temporisation de freinage. -
Page 260: Activation Des Fonctions Du Décodeur De Locomotive
Activation des fonctions du décodeur de locomotive Tous les décodeurs de locomotive Digital plus by Lenz ® possèdent une ou plusieurs fonctions complémentaires. Les fonctions sont numérotées en commençant par 0. Au total, le système Digital plus by Lenz ®... -
Page 261: Commutation Entre Les Groupes De Fonctions
Mode d’emploi LH101 Ces 28 fonctions sont divisées en 3 groupes de fonctions pour les besoins du LH101. Pour passer d'un groupe à un autre, référez-vous à la ligne inférieure de l'écran. En relation avec le groupe de fonctions sélectionné (0 – 2), les fonctions sont commutées comme suit : Taste: Groupe de fonctions 0:... -
Page 262: Configuration Des Fonctions Du Décodeur De Locomotive
Pilotage de locomotives L'écran montre de nouveau le groupe de fonctions Fg 0. Après la première mise en service du LH101, c'est le groupe de fonctions 0 qui apparaît sur l'écran. 5.3.2 Configuration des fonctions du décodeur de locomotive Il vous est possible de régler les fonctions F1 à F28 soit sur fonctionnement permanent, soit sur fonctionnement momentané. -
Page 263: Configuration Du Rafraîchissement (Refresh) Des Fonctions
Mode d’emploi LH101 Tournez le curseur pour faire apparaître la fonction vous désirez régler fonctionnement permanent ou momentané. En pressant le curseur, vous basculez au choix entre fonctionnement permanent ou momentané. tournant curseur, vous pouvez sélectionner la fonction suivante dont vous désirez modifier la configuration …... - Page 264 Pilotage de locomotives Action Ecran Explication Démarrez avec menu Pilotage locomotive. importe l'adresse locomotive qui est affichée. Pressez le curseur pour faire apparaître le paramètre en cours du rafraîchissement. Relâchez touche tournez éventuellement le curseur jusqu'à ce que cet affichage apparaisse à l'écran. Pressez le curseur pour faire apparaître le paramètre en cours du rafraîchissement.
-
Page 265: Indication Et Modification Des Crans De Vitesse
Mode d’emploi LH101 Indication et modification des crans de vitesse La plage de vitesse allant de l’arrêt à la vitesse maximale d’un véhicule moteur est divisée en crans de vitesse. Plus il y a de crans, plus cette division est fine. Avec le LH101, vous pouvez choisir entre 2 types de réglages, appelés "modes de pilotage par crans de vitesse", lesquels comportent respectivement 28 et 128 crans de vitesse. -
Page 266: Arrêt D'urgence
Pilotage de locomotives En tournant le curseur, vous affichez le nombre de crans de vitesse désiré. Pour attribuer un mode de pilotage par crans de vitesse déterminé, pressez le curseur rotatif. En mode pilotage à "128 crans de vitesse", le cran de vitesse "0"... -
Page 267: Commutation Des Articles Électriques/Électromagnétiques
A cet effet, ces articles doivent être raccordés à des décodeurs de commutation, par exemple LS100/LS150 du système Digital plus by Lenz ® ou encore à d’autres modules similaires compatibles. Au total, il est possible de commuter 1 024 articles électriques et électromagnétiques avec le système... -
Page 268: Affichage De La Position Des Aiguillages
Commutation des articles électriques/électromagnétiques … appuyer sur la touche'8' pour passer à '+'. … appuyer sur la touche'8' pour passer à '-'. La touche '<=' vous permet d'encoder une autre adresse d'accessoire … …ou… avec touche 'Esc' terminer commutation des aiguillages et signaux. Pendant la commutation d'aiguillages et signaux, il est possible de modifier la vitesse et le sens de marche de la locomotive affichée au moyen du curseur rotatif. - Page 269 Mode d’emploi LH101 Conditions préalables : - utilisation de décodeurs de commutation LS100 aptes à la rétrosignalisation - câblage du bus de rétrosignalisation (R, S) à la centrale - moteurs d'aiguillages avec fins de course ou - contacts de rétrosignalisation aux moteurs d'aiguillage Supposons que l'aiguillage n°...
- Page 270 Commutation des articles électriques/électromagnétiques c'est que sur cette adresse ne se trouve aucun décodeur de commutation mais au contraire un module de rétrosignalisation LR100/LR101. Dans ce cas, une pression sur la touche n'aura aucun effet. Vous pouvez introduire une autre adresse d'aiguillage en vous servant de la touche <= …...
-
Page 271: Créer, Éditer Et Supprimer Des Itinéraires
Mode d’emploi LH101 Créer, éditer et supprimer des itinéraires Les itinéraires sont une suite de plusieurs ordres de commutation d'aiguillages et de signaux que vous pouvez aisément appeler au moyen de peu de manipulations. Avec de tels itinéraires, vous pouvez aisément régler les positions d'aiguillage nécessaires pour un itinéraire particulier. -
Page 272: Créer Un Nouvel Itinéraire
Créer, éditer et supprimer des itinéraires Créer un nouvel itinéraire AVANT de créer. un itinéraire, vous devriez noter les numéros d'aiguillages concernés ainsi que leurs positions respectives. Dans l'appendice, vous trouverez un tableau de caractéristiques que vous pourrez copier dans ce but. Sur notre site et dans l'onglet des téléchargements, vous trouverez également un tel tableau sous forme de fichier pdf. -
Page 273: Editer Un Itinéraire
Mode d’emploi LH101 nouvelle pression touche 'Aiguillages/signaux' confirme votre entrée. Derrière l'adresse apparaît maintenant le signe + ou – pour désigner la position. Avec la touche 'M', vous pouvez introduire la position souhaitée de l'aiguillage/signal. A chaque pression sur la touche 'M', un ordre de commutation correspondant est envoyé... - Page 274 Créer, éditer et supprimer des itinéraires Avec la touche 'Aiguillages/signaux', vous passez au menu permettant de commuter aiguillages et signaux. seconde pression touche 'Aiguillages /signaux' vous permet de parvenir menu création édition suppression) d'itinéraires. Sélectionnez à l'aide du curseur l'option "éditer itinéraire".
-
Page 275: Modifier Une Étape Dans Un Itinéraire
Mode d’emploi LH101 7.2.1 Modifier une étape dans un itinéraire Tout d'abord, procédez comme décrit dans "Editer un itinéraire", page 36 et sélectionnez l'option "Changer d'étape". La première étape dans la modification de l'itinéraire sélectionné est affichée. Faites défiler jusqu'à l'étape que vous souhaitez modifier, Si vous désirez seulement modifier la position de l'aiguillage, voyez plus loin au point (2) =>... -
Page 276: Supprimer Une Étape Dans Un Itinéraire
Créer, éditer et supprimer des itinéraires … choisir une autre étape pour le paramétrage … …ou… … quitter le menu "Editer l'itinéraire" au moyen de la touche 'Esc' et retourner au mode Pilotage de locomotive. 7.2.2 Supprimer une étape dans un itinéraire Tout d'abord, procédez comme dans "Editer un itinéraire", page 38. -
Page 277: Insérer Une Étape Dans Un Itinéraire
Mode d’emploi LH101 7.2.3 Insérer une étape dans un itinéraire L'option "Nouvelle étape" n'apparaît que si le nombre maximal d'étapes dans un itinéraire n'est pas encore atteint. Tout d'abord, procédez comme dans "Editer un itinéraire", page 38. Le nouveau numéro d'étape libre est affiché. Procédez maintenant comme dans "Créer un nouvel itinéraire", page 37. - Page 278 Créer, éditer et supprimer des itinéraires … choisissez au moyen de celui-ci l'itinéraire que vous désirez supprimer. Une autre pression sur le curseur confirme la suppression. L'itinéraire sélectionné supprimé. Vous vous retrouvez maintenant dans le menu itinéraires. Vous pouvez maintenant choisir une autre action dans le menu itinéraires ...
-
Page 279: Actionner Les Itinéraires
Mode d’emploi LH101 Actionner les itinéraires Avant de pouvoir actionner les itinéraires, ceux-ci doivent avoir été créés dans le LH101. La création, l'édition et la suppression d'itinéraires sont décrites à partir de la page 36 . La commande d'un itinéraire est en fait très similaire à la commande d'aiguillages et de signaux. - Page 280 Actionner les itinéraires Les adresses d'aiguillage et les positions enregistrées dans l'itinéraire sont ..affichées dans l'ordre. Lorsque l'itinéraire est terminé apparaît la confirmation à l'écran. Vous pouvez maintenant … ... sélectionner l'itinéraire suivant en tournant à nouveau le curseur … …ou…...
-
Page 281: Affichage De L'heure Du Modèle
Mode d’emploi LH101 Affichage de l'heure du modèle Cette fonction ne peut être utilisée que si vous utilisez la centrale LZV200. Avant de pouvoir utiliser l'affichage de l'heure, vous devez régler l'heure du modèle et le facteur souhaité dans le "Systéme d'instal"... -
Page 282: Double Traction
Double traction Double traction Avec le LH101, vous pouvez aisément assembler deux locomotives en une double traction et piloter celle-ci comme s’il s’agissait d’une simple locomotive. Dans ce chapitre, vous apprendrez : ce qu'est une double traction ; quelles conditions doivent être remplies pour une double traction ; comment assembler une double traction ;... -
Page 283: Ainsi Se Compose Une Double Traction
Mode d’emploi LH101 La locomotive conventionnelle (adresse 0) ne peut pas être intégrée dans une double traction ! En cas de méprise, vous obtiendriez annonce d'erreur page 51). 10.3 Ainsi se compose une double traction Appelez d'abord la première locomotive (par exemple, la locomotive n°... -
Page 284: Composition De Deux Locomotives En Une Double Traction Avec Un Nombre De Crans De Marche Différent
Double traction Vous pouvez maintenant sélectionner l'adresse de locomotive au moyen du clavier numérique ou en tournant le curseur pour choisir une adresse de locomotive dans la pile. Une fois cette opération terminée, l'adresse 78 précédée de la lettre D est affichée. Les deux locomotives peuvent maintenant être pilotées ensemble au moyen du curseur. -
Page 285: Désassemblage D'une Double Traction
Mode d’emploi LH101 apparaître à l'écran le cran de vitesse maximal, c’est-à-dire 28 crans, ce sera cependant le cran de marche 126 qui apparaîtra à l'écran si vous appelez la locomotive 78, car c'est le nombre de crans de marche maximal pour l’adresse de locomotive 78. 10.5 Désassemblage d’une double traction Pour séparer les locomotives se trouvant dans une double traction, suivez les instructions suivantes :... -
Page 286: Annonces D'erreur Lors De La Composition D'une Double Traction
Double traction 10.6 Annonces d’erreur lors de la composition d’une double traction Si vous avez commis une faute lors de l'assemblage d'une double traction, référez-vous à l'annonce affichée. l'adresse de locomotive n'a pas été introduite dans la pile avant son insertion dans la double traction ; la locomotive dans la pile n'a pas encore été... -
Page 287: Multitraction (Mtr)
Mode d’emploi LH101 Multitraction (MTR) Avec le régulateur LH101, il est possible de composer, piloter, désassembler et supprimer une traction multiple (ceci en fonction de la version du logiciel de la centrale que vous utilisez). Dans ce chapitre, nous verrons : •... -
Page 288: Conditions Pour Une Multitraction
11.2 Conditions pour une multitraction Vous pouvez commander les multitractions avec tous les décodeurs du programme Digital plus by Lenz ® produits depuis la fin de 1996. Néanmoins, vous pouvez aussi utiliser des décodeurs DCC d'autres fabricants pour autant que ceux-ci acceptent la propriété multitraction. - Page 289 Mode d’emploi LH101 Pressez la touche 'M'. Tournez le curseur pour faire apparaître l'option "Multitraction". Si la locomotive pilotée est une locomotive analogique (adresse 0), l'option "Multitraction" n'apparaîtra pas sur l'écran. Pressez le curseur pour sélectionner l'option. Tournez le curseur jusqu'à ce que l'annonce "Loco MTR "...
-
Page 290: Pilotage D'une Multitraction
Multitraction (MTR) En tournant le curseur, vous sélectionnez d'autres locomotives dans la pile que vous pouvez insérer dans la MTR. Une pression sur le curseur vous permet d'insérer l'adresse affichée dans la MTR. Continuez ainsi jusqu'à ce que la dernière locomotive souhaitée soit insérée dans la MTR et …... -
Page 291: Vitesse Et Sens De Marche D'une Multitraction
Mode d’emploi LH101 11.4.1 Vitesse et sens de marche d’une multitraction On pilote une MTR à l’aide du curseur rotatif comme une locomotive "normale". Lorsqu’on pilote une MTR, les modifications de vitesse et de sens de marche opérées au moyen du curseur agissent simultanément sur toutes les locomotives de la MTR. -
Page 292: Suppression D'une Locomotive Dans Une Mtr
Multitraction (MTR) Presser le curseur sélectionne l'option. Tournez le cas échéant le curseur pour faire apparaître "Afficher locos MTR". Pressez le curseur ; la première locomotive de la MTR apparaît sur l'écran. En tournant le curseur, vous feuilletez la liste des locomotives présentes dans la MTR. - Page 293 Mode d’emploi LH101 Aktion Ecran Explication Appelez une locomotive dans la MTR ou l'adresse MTR elle-même. Pressez la touche 'M'. Puisque vous avez sélectionné une MTR ou une locomotive d'une MTR, l'option "Multitraction" vous est immédiatement proposée. Une pression sur le curseur sélectionne l'option.
-
Page 294: Suppression D'une Mtr Complète
Multitraction (MTR) 11.7 Suppression d'une MTR complète Au lieu de supprimer une seule locomotive, vous pouvez aussi supprimer une multitraction au complet. Lors de la suppression d'une MTR complète, toutes les locomotives présentes dans la MTR doivent se trouver sur les rails ! Les ordres spécifiques à... -
Page 295: Annonces D'erreur Lors De La Composition D'une Multitraction
Mode d’emploi LH101 11.8 Annonces d’erreur lors de la composition d’une multitraction Si vous avez commis une erreur lors de la composition d’une multitraction, vous en serez avisé par une annonce d'erreur sur l'écran. Error 24: La locomotive n'a pas été appelée avant son insertion dans la MTR ou elle n'a pas reçu d'ordre de marche. -
Page 296: Affichage Des États Rétrosignalés
Affichage des états rétrosignalés Affichage des états rétrosignalés Aktion Ecran Explication Pressez la touche 'M'. La dernière option utilisée vous est proposée ; ici dans l'exemple, c'est la multitraction. Tourner curseur sélectionne l'option "Afficher la rétrosignalisation". Une pression sur le curseur sélectionne l'option. - Page 297 Mode d’emploi LH101 Si vous entrez une adresse de rétrosignalisation et qu'il n'y aucun module rétrosignalisation raccordé correspondant à cette adresse, l'écran vous montrera ceci : Si vous pressez la touche <=, vous pourrez alors introduire l'adresse d'un autre module de rétrosignalisation. Le domaine d'adresses autorisées pour l'encodage des adresses de rétrosignalisation va de 1 à...
-
Page 298: Encodage (Programmation) Des Propriétés De Décodeur
Encodage (programmation) des propriétés de décodeur Dans ce chapitre assez copieux, nous verrons : ce qu'est, à vrai dire, la "programmation" avec Digital plus by Lenz ® ; quelles sont les propriétés qui peuvent être modifiées durant la programmation ;... - Page 299 Mode d’emploi LH101 toute CV ou toute propriété correspondante, reportez-vous aux documents décrivant les décodeurs Digital plus by Lenz ® ou au "Manuel des décodeurs de locomotive (art. n° 90005)". Vous pouvez également télécharger ces informations sur Internet (www.digital-plus.de), les obtenir auprès de votre détaillant-spécialiste ou chez Lenz Elektronik GmbH...
-
Page 300: Différence Entre "Programmation Pendant L'exploitation" Et "Programmation Sur La Voie De Programmation
Tout décodeur qui reçoit cet ordre l’exécutera également. 13.1.2 Quand faut-il programmer sur la voie de programmation ? Toujours quand vous désirez modifier l’adresse d’un décodeur de locomotive. En outre, il existe des décodeurs Digital plus by Lenz ® qui n’acceptent procédure "programmation pendant l’exploitation". -
Page 301: Programmation Pendant L'exploitation (Pom)
13.2.2 Quels décodeurs peut-on modifier dans ses propriétés avec la PoM ? Tous les décodeurs Digital plus by Lenz ® à partir des séries XF et XS acceptent la PoM. Si vous utilisez un décodeur provenant d'un autre fabricant, consultez les instructions accompagnant ce décodeur pour savoir si celui-ci accepte la PoM. -
Page 302: Programmation D'une Valeur De Nombre Dans Une Cv - Procédure Pas À Pas
Encodage (programmation) des propriétés de décodeur • Si le décodeur à partir duquel les valeurs PoM doivent être lues ne se trouve pas dans la plage d'alimentation du LZV200, un LV103 doit être utilisé comme amplificateur. 13.2.4 Programmation d’une valeur de nombre dans une CV - procédure pas à... - Page 303 Mode d’emploi LH101 Dans cet exemple, la valeur "10" a été lue dans CV 3. Effacer la valeur affichée pour entrer une nouvelle valeur ou tourner le bouton pour modifier la valeur. Si le CV ne peut pas être lu via Railcom, vous pouvez saisir directement la valeur souhaitée : …...
-
Page 304: Lecture De Cv Au Moyen De L'indicateur D'adresse Lrc120
Encodage (programmation) des propriétés de décodeur 13.2.5 Lecture de CV au moyen de l'indicateur d'adresse LRC120. Il est possible au moyen de la PoM de lire les valeurs de CV pendant l'exploitation. Quelques conditions sont à respecter : • utilisation de décodeurs avec la fonctionnalité RailCom intégrée ; •... - Page 305 Mode d’emploi LH101 Procédure : Aktion Ecran Explication Appelez la locomotive dont vous désirez modifier les propriétés au moyen de la PoM. Si vous faites rouler la locomotive dont vous désirez lire l'adresse par la PoM sur la voie surveillée par l'indicateur d'adresse LRC120, celui-ci affichera l'adresse.
- Page 306 Encodage (programmation) des propriétés de décodeur 13.2.6 Inscription et effacement de bits (commutateurs) au moyen de la PoM – procédure pas à pas Dans beaucoup de CV, dans le but d'un réglage déterminé, les nombres ne sont pas utilisés, mais au contraire de simples bits (commutateurs).
- Page 307 Mode d’emploi LH101 Pressez la touche 'M'. Sélectionnez avec le curseur le bit que vous désirez modifier. Confirmez votre choix en pressant le curseur. Tournez le curseur pour déterminer si vous voulez inscrire (1) ou effacer (0) le bit. Démarrez la programmation par une pression sur le curseur.
-
Page 308: Programmation Sur La Voie De Programmation
Encodage (programmation) des propriétés de décodeur 13.3 Programmation sur la voie de programmation Comme nous l’avons déjà dit, nous entendons par programmation la modification des propriétés du décodeur. Selon les propriétés d'un décodeur que vous désirez modifier, il existe deux menus dans le LH101 pour paramétrer aussi facilement que possible. -
Page 309: Où Se Connecte La Voie De Programmation / Le Décodeur
Mode d’emploi LH101 "Ecrivez la valeur 15 dans la CV 4". Afin de vous assurer qu'un seul décodeur de locomotive bien précis recevra l'ordre donné, vous devez veiller à ce qu'aucun autre décodeur ne puisse être contacté lors de la programmation sur la voie de programmation. - Page 310 Encodage (programmation) des propriétés de décodeur Une fois que l'adresse a été lue avec succès, elle est aussitôt affichée. Si une erreur survient en cours de lecture, l'écran affichera une annonce d'erreur (page 81) Si vous désirez changer l'adresse affichée, effacez alors l'annonce.
-
Page 311: Lecture Et Programmation D'une Cv
Mode d’emploi LH101 2 Les adresses de locomotive à deux chiffres (1 à 99) sont enregistrées dans la CV1 du décodeur tandis que les adresses à quatre chiffres (100 à 9999) le sont dans les CV17 CV18. Lors l'utilisation menu "Programmation de l'adresse de locomotive", vous n’avez pas à... -
Page 312: Affichage Binaire (Au Moyen De Bits) De La Valeur De Cv Et Modification
Encodage (programmation) des propriétés de décodeur Tournez le curseur jusqu'à ce que l'écran affiche "Programmer CV" … … et confirmez votre choix. Vous voyez maintenant l'invitation à entrer la CV dont vous voulez modifier la valeur. Entrez le numéro de la CV au moyen du pavé numérique (avec la touche , vous pouvez effacer un chiffre erroné... - Page 313 Mode d’emploi LH101 de choisir la méthode mais il y a des CV pour lesquelles l'entrée de bits est plus simple mais pour d'autres en revanche, l'encodage décimal est préférable. Exemple : Dans la CV 29 les propriétés du décodeur par inscription ou effacement de bits est recommandé.
-
Page 314: Lecture Et Programmation D'un Registre
Encodage (programmation) des propriétés de décodeur Affichage par bits. Vous avez maintenant les possibilités suivantes : choisir une autre CV retourner au menu Pilotage de locomotive. Lorsque vous entrez la valeur numérique dans la CV, veillez à ne pas dépasser la plage de valeurs autorisées du décodeur ! Si nécessaire, reportez-vous au mode d'emploi du décodeur. - Page 315 Mode d’emploi LH101 Si nécessaire, tourner le bouton jusqu'à ce que "Programmation register" apparaisse..et confirmez votre choix. Vous êtes maintenant invité à entrer le registre dont vous voulez lire ou modifier la valeur. Entrer le numéro du registre à l'aide des touches …...
-
Page 316: Annonces D'erreur Lors De La Programmation Sur La Voie De Programmation
Encodage (programmation) des propriétés de décodeur Lors de la saisie de la valeur numérique dans le registre, veillez à ne pas dépasser la plage de valeurs autorisée ! Le cas échéant, se reporter au mode d'emploi du récepteur. 13.4 Annonces d’erreur lors de la programmation sur la voie de programmation Lors de la programmation ou la lecture, si une erreur survient, l'affichage vous informera :... -
Page 317: Setup Lh101 - Réglage Des Appareils
Mode d’emploi LH101 Setup LH101 - Réglage des appareils Ce chapitre décrit les réglages que vous pouvez effectuer avec le LH101. Ces réglages sont enregistrés durablement dans le LH101. 14.1 Réglages du mode pilotage Deux méthodes s'offrent à vous pour piloter vos locomotives en vitesse et en sens de marche : Le mode normal Dans ce mode (réglage d'usine), vous pouvez utiliser le curseur... -
Page 318: Réglages Du Mode Club
Setup LH101 - Réglage des appareils Pressez le curseur sélectionne l'option. Tournez le curseur jusqu'à obtenir l'option "Régler le mode de pilotage" et pressez le curseur. Le paramètre actuellement actif est affiché (le réglage d'usine est "normal"). Tournez le curseur pour sélectionner le paramètre souhaité…... -
Page 319: Paramétrage Des Modes Club 1 Ou 2
Mode d’emploi LH101 Toutes les autres options de maniement du LH101 sont bloquée Modus 0: Ceci est le mode enregistré en usine. La totalité des manipulations du LH101 est permise. Les modes 1 et 2 sont activables via un mot de passe (un code à quatre chiffres). -
Page 320: Paramétrage Du Mode 0
Setup LH101 - Réglage des appareils Une pression sur le curseur sélectionne l'option. Vous pouvez maintenant choisir entre "Mode Club 1" ou "Mode Club 2". (Si le LH101 se trouve dans le mode 1 ou 2, cette étape du menu n'est pas disponible.) Presser le curseur sélectionne le mode Club. -
Page 321: Mode De Comptage Des Bits
Mode d’emploi LH101 Une fois la touche relâchée, vous pouvez introduire le mot de passe, en espérant que vous l'avez retenu ;-) Une fois le mot de passe correctement encodé, un avis au sujet du mode club 0 est affiché … …... -
Page 322: Luminosité De L'écran
Setup LH101 - Réglage des appareils Pressez le curseur sélectionne l'option. Tournez le curseur jusqu'à l'option "Mode de comptage des bits". Pressez le curseur pour sélectionner cette option ; le paramétrage actuel est affiché Tournez le curseur pour établir la sélection entre les deux options…... - Page 323 Mode d’emploi LH101 Tournez le curseur pour faire apparaître l'option "Setup LH101". Pressez le curseur pour sélectionner cette option. Tournez le curseur pour faire apparaître l'option "Luminosité écran". Une pression sur le curseur sélectionne cette option. Tournez le curseur pour régler la luminosité de l'écran.
-
Page 324: Contraste De L'écran
Setup LH101 - Réglage des appareils 14.5 Contraste de l'écran Aktion Ecran Explication En sortant du menu Pilotage de locomotive … … pressez la touche 'M' Tournez le curseur pour afficher l'option "Setup LH101". Pressez le curseur pour sélectionner cette option. -
Page 325: Affichage Du Numéro De Version
Mode d’emploi LH101 14.6 Affichage du numéro de version Aktion Ecran Explication Pour sortir du menu Pilotage de locomotive, … … pressez la touche 'M'. Tournez le curseur pour afficher l'option "Setup LH101". Pressez le curseur pour sélectionner cette option. Tournez le curseur pour afficher l'option "Afficher numéro de version". -
Page 326: Réglage De L'adresse Xpressnet
Setup LH101 - Réglage des appareils 14.7 Réglage de l'adresse XpressNet Tous les appareils raccordés au bus XpressNet doivent posséder une adresse propre pour un échange correct des informations avec la centrale. Vous devez donc vous assurer que tous les appareils connectés possèdent bien chacun une adresse individuelle. -
Page 327: Retour Aux Réglages D'usine
Mode d’emploi LH101 Presser le curseur enregistre la valeur affichée, … ... vous êtes de nouveau dans le menu "Régler l'adresse XpressNet". En pressant la touche 'Esc', vous retournez au menu Pilotage de locomotive. 14.8 Retour aux réglages d'usine Aktion Ecran Explication Pour sortir du menu Pilotage de locomotive... -
Page 328: Durée D'itinéraire
Setup LH101 - Réglage des appareils … et l'appareil redémarre. Itinéraire Les itinéraires enregistrés dans le LH101 restent inchangés lors d'un retour aux réglages d'usine. 14.9 Durée d'itinéraire Avec ce réglage, vous déterminez avec quel intervalle de temps les ordres de commutation d'un itinéraire sont envoyés à la centrale. Le domaine va de 250ms (0,25s) ) à... -
Page 329: Choix De Langue
Mode d’emploi LH101 Après pression sur le curseur, le réglage actuel est affiché (en usine réglé sur 500 ms). En tournant le curseur, vous encodez la durée souhaitée. Les durées vont de 250 à 1500 ms. Confirmez le choix par une pression sur le curseur. - Page 330 Setup LH101 - Réglage des appareils Tournez le curseur pour afficher l'option "Setup LH101". Pressez le curseur pour sélectionner cette option. Tournez le bouton jusqu'à ce que l'option "Sprachauswahl" s'affiche. Choisissez cette option en appuyant sur le bouton rotatif. Tournez le bouton rotatif jusqu'à ce que la langue "...
-
Page 331: Durée Éclairage (À Partir De La Version 2.1)
Mode d’emploi LH101 14.11 Durée éclairage (à partir de la version 2.1) La durée d'éclairage détermine le temps au bout duquel le rétroéclairage de l'écran s'éteint. Si aucune entrée n'est plus effectuée sur le LH101 ou le LH101R (rotation du bouton rotatif ou pression d'une touche), le rétroéclairage de l'écran s'éteint après écoulement du temps d'éclairage. -
Page 332: Condition D'arrêt (À Partir De La Version 2.1)
Setup LH101 - Réglage des appareils Une pression sur le bouton rotatif permet d'enregistrer le réglage sélectionné. Vous pouvez maintenant choisir une autre option de configuration ou ..en appuyant 2x sur 'Esc' ..vous retournez à la conduite de la locomotive 14.12 Condition d'arrêt (à... -
Page 333: F29-F68 Mode
Mode d’emploi LH101 La condition d'arrêt actuelle s'affiche. Tourne le bouton pour sélectionner la condition d'arrêt souhaitée. Appuyer bouton rotatif permet d'enregistrer le réglage sélectionné. Vous pouvez maintenant choisir une autre option de configuration ou ..en appuyant 2x sur 'Esc' .. -
Page 334: Réglage Du Groupe De Fonctions Maximal
Setup LH101 - Réglage des appareils Appuyer sur le bouton rotatif permet de sélectionner cette option. Tournez le bouton jusqu'à ce que l'option "Mode F29-F68" s'affiche, puis appuyez sur le bouton. Le mode actuellement sélectionné s'affiche. Tourner le bouton rotatif modifie le réglage. Appuyer bouton rotatif... - Page 335 Mode d’emploi LH101 Tournez le bouton jusqu'à ce que l'option "Setup LH101" s'affiche. Appuyer sur le bouton rotatif permet de sélectionner cette option. Tournez le bouton jusqu'à ce que l'option "max.fonct-groupe" s'affiche, puis appuyez sur le bouton. Le groupe de fonctions qui peut être sélectionné...
-
Page 336: Installation Du Système (Setup Du Système)
Installation du système (setup du système) Installation du système (setup du système) Par installation du système, nous entendons la configuration de tous les paramètres qui concernent non seulement des locomotives déterminées mais aussi le système digital en entier. Ces réglages sont enregistrés durablement dans la centrale (LZ100 / LZV100 / LZV200). - Page 337 Mode d’emploi LH101 ... et confirmer en appuyant sur le bouton rotatif. Si nécessaire, tourner le bouton rotatif jusqu'à ce que l'option "regler l'horloge" soit visible. Appuyer bouton rotatif pour sélectionner l'option. Le réglage actuel de la montre modèle s'affiche (l'image de gauche montre l'état du réglage d'usine ou après une remise à...
- Page 338 Installation du système (setup du système) Sélectionner le réglage des minutes ..et appuyer sur le bouton rotatif. Réglez les minutes souhaitées ..et appuyer sur le bouton rotatif. Utilisez le bouton rotatif pour sélectionner le réglage du facteur de temps. Appuyer sur le bouton rotatif, ...
-
Page 339: Activation Et Désactivation Du Mode "Auto
LZV100 / LZV200). S'il est activé, la centrale "mémorise" les vitesses des locomotives appelées même après avoir désactivé le système. Si vous activez à nouveau votre système Digital plus by Lenz ®, toutes les locomotives reprendront leur marche avec leur dernière vitesse. -
Page 340: Comportement Du Système Avec Le Mode "Auto" Activé
Installation du système (setup du système) 15.2.1 Comportement du système avec le mode "AUTO" activé vous remettez exploitation votre centrale LZ100/LZV100/LZV200 avec le mode "AUTO" activé, vous verrez apparaître sur l'écran l'affichage suivant : Si vous désirez faire rouler maintenant vos locomotives avec leur "ancienne"... -
Page 341: Suppression D'adresses De Locomotive Dans La Mémoire De La Centrale
Mode d’emploi LH101 Tournez le curseur pour faire apparaître l'option "Affichage du numéro de version". 15.4 Suppression d'adresses de locomotive dans la mémoire de la centrale La centrale LZ100/LZV100/LZV200 envoie à tous les appareils de façon répétée les adresses de locomotive répertoriées dans sa mémoire. - Page 342 Installation du système (setup du système) Pressez le curseur pour sélectionner l'option. Tournez le curseur pour faire apparaître l'option "Supprimer l'adresse de locomotive dans la mémoire de la centrale". Pressez le curseur pour sélectionner l'option et afficher ensuite la première locomotive dans la mémoire de la centrale.
-
Page 343: Service Variable Lire / Écrire
Mode d’emploi LH101 Utilisez la suppression d'une adresse de locomotive dans la centrale avec prudence. Si une adresse est effacée, la centrale n'enverra plus ses données à la locomotive. En cas d'interruption de courant, la locomotive concernée pourrait perdre les informations. 15.5 Service Variable lire / écrire Les variables de service sont des réglages qui peuvent être effectués dans le LZV200. - Page 344 Installation du système (setup du système) Entrer le numéro de la VS souhaitée (dans l'exemple SV2, baudrate l'interface). Confirmer l'entrée du numéro avec la touche 'Loco'. Le réglage actuel de la VS est affiché. Vous pouvez maintenant supprimer la valeur affichée ...
-
Page 345: Appendice
à nouveau, il est possible que la pile de la centrale soit déchargée. Cette pile assure la sauvegarde des données pendant la déconnexion de la centrale. Voyez dans ce cas votre revendeur ou la firme Lenz Elektronik pour un remplacement de pile. - Page 346 La raison peut être une perturbation dans le bus XpressNet. Vérifiez que tous les câbles sont correctement placés. En outre, il est possible qu'il y ait une défectuosité dans la centrale ou dans le régulateur. Contactez alors votre revendeur ou la firme Lenz.
-
Page 347: Itinéraires - Formulaire
Mode d’emploi LH101 16.2 Itinéraires – Formulaire Itinéraire n°____ Itinéraire n°____ Etape Adresse + / - Etape Adresse + / -... -
Page 348: Aide En Cas De Panne
Appendice 16.3 Aide en cas de panne Panne Cause possible Remède La locomotive ne roule L'adresse sur l'écran est Encodez la bonne adresse de pas. erronée. locomotive (page 18) L’adresse est affichée à Vous vous trouvez en Pressez le curseur. l’écran. - Page 349 Mode d’emploi LH101 La locomotive est réglée Pilotez la locomotive avec sur exploitation avec l’adresse à 4 chiffres. Si vous adresse à 4 chiffres (bit 6 ne connaissez pas cette dans la CV 29 inscrit). Un adresse, lisez-la sur la voie de avis est donné...
-
Page 350: Structure Arborescente Des Options Du Lh101
Appendice 16.4 Structure arborescente des options du LH101 Choisir l'adresse de locomotive dans la pile du LH101 Choisir l'adresse de locomotive dans la mémoire de la centrale Choisir le mode pilotage par crans de vitesse Modifier le groupe de fonctions Presser longuement : configurer fonctions Configurer le rafraîchissement des fonctions Régler le mode de fonctionnement : permanent ou... - Page 351 Mode d’emploi LH101 Luminosité écran Contraste écran Afficher numéro de version Régler adresse XpressNet Retour aux réglages d'usine Durée itinéraires Choix de la langue Temps d'éclairage Condition d'arrêt F29-F68 Mode Groupe de fonctions max. Setup système " Mode "AUTO" Afficher numéro de version du système Supprimer adresse loco dans la mémoire de centrale Lire/écrire la variable de service...
- Page 352 De surcroît est éteinte toute prétention à l'exécution de la garantie. Vogelsang 14 35398 Giessen Hotline: 06403 900 133 Fax: 06403 900 155 www.lenz-elektronik.de info@lenz-elektronik.de Conservez bien ce livret d'instructions pour une utilisation ultérieure !