Table des Matières

Publicité

Les langues disponibles

Les langues disponibles

Liens rapides

RESV1300
ELECTRIC MULCHINATOR BLOWER / VACUUM
OPERATOR'S MANUAL
FOR QUESTIONS, CALL 1-800-345-8746 in U.S. or
1-800-668-1238 in CANADA
www.RyobiOutdoor .com
SAVE THESE INSTRUCTIONS
DO NOT THROW AWAY

Publicité

Table des Matières
loading

Sommaire des Matières pour Ryobi RESV1300

  • Page 1 RESV1300 ELECTRIC MULCHINATOR BLOWER / VACUUM OPERATOR’S MANUAL FOR QUESTIONS, CALL 1-800-345-8746 in U.S. or 1-800-668-1238 in CANADA www.RyobiOutdoor .com SAVE THESE INSTRUCTIONS DO NOT THROW AWAY...
  • Page 2: Table Des Matières

    NOTE: PROOF OF PURCHASE WILL BE REQUIRED CONTENTS OF CARTON FOR WARRANTY SERVICE. This unit includes the following: • Blower/Vacuum Model RESV1300 Make sure you carefully read and understand this • Blower/Vacuum Tube manual before starting or operating this equipment.
  • Page 3: Safety Alert

    RULES FOR SAFE OPERATION The purpose of safety symbols is to attract your SYMBOL MEANING attention to possible dangers. The safety symbols, and their explanations, deserve your careful attention Failure to obey a DANGER: and understanding. The safety warnings do not by safety warning will themselves eliminate any danger.
  • Page 4: While Operating

    RULES FOR SAFE OPERATION • CORD SETS: Make sure your cord set is in good • Do not leave the Blower/Vacuum plugged in when not condition, with a cord that is heavy enough to carry in use, changing tubes, or while being the current that your unit will draw.
  • Page 5: Safety And International Symbols

    RULES FOR SAFE OPERATION SAFETY AND INTERNATIONAL SYMBOLS This operator's manual describes safety and international symbols and pictographs that may appear on this product. Read the operator's manual for complete safety, assembly, operating and maintenance and repair information. SYMBOL MEANING SYMBOL MEANING •...
  • Page 6: Know Your Unit

    RULES FOR SAFE OPERATION KNOW YOUR UNIT APPLICATION As a blower: • Cleaning of yards, garages, driveways, porches, patios, around walls, fences, etc. As a vacuum: • Picking up leaves, light debris, etc. Latch Support Blower/Vacuum Tube Vacuum Inlet Power/Speed Switch Motor Air Vents Blower Outlet Vacuum Bag Hook...
  • Page 7: Assembly Instructions

    ASSEMBLY INSTRUCTIONS ATTACHING AND REMOVING THE Removing BLOWER/VACUUM TUBE NOTE: It may be necessary to remove the Blower/Vacuum Tube to clear a blocked tube To avoid serious WARNING: or impeller. personal injury, the blower/vacuum tube and vacuum bag must To prevent serious WARNING: be used when operating this unit.
  • Page 8: Attaching And Removing The Vacuum Bag

    ASSEMBLY INSTRUCTIONS ATTACHING AND REMOVING THE VACUUM BAG INSTALLING THE SHOULDER HARNESS 1. Push the strap through the center of the buckle. Attaching 2. Pull the strap over the cross bar and down through 1. Attach the vacuum bag to the vacuum bag hook on the slot in the buckle (Fig.
  • Page 9: Operating Instructions

    OPERATING INSTRUCTIONS CONNECTING THE POWER CORD 2. Plug the female end of the electrical cord into the receptacle at the back of the unit (Fig. 10). Use a minimum 25 foot (7.6 m.) long, 16AWG, outdoor electrical cord when using this unit. Other sizes include: MINIMUM WIRE SIZE FOR EXTENSION CORDS FOR 120 VOLT APPLIANCES USING 0-12 AMPS Cord length (ft.)
  • Page 10: Holding The Blower/Vacuum

    OPERATING INSTRUCTIONS • Operate power equipment only at reasonable hours— HOLDING THE BLOWER/VACUUM not early in the morning or late at night when people Before operating the unit, stand in the operating position. might be disturbed. Comply with times listed in local (Fig.
  • Page 11: Operating As A Blower

    OPERATING INSTRUCTIONS OPERATING AS A BLOWER Converting to a Blower 1. Place the shoulder harness over your head, onto your shoulder and adjust it if necessary. Refer to Installing the Shoulder Harness. 2. Start the unit. See Starting/Stopping Instructions. 3. Set the blower/vacuum mode change-over lever to the up position (Blower Mode) (Fig.
  • Page 12: Operating As A Vacuum

    OPERATING INSTRUCTIONS OPERATING AS A VACUUM Converting to Vacuum 1. Place the shoulder harness over your head, onto your shoulder and adjust it if necessary. Refer to Installing the Shoulder Harness. 2. Start the unit. See Starting/Stopping Instructions. 3. Set the blower/vacuum mode change-over lever to the down position (Vacuum Mode) (Fig.
  • Page 13: Clearing A Blocked Impeller

    OPERATING INSTRUCTIONS EMPTYING THE VACUUM BAG CLEARING A BLOCKED TUBE / IMPELLER To avoid serious WARNING: To avoid serious WARNING: personal injury, personal injury, be never unzip or remove the vacuum bag sure the unit is off and unplugged before without first turning the unit off.
  • Page 14: Maintenance And Repair Instructions

    MAINTENANCE AND REPAIR INSTRUCTIONS 3. Wash the bag once a year or more often if needed: SERVICING DOUBLE INSULATED UNITS Remove the vacuum bag. This unit is double-insulated. In a double-insulated unit, two systems of insulation are provided instead of b.
  • Page 15: Specifications

    SPECIFICATIONS Motor Amperage..............................12 Amps Blower Air Output ........................up to 160 mph (257.5 kmh) Vacuum Air Flow..........................up to 424 cfm (12 cmm) Mulching Ratio..............................up to 10:1 Operating Weight ............................10 lb (4.5 kg) Vacuum Bag Capacity .......................... .75 bushels (26.4 L) TROUBLESHOOTING UNIT WILL NOT BLOW OR VACUUM C A U S E...
  • Page 16 NOTES...
  • Page 17 NOTES...
  • Page 18: How To Obtain Service

    P.O. Box 361131 MTD reserves the right to change or improve the design of Cleveland, OH 44136-0019 any RYOBI Product without assuming any obligation to modify any product previously manufactured. SAVE THESE INSTRUCTIONS FOR FUTURE REFERENCE. FOR QUESTIONS CALL 1-800-345-8746 IN U.S.
  • Page 19: Resv1300 Souffleuse/Aspirateur À Pailler Électrique

    RESV1300 SOUFFLEUSE/ASPIRATEUR À PAILLER ÉLECTRIQUE MANUEL DE L'UTILISATEUR SI VOUS AVEZ DES QUESTIONS, APPELEZ LE 1-800-345-8746 aux ÉTATS-UNIS, ou le 1-800-668-1238 au CANADA www.RyobiOutdoor.com MANUEL IMPORTANT À NE PAS JETER...
  • Page 20: Références, Illustrations Et Spécifications Relatives Au Produit

    CONTENU DE L'EMBALLAGE Cet appareil comprend les éléments suivants : • Allez sur www.RyobiOutdoor.com pour obtenir une • Souffleuse/aspirateur, modèle RESV1300 liste des concessionnaires agréés les plus proches. • Tube de souffleuse/aspirateur NE RETOURNEZ PAS L'APPAREIL AU DÉTAILLANT.
  • Page 21: Consignes De Sécurité

    CONSIGNES DE SÉCURITÉ Les symboles de sécurité attirent votre attention sur SYMBOLE SIGNIFICATION des dangers potentiels. Ces symboles et leurs détails explicatifs méritent que vous les lisiez et compreniez le non-respect d’un DANGER: bien. Les avertissements de sécurité ne peuvent éviter avertissement peut les dangers de par eux-mêmes.
  • Page 22: Pendant L'utilisation

    CONSIGNES DE SÉCURITÉ Cet outil comporte une isolation double. Pour toutes les • Débranchez en tirant sur la prise et non le cordon. réparations, utilisez uniquement des pièces de rechange • Restez toujours en alerte. Faites preuve de bon sens. Pour identiques.
  • Page 23: Symboles De Sécurité Et Internationaux

    CONSIGNES DE SÉCURITÉ SYMBOLES DE SÉCURITÉ ET INTERNATIONAUX Ce manuel de l'utilisateur décrit les symboles et pictogrammes de sécurité et internationaux pouvant apparaître sur ce produit. Consultez le manuel de l'utilisateur pour les informations concernant la sécurité, le montage, le fonctionnement, l'entretien et les réparations.
  • Page 24: Familiarisez-Vous Avec Votre Appareil

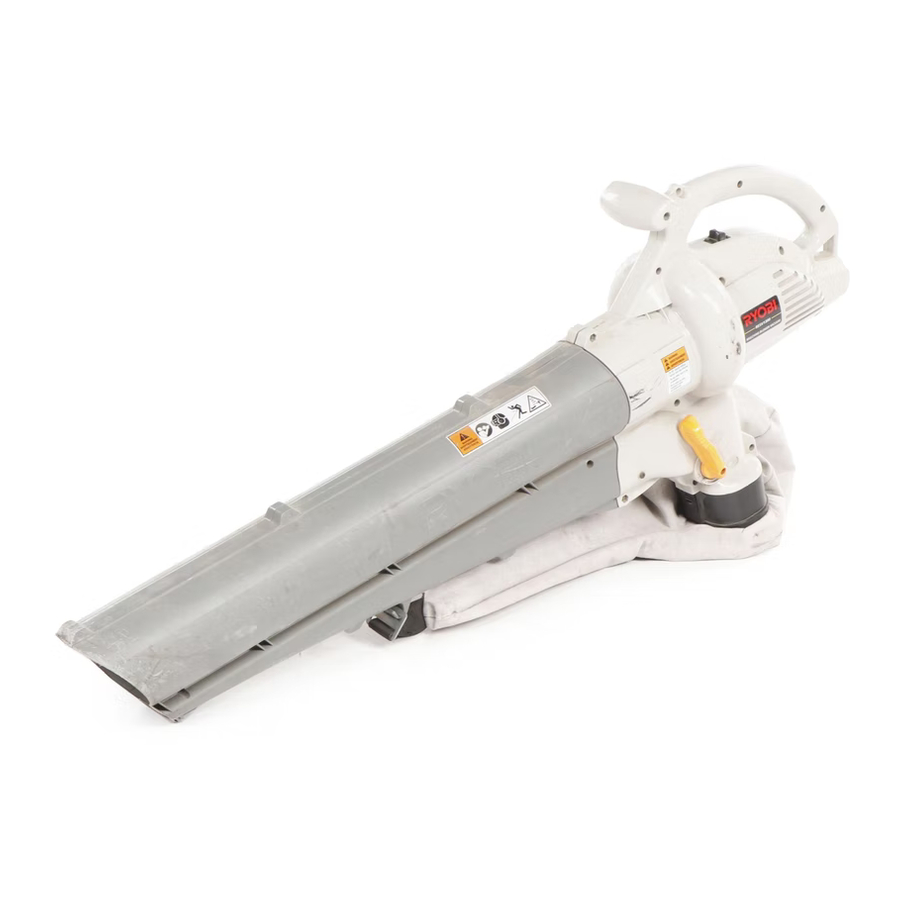
    CONSIGNES DE SÉCURITÉ FAMILIARISEZ-VOUS AVEC L’APPAREIL USAGE Comme souffleuse : • Nettoyage de cours, garages, chemins, porches, terrasses, autour des murs, clôtures, etc. Comme aspirateur : • Ramassage de feuilles, de débris légers, etc. Soutien du verrou Tube de Bandoulière souffleuse/aspirateur Interrupteur Entrée de aspirateur...
  • Page 25: Instructions De Montage

    INSTRUCTIONS DE MONTAGE FIXATION ET RETRAIT DU TUBE DE Retrait SOUFFLEUSE/ASPIRATEUR REMARQUE : Il peut s'avérer nécessaire de retirer le tube de souffleuse/aspirateur pour le dégager ou Pour AVERTISSEMENT: dégager l’hélice. éviter des blessures graves, veillez à ce que le tube et le sac soient installés sur l’appareil lors de Pour AVERTISSEMENT:...
  • Page 26: Fixation Et Retrait Du Sac D'aspirateur

    INSTRUCTIONS DE MONTAGE FIXATION ET RETRAIT DU SAC D'ASPIRATEUR INSTALLATION DU HARNAIS 1.Faites passer la bande au centre de la boucle. Fixation 2.Tirez la bande par-dessus la traverse et à travers la 1. 1. Fixez le sac d’aspirateur à son crochet, sur le tube fente de la boucle (Fig.
  • Page 27: Mode D'emploi

    MODE D'EMPLOI CONNEXION DU CORDON D'ALIMENTATION 2. Branchez l’extrémité femelle du cordon dans la prise située à l’arrière de l’appareil (Fig. 10). Employez une corde électrique extérieure (minimum 7,6 m ou 25 pieds de long, 16 AWG). D'autres tailles incluent:: CALIBRE MINIMUM DES RALLONGES ALIMENTANT DES APPAREILS 120V, A COURANT DE CHARGE DE 0-12 AMPS Prise...
  • Page 28: Tenue De La Souffleuse/Aspirateur

    MODE D'EMPLOI TENUE DE LA SOUFFLEUSE/ASPIRATEUR • N’utiliser l’outil qu’à des heures raisonnables, c’est-à- dire pas trop tôt le matin ou tard le soir lorsque cela Avant d’utiliser l’outil, se tenir en position de travail peut déranger les personnes vivant aux environs. Se (Fig.
  • Page 29: Utilisation De La Souffleuse

    MODE D'EMPLOI UTILISATION DE LA SOUFFLEUSE Conventir en Souffleuse 1. Démarrez l'appareil. Voir Instructions de démarrage et d'arrêt. 2. Relevez le levier de bascule des modes souffleuse/aspirateur (mode souffleuse) (Fig. 14). REMARQUE : N’utilisez jamais l’appareil avec le levier sur la position du milieu. Vacuum Fig.
  • Page 30: Utilisation Comme Aspirateur

    MODE D'EMPLOI UTILISATION COMME ASPIRATEUR Convertir en Aspirateur 1. Démarrez l'appareil. Voir Instructions de démarrage et d'arrêt. 2. Rabaissez le levier de bascule des modes souffleuse/aspirateur (mode aspirateur) (Fig. 18). REMARQUE : N’utilisez jamais l’appareil avec le levier sur la position du milieu. Mode aspirateur Mode...
  • Page 31: Dégagement D'un(E) Tube/ Hélice Bloqué(E)

    MODE D'EMPLOI DÉGAGEMENT D’UN(E) TUBE/ HÉLICE Vider le Sac D’aspirateur BLOQUÉ(E) Afin AVERTISSEMENT: d'éviter Pour des blessures graves, n’ouvrez et ne retirez AVERTISSEMENT: éviter jamais le sac avant d’éteindre l’appareil. des blessures graves, éteignez l'appareil avant tout nettoyage ou entretien. REMARQUE : Videz le sac après chaque utilisation pour éviter toute détérioration et ne pas restreindre le débit d'air, ce qui affaiblirait les performances de...
  • Page 32: Entretien Et Réparations

    ENTRETIEN ET RÉPARATIONS 3. Lavez le sac une fois par an ou plus selon le besoin : ENTRETIEN D’APPAREILS À DOUBLE ISOLEMENT Retirez le sac d’aspirateur. Cet appareil possède un double isolement. Au lieu d’une b. Retournez-le à l’envers. mise à la terre, les appareils à double isolement Suspendez-le.
  • Page 33: Caractéristiques

    CARACTÉRISTIQUES Intensité du moteur............................... 12 A Sortie d’air de la souffleuse ....................... 257,5 km/h (160 m/h) max. Débit d'air de l'aspirateur ...................... 12 m3/min (424 pi3/min) max. Rapport de paillage ..............................10:1 max. Poids en fonctionnement ..........................4,54 kg (10 lb) Capacité...
  • Page 34: Remarques

    REMARQUES...
  • Page 35 REMARQUES...
  • Page 36: Garantie

    MTD LLC canaux agréés de distribution à l’exportation. MTD se réserve la droit de modifier ou d’améliorer la P.O. Box 361131 ® RYOBI conception de tout produit sans assumer l’obligation de modifier tout produit d’une fabrication plus Cleveland, OH 44136-0019 ancienne.
  • Page 37 RESV1300 SOPLADOR / ASPIRADOR TRITURADOR ELECTRICO MANUAL DEL OPERADOR SI TIENE PREGUNTAS, LLAME AL 1-800-345-8746 en EE.UU. o al 1-800-668-1238 en CANADA www.RyobiOutdoor.com ESTE MANUAL ES IMPORTANTE NO LO DESECHE...
  • Page 38: Contenido De La Caja

    CONTENIDO DE LA CAJA distribuidores de servicio localizados cerca de usted. Esta unidad incluye lo siguiente: • Soplador / Aspirador Modelo RESV1300 • Vaya a www.RyobiOutdoor.com en la Red Mundial • Tubo del Soplador / Aspirador World Wide Web para obtener una lista de distribuidores de servicios localizados cerca de usted •...
  • Page 39: Normas Para Una Operación Segura

    NORMAS PARA UNA OPERACION SEGURA SIMBOLO SIGNIFICADO Los símbolos de seguridad se utilizan para llamar su atención sobre posibles peligros. Los símbolos de El no obedecer una PELIGRO: seguridad y sus explicaciones merecen toda su atención advertencia de y comprensión. Los símbolos de seguridad no eliminan seguridad puede conducir a que usted u ningún peligro por sí...
  • Page 40 NORMAS PARA UNA OPERACION SEGURA DURANTE LA OPERACION TAMAÑO MINIMO DE ALAMBRE PARA LOS CABLES DE EXTENSION PARA APARATOS DE 120 VOLTIOS • Use anteojos o gafas de protección que indiquen que QUE UTILIZAN 0-6 AMPERIOS* cumplen con las normas ANSI Z87.1, y use protección para sus oídos y audición cuando opere esta unidad.
  • Page 41 NORMAS PARA UNA OPERACION SEGURA • Use sólo piezas y accesorios de repuesto Genuine • La unidad está diseñada para recoger material seco tal Factory Parts™ para esta unidad. Puede obtenerlos como hojas, césped, ramitas y pedazos de papel. No en su proveedor de servicio autorizado.
  • Page 42: Símbolos De Seguridad E Internacionales

    NORMAS PARA UNA OPERACIÓN SEGURA SIMBOLOS DE SEGURIDAD E INTERNACIONALES Este manual del operador describe los símbolos y figuras de seguridad e internacionales que pueden aparecer en este producto. Lea el manual del operador para obtener información completa acerca de la seguridad, ensamble, operación y mantenimiento y reparación.
  • Page 43: Conozca Su Unidad

    NORMAS PARA UNA OPERACION SEGURA CONOZCA SU UNIDAD APLICACIÓN Como soplador: • Limpieza de jardines, cocheras, entradas de automóviles, pórticos, patios, alrededor de paredes, cercos, etc. Como aspirador: • Recoger hojas, escombros livianos, etc. Soporte de sujeción Correa para el hombro Entrada del Tubo Soplador / Aspirador Interruptor de...
  • Page 44: Instrucciones De Ensamble

    INSTRUCCIONES DE ENSAMBLE CONEXIÓN Y REMOCIÓN DEL TUBO DEL Remoción SOPLADOR / ASPIRADOR NOTA: s posible que deba retirar el tubo del soplador / aspirador para desbrozar un tubo o propulsor ADVERTENCIA: Para evitar que estén obstruidos. graves lesiones personales, debe usar el tubo del ADVERTENCIA: Para evitar soplador / aspirador y la bolsa del aspirador...
  • Page 45: Conexión Y Remoción De La Bolsa Del Aspirador

    INSTRUCCIONES DE ENSAMBLE CONEXIÓN Y REMOCIÓN DE LA BOLSA INSTALACION DEL ARNES DEL ASPIRADOR 1. Pase la correa por el centro de la hebilla. Conexión 2. Pase la correa sobre la barra transversal y hacia abajo por la ranura de la hebilla (Fig. 6). 1.
  • Page 46: Instrucciones De Operación

    INSTRUCCIONES DE OPERACION CONEXION DEL CABLE DE ENERGIA 2. Enchufe el extremo hembra del cable de electricidad en el receptáculo de la parte posterior de la unidad Utilice una cuerda eléctrica al aire libre (mínimo 7,6 m o (Fig. 10). 25 pies de largo, 16AWG).
  • Page 47: Respiraderos

    INSTRUCCIONES DE OPERACION • Se requiere el uso de protección auditiva para reducir SOSTENIMIENTO DE LA SOPLADORA/ el riesgo de pérdida auditiva asociada con los niveles ASPIRADORA de sonido. Antes de operar esta unidad, párese en la posición de • Opere el equipo solamente durante horas razonables — no operación (Fig.
  • Page 48: Operación De La Unidad Como Soplador

    INSTRUCCIONES DE OPERACION OPERACIÓN DE LA UNIDAD COMO SOPLADOR El Convertir a un Soplador 1. Arranque la unidad. Lea las Instrucciones de arranque y apagado. 2. Coloque la palanca de cambio de modo del soplador / aspirador en la posición hacia arriba (Modo de soplador) (Fig.
  • Page 49: Operación De La Unidad Como Aspirador

    INSTRUCCIONES DE OPERACION OPERACIÓN DE LA UNIDAD COMO ASPIRADOR El Convertir a un Aspirador 1. Arranque la unidad. Lea las Instrucciones de arranque y apagado. 2. Coloque la palanca de cambio de modo del soplador/ aspirador en la posición hacia abajo (modo de aspirador) (Fig.
  • Page 50: Vaciado De La Bolsa Del Aspirador

    INSTRUCCIONES DE OPERACION VACIADO DE LA BOLSA DEL ASPIRADOR DESBROCE DE UN TUBO / PROPULSOR OBSTRUIDO ADVERTENCIA: Para evitar graves lesiones personales, nunca abra el cierre ADVERTENCIA: Para evitar relámpago ni saque la bolsa del aspirador sin graves antes apagar la unidad. lesiones personales, use siempre guantes para protegerse contra las cuchillas del NOTA: Vacíe la bolsa del aspirador luego de cada uso...
  • Page 51: Instrucciones De Mantenimiento Y Reparación

    INSTRUCCIONES DE MANTENIMIENTO Y REPARACION 3. Lave la bolsa una vez por año o con más frecuencia SERVICIO DE LAS UNIDADES CON si es necesario: AISLAMIENTO DOBLE Retire la bolsa del aspirador. Esta unidad cuenta con un aislamiento doble. En una unidad con aislamiento doble, existen dos sistemas de b.
  • Page 52: Especificaciones

    ESPECIFICACIONES Amperaje del motor ............................12 Amperios Salida de aire del soplador .................... hasta 257,5 km/h (160 millas/hora) Flujo de aire del aspirador....................... hasta 12 m /m (424 pies /m ) Proporción de triturado ............................hasta 10:1 Peso operativo ............................4,5 kg (10 libras) Capacidad de la bolsa del aspirador....................
  • Page 53 NOTAS...
  • Page 54 NOTAS...
  • Page 55: Parts List

    PARTS LIST REPLACEMENT PARTS - MODEL RESV1300 120 VOLT ELECTRIC BLOWER/VAC Item Part No. Description Item Part No. Description 791-182410 Mode Control Flapper 791-182544 Left Motor Housing 791-182411 Mode Control Lever (includes 3) 791-182545 Right Motor Housing 791-182415 Blower/Vac Tube Assembly (includes 3)
  • Page 56: Garantía

    MTD. MTD LLC MTD se reserva el derecho a cambiar o mejorar el diseño ® de cualquier Producto RYOBI sin asumir cualquier P.O. Box 361131 obligación en cuanto a modificar cualquier producto previamente fabricado. Cleveland, OH 44136-0019 GUARDE ESTAS INSTRUCCIONES PARA USARLAS COMO REFERENCIA EN EL FUTURO.

Table des Matières