Table des Matières
Publicité
Les langues disponibles
Les langues disponibles
Liens rapides
Publicité
Chapitres
Table des Matières
Dépannage

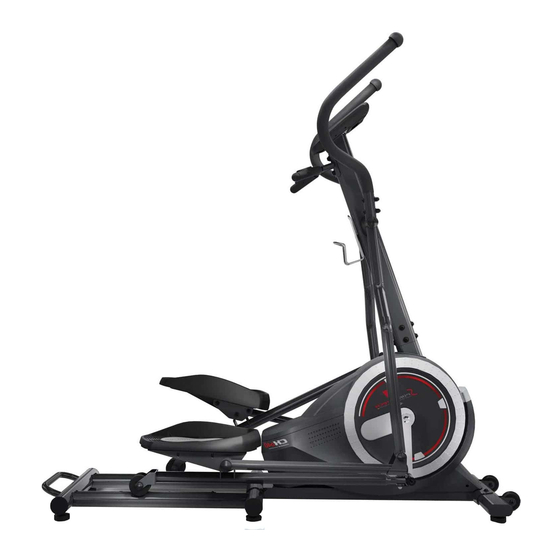
Manuels Connexes pour SPORTSTECH CX640


Sommaire des Matières pour SPORTSTECH CX640
- Page 1 CX640...
- Page 3 Sehr geehrter Kunde wir freuen uns, dass Sie sich für ein Gerät aus der SPORTSTECH Produktpalette entschieden haben. SPORTSTECH Sportgeräte bieten Ihnen höchste Qualität und neueste Technologie. Um die Leistungsfähigkeit des Gerätes voll nutzen zu können und viele Jahre Freude an Ihrem Gerät zu haben, lesen Sie bitte vor der Inbetriebnahme und dem Beginn des Trainings dieses Benutzerhandbuch sorgfältig durch und verwenden Sie das Gerät den Anweisungen entsprechend.
- Page 4 Aufbau, Benutzung, Abbau. 1. QR-Code scannen 2. Videos anschauen 3. Schnell und sicher starten Link zu den Videos: https://service.innovamaxx.de/cx640_video Uns gibt es auch auf Social Media! Hol dir die neuesten Produktinfos, Trainingsinhalte uvm. auf unserer: Instagram-Seite Facebook-Seite https://www.instagram.com/sportstech.de https://www.facebook.com/sportstech.de...
-
Page 5: Table Des Matières
INHALT INHALT 1. WICHTIGE SICHERHEITSHINWEISE ..............6 2. EXPLOSIONSZEICHNUNG/ERSATZTEILLISTE ............7 3. WERKZEUG ....................8 4. MONTAGEANLEITUNG ...................9 5. WICHTIGE DINGE VOR DEM TRAINING ............17 6. FUNKTIONEN UND FEATURES ..............18 7. HAUPTFUNKTIONEN ..................19 8. PROGRAMMEINFÜHRUNG UND BEDIENUNG ..........20 9. BEDIENUNG ....................25 10. -
Page 6: Wichtige Sicherheitshinweise
1. WICHTIGE SICHERHEITSHINWEISE Diese allgemeinen Sicherheitsinformationen müssen unbedingt für die Benutzung dieses Produktes beachtet werden. Lesen Sie alle Hinweise, bevor Sie das Produkt in Benutzung nehmen. ACHTUNG: Konsultieren Sie einen Arzt, bevor Sie trainieren. Dieser Hinweis ist unbedingt für Ältere oder gesundheitlich eingeschränkte Personen zu beachten. -
Page 7: Explosionszeichnung/Ersatzteilliste
2. EXPLOSIONSZEICHNUNG/ERSATZTEILLISTE Unter folgendem Link Unter folgendem Link finden Sie die Explosionszeichnung finden Sie die Explosionszeichnung und die Ersatzteile-Liste: und die Ersatzteile-Liste: https://service.innovamaxx.de/cx640_spareparts https://service.innovamaxx.de/cx640_spareparts... -
Page 8: Werkzeug
3. WERKZEUG (Schraube M8x80 2PCS Hutmutter S13 2PCS Kurvenscheibe Ø8xØ20x2.0 2PCS Federunterlegscheibe Ø8 2PCS Mutter M8 2PCS Schraube M8x49 4PCS Hutmutter S38 4PCS Gewölbte Scheibe Ø8xØ16x1,5 4PCS Hutmutter M8 4PCS Inbusschlüssel 6mm 1PC Multi-Hex-Werkzeug / Phillips Schraubendreher S10 S13 S14 S15 1PC Multi-Hex-Werkzeug S14 S19 2PCS... -
Page 9: Montageanleitung
4. MONTAGEANLEITUNG Fussauflage, Installation der vorderen und hinteren Stabilisatoren: Positionieren Sie zwei Fusspolster (52) auf dem vorderen Stabilisator (13). Positionieren Sie vier Fusspolster (52) auf dem hinteren Stabilisator (8). Entfernen Sie zwei M8x15 Schrauben (28), zwei Ø8x Ø20 Unterlegscheiben (31) vom vorderen Stabilisator (13). - Page 10 Installation der Frontsäule: Acht Schrauben M8x15 (28), vier Scheiben Ø8x Ø20x2,0 (31), acht Federringe Ø8 (18), vier Scheiben Ø8x Ø16x2 (63) vom Hauptrahmen (1) entfernen. Verbinden Sie den Sensorkabel I (59) vom Hauptrahmen (1) mit dem Mitteldraht (20) vom vorderen Pfosten (2). Den vorderen Pfosten (9) auf das Rohr des Hauptrahmens (1) stecken und mit acht Schrauben M8x15 (28), vier Scheiben Ø8x Ø20x2,0 (31), acht Federringen Ø8 (18), vier Kurventrägern Ø8x Ø16x2 (63), die entfernt wurden.
- Page 11 Installation des linken/rechten Handlauf-Arms: Achtung: Vor dem Zusammenbau bitte das weisse Universalfett auf die horizontalen Ach- sen auftragen. Entfernen Sie zwei Schrauben M8x20 (28), zwei Federscheiben Ø8 (18), zwei gewölbte Schei- ben Ø8xØ33x2,0 (19), zwei grosse Unterlegscheiben Ø19xØ25x2,0 (29) und Wellfederscheibe Ø19 (72) von den linken und rechten horizontalen Achsenden der Frontsäule (9).
- Page 12 Montage der Fusspedale links/rechts Achtung: Vor dem Zusammenbau bitte das weisse Universalfett auf die Kurbelwelle auf- tragen. Entfernen Sie zwei Schrauben M8x50 (110), zwei Scheiben Ø8x Ø16 (63) und zwei Muttern M8 (50) vom U Halterung (108). Befestigen Sie das linke Antriebsrohr (5) an der linken Kurbel (57) mit einem Bolzen M8x50 (110), einer Scheibe Ø8x Ø16 (63) und einer Mutter M8 (50), die entfernt wurden.
- Page 13 5. Montage des Fussrohrs links/rechts Entfernen Sie eine Schraube M12x85 (23), 2x Unterlegscheibe ø8xø25 (34)) und 1x Verbindungs- schaft (21) vom linken Handlauf-Arm (2). Befestigen Sie den linken Handlaufarm (2) am linken Fusspedalrohr (3) mit 1x Verbindungsschaft (21), 2x Unterlegscheibe ø8xø25 (34)) und 2x Bolzen M8x16 (23)), welche sie soeben entfernt hatten.
- Page 14 Montage des linken/rechten Fusspedals: Befestigen Sie das linke (L) und rechte (R) Pedal (47 bzw. 62) mit vier M8x20 Schrauben (32) am linken und rechten Fussrohr (3 bzw. 4).
- Page 15 Montage des linken/rechten Handlaufs: Befestigen Sie den linken/rechten Handlauf (11 bzw. 12) mit vier M8x47 Schrauben (67), vier gewölbten Scheiben Ø8xØ16x1,5 (60) und vier Muttern M8 (68) am linken/rechten Handlauf-Arm (2 bzw. 6).
- Page 16 Griffstange: Entfernen Sie zwei M8x15 Schrauben (28) und zwei Ø8xØ16 x1,5 gewölbte Scheiben (60) von der Frontsäule (9). Führen Sie die Handpulssensor-Kabel (43) von der Griffstange (10) aus durch die Bohrung in der Frontsäule (9) und ziehen sie dann vom oberen Ende der Frontsäule (9) heraus. Befestigen Sie die Griffstange (10) an der Frontsäule (9) mit den zuvor entfernten zwei Schrauben M8x15 (28) und zwei Ø8xØ16x1,5 gewölbten Scheiben (60) unter Zuhilfenahme des beiliegenden Inbusschlüssels.
-
Page 17: Wichtige Dinge Vor Dem Training
Montage des Netzadapters: Stecken Sie ein Ende des Netzadapters (40) in die Netzkabelbuchse der Spannungsversorgung (56) auf der Rückseite der linken Verkleidung. Prüfen Sie die auf dem Adapter angegebenen technischen Spezifikationen vor dem Anschliessen zunächst sorgfältig. Dann stecken Sie das andere Ende des Netzadapters (40) in die elektrische Wandsteckdose. -
Page 18: Funktionen Und Features
6. FUNKTIONEN UND FEATURES 1. Zeigt Ihnen die Trainingszeit in Minuten und Sekunden an. Der Computer zählt automatisch von 0:00 bis 99:59. Sie können auch einen Countdown-Wert einstellen, indem Sie die UP und DOWN Tasten verwenden. Wenn Sie nach Ablauf der Zeit weiter trainieren, wird der Computer „beepen“... -
Page 19: Hauptfunktionen
7. HAUPTFUNKTIONEN Es gibt 6 Tasten mit den folgenden Funktionen: 1. START/STOP Taste: Schnellstartfunktion: Erlaubt einen Schnellstart, ohne vorher ein Programm auszuwählen. Die Zeit zählt automatisch von null aufwärts. • Im Trainingsmodus: Training stoppen/pausieren. • Wenn das Training gestoppt/pausiert wurde, drücken Sie, um das Training wiederaufzunehmen. 2. -
Page 20: Programmeinführung Und Bedienung
8. PROGRAMMEINFÜHRUNG UND BEDIENUNG Manuelles Programm: Bedienungsanleitung P1 ist ein manuelles Programm. Es kann durch Drücken der START/STOP Taste gestartet werden. Der voreingestellte Widerstand ist 5. Diesen kann der Benutzer durch Drücken der UP/DOWN Taste anpassen. Auch ein Kalorienwert oder eine Zieldistanz kann festgelegt werden. Bedienung: 1.Drücken Sie UP/DOWN um das manuelle Programm (P1) auszuwählen. - Page 21 Benutzerdefinierte Programme: User 1, User 2, User 3, User 4 Die Programme 14-17 sind benutzerdefiniert. Die Benutzer können hier durch einstellen der Werte TIME, DISTANCE, CALORIES und Widerstand ihre eigenen Trainingseinheiten erstellen. Alle Einstel- lungen werden gespeichert. Die Programme können durch die UP/DOWN Taste gewechselt werden. Bedienung: 1.Drücken Sie die UP/DOWN Taste, um P14 –...
- Page 22 Herzfrequenzkontrolle: 55% H.R.C., 65% H.R.C., 75% H.R.C., 85% H.R.C., Ziel - H.R.C. Programm 18 – 22 sind Herzfrequenzkontrollprogramme; Programm 22 kontrolliert eine benutzer- definierte Herzrate. Programm 18 ist die Programm 19 ist die Programm 20 ist die Programm 21 ist die Programm 22 ist die 55% Max H.R.C.
- Page 23 Wattkontrollprogramm: Programm 23 ist ein geschwindigkeitsabhängiges Programm. Drücken Sie ENTER, um die Werte WATT, ZEIT, DISTANZ und KALORIEN einzustellen. Während des Trainings kann der Widerstand dies- mal nicht eingestellt werden. Dieser wird sich von selbst verändern, wenn Sie z.B. zu langsam sind erhöhen und sich verringern, wenn Sie zu schnell sind.
- Page 24 Körperfettprogramm: Körperfett Programm 24 ist ein spezielles Programm, um den Körperfettanteil des Benutzers auszurechnen. Es gibt drei Körpertypen, zwischen denen unterschieden wird: Typ 1: Körperfettanteil% > 27 Typ 2: Körperfettanteil% > 27 Typ 3: Körperfettanteil % < 20 Der Computer wird die Ergebnisse in Prozent angeben. Bedienung: 1.Verwenden Sie die UP/DOWN Taste, um das Programm 24 zu starten.
-
Page 25: Bedienung
9. BEDIENUNG 1. Schlafmodus: Der Computer wird nach vier Minuten in den Schlafmodus gehen, wenn keine Eingabe erfolgt. Drü- cken Sie irgendwo auf den Bildschirm, um ihn wieder aufzuwecken. 2. Fehlermeldungen: E1 (ERROR 1): Normaler Status: Dieser Fehler erscheint, wenn der Monitor für mehr als vier Sekunden kein Signal mehr vom Motor erhalten hat. -
Page 26: Lcd Trainingsgrafiken
10. LCD TRAININGSGRAFIKEN PROGRAMM 1: PROGRAMM 2: PROGRAMM 3: MANUELL SCHRITTE HÜGEL PROGRAMM 6: PROGRAMM 4: ROLLEN PROGRAMM 5: TAL FETTVERBRENNUNG PROGRAMM 9: PROGRAMM 7: RAMPE PROGRAMM 8: BERG INTERVALL PROGRAMM 10: PROGRAMM 11: PROGRAMM 12: ZUFÄLLIG PLATEAU FARTLEK PROGRAMM 13: KLIPPE... -
Page 27: Benutzerdefinierte Programme
11. BENUTZERDEFINIERTE PROGRAMME PROGRAMM 14 PROGRAMM 15 PROGRAMM 16 PROGRAMM 17... -
Page 28: Herzfrequenzprogrammprofile
12. HERZFREQUENZPROGRAMMPROFILE PROGRAMM 18 55% HRC PROGRAMM 19 65% HRC PROGRAMM 20 75% HRC PROGRAMM 21 85% HRC PROGRAMM 22 TARGET HRC PROGRAMM 23 WATT CONTROL... -
Page 29: Körperfettmessung
13. KÖRPERFETTMESSUNG KÖRPERFETT (STOPPMODUS) KÖRPERFETT (START MODUS) Trainingszeit: 40 Minuten Trainingszeit: 40 Minuten Trainingszeit: 20 Minuten Eines der Trainingsprogramme erscheint automatisch bei der Messung von Körperfett 14. WARTUNG Reinigung Der Cross-Trainer kann mit einem weichen Tuch und einem milden Reinigungsmittel gereinigt wer- den. -
Page 30: Fehlerbehebung
15. FEHLERBEHEBUNG PROBLEM LÖSUNG Der Cross-Trainer wackelt beim Drehen Sie die Endkappe am hinteren Sta-bi- Gebrauch. lisator so weit, wie erforderlich ist, um den Cross-Trainer waagerecht auszurichten. Das Display auf der Computer-Konso- Entfernen Sie die Computerkonsole und ver- le zeigt nichts an. ge-wissern Sie sich, dass die von der Com- puter-konsole kommenden Kabel ordnungs- gemäss an die Kabel angeschlossen sind, die... -
Page 31: Anwendungssoftware (App)
16. ANWENDUNGSSOFTWARE (APP) Sie können die App's über die hier abgebildeten QR-Codes herunterladen oder in Ihrem Store suchen. Voraussetzung für mobiles Gerät: Android 5.0 oder höher mit Bluetooth 4.0, iOS 8.0 oder höher. Android Kinomap Hinweise zur Nutzung der App: Als Android-Nutzer stellen Sie bitte sicher, dass unter dem Punkt "Einstellungen ->... -
Page 32: Dehnungsübungen
17. DEHNUNGSÜBUNGEN Bevor Sie das Laufband benutzen, ist es am besten, 5 bis 10 Minuten zum Aufwärmen Stretching-Übungen durchzuführen. Dehnen vor dem Training hilft die Flexibilität zu verbessern und das Verletzungsrisiko zu mindern. MIT DEM KOPF ROLLEN Drehen Sie den Kopf nach rechts für eine Sekunde, fühlen Sie die Streckung auf der linken Seite des Nackens, dann drehen Sie den Kopf zurück für eine Sekunde, recken Sie Ihr Kinn nach oben und lassen Ihren Mund geöffnet. - Page 33 Europäische Entsorgungsrichtlinie 2002/96/EG Entsorgen Sie Ihr Trainingsgerät in keinem Fall über den normalen Hausmüll. Entsorgen Sie das Gerät ausschließlich über einen kommunalen oder zugelassenen Entsorgungsbetrieb.Beachten Sie hierbei die aktuell geltenden Vorschriften.Erkundigen Sie sich im Zweifelsfall bei Ihrer Stadt- bzw. Gemeindeverwal- tung nach einer sach- und umweltgerechten Entsorgungsmöglichkeit.
- Page 35 Dear customer, We are pleased you chose a device from the SPORTSTECH product range. With sports equipment from SPORTSTECH you get the highest quality and latest technology. In order to fully use the potential of your device and be able to enjoy it for many years, please read this manual carefully before starting up and beginning of training, and use the device according to the instruc- tions.
- Page 36 1. Scan the QR code 2. Watch videos 3. Start fast and safely Link to the videos: https://service.innovamaxx.de/cx640_video We are also on social media! Get the latest product information, training content and much more on our: Instagram-page Facebook-page https://www.instagram.com/sportstech.de https://www.facebook.com/sportstech.de...
- Page 37 INDEX INHALT 1. IMPORTANT SAFETY INSTRUCTIONS ................. 39 2. EXPLODED DRAWING/SPARE PARTS LIST ..............40 3. TOOLS ........................41 4. INSTRUCTIONS ....................... 42 5. BEFORE YOU START ....................50 6. FUNCTIONS & FEATURES ..................51 7. KEY FUNCTIONS ..................... 52 8.
-
Page 38: Important Safety Instructions
1. IMPORTANT SAFETY INSTRUCTIONS Basic precautions should always be followed, including the following safety instruc- tions when using the crosstrainer: Read all instructions before using this equipment. WARNING: Before beginning any exercise program consult your physician. This is especially import ant for people who are over 35 years old or who have pre-existing health problems. -
Page 39: Exploded Drawing/Spare Parts List
2. EXPLODED DRAWING/SPARE PARTS LIST At the following link At the following link you will find the exploded drawing you will find the exploded drawing and the spare parts list: and the spare parts list: https://service.innovamaxx.de/cx640_spareparts https://service.innovamaxx.de/cx640_spareparts... -
Page 40: Tools
3. TOOLS Cap Nut S13 2PCS Bolt M8x80 2PCS Curve Washer Ø8xØ20x2.0 2PCS Spring Washer Ø8 2PCS Nut M8 2PCS Bolt M8x49 4PCS Curve Washer Ø8xØ16x1,5 4PCS Cap Nut M8 4PCS Cap Nut S38 4PCS Allen Key 6mm 1PC Multi-Hex-Tool/ Phillips screwdriver S10 S13 S14 S15 1PC Multi-Hex-Tool S14 S19 2PCS... -
Page 41: Instructions
4. INSTRUCTIONS Foot Pad, Front and Rear Stabilizers Installation: Position two Foot Pad(52) onto the Front Stabilizer (13). Position four Foot Pad(52) onto the Rear Stabilizer (8). Remove two M8x15 Bolts (28), two Ø8x Ø20 Washers (31) from Front Stabilizer (13) . Position the Front Stabilizer (13) in front of the Main Frame (1) and align bolt holes. - Page 42 Front Post Installation: Remove eight Bolt M8x15 (28), four Washer Ø8x Ø20x2.0 (31),eight spring washer Ø8 (18),four Curve Washer Ø8x Ø16x2 (63)from the Main Frame (1). Connect the Sensor Wire I(59) from the Main Frame (1) to the Middle wire (20) from the Front Post (2). Insert the Front Post (9) onto the tube of the Main Frame (1) and secure with eight Bolt M8x15 (28), four Washer Ø8x Ø20x2.0 (31),eight spring washer Ø8 (18),four Curve Washer Ø8x Ø16x2 (63)that were removed.
- Page 43 Left/Right Handrail Arms Installation: Caution: Before Assembling,please add the General White Grease onto the horizontal axes. Remove two Bolt M8x20 (28), two Spring washer Ø8 (18), two Curve Washer Ø8xØ33x2.0 (19), two Big Washer Ø19xØ25x2.0 (29) and Ware Washer Ø19(72) from the left and right horizontal axes of the Front Post (9).
- Page 44 Left/Right Foot Pedals Installation: Remove two Bolt M8x50(110),two Washer Ø8x Ø16(63) and two Nut M8 (50) from the U Bracket(108). Attach the left Drive tube (5) to the Left Crank (57) with one Bolt M8x50(110),one Washer Ø8x Ø16(63) and one Nut M8 (50) that were removed. Attach the Right Drive tube (5) to the Right Crank (57) with one Bolt M8x50(110),one Washer Ø8x Ø16(63) and one Nut M8 (50) that were removed.
- Page 45 5. Left/Right Foot Tube Installation Remove two Bolt M8x16(23),two Washer Ø8x Ø25(34) and one Connect shaft(21) from the Left Handrail Arm (2) . Attach the Left Handrail Arm (2) to the Left Foot Pedal Tube (3) with one Connect shaft(21) , two Washer Ø8x Ø25(34) and two Bolt M8x16(23) that were removed. Attach two Cap S13 (109) onto the Left Pedal Tube (3).
- Page 46 Left/Right Foot Pedal Installation: Attach the L & R Pedal (47,62) onto the Left & Right Foot Tube (3,4) with four M8x20 Bolt (32).
- Page 47 Left/Right Handrails Installation: Attach the Left/Right Handrails (11, 12) onto the Left/Right Handrail Arms (2,6) with four M8x47 Bolts (67), four Curve Washer Ø8x Ø16x1.5 (60), and four Nut M8 (68).
-
Page 48: Handlebar
Handlebar: Remove two M8x15 Bolts (28) and two Ø8xØ16 x1.5Curve Washers (60) from the Front Post (9). Insert the Hand Pulse Sensor Wires (43) from the Handlebar (10) into the hole on the Front Post (9) and then pull them out from the top end of the Front Post (9). Attach the Handlebar (10) onto the Front Post (9) with two M8x15 Bolts (28) and two Ø8xØ16x1.5 Curve Washers (60) that were removed with the S6 Allen Wrench provided Computer and BollInstallation:... -
Page 49: Before You Start
AC Adapter Installation: Plug one end of the AC Adapter (40) into the power jack of the Power Supply Wire(56)on the back of the Left Shroud. Before plugging in,make sure to check carefully the specifications on the Adapter. Plug the other end of the AC Adapter (40) into the electrical wall outlet. 5. -
Page 50: Functions & Features
6. FUNCTIONS & FEATURES 1.TIME: Shows your elapsed workout time in minutes and seconds. Your computer will automatically count up from 0:00 to 99:59 in one second intervals. You can also program your computer to count down from a set value by using the UP and DOWN keys. If you continue exercising once the time has reached 0:00, the computer will begin beeping, and reset itself to the origi- nal time set, letting you know your workout is done. -
Page 51: Key Functions
7. KEY FUNCTIONS There are 6 button keys and the function description as follows: 1.START/STOP key: a. Quick Start function: Allows you to start the computer without selecting a pro- gram. Manual workout only. Time automatically begins to count up from zero •... -
Page 52: Program Introduction & Operation
8. PROGRAM INTRODUCTION & OPERATION Manual Program: Manual P1 is a manual program. User can start exercise by pressing START/STOP key. The default resistan- ce level is 5. Users may exercise in any desirous of resistance level (Adjusting by UP/DOWN keys during the workout) with a period of time or a number of calories or a certain distance. - Page 53 User Setting Program: User 1, User 2, User 3, User 4 Program 14 to 17 is the user setting program. Users are free to create the values in the order of TIME, DISTANCE, CALORIES and the resistance level in 10 columns. The values and profiles will be stored in the memory after setup.
- Page 54 Heart Rate Control Program: 55% H.R.C., 65% H.R.C., 75% H.R.C., 85% H.R.C., Target H.R.C. Program 18 to Program 22 is the Heart Rate Control Programs and Program 22 is the Target Heart Rate Control program. Program 18 is the 55% Max H.R.C. - Target H.R. = (220 – AGE) x 55% Program 19 is the 65% Max H.R.C.
- Page 55 Watt Control Program: Watt Control Program 23 is a Speed Independent Program. Press ENTER key to set up the values of TARGET WATT, TIME, DISTANCE and CALORIES. During the exercise mode, the level of resistance is not ad- justable. For example, the level of resistance may increase while the speed is too slow. Also the level of resistance may decrease while the speed is too fast.
- Page 56 Body Fat Program: Body Fat Program 24 is a special program design to calculate users’ body fat ratio and to offer a specific loading profile for users. There are 3 body types divided according to the FAT% calculated. Type1: BODY FAT% > 27 Type2: 27 >...
-
Page 57: Operation Guide
9. OPERATION GUIDE 1. Sleep Mode: The computer will enter the sleep mode when there is no signal input and no keys be pressed after 4 minutes. You can press any key to wake up the computer. 2. Error Message: E1 (ERROR 1): Normal state: During workout, when the monitor did not get the count signal from the gear motor more than 4 seconds and check under successive 3 times then the LCD will show E1. -
Page 58: Lcd Workout Graphics
10. LCD WORKOUT GRAPHICS PROGRAM1: Manual PROGRAM2: Steps PROGRAM3: Hill PROGRAM4: Rolling PROGRAM5: Valley PROGRAM6: Fat Burn PROGRAM7: Ramp PROGRAM8: Mountain PROGRAM9: Intervals PROGRAM10: Random PROGRAM11: Plateau PROGRAM12: Tartlek PROGRAM13: Precipice... -
Page 59: User Profile Lcd Graphics
11. USER PROFILE LCD GRAPHICS PROGRAMM 14 PROGRAMM 15 PROGRAMM 16 PROGRAMM 17... -
Page 60: Heart Rate Program Graphics
12. HEART RATE PROGRAM GRAPHICS PROGRAMM 18 55% HRC PROGRAMM 19 65% HRC PROGRAMM 20 75% HRC PROGRAMM 21 85% HRC PROGRAMM 22 TARGET HRC PROGRAMM 23 WATT CONTROL... -
Page 61: Body Fat Test Programs
13. BODY FAT TEST PROGRAMS BODY FAT START MODE BODY FAT STOP MODE Workout Time 40 mins. Workout Time 40 mins. Workout Time 20 mins. One of the workouts will appear automatically when measuring body fat 14. MAINTENANCE Cleaning The elliptical trainer can be cleaned with a soft cloth and mild detergent. Do not use abrasives or solvents on plastic parts. -
Page 62: Troubleshooting
15. TROUBLESHOOTING PROBLEM SOLUTION The elliptical trainer wobbles when in Turn the rear stabilizer end cap on the rear use. stabilizer as needed to level the elliptical trainer. There is no display on the computer Remove the computer console and verify the console. -
Page 63: Application Software (App)
16. APPLICATION SOFTWARE (APP) You can download the app using the QR codes shown here or search in your store. Minimum compatibility specifications for mobile device; android 5.0 or higher with Bluetooth 4.0, iOS 8.0 or higher. Android Kinomap Notes on using the App: As an android user, please make sure that under "Settings ->... -
Page 64: Stretch Exercise
17. STRETCH EXERCISE No matter how you do sports, please do some stretch at first, The warm muscle will extend easily, so warm up yourself with 5-10minutes, Then We suggest the following stretch exercise, five times.10 counts for each time or longer do these exercise again after sports. HEAD ROLLS Rotate your head to the right for one count, feeling the stretch up the left side of your neck, then rotate your head back for one count, stretching your chin to the ceiling and letting your mouth open. - Page 65 European Disposal Directive 2002/96/EG Never dispose your training device in your regular household waste. Dispose the device only at a local or approved disposal. Take care of the currently applicable regulations. If you have doubts contact your local au- thorities for information about a correct and environment friendly disposal option.
- Page 67 Estimado cliente, Nos complace que haya elegido un dispositivo de la línea de productos SPORTSTECH. Con el equipo deportivo de SPORTSTECH usted obtiene la más alta calidad y la mejor tecnología. Con el fin de usar todo el potencial de su dispositivo y para que pueda disfrutarlo durante muchos años, por favor lea este manual cuidadosamente antes de comenzar a ejercitarse, y use el dispositivo de acuer- do a las instrucciones.
- Page 68 Montaje, Utilizar, Desmontaje. 1. Escanear el código QR 2. Ver vídeos 3. Comienza rápido y seguro Enlace a los videos: https://service.innovamaxx.de/cx640_video ¡También estamos en redes sociales! Obtenga la última información sobre nuestros productos, entrenamientos y mucho más aquí: Instagram Facebook https://www.instagram.com/sportstech.de https://www.facebook.com/sportstech.de...
- Page 69 CONTENIDOS 1. INSTRUCCIONES DE SEGURIDAD IMPORTANTES ............72 2. DIBUJO DE EXPLSOIÓN/LISTA DE REPUESTOS ............73 3. HERRAMIENTAS ...................... 74 4. INSTRUCCIONES DE ENSAMBLAJE ................75 5. COSAS QUE DEBE SABER ANTES DE EJERCITARSE ........... 83 6. FUNCIONES Y CARACTERÍSTICAS: ................84 7.
-
Page 70: Instrucciones De Seguridad Importantes
1. INSTRUCCIONES DE SEGURIDAD IMPORTANTES Al usar la caminadora siempre se deben seguir las precauciones básicas, incluy- en-do las siguientes instrucciones de seguridad importantes. Lea todas las instruc- cio-nes antes de usar este producto. ADVERTENCIA: Antes de comenzar cualquier programa de ejercicios consulte a su médico. Esto es especialmente importante para personas mayores de 35 años o para quienes tienen problemas prexistentes de salud. -
Page 71: Dibujo De Explsoión/Lista De Repuestos
2. DIBUJO DE EXPLSOIÓN/LISTA DE REPUESTOS En el siguiente enlace En el siguiente enlace encontrarás el dibujo de explosión encontrarás el dibujo de explosión y la lista de repuestos: y la lista de repuestos: https://service.innovamaxx.de/cx640_spareparts https://service.innovamaxx.de/cx640_spareparts... -
Page 72: Herramientas
3. HERRAMIENTAS (48)tornillo M8x80 2PCS (109) tuerca ciega S13 2PCS (49)lavadora de curvas Ø8xØ20x2.0 2PCS (18) arandela de resorte Ø8 2PCS (68) tuerca M8 2PCS (67) tornillo M8x49 4PCS (16) tuerca ciega S38 4PCS (60) lavadora de curvas Ø8xØ16x1,5 4PCS (68) tuerca ciega M8 4PCS toda la llave 6mm 1PC herramienta multi hex / Phillips destornillador S10 S13 S14 S15 1PC... -
Page 73: Instrucciones De Ensamblaje
4. INSTRUCCIONES DE ENSAMBLAJE Instalación de la almohadilla base, estabilizador frontal y posterior: Coloque dos almohadillas base (52) en el estabilizador frontal (13). Coloque cuatro almohadillas base (52) en el estabilizador posterior (8). Retire dos tornillos M8x15 (28), dos arandelas Ø8x Ø20 (31) del estabilizador frontal (13). Coloque el estabilizador frontal (13) frente al marco principal (1) y alinee ambos agujeros. - Page 74 Instalación del poste frontal: Retire ocho tornillos M8x15 (28), cuatro arandelas Ø8x Ø20x2.0 (31), ocho arandelas elásticas Ø8 (18) y cuatro arandelas curvas Ø8x Ø16x2 (63) del marco principal (1). Conecte el cable del sensor I (59) desde el marco principal (1) hasta el cable central (20) del poste frontal (2). Inserte el poste frontal (9) en el tubo del marco principal (1) y asegure con los ocho tornillos M8x15 (28), las cuatro arandelas Ø8x Ø20x2.0 (31), las cuatro arandelas elásticas Ø8 (18) y las cuatro arandelas curvas Ø8x Ø16x2 (63)que fueron retirados previamente.
- Page 75 Instalación del reposabrazos izquierdo/derecho: Precaución: Antes del ensamblaje, por favor agregue grasa blanca en los ejes horizonta- les. Retire dos tornillos M8x20 (28), dos arandelas planas Ø8 (18), dos arandelas curvas Ø8xØ33x2.0 (19), dos arandelas grandes Ø19xØ25x2.0 (29) y una arandela Ø19 (72) de los ejes horizontales izquierdo y derecho del poste frontal (9).
- Page 76 Instalación del pedal izquierdo/derecho: Retire dos pernos M8x50 (110), dos arandelas Ø8x Ø16 (63) y dos tuercas M8 (50) de la U Soporte (108). Conecte el tubo de transmisión izquierdo (5) a la manivela izquierda (57) con un perno M8x50 (110), una arandela Ø8x Ø16 (63) y una tuerca M8 (50) que se quitaron.
- Page 77 5.Instalación del tubo izquierdo/derecho del pie: Retire un tornillo M12x85(23), 2x Arandela ø8xø25 (34) y 1x Manguito de unión (21) del repo- sabrazos izquierdo (2). Conecte el reposabrazos izquierdo (2) al tubo del pedal izquierdo (3) con 1x Manguito de unión (21, 2x Arandela ø8xø25 (34) y 2x Bulón M8x16 (23) que fueron retiradas previamente.
- Page 78 Instalación del pedal izquierdo/derecho: Conecte el pedal L & R (47,62) en el tubo del pedal derecho y del pedal izquierdo (3,4) con cuatro tornillos M8x20 (32).
- Page 79 Instalación del pasamanos derecho e izquierdo: Conecte los pasamanos derecho e izquierdo (11, 12) en el reposabrazos derecho e izquierdo (2,6) con cuatro tornillos M8x47 (67), cuatro arandelas curvas Ø8x Ø16x1.5 (60), y cuatro tuercas M8 (68).
- Page 80 Manillar: Retire dos tornillos M8x15(28) y dos arandelas curvas Ø8xØ16 x1.5 (60) del poste frontal (9). Inserte los cables del sensor de pulso (43) del manillar (10) en el agujero del poste frontal (9) y luego sáquelos por el extremo superior del poste frontal (9). Conecte el manillar (10) en el poste frontal (9) con los dos tornillos M8x15 (28) y las dos arandelas curvas Ø8xØ16x1.5 (60) que fueron retiradas previamente con la llave Allen S6 incluida.
-
Page 81: Cosas Que Debe Saber Antes De Ejercitarse
Instalación del adaptador de CA: Conecte un extremo del adaptador de CA (40) en el enchufe eléctrico del cable de alimentación (56) en la parte trasera de la cubierta izquierda. Antes de conectarlo, asegúrese de revisar cuidado- samente las especificaciones del adaptador. Conecte el otro extremo del adaptador de CA (40) en la tomacorriente 5. -
Page 82: Funciones Y Características
6. FUNCIONES Y CARACTERÍSTICAS: 1. TIME: Muestra su tiempo de ejercicio transcurrido en minutos y segundos. Su ordenador contará automáticamente desde 0:00 hasta 99:59 en intervalos de un segundo. También puede pro- gramar su ordenador para contar hacia atrás desde un valor establecido usando las teclas Up y DOWN. -
Page 83: Funciones De Las Teclas
7. FUNCIONES DE LAS TECLAS Hay 6 teclas y la descripción de cada función es la siguiente: 1. Tecla START/STOP: a. Función de inicio rápido: Le permite iniciar el ordenador sin seleccionar un programa. Solo ejercicio manual. El tiempo comenzará a contar automáticamente desde cero. •... -
Page 84: Presentación & Funcionamiento De Los Programas
8. PRESENTACIÓN & FUNCIONAMIENTO DE LOS PROGRAMAS Programa Manual: Manual P1 e un programa manual. El usuario puede comenzar el ejercicio presionando la tecla START/ STOP. El nivel de resistencia por defecto es 5. Los usuarios pueden ejercitarse en cualquier nivel de resistencia deseado (ajustando las teclas UP/DOWN durante el ejercicio) con un periodo de tiempo o un número de calorías o una distancia determinada. - Page 85 Programa configurado por el usuario: User 1, User 2, User 3, User 4 Los programas 14 hasta 17 son programas configurados por el usuario. Los usuarios son libres de crear los valores en el orden de TIME, DISTANCE, CALORIES y el nivel de resistencia en 10 colum- nas.
- Page 86 Programa de control de la frecuencia cardíaca (H.R.C.): 55% H.R.C., 65% H.R.C., 75% H.R.C., 85% H.R.C., Target H.R.C. Desde el programa 18 hasta Programa 22 son los programas de control de la frecuencia cardíaca y el programa 22 es el programa objetivo de control de la frecuencia cardíaca. Programa 18 es el 55% Máx del H.R.C.
- Page 87 Programa de control de vatios: Watt Control El programa 23 es un programa independiente de la velocidad. Presione la tecla ENTER para con- figurar los valores de TARGET WATT, TIME, DISTANCE y CALORIES. Durante el ejercicio, el nivel de resistencia no es ajustable. Por ejemplo, el nivel de resistencia puede aumentar mientras la velocidad sea demasiado lenta.
- Page 88 Programa de grasa corporal: Body Fat El programa 24 es un programa especial diseñado para calcular el índice de grasa corporal del usuario y para ofrecer un perfil de carga específico para los usuarios. Typo1: % de GRASA CORPORAL > 27 Typo2: 27 <...
-
Page 89: Guía De Uso
9. GUÍA DE USO 1. Modo de reposo: El ordenador entrará en modo de reposo cuando no haya entrada de señal o si no se presiona ninguna tecla después de 4 minutos. Puede presionar cualquier tecla para activar el ordenador. 2. -
Page 90: Diagramas Lcd Del Ejercicio
10. DIAGRAMAS LCD DEL EJERCICIO PROGRAM1: Manual PROGRAM2: Steps PROGRAM3: Hill PROGRAM4: Rolling PROGRAM5: Valley PROGRAM6: Fat Burn PROGRAM7: Ramp PROGRAM8: Mountain PROGRAM9: Intervals PROGRAM10: Random PROGRAM11: Plateau PROGRAM12: Tartlek PROGRAM13: Precipice... -
Page 91: Programas Configurados Por El Usuario
11. PROGRAMAS CONFIGURADOS POR EL USUARIO PROGRAM 14 PROGRAM 15 PROGRAM 16 PROGRAM 17... -
Page 92: Perfiles De Programas De Frecuencia Cardiaca
12. PERFILES DE PROGRAMAS DE FRECUENCIA CARDIACA PROGRAM 18 55% HRC PROGRAM 19 65% HRC PROGRAM 20 75% HRC PROGRAM 21 85% HRC PROGRAM 22 TARGET HRC PROGRAM 23 WATT CONTROL... -
Page 93: Programas De Prueba De Grasa Corporal
13. PROGRAMAS DE PRUEBA DE GRASA CORPORAL BODY FAT (MODO START) BODY FAT (MODO STOP) Tiempo de ejercicio: Tiempo de ejercicio: Tiempo de ejercicio: 40 minutos 40 minutos 20 minutos Uno de los entrenamientos aparecerá automáticamente al medir la grasa corporal 14. -
Page 94: Solución De Problemas
15. SOLUCIÓN DE PROBLEMAS PROBLEMA SOLUCIÓN El entrenador elíptico se tambalea Gire la tapa de extremo en el estabilizador cuando está en uso posterior lo que sea necesario para nivelar el entrenador elíptico. No se observa nada en la pantalla de Retire la consola y verifique que los cables la consola provenientes de la consola estén conectados... -
Page 95: Software (Aplicación)
16. SOFTWARE (APLICACIÓN) Puede descargar las aplicaciones usando los códigos QR mostrados aquí o buscarlos en la tienda. Requisitos para dispositivos móviles: Android 5.0 o superior con Bluetooth 4.0, iOS 8.0 o superior. Android Kinomap Consejos para el uso de las aplicaciones: Como usuario de Android, por favor, asegúrese de marcar la opción "Fuentes desconocidas"... -
Page 96: Ejercicios De Estiramiento
17. EJERCICIOS DE ESTIRAMIENTO No importa cómo se ejercite, siempre haga algo de estiramiento primero. El calentamiento muscular hará que sus músculos se extiendan fácilmente, así que caliente al menos 5-10 minutos. Luego le sugerimos hacer los siguientes ejercicios de estiramiento cinco veces. El estiramiento antes del ejercicio le ayuda a mejorar la flexibilidad y reduce los riesgos de lesiones. - Page 97 Directiva Europea de Residuos 2002/96/EG Nunca elimine su dispositivo de entrenamiento en su basura doméstica ordinaria. Elimine el dispositivo únicamente en un sitio de eliminación aprobado. Tenga en cuenta las normativas aplicables actualmen-te. Si tiene dudas contacte a las autoridades locales para conseguir información sobre una opción de eliminación adecuada y ecológica.
- Page 99 FRANÇAIS Cher client, Nous sommes ravis que vous ayez choisi un appareil de la gamme de produits SPORTSTECH. Avec les équipements sportifs de SPORTSTECH, vous obtenez la plus haute qualité et la meilleure technologie. Afin d'utiliser pleinement le potentiel de votre appareil et de pouvoir l'apprécier pendant de nombreuses années, lisez attentivement ce manuel avant l'utilisation et le début de votre entraînement et utilisez l'ap-...
- Page 100 3. Démarrez rapidement et en toute sécurité Lien vers les vidéos: https://service.innovamaxx.de/cx640_video Vous pouvez aussi nous trouver sur les réseaux sociaux! Retrouve les dernières informations sur les produits, le contenu des entraînements et bien plus encore sur notre: la page Instagram la page Facebook https://www.instagram.com/sportstech.de https://www.facebook.com/sportstech.de...
- Page 101 CONTENU INHALT 1. CONSIGNES DE SÉCURITÉ IMPORTANTES ..............105 2. DESSIN ÉCLATÉ/LISTE DES PIÈCES DE RECHANGE ............ 106 4. PIÈCES ........................107 4. INSTRUCTIONS D'ASSEMBLAGE ................108 5. LES CHOSES QUE VOUS DEVEZ SAVOIR AVANT L'EXERCICE........116 6. FONCTIONS ET CARACTÉRISTIQUES ................. 117 7.
-
Page 102: Consignes De Sécurité Importantes
1. CONSIGNES DE SÉCURITÉ IMPORTANTES Les précautions de base, y compris les consignes de sécurité importantes suivantes doivent toujours être respectées lorsque vous utilisez ce tapis roulant. Lisez toutes les instructions avant d'utiliser cette appareil. AVERTISSEMENT: Avant de commencer un programme d'exercice, consultez votre médecin. Ceci est particulièrement important pour les personnes qui ont plus de 35 ans ou qui ont des problèmes de santé... -
Page 103: Dessin Éclaté/Liste Des Pièces De Rechange
2. DESSIN ÉCLATÉ/LISTE DES PIÈCES DE RECHANGE A l‘adresse suivante A l‘adresse suivante vous trouverez le dessin éclaté vous trouverez le dessin éclaté et la liste des pièces de rechange : et la liste des pièces de rechange : https://service.innovamaxx.de/cx640_spareparts https://service.innovamaxx.de/cx640_spareparts... - Page 104 3. PIÈCES boulon M8x80 2PCS bouchon écrou S13 2PCS )rondelle de courbe Ø8xØ20x2.0 2PCS rondelle de ressort Ø8 2PCS écrou M8 2PCS boulon M8x49 4PCS bouchon écrou S38 4PCS rondelle de courbe Ø8xØ16x1,5 4PCS bouchon écrou M8 4PCS clé Allen 6mm 1PC multi hex tool / Phillips screwdriver S10 S13 S14 S15 1PC multi hex tool S14 S19 2PCS...
-
Page 105: Instructions D'assemblage
4. INSTRUCTIONS D'ASSEMBLAGE Installation du stabilisateur de pied, stabilisateur avant et arrière: Positionnez deux coussins de pied (52) sur le stabilisateur avant (13) Positionnez quatre coussins de pied (52) sur le stabilisateur arrière (8) Enlevez deux boulons M8x15 (28), deux rondelles Ø8x Ø20 (31) du stabilisateur avant (13). Positi- onnez le stabilisateur avant (13) devant le cadre principal (1) et alignez les trous de boulons. - Page 106 Installation des panneaux avant: Enlevez huit boulons M8x15 (28), quatre rondelles Ø8x Ø20x2.0 (31), huit rondelles Ø8 (18), quatre rondelles Ø8x Ø16x2 (63) du cadre principal (1). Connectez le fil du capteur I (59) du cadre principal (1) au fil médian (20) du poste avant (2). Insérez le panneau avant (9) sur le tube du cadre principal (1) et fixez-le avec huit boulons M8x15 (28), quatre rondelles Ø8x Ø20x2.0 (31), huit ron- delles élastiques Ø8 (18), quatre rondelles Ø8x Ø16x2 (63) qui ont été...
- Page 107 Installation des bras de mains courantes gauche / droite Attention: Avant d'assembler, ajoutez de la graisse blanche sur les axes horizontaux. Retirez les deux boulons M8x20 (28), deux rondelles élastiques Ø8 (18), deux rondelles courbées Ø8xØ33x2.0 (19), deux grosse rondelles Ø19xØ25x2.0 ( 29) et la rondelle de stockage Ø19 (72) à...
- Page 108 Installation des pédales gauche / droite Retirez deux boulons M8x50 (110), deux rondelles Ø8x Ø16 (63) et deux écrous M8 (50) de l'U Support (108). Fixez le tube d'entraînement gauche (5) à la manivelle gauche (57) avec un boulon M8x50 (110), une rondelle Ø8x Ø16 (63) et un écrou M8 (50) qui ont été...
- Page 109 5. Installation du tube de pied gauche / droit Retirez un boulon M12x85 (23),2x Rondelle plate ø8xø25 (34) et 1x Tube de raccordement (21) de la main courante gauche (2). Fixez la main courante gauche (2) au tube de la pédale gauche (3) 1x Tube de raccorde-ment (21), 2x Rondelle plate ø8xø25 (34) et 2x Boulon M8x16 (23) qui ont été...
- Page 110 Installation des pédales gauche / droite: Fixez la pédale G & D (47,62) sur le tube de pied gauche et droit (3,4) avec quatre boulons M8x20 (32).
- Page 111 Installation des mains courantes gauches et droites: Fixez les mains courantes gauche / droite (11, 12) sur les bras gauches / droits (2,6) avec quatre boulons M8x47 (67), quatre rondelles Ø8x Ø16x1.5 (60) et quatre écrous M8 (68).
- Page 112 Guidon: Retirez deux Boulons M8x15 (28) et deux rondelles courbées Ø8xØ16 x1.5 (60) du panneau avant (9). Insérez les fils du capteur d'impulsions à main (43) à partir du guidon (10) dans le trou du pan- neau avant (9), puis retirez-les de l'extrémité supérieure du panneau avant (9). Fixez le guidon (10) sur le poteau avant (9) avec deux boulons M8x15 (28) et deux rondelles cour- bées Ø8xØ16x1.5 (60) qui ont été...
-
Page 113: Les Choses Que Vous Devez Savoir Avant L'exercice
Installation de l'adaptateur AC: Branchez une extrémité de l'adaptateur AC (40) dans la prise d'alimentation du fil d'alimentation (56) à l'arrière du carénage gauche. Avant de brancher, vérifiez attentivement les caractéristiques de l'adaptateur. Branchez l'autre extrémité de l'adaptateur secteur (40) dans la prise murale électrique. 5. -
Page 114: Fonctions Et Caractéristiques
6. FONCTIONS ET CARACTÉRISTIQUES 1. TIME: Affiche votre temps d'entraînement écoulé en minutes et secondes. Votre ordinateur va automatiquement compter de 0:00 à 99:59 en intervalles d'une seconde. Vous pouvez également programmer votre ordinateur pour le compte à rebours à partir d'une valeur cible en utilisant les touches HAUT et BAS. -
Page 115: Fonction Cle
7. FONCTION CLE Il y a 6 touches bouton et la description de fonction comme suit: 1. la touche START / STOP: •fonction de démarrage rapide: Vous permet de démarrer l'ordinateur sans sélectionner un pro- gramme. Séance d'entraînement manuel uniquement. Le Temps commence automatiquement à compter à... -
Page 116: Introduction Au Programme Et Opérations
8. INTRODUCTION AU PROGRAMME ET OPÉRATIONS Programme manuel : Manuel P1 est un programme manuel. L'utilisateur peut commencer l'exercice en appuyant sur la touche START / STOP. Le niveau de résistance par défaut est 5. Les utilisateurs peuvent exercer à n’importe quel niveau de résistance (Réglage par touches HAUT / BAS pendant la séance d'entraînement) avec une période de temps ou un certain nombre de calories ou une certaine distance. - Page 117 Programme de réglage d’utilisateurs : USER 1 USER 2 USER 3 USER 4 Programme 14-17 est le programme de configuration de l'utilisateur. Les utilisateurs sont libres de créer les valeurs dans l'ordre du temps, distance, calories et le niveau de résistance en 10 colonnes. Les valeurs et les profils seront stockées dans la mémoire après l'installation.
- Page 118 Programme de contrôle de la fréquence cardiaque: 55% H.R.C., 65% H.R.C., 75% H.R.C., 85% H.R.C., Cible H.R.C. Programme 18 Programme 22 sont les programmes de contrôle de fréquence cardiaque et le programme 22 est le programme du contrôle du taux de la fréquence cardiaque. Programme 18 est le 55% Max H.R.C.
- Page 119 Programme de contrôle Watt: Contrôle Watt Programme 23 est un programme indépendant de la vitesse. Appuyez sur la touche ENTER pour mettre en place les valeurs de TARGET WATT, TIME, DISTANCE et CALORIES. Pendant le mode d'exercice, le niveau de résistance est pas réglable. Par exemple, le niveau de résistance peut aug- menter alors que la vitesse est trop lente.
- Page 120 Programme de graisse corporelle: graisse corporelle Programme 24 est un programme spécial conçu pour calculer le ratio de graisse corporelle des utilisateurs et d'offrir un profil de charge spécifique pour les utilisateurs. Il existe 3 types de corps divisés selon le FAT% calculé. Type1: BODY FAT%>...
-
Page 121: Guide Des Opérations
9. GUIDE DES OPÉRATIONS 1. Mode en veille: L'ordinateur sera en mode veille quand il n'y a pas d'entrée de signal et aucune touche pressée au bout de 4 minutes. Vous pouvez appuyer sur une touche pour réveiller l'ordinateur. 2. MESSAGE D’ERREUR: E1 (ERROR 1): état normal: Au cours de l'entraînement, lorsque le moniteur n'obtient pas de signal de comptage du moteur d'engrenage pendant plus de 4 secondes et après 3 vérifications successifs , puis l'écran... -
Page 122: Graphiques Lcd D'entrainement
10. GRAPHIQUES LCD D’ENTRAINEMENT PROGRAM1: Manual PROGRAM2: Steps PROGRAM3: Hill PROGRAM4: Rolling PROGRAM5: Valley PROGRAM6: Fat Burn PROGRAM7: Ramp PROGRAM8: Mountain PROGRAM9: Intervals PROGRAM10: Random PROGRAM11: Plateau PROGRAM12: Tartlek PROGRAM13: Precipice... -
Page 123: Programme De Configuration De L'utilisateur
11. PROGRAMME DE CONFIGURATION DE L'UTILISATEUR PROGRAM 14 PROGRAM 15 PROGRAM 16 PROGRAM 17... -
Page 124: Programme Des Profils De Frequence Cardiaque
12. PROGRAMME DES PROFILS DE FREQUENCE CARDIAQUE PROGRAM 18 55% HRC PROGRAM 19 65% HRC PROGRAM 20 75% HRC PROGRAM 21 85% HRC PROGRAM 22 TARGET HRC PROGRAM 23 WATT CONTROL... -
Page 125: Programme Test Body Fat
13. PROGRAMME TEST BODY FAT BODY FAT START MODE BODY FAT STOP MODE Temps d'entraînement Temps d'entraînement Temps d'entraînement 40 minutes 40 minutes 20 minutes L'un des exercices apparaîtra automatiquement lors de la mesure de la graisse corporelle 14. ENTRETIEN Nettoyage Le vélo elliptique peut être nettoyé... -
Page 126: Dépannage
15. DÉPANNAGE Problème Solution Le vélo elliptique vacille lorsqu'il est Tournez le bouchon d'extrémité du stabili- utilisé. sateur arrière sur le stabilisateur arrière au besoin pour niveler le vélo elliptique Il n'y'a pas d'affichage sur la console 1.Retirez la console de l'ordinateur et vérifiez de l'ordi-nateur. -
Page 127: Logiciel D'application (App)
16. LOGICIEL D’APPLICATION (APP) Pour télécharger l’application, scannez son code QR ou recherchez-la dans votre App Store. Conditions requises : l’appareil mobile doit correspondre à un Android 5.0 ou davantage avec Blue- tooth 4.0 ou un iOS 8.0 ou davantage. Android Kinomap Informations sur l’utilisation de l’application :... -
Page 128: Excercice D'ètirement
17. EXCERCICE D'ÈTIREMENT Peu importe comment vous pratiquez le sport, Veuillez faire quelques étirements avant de commencer votre entraî-nement, le muscle chaud s’étendra facilement, donc réchauffez vous durant 5-10minutes, nous suggérons l'exercice d'étirement suivant : 5 fois ,10 comptes pour chaque fois ou plus, faire ces exercices à... - Page 129 Directive européenne n° 2002/96/EG relative aux déchets Ne jeter en aucun cas l‘appareil avec les ordures ménagères. Ne dispo- sez de l‘appareil que dans les décharges publiques (Gestion des déchets communaux de la ville). Pour leur élimination respectez les réglementations en vigueur locales.
- Page 131 ITALIANO Gentile cliente Siamo lieti che abbiate scelto un dispositivo della gamma SPORTSTECH. Con le attrezzature sportive di SPORSTECH potrete usufruire della più alta qualità e della più recente tecnologia. Per sfruttare a pieno il potenziale del dispositivo e poterlo utilizzare per molti anni, raccomandiamo di leggere attentamente questo manuale prima di iniziare l’allenamento e di utilizzare il dispositivo seguendo...
- Page 132 2. Guarda il video 3. Inizia ad allenarti veloce e sicuro Link per il Video: https://service.innovamaxx.de/cx640_video Ci siamo anche sui social! Scopri le ultime novità sui prodotti, contenuti per l'allenamento e molto altro ancora sul nostro: pagina Instagram pagina Facebook https://www.instagram.com/sportstech.de https://www.facebook.com/sportstech.de...
- Page 133 INDICE 1. IMPORTANTI ISTRUZIONI DI SICUREZZA............138 2. DISEGNO ESPLOSO/LISTA DEI PEZZI DI RICAMBIO ........139 3. ATTREZZI ....................140 4. ISTRUZIONI DI MONTAGGIO ................ 141 5. LE COSE DA SAPERE PRIMA DI INIZIARE L’ALLENAMENTO ......149 6. FUNZIONI E CARATTERISTICHE ..............150 7.
-
Page 134: Importanti Istruzioni Di Sicurezza
1. IMPORTANTI ISTRUZIONI DI SICUREZZA Precauzioni minime, incluse importanti istruzioni di sicurezza incluse nel presente manual dovrebbero essere sempre seguite durante l’uso del tapisroulant. Leggere tutte le istruzioni prima di utilizzare il dispositivo. ATTENZIONE: Prima di iniziare qualsiasi programma di esercizio consultare il proprio medico. Ques- to è... -
Page 135: Disegno Esploso/Lista Dei Pezzi Di Ricambio
2. DISEGNO ESPLOSO/LISTA DEI PEZZI DI RICAMBIO Al seguente link Al seguente link troverete il disegno esploso troverete il disegno esploso e la lista dei pezzi di ricambio: e la lista dei pezzi di ricambio: https://service.innovamaxx.de/cx640_spareparts https://service.innovamaxx.de/cx640_spareparts... -
Page 136: Attrezzi
3. ATTREZZI bullone M8x80 2PCS cap noce S13 2PCS rondella curva Ø8xØ20x2.0 2PCS rondella elastica Ø8 2PCS Noce M8 2PCS bullone M8x49 4PCS cap noce S38 4PCS rondella curva Ø8xØ16x1,5 4PCS (68) noce M8 4PCS chiave a brugola 6mm 1PC strumento multi hex / Phillips Cacciavite S10 S13 S14 S15 1PC strumento multi hex S14 S19 2PCS... -
Page 137: Istruzioni Di Montaggio
4. ISTRUZIONI DI MONTAGGIO Installazione Pedaliera e Stabilizzatori Anteriore e Posteriore: Posiziona due Pedaliere(52) sullo Stabilizzatore Anteriore (13) Posiziona quattro Pedaliere(52) sullo Stabilizzatore Posteriore (8) Rimuovere due Bulloni M8x15 (28), due Rondelle Ø8x Ø20 (31) dallo Stabilizzatore Frontale(13) . Posizionare lo Stabilizzatore Frontale (13) davanti al Telaio Principale (1) e allineare entrambi i buchi. Attacca lo Stabilizzatore Anteriore (13) sulla curva frontale del Telaio Principale (1) con le due Bulloni M8x15 (28) , due rondelle two Ø8x Ø20 (31) che sono state rimosse. - Page 138 Installazione Cingolo Anteriore Rimuovere otto Bulloni M8x15 (28), quattro Rondelle Ø8x Ø20x2.0 (31),otto rondelle Ø8 (18),quattro Rondelle Curve Ø8x Ø16x2 (63) dal Telaio Principale (1). Connettere il Filo Sensore I(59)dal Telaio Principale (1) al filo medio (20)dal cingolo anteriore (2). Inserire il cingolo anteriore (9) sul tubo del telaio Principale(1) e assicurare con otto Bulloni M8x15 (28), quattro Rondelle Ø8x Ø20x2.0 (31), otto rondelle Ø8 (18),quattro Rondelle Curve Ø8x Ø16x2 (63)che sono state rimos- se.
- Page 139 Installazione Braccio Destro/Sinistro corrimano: Attenzione: Prima del montaggio, per favore aggiungere il Grasso Biano Generico sugli assi orizzontali. Rimuovere due Bulloni M8x20 (28), due Rondelle Ø8 (18), due Rondelle Curve Ø8xØ33x2.0 (19), due Rondelle Grandi Ø19xØ25x2.0 (29) e la rondella Ø19(72) dagli assi sinistro e destro orizzontali del Cingolo Anteriore(9).
- Page 140 Installazione Pedali Destro/Sinistro: Rimuovere due bulloni M8x50 (110), due rondelle Ø8x Ø16 (63) e due dadi M8 (50) dalla U Staffa (108). Attaccare il tubo guida sinistro (5) alla manovella sinistra (57) con un bullone M8x50 (110), una rondella Ø8x Ø16 (63) e un dado M8 (50) che sono stati rimossi. Attaccare il tubo guida destro (5) alla manovella destra (57) con un bullone M8x50 (110), una ron- della Ø8x Ø16 (63) e un dado M8 (50) che sono stati rimossi.
- Page 141 5. Installazione Tubo Pedale Sinistro/Destro Rimuovere un Bullone M12x85(23) 2x Rondella ø8xø25 (34) e 1x Manicotto di raccordo (21) dal Braccio Sinistro del Corrimano (2) . Attaccare il braccio Sinistro del Corrimano (2) al Tubo del Pedale Sinistro (3) con 1x Manicotto di raccordo (21),2x Rondella ø8xø25 (34) e 2x Bullone M8x16 (23) che sono stati rimossi.
- Page 142 Installazione Pedale Destro/Sinistro: Attaccare i pedali Destro e Sinistro (47,62)Sui Tubi Pedali Destro e Sinistro (3,4) con quattro Bulloni M8x20 (32).
- Page 143 Installazione Corrimano Destro/Sinistro: Attaccare i Corrimano Destro/Sinistro (11, 12)sui Bracci Destro/Sinistro dei Corrimano (2,6) con quattro Bulloni M8x47 (67), quattro Rondelle Curve Ø8x Ø16x1.5 (60),e quattro Dadi M8 (68).
- Page 144 Manubrio: Rimuovere due Bulloni M8x15 (28) e due Rondelle Curve Ø8xØ16 x1.5 (60) dal Cingolo Anterio- re(9). Inserire I fili del Sensore Di Pulsazioni (43) dal Manubrio (10) nel buco sul Cingolo Anteriore (9) e poi tirarli fuori dalla parte superiore del Cingolo Anteriore (9). Attaccare il Manubrio (10) sul Cingolo anteriore (9) con due Bulloni M8x15 (28) e due Rondelle Curve Ø8xØ16x1.5 (60) tche sono stati rimossi con la Chiave a Brugola S6 fornita.
-
Page 145: Le Cose Da Sapere Prima Di Iniziare L'allenamento
Installazione Adattatore AC: Connettere un'estremità dell'Adattatore AC (40) nel jack di alimentazione del Filo di Alimentazione (56)sul retro della Copertura Sinistra. Prima di connettere, assicurarsi di aver letto attentamente le specifiche dell'Adattatore. Connettere l'altra estremità dell'Adattatore AC(40) alla presa di corrente. 5. -
Page 146: Funzioni E Caratteristiche
6. FUNZIONI E CARATTERISTICHE 1. TIME: Mostra il tempo dell’allenamento in minuti e secondi. Il computer conterà automaticamente da 0:00 a 99:59 ad intervallic di un secondo. Puoi anche programmare il tuo computer per fare un conto alla rovescia da un valore stabilito usando I pulsanti UP e DOWN. Se continui l’allena- mento una volt ache il conteggio ha raggiunto i 0:00, il computer emetterà... -
Page 147: Funzioni
7. FUNZIONI Ci sono 6 pulsanti e la loro descrizione si trova qui di seguito: 1. START/STOP •funzione Quick Start: ti permette di iniziare l’allenamento senza selezionare un programma. Solo per allenamento manuale. Il conteggio del tempo parte dallo zero •Durante l’allenamento premere STOP per fermarsi. -
Page 148: Introduzione E Funzionalità Programmi
8. INTRODUZIONE E FUNZIONALITÀ PROGRAMMI Programma Manuale: Manuale P1 è il programma manuale. L’utente può iniziare l’allenamento con il pulsante START/STOP .La re- sistenza standard è a livello 5. L’utente può decidere di aumentare il livello (regolando con I pulsanti UP/DOWN durante l’allenamento) con un period di tempo, un numero di calorie o di distanza. - Page 149 Programma prestabilito per utente: Utente 1, Utente 2, Utente 3, Utente 4 I programmi dal 14 al 17 sono I programmi predefiniti dall’utente. Gli utenti possono stabilire I valori di TIME, DISTANCE, CALORIES e il livello di resistenza in 10 colonne. I valori e I profile saranno conservati nella memoria dopo l’impostazione.
- Page 150 Programma controllo battito cardiaco: 55% H.R.C., 65% H.R.C., 75% H.R.C., 85% H.R.C., Target H.R.C. Programma 18 a Programma 22 sono I programmi Heart Rate Control (controllo battito cardiaco e il programma 22 stabilisce l’obiettivo del controllo del battito cardiaco. Programma 18 è il 55% del Massimo H.R.C. -Obiettivo H.R. = (220 – ETA’) x 55% Programma 19 è...
- Page 151 Programma controllo Watt: Watt Control Il Programma è un programma a velocità indipendente. Premi ENTER per impostare I valori di TARGET WATT, TEMPO, DISTANZA E CALORIE. Durante l’allenamento il livello di resistenza non è regolabile. Per esempio il livello può aumentare quando la velocità è troppo bassa. O può diminuire quando la velocità...
- Page 152 Programma Grasso Corporeo: Body Fat Il Programma 24 è un programma speciale progettato per calcolare la percentuale di grasso corpo- reo dell’utente e per offrire un carico specifico per gli utenti. Ci sono 3 tipi di corporature secondo la % di grasso calcolata: Tipo 1: Grasso corporeo% >...
-
Page 153: Guida Al Funzionamento
9. GUIDA AL FUNZIONAMENTO 1. Sleep Mode: Il monitor entrerà in modalità SLEEP (LCD spento) quando non c’è input di segnale e nessun pulsan- te viene premuto per 4 minuti. Premi sullo schermo per riavviare il monitor. 2. Messaggio di errore: E1 (ERROR 1): stato normale: durante l’allenamento, se il motore non riceve il segnale di conteggio dal motore di trazione entro 4 secondi e ripete l’anomalia per altre tre volte,il display LCD mostrerà... -
Page 154: Grafici Di Allenamento Su Schermo Lcd
10. GRAFICI DI ALLENAMENTO SU SCHERMO LCD PROGRAM1: Manual PROGRAM2: Steps PROGRAM3: Hill PROGRAM4: Rolling PROGRAM5: Valley PROGRAM6: Fat Burn PROGRAM7: Ramp PROGRAM8: Mountain PROGRAM9: Intervals PROGRAM10: Random PROGRAM11: Plateau PROGRAM12: Tartlek PROGRAM13: Precipice... -
Page 155: Impostazione Programma Utente
11. IMPOSTAZIONE PROGRAMMA UTENTE PROGRAM 14 PROGRAM 15 PROGRAM 16 PROGRAM 17... -
Page 156: Profili Programma Battito
12. PROFILI PROGRAMMA BATTITO PROGRAM 18 55% HRC PROGRAM 19 65% HRC PROGRAM 20 75% HRC PROGRAM 21 85% HRC PROGRAM 22 TARGET HRC PROGRAM 23 WATT CONTROL... -
Page 157: Test Programma Test Grasso Corporeo
13. TEST PROGRAMMA TEST GRASSO CORPOREO BODY FAT MODALITA’START BODY FAT MODALITA’ STOP Tempo di allenamento: Tempo di allenamento: Tempo di allenamento: 40 minuti 40 minuti 20 minuti Uno degli allenamenti apparirà automaticamente quando si misura il grasso corporeo 14. MANUTENZIONE Pulizia L'elliptical trainer può... -
Page 158: Risoluzione Dei Problemi
15. RISOLUZIONE DEI PROBLEMI PROBLEMA SOLUZIONE L'elliptical trainer oscilla quando è in Ruota il coperchio finale dello stabilizzatore uso. pos-teriore finché necessario per regolare l'elliptical trainer. Non compare nulla sulla console del Rimuovere la console del computer e veri- computer. ficare che i fili provenienti dalla console del computer siano propriamente connessi ai fili provenienti dal cingolo anteriore. -
Page 159: Software Di Utilizzo (App)
16. SOFTWARE DI UTILIZZO (APP) Puoi scaricare l'app utilizzando i codici QR mostrati qui o cercando direttamente nel negozio. Pre- requisito per il dispositivo mobile: Android 5.0 o versioni successive con Bluetooth 4.0, iOS 8.0 o versioni successive. Android Kinomap Note sull'uso dell'app: Come utente Android, assicurati che in "Impostazioni ->... -
Page 160: Esercizi Di Stretching
17. ESERCIZI DI STRETCHING Non importa la ragione per cui fai sport, fai in modo di fare sempre esercizi di stretching prima di cominciare. Il uscolo riscaldato si allungherà facilmente, quindi scaldati con degli esercizi per 5-10 minuti. Ti suggeriamo di eseguire i seguenti esercizi cinque volte conta fino a dieci ogni volta o anche più a lungo quando ripeti l’esercizio dopo aver praticato sport. - Page 161 Direttive Europee 2002/96/EG per lo smaltimento Non gettare mai il tuo attrezzo sportivo nell’immondizia normale. Smaltisci l’attrezzo solo tramite un siste-ma locale o approvato. Tieni in conto le regole applicabili correntemente. Se hai dubbi contatta le autorità locali per informazioni circa le opzioni per uno smaltimento corretto ed ecosostenibi- Riciclaggio dei rifiuti Il materiale di imballaggio può...
- Page 162 Verkauf durch / Distributed by / Distribuido por / Distribué / Distribuito da InnovaMaxx GmbH Allee der Kosmonauten 33 C-G 12681 Berlin +49 30 220 663 569 service@innovamaxx.de http://www.sportstech.de...