LawnMaster CS1216 Manuel D'utilisation
Scie à chaîne électrique de 406 mm (16 po)
Table des Matières
Les langues disponibles
Les langues disponibles
Liens rapides
Operators Manual / Manual D'utilisation
EN p. 2
16" ELECTRIC CHAIN SAW CS1216
FR p. 46
SCIE À CHAÎNE ÉLECTRIQUE DE 406 MM (16 PO)
MNL_CS1216_V1
Read all safety rules and instructions carefully before operating this tool.
Distributed By Cleva North America 601 Regent Park Court Greenville, SC 29607 (866)-384-8432
Lisez attentivement toutes les règles de sécurité ainsi que les instructions avant de faire fonctionner cet outil.
Distribué par Cleva North America 601 Regent Park Court Greenville, SC 29607 (866)-384-8432
Table des Matières

Manuels Connexes pour LawnMaster CS1216


Sommaire des Matières pour LawnMaster CS1216
- Page 1 Operators Manual / Manual D'utilisation EN p. 2 16" ELECTRIC CHAIN SAW CS1216 FR p. 46 SCIE À CHAÎNE ÉLECTRIQUE DE 406 MM (16 PO) MNL_CS1216_V1 Read all safety rules and instructions carefully before operating this tool. Distributed By Cleva North America 601 Regent Park Court Greenville, SC 29607 (866)-384-8432 Lisez attentivement toutes les règles de sécurité...
- Page 45 NOTES...
-
Page 46: Table Des Matières
72-84 DÉPANNAGE GARANTIE VUE ÉCLATÉE/LISTE DES PIÈCES 87-88 REMARQUES DONNÉES TECHNIQUES SCIE À CHAÎNE ÉLECTRIQUE DE 406 MM (16 PO) CS1216 Tension Nominale : 120 V 60Hz Capacité : 12 A Vitesse De La Chaîne (À Vide): 12m/s Longueur Du Guide-chaîne: 406 mm (16 po) Pas De Chaîne:... -
Page 47: Consignes De Sécurité Importantes
CONSIGNES DE SÉCURITÉ IMPORTANTES AVERTISSEMENT N'essayez pas d'utiliser cette machine avant d'avoir lu et entièrement compris toutes les consignes, informations de sécurité etc. contenues dans ce manuel. Dans le cas contraire, vous risquez de provoquer un accident, avec à la clé un incendie, une électrocution ou des blessures graves. équilibre et un chemin de retraite pour le moment où... - Page 48 à vous-même mais aussi aux autres utilisée à deux mains. métalliques. Le risque d'électrocution est accru si votre corps est en contact avec la terre. l'appareil par votre concessionnaire LawnMaster. devra être assuré par votre concessionnaire LawnMaster.
-
Page 49: Conservez Ces Consignes
CONSIGNES DE SÉCURITÉ IMPORTANTES l'interrupteur défectueux par un centre d'entretien agréé. fonctionner des pièces ou des fixations qui ne sont pas prévues pour elle. de lui faire passer un entretien, quand vous faites des réglages et quand vous changez des pièces telles que la chaîne et le garde-chaîne. -
Page 50: Règles Générales De Sécurité
RÈGLES GÉNÉRALES DE SÉCURITÉ REBOND (voir fig. 1 et 2) AVERTISSEMENT Un rebond peut se produire si la pointe du guide-chaîne touche un objet ou que le bois se resserre et coince la scie à chaîne dans l'entaille Le contact de la partie supérieure de l'extrémité du guide peut faire plonger la chaîne dans le bois et la bloquer pendant un instant. - Page 51 RÈGLES GÉNÉRALES DE SÉCURITÉ lorsqu'il scie avec le bas du guide, et la POUSSÉE lorsqu'il scie avec le dessus (voir fig. 3) TRACTION POUSSÉE Fig. 3...
-
Page 52: Symboles
SYMBOLES Vous trouverez peut-être certains des symboles suivants sur ce produit. Veuillez les étudier et apprendre SYMBOLE DÉSIGNATION/EXPLICATION Volts Tension Ampères Courant Hertz Fréquences (cycles par seconde) Alimentation Minutes Durée Courant Alternatif Type De Courant Courant Continu Type Ou Caractéristique Du Courant Vitesse À... - Page 53 SYMBOLES Les termes de mise en garde suivants et leur signification visent à expliquer le degré de risque associé à cet appareil. SYMBOLE MISE EN GARDE SIGNIFICATION DANGER Pas Évitée, Provoquera Des Blessures Graves, Voire La Mort. AVERTISSEMENT Pas Évitée, Peut Provoquer Des Blessures Graves, Voire La Mort. ATTENTION Pas Évitée, Pourrait Provoquer Des Blessures Mineures Ou Modérées.
-
Page 54: Équipement Électrique
ÉQUIPEMENT ÉLECTRIQUE AVERTISSEMENT POUR ÉVITER TOUT RISQUE D'ÉLECTROCUTION, D'INCENDIE OU D'ENDOMMAGEMENT DE L'OUTIL, VEUILLEZ UTILISER UNE PROTECTION DE CIRCUIT ADÉQUATE. LE CÂBLAGE D'USINE DE CETTE SCIE À CHAÎNE EST PRÉVU POUR UNE UTILISATION À 120 V. BRANCHEZ L'APPAREIL SUR UN CIRCUIT À 120 V 15 A ET METTEZ UN FUSIBLE TEMPORISÉ DE 15 A OU UN DISJONCTEUR. -
Page 55: Directives Relatives À L'utilisation De Cordons Prolongateurs
ÉQUIPEMENT ÉLECTRIQUE AVERTISSEMENT CET OUTIL EST CONÇU POUR ÊTRE EXCLUSIVEMENT UTILISÉ À L'EXTÉRIEUR. NE PAS EXPOSER À LA PLUIE NI UTILISER DANS DES ENDROITS HUMIDES. DIRECTIVES RELATIVES À L’UTILISATION DE CORDONS PROLONGATEURS UTILISEZ UN CORDON PROLONGATEUR ADÉQUAT. Veillez à ce qu'il soit en bon état. Lorsque vous utilisez un cordon prolongateur, veillez à... -
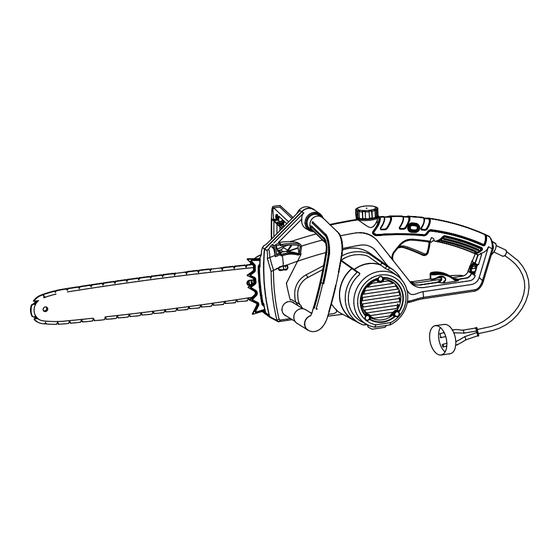
Page 56: Familiarisez-Vous Avec Votre Scie À Chaîne
FAMILIARISEZ-VOUS AVEC VOTRE SCIE À CHAÎNE Commutateur De Verrouillage Gachette GAINE RÉUTILISABLE Retenue Du FAIBLE REBOND Metal Pointes Poignée Cordon SAW CHAIN Tron?onnage Avant Reservoir Protège-main D'huile Pac Avant Poignée Arrière Tension De Cha?ne GUIDE Bouton Quick View Carter De Oil Indicator Cha?ne Chain ??Cache-serrure... - Page 57 FAMILIARISEZ-VOUS AVEC VOTRE SCIE À CHAÎNE Pour utiliser ce produit en toute sécurité, assimilez bien les informations inscrites sur l'outil et contenues dans le présent manuel. Préparez également soigneusement votre projet de travail. ainsi que les règles de sécurité. BOUTON DE TENSION DE LA CHAÎNE Dispositif permettant de régler la tension de la chaîne.
-
Page 58: Montage
MONTAGE DÉBALLAGE Ce produit a été expédié entièrement monté. les accessoires répertoriés sont présents. le transport. 1-866-384-8432 pour obtenir de l'aide. LISTE D'EMBALLAGE AVERTISSEMENT Si des pièces sont manquantes ou endommagées, ne faites pas fonctionner ce produit avant de les avoir remplacées. Le non-respect de cet avertissement peut entraîner des blessures graves. -
Page 59: Utilisation
UTILISATION AVERTISSEMENT AVERTISSEMENT Quand vous utilisez des outils électriques, portez toujours des lunettes de sécurité ou des lunettes de sécurité à écrans latéraux. Le non-respect de cette consigne peut provoquer des projections d'objets dans les yeux, avec des risques de lésions graves. AVERTISSEMENT APPLICATIONS Ce produit est destiné... - Page 60 UTILISATION Fig. 6 Fig. 7 BOUCHON DU RÉSERVOIR D'HUILE INDICATEUR CORDON INSTANTANÉ PROLONGATEUR DE NIVEAU D'HUILE RACCORDEMENT À LA SOURCE D'ALIMENTATION (voir fig. 7) détacher pendant l'utilisation. poignée arrière et placez-la sur la fixation du cordon. REMARQUE: Si vous n'éliminez pas totalement l'excédent de mou du serre-câble du cordon prolongateur, la fiche risque de se détacher de la prise.
-
Page 61: Démarrage De La Scie À Chaîne
UTILISATION DÉMARRAGE DE LA SCIE À CHAÎNE: manuel consacrée au réglage de la tension de la chaîne. ou le guide. l'interrupteur à gâchette enfoncé pour éviter que la scie ne s'éteigne. ARRÊT DE LA SCIE À CHAÎNE: REMARQUE: Une fois que vous aurez lâché l'interrupteur à gâchette, la chaîne ralentira jusqu'à l'arrêt complet. - Page 62 UTILISATION COMMENT SE PRÉPARER À SCIER COMMENT TENIR CORRECTEMENT LES POIGNÉES (voir fig. 9) Pour l'équipement de sécurité souhaitable, voir les Règles générales de sécurité. l'axe de la chaîne. serrés autour de la poignée, avec le pouce recroquevillé sous la barre. Cette position des mains sera la plus stable en cas de rebond ou de saute de la scie à...
-
Page 63: Méthode D'utilisation/De Coupe Élémentaire
UTILISATION BONNE POSITION POUR SCIER (voir fig. 10) MÉTHODE D'UTILISATION/DE COUPE ÉLÉMENTAIRE Exercez-vous en coupant quelques petites branches avec la technique décrite ci-après, pour vous familiariser avec la scie à chaîne avant d'entreprendre un travail plus important. laissez la chaîne parvenir à pleine vitesse avant de commencer la coupe. s'immobilise. - Page 64 UTILISATION PRÉCAUTIONS DE CHANTIER (voir fig. 11) en bois ou à base de bois. quelqu'un qui n'ait pas lu le manuel d'utilisation ou qui n'ait pas été formé à son utilisation. de votre zone de coupe. Pour l'abattage, la distance de sécurité doit être d'au moins deux fois la taille de l'arbre le plus grand se trouvant dans la zone de coupe.
-
Page 65: Pour Éviter Les Rebonds
UTILISATION POUR ÉVITER LES REBONDS susceptible d'être heurté pendant le travail. ou des produits équivalents. Quand deux personnes ou plus font de l'abattage et du débitage ensemble, veillez à laisser entre l'abattage et le débitage une distance d'au moins deux fois la taille de l'arbre à abattre. Quand vous abattez des arbres, veillez à... -
Page 66: Procédure Correcte Pour L'abattage (Voir Fig. 13)
UTILISATION AXE DE CHUTE PRÉVU AXE DE CHUTE CHEMIN PRÉVU 135° RETRAITE 45° 90° 45° 135° 90° 135° PAR RAPPORT CHEMIN DE À L'AXE DE CHUTE RETRAITE Fig. 12 PRÉVU pourries, l'écorce décollée ou le tronc creux. Ces arbres doivent être poussés ou tirés à terre par un engin de chantier lourd avant d'être débités. - Page 67 UTILISATION de chute prévu (fig. 26). Avant de commencer l'abattage, tenez compte de l'inclinaison de l'arbre, de la position des grosses branches et de la direction du vent. Tous ces facteurs influenceront la direction dans laquelle l'arbre tombera. Fig.13 SIFFLET Pour faire un sifflet, pratiquez une entaille (B), d'environ le tiers du diamètre du tronc, perpendiculairement empêcher le pincement de la scie à...
- Page 68 UTILISATION COMMENT RETIRER LES RACINES D'APPUI (voir fig. 14) Une racine d'appui est une grosse racine partant du tronc et faisant saillie au-dessus du sol. Retirez les racines d'appui avant d'abattre l'arbre. Commencez par faire une entaille horizontale dans la racine, puis faites-en une verticale. Retirez la partie ainsi découpée et jetez-la au loin. Une fois que vous aurez retiré...
-
Page 69: Coupe Par Le Dessus
UTILISATION TRONÇONNAGE AVEC UN COIN (voir fig. 16) Si le diamètre du tronc vous permet d'enfoncer un coin sans toucher la chaîne, utilisez-en un pour maintenir l'entaille ouverte et éviter de pincer la scie à chaîne. TRONÇONNAGE DE BILLES SOUS CONTRAINTE (voir fig. - Page 70 UTILISATION ÉBRANCHAGE (voir fig. 20) L'opération consistant à retirer les branches d'un arbre abattu s'appelle l'ébranchage. vous tenir bien campé et en équilibre, le poids également réparti sur les deux pieds. qui le soutiennent. évacuez les branches coupées. ÉLAGAG (voir fig. 21) L'élagage consiste à...
- Page 71 UTILISATION DEUXIÈME COUPE CHARGE 1e COUPE: COUPEZ LES BRANCHES UNE PAR 1/3 DIAM. UNE ET LAISSEZ LES GROSSES BRANCHES QUI SOUTIENNENT COUPE DE L'ARBRE JUSQU´À CE QUE VOUS FINITION Fig. 20 AYEZ FINI LE TRONÇONNAGE. Fig. 21 FOUETS (voir fig. 22) Un fouet est une bille, une branche, une souche déracinée ou un arbrisseau fléchi et mis sous tension par une autre pièce de bois, et qui se détendra une fois que cette pièce aura été...
-
Page 72: Entretien
ENTRETIEN AVERTISSEMENT Pour les entretiens, utilisez exclusivement des pièces identiques à celles d'origine OU des pièces de risques ou endommager le produit. AVERTISSEMENT Portez toujours des lunettes de protection ou des lunettes de sécurité à écrans latéraux de protection quand vous utilisez un outil électrique ou que vous évacuez de la poussière. Si vous travaillez dans une zone poussiéreuse, portez également un masque anti poussière. -
Page 73: Nettoyage Général
MAINTENANCE Éteignez la machine, retirez les batteries et laissez-les refroidir. Examinez la machine, nettoyez-la de la machine après chaque utilisation et avant de la ranger. Un bon nettoyage régulier permet de garantir une utilisation en toute sécurité et de prolonger la durée de vie de la machine. - Page 74 MAINTENANCE REMPLACEMENT DU GUIDE ET DE LA CHAÎNE (voir fig.. 24 - 32.) D A N G E R Ne lancez jamais le moteur avant d'avoir installé la chaîne, le guide-chaîne, le carter de chaîne et le bouton de verrouillage du carter de chaîne. Si ces pièces ne sont pas toutes en place, l'embrayage peut être éjecté...
- Page 75 MAINTENANCE AVERTISSEMENT Maintenez tout membre du corps à l’écart de la chaîne lorsque la scie à chaîne est en cours de fonctionnement. Avant d’allumer la scie à chaîne, assurez-vous qu’elle ne touche rien. pour que des vêtements ou des parties du corps soient entraînés par la chaîne. AVERTISSEMENT Tenez toujours la scie à...
-
Page 76: Tension De La Chaîne
MAINTENANCE TENSION DE LA CHAÎNE Vérifiez toujours la tension de la chaîne avant de commencer à utiliser la scie, puis régulièrement en cours d'utilisation (après environ 5 coupes). Il faut prendre en considération que les chaînes neuves peuvent s'élargir considérablement au PLACEZ LA MACHINE SUR UNE SURFACE PLATE. - Page 77 MAINTENANCE Vérifiez que le disque de tension (6b) est en position droite extérieur et, si nécessaire, tournez-le dans le sens inverse des aiguilles d'une montre (fig. 29 et 30). Fig. 29 Fig. 30 Alignez le guide-chaîne (6) et la chaîne (5) avec le pignon d'entraînement (19) et le boulon de soutien (17). Attachez la chaîne autour du pignon d'entraînement, puis descendez le guide pour l'attacher sur le boulon de soutien (fig.
- Page 78 MAINTENANCE ROTATION DE LAMES LA CHAÎNE MAILLONS-GUIDES Fig. 36 Fig. 34 MAILLONS- GUIDES RAINURE DU GUIDE Fig. 35 Fig. 37 La tension est bonne s'il n'y a pas de mou sur le dessous du guide et si la chaîne est bien serrée mais qu'elle ne se bloque pas quand on la fait tourner à...
- Page 79 MAINTENANCE REMARQUE: La tension d'une chaîne à froid tension est bonne s'il n'y a pas de mou sur le dessous du guide et si la chaîne est bien serrée mais sans se bloquer quand on la fait tourner à la main. montre.
- Page 80 MAINTENANCE Tournez la roue de serrage (9) pour serrer à fond le >>cache latéral (10) (fig. 40). Fig. 40 se dilater (fig. 41). Avant de lancer la machine, vérifiez visuellement le niveau d'huile du réservoir (11) et revérifiez encore régulièrement pendant que vous travaillez. Remplissez quand le niveau est en-dessous de la graduation MIN (fig.
- Page 81 MAINTENANCE SOIN ET ENTRETIEN il doit être remplacé par un service de réparation agréé. Prenez un tournevis, un couteau de vitrier, une brosse métallique ou un objet similaire, et nettoyez le guide (6) et la chaîne (5) soient correctement lubrifiés . Vérifiez si le rail du guide-chaîne est usé.
-
Page 82: Entretien De La Chaîne (Voir Fig. 44)
MAINTENANCE A T T E N T I O N Avant de commencer à travailler sur la scie à chaîne, vérifier qu'elle est bien débranchée. ENTRETIEN DE LA CHAÎNE (voir fig. 44) Utilisez cette scie à chaîne uniquement avec une chaîne à faible rebond. Quand elle est bien entretenue, cette chaîne rapide permet de réduire les rebonds. -
Page 83: Affûtage De La Chaîne
MAINTENANCE Regardez si la chaîne est usée ou endommagée. Si nécessaire, remplacez-la par une nouvelle. ci-dessous). AFFÛTAGE DE LA CHAÎNE Faites affûter votre chaîne (5) par les professionnels d'un centre d'entretien agréé ou affûtez-la vous-même en utilisant une bonne trousse d'affûtage. Suivez les instructions qui accompagnent la La différence de hauteur entre la dent et la strie représente la Lame de gauche profondeur de coupe. -
Page 84: Transport
MAINTENANCE Pointe coupante Longueur Flasque de la lame supérieur Réglage du limiteur de Position du feu profondeur 0,025” Limiteur de profondeur Aucune des pièces de ce produit ne peut être réparée par le consommateur. Comme stipulé ci-dessus, faites-le examiner et réparer par un spécialiste. RANGEMENT Rangez le produit et ses accessoires dans un endroit sec et à... -
Page 85: Dépannage
DÉPANNAGE PROBLÈME CAUSE REMÈDE Vérifiez si la chaîne n'est La chaîne et le guide pas trop tendue deviennent chauds et f ument Le réservoir d'huile de la chaîne est vide La chaîne est trop tendue Vérifiez la tension de la chaîne (reportez-vous à... -
Page 86: Garantie
GARANTIE Nous sommes fiers de fabriquer un produit durable de haute qualité. Ce produit LawnMaster ® comporte une garantie limitée de deux (2) ans contre tout défaut de fabrication et défaillance matérielle à compter de sa date d'achat, sous réserve de conditions normales d'usage résidentiel. -
Page 87: Vue Éclatée/Liste Des Pièces
VUE ÉCLATÉE/LISTE DES PIÈCES... -
Page 88: Cs1216 Manual Liste Des Pièces
VUE ÉCLATÉE/LISTE DES PIÈCES CS1216 Manual LISTE DES PIÈCES Key Number Drawing Number Quantity 171-7J13002 Le Cordon D'alimentation 196-7J11601 Bouclier Manches 293-7J13001 Mettez Bouton 293-7J13002 Ens. Bouton 235-7J13001 Bouton Poussoir 324-7J13001 Huile Resevoir 139-7J13001 Assemblée Swith 297-7J13001 Top Manche 216-7J13001 Garde De La Poignée Avant... -
Page 89: Remarques
REMARQUES...