Table des Matières

Publicité

Les langues disponibles
  • FR

Les langues disponibles

Liens rapides

8
80
INSTRUCTIONS MANUAL
MANUALE DI ISTRUZIONI
MANUAL DE INSTRUCCIONES
MANUEL D'UTILISATION
BETRIEBSANLEITUNG
+ DHS
+ DHS
pH - Cond - PC

Publicité

Table des Matières
loading

Sommaire des Matières pour Giorgio Bormac 8+ Série

  • Page 1 + DHS + DHS pH - Cond - PC INSTRUCTIONS MANUAL MANUALE DI ISTRUZIONI MANUAL DE INSTRUCCIONES MANUEL D’UTILISATION BETRIEBSANLEITUNG...
  • Page 2 UM Serie 880 EN rev.2 30.07.2020...
  • Page 3: Table Des Matières

    INDEX Introduction Safety information • Definition of warning words and symbols • Reporting terms Additional documents for safety • • Use according to destination • Basic requirements for a safe use Unauthorized use • • Device Maintenance • Responsibility of the owner of the instrument Instrumental Features •...
  • Page 4 Ion parameters setup • • Calibration with Ion-Selective Electrodes Measurement with Ion-Selective Electrodes • Conductivity Parameter • … how to get to the conductivity? Configuration of setup menu for Conductivity parameter • • Automatic Conductivity calibration • Manual conductivity calibration Performing a Conductivity measurement •...
  • Page 5: Introduction

    Introduction XS Instruments, globally recognized as a leading brand in the field of electrochemical measurements, has developed this new line of bench instruments completely produced in Italy, finding the perfect balance between performance, attractive design and ease of use. The large, simple and intuitive color display shows all the necessary information such as the measurement, the temperature, the buffers used for the last calibration (also custom), the electrode conditions, GLP information and stored data.
  • Page 6: Safety Information

    Safety information • Definition of warning words and symbols This manual contains extremely important safety information, in order to avoid personal injury, damage to the instrument, malfunctions or incorrect results due to failure to comply with them. Read entirely and carefully this manual and be sure to familiarize with the tool before starting to work with it.
  • Page 7: Additional Documents For Safety

    • Additional documents for safety Following documents provide the operator with additional information to work safely with the measurement system: Operating manual for electrochemical sensors • • Safety data sheets for buffer solutions and other maintenance solutions (e.g. storage) • Specific notes on product safety.
  • Page 8: Responsibility Of The Owner Of The Instrument

    • Responsibility of the owner of the instrument The person who owns and uses the device or authorizes its use by other people is the owner of the instrument and is responsible for the safety of all users of the device and third parties The owner of the instrument must inform users of the use of the same safely in their workplace and on the management of potential risks, also providing the required protective devices When using chemicals or solvents, follow the manufacturer's safety data sheets.
  • Page 9: Description Of The Instruments

    Resistivity Cond8+ - PC8+DHS Cond80+ - PC80+DHS Measuring Range 0….10 MΩ*cm Temperature Measuring Range -10…110 °C -20…120 °C Resolution / Accuracy 0,1 / ± 0,2°C Temperature compensation 0…100 °C ATC (NTC30KΩ) and MTC System GLP with Calibration Timer Memory 1000 Data Display Multicolor dot matrix Multilingual...
  • Page 10: Keyboard

    • Keyboard On-Off key to turn Quick-Manual key * the device on and off Directional keys Meas / Cal key to return to to scroll through measurement mode and to menus and start the calibration manage data logging Enter / Menu key to confirm the selected values and enter setup menu from Mode key to scroll...
  • Page 11: Turning On And Off, Update Date, Time And Language

    • The instrument is equipped with an external power supply that has no protection against infiltration of liquids, therefore for its use it is necessary to keep all the electrical cables and connections away from any liquids and humidity and not to use the appliance in a humid room such as a bathroom or laundry room.
  • Page 12: Key Functions

    • Key functions Push Functions Press to turn the device on or off. Short In measurement mode press to scroll through the parameters: pH80+DHS : pH  ORP  analogic pH  Ion* • Cond80+: Cond  TDS  Sal  Res* •...
  • Page 13: Symbols And Icons On The Display

    • Symbols and icons on the display Symbol Description Symbol Description Number of data stored in Data Logger Titration stability criterion mode on instrument memory (continuous measurement) Printer data logger Measurement stability icon External keyboard* HOLD mode, value is freezed Data logger with data sending on PC No user Password Data logger with data sending on...
  • Page 14: Setup Menu

    Reading this manual before each use eliminates the residual risk of possible and significant errors in the interpretation of the data on the display. It is therefore recommended that the user carefully read the manual to correctly use the instrument and correctly interpret the information on the display. All this will ensure that the risk of misinterpretation goes from possible to highly improbable.
  • Page 15: Ph Parameters

    pH parameters pH8+DHS, pH80+DHS, PC8+DHS, PC80+DHS On this series of devices, you can use pH sensors with integrated temperature probe or connect two different sensors. The pH electrode uses a BNC connector while the temperature probe uses a RCA/CINCH connector. The instrument is also able to recognize DHS sensor, an innovative electrode capable of storing the calibration data and then being immediately used on any enabled instrument.
  • Page 16 P1.3 Last calibration pH data Access this menu to get information on the last performed calibration. “View” (Factory default), a report is shown on the display with the following information about the • current calibration: CALIBRATION DATE and HOUR / TEMPERATURE / DHS DATA / OFFSET / SLOPE % for every range. •...
  • Page 17: Automatic Ph Calibration

    P1.8 Restore factory default. If the instrument does not properly work or incorrect calibration were performed press Yes with key to return all pH parameters to the factory default settings. IMPORTANT: the factory reset of the parameters does not delete stored data. •...
  • Page 18: Calibration With Manual Values

    The calibration report and graphic representation are displayed, press to exit and return in measurement mode. Bottom left are displayed buffers used for the last calibration. • Example for 3 Points Calibration for 8+ Series • Example for 5 Points Calibration for 80+ Series Note: calibration of the electrode is a fundamental operation for the quality and veracity of measurement.
  • Page 19: Performing Ph Measurement

    • When icon reappears press key to confirm the second point, the actual measured value flashes on the display and the becker icon appears with the identifier color and the buffer value at the bottom U 4.65 left • Although the device could accept two other calibration points, we stop and confirm this calibration (8+ Series will automatically end after three points).
  • Page 20: Errors During Calibration

    The device automatically recognizes the chip, the display shows information about the model and lot • of the sensor and the date of the last calibration (if the electrode had already been calibrated). As soon as the DHS electrode is recognized the active calibration on the instrument becomes the one •...
  • Page 21 The table below shows the structure of the setup menu for the Ion parameter, for each program there are the options that the user can choose and the default value. Program Description Options Factory default P3.1 Measuring unit mg/L – g/L – mol/L mg/L P3.2 Select low standard...
  • Page 22: Calibration With Ion-Selective Electrodes

    P3.6 Ion Sensor ID Enter this menu to assign an identifier name to the sensor currently in use. To activate this option, the external keyboard must be connected. • • The sensor ID will appear in the “Complete” display screen (P6.7) and in Complete or GLP paper print (P5.3) P3.7 Restore factory default.
  • Page 23: Measurement With Ion-Selective Electrodes

    Important: make at least two calibration points, if key is pressed after the first calibration the display shows the error “Not enough calibrated points” and calibration is invalidated. ATTENTION: Before proceeding with the calibration operations, carefully consult the safety data sheets of the substances involved: Standard calibration buffer solution.
  • Page 24 Conductance is transformed into a specific conductivity (k), which is independent of the cell configuration, multiplying it by the cell constant. k = GxC is express in S/cm even if measurement units “mS/cm” (1 S/cm -> 10 mS/cm) and “µS/cm” (1 S/cm -> 10 µS/cm) are commonly used.
  • Page 25 • Once the calibration has expired, “ ” icon will appear on the display, anyway the user may continue to make measurements. P2.5 Last Calibration Cond Data Access this menu to get information about the last calibration performed. • “View” (Factory default): a report is shown on the display with the following information about the current calibration: CAL DATE and HOUR / TEMP / MEASURING UNIT / ID SENSOR / CELL CONSTANT for every range.
  • Page 26: Automatic Conductivity Calibration

    Compensation coefficients for calibration standards at different temperatures for T 25 °C are shown in the following table. 0.001 mol/L KCl (147µS) 0.01 mol/L KCl (1413 µS) 0.1 mol/L KCl (12.88 mS) 1.81 1.81 1.78 1.92 1.91 1.88 2.04 2.02 2.03 2.08 2.06...
  • Page 27: Manual Conductivity Calibration

    Rinse the sensor with distilled water and gently dab with • absorbent paper. Flush with some mL of standard solution. Press and immerse the sensor in 1413 µS/cm standard • solutions keeping it slightly in moving and making sure there are no air bubbles in the cell.
  • Page 28: Performing A Conductivity Measurement

    • Press and hold for 3 sec “ CAL” key to enter in calibration mode. • Rinse the sensor with distilled water and gently dab with absorbent paper. Rinse with some mL of standard solution, press and immerse the sensor in 5.00 µS/cm standard solution.
  • Page 29: Other Measurements Perform With Conductivity Cell

    The Cond measurement can be displayed on two different screens: • Digital • Simultaneous pH/Cond Available only for PC8+DHS and PC80+DHS Cell C=1 Cell C=1 • Connect the conductivity cell to the BNC for Cond of device (grey). • If the user does not use a sensor with incorporated temperature probe or an external NTC 30KΩ probe, it is advisable to manually update the temperature value (MTC).
  • Page 30: Salinity

    • Salinity Cond8+, Cond80+, PC8+DHS, PC80+DHS Usually the UNESCO 1978 definition is used for this parameter, which provides the use of psu (Practical Salinity Units) as unit of measurement corresponding to the ratio between the conductivity of a sample of sea water and that of a standard KCl solution maked by 32,4356 grams of salt dissolved in 1 kg of solution at 15 °...
  • Page 31: Example 1 Data Logger Mode

    The recorded data is directly sent to the PC through USB connection and processed using the • appropriate software DataLink+. P5.2 Data logging type Enter this menu to select the acquisition mode data. • Manual : The data is acquired or printed only when the user presses the key.
  • Page 32: Recalling Saved Data On Instrumental Memory

    • Press key to return in measurement mode and activate MEAS Cond screen. In the upper band you can find icons -print – and - manual saving. Connect the printer to the RS232 port. • • When you want to print the value, press key.
  • Page 33 P6.2 User ID: name of the user; max 8 characters, appears in the print header Complete and GLP and • on display along with the padlock: open if no password is entered so the user can access all the menus, close if password is entered so the user has access restrictions to the menus.
  • Page 34: Magnetic Stirrer With Independent Control

    P6.13 Set Language Enter this setup menu to select which language to use. English -default- • Espanol • • Italiano • Francais • Deutsch • Czech Magnetic stirrer with independent control All the device of 8+ and 80+ Series can be connected to the appropriate magnetic stirrer independently controlled;...
  • Page 35: Functions

    Use only the USB cable supplied with each instrument. • • Start the program and then turn on the instrument. Wait for the connection to be established (the connection data are displayed at the bottom left of the • display). •...
  • Page 36: Warranty

    Warranty The manufacturer of this device and its accessories offers the final consumer of the new device the • three-year warranty from the date of purchase, in the event of state-of-the-art maintenance and use. • During the warranty period, the manufacturer will repair or replace defective components. •...
  • Page 38 UM Serie 880 IT rev. 3 30.07.2020...
  • Page 39 Sommario Introduzione Informazioni sulla sicurezza • Definizioni delle parole e dei simboli di avvertimento • Termini di segnalazione Ulteriori documenti che forniscono informazioni sulla sicurezza • • Uso secondo destinazione • Requisiti fondamentali per un utilizzo in sicurezza Utilizzo non autorizzato •...
  • Page 40 • Taratura con elettrodi Iono - Selettivi Misura con elettrodi Iono - Selettivi • Parametro conducibilità …come si arriva alla conducibilità? • Setup per il parametro conducibilità • • Taratura automatica della conducibilità • Taratura con valore manuale Effettuare una misura di conducibilità •...
  • Page 41: Introduzione

    Introduzione XS Instruments, globalmente riconosciuto come brand leader nel settore delle misure elettrochimiche, ha sviluppato questa nuova linea di strumenti da banco completamente prodotta in Italia, trovando il perfetto equilibrio tra performance, design accattivante e semplicità di utilizzo. L’ampio display a colori, semplice ed intuitivo, mostra tutte le informazioni necessarie come la misura, la temperatura, i buffers utilizzati per l’ultima taratura (anche custom), le condizioni dell’elettrodo, informazioni GLP e i dati memorizzati.
  • Page 42: Informazioni Sulla Sicurezza

    Informazioni sulla sicurezza • Definizioni delle parole e dei simboli di avvertimento Le informazioni sulla sicurezza presenti su questo manuale sono importantissime per evitare lesioni personali, danni allo strumento o malfunzionamenti o risultati errati dovuti al mancato rispetto delle stesse. Leggere attentamente questo manuale nella sua completezza e fare in modo di familiarizzare con lo strumento prima di metterlo in attività...
  • Page 43: Ulteriori Documenti Che Forniscono Informazioni Sulla Sicurezza

    • Ulteriori documenti che forniscono informazioni sulla sicurezza I seguenti documenti possono fornire all’operatore informazioni addizionali per lavorare in sicurezza con il sistema di misura: Manuale operativo per i sensori elettrochimici. • • Schede di sicurezza per le soluzioni tampone ed altre soluzioni di manutenzione (es storage). •...
  • Page 44: Responsabilità Del Proprietario Dello Strumento

    • Responsabilità del proprietario dello strumento La persona che detiene la titolarità e che utilizza lo strumento o ne autorizza l’uso da parte di altre persone è il proprietario dello strumento e in quanto tale è responsabile per la sicurezza di tutti gli utenti dello stesso e di terzi.
  • Page 45: Descrizione Strumento

    Resistività Cond8+ - PC8+DHS Cond80+ - PC80+DHS Range di misura 1….10 MΩ*cm Temperatura Range di misura -10…110 °C -20…120 °C Risoluzione / Accuratezza 0,1 / ± 0,2°C Compensazione della temperatura ATC 0…100 °C (NTC30KΩ) e MTC Sistema GLP con timer di calibrazione Memoria interna 1000 Dati Display...
  • Page 46: Tastiera

    • Tastiera Tasto On-Off per accendere Tasto e spegnere il dispositivo Information* Quick Manual Tasto Meas / Cal per tornare in modalità di misura e per Tasti direzionali avviare la calibrazione per scorrere i menù e gestire la registrazione dati Tasto Enter / Menu per confermare i valori scelti Tasto mode per scorrere i vari parametri di misura ed entrare nel setup dalla modalità...
  • Page 47: Accensione, Aggiornamento Data Ora E Lingua, Spegnimento

    Connettere il plug dell’alimentatore al connettore sul pannello posteriore dello strumento indicato • con l’icona • Connettere l’alimentatore ad una presa di rete non difficoltosa da raggiungere. • Lo strumento è dotato di un alimentatore esterno che non ha protezione contro l’ingresso dei liquidi, pertanto per il suo utilizzo è...
  • Page 48: Funzioni Tasti

    • Funzioni Tasti Tasto Pressione Funzione Premere per accendere o spegnere il dispositivo. Breve In modalità di misura premere per scorrere I diversi parametri: • pH80+DHS : pH  ORP  pH analogico  Ion* • Cond80+: Cond  TDS  Sal  Res* Breve •...
  • Page 49: Simboli Ed Icone Sul Display

    • Simboli ed icone sul display Simbolo Descrizione Simbolo Descrizione Numero di dati memorizzati in modalità Criterio di stabilità Titolazione Data Logger su memoria strumentale (misura in continuo) Data Logger impostato su stampante Icona di stabilità di misura Tastiera esterna connessa* Modalità...
  • Page 50: Menu Di Setup

    La lettura del presente manuale prima di ogni utilizzo, elimina il rischio residuo di possibili e significativi, errori nell’interpretazione dei dati sul display. Si raccomanda, pertanto, l’utilizzatore di leggere attentamente il manuale per utilizzare correttamente lo strumento ed interpretare in maniera corretta le informazioni su display.
  • Page 51: Parametro Ph

    Parametro pH pH8+DHS, pH80+DHS, PC8+DHS, PC80+DHS Su questa serie di dispositivi è possibile utilizzare sensori di pH con sonda di temperatura integrata oppure connettere due sensori differenti. Connettere l’elettrodo di pH al connettore di tipo BNC contrassegnato dai colori giallo/azzurro mentre la sonda di temperatura al connettore RCA/CINCH Temp/pH. Lo strumento è in grado di riconoscere anche il sensore DHS, un innovativo elettrodo in grado di memorizzare i dati di taratura per poi poter essere utilizzato immediatamente su qualsiasi strumento abilitato.
  • Page 52 P1.3 Dati ultima calibrazione pH Accedere a questo menu per ottenere informazioni sull’ultima taratura eseguita. • “Visualizza” -default-, viene visualizzato sul display un report con le seguenti informazioni riguardo la taratura attualmente in uso: DATA TARATURA / ORA TARATURA / TEMPERATURA / MODELLO DHS SE PRESENTE / OFFSET / SLOPE % per ogni range.
  • Page 53: Taratura Automatica Del Ph

    P1.8 Ritorna impostazioni di fabbrica Se lo strumento non lavora ottimamente o sono state eseguite tarature errate confermare Si con riportare tutti I parametri pH alle impostazioni di default. IMPORTANTE: Il ripristino di fabbrica dei parametri non cancella i dati memorizzati. •...
  • Page 54: Taratura Con Valori Manuali

    • Sul display lampeggia il valore misurato effettivamente e successivamente a fianco dei becher pH 7.00 e pH 4.01 compare l’icona del becher pH 10.01 : lo strumento è tarato anche nel campo alcalino. 10.01 • Nonostante il dispositivo possa accettare altri due punti di taratura, interrompiamo e confermiamo questa curva a tre punti premendo (Serie 8+ dopo tre punti invece termina automaticamente).
  • Page 55: Effettuare Una Misura Di Ph

    • Estrarre l’elettrodo, sciacquare con acqua distillata e tamponare delicatamente con carta assorbente. Premere per proseguire la taratura ed immergere l’elettrodo nel tampone successivo (es pH 4.65). • Attendere che il valore di pH sul display si stabilizzi; quando compare l’icona utilizzare i tasti per aggiustare il valore inserendo quello del buffer (es pH 4.65).
  • Page 56: Sensori Con Tecnologia Dhs

    • Sensori con tecnologia DHS Gli elettrodi dotati della tecnologia DHS sono in grado di salvare all’interno della loro memoria una curva di taratura. Il sensore tarato viene riconosciuto in automatico da qualsiasi strumento abilitato al riconoscimento DHS e ne acquisisce la taratura.
  • Page 57: Setup Per Il Parametro Ion

    • Setup per il parametro Ion • In modalità di misura premere “ MENU” per accedere al menu di SETUP. • Scorrere utilizzando i tasti fino al menu “Ion” e selezionare premendo • Spostarsi con i tasti selezionare il programma che si desidera modificare. Nella tabella sottostante è...
  • Page 58: Taratura Con Elettrodi Iono - Selettivi

    Di default non è impostata nessuna scadenza di calibrazione. Utilizzare i tasti per scegliere i • giorni oppure le ore che devono trascorrere tra due tarature e confermare con • Scaduta la calibrazione comparirà sul display l’icona “ ”; l’utente potrà comunque continuare ad effettuare misurazioni.
  • Page 59: Parametro Conducibilità

    • Terminato il secondo punto l’utente ha la possibilità di uscire dalla taratura premendo il tasto premere invece per proseguire con i restanti punti. • Al termine della taratura viene visualizzato sul display il report di taratura con DATA E ORA, TEMPERATURA, UNITA’ DI MISURA, SENSOR ID e SLOPE % per ogni RANGE. Importante: effettuare almeno due punti di taratura.
  • Page 60: Come Si Arriva Alla Conducibilità

    • …come si arriva alla conducibilità? La prima legge di Ohm esprime la diretta proporzionalità in un conduttore tra l’intensità di corrente (I) e la differenza di potenziale applicata (V) mentre la resistenza R ne rappresenta la costante di proporzionalità. Nello specifico: V= R x I, la resistenza è...
  • Page 61 • Utente: il dispositivo può essere tarato su un punto con valore inserito manualmente. Nota: Per ottenere risultati accurati è consigliabile tarare il dispositivo con standards vicini al valore teorico della soluzione da analizzare. P2.4 Scadenza calibrazione Cond Accedere a questo menu per impostare una scadenza di calibrazione; questa opzione è fondamentale nei protocolli GLP.
  • Page 62 Coefficienti di compensazione per soluzioni speciali e per gruppi di sostanze sono riportati nella seguente tabella. Soluzione (%/°C) Soluzione (%/°C) NaCl Soluzione salina 2.12 1.5% Acido fluoridrico 7.20 5% NaOH Soluzione 1.72 Acidi 0.9 - 1.60 Soluzione ammoniaca diluita 1.88 Basi 1.7 –...
  • Page 63: Taratura Automatica Della Conducibilità

    P2.10 Ritorna impostazioni di fabbrica Se lo strumento non lavora ottimamente o sono state eseguite tarature errate confermare Si con riportare tutti i parametri Cond alle impostazioni di default. IMPORTANTE: Il ripristino di fabbrica dei parametri non cancella i dati memorizzati. •...
  • Page 64: Taratura Con Valore Manuale

    ATTENZIONE: Prima di procedere con le operazioni di taratura consultare attentamente le schede di sicurezza delle sostanze coinvolte: • Soluzioni tampone di calibrazione. L’attenta lettura delle schede di sicurezza delle soluzioni utilizzate, favorisce l’eliminazione dei rischi residui legati al contatto cutaneo, l’ingestione, l’inalazione o il contatto oculare con le stesse che possono generare, possibili ma non probabili danni di lieve entità.
  • Page 65: Effettuare Una Misura Di Conducibilità

    • Effettuare una misura di conducibilità Accedere al menu di Setup per la conducibilità per controllare la taratura e verificare ed eventualmente • aggiornare i parametri di lettura (vedi paragrafo “Setup per il parametro Cond/TDS”), premere tornare in modalità di misura. Premere per scorrere le differenti schermate dei parametri fino ad attivare MEAS Cond •...
  • Page 66: Salinità

    Di seguito sono riportati i fattori TDS in relazione al valore di conducibilità. Conducibilità della soluzione Fattore TDS 1-100 µS/cm 0.60 100 – 1000 µS/cm 0.71 1 – 10 mS/cm 0.81 10 – 200 mS/cm 0.94 La misura dei TDS viene espressa in mg/L oppure g/L a seconda del valore. •...
  • Page 67: Esempio Modalità Data Logger

    P5.1 Invia dati in Accedere a questo menu per selezionare la destinazione di salvataggio dei valori registrati: • Memoria – impostazione di default - I dati registrati vengono salvati nella memoria interna del dispositivo. Questa serie di strumenti può memorizzare fino a 1000 dati in totale e il numero progressivo di registrazione compare a fianco dell’icona •...
  • Page 68: Esempio Modalità Data Logger

    • Esempio modalità Data Logger 2 Esempio stampa manuale di un valore di conducibilità con data dell’ultima taratura. Accedere al menu di setup Data Logger. Nel P5.1 selezionare Stampa. • • Nel P5.2 selezionare Manuale. • Nel P5.3 selezionare Completo. per ritornare in modalità...
  • Page 69 P6.1 / P6.2 / P6.3 / P6.4 / P6.5 (Programmi disponibili solo per Serie 80+) Per utilizzare questi programmi connettere la tastiera esterna alla porta USB identificata “keyboard” (vedere paragrafo “Connessione inputs/outputs”). Utilizzare solamente tastiera fornita a corredo dal produttore, per informazioni contattare il distributore di zona.
  • Page 70: Agitatore Magnetico A Controllo Indipendente

    P6.9 Formato data Accedere a questo menu di setup per modificare il formato della data. • gg/mm/aaaa -default- mm/gg/aaaa • aaaa/mm/gg • P6.10 / P6.11 Impostazione data ed ora Accedere a questi menu di setup per aggiornare data ed ora del dispositivo. P6.12 Unità...
  • Page 71: Software Datalink+ (Per Windows 7/8/Xp/10)

    Software DataLink+ (per Windows 7/8/XP/10) È possibile connettere gli strumenti della Serie 8+ e Serie 80+ al PC e poi utilizzare il software DataLink+ per eseguire download di dati, datalogger direttamente su PC ed esportazioni in excel e pdf complete di intestazioni ed ID. Il software è scaricabile gratuitamente dai siti (prestare attenzione alla corretta installazione dei driver): https://www.giorgiobormac.com/it/download-software_Download.htm •...
  • Page 72: Garanzia

    Garanzia • Il produttore di questo apparecchio offre al consumatore finale dell’apparecchio nuovo la garanzia di tre anni dalla data di acquisto in caso di manutenzione ed uso a regola d’arte. • Durante il periodo di garanzia il produttore riparerà o sostituirà i componenti difettosi. •...
  • Page 74 UM Serie 880 ES rev. 2 30.07.2020...
  • Page 75 Índice Introducción Información de seguridad • Definiciones de palabras y símbolos de advertencia Términos de informe • • Documentos adicionales que proporcionan información de seguridad • Uso según destino Requisitos básicos para un uso seguro • • Uso no autorizado •...
  • Page 76 Calibración con electrodo Ion-selectivo (ISE) • • Medición con electrodo Ion-Selectivo 12. Parámetros de conductividad • ...¿Cómo llegar a la conductividad? • Configuración del menú para el parámetro Conductividad Calibración automática de conductividad • • Calibración manual de conductividad • Hacer una medición de conductividad 13.
  • Page 77: Introducción

    Introducción XS Instruments, con varias décadas de experiencia en electroquímica, ha desarrollado esta nueva línea de medidores de sobremesa, encontrando el equilibrio perfecto entre rendimiento, diseño atractivo y facilidad de uso. La amplia pantalla a color, simple e intuitiva, muestra toda la información necesaria, como la medida, los tampones de pH utilizados para la última calibración (también el usuario), las condiciones del electrodo, las informaciones GLP y el valor guardado.
  • Page 78: Información De Seguridad

    2. Información de seguridad • Definiciones de palabras y símbolos de advertencia La información de seguridad en este manual es muy importante para evitar lesiones personales, daños al instrumento o mal funcionamiento o resultados incorrectos debido al incumplimiento de los mismos. Lea este manual detenidamente en su totalidad y asegúrese de familiarizarse con la herramienta antes de ponerla en funcionamiento y comenzar a trabajar con ella.
  • Page 79: Requisitos Básicos Para Un Uso Seguro

    • Documentos adicionales que proporcionan información de seguridad Los siguientes documentos pueden proporcionar al operador información adicional para trabajar de manera segura con el sistema de medición: Manual de operación para sensores electroquímicos. • • Fichas de datos de seguridad para soluciones tampón y otras soluciones de mantenimiento (por ejemplo, almacenamiento).
  • Page 80: Responsabilidad Del Propietario Del Instrumento

    Para el mantenimiento de los sensores electroquímicos, consulte la documentación presente en su embalaje o póngase en contacto con el proveedor. • Responsabilidad del propietario del instrumento La persona que posee y utiliza la herramienta o autoriza su uso por otras personas es el propietario de la herramienta y, como tal, es responsable de la seguridad de todos los usuarios de la herramienta y de terceros.
  • Page 81: Descripción De Los Instrumentos

    Salinidad Cond8+ - PC8+DHS Cond80+ - PC80+DHS Escala de medida 0,01...100ppt Resistividad Cond8+ - PC8+DHS Cond80+ - PC80+DHS Escala de medida 0….10 MΩ*cm Temperatura Escala de medida -10…110 °C -20…120 °C Resolución / Precisión 0,1 / ± 0,2°C Compensación de temperatura ATC 0…100 °C (NTC30KΩ) y MTC Sistema...
  • Page 82: Teclado

    • Teclado Tecla de información * Tecla de encendido / apagado para encender y apagar el dispositivo Teclas direccionales para desplazarse por los menús y Tecla Meas / Cal para volver administrar el registro al modo de medición y iniciar de datos la calibración Tecla de modo para...
  • Page 83: Encender Y Apagar, Actualizar Fecha, Hora E Idioma

    Conecte la fuente de alimentación a una toma de corriente que no sea difícil de alcanzar. • • El instrumento está equipado con una fuente de alimentación externa que no tiene protección contra la entrada de líquidos, por lo tanto, para su uso es necesario mantener todos los cables eléctricos y conexiones lejos de cualquier líquido y humedad, y no usar el aparato en una habitación húmeda.
  • Page 84: Funciones De Teclas

    • Funciones de teclas Tecla Pulsar Funciones Pulse para encender o apagar el dispositivo. Corto En el modo de medición, pulse para desplazarse por los parámetros: • pH8 y 80+DHS: pH ORP  analógico pH  Ion* COND8 y 80+: Cond  TDS  Sal  Res* •...
  • Page 85: Símbolos E Iconos En La Pantalla

    PC80+DHS panel posterior BNC para célula de conductividad * función disponible solo para Series 80+ USB tipo A para teclado * BNC para electrodos de pH, mV y ISE Conexión a red Conexión para agitador (controlado independientemente) eléctrica a través de fuente de alimentación de 12V RCA para sonda de...
  • Page 86: Menú De Configuración

    pH8+DHS - pH80+DHS COND8+ - COND80+ PC8+DHS - PC80+DHS Conductividad Simultáneo pH/Cond mV/ORP pH analógico Salinidad mV/ORP ISE Ion Selectivo* Resistividad* pH analógico ISE Ion Selectivo* Conductividad Salinidad Resistividad* Ejemplo: pantalla simultánea pH / Cond en PC8 + DHS y PC80 + DHS * parámetros disponibles solo para Series 80+ •...
  • Page 87: Medición De Temperatura Atc - Mtc

    8. Medición de temperatura ATC - MTC • ATC: La medición directa de la temperatura de la muestra de todos los parámetros se lleva a cabo a través de la sonda NT 30KΩ, que puede estar integrada en el electrodo o bien externamente. MTC: Si no hay una sonda de temperatura conectada, la temperatura debe insertarse manualmente, •...
  • Page 88 P1.1 Selección tampón pH • Entre en este menú de configuración para elegir el tipo de tampón para calibrar el electrodo. La Serie 80+ permite que la calibración de pH se realice de 1 a 5 puntos, mientras que la Serie 8+ puede •...
  • Page 89: Calibración Automática De Ph

    • Una vez que la calibración ha expirado, aparecerá el icono, en la pantalla, de todos modos el usuario puede continuar realizando mediciones. Nota: El parámetro "Tiempo desde la última calibración" en el informe de calibración gráfica no se ve afectado por la calibración caducada, solo es informativo. Nota 2: Con el electrodo DHS conectado, la calibración caducada está...
  • Page 90 • Extraiga el electrodo, enjuague con agua destilada y limpie suavemente con papel absorbente. • Presione la tecla para continuar la calibración y sumerja el electrodo en el tampón de pH 4.01. Aparecerán sucesivamente en pantalla todos los valores de pH que el dispositivo es capaz de reconocer. •...
  • Page 91: Calibración Con Valores Manuales

    ATENCIÓN: Antes de continuar con las operaciones de calibración, consulte cuidadosamente las hojas de datos de seguridad de las sustancias involucradas. • Soluciones tampón de calibración. • Solución de mantenimiento para electrodos de pH. Solución de mantenimiento para electrodos de pH. •...
  • Page 92: Hacer Una Medición De Ph

    • Hacer una medición de pH • Entre en el menú de configuración de pH para verificar la calibración y, si es necesario, actualice los parámetros de lectura (consulte el párrafo "Configuración de parámetros de pH"), pulse para volver al modo de medida. •...
  • Page 93: Errores Durante La Calibración

    El electrodo DHS no requiere baterías y si se utiliza en un medidor de pH que no está habilitado para el • reconocimiento de chips, funciona como un electrodo analógico normal. • Errores durante la calibración Error 1: Medida no estable durante la calibración, antes de presionar tecla •...
  • Page 94 La siguiente tabla muestra la estructura del menú de configuración para el parámetro Ion, para cada programa existen diferentes opciones que el usuario puede elegir y el valor predeterminado. Programa Descripción Opciones Predeterminado de fábrica P3.1 Unidad de medida mg/L – g/L – mol/L mg/L P3.2 Seleccione estàndar bajo...
  • Page 95: Calibración Con Electrodo Ion-Selectivo (Ise)

    • Una vez que la calibración ha expirado, aparecerá el ícono en la pantalla, aun así, el usuario puede continuar realizando mediciones. P3.6 ID sensor Ion Acceda e a este menú para asignar un nombre identificador del sensor actualmente en uso. •...
  • Page 96: Parámetros De Conductividad

    Cuando se completa la calibración, el informe de calibración se muestra con CALIBRACIÓN FECHA Y • HORA / TEMPERATURA / UNIDAD DE MEDIDA / ID DEL SENSOR PENDIENTE %, para cada escala. Importante: Efectúe al menos dos puntos de calibración. Si se pulsa la tecla después de la primera calibración, la pantalla muestra el error "No hay suficientes puntos calibrados"...
  • Page 97 k = GxC es expresado en S/cm incluso si las unidades de medida "mS/cm" (1 S/cm -> 10 mS/cm) y “µS/cm” (1 S/cm -> 10 µS/cm) es la usada comúnmente. • Configuración del menú para el parámetro Conductividad • En medida pulsar “ MENU”...
  • Page 98 • Una vez que la calibración ha expirado, aparecerá el ícono en la pantalla, de todos modos, el usuario puede continuar haciendo mediciones. P2.5 Datos última calibración Acceda a este menú para obtener información sobre la última calibración realizada. • “Ver"...
  • Page 99 Los coeficientes de compensación para patrones de calibración a diferentes temperaturas para T ref 25°C se muestran en la siguiente tabla. 0.001 mol/L KCl (147µS) 0.01 mol/L KCl (1413 µS) 0.1 mol/L KCl (12.88 mS) 1.81 1.81 1.78 1.92 1.91 1.88 2.04 2.02...
  • Page 100: Calibración Automática De Conductividad

    • Calibración automática de conductividad Ejemplo de calibración de 1 punto (1413 μS/cm) usando una célula de constante de 1 • En el modo de medición Cond, mantenga presionado durante 3 segundos “ CAL” para entrar en modo de calibración. •...
  • Page 101: Calibración Manual De Conductividad

    • Calibración manual de conductividad Ejemplo para una calibración de 5,00 μS/cm con una célula de constante de 0,1 Entre en el menú de configuración de Cond/TDS y configure en P2.2  0.1 y P2.3  Usuario, pulse la • tecla para volver al modo de medida y active el modo Cond.
  • Page 102: Otras Mediciones Que Se Realizan Con Célula De Conductividad

    La medición de Cond se puede mostrar en dos pantallas diferentes: • Digital • Simultáneos pH/Cond Disponible solo para PC8 + DHS y PC80 +DHS Cell C=1 • Conecte la célula de conductividad al BNC para conductividad del instrumento (gris). •...
  • Page 103: Salinidad

    • Salinidad COND8+, COND80+, PC8+DHS, PC80+DHS Por lo general, la definición que la UNESCO 1978 utiliza para este parámetro, que proporciona el uso de PSU (unidades prácticas de salinidad) como unidad de medida correspondiente a la relación entre la conductividad de una muestra de agua de mar y la de una solución patrón de KCl de 32,4356 gramos de sal disueltos en 1 kg de solución a 15°C.
  • Page 104: Ejemplo 1 Modo Data Logger

    P5.1 Envio de datos a Acceda a este menú para seleccionar la ubicación para guardar los valores grabados: • Memoria - predeterminado de fábrica - Los datos grabados se guardan en la memoria interna del dispositivo. Esta serie de herramientas puede almacenar hasta 1000 datos en total, el número de registro progresivo aparece junto con el icono Imprimir Los datos se imprimen directamente en una impresora externa conectada a través del...
  • Page 105: Ejemplo 2 Modo Datalogger

    Nota 2: la grabación y la impresión en pantalla simultánea de pH/Cond se producen para ambos valores. • Ejemplo 2 Modo Datalogger Ejemplo de la impresión manual de un valor de pH con la fecha de la última calibración Entrar en el modo de configuración del Datalogger. •...
  • Page 106 P6.1 / P6.2 / P6.3 / P6.4 / P6.5 (función disponible solo para Series 80) Para usar estos programas, conecte el teclado externo al puerto USB identificado como "teclado" (consulte el párrafo "Conexión de entrada / salida"). Utilice solo el teclado suministrado por el fabricante; para obtener información, póngase en contacto con el distribuidor local.
  • Page 107: Agitador Magnético Con Control Independiente

    P6.9 Formato de fecha Acceda a este menú de configuración para modificar el formato de fecha. dd/mm/yyyy -predeterminado- • • mm/dd/yyyy • yyyy/mm/dd P6.10 / P6.11 Ajuste de fecha y hora Acceda a este menú de configuración para actualizar la fecha y hora del dispositivo. P6.12 Unidad de temperatura Acceda a este menú...
  • Page 108: Software Datalink+ (Para Windows 7/8/Xp/10)

    17. Software DataLink+ (para Windows 7/8/XP/10) Es posible conectar los dispositivos Series 8+ y Series 80+ a PC y luego usar el software DataLink+ para realizar la descarga de datos, el registro de datos directamente en PC y las exportaciones de archivos Excel y PDF con encabezados e ID Descargue software gratuito en sitios web (prestar atención a los controladores instalados): •...
  • Page 109: Advertencias Y Garantia

    18. Advertencias y Garantia • El fabricante de este aparato ofrece al consumidor final del nuevo aparato una garantía de tres años a partir de la fecha de compra en caso de mantenimiento y uso profesional. • Durante el período de garantía, el fabricante reparará o reemplazará los componentes defectuosos. •...
  • Page 112 UM Serie 880 FR rev. 2 30.07.2020...
  • Page 113 Table des matières Introduction Informations sur la sûreté • Définition des mots et des symboles d’avertissement Termes d’avertissement • • Documents additionnels qui fournissent informations sur la sûreté • Usage selon déstination Obligations essentielles pour une utilisation en sûreté • •...
  • Page 114 Etalonnage avec des électrodes à Ions sélectifs • • Mesure avec des électrodes à Ions-Selectifs Le paramètre Conductivité • …comment obtenez-vous la conductivité ? • Paramètrage pour le paramètre conductivité Etalonnage automatique de la conductivité • • Etalonnage avec des valeurs définies par l’utilisateur •...
  • Page 115: Introduction

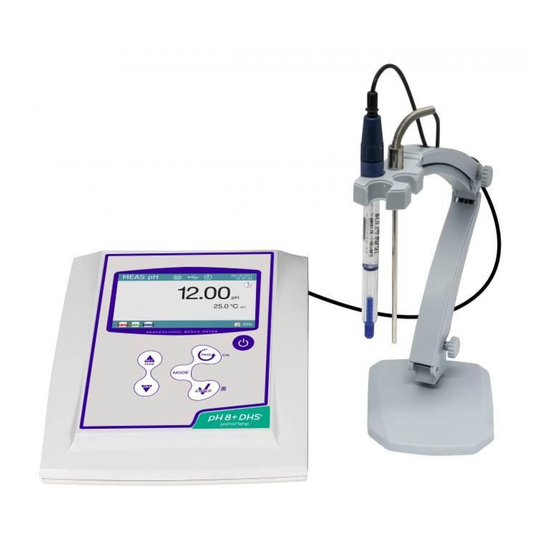
    Introduction Xs Instruments, entreprise avec plusieurs années d'expérience dans le secteur électrochimique, a développé cette nouvelle ligne d'instruments de paillasse produite complètement en Italie, en trouvant l'équilibre parfait entre performance, design attrayant et facilité d'utilisation. Le grand écran à couleur, simple et intuitive, affiche toutes les informations nécessaires comme la mesure, la température, les tampons utilisés pour le dernier étalonnage (personnalisé...
  • Page 116: Informations Sur La Sûreté

    Informations sur la sûreté • Définition des mots et des symboles d’avertissement Les informations sur la sûreté énumérées sur le présent manuel sont vraiment importantes pour prévenir dommages corporels, dommages à l’appareil, défauts de fonctionnement ou résultats incorrects causés par le non-respect de celles-ci.
  • Page 117: Documents Additionnels Qui Fournissent Informations Sur La Sûreté

    • Documents additionnels qui fournissent informations sur la sûreté Les documents suivants peuvent fournir à l’opérateur des informations additionnelles pour travailler en sûreté avec le système de mesure : • Manuel opératif pour les capteurs électrochimiques ; Fiche de sûreté pour les solutions tampons et d’autres solutions de maintenance (par ex. storage) ; •...
  • Page 118: Responsabilité Du Propriétaire Du Dispositif

    • Responsabilité du propriétaire du dispositif La personne qui détient la propriété et qui utilise l’instrument ou autorise l’emploi à des autres opérateurs, est le propriétaire du dispositif et en tant que tel, il est responsable pour la sûreté de tous les utilisateurs ou tiers.
  • Page 119: Description De L'instrument

    Salinité Cond8+ - PC8+DHS Cond80+ - PC80+DHS Plage de mesure 0,01…100ppt Resistivité Cond8+ - PC8+DHS Cond80+ - PC80+DHS Plage de mesure 0…10 MΩ*cm Température Plage de mesure -10…110 °C -20…120 °C Résolution/Précision 0,1 / ± 0,2°C Compensation de la température ATC 0…100 °C (NTC30KΩ) e MTC Systéme...
  • Page 120: Clavier

    • Clavier Touche On-Off pour allumer Touche Information* et éteindre l’instrument Quick manual Touche Meas/Cal pour revenir au mode mesure e pour entrer Touches en mode étalonnage directionnelles pour naviguer dans le menu et gérer Touche Enter/Menu pour confirmer l’enregistrement les valeurs choisies et entrer dans le des données paramètrage à...
  • Page 121: Allumage, Mise Au Jour De La Date, Heure Et Langue, Arrêt

    • Connecter l’adaptateur à une prise de réseau que ne soit pas difficile à joindre. • L’instrument est équipé d’un adaptateur externe que n’a pas une protection pour l’entrée des liquides, pour cette raison il est important de garder tous les câbles électriques et les connexions loins des éventuels liquides et d’humidité...
  • Page 122: Fonctions Des Touches

    • Fonctions des Touches Touches Pression Fonction Appuyer pour allumer ou éteindre le dispositif Bréve En mode mesure, appuyer pour faire défiler les différents paramètres pH80+DHS : pH  ORP  pH analogique Ion* • Cond80+ • : Cond  TDS  Sal  Res* Bréve PC80+DHS •...
  • Page 123: Symboles Et Icônes Sur L'écran

    • Symboles et icônes sur l’écran Symbole Description Symbole Description Numéro de données mémorisées en Critères de stabilité titrage (mesure en mode enregistrement des données contenu) dans la mémoire de l’instrument Enregistrement de données vers Icône de stabilité de mesure imprimante Clavier externe connectè* Mode HOLD, lecture verrouillée...
  • Page 124: Menu De Paramètrage

    La lecture du manuel avant chaque utilisation, elimine le risque résiduel de possibles et significatives erreures dans l’interpretation des données sur l’écran. Il est récommandé que l’opérateur lise attentivement le manuel pour utiliser correctement le dispositif et comprendre en manière optimale les informations sur l’écran.
  • Page 125: Paramètre Ph

    Paramètre pH pH8+DHS, pH80+DHS, PC8+DHS, PC80+DHS Sur cette série d’appareils, vous pouvez utiliser des capteurs de pH avec sonde de température intégrée ou connecter deux capteurs différents. L'électrode de pH utilise un connecteur de type BNC alors que la sonde de température utilise un connecteur RCA / CINCH. L'instrument peut également reconnaître le capteur DHS, une électrode innovante capable de stocker les données d'étalonnage et que peut ensuite être utilisé...
  • Page 126 P1.3 Données du dernier étalonnage pH Accéder à ce menu pour obtenir des informations sur le dernier étalonnage effectué. “Visualiser” (configuration par défaut), un rapport sur l'étalonnage en cours s'affiche contenant les • informations suivantes : DATE D’ETALONNAGE / HEURE D’ETALONNAGE/ TEMPERATURE / MODELE DHS S’Il EST PRESENT / OFFSET / SLOPE % pour chaque plage de mesure.
  • Page 127: Etalonnage Automatique De Ph

    • Utiliser les touches pour corriger la valeur de décalage de température et confirmer en appuyant sur la touche P1.8 Restaurer les paramètres usine par défaut Si l'instrument ne fonctionne pas correctement ou si un étalonnage incorrect est effectué, confirmer Oui avec pour faire revenir tous les paramètres de pH aux paramètres par défaut.
  • Page 128: Etalonnage Avec Des Valeurs Définies Par L'utilisateur

    Appuyer sur pour continuer l'étalonnage et plonger l'électrode • dans le tampon pH 10.01. Le becher exécute toutes les valeurs de pH que l'instrument peut reconnaître. Lorsque le becher se stabilise à pH 10,01 et que l'icône apparaît, • confirmer la valeur en appuyant sur Le passage d'un pH acide à...
  • Page 129: Effectuer Une Misure Du Ph

    Rincez l'électrode avec de l'eau distillée et sécher-la doucement avec du papier absorbant. • Appuyez sur et plongez l'électrode dans la première solution tampon (ex. pH 6,79). • Attendre que la valeur du pH se stabilise à l'écran, lorsque l'icône apparaît, utiliser les touches pour ajuster la valeur en entrant la valeur de tampon (ex.
  • Page 130: Capteurs Avec Technologie Dhs

    Connecter l'électrode au BNC pour pH / mV / ORP de l'instrument (jaune / bleu). • • Si l'utilisateur n'utilise pas une électrode avec sonde de température intégrée ou une sonde externe NTC 30KΩ, une actualisation manuelle de la valeur de température (MTC) est raccomandée. •...
  • Page 131: Mesure Avec Des Électrodes À Ions Sélectifs (Ise/Ion)

    Connecter l'électrode de mesure Redox au BNC pour le pH / mV / ORP (jaune / bleu) et insérer le • capteur dans l'échantillon à analyser. • Prendre la mesure seulement lorsque l'icône de stabilité apparaît. • La mesure du potentiel Redox se réalise en mV et ne nécessite pas d'étalonnage du capteur. Pour vérifier la précision de la mesure, il est conseillé...
  • Page 132: Etalonnage Avec Des Électrodes À Ions Sélectifs

    L'appareil peut accepter un minimum de 2 et un maximum de 5 points d'étalonnage, lorsqu’il termine le deuxième point, l'utilisateur peut arrêter l’étalonnage en appuyant , les points exécutés jusqu'à ce point sont sauvegardés. P3.3 Régler les critères de stabilité Accéder à...
  • Page 133: Mesure Avec Des Électrodes À Ions-Selectifs

    • Appuyez sur pour revenir au mode mesure et sur pour se passer à la page MEAS Ion. • Maintenez le bouton " CAL" enfoncé pendant 3 secondes pour accéder au mode étalonnage. • Rincer l'électrode avec de l'eau distillée et sècher-la doucement avec du papier absorbant Appuyer sur et immerger l'électrode dans le standard le plus...
  • Page 134: Le Paramètre Conductivité

    Lorsque la mesure est stabilisée, la mesure en mV est remplacée par la concentration de l'analyte avec • l'unité de mesure choisie par l'utilisateur. Important : Si l'appareil n'est pas étalonné, seulement des valeurs en mV seront affichés en mode lecture. Note : Si vous utilisez le compte à...
  • Page 135 P2.2 Constante de cellule Choisir la bonne cellule de conductivité est un facteur décisif pour obtenir des mesures précises et reproductibles. L'un des paramètres fondamentaux à considérer est d'utiliser un capteur avec la bonne constante de cellule par rapport à la solution à analyser. Le tableau suivant établit la relation entre la constante de cellule du capteur avec la plage de mesure et la norme avec laquelle il est préférable d’étalonner.
  • Page 136 P2.6 Température de référence pour Cond. La mesure de la conductivité dépend fortement de la température. Si la température d'un échantillon augmente, sa viscosité diminue et ceci entraîne une mobilité accrue des ions et de la conductivité mesurée, malgré une concentration constante. Pour chaque mesure de conductivité, la température à...
  • Page 137: Etalonnage Automatique De La Conductivité

    Le coefficient de température dans l'eau ultra-pure varie considérablement. La raison principale de ceci est que l'auto-ionisation des molécules d'eau dépend de la température que de la conductivité des autres ions. Note : Les mesures de faible conductivité (<10 μS / cm) sont fortement influencées par le dioxyde de carbone atmosphérique.
  • Page 138: Etalonnage Avec Des Valeurs Définies Par L'utilisateur

    Pour étalonner l'instrument sur plusieurs points, Une fois vous revenez au mode mesure, répétez • toutes les étapes d'étalonnage. Le bécher relatif au nouveau point étalonné s’affiche à còtè de celle précédent. Il est recommandé de commencer l'étalonnage à partir de la solution étalon moins concentrée, puis de procéder en ordre de concentration croissante.
  • Page 139: Effectuer Une Mesure De La Conductivité

    U5.00 • Le bécher relatif à l'étalonnage apparaît en bas à gauche, la valeur est précédée de la lettre "U" indiquant que la valeur a été saisie manuellement. Cell C=0.1 U 5.00 U 5.00 Pour chaque constante de cellule (P2.2), l'instrument mémorise l'étalonnage afin que l'utilisateur •...
  • Page 140: Autres Mesures Effectuées Avec La Cellule De Cond

    Le capteur de conductivité ne nécessite pas beaucoup d'entretien, l'essentiel est de s'assurer que la • cellule est propre. Le capteur doit être rincé avec de l'eau distillée en abondance après chaque analyse ; s'il a été utilisé avec des échantillons insolubles dans l'eau, avant de le faire, nettoyez-le en l'immergeant dans de l'éthanol ou de l'acétone.
  • Page 141: Fonctions Enregistrement Des Données Et Impression

    Fonctions enregistrement des données et impression Ces séries des dispositifs ont la capacité d'enregistrer des valeurs dans la mémoire interne ou dans un PC ou de les imprimer directement dans différents formats en utilisant une imprimante externe connectée via Le port aproprié RS232. Les enregistrements peuvent être acquis manuellement ou à des intervalles prédéfinis.
  • Page 142: Exemple Mode Enregistrement Des Données

    P5.3 Format d’impression. Accéder à ce menu pour sélectionner les informations à imprimer dans l’en-tête de l’enregistrement des données à travers l’imprimante. • Pour La série 8+ : Simple : numéro progressif de sauvegarde / date et • heure / valeur, unité de mesure et température. •...
  • Page 143: Rappel Des Données Sauvegardées Dans La Mémoire De L'instrument

    • Rappel des données sauvegardées dans la mémoire de l’instrument En mode de mesure, dans le paramétre désiré, appuyer sur pour visualiser sur l’écran les données • mémorisées pour ce paramétre spécifique. A l’aide des touches , naviguer entre les différentes pages des données. •...
  • Page 144 P6.3 Nom de société : Max 15 caractères, apparait seulement à l’en-tête de l’impression complete et • GLP. P6.4 ID capteur pH : Nominative du capteur pH ; max 8 caractéres, apparait à l’en-tête de l’impression • compléte et GLP (BPL) sur l’écran à-côté de l’état d’étalonnage de l’électrode . P6.5 : ID capteur Cond : Nominative du capteur Cond ;...
  • Page 145: Agitateur Magnétique À Commande Indépendante

    P6.12 Unité de la température Accéder à ce menu de paramètrage pour sélectionner l’unité de mesure de la température à utiliser. °C -par défaut- • • °F P6.13 Sélectionnez la langue Accéder à ce menu de paramètrage pour sélectionner la langue de l’instrument. English -par défaut- •...
  • Page 146: Logiciel Datalink+ (Pour Windows 7/8/Xp/10)

    Logiciel DataLink+ (pour Windows 7/8/XP/10) Il est possible de connecter les instruments de la série 8+ et 80+ à l’ordinateur et puis d’utiliser le logiciel Datalink+ pour exécuter des téléchargements des données, des enregistrements des données directement sur l’ordinateur et des exportations vers excel et pdf avec intestations et ID. Le logiciel peut être téléchargé gratuitement aux adresses suivantes (Faire attention particuliére à...
  • Page 147: Garantie

    Garantie Le producteur de cet appareil offre à l’utilisateur final de l’appareil neuf une garantie de 3 ans à partir • de la date d’achat en cas d’entretien et d’une bonne utilisation. Pendant la période de garantie le producteur réparera ou remplacera les composants défectueux. •...
  • Page 150 UM Serie 880 DE rev. 2 30.07.2020...
  • Page 151 Inhaltsverzeichnis Einleitung Sicherheitsinformationen • Definitionen von Warnwörtern und Symbolen • Meldungsbegriffe Zusätzliche Dokumente mit Sicherheitsinformationen • • Verwendung je nach dem Bestimmungsort der Produkte • Grundvoraussetzungen für eine sichere Verwendung Nicht autorisierte Verwendung • • Gerätewartung • Verantwortung des Inhabers des Geräts Geräteeigenschaften •...
  • Page 152 • Kalibrierung mit ionenselektiven Elektroden Messung mit ionenselektiven Elektroden • Parameter für den Leitwert … wie kommt man zur Leitfähigkeit? • Setup für den Leitfähigkeit-Parameter • • Automatische Kalibrierung des Leitwerts • Manuelle Kalibrierung Messung des Leitwerts • Weitere Messungen mit Leitfähigkeit-Elektrode Parameter TDS •...
  • Page 153: Einleitung

    Einleitung XS Instruments, weltweit als führende Marke auf dem Gebiet der elektrochemischen Messungen anerkannt, hat diese neue Linie professioneller Tischmessgeräte entwickelt, die vollständig in Italien hergestellt wurde und das perfekte Gleichgewicht zwischen Leistung, attraktivem Design und Benutzerfreundlichkeit findet. Das große einfache und intuitive Farbdisplay zeigt alle notwendigen Informationen wie die Messung, die Temperatur, die für die letzte Kalibrierung verwendeten Puffer (personalisiert auch), die Bedingungen von Elektroden, GLP-Informationen und gespeicherte Daten.
  • Page 154: Sicherheitsinformationen

    Sicherheitsinformationen • Definitionen von Warnwörtern und Symbolen Die Sicherheitsinformationen in diesem Handbuch sind äußerst wichtig, um Verletzungen, Schäden am Instrument oder Fehlfunktionen oder falsche Ergebnisse aufgrund der Nichtbeachtung zu vermeiden. Lesen Sie diese Bedienungsanleitungen vollständig durch und machen Sie sich mit dem Produkt vertraut, bevor Sie es in Betrieb nehmen und mit der Arbeit beginnen.
  • Page 155: Zusätzliche Dokumente Mit Sicherheitsinformationen

    • Zusätzliche Dokumente mit Sicherheitsinformationen Die folgenden Dokumente können dem Bediener zusätzliche Informationen zur sicheren Arbeit mit dem Messsystem liefern: • Bedienungsanleitung für elektrochemische Sensoren; • Sicherheitsdatenblätter für Pufferlösungen und weitere Wartungslösungen (z. B. Aufbewahrungslosung); Spezifische Hinweise zur Produktsicherheit. • •...
  • Page 156: Verantwortung Des Inhabers Des Geräts

    Es wird empfohlen, nur Originalersatzteile zu verwenden. Informationen erhalten Sie von Ihrem örtlichen Händler. Die Verwendung von nicht originalen Ersatzteilen kann zu Fehlfunktionen oder dauerhaften Schäden am Instrument führen. Darüber hinaus kann die Verwendung von Ersatzteilen, die vom Lieferanten nicht garantiert werden, für den Benutzer selbst gefährlich sein. Informationen zur Wartung der elektrochemischen Sensoren finden Sie in der Dokumentation in der Verpackung oder wenden Sie sich an den Lieferanten.
  • Page 157: Beschreibung Des Geräts

    Referenztemperatur 15…30 °C Temperatur-Koeffizient 0,00…10,00 %/°C 0,00…10,00 %/°C ultrareines Wasser Cond8+ - PC8+DHS Cond80+ - PC80+DHS Messbereich/ TDS-Faktor 0,1mg/L…100 g/L / 0,40…1,00 0,1mg/L…500 g/L / 0,40…1,00 Salzgehalt Cond8+ - PC8+DHS Cond80+ - PC80+DHS Messbereich 0,01…100ppt Widerstand Cond8+ - PC8+DHS Cond80+ - PC80+DHS Messbereich 1…10 MΩ*cm Temperatur...
  • Page 158: Tastenfeld

    • Tastenfeld On-Off Taste um das Information Taste* Gerät ein-und auszuschalten Quick Manual Meas / Cal Taste um in den Richtungstaste um das Messmodus zurückzukehren Menü zu scrollen und und die Kalibrierung zu starten die Datenregistrierung zu leiten Tasto Enter / Menu um die gewählte Werte zu bestätigen und das Setup Mode Taste um die aus dem Messmodus aufzurufen...
  • Page 159: Ein-Und Ausschalten Des Geräts, Datum, Uhrzeit Und Sprache

    • Schließen Sie das Netzteil an eine nicht schwer erreichbare Netzsteckdose an. Das Instrument ist mit einer externen Stromversorgung ausgestattet, die keinen Schutz gegen das • Eindringen von Flüssigkeiten bietet. Daher ist es für die Verwendung erforderlich, alle elektrischen Kabel und Anschlüsse von Flüssigkeiten und Feuchtigkeit fernzuhalten und das Gerät nicht in einem feuchten Raum wie ein Badezimmer oder eine Waschküche zu verwenden.
  • Page 160: Tastenfunktionen

    • Tastenfunktionen Taste Druck Funktion Drücken Sie diese Taste, um es ein- oder auszuschalten. Kurz In der Messmodalität: drücken, um die Parameters zu scrollen: pH80+DHS : pH  ORP  pH analog  Ion* • • Cond80+: Cond  TDS  Sal  Res* Kurz PC80+DHS: pH/Cond ...
  • Page 161: Symbole Und Icons Auf Dem Display

    • Symbole und Icons auf dem Display Symbol Beschreibung Symbol Beschreibung Gespeicherte Anzahl von Daten in der Stabilitätskriterium Datenlogger-Modalität auf dem (dauernde Messung) Instrumentalspeicher Datenlogger am Drucker eingestellt Icon von Messstabilität Externe Tastatur verbunden* HOLD-Modalität, blockiertes Ablesung Datenlogger mit Datenübertragung Kein Benutzer-Passwort auf PC Datenlogger mit Datenübertagung auf...
  • Page 162: Setup-Menü

    Durch das Lesen dieses Handbuchs vor jedem Gebrauch wird das verblendende Risiko möglicher und erheblicher Fehler bei der Interpretation der Daten auf dem Display beseitigt. Es wird daher empfohlen, dass der Benutzer das Handbuch sorgfältig liest, um das Instrument richtig zu verwenden und die Informationen auf dem Display richtig zu interpretieren.
  • Page 163: Parameter Ph-Wert

    Parameter pH-Wert pH8+DHS, pH80+DHS, PC8+DHS, PC80+DHS Mit diesem Gerät ist es möglich, pH-Elektroden mit integriertem Temperatursensor zu verwenden oder es können 2 separate Sensoren angeschlossen werden. Die pH-Elektrode verwendet einen gelben/blauen BNC- Anschluss, während di Temperatursonde einen grünen RCA/CINCH Temp/pH-Stecker benötigt. Das Instrument kann auch den DHS-Sensor erkennen, eine innovative Elektrode, die Kalibrierungsdaten speichern und dann sofort auf jedem aktivierten Gerät verwendet werden kann.
  • Page 164 P1.3 Letzte Kalibrierungsdaten für pH-Wert Benutzen Sie dieses Menü, um die Informationen auf die letzte durchgeführte Kalibrierung zu bekommen. • “Ansicht” -default-, man ansieht auf dem Display einen Bericht mit den folgenden Informationen bezüglich der verwendeten Kalibrierung: KALIBRIERUNGSDATUM / KALIBRIERUNGSUHRZEIT / TEMPERATUR / DHS-MODELL (wenn es anwesend ist) / OFFSET / SLOPE % für jeden Bereich.
  • Page 165: Automatische Kalibrierung Des Ph-Werts

    Verwenden Sie die Tasten , um den Temperaturversatzwert zu korrigieren und mit der • Taste zu bestätigen. P1.8 Zurücksetzen der Werkseinstellungen Wenn das Instrument nicht optimal funktioniert oder falsche Einstellungen vorgenommen wurden, bestätigen Sie Ja mit der Taste um alle Parameter des pH-Menüs auf die Standardeinstellungen zurücksetzen.
  • Page 166: Die Manuelle Kalibrierung

    • Wenn das Becker bei pH 10.01 sich stabilisiert und erscheint das Symbol , bestätigen Sie mit der Taste Der Übergang vom saurem pH-Wert bis zum alkalischen pH-Wert kann einige Sekunden dauern, um die Stabilität zu erreichen. Auf dem Display blinkt der gemessene Wert und dann neben dem Becker pH 7.00 und pH 4.01 erscheint das Symbol pH 10.01 10.01 ;...
  • Page 167: Die Messung Des Ph-Werts

    • Warten Sie, bis sich der pH-Wert auf dem Display stabilisiert hat. Wenn das Symbol angezeigt wird, benutzen Sie die Richtungstasten , indem Sie den richtigen Wert eingeben (z.B. pH 6.79). Hinweis: Überprüfen Sie den Pufferwert entsprechend der Temperatur. Wenn das Symbol wieder angezeigt wird, drücken Sie die Taste •...
  • Page 168: Dhs-Sensoren

    • Entnehmen Sie die Elektrode aus der Kappe mit Aufbewahrungslösung, spülen Sie diese mit destilliertem Wasser, trocknen Sie diese vorsichtig mit saugfähigen Papiertüchern. • Kontrollieren Sie die Anwesenheit von Luftblase in der Membranbirne und entfernen Sie sie dank Vertikalschütteln (wie für das klinische Thermometer). Wenn es anwesend ist, öffnen Sie die seitliche Kappe.
  • Page 169: Messung Mit Ionenselektiven Elektroden (Ise/Ion)

    • Schlieβen Sie die Elektrode für Redox an BNC für pH/mV/ORP von dem Gerät (gelb/himmelblau) und fügen Sie den Sensor in die zur Analysierung Probe ein. • Wenn das Symbol auf dem Display angezeigt wird, können Sie den mV-Messwert ablesen. Der mV-Messwert erfordert keine Kalibrierung.
  • Page 170: Kalibrierung Mit Ionenselektiven Elektroden

    Das Gerät kann mindestens 2 bis maximal 5 Punkte von Kalibrierung annehmen; nach dem zweiten Kalibrierungspunkt kann der Benutzer die Kalibrierung beim Drücken die Taste abbrechen, indem er die bis zu diesem Zeitpunkt durchgeführten Punkte speichert. P3.3 Stabilitätskriterien Treten Sie zu diesem Menü, um die Stabilitätskriterien auszuwählen, die Sie in der Kalibrierung und Messung verwenden wollen.
  • Page 171: Messung Mit Ionenselektiven Elektroden

    Drücken Sie , um zum Messmodus zurückzukehren und scrollen mit , um zur Seite von MEAS • Ion sich zubewegen. Halten Sie die Taste “ CAL” für 3 Sekunden gedrückt, um zur Kalibrierungsmodalität zuzutreten. • Spülen Sie die Elektrode mit destilliertem Wasser , trocknen Sie diese vorsichtig mit saugfähigen •...
  • Page 172: Parameter Für Den Leitwert

    • Verbinden Sie richtig den Sensor ISE der Stecker pH/mV/ORP, spülen Sie ihn mit destilliertem Wasser, und trocknen Sie diese vorsichtig mit saugfähigen Papiertüchern. • Auf dem Display erscheint die Messung in mV, bis wann man nicht die Stabilität erreicht wird. Wenn die Messung in mV sich stabilisiert, wird sie von der Analytkonzentration mit der Maβeinheit •...
  • Page 173 Die folgende Tabelle zeigt die Setup-Menüstruktur für den COND/TDS-Parameter. Für jedes Programm gibt es die Optionen, die der Benutzer auswählen kann, und den Standardwert: Programm Beschreibung Option Werkseinstellungen P2.2 Zellkonstante 0.1 - 1 - 10 P2.3 Kalibrierungslösungen Standard / Custom Standard P2.4 Kalibrierungsfrist der Leitfähigkeit...
  • Page 174 P2.5 Letzte Kalibrierungsdaten der Leitfähigkeit Treten Sie zu diesem Menü zu, um Informationen auf die letzte Kalibrierung zu erlangen. Wählen Sie “Ansicht” aus und drücken Sie , um der Kalibrierungsbericht auf dem Display • anzusehen. • Schlieβen ein Drucker an die Tür RS232 an und wählen Sie „Ausdrücken“, um den Kalibrierungsbericht zu drucken.
  • Page 175: Automatische Kalibrierung Des Leitwerts

    Um den Kalibrierungskoeffizienten einer bestimmten Lösung zu bestimmen, wird die folgende Formel ���� − ���� �������� = 100���� angewendet: ����2 ����1 ���� ( ���� − 25 ) − ���� (���� − 25) ����1 ����2 Wobei tc der zu berechnende Temperaturkoeffizient ist, C und C die Leitfähigkeit bei Temperatur 1 (T1) und bei Temperatur 2 (T2).
  • Page 176 Drücken Sie , und tauchen Sie diese in das Standard 1413 µS/cm, • kontrollieren Sie die Anwesenheit von Luftblase in der Zelle und entfernen Sie sie dank Vertikalschütteln. Im Becker fließen alle Leitfähigkeitswerte, die das Gerät erkennen kann. • Warten Sie darauf, dass der Wert 1413 stabil wird, und wenn es das Symbol erscheint, bestätigen Sie mit •...
  • Page 177: Manuelle Kalibrierung

    • Manuelle Kalibrierung Beispiel: Kalibrierung auf 5.00 µS/cm mit Zellkonstante 0.1 • Rufen Sie das Setup-Menü für Cond/TDS auf und wählen Sie in P2.2  0.1 und in P2.3  Custom, drücken Sie um zur Messung zurückzukehren und in den Cond-Modus zu wechseln. Halten Sie für 3 Sekunde die Taste “...
  • Page 178: Messung Des Leitwerts

    • Messung des Leitwerts Treten Sie zum Leitfähigkeitsmenü zu, um die Kalibrierung zu prüfen und eventuell vertagen Sie die • Parameter von Ablesung (sehen Sie Paragraf „Setup für Parameter Cond/TDS“), drücken Sie , um zur Messmodalität zurückzukehren. Drücken Sie , um verschiedene Bildschirm bis MEAS Cond zu scrollen (sehen Sie Paragraph •...
  • Page 179: Salzgehalt

    Das Folgende sind die TDS-Faktoren in Bezug auf den Leitfähigkeitswert: Leitfähigkeit der Lösung TDS-Faktor 1-100 µS/cm 0.60 100 – 1000 µS/cm 0.71 1 – 10 mS/cm 0.81 10 – 200 mS/cm 0.94 Die TDS-Messung wird je nach Wert in mg/l oder g/l ausgedrückt. •...
  • Page 180: Beispiel 1- Betrieb Vom Datenlogger

    Die folgende Tabelle zeigt die Setup-Menüstruktur für den Datenlogger-Modus. Für jedes Programm gibt es die Optionen, die der Benutzer auswählen kann, und den Standardwert. Programm Beschreibung Optionen Werkseinstellungen P5.1 Sende Daten an Speicher – Drucker – PC Speicher P5.2 Registrierungsart Manuell –...
  • Page 181: Beispiel 2- Betrieb Vom Datenlogger

    Drücken Sie um zum Messmodus zurückzukehren, und bewegen Sie sich auf den Bildschirm MEAS • pH. Im oberen Bereich des Displays befinden Sie sich die Symbole - Speichern im internen Speicher - und - automatisches Speichern in einer vorgegebenen Frequenz-. Drücken Sie , um die Registrierung zu beginnen.
  • Page 182 Die folgende Tabelle zeigt die Setup-Menüstruktur für die allgemeinen Einstellungen des Instruments. Für jedes Programm gibt es die Optionen, die der Benutzer auswählen kann, und den Standardwert. Programm Beschreibung Option Werkseinstellungen P6.1* Proben ID Keine P6.2* Anwender ID Keine P6.3* Firmen Name Keine P6.4*...
  • Page 183: Magnetrührer Mit Unabhängiger Kontrolle

    • Um das Passwort zu deaktivieren, fügen Sie als neues Passwort “0 0 0 0” ein. Für Serie 80+: • Das Passwort mit 4 alphanumerischen Zeichen kann mit externem Tastenfeld eingefügt werden. Um das Passwort zu deaktivieren, drücken Sie “ENTER” als neues Passwort mit externem Tastenfeld. •...
  • Page 184: Software Datalink+ (Für Windows 7/8/Xp/10)

    Drücken Sie , um den Magnetrührer einzuschalten; das erste grüne LED-Licht aufleuchtet. • • Um der Motor zu aktivieren, drücken Sie einmal die Taste , verwenden Sie die Tasten , um die Geschwindigkeit zu regeln. Die Rührgeschwindigkeit ist in 15 Stufen einstellbar; alle 5 Stufen leuchtet ein grünes LED-Licht.
  • Page 185: Funktionen

    • Tabelle/Diagramm: Ansicht der erfassten Daten. Die Grafiken sind nach Parametern unterteilt und können separat gedruckt werden. Funktionen Ansicht der erfassten Daten in Tabelle oder Grafik Reproduktion des Displays für Echtzeitmessungen Kalibrierungsdaten für jeden Parameter Automatischer Datenlogger Verbindungsdaten und Instrumenteninformationen UM Serie 880 DE rev.
  • Page 186: Garantie

    Garantie • Der Hersteller dieses Geräts bietet dem Endverbraucher des neuen Geräts eine dreijährige Garantie ab Kaufdatum bei Wartung und fachmännischer Verwendung. • Während der Garantiezeit repariert oder ersetzt der Hersteller defekte Komponenten. Diese Garantie gilt nur für das elektronische Teil und gilt nicht, wenn das Produkt beschädigt, falsch •...

Table des Matières