Janome 49018 Manuel D'instructions
Table des Matières
Liens rapides
Table des Matières
Dépannage

Manuels Connexes pour Janome 49018


Sommaire des Matières pour Janome 49018
- Page 1 Instruction book Libro de instrucciones Manuel d’instructions...
-
Page 2: Important Safety Instructions
IMPORTANT SAFETY INSTRUCTIONS When using an electrical appliance, basic safety precautions should always be followed, including the following: Read all instructions before using this appliance. DANGER — To reduce the risk of electric shock: 1. An appliance should never be left unattended when plugged in. Always unplug this sewing machine from the electric outlet immediately after using and before cleaning. -
Page 3: Instrucciones Importantes De Seguridad
INSTRUCCIONES IMPORTANTES DE SEGURIDAD Cuando se utiliza un aparato eléctrico es necesario tomar ciertas precauciones básicas de seguridad, como las siguientes: Lea todas las instrucciones antes de utilizar este aparato. PELIGRO — Para reducir el riesgo de choque eléctrico: 1. No deje nunca el aparato sin vigilancia mientras esté enchufado. Desenchufe siempre la máquina de la toma eléctri- inmediatamente después de utilizarla y antes de limpiarla. -
Page 4: Consignes Importantes De Sécurité
CONSIGNES IMPORTANTES DE SÉCURITÉ Pour utiliser un appareil électrique, il faut toujours respecter les consignes de sécurité fondamentales, notamment les consignes suivantes: Avant d’utiliser cet appareil, lisez toutes ces instructions. DANGER — Pour réduire les risques d’électrocution. 1. Il ne faut jamais laisser un appareil sans surveillance lorsqu’il est branché. Il faut toujours débranchercette machine à... -
Page 5: Table Des Matières
TABLE OF CONTENTS • Fabric preparation ............46 SECTION I. NAMES OF PARTS • To sew ..............46~48 Cabinets and Sewing Machine Carrying Case ....2 Names of Parts ..............2 SECTION IV. ZIGZAG STITCH SEWING Available Accessories and Attachments ......4 Zigzag Stitch ............. - Page 6 INDICE SECCION I. NOMBRE DE LAS PARTES • Preparación de la tela ............. 47 • Para coser ................ 47~49 Gabinete y estuche portátil ............3 Nombre de las partes ..............3 SECCION IV. PUNTADAS DE ZIG-ZAG Accesorios y refacciones disponibles ......... 5 Puntada de zig-zag .............
- Page 7 TABLE DES MATIÈRES PARTIE I. IDENTIFICATION DES PIÈCES DE LA • Pour coudre ..............47~49 MACHINE PARTIE IV. POINTS ZIG-ZAG Des meubles et des boîtiers portables ........3 Zig-zag simple ..............51~53 Identification des composants ............. 3 • Réglage de la largeur de point ..........51 Accessoires et pièces disponibles ..........
-
Page 8: Section I. Names Of Parts
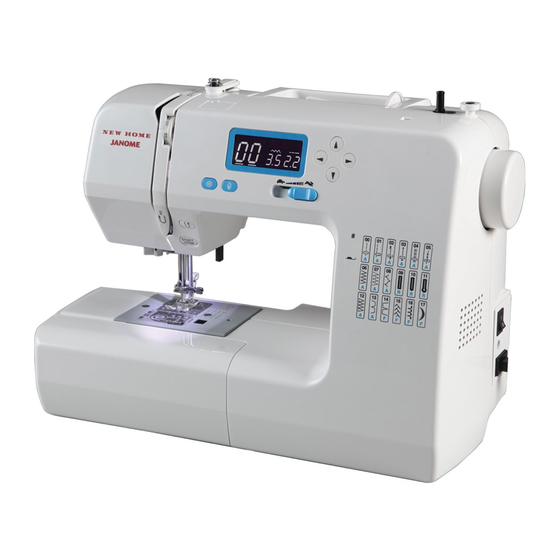
SECTION I. NAMES OF PARTS Names of Parts q Extension table (Accessory box) w Needle plate e Needle threader r Thread cutter t Face cover y Thread take-up lever u Thread tension dial i Spool pin o Large spool holder !0 Bobbin winder spindle !1 Bobbin winder stopper !2 Hole for additional spool pin... -
Page 9: Seccion I. Nombre De Las Partes
SECCION I. NOMBRE DE LAS PARTES PARTIE I. IDENTIFICATION DES PIÉCES DE LA MACHINE Nombre de las partes Identification des composants q Tabla de ampliación (caja de accesorios) q Table d’extension (boîte de rangement d’accessoires) w Placa de agujas w Plaque à aiguilles e Enhebrador de agujas e Enfile-aiguille r Cortahilos... -
Page 10: Accessories And Attachments
Accessories and Attachments Ref. No. Description Bobbin Needle set Zigzag foot: A (set on the machine) Satin stitch foot: F Zipper foot: E Automatic buttonhole foot: R Seam ripper/Buttonhole opener Screwdriver Small spool holder Spool stand Spool pin felt Additional spool pin Lint brush Foot control Power supply cord... -
Page 11: Accesorios Y Refacciones Disponibles
Accesorios y refacciones Accessoires et pièces ó i Désignation N°de réf Canillas Canettes Juego de agujas Jeu d’aiguilles Prensatelas para zig-zag: A (puesto en la máquina) Pied zig-zag: A (placé sur la machine) Prensatelas para puntada decorativa: F Pied pour point passé: F Prensatelas para cremalleras: E Pied à... -
Page 12: Section Ii. Getting Ready To Sew Connecting Machine To Power Supply
SECTION II. GETTING READY TO SEW Connecting Machine to Power Supply • To use the foot control Turn off the power switch q. Insert the foot control plug w into the foot control jack e. Insert the machine plug r into the power inlet t. Insert the power supply plug y into the wall outlet u. -
Page 13: Seccion Ii. Preparacion De La Maquina Para Coser
SECCION II. PREPARACION DE LA MAQUINA PARTIE II. PRÉPAREZ-VOUS À COUDRE PARA COSER Conexión a la fuente de alimentación Branchement de la machine sur l’alimentation • Uso del pedal électrique Apague la máquina q. • Utilisation de la pédale Introduzca el enchufe del pedal w en el conector del pedale. Mettez l’interrupteur d’alimentation q en position d’arrêt. -
Page 14: For Your Safety
For Your Safety * While in operation, always keep your eyes on the sewing area. Do not touch any moving parts such as the thread take-up lever, handwheel or needle. * Always turn off the power switch and unplug from the power supply: - When leaving the machine unattended. -
Page 15: Para Su Seguridad
Para su seguridad Consignes de sécurité * Cuando cosa, no pierda de vista el área de costura. No toque * Pendant la couture, gardez toujours les yeux sur la couture en ninguna pieza en movimiento tal como tirahilos, volante o aguja. cours et ne touchez aucune des parties mobiles, telles que le * Apague siempre la máquina con el interruptor de corriente y levier releveur du fil, le volant ou l’aiguille. -
Page 16: Machine Operating Buttons
Machine Operating Buttons q q q q q Start/Stop Button Lower the presser foot lifter. Press the start/stop button q to start the machine. The machine starts running slowly for the first few stitches; it then runs at the speed set by the speed control slider. -
Page 17: Botones De La Máquina
Botones de la máquina Touches de commande de la machine q q q q q Botón de inicio/parada q q q q q Touche de démarrage (start/stop) Abaissez le relève-pied. Baje el alzador del pie prensatelas. Appuyez sur la touche de démarrage (start/stop) q pour Presione el botón de inicio/parada q para poner en marcha la démarrer la machine. -
Page 18: Speed Control Lever
t t t t t Cursor Buttons Use these buttons to move the cursor u. Press button to move the cursor to right. Press button to move the cursor to left. y y y y y Value Set Buttons Use these buttons to change the set value. Move the cursor under the digit you would like to change. -
Page 19: Palanca De Control De Velocidad
t t t t t Botones del cursor t t t t t Touches du curseur Use estos botones para mover el cursor u. Utilisez ces touches pour déplacer le curseur u. Presione el botón para mover el cursor a la derecha. Appuyez sur la touche pour déplacer le curseur vers la droite. -
Page 20: Presser Foot Lifter
Presser Foot Lifter The presser foot lifter raises and lowers the presser foot. You can raise the foot about 1/4˝ (0.6 cm) higher than the normal up position for easy removal of the presser foot, or to help you place heavy fabric under the foot. q Lowered position w Normal up position e Extra up position... -
Page 21: Palanca De Elevación Del Prensatelas
Relève-pied presseur Palanca de elevación del prensatelas Le releveur de pied permet de relever et d’abaisser le pied El alzador del prensatelas sube y baja el prensatelas presseur. Puede subirlo hasta unos 0.6 cm por encima de la posición Vous pouvez le relever à environ 0,6 cm au-dessus de la position normal para facilitar el desmontaje del prensatelas o para colocar relevée normale pour pouvoir retirer facilement le pied presseur, tejidos pesados bajo él. -
Page 22: Changing The Needle
Changing the Needle q Needle clamp screw w Needle clamp e Flat side r Gap z Turn off the power switch. Raise the needle to its highest position by turning the handwheel counterclockwise, toward you, and lowering the presser foot. Loosen the needle clamp screw q by turning it counterclockwise. -
Page 23: Cambio De Aguja
Cambio de aguja Changer l’aiguille q Tornillo de sujeción de la aguja q Vis du pince l’aiguille w Alojamiento de la aguja w Pince l’aiguille e Lado plano e Méplat r Separación r Espace z Apague la máquina con el interruptor de corriente. z Éteignez la machine. -
Page 24: Presser Foot Types
Presser Foot Types • Zigzag foot (Foot A) This foot is made of clear plastic for clearer visibility when sewing. Use this foot for both straight and zigzag stitching. More durable metal foot is also available as an optional item. (page 4) For: Straight stitch (page 40) Automatic reverse stitch... -
Page 25: Tipos De Prensatelas
Tipos de prensatelas Différents pieds presseurs • Prensatelas para zig-zag (Prensatelas A) • Pied zig-zag (Pied A) Este prensatelas se hase del plástico claro para la visibilidad Ce pied est fait de plastique clair pour la visibilité claire en clara al coser. Utilice este prensatelas para puntada recta y cousant. -
Page 26: Selecting Needle And Fabric
Selecting Needle and Fabric For general sewing, use needle sizes 11 or 14. A fine thread and needle should be used for sewing lightweight fabrics, so the fabric will not be marred. Heavy fabrics require a needle large enough to pierce the fabric without fraying the needle thread. Use the blue needle (optional) to eliminate skipped stitches when sewing knits and synthetic fabrics. -
Page 27: Selección De Hilo Y Tela
Selección de hilo y tela Para el cosido general se utilizan agujas del tamaño 11 o 14. Los hilos y agujas delgados deberán utilizarse para coser tejidos ligeros evitando así que éstos se puedan echar a perder. Cosa tejidos gruesos con una aguja lo suficientemente gruesa como para que pueda penetrar el tejido sin que el hilo de la aguja se deshilache. - Page 28 Choix de l’aiguille et tissu Pour les coutures normales, utilisez une aiguille n°11 ou 14. On devrait utiliser du fil fin et une aiguille fine avec les tissus légers pour ne pas les endommager. Les tissus lourds nécessitent une aiguille assez grosse pour percer le tissu sans effilocher le fil de l’aiguille.
- Page 29 (blank page) (página blanca) (page blanche)
-
Page 30: Bobbin Winding
Bobbin Winding • Setting the spool Place a spool of thread on the spool pin with the thread coming off the back of spool as illustrated. A: Press the large spool holder q firmly against the spool of thread. q Large spool holder B: For a small spool, use the small spool holder w. -
Page 31: Remplissage De La Canette
Remplissage de la canette Bobinado de la canilla • Fijación del carrete • Réglage de la bobine de fil Coloque el carrete de hilo en el pasador del carrete, haciendo Placez une bobine de fil sur le porte-bobine, avec le fil positionné que el hilo salga del carrete como se muestra. -
Page 32: Winding The Bobbin
• Winding the bobbin NOTE: Set the speed control lever at its fastest position for bobbin winding. z Draw the thread from the spool. x Guide the thread around the thread guide. c Pass the thread through the hole in the bobbin from the inside to the outside. - Page 33 • Remplissage de la canette • Devanado de la canilla NOTA: REMARQUE: Ponga la corredera de control de velocidad en la posición Réglez le curseur de réglage de la vitesse sur sa position la de máxima velocidad para bobinar. plus rapide pour bobiner la canette. z Extraiga hilo del carrete.
-
Page 34: Inserting The Bobbin
• Inserting the bobbin q End of thread w Notch e Notch r Threading diagram z Place a bobbin in the bobbin holder with the thread running off counterclockwise. x Guide the thread into notch w on the front side of the bobbin holder. -
Page 35: Colocación De La Canilla En El Portacanillas
• Colocación de la canilla en el portacanillas • Insertion de la canette q Extremo de hilo q Extrémité du fil w Ranura w Encoche e Ranura e Encoche r Esquema de enhebrado r Guide d’enfilage z Ponga una canilla dentro del portacanillas de modo que el hilo z Placez la canette dans son support, le fil se déroulant en sens se suelte en el sentido contrario a las agujas del reloj. -
Page 36: Threading The Machine
Threading the Machine • Threading the machine * Raise the thread take-up lever to its highest position by pressing the needle position up/down button q. * Raise the presser foot lifter. * Place a spool on the spool pin, with the thread coming off the back of spool (refer to page 24). -
Page 37: Enhebrado Del Hilo De La Aguja
Enhebrado del hilo de la aguja Enfilage de la machine • Enhebrado del hilo de la aguja • Enfilage de la machine * Suba el pie prensatelas. Presione el botón para subir/bajar la * Relevez le pied de biche. Appuyez sur la touche de position aguja q para subir la palanca tirahilos hasta su posición más haute/basse de l’aiguille q afin de relever le levier releveur de alta. -
Page 38: Drawing Up The Bobbin Thread
• Drawing up the bobbin thread z Raise the presser foot and hold the needle thread lightly with your left hand. q Needle thread x Press the needle position up/down button w twice to lower and raise the needle to pick up the bobbin thread. -
Page 39: Extracción Del Hilo De La Canilla
• Extracción del hilo de la canilla • Remonter le fil de la canette z Suba el prensatelas y sujete el hilo de la aguja suavemente z Relevez le pied-de-biche et maintenez légèrement le fil con la mano izquierda. d’aiguille entre les doigts de votre main gauche. q Hilo de la aguja q Fil d’aiguille x Presione dos veces el botón para subir/bajar la aguja w para... -
Page 40: Adjust The Needle Thread Tension For A Straight Stitch
Adjust the Needle Thread Tension for a Straight Stitch • Correct tension q Needle thread (Top thread) w Bobbin thread (Bottom thread) e To loosen r To tighten The ideal straight stitch has threads locked between two layers of fabric, as illustrated (magnified to show detail). If you look at the top and bottom of a seam, look to see that the stitches are evenly balanced. -
Page 41: Ajuste De La Tensión Del Hilo De La Aguja Para Puntada Recta
Ajuste de la tensión del hilo de la aguja para Réglage de la tension du fil de l’aiguille pour le puntada recta point droit • Tensión correcta • Tension correcte q Hilo de la aguja (Hilo superior) q Fil de l’aiguille (Fil supérieur) w Hilo de la canilla (Hilo inferior) w Fil de la canette (Fil inférieur) e Para aflojar... -
Page 42: Adjust The Needle Thread Tension For A Zigzag Stitch
Adjust the Needle Thread Tension for a Zigzag Stitch For an ideal zigzag stitch, the bobbin thread does not show on the right side (Top side) of the fabric, and the needle thread shows slightly on the wrong side (Bottom side) of the fabric. -
Page 43: Ajuste De La Tensión Del Hilo De La Aguja Para Puntada Zig-Zag
Ajuste de la tensión del hilo de la aguja para Réglage de la tension du fil de l’aiguille pour le puntada zig-zag point zig-zag En la puntada zig-zag ideal, el hilo de la canilla no aparecerá en Lorsqu’un point zig-zag est effectué correctement, le fil de la la parte de arriba de la tela y el hilo de la aguja se verá... -
Page 44: Lcd Display
LCD Display The LCD display shows the following information when the machine is turned on. q Stitch pattern number w Cursors e Stitch width r Stitch length z Press the cursor keys to move the cursor under the stitch pattern number. The cursors appear under both digits when turning the power on. -
Page 45: Pantalla Lcd
Pantalla LCD Afficheur à cristaux liquides La pantalla LCD muestra la siguiente información cuando se L’écran à cristaux liquides affiche les informations suivantes enciende la máquina. lorsque la machine est sous tension. q Numéro du motif de point q Número de patrón de puntada w Curseurs w Cursores e Largeur de point... -
Page 46: Section Iii. Straight Stitch Sewing Straight Stitch
SECTION III. STRAIGHT STITCH SEWING Straight Stitch Machine setting q Stitch pattern: 00 or 01 w Needle thread tension: 2 to 6 e Presser foot: Zigzag foot: A • Starting to sew Raise the presser foot and position the fabric next to a seam guide line on the needle plate (5/8˝... -
Page 47: Seccion Iii. Costura De Puntada Recta Puntada Recta
SECCION III. COSTURA DE PUNTADA RECTA PARTIE III. COUTURE AU POINT DROIT Puntada recta Point droit Configuración de la máquina Réglage de la machine q Patrón de puntada: q Motif de point: 00 o 01 00 ou 01 w Tensión del hilo de la aguja: w Tension du fil de l’aiguille: 2 –... -
Page 48: To Adjust The Stitch Length
• To adjust the stitch length to move the cursor q Press the cursor buttons under the stitch length value “2.2” w (default setting). Press the button to decrease stitch length. Press the button to increase stitch length. The stitch length can be varied from 0.0 to 5.0. q Cursor w Stitch length (2.2) NOTE:... - Page 49 • Ajuste de la longitud de la puntada • Réglage de la longueur de point del cursor para colocar el cursor q Presione los botones Appuyez sur les touches du curseur pour déplacer le debajo del valor de la longitud de la puntada “2.2” w. (valor curseur q sous la valeur de longueur de point “2,2”...
-
Page 50: Automatic Reverse Stitch
Automatic Reverse Stitch Machine setting q Stitch pattern: w Needle thread tension: 2 to 6 e Presser foot: Zigzag foot: A r Reverse stitch button Use this stitch to secure the beginning and the end of a seam with backstitching. When you reach the end of the seam, press the reverse stitch button r once. -
Page 51: Puntada Invertida Automática
Puntada invertida automática Point arrière automatique Réglage de la machine Configuración de la máquina q Motif de point: q Patrón de puntada: w Tensión del hilo de la aguja: w Tension du fil de l’aiguille: 2 – 6 2 à 6 e Prensatelas: e Pied presseur: Pied zig-zag: A... -
Page 52: Zipper Sewing
Zipper Sewing Machine setting q Stitch pattern: w Needle thread tension: 1 to 4 e Presser foot: Zipper foot: E • To snap on the zipper foot q Slit w Pin e To sew left side r To sew right side Fit the pin on the zipper foot into the slit on the foot holder. -
Page 53: Costura De Cremalleras O Cierres
Costura de cremalleras o cierres La couture des fermetures à glissière Réglage de la machine Configuración de la máquina q Motif de point: q Patrón de puntada: w Tension du fil de l’aiguille: 1 à 4 w Tensión del hilo de la aguja: 1 –... - Page 54 Zipper Sewing (Continued) x Raise and release foot, and re-attach it on left-hand side of pin. Take the upper fabric layer and lay it flat over the zipper. Starting just below zipper bottom stop, sew across fabric to about 3/8˝ to 1/2˝ distance from the basting stitch line. Turn fabric 90°...
- Page 55 Costura de cremalleras o cierres (continuación) La couture des fermeture à glissière (suite) x Levante y libere el prensatelas y vuelva a colocarlo en el lado x Soulever et relâcher le pied, puis le fixer à nouveau du côté izquierdo del poste. gauche de la broche.
-
Page 56: Section Iv. Zigzag Stitch Sewing Zigzag Stitch
SECTION IV. ZIGZAG STITCH SEWING Zigzag Stitch Machine setting q Stitch pattern: w Needle thread tension: 2 to 6 e Presser foot: Zigzag foot: A The zigzag stitch is one of the most common and versa- tile stitches. It can be a utility stitch for button sewing, buttonhole making, hemming, overcasting, mending and darning. -
Page 57: Seccion Iv. Puntadas De Zig-Zag
SECCION IV. PUNTADAS DE ZIG-ZAG PARTIE IV. POINTS ZIG-ZAG Puntada de zig-zag Zig-zag simple Configuración de la máquina Réglage de la machine q Patrón de puntada: q Motif de point: w Tensión del hilo de la aguja: w Tension du fil de l’aiguille: 2 –... -
Page 58: To Drop Or Raise The Feed Dogs
To Drop or Raise the Feed Dogs The drop feed lever is located underneath the free arm bed on the back of the machine. q To drop the feed dog, push the lever in the direction of the arrow q. w To raise the feed dog, push the lever in the direction of the arrow w, as illustrated, and turn the handwheel e toward you. -
Page 59: Bajada O Elevación De Los Dientes De Arrastre
Bajada o elevación de los dientes de arrastre Abaissement ou relevage des griffes d’entraînement La palanca de bajada de los dientes de arrastre está situada Le levier d’escamotage des griffes d’entraînement est situé sous debajo del brazo libre en la parte posterior de la máquina. le bâti du bras libre à... -
Page 60: Section V. Utility And Decorative Stitches Blind Hem Stitch
SECTION V. UTILITY AND DECORATIVE STITCHES Blind Hem Stitch Machine setting q Stitch pattern: w Needle thread tension: 1 to 4 e Presser foot: Zigzag foot: A q Lightweight fabric w Heavyweight fabric e Wrong side (Bottom side) of fabric r 1/4˝... -
Page 61: Seccion V. Puntadas Utiles Y Puntadas Decorativas
SECCION V. PUNTADAS UTILES Y PARTIE V. POINTS UTILITAIRES ET PUNTADAS DECORATIVAS DÉCORATIFS Dobladillo invisible Ourlet invisible Configuración de la máquina Réglage de la machine q Patrón de puntada: q Motif de point: w Tensión del hilo de la aguja: 1 –... -
Page 62: Patchwork Piecing
Patchwork Piecing Machine setting q Stitch pattern: 00 and 08 w Needle thread tension: 3 to 6 e Presser foot: Zigzag foot: A z Place the patchwork pieces right sides together. Sew seam with straight stitch 00. q Wrong side of fabric w Right side of fabric x Press the seam allowance to open. -
Page 63: Unión De Pezas Parcheadas
Unión de pezas parcheadas Patchwork Réglage de la machine Configuración de la máquina q Motif de point: 00 et 08 q Patrón de puntada: 00 y 08 w Tension du fil d’aiguille: 3 à 6 w Tensión del hilo de la aguja: 3 –... -
Page 64: Applique
Applique Machine setting q Stitch pattern: w Needle thread tension: 1 to 4 e Presser foot: Satin stitch foot: F * The stitch width can be changed without changing its center needle position. Place an applique on the fabric and baste or pin it in place. Sew while guiding the fabric so the needle falls along the outer edge of the applique. -
Page 65: Apliques
Apliques Appliqués Réglage de la machine Configuración de la máquina q Motif de point: q Patrón de puntada: w Tension du fil d’aiguille: 1 à 4 w Tensión del hilo de la aguja: 1 – 4 e Pied presseur: Pied pour point passé: F e Prensatelas: Prensatelas para puntada decorativa: F... -
Page 66: Section Vi. Buttonhole Various Kinds Of Buttonholes And Their Uses
SECTION VI. BUTTONHOLE Various Kinds of Buttonholes and Their Uses q Square Buttonhole This square buttonhole is widely used on medium to heavy fabrics. The buttonhole size is automatically determined by placing a button in the foot. w Round-end Buttonhole This buttonhole is used on fine to medium weight fabrics, especially for blouses and children’s clothes. -
Page 67: Seccion Vi. Ojal
SECCION VI. OJAL PARTIE VI. BOUTONNIÈRE Varios tipos de ojales y sus usos Différentes boutonnières et leurs utilisations q Ojal cuadrado q Boutonnière carrée Este ojal cuadrado se suele usar para telas entre Cette boutonnière carrée est très utilisée sur les tissus medianamente pesadas y pesadas. -
Page 68: Square Buttonhole
Square Buttonhole Machine setting q Stitch pattern: w Needle thread tension: 1 to 5 e Presser foot: Automatic buttonhole foot: R r Buttonhole lever sign • To sew z Press the needle up/down button to raise the needle. Attach the automatic buttonhole foot R snapping the pin w into the slit q of the foot holder. -
Page 69: Ojal Cuadrado
Boutonnière carrée Ojal cuadrado Réglage de la machine Configuración de la máquina q Motif de point: q Patrón de puntada: w Tension du fil d’aiguille: 1 à 5 w Tensión del hilo de la aguja: 1 – 5 e Pied presseur: Pied à... - Page 70 b Start the machine to sew the buttonhole. The buttonhole will be automatically sewn. The machine will sew the left row first. n The machine will sew the back bartack and the right row. m The machine will sew the front bartack, then it stops automatically.
- Page 71 b Ponga en marcha la máquina para coser el ojal. b Démarrez la machine pour coudre la boutonnière. El ojal se cose automáticamente. La couture de la boutonnière se fait automatiquement. La máquina cose primero la hilera de la izquierda. La machine coud le côté...
-
Page 72: To Adjust Buttonhole Stitch
To Adjust Buttonhole Stitch • To adjust the stitch width Press the cursor buttons to move the cursor under the stitch width value “5.0” q (default setting). button to decrease buttonhole width w. Press the button to increase buttonhole width e. Press the The stitch width can be varied from 2.5 to 7.0 depending on the selected buttonhole. -
Page 73: Ajuste De La Anchura De La Puntada Y La Densidad De Los Ojales
Ajuste de la anchura de la puntada y la densidad de los Réglage de la largeur et de la densité des points de ojales boutonnière • Ajuste de la anchura de la puntada • Réglage de la largeur de point Presione los botones del cursor para colocar el cursor Appuyez sur les touches... -
Page 74: Corded Buttonhole
Corded Buttonhole Machine setting q Stitch pattern: w Needle thread tension: 1 to 5 e Presser foot: Automatic buttonhole foot: R z Use the same procedure as the square buttonhole procedure. Set the stitch width to match the thickness of the cord used. -
Page 75: Ojal Acordonado
Ojal acordonado Boutonnière cordonnet Configuración de la máquina Réglage de la machine q Motif de point: q Patrón de puntada: w Tension du fil d’aiguille: w Tensión del hilo de la aguja: 1 – 5 1 à 5 e Pied presseur: e Prensatelas: Prensatelas para ojal Pied à... -
Page 76: Section Vii. Stretch Stitches
SECTION VII. STRETCH STITCHES Triple Stretch Stitch Machine setting q Stitch pattern: w Needle thread tension: 2 to 6 e Presser foot: Zigzag foot: A This strong, durable stitch is recommended when both elasticity and strength are necessary in order to insure comfort and durability. -
Page 77: Seccion Vii. Puntadas Elasticas
SECCION VII. PUNTADAS ELASTICAS PARTIE VII. POINTS EXTENSIBLES Puntada recta triple Point droit extensible Réglage de la machine Configuración de la máquina q Patrón de puntada: q Motif de point: w Tension du fil de l’aiguille: w Tensión del hilo de la aguja: 2 –... -
Page 78: Correcting Distorted Stitch Patterns
Correcting Distorted Stitch Patterns The sewing results of the stretch patterns may vary de- pending upon the sewing conditions, such as sewing speed, type of the fabric, number of layers etc. Always test sew on a scrap piece of the fabric that you wish to use. -
Page 79: Corrección De Patrones De Puntadas Distorsionados
Corrección de patrones de puntadas distorsionados Correction des motifs déformés Los resultados de la costura con patrones elásticos pueden variar Les résultats obtenus avec les motifs pour tissus extensibles dependiendo de las condiciones de la costura, como la velocidad, peuvent varier selon les conditions de couture (vitesse de el tipo de tela, el número de capas, etc. -
Page 80: Section Viii. Care Of Your Machine
SECTION VIII. CARE OF YOUR MACHINE NOTE: * Unplug the machine. * Do not dismantle the machine other than as explained in this section. * Do not store the machine in a high-humidity area, near a heat radiator, or in direct sunlight. * Clean the outside of the machine with a soft cloth and mild soap. -
Page 81: Seccion Viii. Mantenimiento Del La Maquina
SECCION VIII. MANTENIMIENTO DEL LA PARTIE VIII. ENTRETIEN DE VOTRE MAQUINA MACHINE REMARQUE: NOTA: * Débranchez la machine. * Desenchufe la máquina. * Ne démontez rien d’autre que ce qui est décrit dans ce * No desmonte la máquina de ninguna otra forma que la chapitre. -
Page 82: Replacing The Bobbin Holder
Replacing the Bobbin Holder z Insert the bobbin holder into the hook race. x Make sure the knob of the bobbin holder fits next to the stopper on the race. q Knob w Stopper c Replace the bobbin. Attach the needle plate. Tighten the screw firmly with the screwdriver. -
Page 83: Cambio Del Portacanillas
Cambio del portacanillas Remplacement du porte-canette z Introduzca el portacanillas en el recorrido. z Insérez le porte-canette dans le logement de crochet. x Asegúrese de que la manilla del portacanillas encaja cerca x Assurez-vous que le bouton du porte-canette est bien placé del tope del recorrido. -
Page 84: Problems And Warning Signs
Problems and Warning Signs Warning sign Cause Try this The machine will not sew with the start/stop button Disconnect the foot control because the foot control is connected. and start the machine. A buttonhole cannot be sewn without lowering Lower the buttonhole lever the buttonhole lever. -
Page 85: Problemas Y Señales De Advertencia
Problemas y señales de advertencia Señal de advertencia Causa Intente lo siguiente Desconecte el pedal y ponga La máquina no coserá con el botón de botón de inicio/ en marcha la máquina. parada porque el pedal está conectado. Los ojales se cosen sin bajar la palanca de ojales. Abaissez le levier de boutonnière et redémarrez la machine. -
Page 86: Problèmes Et Indications D'alerte
Problèmes et indications d’alerte Indication d’alerte Cause Essayer ceei Débrancher la pédale et La machine ne coud pas avec la touche de démarrage redémarrer la machine. (start/stop) parce que la pédale est branchée. Une boutonnière est cousue sans abaisser le levier Abaissez le levier de de boutonnière. -
Page 87: Troubleshooting
Troubleshooting Cause Reference Condition 1. The needle thread is not threaded properly. Page 30 The needle thread 2. The needle thread tension is too tight. Page 34, 36 breaks. 3. The needle is bent or blunt. Page 16 4. The needle is incorrectly inserted. Page 16 5. -
Page 88: Detección Y Solución De Problemas
Detección y solución de problemas Problema Referencia Causa 1. El hilo de la aguja no está correctamente enhebrado. Página 31 El hilo de la aguja se 2. El hilo de la aguja está demasiado tenso. Página 35, 37 rompe. 3. La aguja está doblada o dañada. Página 17 4. -
Page 89: Dépistage Des Pannes
Dépistage des pannes Cause Références Condition Le fil d’aiguille casse. 1. Le fil d’aiguille n’est pas bien enfilé. Page 31 2. Le fil d’aiguille est trop tendu. Page 35, 37 3. L’aiguille est déformée ou émoussée. Page 17 4. L’aiguille est mal positionnée. Page 17 5. - Page 92 808-800-925 (EN/SP/FR)