Télécharger Imprimer la page
Beurer HM 22 Mode D'emploi
Masquer les pouces Voir aussi pour HM 22:

Publicité

Les langues disponibles
  • FR

Les langues disponibles

  • FRANÇAIS, page 35

Liens rapides

DE
Thermo-Hygrometer
Gebrauchsanweisung .................... 3
EN
Thermo hygrometer
Instructions for use ...................... 19
FR
Thermo-hygromètre
Mode d'emploi ............................ 35
ES
Termohigrómetro
Instrucciones de uso ................... 51
IT
Termoigrometro
Istruzioni per l'uso ....................... 67
TR
Termo-higrometre
Kullanım kılavuzu ......................... 83
RU
Термогигрометр
Инструкция по применению ..... 99
PL
Termohigrometr
Instrukcja obsługi ...................... 115
HM 22

Publicité

loading

Sommaire des Matières pour Beurer HM 22

  • Page 1 HM 22 Thermo-Hygrometer Gebrauchsanweisung ....3 Thermo hygrometer Instructions for use ...... 19 Thermo-hygromètre Mode d’emploi ......35 Termohigrómetro Instrucciones de uso ....51 Termoigrometro Istruzioni per l’uso ....... 67 Termo-higrometre Kullanım kılavuzu ......83 Термогигрометр Инструкция по применению ..99 Termohigrometr Instrukcja obsługi ......
  • Page 3 Unser Name steht für hochwertige und eingehend geprüfte Qualitätspro- dukte aus den Bereichen Wärme, Gewicht, Blutdruck, Körpertemperatur, Puls, Sanfte Therapie, Massage, Beauty, Baby und Luft. Mit freundlicher Empfehlung Ihr Beurer-Team Inhaltsverzeichnis 1. Zum Kennenlernen ......4 7.3 Auf Werkseinstellung 2.
  • Page 4 1. Zum Kennenlernen Mit dem Thermo-Hygrometer HM 22 können Sie die aktuelle Raumtemperatur und relative Luftfeuchtigkeit messen und am Display ablesen. Zusätzlich besitzt das Thermo-Hygrometer einen Timer, mit dem Sie eine Kurzzeitmessung einstellen können. Durch seine handliche Größe können Sie das Thermo-Hygrometer überall aufstel- len.
  • Page 5 CE-Kennzeichnung Dieses Produkt erfüllt die Anforderungen der geltenden euro- päischen und nationalen Richtlinien Entsorgung gemäß Elektro- und Elektronik-Altgeräte EG- Richtlinie WEEE (Waste Electrical and Electronic Equipment) Schadstoffhaltige Batterien nicht im Hausmüll entsorgen Hersteller Verpackung umweltgerecht entsorgen Die Produkte entsprechen nachweislich den Anforderungen der Technischen Regelwerke der EAWU 4.
  • Page 6 5. Warn- und Sicherheitshinweise WARNUNG • Halten Sie Kinder von Verpackungsmaterial fern. Es besteht Ersti- ckungsgefahr. • Das Gerät ist kein Spielzeug. Bewahren Sie es außerhalb der Reich- weite von Kindern auf. • Sie dürfen das Gerät keinesfalls öffnen oder reparieren, da sonst eine einwandfreie Funktion nicht mehr gewährleistet ist.
  • Page 7 • Auf Polaritätskennzeichen Plus (+) und Minus (-) achten. • Wenn eine Batterie ausgelaufen ist, Schutzhandschuhe anziehen und das Batteriefach mit einem trockenen Tuch reinigen. • Schützen Sie Batterien vor übermäßiger Wärme. • Explosionsgefahr! Keine Batterien ins Feuer werfen. • Batterien dürfen nicht geladen oder kurzgeschlossen werden. •...
  • Page 8 6. Gerätebeschreibung Vorderseite 1 [1 min]-Taste 2 [CLEAR]-Taste 3 [10 min]-Taste 4 Display...
  • Page 9 Rückseite TIME UP/CF DOWN RESET 5 6 7 8 1 Sensoren-Abdeckung 5 [TIME]-Taste 2 Batteriefach-Abdeckung 6 [UP/CF]-Taste 3 Ausklappbarer Standfuß 7 [DOWN]-Taste 4 Aufhängevorrichtung 8 [RESET]-Taste 9 Batteriefach...
  • Page 10 7. Inbetriebnahme 7.1 Batterien einlegen Hinweis Bevor Sie das Thermo-Hygrometer in Betrieb nehmen können, müssen Sie zuerst zwei AAA-Batterien (im Lieferumfang enthalten) in das Batteriefach einlegen. Gehen Sie dazu wie folgt vor: 1. Auf der Rückseite des Thermo-Hygrometers befindet sich eine runde Batteriefach-Abdeckung.
  • Page 11 7.2 Datum / Uhrzeit / Temperatureinheit einstellen 1. Um zwischen 12- und 24-Stundenmodus zu wechseln, drücken Sie die [TIME]- Taste. Um zwischen Celsius (°C) und Fahrenheit (°F) zu wechseln, drücken Sie die [UP/CF]-Taste. 2. Die Reihenfolge im Einstellungsmenü lautet: Jahr -> Monat -> Tag -> Stunde -> Minute Um in das Einstellungsmenü...
  • Page 12 7.3 Auf Werkseinstellung zurücksetzen Um das Datum und die Uhrzeit auf die Werkseinstellung zurückzusetzen, drücken Sie mit einem spitzen Gegenstand kurz die [RESET]-Taste. 8. Anwendung Das Thermo-Hygrometer besitzt einen Standard-Modus und einen Timer. 8.1 Standard-Modus Wenn Sie am Thermo-Hygrometer keine Taste drücken, wird Ihnen auf dem Display automatisch der Standard-Modus angezeigt.
  • Page 13 8.2 Timer Sie können am Thermo-Hygrometer auch einen Timer von bis zu 99 Minuten einstellen. 1. Um den Timer zu starten, stellen Sie mit der [1 min]-Taste und der [10 min]-Taste Ihre gewünschte Timer-Dauer ein. In der Mitte des Displays erscheint die einge- stellte Timer-Dauer.
  • Page 14 9. Reinigung und Pflege ACHTUNG • Reinigen Sie das Gerät mit einem feuchten Tuch. Benutzen Sie keine scharfen Reinigungsmittel oder harte Bürsten! • Es darf keinesfalls Flüssigkeit in das Gerät eindringen. • Wenn Sie das Gerät längere Zeit nicht verwenden, empfehlen wir Ihnen, es in der Originalverpackung in trockener Umgebung und ohne Beschwerung aufzubewahren.
  • Page 15 Relative Luftfeuchtig- Auf dem Display erscheint Relative Luftfeuchtig- keit liegt außerhalb keit unter 20 % des Messbereichs Relative Luftfeuchtig- Auf dem Display erscheint Relative Luftfeuchtig- keit liegt außerhalb keit über 95 % des Messbereichs Nach Inbetriebnahme Gerät zeigt keine oder kann es 10 Minuten falsche Temperatur und Wechselnde Umgebung...
  • Page 16 20 bis 95 % relative Luftfeuchtigkeit Feuchtigkeit 13. Garantie/Service Die Beurer GmbH, Söflinger Straße 218, D-89077 Ulm (nachfolgend „Beurer“ genannt) gewährt unter den nachstehenden Voraussetzungen und in dem nach- folgend beschriebenen Umfang eine Garantie für dieses Produkt. Die nachstehenden Garantiebedingungen lassen die gesetzlichen Gewähr- leistungsverpflichtungen des Verkäufers aus dem Kaufvertrag mit dem...
  • Page 17 - Produkte, die unsachgemäß und/oder entgegen der Bestimmungen der Bedie- nungsanleitung verwendet, gereinigt, gelagert oder gewartet wurden sowie Pro- dukte, die vom Käufer oder einem nicht von Beurer autorisierten Servicecenter geöffnet, repariert oder umgebaut wurden; - Schäden, die auf dem Transportweg zwischen Hersteller und Kunde bzw.
  • Page 18 - Folgeschäden, welche auf einem Mangel dieses Produktes beruhen (es können für diesen Fall jedoch Ansprüche aus Produkthaftung oder aus anderen zwin- genden gesetzlichen Haftungsbestimmungen bestehen). Reparaturen oder ein Komplettaustausch verlängern in keinem Fall die Garan- tiezeit.
  • Page 19 With kind regards, Your Beurer team Table of contents 1. Getting to know your device ..20 7.3 Resetting to factory settings ..27 8.
  • Page 20 1. Getting to know your device Using the HM 22 thermo hygrometer, you can measure the current room temperature and relative humidity and read them from the display. In addition, the thermo hygrometer has a timer which you can set.
  • Page 21 Disposal in accordance with the Waste Electrical and Electronic Equipment EC Directive – WEEE Do not dispose of batteries containing harmful substances with household waste Manufacturer Dispose of packaging in an environmentally friendly manner The products demonstrably meet the requirements of the Technical Regulations of the EAEU 4.
  • Page 22 5. Warnings and safety notes WARNING • Keep packaging material away from children. There is the risk of suffocation. • The device is not a toy. Keep out of the reach of children. • Under no circumstances should you open or repair the device yourself, as faultless functionality can no longer be guaranteed thereafter.
  • Page 23 • If a battery has leaked, put on protective gloves and clean the battery compartment with a dry cloth. • Protect batteries from excessive heat. • Risk of explosion! Do not throw batteries into a fire. • Do not charge or short-circuit batteries. •...
  • Page 24 6. Device description Front 1 [1 min] button 2 [CLEAR] button 3 [10 min] button 4 Display...
  • Page 25 Rear TIME UP/CF DOWN RESET 5 6 7 8 1 Sensor cover 5 [TIME] button 2 Battery compartment lid 6 [UP/CF] button 3 Fold-out stand 7 [DOWN] button 4 Mounting fixture 8 [RESET] button 9 Battery compartment...
  • Page 26 7. Initial use 7.1 Inserting the batteries Note Before you can use the thermo hygrometer, you first have to insert two AAA batteries (included in delivery) into the battery compartment. Proceed as follows: 1. A round battery compartment lid is located on the rear of the thermo hygrometer.
  • Page 27 2. The order in the settings menu is: Year -> Month -> Day -> Hour -> Minute To access the settings menu, press and hold the [TIME] button for 3 seconds. The year starts to flash in the display. 3. Set the current year using the [UP/CF]/[DOWN] buttons. Confirm using the [TIME] button.
  • Page 28 8. Usage The thermo hygrometer has a standard mode and a timer mode. 8.1 Standard mode If you do not press any buttons on the thermo hygrometer, the standard mode is automatically shown on the display. Time Date (D = day, M = month) Room temperature Relative humidity Note...
  • Page 29 automatically with a beep. A beep sounds again when the timer elapses. To switch off the beep, press the [CLEAR] button. 2. In order to end a timer early, press the [CLEAR] button. Remaining minutes on the timer Remaining seconds on the timer 9.
  • Page 30 10. What if there are problems? Problem Possible cause Solution Device will not switch on Flat batteries Insert new batteries appears on the Batteries almost flat Insert new batteries display The device will not switch Contact Customer on although new batteries The device is faulty Services have been inserted...
  • Page 31 11. Disposal For environmental reasons, do not dispose of the device in household waste at the end of its service life. Dispose of the device at a suitable local collection or recycling point in your country. Dispose of the device in accordance with EC Directive –...
  • Page 32 13. Warranty/service Beurer GmbH, Söflinger Straße 218, 89077 Ulm, Germany (hereinafter referred to as “Beurer”) provides a warranty for this product, subject to the requirements below and to the extent described as follows. The warranty conditions below shall not affect the seller’s statutory warranty obligations which ensue from the sales agreement with the buyer.
  • Page 33 During the warranty period, should this product prove to be incomplete or defective in functionality in accordance with the following provisions, Beurer shall carry out a repair or a replacement delivery free of charge, in accordance with these warranty conditions.
  • Page 34 Beurer; –  damage that arises during transport between manufacturer and customer, or between service centre and customer;...
  • Page 35 Sincères salutations, Votre équipe Beurer Table des matières 1. Familiarisation avec l’appareil ..36 7.3 Repasser aux réglages d’usine ..44 8.
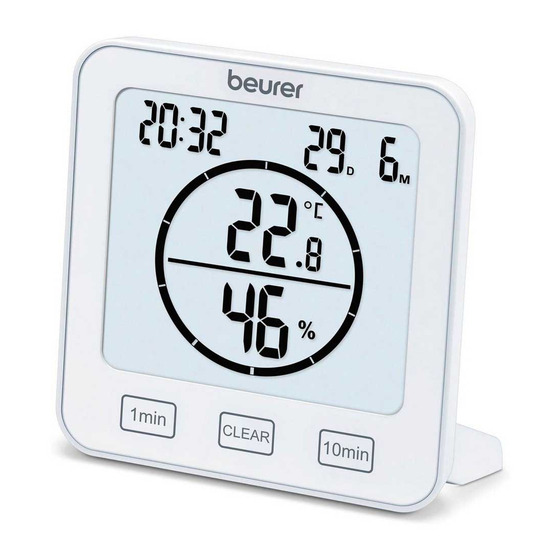
  • Page 36 1. Familiarisation avec l’appareil Le thermo-hygromètre HM 22 vous permet de mesurer la température ambiante ac- tuelle et l’humidité relative et la consulter sur l’écran. En outre, le thermo-hygromètre est équipé d’un minuteur vous permettant de régler une mesure sur un temps court.
  • Page 37 Sigle CE Ce produit répond aux exigences des directives européennes et nationales en vigueur Élimination conformément à la directive européenne WEEE (Waste Electrical and Electronic Equipment) relative aux déchets d’équipements électriques et électroniques Ne pas jeter les piles à substances nocives avec les déchets ménagers Fabricant Éliminer l’emballage dans le respect de l’environnement...
  • Page 38 5. Consignes d’avertissement et de mise en garde AVERTISSEMENT • Conservez les emballages hors de la portée des enfants. Ils pour- raient s’étouffer. • L’appareil n’est pas un jouet. Tenez-le hors de portée des enfants. • Vous ne devez en aucun cas ouvrir ou réparer l’appareil ; le bon fonctionnement de l’appareil ne serait plus assuré.
  • Page 39 • Si une pile a coulé, enfiler des gants de protection et nettoyer le compartiment à piles avec un chiffon sec. • Protéger les piles d’une chaleur excessive. • Risque d’explosion ! Ne pas jeter les piles dans le feu. • Les piles ne doivent être ni rechargées ni court-circuitées. •...
  • Page 40 6. Description de l’appareil Face avant 1 Touche [1 min] 2 Touche [CLEAR] 3 Touche [10 min] 4 Écran...
  • Page 41 Face arrière TIME UP/CF DOWN RESET 5 6 7 8 1 Couvercle du capteur 5 Touche [TIME] 2 Couvercle du compartiment 6 Touche [UP/CF] à piles 3 Pied déployable 7 Touche [DOWN] 4 Système d’accrochage 8 Touche [RESET] 9 Compartiment à piles...
  • Page 42 7. Mise en service 7.1 Insérer les piles Remarque Avant de pouvoir mettre en service le thermo-hygromètre, vous devez d’abord insérer deux piles AAA (fournies) dans le compartiment à piles. Pour ce faire, procédez comme suit : 1. Un couvercle rond du compartiment à piles se trouve à l’arrière du thermo-hygromètre.
  • Page 43 7.2 Réglage de la date / de l’heure / de l’unité de température 1. Pour basculer entre le mode 12 heures et 24 heures, appuyez sur la touche [TIME]. Pour basculer entre Celsius (°C) et Fahrenheit (°F), appuyez sur la touche [UP/CF].
  • Page 44 7.3 Repasser aux réglages d’usine Pour réinitialiser la date et l’heure aux réglages d’usine, utilisez un objet pointu pour appuyer sur la touche [RESET]. 8. Utilisation Le thermo-hygromètre possède un mode Standard et un minuteur. 8.1 Mode Standard Si vous n’appuyez sur aucune touche du thermo-hygromètre, le mode Standard s’affiche automatiquement à...
  • Page 45 8.2 Minuteur Vous pouvez aussi régler un minuteur de jusqu’à 99 minutes sur le thermo-hy- gromètre. 1. Pour démarrer le minuteur, utilisez la touche [1 min] et la touche [10 min] pour régler la durée de minuteur souhaitée. La durée de minuteur réglée s’affiche au milieu de l’écran.
  • Page 46 9. Nettoyage et entretien ATTENTION • Nettoyez l’appareil à l’aide d’un chiffon humide. N’utilisez ni détergent dur ni brosse dure ! • En aucun cas, un liquide ne doit pénétrer dans l’appareil. • Si vous n’utilisez pas l’appareil pendant une période prolongée, nous vous recommandons de le ranger dans on emballage d’origine sans rien poser dessus.
  • Page 47 Problème Cause possible Solution La température Température ambiante ambiante est en HH.H. supérieure à 50 °C s’affiche à l’écran dehors de la plage (122 °F) de mesure L’humidité relative Humidité relative infé- est en dehors de la s’affiche à l’écran rieure à 20 % plage de mesure L’humidité...
  • Page 48 Ces pictogrammes se trouvent sur les piles à substances nocives : Pb = pile contenant du plomb, Cd = pile contenant du cadmium, Hg = pile contenant du mercure. 12. Caractéristiques techniques Type HM 22 Référence de 678.04 l’article Alimentation 2 piles AAA LR03 1,5 V Poids...
  • Page 49 13. Garantie/maintenance La société Beurer GmbH, sise Söflinger Straße 218, 89077 Ulm, Allemagne, (ci-après désignée « Beurer ») propose une garantie pour ce produit dans les conditions suivantes et dans la mesure prévue ci-après. Les conditions de garantie suivantes n’affectent en rien les obligations de garantie du vendeur découlant du contrat de vente conclu avec l’acheteur.
  • Page 50 –  une copie de la facture/du reçu et –  le produit d’origine à Beurer ou à un partenaire autorisé de Beurer. La présente Garantie exclut expressément –  toute usure découlant de l’utilisation ou de la consommation normale du produit ;...
  • Page 51 ámbitos de aplicación de calor, peso, presión arterial, temperatura corporal, pulso, trata- miento suave, masaje, belleza, bebés y aire. Atentamente, El equipo de Beurer Índice 1. Información general ....... 52 7.3 Reposición a la configuración de 2.
  • Page 52 1. Información general El termohigrómetro HM 22 le permite medir la temperatura ambiente actual y la hu- medad relativa del aire y leer los valores en la pantalla. Además, el termohigrómetro cuenta con un temporizador con el que podrá ajustar una medición de tiempo corto.
  • Page 53 Marcado CE Este producto cumple los requisitos de las directivas europeas y nacionales vigentes. Eliminación según la Directiva europea sobre residuos de aparatos eléctricos y electrónicos (RAEE) No desechar con la basura doméstica pilas que contengan sustancias tóxicas Fabricante Eliminar el embalaje respetando el medio ambiente Está...
  • Page 54 5. Indicaciones de advertencia y de seguridad ADVERTENCIA • No deje el material de embalaje al alcance de los niños. Existe peligro de asfixia. • Este aparato no es un juguete. Manténgalo fuera del alcance de los niños. • No debe abrir ni reparar el aparato bajo ningún concepto; en caso contrario, ya no se garantizará...
  • Page 55 • Respete los símbolos más (+) y menos (-) que indican la polaridad. • Si se derrama el líquido de una pila, póngase guantes protectores y limpie el compartimento de las pilas con un paño seco. • Proteja las pilas de un calor excesivo. •...
  • Page 56 6. Descripción del aparato Parte delantera 1 Botón [1 min] 2 Botón [CLEAR] 3 Botón [10 min] 4 Pantalla...
  • Page 57 Parte trasera TIME UP/CF DOWN RESET 5 6 7 8 1 Tapa de sensor 5 Botón [TIME] 2 Tapa del compartimento de 6 Botón [UP/CF] las pilas 3 Pie de apoyo abatible 7 Botón [DOWN] 4 Anilla para colgar 8 Botón [RESET] 9 Compartimento de las pilas...
  • Page 58 7. Puesta en funcionamiento 7.1 Inserción de las pilas Nota Para poder poner en funcionamiento el termohigrómetro deberá insertar dos pilas AAA (incluidas en los artículos suministrados) en el compartimento de las pilas. Proceda para ello del siguiente modo: 1. En la parte trasera del termohigrómetro hay una tapa re- donda del compartimento de las pilas.
  • Page 59 7.2 Ajuste de fecha, hora y unidad de temperatura 1. Para cambiar entre el modo de 12 y de 24 horas, pulse el botón [TIME]. Para cambiar entre Celsius (°C) y Fahrenheit (°F), pulse el botón [UP/CF]. 2. Este es el orden en el menú de ajuste: año->...
  • Page 60 7.3 Reposición a la configuración de fábrica Para reponer la fecha y la hora a los ajustes de fábrica, pulse brevemente con un objeto afilado el botón [RESET]. 8. Utilización El termohigrómetro dispone de un modo estándar y un temporizador. 8.1 Modo estándar Si no pulsa ningún botón del termohigrómetro, en la pantalla se mostrará...
  • Page 61 8.2 Temporizador También puede ajustar en el termohigrómetro un temporizador de hasta 99 minutos. 1. Para iniciar el temporizador, ajuste la duración que desee con el botón [1 min] y el botón [10 min]. La duración ajustada aparece en el centro de la pantalla. Si no pulsa ningún botón durante 3 segundos, el temporizador se iniciará...
  • Page 62 9. Limpieza y cuidado ATENCIÓN • Limpie el aparato con un paño húmedo. ¡No utilice productos abrasivos ni cepillos duros para la limpieza! • Bajo ningún concepto deben penetrar líquidos en el aparato. • Si no va a utilizar el aparato durante un periodo de tiempo pro- longado, le recomendamos que lo guarde en su embalaje original en un ambiente seco y sin soportar cargas.
  • Page 63 Problema Posible causa Solución La humedad relativa Humedad relativa del del aire está fuera del En la pantalla aparece aire inferior al 20 % rango de medición La humedad relativa Humedad relativa del del aire está fuera del En la pantalla aparece aire superior al 95 % rango de medición El aparato muestra...
  • Page 64 Estos símbolos se encuentran en pilas que contienen sustan- cias tóxicas: Pb: la pila contiene plomo, Cd: la pila contiene cadmio, Hg: la pila contiene mercurio. 12. Datos técnicos Tipo HM 22 Referencia 678.04 Alimentación 2 pilas de 1,5 V AAA LR03 Peso...
  • Page 65 En el caso de que, durante el periodo de garantía, este producto resultara estar incompleto o no funcionara correctamente conforme a lo dispuesto en las siguientes disposiciones, Beurer se compromete a sustituir el producto o a repararlo según las presentes condiciones de garantía.
  • Page 66 Beurer; –  daños que se hayan producido durante el transporte entre las instalaciones del fabricante y las del cliente o bien entre el centro de servicio técnico y...
  • Page 67 Beauty, Baby e aria. Cordiali saluti Il team Beurer Indice 1. Introduzione ........68 7.3 Ripristino delle impostazioni di 2.
  • Page 68 1. Introduzione Con il termoigrometro HM 22 è possibile misurare la temperatura ambiente attuale e l'umidità relativa dell'aria e visualizzarle sul display. Inoltre, il termoigrometro è dotato di un timer che consente di impostare una misurazione a breve termine. Grazie alla dimensione che lo rende maneggevole, il termoigrometro può essere posizionato ovunque.
  • Page 69 Marcatura CE Il presente prodotto soddisfa i requisiti delle direttive europee e nazionali vigenti Smaltimento secondo la direttiva europea sui rifiuti di apparec- chiature elettriche ed elettroniche (RAEE) Non smaltire le batterie contenenti sostanze tossiche insieme ai rifiuti domestici Produttore Smaltire la confezione nel rispetto dell'ambiente I prodotti sono comprovatamente conformi ai requisiti delle normative tecniche dell'UEE.
  • Page 70 5. Avvertenze e indicazioni di sicurezza AVVERTENZA • Tenere lontani i bambini dal materiale d'imballaggio. Pericolo di soffocamento. • Questo apparecchio non è un giocattolo. Tenerlo fuori dalla portata dei bambini. • Non aprire o riparare l'apparecchio per non comprometterne il fun- zionamento corretto.
  • Page 71 • In caso di fuoriuscita di liquido dalle batterie, indossare guanti pro- tettivi e pulire il vano batterie con un panno asciutto. • Proteggere le batterie dal caldo eccessivo. • Pericolo di esplosione! Non gettare le batterie nel fuoco. • Le batterie non devono essere ricaricate o mandate in cortocircuito. •...
  • Page 72 6. Descrizione dell'apparecchio Vista anteriore 1 Pulsante [1 min] 2 Pulsante [CLEAR] 3 Pulsante [10 min] 4 Display...
  • Page 73 Vista posteriore TIME UP/CF DOWN RESET 5 6 7 8 1 Coperchio dei sensori 5 Pulsante [TIME] 2 Coperchio del vano batterie 6 Pulsante [UP/CF] 3 Supporto apribile 7 Pulsante [DOWN] 4 Predisposizione per fissaggio 8 Pulsante [RESET] 9 Vano batterie...
  • Page 74 7. Messa in funzione 7.1 Inserimento delle batterie Indicazione Prima di mettere in funzione il termoigrometro, è necessario inserire le due batterie AAA in dotazione nell'apposito vano. Procedere come descritto di seguito: 1. Sul lato posteriore del termoigrometro è presente un coper- chio rotondo per il vano batterie.
  • Page 75 7.2 Impostazione di data/ora/unità di temperatura 1. Per commutare tra le modalità 12 ore e 24 ore, premere il pulsante [TIME]. Per commutare tra Celsius (°C) e Fahrenheit (°F), premere il pulsante [UP/CF]. 2. L'ordine nel menu delle impostazioni è: Anno ->...
  • Page 76 7.3 Ripristino delle impostazioni di fabbrica Per ripristinare le impostazioni di fabbrica di data e ora, premere brevemente il pulsante [RESET] con un oggetto appuntito. 8. Utilizzo Il termoigrometro possiede una modalità standard e un timer. 8.1 Modalità standard Se non si preme alcun pulsante sul termoigrometro, sul display viene visualizzata automaticamente la modalità...
  • Page 77 8.2 Timer Sul termoigrometro è inoltre possibile impostare un timer fino a 99 minuti. 1. Per avviare il timer, utilizzare il pulsante [1 min] e il pulsante [10 min] per impo- stare la durata del timer desiderata. La durata del timer impostata viene visua- lizzata al centro del display.
  • Page 78 9. Pulizia e cura ATTENZIONE • Pulire l'apparecchio con un panno umido. Non utilizzare deter- genti corrosivi o spazzole dure! • Non deve in nessun caso penetrare liquido nell'apparecchio. • Se l'apparecchio non viene usato per lunghi periodi, si consiglia di conservarlo nell'imballo originale in un ambiente asciutto e senza sovrapporvi carichi.
  • Page 79 Problema Possibile causa Soluzione La temperatura Temperatura ambiente ambiente è al di HH.H. Sul display compare superiore a 50°C (122°F) fuori dell'intervallo di misurazione L'umidità relativa Umidità relativa dell'aria dell'aria è al di fuori Sul display compare inferiore al 20% dell'intervallo di misu- razione L'umidità...
  • Page 80 Sulle batterie contenenti sostanze tossiche sono riportati i seguenti simboli: Pb = batteria contenente piombo, Cd = batteria contenente cadmio, Hg = batteria contenente mercurio. 12. Dati tecnici Tipo HM 22 Codice articolo 678.04 Alimentazione 2 batterie da 1,5 V AAA LR03 Peso...
  • Page 81 Nel caso in cui il prodotto, durante il periodo di garanzia, si dimostrasse incom- pleto o presentasse difetti di funzionamento in linea con le seguenti disposizioni, Beurer provvederà a sostituire o riparare gratuitamente il prodotto in base alle presenti condizioni di garanzia.
  • Page 82 –  una copia della fattura/prova d’acquisto e –  il prodotto originale a Beurer o a un partner Beurer autorizzato. Sono espressamente esclusi dalla presente garanzia –  l’usura dovuta al normale utilizzo o al consumo del prodotto; –  gli accessori forniti assieme a questo prodotto che, in caso di utilizzo con- forme, si consumano o si esauriscono (ad es.
  • Page 83 ürünlerimiz, dünyanın her tarafında tercih edilmektedir. Yeni cihazınızı iyi günlerde kullanmanızı dileriz Beurer Ekibiniz İçindekiler 1. Ürün özellikleri ....... 84 8. Kullanım ........92 2.
  • Page 84 1. Ürün özellikleri HM 22 termo-higrometre ile, bulunduğunuz mekandaki sıcaklığı ve bağıl hava nemini ölçebilir ve değerleri cihazın ekranından okuyabilirsiniz. Termo-higrometrede ayrıca, kısa süreli ölçümler ayarlamanıza olanak veren bir zamanlayıcı mevcuttur. Küçük boyutları sayesinde termo-higrometreyi her yerde kullanabilirsiniz. Ter- mo-higrometrenin arka tarafında, cihazı duvara sabitlemek için kullanabileceğiniz bir asma deliği mevcuttur.
  • Page 85 CE işareti Bu ürün geçerli Avrupa Birliği yönergelerinin ve ulusal yönerge- lerin gereklerini yerine getirmektedir Elektrikli ve elektronik atık cihazlarla ilgili AB direktifine (WEEE - Waste Electrical and Electronic Equipment) uygun şekilde bertaraf edilmelidir Zararlı madde içeren piller evsel atıklarla birlikte bertaraf edilmemelidir Üretici Ambalaj çevreye zarar vermeyecek şekilde bertaraf edilmelidir...
  • Page 86 5. Uyarılar ve güvenlik yönergeleri UYARI • Çocukları ambalaj malzemesinden uzak tutun. Boğulma tehlikesi vardır. • Bu cihaz oyuncak değildir. Cihazı çocukların ulaşamayacağı bir yerde saklayın. • Cihazı kesinlikle sökmeyin veya onarmaya çalışmayın, aksi halde kusursuz çalışması garanti edilemez. Bu husus dikkate alınmadığı takdirde garanti geçerliliğini yitirir.
  • Page 87 • Bir pil aktığında koruyucu eldiven giyin ve pil bölmesini kuru bir bezle temizleyin. • Pilleri aşırı ısıya karşı koruyun. • Patlama tehlikesi! Piller ateşe atılmamalıdır. • Piller şarj edilmemeli veya kısa devre yaptırılmamalıdır. • Cihaz uzun süre kullanılmayacaksa pilleri pil bölmesinden çıkarın. •...
  • Page 88 6. Cihaz açıklaması Ön taraf 1 [1 min] tuşu 2 [CLEAR] tuşu 3 [10 min] tuşu 4 Ekran...
  • Page 89 Arka taraf TIME UP/CF DOWN RESET 5 6 7 8 1 Sensör kapağı 5 [TIME] tuşu 2 Pil bölmesi kapağı 6 [UP/CF] tuşu 3 Açılır-kapanır ayak 7 [DOWN] tuşu 4 Asma deliği 8 [RESET] tuşu 9 Pil bölmesi...
  • Page 90 7. İlk çalıştırma 7.1 Pillerin takılması Termo-higrometreyi çalıştırabilmek için önce iki adet AAA pili (teslimat kapsamına dahildir) pil bölmesine yerleştirmeniz gerekir. Bunun için aşağıdakileri yapın : 1. Termo-higrometrenin arka tarafında yuvarlak bir pil bölme- si kapağı mevcuttur. Pil bölmesi kapağını saat yönünün ak- sine döndürün.
  • Page 91 7.2 Tarih, saat, sıcaklık birimi ayarı 1. 12 saat modu ve 24 saat modu arasında geçiş yapmak için [TIME] tuşuna basın. Santigrat (°C) ve Fahrenheit (°F) arasında geçiş yapmak için [UP/CF] tuşuna basın. 2. Ayar menüsündeki sıralama şöyledir: Yıl -> Ay -> Gün -> Saat -> Dakika Ayar menüsüne erişmek için [TIME] tuşunu 3 saniye basılı...
  • Page 92 7.3 Fabrika ayarlarına geri alma Tarihi ve saati fabrika ayarlarına geri almak için sivri uçlu bir nesne ile [RESET] tuşuna kısa süre basın. 8. Kullanım Termo-higrometrede bir standart mod ve bir zamanlayıcı mevcuttur. 8.1 Standart mod Termo-higrometrede herhangi bir tuşa basmazsanız ekranda otomatik olarak Standart mod gösterilir.
  • Page 93 8.2 Zamanlayıcı Termo-higrometrede 99 dakikaya kadar ayarlayabileceğiniz bir zamanlayıcı mevcuttur. 1. Zamanlayıcıyı başlatmak için [1 min] tuşu ve [10 min] tuşu ile istediğiniz süreyi ayarlayın. Ayarladığınız zamanlayıcı süresi ekranın ortasında gösterilir. 3 saniye boyunca hiçbir tuşa basmazsanız zamanlayıcı bir bip sesi ile birlikte otomatik olarak çalışmaya başlar.
  • Page 94 9. Temizlik ve bakım DİKKAT • Cihazı nemli bir bezle temizleyin. Agresif temizlik maddeleri ya da sert fırçalar kullanmayın! • Cihaza kesinlikle su girmemelidir. • Cihazı uzun süre kullanmayacaksanız, orijinal ambalajı içinde, kuru bir ortamda ve üzerinde ağırlık olmadan saklamanızı öneririz. 10.
  • Page 95 Sorun Olası neden Çözüm Bağıl nem %95 Bağıl nem ölçüm Ekranda görünüyor üzerinde aralığının dışında Cihaz çalıştırıldıktan Cihaz sıcaklık veya nem sonra doğru verilerin değeri göstermiyor veya Ortam değişikliği gösterilmesi 10 daki- hatalı gösteriyor ka kadar sürebilir 11. Bertaraf etme Çevreyi korumak için, kullanım ömrü...
  • Page 96 Garanti, yasalarla zorunlu kılınan sorumlulukların kapsamında herhangi bir kısıtlamaya neden olmaksızın geçerlidir. Beurer, bu ürünün kusursuz bir şekilde çalıştığını ve eksiksiz olduğunu garanti eder. Yeni ve kullanılmamış bir ürünün müşteri tarafından satın alınmasıyla başlayan ve...
  • Page 97 ürünler için geçerlidir. Alman yasaları geçerlidir. Bu ürünün garanti süresi içinde aşağıda belirtilen hükümler uyarınca eksiksiz olmadığı veya çalışma açısından kusurlu olduğu saptanırsa, Beurer bu garanti koşulları kapsamında ücretsiz bir ikame ürün teslimatı veya onarım gerçekleştir- mekle yükümlüdür.
  • Page 98 Beurer tarafından yetkilendirilmemiş bir servis merkezi veya müşterinin kendisi tarafından açılan, onarılan veya üzerinde değişiklik yapılan ürünler; –  Ürünün üreticiden müşteriye nakliyesi sırasında oluşan hasarlar; –  İkinci kalite ürün veya kullanılmış ürün olarak satın alınan ürünler; –  Bu üründeki bir kusurdan kaynaklanan müteakip hasarlar (ancak bu durumda ürün sorumluluğu veya yasal zorunlu sorumluluk hükümleri uyarınca tüketici...
  • Page 99 современные, тщательно протестированные высококачественные изделия для обогрева тела, измерения массы, кровяного давления, температуры тела, пульса, для легкой терапии, массажа, косметических процедур, ухода за детьми и очистки воздуха. С наилучшими пожеланиями, компания Beurer Содержание 1. Ознакомительная информация 100 7.3 Сброс на заводские 2. Комплект поставки ..... 100 настройки...
  • Page 100 1. Ознакомительная информация Термогигрометр HM 22 измеряет температуру и относительную влажность воздуха в  помещении. Полученные значения отображаются на  дисплее. Дополнительно термогигрометр оснащен таймером, при помощи которого Вы можете настроить кратковременное измерение. Благодаря небольшим размерам термогигрометр можно установить в любом месте. С обратной стороны термогигрометра имеется приспосо- бление...
  • Page 101 Прочтите инструкцию по применению. Маркировка CE Это изделие соответствует требованиям действующих европейских и национальных директив. Утилизация прибора в соответствии с директивой ЕС по от- ходам электрического и электронного оборудования — WEEE (Waste Electrical and Electronic Equipment). Не утилизируйте батарейки вместе с бытовым мусором: они содержат токсичные вещества. Производитель Утилизация упаковки должна производиться в соответ- ствии...
  • Page 102 4. Использование по назначению ПРЕДУПРЕЖДЕНИЕ Прибор предназначен исключительно для измерения влажности воздуха и температуры воздуха в помещении. Прибор предназначен исключительно для частного использования. Используйте прибор только в целях, для которых он был разработан, и только таким способом, который описан в данной инструкции по при- менению. Любое применение не по назначению может быть опасным! Производитель...
  • Page 103 • Держите прибор подальше от открытого пламени (например, свечей). • Никогда не погружайте прибор в воду или другие жидкости. • Не накрывайте прибор во время использования, например одеялом или подушкой. • Не используйте прибор вне помещения. Указания по обращению с батарейками ПРЕДУПРЕЖДЕНИЕ • При попадании жидкости из элемента батарейки на кожу или в глаза...
  • Page 104 • Используйте батарейки только одного типа или равноценных типов. • Всегда заменяйте все батарейки сразу. • Не используйте аккумуляторы! • Не разбирайте, не открывайте и не разбивайте батарейки. ВНИМАНИЕ • Предохраняйте прибор от ударов, влажности, пыли, химикатов, сильных колебаний температуры, прямых солнечных лучей, брызг, песка и не устанавливайте его вблизи источников тепла (печей...
  • Page 105 6. Описание прибора Передняя сторона 1 Кнопка [1 мин] 2 Кнопка [CLEAR] 3 Кнопка [10 мин] 4 Дисплей...
  • Page 106 Обратная сторона TIME UP/CF DOWN RESET 5 6 7 8 1 Защитная крышка для 5 Кнопка [TIME] датчиков 2 Крышка отсека для 6 Кнопка [UP/CF] батареек 3 Откидная подставка 7 Кнопка [DOWN] 4 Приспособление для 8 Кнопка [RESET] подвешивания 9 Отсек для батареек...
  • Page 107 7. Подготовка к работе 7.1 Установка батареек Указание Перед вводом термогигрометра в эксплуатацию сначала необходимо вставить две батарейки AAA (входят в комплект поставки) в отсек для батареек. Для этого выполните следующие действия. 1. С обратной стороны термогигрометра находится кру- глая крышка отсека для батареек. Поверните крышку отсека...
  • Page 108 7.2 Настройка даты/времени/единицы измерения 1. Для переключения между 12-часовым и 24-часовым режимом отображе- ния времени нажмите кнопку [TIME]. Для переключения между градусами Цельсия (°C) и Фаренгейта (°F) нажмите кнопку [UP/CF]. 2. В меню настройки задана следующая последовательность: год -> месяц -> день -> часы -> минуты Чтобы...
  • Page 109 7.3 Сброс на заводские настройки Для сброса даты и времени на заводские настройки при помощи острого предмета коротко нажмите на кнопку [RESET]. 8. Применение Термогигрометр может работать в стандартном режиме или в режиме таймера. 8.1 Стандартный режим Если Вы не нажимаете никакие кнопки на термогигрометре, на дисплее автоматически отображается стандартный режим работы. Время...
  • Page 110 8.2 Таймер Вы также можете настроить на термогигрометре таймер в диапазоне до 99 минут. 1. Для запуска таймера при помощи кнопок [1 мин] и [10 мин] установите же- лаемое время. В центре дисплея появится установленное время таймера. Если в течение 3 секунд Вы не нажмете ни одну кнопку, таймер подаст зву- ковой сигнал и запустится автоматически. По истечении установленного времени...
  • Page 111 9. Очистка и уход ВНИМАНИЕ • Очищайте прибор влажной салфеткой. Не используйте абра- зивные чистящие средства или жесткие щетки! • Не допускайте попадания жидкости внутрь прибора. • Если прибор не используется длительное время, рекомен- дуется хранить его в сухом месте в оригинальной упаковке. При этом не следует класть на прибор какие-либо предметы. 10.
  • Page 112 Проблема Возможные причины Меры по устранению Относительная Относительная влаж- На дисплее отображается влажность воздуха ность воздуха ниже надпись за пределами диапа- 20 %. зона измерения. Относительная Относительная влаж- На дисплее отображается влажность воздуха ность воздуха выше надпись за пределами диапа- 95 %. зона измерения. После ввода в экс- Прибор...
  • Page 113 11. Утилизация В целях охраны окружающей среды по окончании срока службы прибора запрещается утилизировать его вместе с бытовыми отходами. Утилизация должна производиться через соответствующие пункты сбора в стране использования изделия. Прибор следует утилизировать согласно Директиве ЕС об отходах электрического и электронно- го оборудования — WEEE (Waste Electrical and Electronic Equipment). При...
  • Page 114 12. Технические характеристики Тип HM 22 Артикул 678.04 Электропитание 2 шт. по 1,5 В , батарейки AAA, LR03 Масса 135 г (без батареек) Размеры 110 x 105 x 29,5 мм Диапазон измерения от -10 до 50 °C (от 14 до 122 °F) температуры Диапазон измерения относительная влажность воздуха от 20 до 95 % влажности 13. Гарантия/сервисное обслуживание Более подробная информация по гарантии/сервису находится в гарантийном/сервисном...
  • Page 115 Drodzy Klienci, cieszymy się, że zdecydowali się Państwo na zakup naszego produktu. Firma Beurer oferuje dokładnie przetestowane produkty wysokiej jakości przeznaczone do pomiaru wagi, ciśnienia krwi, temperatury ciała i tętna, do łagodnej terapii, masażu, ogrzewania i nawilżania powietrza, a także urządzenia do pielęgnacji urody i ułatwiające opiekę...
  • Page 116 1. Informacje ogólne Termohigrometr HM 22 umożliwia zmierzenie względnej wilgotności oraz aktualnej temperatury powietrza w pomieszczeniu oraz odczytanie wyników na wyświetlaczu. Dodatkowo termohigrometr posiada minutnik, za pomocą którego można ustawić krótki pomiar czasu. Dzięki poręcznym rozmiarom termohigrometr można umieścić w dowolnym miej- scu.
  • Page 117 Oznaczenie CE Niniejszy produkt spełnia wymagania obowiązujących dyrektyw europejskich i krajowych. Utylizacja zgodnie z dyrektywą WE w sprawie zużytych urządzeń elektrycznych i elektronicznych – WEEE (ang. Waste Electrical and Electronic Equipment) Baterii zawierających szkodliwe substancje nie należy wyrzu- cać z odpadami z gospodarstwa domowego Producent Opakowanie zutylizować w sposób przyjazny dla środowiska Produkty spełniają...
  • Page 118 5. Ostrzeżenia i wskazówki dotyczące bezpieczeństwa OSTRZEŻENIE • Opakowanie przechowywać w miejscu niedostępnym dla dzieci. Istnieje ryzyko uduszenia. • Urządzenie nie służy do zabawy! Należy je przechowywać poza zasięgiem dzieci. • W żadnym wypadku nie wolno samodzielnie otwierać ani napra- wiać urządzenia, gdyż może to zaburzyć jego prawidłowe działanie. Nieprzestrzeganie skutkuje utratą...
  • Page 119 Wskazówki dotyczące postępowania z bateriami OSTRZEŻENIE • Jeśli dojdzie do kontaktu elektrolitu ze skórą lub oczami, należy przemyć podrażnione miejsca wodą i skontaktować się z lekarzem. • Niebezpieczeństwo połknięcia! Małe dzieci mogą połknąć baterie i udusić się nimi. Dlatego należy przechowywać baterie w miejscach niedostępnych dla dzieci! •...
  • Page 120 UWAGA • Urządzenie należy chronić przed wstrząsami, wilgocią, kurzem, chemikaliami, dużymi wahaniami temperatury, bezpośrednim pro- mieniowaniem słonecznym, kroplami wody, piaskiem i znajdującymi się zbyt blisko źródłami ciepła (np. piecem lub grzejnikiem). • Na urządzeniu nie należy kłaść żadnych przedmiotów. • Urządzenie należy czyścić zwilżoną ściereczką. Nie należy stoso- wać...
  • Page 121 6. Opis urządzenia Przód 1 Przycisk [1 min] 2 Przycisk [CLEAR] 3 Przycisk [10 min] 4 Wyświetlacz...
  • Page 122 Tył TIME UP/CF DOWN RESET 5 6 7 8 1 Osłona czujników 5 Przycisk [TIME] 2 Pokrywa komory baterii 6 Przycisk [UP/CF] 3 Rozkładana nóżka 7 Przycisk [DOWN] 4 Uchwyt do zawieszenia 8 Przycisk [RESET] 9 Komora baterii...
  • Page 123 7. Pierwsze włączenie 7.1 Wkładanie baterii Wskazówka Przed włączeniem termohigrometru należy najpierw włożyć dwie baterie AAA (dostarczone z urządzeniem) do komory baterii. W tym celu wykonać następujące czynności: 1. Z tyłu termohigrometru znajduje się okrągła pokrywa ko- mory baterii. Otworzyć pokrywę komory baterii, przekręca- jąc nią...
  • Page 124 7.2 Ustawianie daty / godziny / jednostki temperatury 1. Aby przełączyć się między trybem 12- i 24-godzinnym, należy nacisnąć przy- cisk [TIME]. Aby przełączyć się między skalą Celsjusza (°C) i Fahrenheita (°F), należy nacisnąć przycisk [UP/CF]. 2. Kolejność w menu ustawień jest następująca: Rok ->...
  • Page 125 7.3 Przywracanie ustawień fabrycznych Aby przywrócić datę i godzinę do ustawień fabrycznych, należy krótko nacisnąć przycisk [RESET] ostro zakończonym przedmiotem. 8. Zastosowanie Termohigrometr ma standardowy tryb pracy i minutnik. 8.1 Tryb standardowy Jeśli nie zostanie naciśnięty żaden przycisk na termohigrometrze, na wyświetla- czu pojawi się...
  • Page 126 8.2 Minutnik Na termohigrometrze można również ustawić minutnik na czas do 99 minut. 1. Aby uruchomić minutnik, użyć przycisku [1 min] i przycisku [10 min], aby ustawić żądany czas odliczania minutnika. Ustawiony czas odliczania minutnika pojawia się na środku wyświetlacza. Jeżeli przez 3 sekundy nie zostanie naciśnięty żaden przycisk, minutnik uruchomi się...
  • Page 127 9. Czyszczenie i konserwacja UWAGA • Urządzenie należy czyścić zwilżoną ściereczką. Nie należy stosować silnych środków czyszczących ani szczotki o twardym włosiu! • W żadnym wypadku do urządzenia nie powinna dostać się ciecz. • Nieużywane przez dłuższy czas urządzenie należy przechowywać w oryginalnym opakowaniu w suchym miejscu, nie kładąc na nim żadnych przedmiotów.
  • Page 128 Problem Możliwa przyczyna Rozwiązanie Względna wilgotność Na wyświetlaczu pojawia Względna wilgotność powietrza poza zakre- się powietrza poniżej 20% sem pomiarowym Względna wilgotność Na wyświetlaczu pojawia Względna wilgotność powietrza poza zakre- się powietrza ponad 95% sem pomiarowym Po uruchomieniu Przyrząd nie wykazuje może minąć...
  • Page 129 Na bateriach zawierających szkodliwe związki znajdują się następujące oznaczenia: Pb = bateria zawiera ołów, Cd = bateria zawiera kadm, Hg = bateria zawiera rtęć. 12. Dane techniczne HM 22 Numer artykułu. 678.04 Zasilanie 2 baterie 1,5 V  AAA LR03 Masa 135 g (bez baterii) Wymiary 110 x 105 x 29,5 mm...
  • Page 130 13. Gwarancja/serwis Firma Beurer GmbH, Söflinger Straße 218, D-89077 Ulm (zwana dalej „Beurer”) udziela gwarancji na ten produkt na następujących warunkach i w poniżej opisa- nym zakresie. Poniższe warunki gwarancji nie naruszają ustawowych zobowiązań gwaran- cyjnych sprzedającego wynikających z umowy kupna zawartej z kupującym.
  • Page 131 Roszczenie z tytułu gwarancji będzie rozpatrywane tylko wtedy, gdy kupujący może przedłożyć –  kopię faktury/paragon zakupu oraz –  oryginalny produkt firmie Beurer lub autoryzowanemu partnerowi firmy Beurer. Niniejsza gwarancja wyraźnie nie obejmuje: –  zużycia wynikającego z normalnego użytkowania lub zużywania się pro- duktu;...
  • Page 132 Beurer GmbH • Söflinger Straße 218 • 89077 Ulm, Germany www.beurer.com • www.beurer-gesundheitsratgeber.com • www.beurer-healthguide.com...