Beurer FT 58 Mode D'emploi
Masquer les pouces Voir aussi pour FT 58:
Table des Matières

Publicité

Les langues disponibles
  • FR

Les langues disponibles

  • FRANÇAIS, page 27

Liens rapides

DE Ohrthermometer
Gebrauchsanweisung ........................................... 2
EN Ear thermometer
Instructions for use ............................................. 15
FR Thermomètre auriculaire
Mode d'emploi ................................................... 27
ES Termómetro para el oído
Instrucciones de uso .......................................... 40
IT Termometro per orecchio
Istruzioni per l'uso .............................................. 53
TR Kulak Termometresi
Kullanım Kılavuzu ............................................... 66
RU Термометр для измерения
температуры в ухе
Инструкция по применению ............................. 78
PL Termometr douszny
Instrukcja obsługi ................................................ 92
FT 58

Publicité

Table des Matières
loading

Sommaire des Matières pour Beurer FT 58

  • Page 1 FT 58 DE Ohrthermometer Gebrauchsanweisung ........... 2 EN Ear thermometer Instructions for use ..........15 FR Thermomètre auriculaire Mode d’emploi ........... 27 ES Termómetro para el oído Instrucciones de uso .......... 40 IT Termometro per orecchio Istruzioni per l’uso ..........53 TR Kulak Termometresi Kullanım Kılavuzu ..........
  • Page 2: Table Des Matières

    Wär me, Sanfte Therapie, Blutdruck/Diagnose, Gewicht, Mas­ sage und Luft. beachten Sie die Hinweise. Mit freundlicher Empfehlung Inhaltsverzeichnis Ihr Beurer­Team 1. Zeichenerklärung ................3 2. Bestimmungsgemäßer Gebrauch ........... 3 Lieferumfang 3. Hinweise .................... 4 Überprüfen Sie den Lieferumfang auf äußere Unversehrtheit 4.
  • Page 3: Zeichenerklärung

    1. Zeichenerklärung Operating Zulässige Betriebstemperatur und ­luft­ feuchtigkeit Folgende Symbole werden in dieser Gebrauchsanweisung und auf dem Gerät verwendet: Hersteller WARNUNG Warnhinweis auf Verletzungsgefahren oder Ge­ Verpackung umweltgerecht entsorgen fahren für Ihre Gesundheit. ACHTUNG IP 22, Schutz gegen schädliches Eindringen von Sicherheitshinweis auf mögliche Schäden am IP 22 Wasser und Staub...
  • Page 4: Hinweise

    Verträglichkeit. tamination zu vermeiden. Beachten Sie dabei, dass tragbare und mobile HF­Kommunika­ • Das Ohrthermometer darf nur mit Schutzkappen von Beurer tionseinrichtungen dieses Gerät beeinflussen können. verwendet werden, andere Schutzkappen können Messfeh­ ler verursachen. Wenn Sie keine Schutzkappen mehr ha­...
  • Page 5 • Auf Polaritätskennzeichen Plus (+) und Minus (­) achten. Hinweise zu Elektromagnetischer Verträglichkeit • Wenn eine Batterie ausgelaufen ist, Schutzhandschuhe an­ ziehen und das Batteriefach mit einem trockenen Tuch rei­ • Das Gerät ist für den Betrieb in allen Umgebungen geeig­ nigen.
  • Page 6: Gerätebeschreibung

    4. Gerätebeschreibung 5. Inbetriebnahme Die Batterien sind beim neuen Gerät bereits eingelegt. Ziehen Sie vor der ersten Anwen­ dung den herausstehenden Batterieschutz­ 1 Schutzkappe streifen aus dem Batteriefach. Das Ohrther­ 2 Messsonde mometer schaltet sich dabei anschließend 3 START ­Taste automatisch ein.
  • Page 7: Temperatureinheit Wählen (°C Oder °F)

    6.2 Temperatureinheit wählen (°C oder °F) 3. Auf dem Display erscheint die Stundenanzeige. Wählen Sie Sie können sich Ihre Messergebnisse in der Temperatureinheit mit der START­Taste die aktuel­ Grad Celsius (°C) oder Grad Fahrenheit (°F) anzeigen lassen. le Stunde und bestätigen Sie mit 1.
  • Page 8: Körpertemperatur Messen

    7.1 Körpertemperatur messen die Ohren abgedeckt sind, die Ohren starker Hitze/Kälte aus­ gesetzt sind oder nach dem Schwimmen/Baden. Wenn ei­ WARNUNG nes dieser Umstände auf Sie zutrifft, warten Sie 20 Minuten • Es gibt Personen, die unterschiedliche Messwerte im lin­ bevor Sie die Messung durchführen.
  • Page 9: Objekttemperatur Messen

    7.2 Objekttemperatur messen 5. Nach ca. einer Sekunde ertönt ein Sig­ nalton und das Messergebnis erscheint 1. Nehmen Sie die Schutzkappe (wenn im Display. Um das Ohrthermometer aufgesetzt) von der Sensorspitze des auszuschalten, drücken Sie die EIN/ Ohrthermometers ab. AUS­Taste 2.
  • Page 10: Raumtemperatur Anzeigen

    7.3 Raumtemperatur anzeigen 7.4 Gespeicherte Messwerte anzeigen Wenn Sie das Ohrthermometer einschalten, erscheinen auf Das Ohrthermometer speichert automatisch die Tempera­ dem Display die Raumtemperatur, das Datum und die Uhrzeit tur­Messwerte der letzten 10 Messungen von jeweils Körper­ alle 3 Sekunden im Wechsel. und Objekttemperatur (inkl.
  • Page 11: Batteriewechsel

    8. Batteriewechsel 9. Reinigung / Aufbewahrung Bevor Sie die Batterie wechseln, vergewissern Sie sich, dass Schutzkappen sind nur für den einmali­ das Gerät ausgeschaltet ist. gen Gebrauch bestimmt. Die Sensorspitze ist das empfindlichs­ 1. Tauschen Sie die Batterien aus, sobald te Teil des Ohrthermometers.
  • Page 12: Was Tun Bei Fehlermeldungen

    Hinweis: Diese Zeichen finden Sie auf schadstoff­ Fehler- Ursache Behebung haltigen Batterien: Pb = Batterie enthält Blei, meldung E     3 Cd = Batterie enthält Cadmium, Hg = Batterie Das Ohrthermometer Beachten Sie die Hinweise ist nicht korrekt in Ih­ im Kapitel „Messen“.
  • Page 13: Technische Daten

    Fehler- Ursache Behebung Klinische Wiederholbar­ 0,11 °C (0,2 °F) meldung keit Ohrmessung: Gemes­ Vergewissern Sie sich, Messdauer Ca. eine Sekunde sene Temperatur liegt dass das Gerät und die Betriebstemperaturbe­ 10 – 40 °C (50 – 104 °F), Luftfeuchtigkeit unter 28 °C (82,4 °F) Schutzkappe in einwand­...
  • Page 14: Garantie / Service

    Nachweis des Kaufes zu führen. Die Garantie ist innerhalb eines Zeitraumes von 5 Jahren ab Kaufdatum gegenüber der Beurer GmbH, Ulm (Germany) geltend zu machen. Bitte wenden Sie sich im Falle von Reklamationen an un- seren Service unter folgendem Kontakt: Service Hotline: Tel.: +49 (0) 731 / 39 89­144...
  • Page 15 With kind regards, Your Beurer team Table of contents 1. Signs and symbols ................. 16 2. Intended use ................... 16 Included in delivery 3.
  • Page 16: Signs And Symbols

    1. Signs and symbols Operating Permissible operating temperature and humidity The following symbols appear in these instructions for use and on the device: Manufacturer WARNING Warning notice indicating a risk of injury or Dispose of packaging in an environmentally damage to health. friendly manner IMPORTANT IP 22, protection against harmful ingress of...
  • Page 17: Notes

    • The ear thermometer may only be used with protective caps compatibility. from Beurer; other protective caps may result in faulty meas­ Please note that portable and mobile HF communication systems urements. If you have run out of protective caps, contact the may interfere with this device.
  • Page 18: Unit Description

    • If a battery has leaked, put on protective gloves and clean Notes on electromagnetic compatibility the battery compartment with a dry cloth. • Protect batteries from excessive heat. • The device is suitable for use in all environments listed in these instructions for use, including domestic environments.
  • Page 19: Initial Use

    LCD display 1. Press and hold the ON/OFF but­ on the switched­off de­ 1 Room temperature mode vice for three seconds. “24 H” 2 Displays room temperature/ appears on the display. time/date 3 AM/PM display (time) 2. Use the START button to select the hour format (12h or 24h) and 4 Battery symbol confirm using the ON/OFF but­...
  • Page 20: Setting The Temperature Unit (°C Or °F)

    7. Measuring 7. The month flashes on the display. Use the START button to select the current month and confirm Note using the ON/OFF button Check before each use that the lens is intact. If it is damaged, The device then switches itself contact your retailer or the service address.
  • Page 21 • This ear thermometer may only be used with the protective 4. Insert the sensor tip with the protec­ cap in place. tive cap carefully into the ear canal and • The following circumstances may influence the temperature press the START button to begin the in the ear: if you have been lying on the ear for an extended measurement.
  • Page 22: Measuring Object Temperature

    7.2 Measuring object temperature 7.3 Displaying room temperature When you switch on the ear thermometer, the room tempera­ 1. Remove the protective cap from the ture, the date and time appear alternately on the display every sensor tip of the ear thermometer (if 3 seconds.
  • Page 23: Displaying Stored Measurements

    7.4 Displaying stored measurements 8. Replacing the battery The ear thermometer automatically stores the last 10 temper­ Before replacing the battery, ensure that the device is switched ature measurements of body and object temperature respec­ off. tively (incl. date and time). To recall the stored measurements, proceed as follows: 1.
  • Page 24: Cleaning And Storage

    For environmental reasons, do not dispose of the device in the 9. Cleaning and storage household waste at the end of its useful life. Dispose of the unit at a suitable local collection or recycling Protective caps are only intended for point.
  • Page 25: Technical Data

    If you cannot find a solution to your problem here, contact our Error Cause Solution Customer Services. message E     5 The ear thermom­ Replace the batteries and eter is not working try again. If the fault occurs 12. Technical data properly.
  • Page 26: Warranty / Service

    In case of returning the unit please add a copy of your receipt and a short report of the defect. The following warranty terms shall apply: 1. The warranty period for BEURER products is either 5 years or­ if longer­ the country specific warranty period from date of Purchase.
  • Page 27 Sincères salutations, Table des matières Votre équipe Beurer 1. Symboles utilisés ................28 2. Utilisation conforme aux recommandations ....... 28 3. Remarques ..................29 Contenu 4.
  • Page 28: Symboles Utilisés

    1. Symboles utilisés Storage/Transport Température et taux d’humidité de stockage et de transport admissibles Les symboles suivants sont employés dans ce mode d’emploi et sur l’appareil : Operating Température et taux d’humidité d’utilisation AVERTISSEMENT admissibles Ce symbole vous avertit des risques de blessures ou des dangers pour votre santé.
  • Page 29: Remarques

    • Remplacez la protection après chaque utilisation afin de garantir une mesure précise et empêcher toute contami­ nation croisée. • Le thermomètre auriculaire doit être utilisé uniquement avec des embouts de protection de Beurer. D’autres embouts de protection peuvent provoquer des erreurs de mesure. Si...
  • Page 30 vous n’avez plus d’embout de protection, consultez le fabri­ Risques pour l’appareil cant ou un revendeur pour en obtenir d’autres. ATTENTION • Consultez un médecin si vous constatez une dégradation de votre état de santé. • Ne soumettez l’appareil à aucun choc mécanique. •...
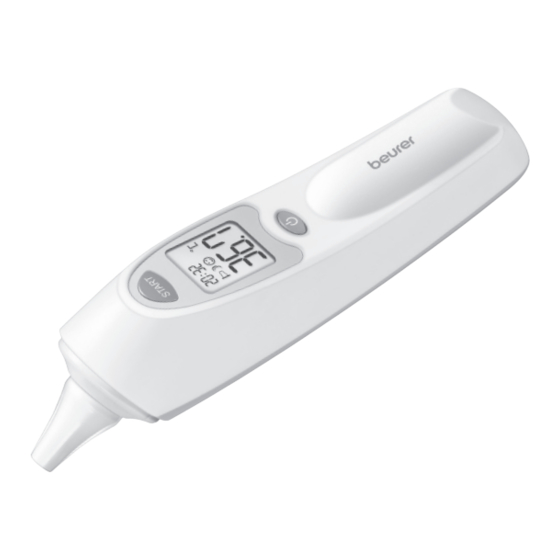
  • Page 31: Description De L'appareil

    • L’utilisation d’accessoires autres que ceux spécifiés ou four­ Écran LCD nis par le fabricant de cet appareil peut provoquer des per­ 1 Mode température ambiante turbations électromagnétiques accrues ou une baisse de 2 Affichage de la température l’immunité électromagnétique de l’appareil, et donc causer ambiante/l’heure/la date des dysfonctionnements.
  • Page 32: Paramètres

    6. Paramètres 5. L’année s’affiche sur l’écran. À l’aide de la touche START, sélectionnez l’année actuelle 6.1 Réglage de l’heure/la date et confirmez avec la touche Avant de commencer les mesures, nous vous conseillons de MARCHE/ARRÊT régler l’heure et la date. Ainsi, vous pourrez affecter les mesures 6.
  • Page 33: Mesures

    • La mesure ne doit pas être effectuée dans une oreille atteinte 2. À l’aide de la touche START, de maladies inflammatoires (par ex. pyorrhée, sécrétions), sélectionnez alors l’unité de après d’éventuelles blessures des oreilles (par ex. blessures température souhaitée (°C ou du tympan) ou lors de la phase de guérison après une inter­...
  • Page 34: Mesurer La Température D'objet

    2. Pour allumer le thermomètre auricu­ Remarque laire, appuyez sur la touche MARCHE/ ARRÊT . Trois signaux sonores re­ Après une mesure, si vous n’appuyez sur aucune touche pen­ tentissent et l’écran s’allume. dant une minute, le thermomètre auriculaire s’éteint automa­ tiquement.
  • Page 35: Afficher La Température Ambiante

    7.3 Afficher la température ambiante 3. Assurez­vous d’être en mode tempé­ rature d’objet ( Lorsque vous allumez le thermomètre auriculaire, l’écran af­ Pour passer du mode température cor- fiche la température ambiante, la date et l’heure en alternant porelle au mode température d’objet, toutes les 3 secondes.
  • Page 36: Afficher Les Valeurs De Mesure Enregistrées

    7.4 Afficher les valeurs de mesure enregistrées 8. Changement des piles Le thermomètre auriculaire enregistre automatiquement les Avant de changer les piles, assurez­vous que l’appareil est valeurs de température des 10 dernières mesures pour chaque éteint. température corporelle et température d’objet (avec date et heure).
  • Page 37: Nettoyage/Stockage

    Remarque : Ces pictogrammes se trouvent sur les 9. Nettoyage/stockage piles à substances nocives : Pb = pile contenant du plomb, Cd = pile contenant du cadmium, Les embouts de protection sont à usage Hg = pile contenant du mercure. unique. La pointe du capteur est la partie la plus Dans l’intérêt de la protection de l’environnement, sensible du thermomètre auriculaire.
  • Page 38: Données Techniques

    Message Cause Solution Message Cause Solution d’erreur E     3 d’erreur Le thermomètre auricu­ Respectez les consignes Mesure auriculaire : tem­ Assurez­vous que l’ap­ laire n’est pas placé cor­ indiquées au chapitre pérature mesurée infé­ pareil et l’embout de rectement dans l’oreille. « Mesures ».
  • Page 39: Garantie / Maintenance

    • Température ambiante : ± 2 °C (± 4 °F) Reproductibilité médicale 0,11 °C (0,2 °F) Les conditions de garantie suivantes s‘appliquent : 1. La période de garantie des produits BEURER est de 5 ans Durée de la mesure Env. une seconde ou, si elle est plus longue, elle est applicable dans le pays Plage de température de...
  • Page 40 ámbitos del calor, las terapias no agresivas, la tensión arterial/ el diagnóstico, el peso, los masajes y el aire. Atentamente, El equipo de Beurer Índice 1. Símbolos ..................41 2. Uso correcto ................... 41 Artículos suministrados 3.
  • Page 41: Símbolos

    1. Símbolos Operating Temperatura y humedad de funcionamiento admisibles En estas instrucciones de uso y en el aparato se utilizan los siguientes símbolos: Fabricante ADVERTENCIA Aviso sobre riesgos de lesiones u otros peligros Elimine el embalaje respetando el medio am­ para la salud.
  • Page 42: Indicaciones

    • Utilice el termómetro para el oído únicamente con tapas frecuencia portátiles y móviles pueden interferir en el funcio­ protectoras de Beurer; si utiliza otras tapas protectoras pue­ namiento de este aparato. den producirse fallos en la medición. Si desea adquirir tapas protectoras de repuesto, diríjase al fabricante o a un distri­...
  • Page 43: Indicaciones Relativas A La Compatibilidad Electromagnética

    • Los dispositivos de comunicación de alta frecuencia por­ • ¡Peligro de asfixia! Los niños pequeños podrían tragar­ tátiles y móviles pueden interferir en el funcionamiento de se las pilas y asfixiarse. Guarde las pilas fuera del alcance este aparato. de los niños.
  • Page 44: Descripción Del Aparato

    4. Descripción del aparato 5. Puesta en funcionamiento Los aparatos nuevos se entregan con las pilas ya colocadas. Antes de usarlos por primera vez, quite las cintas de protección que sobre­ 1 Tapa protectora salen del compartimento para pilas. A conti­ 2 Sensor de medición nuación, el termómetro para el oído se encien­...
  • Page 45: Seleccionar Unidad De Temperatura (°C O °F)

    6.2 Seleccionar unidad de temperatura (°C o °F) 3. En la pantalla aparece la indica­ ción de la hora. Seleccione con Puede visualizar los resultados de la medición en grados Cel­ la tecla de inicio la hora actual y sius (ºC) o en grados Fahrenheit (ºF). confirme con la tecla de encen­...
  • Page 46: Medición De La Temperatura Corporal

    7.1 Medición de la temperatura corporal de estas circunstancias, espere 20 minutos antes de tomar la temperatura. ADVERTENCIA • El cerumen puede influir en la medición de la temperatura. • Hay personas que tienen distintos valores de medición en Por ello, límpiese el oído si es necesario antes de tomar la el oído izquierdo y en el derecho.
  • Page 47: Medir Temperatura De Objetos

    7.2 Medir temperatura de objetos 5. Después de aprox. un segundo suena un pitido y el resultado de la medición 1. Retire la tapa protectora (si está pues­ aparece en la pantalla. Para apagar el ta) de la punta del sensor del termóme­ termómetro para el oído, pulse la tecla tro para el oído.
  • Page 48: Mostrar La Temperatura Ambiente

    7.4 Mostrar valores guardados 5. Después de un segundo suena un piti­ do y el resultado de la medición apare­ El termómetro para el oído guarda automáticamente los valores ce en la pantalla. Para apagar el termó­ de temperatura de las últimas 10 mediciones de temperatura metro para el oído, pulse brevemente corporal y de objetos (incl.
  • Page 49: Cambio De Pilas

    8. Cambio de pilas 9. Limpieza/conservación Antes de cambiar las pilas asegúrese de que el aparato está Las tapas protectoras son desechables. apagado. La punta del sensor es la pieza más sen­ sible del termómetro para el oído. Proce­ 1. Cambie las pilas en cuanto aparezca da con cuidado durante su limpieza para en la pantalla el símbolo de pila ( evitar daños.
  • Page 50: Solución De Problemas

    Nota: Estos símbolos se encuentran en pilas que Aviso de Causa Solución contienen sustancias tóxicas: Pb = la pila errores E     3 contiene plomo, Cd = la pila contiene cadmio, El termómetro para el Respete las indicaciones oído no está coloca­ incluidas del capítulo “To­...
  • Page 51: Datos Técnicos

    Aviso de Causa Solución Repetibilidad clínica 0,11 °C (0,2 °F) errores Duración de la medi­ Aprox. un segundo Medición en el oído: Asegúrese de que el apa­ ción la temperatura medi­ rato y la tapa protectora Rango de temperatura 10 – 40 °C (50 – 104 °F), humedad ambiental da es inferior a 28 °C están en perfecto estado.
  • Page 52: Garantía / Asistencia

    Se aplican las siguientes condiciones de garantía: 1. El periodo de garantía para productos de BEURER es de 5 años o, si es superior, se aplica el periodo de garantía vigen­ te en el país correspondiente a partir de la fecha de compra.
  • Page 53 Cordiali saluti Il team Beurer Sommario 1. Spiegazione dei simboli ..............54 Fornitura 2. Uso conforme ................. 54 Controllare l’integrità...
  • Page 54: Spiegazione Dei Simboli

    1. Spiegazione dei simboli Operating Temperatura e umidità di esercizio consentite I seguenti simboli sono utilizzati nelle Istruzioni per l’uso e sull’apparecchio: Produttore AVVERTENZA Segnalazione di rischio di lesioni o pericoli per Smaltire la confezione nel rispetto dell’am­ la salute. biente ATTENZIONE IP 22, protezione contro la penetrazione di...
  • Page 55: Note

    • Il termometro per orecchio può essere utilizzato esclusiva­ Apparecchiature di comunicazione HF mobili e portatili possono mente con tappi di protezione di Beurer, altri tappi possono influire sul funzionamento di questo apparecchio. determinare errori di misurazione. Se si esauriscono i tap­...
  • Page 56: Avvertenze Sulla Compatibilità Elettromagnetica

    • In caso di fuoriuscita di liquido dalla batteria, indossa­ Avvertenze sulla compatibilità elettromagnetica re guanti protettivi e pulire il vano batterie con un panno asciutto. • L’apparecchio è idoneo per l’utilizzo in qualsiasi ambiente • Proteggere le batterie dal caldo eccessivo. riportato nelle presenti istruzioni per l’uso, incluso l’ambien­...
  • Page 57: Descrizione Dell'apparecchio

    4. Descrizione dell’apparecchio 5. Messa in funzione Le batterie sono già presenti sugli apparec­ chi nuovi. Prima del primo impiego rimuovere la linguetta protettiva dal vano batterie. Il ter­ 1 Tappo di protezione mometro per orecchio si accende automati­ 2 Sensore di misurazione camente.
  • Page 58: Selezione Dell'unità Di Temperatura (°C O °F)

    6.2 Selezione dell’unità di temperatura (°C o °F) 3. Sul display viene visualizzata l’in­ dicazione dell’ora. Con il pulsan­ I risultati della temperatura misurata possono essere visualiz­ te START scegliere l’ora attuale e zati in gradi Celsius (°C) e Fahrenheit (°F). confermare con il pulsante ON/ 1.
  • Page 59: Misurazione Della Temperatura Corporea

    7.1 Misurazione della temperatura corporea bagno. In questi casi è necessario attendere 20 minuti prima di eseguire la misurazione. AVVERTENZA • La presenza di cerume può influire sulla misurazione: pulire • Alcune persone presentano valori diversi nell’orecchio sini­ pertanto l’orecchio prima di misurare la temperatura. stro e nell’orecchio destro.
  • Page 60: Misurazione Della Temperatura Superficiale

    7.2 Misurazione della temperatura superficiale 5. Dopo ca. un secondo viene emesso un segnale acustico e l’esito della misura­ 1. Rimuovere il tappo di protezione (se zione viene visualizzato sul display. Per applicato) dalla punta del sensore del spegnere il termometro per orecchio, termometro per orecchio.
  • Page 61: Visualizzazione Della Temperatura Ambiente

    7.3 Visualizzazione della temperatura ambiente 7.4 Visualizzazione dei valori memorizzati Quando si accende il termometro per orecchio, sul display Il termometro per orecchio memorizza automaticamente le si alternano ogni 3 secondi la temperatura ambiente, la da­ temperature delle ultime 10 misurazioni della temperatura cor­ ta e l’ora.
  • Page 62: Sostituzione Delle Batterie

    8. Sostituzione delle batterie 9. Pulizia/Conservazione Prima di sostituire le batterie, accertarsi che l’apparecchio sia I tappi di protezione sono concepiti co­ spento. me monouso. La punta del sensore è la parte più deli­ 1. Sostituire le batterie quando sul di­ cata del termometro per orecchio.
  • Page 63: Che Cosa Fare In Caso Di Messaggi Di Errore

    Nota: i simboli riportati di seguito indicano che Messaggio Causa Soluzione le batterie contengono sostanze tossiche. di errore E     3 Pb = batteria contenente piombo, Cd = batteria Il termometro per Attenersi alle indicazioni orecchio non è posi­ del capitolo "Misurazione".
  • Page 64: Dati Tecnici

    Messaggio Causa Soluzione Ripetibilità clinica 0,11 °C (0,2 °F) di errore Durata della misurazione Ca. un secondo Misurazione nell’orec­ Accertarsi che l’apparec­ Range temperature di 10 – 40 °C (50 – 104 °F), umidità dell’aria chio: la temperatura chio e il tappo di protezio­ esercizio 15­85% (non condensante) misurata è...
  • Page 65 Si applicano le seguenti condizioni di garanzia: 1. La garanzia dei prodotti BEURER dura 5 anni oppure, se più lunga, fa fede la durata di garanzia valida dalla data di acquisto di ciascun paese. In caso di rivendicazioni, la data di acquisto deve essere dimostrata tramite una prova d‘acquisto o una fattura.
  • Page 66 ürünlerimiz, yın ve içindeki yönergelere uyun. dünyanın her tarafında tercih edilmektedir. Yeni cihazınızı iyi günlerde kullanmanızı dileriz Beurer Ekibiniz İçindekiler 1. İşaretlerin açıklaması ..............67 Teslimat kapsamı 2. Amacına uygun kullanım ............... 67 Teslimat kapsamını...
  • Page 67: İşaretlerin Açıklaması

    1. İşaretlerin açıklaması Operating İzin verilen çalışma sıcaklığı ve hava nemi Aşağıdaki semboller kullanım kılavuzunda ve cihaz üzerinde kullanılmıştır: Üretici UYARI Yaralanma tehlikelerine veya sağlığınızla ilgili tehlikelere yönelik uyarı. Ambalajı çevreye saygılı şekilde bertaraf edin DİKKAT Cihaz ve aksesuarlarındaki olası hasarlar için IP 22, su ve tozların zarar verici bir şekilde nüfuz IP 22 güvenlik uyarısı.
  • Page 68: Yönergeler

    (ölçülen maksimum değeri gösteren) Avrupa standardına mek için koruma kapağını her kullanımdan sonra değiştirin. ve EN 60601­1­2 (CISPR 11, IEC 61000­4­2, IEC 61000­4­3, • Kulak termometresi sadece Beurer tarafından sağlanan ko­ IEC 61000­4­8 uygunluğu) Avrupa standardına uygundur ve ruyucu kapaklarla kullanılabilir; başka koruyucu kapaklar, elektromanyetik uyumluluk bakımından özel önlemlere tabidir.
  • Page 69: Cihaz Açıklaması

    • Cihazı uzun süre kullanmayacağınız durumlarda pilleri pil cihazın hatalı çalışması söz konusu olabilir. Bahsedilen şe­ bölmesinden çıkarın. kilde bir kullanım kesinlikle kaçınılmazsa, gerektiği gibi ça­ • Sadece aynı tip veya eşdeğer tip piller kullanın. lıştıklarından emin olmak için bu cihaz ve diğer cihazlar göz­ •...
  • Page 70: Lcd Ekran

    LCD ekran 1. Cihaz kapalı haldeyken Açma/ Kapama düğmesini üç sani­ 1 Oda sıcaklığı modu ye basılı tutun. Ekranda “24 H” 2 Oda sıcaklığı / saat / tarih görüntülenir. göstergesi 3 AM/PM göstergesi (saat) 2. Şimdi START düğmesiyle bir saat biçimini (12 veya 24 saat) seçin 4 Pil simgesi ve Açma/Kapama düğmesiyle...
  • Page 71: Sıcaklık Birimini Seçme (°C Veya °F)

    7.1 Vücut sıcaklığının ölçülmesi 7. Ekranda ay göstergesi yanıp sö­ ner. START düğmesiyle güncel UYARI ayı seçin ve Açma/Kapama düğ­ • Sağ ve sol kulaklarında farklı ölçüm değerleri olan insanlar mesiyle onaylayın. Cihaz bu­ vardır. Sıcaklık değişikliklerini belirlemek için aynı kişide her nun ardından otomatik olarak ka­...
  • Page 72 • Kulak kirleri ölçümü etkileyebilir, bu nedenle ölçümden önce 5. Yakl. bir saniye sonra bir sinyal sesi du­ gerekirse kulağı temizleyin. yulur ve ölçüm sonucu ekranda belirir. Kulak termometresini kapatmak için 1. Kulak termometresinin sensör ucuna Açma/Kapama düğmesine basın. temiz bir koruyucu kapak yerleştirin. 2.
  • Page 73: Nesne Sıcaklığı Ölçme

    7.2 Nesne sıcaklığı ölçme 7.3 Oda sıcaklığını gösterme Kulak termometresini açtığınızda ekranda oda sıcaklığı, tarih 1. Kulak termometresinin sensör ucun­ ve saat 3 saniye dönüşümlü olarak gösterilir. daki koruyucu kapağı (eğer takılıysa) çıkarın. 2. Kulak termometresini açmak için Aç­ ma/Kapama düğmesine basın.
  • Page 74: Kaydedilen Ölçüm Değerlerinin Görüntülenmesi

    7.4 Kaydedilen ölçüm değerlerinin görüntülenmesi 8. Pil değişimi Kulak termometresi vücut ve nesne sıcaklığı olmak üzere, son Pili değiştirmeden önce cihazın kapalı olduğundan emin olun. 10 ölçüme ait sıcaklık ölçüm değerlerini (tarih ve saat ile bir­ likte) otomatik olarak kaydeder. Kaydedilen ölçüm değerlerini 1.
  • Page 75: Temizlik / Saklama

    Çevreyi korumak için, kullanım ömrü dolan cihazı evsel atıklar­ 9. Temizlik / Saklama la beraber elden çıkarmayın. Cihaz, ülkenizdeki uygun atık top­ lama merkezleri üzerinden bertaraf edilebilir. Cihazı hurda elekt­ Koruyucu kapaklar yalnızca tek kullanım rikli ve elektronik eşya direktifine – WEEE (Waste Ele­ içindir.
  • Page 76: Teknik Veriler

    Hata mesajı Neden Çözüm E     5 12. Teknik veriler Kulak termometresi Pilleri değiştirin ve yeniden sorunsuz çalışmıyor. deneyin. Hata yeniden Sıcaklık ölçüm aralığı • Kulak içinde: 28,0 – 43,0 °C ortaya çıkarsa müşteri (82,4 – 109,4 °F) hizmetlerine başvurun. E  ...
  • Page 77: Garanti / Servis

    Cihazı geri gönderirken faturanızın bir kopyasını ve arızanın kısa açıklamasını ekleyin. Aşağıdaki garanti koşulları geçerlidir: 1. BEURER ürünlerinin garanti süresi 5 yıldır veya – daha uzun ise – ilgili ülkede geçerli olan satın alma tarihinden itibaren garanti süresi kabul edilir.
  • Page 78 ее в месте, доступном для других поль- пии, измерения массы, артериального давления, для диа­ гностики, массажа и очистки воздуха. зователей, и следуйте ее указаниям. С наилучшими пожеланиями, компания Beurer Содержание 1. Пояснения к символам ..............79 2. Использование по назначению ..........79 Комплект поставки 3. Указания ..................80 Проверьте...
  • Page 79: Пояснения К Символам

    Дополнительно покупаемые части Символ CE подтверждает соответствие ос­ Набор защитных колпачков, который можно приобрести новным требованиям директивы о медицин­ дополнительно: 2 x 10 защитных колпачков, № арт. ских изделиях 93/42/EEC. 795.34 Storage/Transport Допустимая температура и влажность воз­ духа при хранении и транспортировке 1.
  • Page 80: Указания

    Дополнительно с помощью термометра для измерения тем­ 3. Указания пературы в ухе можно также измерять температуру поме­ щения и различных объектов. Указания по технике безопасности Данный термометр был тщательно разработан для точно­ го, безопасного и быстрого измерения температуры в ухе. ПРЕДОСТЕРЕЖЕНИЕ Это неинвазивный термометр для измерения температуры •...
  • Page 81 • Если прибор длительное время не используется, извле­ разрешается использовать только с защитными кол­ ките батарейки из отделения для батареек. пачками Beurer; использование других защитных кол­ • Используйте батарейки только одного типа или равно­ пачков может привести к ошибкам в измерении. Если ценных типов.
  • Page 82: Описание Прибора

    • При наличии электромагнитных помех возможности ЖК-дисплей использования прибора могут быть ограничены. В ре­ 1. Режим измерения температуры зультате, например, могут появляться сообщения об в помещении ошибках или произойдет выход из строя дисплея/са­ 2. Индикация температуры мого прибора. в помещении/времени/даты • Не используйте данный прибор рядом с другими устрой­ 3.
  • Page 83: Настройки

    6. Настройки 4. На дисплее появится индика­ ция минут. С помощью кноп­ ки СТАРТ настройте показа­ 6.1 Настройка времени/даты ние минут и подтвердите вы­ Прежде чем Вы приступите к измерениям, рекомендуем Вам бор нажатием кнопки ВКЛ./ настроить текущее время и дату. Это позволит Вам впослед­ ВЫКЛ.
  • Page 84: Выбор Единиц Измерения Температуры (°C Или °F)

    6.2 Выбор единиц измерения температуры (°C или °F) 7.1 Измерение температуры тела Вы можете выбрать отображение результатов измерения ПРЕДОСТЕРЕЖЕНИЕ температуры в градусах Цельсия (°C) или в градусах Фа­ • У некоторых людей температура в левом и правом ухе ренгейта (°F). различна. Для отслеживания изменений температуры у одного человека всегда измеряйте температуру в од­ 1.
  • Page 85 • На температуру в ухе могут повлиять следующие об­ 4. Осторожно введите наконечник дат­ стоятельства: если Вы долгое время лежали на одном чика в защитном колпачке в слухо­ ухе; если уши закрыты; если уши не защищены от силь­ вой проход и нажмите кнопку СТАРТ, ной...
  • Page 86: Измерение Температуры Объекта

    7.2 Измерение температуры объекта 5. Через одну секунду раздастся зву­ ковой сигнал, и результат измере­ 1. Снимите защитный колпачок (если ния отобразится на дисплее. Для он надет) с  наконечника датчика выключения термометра для изме­ термометра для измерения темпе­ рения температуры в ухе ненадол­ ратуры...
  • Page 87: Термометр Для Измерения Температуры В Ухе

    7.4 Отображение сохраненных измеренных 4. Если Вы хотите продолжить измерение, нажмите кнопку значений СТАРТ. Если Вы хотите выключить термометр для измере­ ния температуры в ухе, удерживайте кнопку ВКЛ./ВЫКЛ. Термометр для измерения температуры в ухе автоматиче­ нажатой в течение 3 секунд. ски сохраняет в памяти результаты последних 10 измере­ ний...
  • Page 88: Очистка/Хранение

    или низкой температуре или влажности воздуха (см. тех­ 3. Вставьте новые батарейки 1,5 В ти­ нические характеристики), на ярком солнечном свете, под па AAA. Следите за соблюдением по­ током или в пыльных местах. В противном случае возмож­ лярности батареек. Закройте отде­ ны неточности при измерении. ление...
  • Page 89: Что Делать, Если Появляются Сообщения Об Ошибках

    11. Что делать, если появляются Сообщение Причина Меры по устранению об ошибке E     5 сообщения об ошибках? Термометр для изме­ Замените батарейки и по­ рения температуры вторите попытку. Если Сообщение Причина Меры по устранению в ухе работает неста­ ошибка появится снова, об ошибке бильно.
  • Page 90: Технические Характеристики

    Сообщение Причина Меры по устранению Продолжительность Прибл. одна секунда об ошибке измерения Батарейки разря­ Извлеките две разря­ Рабочий диапазон 10–40 °C (50–104 °F), влажность жены. дившиеся батарейки температур воздуха 15–85 % (без образования и вставьте в термометр конденсата) для измерения темпера­ Диапазон температур От –25 до 55 °C (от –13 до 131 °F), туры...
  • Page 91: Гарантия / Сервисное Обслуживание

    13. Гарантия / сервисное обслуживание Более подробная информация по гарантии/сервису на­ ходится в гарантийном/сервисном талоне, который вхо­ дит в комплект поставки.
  • Page 92 Z poważaniem, Spis treści zespół Beurer 1. Objaśnienie symboli ............... 93 2. Użytkowanie zgodne z przeznaczeniem ........93 Zawartość opakowania 3. Wskazówki ..................94 Zestaw należy sprawdzić pod kątem zewnętrznych uszkodzeń...
  • Page 93: Objaśnienie Symboli

    1. Objaśnienie symboli Operating Dopuszczalna temperatura i wilgotność powietrza podczas pracy W niniejszej instrukcji i na urządzeniu zastosowano następu­ jące symbole: Producent OSTRZEŻENIE Ostrzeżenie przed niebezpieczeństwem obra­ Opakowanie zutylizować w sposób przyjazny żeń ciała lub utraty zdrowia dla środowiska UWAGA Ostrzeżenie przed niebezpieczeństwem uszko­ IP 22, ochrona przed szkodliwym wnikaniem IP 22 dzenia urządzenia lub akcesoriów...
  • Page 94: Wskazówki

    Należy pamiętać, że przenośne i mobilne urządzenia komunika­ • Termometr ten może być używany tylko z  kapturkami cyjne pracujące na wysokich częstotliwościach mogą zakłócać ochronnymi firmy Beurer; inne kapturki mogą powodować działanie urządzenia. błędy pomiarowe. W razie braku kapturków ochronnych na­ leży skontaktować się z producentem lub sprzedawcą w celu wymiany kapturków.
  • Page 95 • Urządzenie może być naprawiane wyłącznie w autoryzowa­ • Istnieje niebezpieczeństwo połknięcia! Małe dzieci nych punktach serwisowych. W przeciwnym razie następuje mogłyby połknąć baterie i się nimi udusić. Dlatego baterie utrata gwarancji. należy przechowywać w miejscach niedostępnych dla dzieci. • Przenośne i mobilne urządzenia komunikacyjne pracują­ •...
  • Page 96: Opis Urządzenia

    4. Opis urządzenia 5. Uruchomienie Baterie są już założone w nowym urządze­ niu. Przed pierwszym użyciem wyjąć pasek ochronny baterii wystający z komory baterii. 1 Kapturek ochronny Termometr douszny włączy się wówczas au­ 2 Czujnik pomiaru tomatycznie. 3 Przycisk START 4 Przycisk WŁ./WYŁ. 6.
  • Page 97: Wybór Jednostki Temperatury (°C Lub °F)

    6.2 Wybór jednostki temperatury (°C lub °F) 3. Na wyświetlaczu pojawi się wskazanie godziny. Wybrać za Wyniki pomiaru można wyświetlać w stopniach Celsjusza (°C) pomocą przycisku START aktu­ lub Fahrenheita (°F). alną godzinę i zatwierdzić przy­ 1. Nacisnąć i przytrzymać przez ciskiem WŁ./WYŁ. trzy sekundy przycisk START 4.
  • Page 98: Pomiar Temperatury Ciała

    7.1 Pomiar temperatury ciała • Woskowina może mieć wpływ na pomiar, dlatego przed po­ miarem należy wyczyścić ucho. OSTRZEŻENIE 1. Nałożyć czysty kapturek ochronny na • W przypadku niektórych osób mogą wystąpić różne warto­ końcówkę czujnika termometru do­ ści pomiarowe w lewym i w prawym uchu. Aby rejestrować usznego.
  • Page 99: Pomiar Temperatury Przedmiotu

    7.2 Pomiar temperatury przedmiotu 5. Po mniej więcej jednej sekundzie rozle­ gnie się dźwięk, a na wyświetlaczu po­ 1. Zdjąć kapturek ochronny (jeśli jest na­ jawi się wynik pomiaru. Aby wyłączyć łożony) z końcówki czujnika termome­ termometr douszny, należy nacisnąć tru dousznego. przycisk WŁ./WYŁ.
  • Page 100: Wyświetlanie Temperatury Pomieszczenia

    7.3 Wyświetlanie temperatury pomieszczenia 7.4 Wyświetlanie zapisanych wartości pomiarowych Po włączeniu termometru dousznego na wyświetlaczu będą Termometr douszny automatycznie zapisuje temperaturę ciała co 3 sekundy wyświetlane temperatura pomieszczenia, data i przedmiotu (z datą i godziną) zmierzoną w trakcie ostatnich i godzina. 10 pomiarów. Aby wyświetlić zapisane wartości pomiarowe, należy postępować...
  • Page 101: Wymiana Baterii

    8. Wymiana baterii 9. Czyszczenie/przechowywanie Przed wymianą baterii należy się upewnić, że urządzenie jest Kapturki ochronne są przeznaczone do wyłączone. jednokrotnego użytku. Końcówka czujnika to najbardziej czu­ 1. Należy wymienić baterie, jak tylko na ły element termometru dousznego. Aby wyświetlaczu pojawi się symbol baterii uniknąć...
  • Page 102: Co Należy Zrobić W Przypadku Pojawienia Się Komunikatów O Błędach

    Wskazówka: Na bateriach zawierających szkodliwe Komunikat Przyczyna Rozwiązanie związki znajdują się następujące oznaczenia: błędu E     2 Pb = bateria zawiera ołów, Cd = bateria zawiera Zmierzona tempe­ Termometr douszny na­ ratura otoczenia nie leży umieścić na 30 mi­ kadm, Hg = bateria zawiera rtęć. mieści się...
  • Page 103: Dane Techniczne

    Komunikat Przyczyna Rozwiązanie 12. Dane techniczne błędu Pomiar temperatury Upewnić się, że stan urzą­ Zakres pomiaru • Ucho: 28,0–43,0°C w uchu: Zmierzona dzenia i kapturka ochron­ temperatury (82,4–109,4°F) temperatura przekra­ nego jest bez zarzutu. Po­ • Przedmiot: ­20–100°C (­4–212°F) cza 43°C (109,4°F). nownie wykonać pomiar. •...
  • Page 104: Gwarancja / Serwis

    W przypadku roszczeń z tytułu gwarancji konieczne jest potwierdzenie daty zakupu przez okazanie dowodu zakupu lub faktury. 2. Naprawy (całego urządzenia lub jego części) nie przedłużają okresu gwarancyjnego. Beurer GmbH • Söflinger Straße 218 • 89077 Ulm, Germany • www.beurer.com www.beurer­gesundheitsratgeber.com • www.beurer­healthguide.com...

Table des Matières