
Manuels Connexes pour Horizon Hobby ParkZone T-28 Trojan


Sommaire des Matières pour Horizon Hobby ParkZone T-28 Trojan
- Page 1 T-28 Trojan Instruction Manual • Bedienungsanleitung • Manuel d’utilisation • Manuale di Istruzioni...
-
Page 2: Additional Safety Precautions And Warnings
Do not attempt disassembly, use with incompatible components or augment product in any way without the approval of Horizon Hobby, Inc. This manual contains instructions for safety, operation and maintenance. It is essential to read and follow all the instructions and warnings in the manual, prior to assembly, setup or use, in order to operate correctly and avoid damage or serious injury. -
Page 3: Table Des Matières
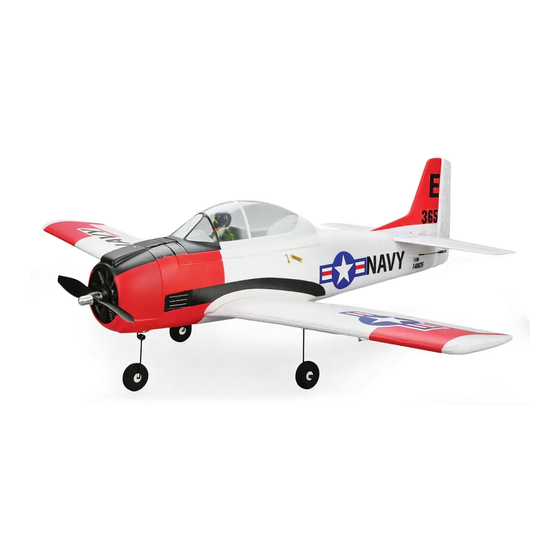
Smooth, predictable response and plenty of power; these are the hallmarks of a great sport fl ying experience and a big reason why the ParkZone ® T-28 Trojan is one of the most popular parkfl yers of all time. Please take some time to read this manual. In addition to instructions for fi nal assembly, you’ll fi nd handy setup tips, important battery charging precautions and a helpful trouble shooting guide. -
Page 4: Charging The Flight Battery
Charging the Flight Battery Your T-28 comes with a DC balancing charger and 3S Li-Po battery. You should DC Li-Po Balancing Charger Features only charge your battery with the included charger. Never leave the battery and • Charges 2- to 3-cell lithium polymer battery packs charger unattended during the charge process. -
Page 5: Transmitter And Receiver Binding
Transmitter and Receiver Binding Binding is the process of programming the receiver of the control unit to recognize the GUID (Globally Unique Identifi er) code of a single specifi c transmitter. You need to ‘bind’ your chosen Spektrum DSM2/DSMX technology equipped aircraft transmitter to the receiver for proper operation. Please visit www.bindnfl... -
Page 6: Before Flight
Before Flight Power on Wait 5 • Lower throttle and • Connect battery Continuous LED Transmitter seconds throttle trim to to ESC. Series of tones lowest settings. Installing a Receiver 1. Remove the wing to install a receiver. 4. Attach the aileron Y-harness to the aileron channel of the receiver. 2. -
Page 7: Installing Landing Gear
Installing the Landing Gear Installation 1. Turn the model so the bottom of the wing faces up. 2. Install the main landing gear by inserting the main gear struts (A) into the corresponding gear plate hole located on each wing. 3. -
Page 8: Installing Clevises On Control Horns And Control Centering
Installing Clevises on Control Horns and Control Centering Tip: Turn the clevis clockwise or counterclockwise on the linkage. • Pull the tube from the clevis to the linkage. • Carefully spread the clevis and put the clevis pin into the desired hole in the control horn. -
Page 9: Control Direction Test
Control Direction Test Bind your aircraft and transmitter before performing these tests. Move the controls on the transmitter to ensure the aircraft control surfaces move correctly. After doing the Control Test, correctly set the failsafe. Make sure the transmitter controls are at neutral and the throttle and throttle trim are in the low position, then rebind the model to your transmitter. -
Page 10: Dual Rates
Dual Rates We recommend using a DSM2/DSMX aircraft transmitter capable of dual rates. High Rate Low Rate Adjust according to individual preferences after initial fl ight. Aileron 13mm up/down 9.5mm up/down Elevator 16mm up/down 13mm up/down Rudder 22mm left/right 16mm left/right Service of Power Components MAINTENANCE Disassembly... -
Page 11: Nose Gear Service
MAINTENANCE Nose Gear Service Hard landings may damage the nose gear. Replace damaged parts as needed. CAUTION: DO NOT handle the propeller while the fl ight battery is connected to the ESC. Personal injury could result. Remove the canopy from the model. Disconnect the fl... -
Page 12: Prefl Ight Checklist
Prefl ight Checklist Before Flying Check List Before Flying Check List Charge fl ight battery. Adjust fl ight controls and transmitter. Install fl ight battery in aircraft (once it has been fully charged). Perform a radio system Range Check. Bind aircraft to transmitter. -
Page 13: Ama National Model Aircraft Safety Code
AMA National Model Aircraft Safety Code Effective January 1, 2011 B. RADIO CONTROL A. GENERAL 1. All pilots shall avoid fl ying directly over unprotected people, vessels, A model aircraft is a non-human-carrying aircraft capable of sustained fl ight vehicles or structures and shall avoid endangerment of life and property in the atmosphere. -
Page 14: Troubleshooting Guide
Troubleshooting Guide Problem Possible Cause Solution Aircraft will not respond Throttle is not at idle and/or throttle trim is too high Reset controls with throttle stick and throttle trim to throttle but responds to at lowest setting other controls Throttle servo travel is lower than 100% Make sure throttle servo travel is 100% or greater Throttle channel is reversed Reverse throttle channel on transmitter... -
Page 15: Limited Warranty
fi cation of or to any part of the Product, (iv) attempted service by anyone other at www.horizonhobby.com under the Support tab. If you do not have internet than a Horizon Hobby authorized service center, or (v) Products not purchased access, please contact Horizon Product Support to obtain a RMA number from an authorized Horizon dealer. -
Page 16: Contact Information
Champaign, Illinois (All other products) productsupport@horizonhobby.com 61822 USA Units 1-4 Ployters Rd Staple Tye +44 (0) 1279 641 097 United Kingdom Horizon Hobby Limited Harlow, Essex sales@horizonhobby.co.uk CM18 7NS United Kingdom Hamburger Str. 10 +49 4121 46199 66 Germany Horizon Technischer Service 25335 Elmshorn service@horizonhobby.de... -
Page 17: Zusätzliche Sicherheitsvorkehrungen Und Warnhinweise
Sachwerten führen. Dieses Produkt eignet sich nicht für die Verwendung durch Kinder ohne direkte Überwachung eines Erwachsenen. Ver- suchen Sie nicht ohne Genehmigung durch Horizon Hobby, Inc., das Produkt zu zerlegen, es mit inkompatiblen Komponenten zu verwenden oder auf jegliche Weise zu erweitern. - Page 18 Präzise, gutmütig und mit jeder Menge Leistung. Das sind die Markenzeichen der ParkZone® T-28 Trojan, eines der erfolgreichsten Parkfl yermodelle aller Zeiten. Bitte nehmen Sie sich die Zeit diese Bedienungsanleitung gründlich zu lesen. Neben der Montageanleitung fi nden Sie dort Einstelltipps und sehr wichtige Sicher- heitsinformationen zum laden der Akkus und eine nützliche Hilfe zur Problemlösung.
-
Page 19: Laden Des Flugakkus
Laden des Flugakkus Ihre T-28 wird mit einem DC Balancer Ladegerät und einem 3S LiPo Flugakku Eigenschaften DC LiPo Balancer Ladegerät geliefert. Sie müssen den im Lieferumfang enthaltenen LiPo Flugakku mit • Lädt 2 bis 3 S LiPo Akkus einem LiPo geeigneten Ladegerät laden. (wie das im Lieferumfang enthaltene •... -
Page 20: Binden Von Sender Und Empfänger
* Der Gaskanal wird nicht armiert wenn die der Gashebel u. Trimmung nicht auf der niedrigsten Position stehen. Sollten Probleme auftreten folgen Sie bitte den Bindeanweisungen und sehen für weitere Informationen in der Hilfestellung zur Problemlösung nach. Kontak- tieren Sie dann falls notwendig den technischen Service von Horizon Hobby. Einsetzen des Flugakkus 1. -
Page 21: Vor Dem Flug
Vor dem Flug Sender 5 Sekunden • Gashebel und Gastrim- • Flugakku mit LED leuchtet einschalten warten mung auf niedrigste Regler (ESC) Serie von Tönen Einstellung einstellen. verbinden. Einbau des Empfängers 1. Zum Einbauen des Empfängers nehmen Sie bitte die Tragfl äche ab. 4. -
Page 22: Montage Des Fahrwerks
Montage des Fahrwerks 1. Drehen Sie das Modell um, dass die Unterseite nach oben zeigt. 2. Setzen Sie die Fahrwerksbeine (A) in die dafür vorgesehenen Öffnungen. 3. Drehen Sie vorsichtig die beiden Fahrwerksbeine bis der horizontale Draht (B) in die Halterungen eingeschnappt ist. 4. -
Page 23: Einsetzen Der Gabelköpfe In Die Ruderhörner
Einsetzen der Gabelköpfe in die Ruderhörner Tipp: Drehen Sie den Gabelkopf am Anschluss im Uhrzeigersinn oder entgegen dem Uhrzeigersinn. • Ziehen Sie das Silikonband vom Gabelkopf. • Spreizen Sie den Gabelkopf vorsichtig auf, und setzen Sie den Pin in das ausgewählte Loch im Steuerhorn. •... -
Page 24: Test Der Kontrollen
Test der Kontrollen Bitte binden Sie vor diesem Test den Sender mit dem Flugzeugempfänger. Bewegen Sie die Kontrollen um zu überprüfen, dass sich die Ruder korrekt bewe- gen. Bitte stellen Sie nach dem Test die Failsafefunktionen korrekt ein. Stellen Sie dabei sicher, dass die Senderkontrollen auf Neutral und sich die Gas/Gas- trimmung in niedriger Position befi... -
Page 25: Dual Rates
Dual Rates Wir empfehlen einen Dual Rate fähigen DSM2/DSMX Sender. Stellen Sie nach High Rate Low Rate dem Erstfl ug die Dual Rates nach Ihren Vorstellungen ein. Querruder 13mm rauf/runter 9.5mm rauf/runter Höhenruder 16mm rauf/runter 13mm rauf/runter Seitenruder 22mm links/rechts 16mm links/rechts Wartung der Antriebskomponenten WARTUNG... -
Page 26: Wartung Des Bugrades
WARTUNG Wartung des Bugrades Harte Landungen können das Bugfahrwerk beschädigen. Ersetzen Sie be- schädigte Teile. ACHTUNG: Arbeiten/hantieren Sie nicht am Motor oder Regler wenn der Flugakku angeschlossen ist. Es besteht Verletzungsgefahr. Nehmen Sie die Kabinenhaube vom Modell ab. Trennen Sie den Flugakku vom Modell. Trennen Sie den Gabelkopf vom Servoarm. -
Page 27: Vorbereitung Für Den Erstfl Ug
Vorbereitung für den Erstfl ug Checkliste vor dem Flug Checkliste vor dem Flug Trennen Sie den Flugakku vom Regler (erforderlich zur Lagern Sie den Akku getrennt vom Flugzeug und überwachen Sicherheit und Akku Lebensdauer). die Ladung. Schalten Sie den Sender aus. Machen Sie sich Notizen zu den Flugbedingungen und Ergeb- nissen und planen Sie daraus ihre zukünftige Flüge. -
Page 28: Hilfestellung Zur Problemlösung
Hilfestellung zur Problemlösung Problem mögliche Ursache Lösung Flugzeug reagiert nicht auf Gasknüppel ist nicht auf Leerlaufposition oder Gastrimmung ist zu Bringen Sie die Gastrimmung und den Gasknüppel auf die Gashebel, reagiert aber auf hoch. niedrigste Stellung. andere Steuerbefehle Gasservoweg ist kleiner als 100%. Stellen Sie sicher, dass der Servoweg auf 100 % oder größer steht. -
Page 29: Garantie Und Service Informationen
Sollte sich ein Garantiefall bestätigen wird das Produkt Defekte oder Defekte, hervorgerufen durch höhere Gewalt, falsche Behandlung repariert oder ersetzt. Diese Entscheidung obliegt einzig Horizon Hobby. des Produktes, falscher Einsatz des Produktes, kommerziellen Einsatz oder Modifi kationen irgendwelcher Art aus. -
Page 30: Kontaktinformationen
Birgit Schamuhn Geschäfstführert Geschäftsführerin Managing Director Managing Director Horizon Hobby GmbH; Christian-Junge-Straße-1; D-25337 Elmshorn HR Pi: HRB 1909; UStIDNr.:DE812678792; Str.Nr.: 1829812324 Horizon Hobby GmbH; Christian-Junge-Straße-1; D-25337 Elmshorn Geschäftsführer: Birgit Schamuhn, Steven A. Hall HR Pi: HRB 1909; UStIDNr.:DE812678792; Str.Nr.: 1829812324 Tel.: +49 4121 4619960 •... -
Page 31: Signifi Cation De Certains Termes Spécifi Ques
Ne pas essayer de démonter le produit, de l‘utiliser avec des composants incompatibles ou d‘en améliorer les performances sans l‘approbation de Horizon Hobby, Inc. Ce manuel comporte des instructions de sécurité, de mise en œuvre et d‘entretien. Il est capital de lire et de respecter toutes les instructions et avertissements du manuel avant l‘assemblage, le réglage ou l‘utilisation afi... - Page 32 Souplesse, réponse prévisible et de la puissance à ne quoi savoir en faire, voici les caractéristiques d‘une expérience de vol sportif hors du commun et une raison convaincante expliquant pourquoi le ParkZone ® T-28 Trojan est l‘un des parkfl yers les plus populaires de tous les temps. Veuillez SVP prendre le temps de lire ce manuel. Outre des instructions concernant l‘assemblage fi...
-
Page 33: Charge De La Batterie De Vol
Charge de la batterie de vol Caractéristiques du chargeur-équilibreur DC Li-Po • Charge des packs de batteries lithium polymère à 2 ou 3 cellules Votre T-28 est livré accompagné d‘un chargeur-équilibreur CC et d‘une batterie Li-Po • Taux de charges variables allant de 300 mAh à 2 A 3S. -
Page 34: Affectation (Binding) De L'émetteur Au Récepteur
Affectation (binding) de l‘émetteur au récepteur L‘affectation est le processus qui programme le récepteur pour qu‘il reconnaisse le code (appelé GUID - Globally Unique Identifi er) d‘un émetteur spécifi que. Il vous faut affecter l‘émetteur e votre choix pour aéronefs Spektrum à technologie DSM2/DSMX au récepteur pour assurer un fonctionnement correct. Veuillez SVP visiter www.bindnfl... -
Page 35: Avant Le Vol
Avant le vol Allumez Attendez 5 • Abaissez la manette et le • Connectez la batterie l‘émetteur secondes DEL allumée fi xe trim des gaz au minimum. au CEV (ESC) Série de signaux Installation d‘un récepteur 1. Enlevez l‘aile pour installer un récepteur. 4. -
Page 36: Mise En Place Du Train D'atterrissage
Mise en place du train d‘atterrissage Installation 1. Retournez le modèle de façon à ce que le dessous de l‘aile soit tourné vers le haut. 2. Installez le train principal en insérant les jambes (A) de train principal dans le trou correspondant de la plaque de train présente sur chaque aile. -
Page 37: Mise En Place Des Clavettes Sur Les Bras De Commande Et Centrage Des Commandes
Mise en place des clavettes sur les bras de commande et centrage des commandes Conseil: Faites tourner la clavette sur la tringle dans le sens horaire ou antihoraire. • Faites glisser l‘anneau tubulaire de la clavette vers la tringle. • Ouvrez doucement la clavette et glissez-en la broche dans l‘orifi ce concerné du bras de commande. -
Page 38: Essais De La Commande De Direction
Essais de la commande de direction Affectez votre aéronef et émetteur avant d‘effectuer ces essais. Actionnez les commandes de l‘émetteur pour vous assurer que les surfaces de commande bougent correctement. Après avoir effectué les essais des commandes, réglez la sécurité (failsafe) correctement. Assurez-vous que les commandes de l‘émetteur se trouvent au neutre et que les gaz et le trim de gaz se trouvent en position basse, puis réaffectez le modèle à... -
Page 39: Doubles Débattements
Doubles débattements Nous recommandons d‘utiliser un émetteur d‘aéronef DSM2/ Débattement haut Débattement bas DSMX capable de doubles débattements. Après le vol initial, réglez selon vos préférences personnelles. Aileron 13mm haut/bas 9,5mm haut/bas Gouverne de profondeur 16mm haut/bas 13mm haut/bas Gouverne de direction 22mm gauche/droite 16mm gauche/droite MAINTENANCE... -
Page 40: Entretien De La Roulette De Nez
MAINTENANCE Entretien de la roulette de nez Des atterrissages durs peuvent endommager la roulette de nez. Remplacez les pièces endommagées en cas de besoin. ATTENTION: NE PAS toucher à l‘hélice tant que la batterie de vol est connectée au CEV (ESC). Cela pourrait occasionner des blessures. 1. -
Page 41: Liste De Contrôle Avant Vol
Liste de contrôle avant vol ✓ ✓ Liste de contrôle avant vol Liste de contrôle avant vol 1. Charger la batterie de vol. 6. Régler les commandes de vol et l‘émetteur. 2. Installer la batterie de vol dans l‘aéronef (après l‘avoir complètement 7. -
Page 42: Guide De Dépannage
Guide de dépannage Problème Cause possible Solution L‘aéronef ne répond pas aux gaz mais bien La manette des gaz n‘est pas au ralenti (idle) et/ou le trim des Réinitialiser les commandes avec la manette des gaz et mettre aux autres commandes. gaz est réglé... -
Page 43: Garantie Limitée
Durée de la garantie Questions, assistance et réparations Garantie exclusive - Horizon Hobby, Inc. (Horizon) garantit que le Produit Votre revendeur spécialisé local et le point de vente ne peuvent effectuer une estimation d’éligibilité à l’application de la garantie sans avoir consulté... -
Page 44: Informations De Contact
Horizon Hobby Adresse Numéro de téléphone/Adresse de courriel 14, Rue Gustave Eiffel +33 (0) 1 60 47 44 70 France Horizon Hobby SAS Zone d‘Activité du Réveil Matin infofrance@horizonhobby.com 91230 Montgeron Informations de conformité pour l‘Union Européenne Déclaration de conformité... -
Page 45: Ulteriori Precauzioni Per La Sicurezza E Avvertenze
AVVISO Istruzioni, garanzie e tutti gli altri documenti accessori sono soggetti a modifi che a totale discrezione di Horizon Hobby, Inc. Per avere la documentazione aggiornata sul prodotto, visitare il sito Web www.horizonhobby.com e fare clic sulla scheda „support“ per questo prodotto Signifi cato della lingua speciale I seguenti termini vengono utilizzati in tutta la documentazione relativa al prodotto per indicare il livello di eventuali danni collegati al suo utilizzo:... - Page 46 ® Reattività senza intoppi, prevedibile e tanta potenza; queste sono le caratteristiche di un‘esperienza eccezionale di volo sportivo e un motivo importante per cui ParkZone T-28 Trojan è uno dei parkfl yer più famosi di tutti i tempi. Dedicare un po‘ di tempo alla lettura del presente manuale Oltre alle istruzioni per l‘assemblaggio fi nale, vi si trovano utili suggerimenti per il setup, precauzioni importanti per il caricamento della batteria e un‘utile guida alla risoluzione dei problemi.
-
Page 47: Caricamento Della Batteria Di Volo
Caricamento della batteria di volo Caricabatterie con bilanciatore c.c. Li-Po Il ParkZone T-28 è dotato di un caricabatterie con bilanciatore a c.c. e batteria 3S Li-Po. • Carica un pacco batteria a 2 o 3 celle ai polimeri di litio Caricare la batteria con il caricabatterie in dotazione. Non lasciare mai la batteria e il •... -
Page 48: Binding Del Trasmettitore E Del Ricevitore
Binding del trasmettitore e del ricevitore Il binding è il processo di programmazione del ricevitore dell’unità di controllo per il riconoscimento del codice GUID (Globally Unique Identifi er) di una particolare trasmittente. Per un corretto funzionamento sarà necessario effettuare il binding del trasmettitore scelto dotato di tecnologia Spektrum DSM2/DSMX con il ricevitore. Visitare il sito www.bindnfl... -
Page 49: Prima Del Volo
Prima del volo Accendere il Attendere 5 • Abbassa il throttle e il • Collegare la trasmettitore. secondi LED fi sso trim del throttle fi no batteria al controllo a metterli nelle posizioni elettronico di velocità Serie di note più basse possibili. (ESC). -
Page 50: Istallazione Del Carrello Di Atterraggio
Istallazione del carrello di atterraggio Installazione 1. Girare il modello in modo che il lato inferiore dell’ala sia rivolto verso l’alto. 2. Installare il carrello principale di atterraggio inserendo i montanti del carrello principale (A) nel foro corrispondente della piastra del carrello situato su ciascuna ala. -
Page 51: Installazione Delle Forcelle Sulle Squadrette Di Comando E Centraggio Del Comando
Installazione delle forcelle sulle squadrette di comando e centraggio del comando Consiglio: far girare la forcella in senso orario o antiorario sul giunto. • Trascinare il tubo dalla forcella al giunto. • Facendo attenzione aprire la forcella e mettere il perno della forcella nel foro desiderato nella squadretta di comando. -
Page 52: Test Di Controllo
Test di controllo Effettuare il binding dell’aereo e del trasmettitore prima di eseguire questi test. Muovere i comandi del trasmettitore per assicurare che le superfi ci di controllo dell’aereo si muovano correttamente. Dopo aver eseguito il test dei comandi, impostare correttamente il failsafe. Accertarsi che i comandi del trasmettitore siano in posizione neutra e che il throttle e il trim del throttle siano nella posizione in basso, quindi effettuare nuovamente il binding tra il modello e il trasmettitore. -
Page 53: Dual Rate
Dual Rate Si consiglia di utilizzare un trasmettitore DSM2/DSMX per High Rate Low Rate aeromobili in grado di utilizzare il dual rate. Regolare secondo le preferenze individuali dopo il volo iniziale. Alettone 13 mm alto/basso 9,5 mm alto/basso Elevatore 16 mm alto/basso 13 mm alto/basso Timone 22 mm sinistra/destra... -
Page 54: Riparazioni Ruotino Di Prua
MANUTENZIONE Riparazioni ruotino di prua Atterraggi su terreni diffi cili potrebbero danneggiare il ruotino di prua. Sostituire le parti danneggiate prima del volo. ATTENZIONE: NON toccare con le mani il motore o il controllo elettronico di velocità (ESC) mentre la batteria di volo è collegata all’ESC. Ne possono derivare lesioni alle persone. -
Page 55: Elenco Di Controllo Prima Del Volo
Elenco di controllo prima del volo ✓ ✓ Elenco di controllo prima del volo Elenco di controllo prima del volo 1. Caricare la batteria 6. Regolare i comandi di volo e il trasmettitore. 2. Installare la batteria di volo nell’elicottero (dopo averla caricata 7. -
Page 56: Guida Alla Risoluzione Dei Problemi
Guida alla risoluzione dei problemi Problema Possibile causa Soluzione Il velivolo non risponde al throttle, ma Il throttle non è al minimo e/o il trim del throttle è troppo alto Ripristinare i comandi tenendo lo stick del throttle e il trim del risponde ad altri comandi throttle nella posizione più... -
Page 57: Garanzia Limitata
Periodo di garanzia Indicazioni di sicurezza Garanzia esclusiva - Horizon Hobby, Inc., (Horizon) garantisce che i prodotti Questo è un prodotto sofi sticato di hobbistica e non è un giocattolo. Esso acquistati (il “Prodotto”) sono privi di difetti relativi ai materiali e di eventuali deve essere manipolato con cautela, con giudizio e richiede delle conoscenze errori di montaggio. -
Page 58: Informazioni Di Contatto
Steven A. Hall Steven A. Hall Vice Presidente Vice Presidente Operazioni internazionali e Gestione dei rischi Operazioni internazionali e Gestione dei rischi Horizon Hobby, Inc. Horizon Hobby Inc. Firmato a nome e per conto di: Firmato a nome e per conto di: Horizon Hobby Inc. Horizon Hobby Inc. -
Page 59: Pezzi Di Ricambio
Replacement Parts • Ersatzteile • Piéces de rechange • Pezzi di ricambio Part # | Nummer Description Beschreibung Description Descrizione Numéro | Codice PKZ5201 Prop Adapter Propeller Adapter Adaptateur d‘hélice Adattatore elica PKZ1012 Propeller “9.5 X 7.5” Luftschraube 9.5x7.5 Hélice 9.5X7.5 Elica “9.5 X 7.5”... -
Page 60: Pezzi Opzionali
Optional Parts • Optionale Bauteile • Piéces optionnelles • Pezzi opzionali Part # | Nummer Description Beschreibung Description Descrizione Numéro | Codice 3-Blade Prop, 9 x 7.5: F4U Cor- Hélice 3 pales, 9 x 7,5 : F4U Corsair, Elica a tre pale, 9 x 7.5: F4U Corsair, PKZ1015 Dreiblattluftschraube 8.7x6 F4U sair, T-28 Trojan... -
Page 61: Recapiti Per I Ricambi
Sales America Champaign, Illinois 61822 USA Sales@horizonhobby.com Units 1-4 Ployters Rd Staple Tye +44 (0) 1279 641 097 United Kingdom Horizon Hobby Limited Harlow, Essex sales@horizonhobby.co.uk CM18 7NS, United Kingdom Christian-Junge-Straße-1 +49 4121 46199 60 Germany Horizon Technischer Service 25337 Elmshorn, Germany service@horizonhobby.de... - Page 62 Notes • Anmerkungen • Remarque • Notas...
- Page 63 Notes • Anmerkungen • Remarque • Notas...
- Page 64 © 2011 Horizon Hobby, Inc. ParkZone, DSMX, DSM2, ModelMatch, Bind-N-Fly, EC3, Z-Foam and Plug-N-Play are trademarks or registered trademarks of Horizon Hobby, Inc. The Spektrum trademark is used with permission of Bachmann Industries, Inc. Futaba is a registered trademark of Futaba Denshi Kogyo Kabushiki Kaisha Corporation of Japan.