
Manuels Connexes pour Horizon Hobby Night Vapor Ultra Micro Série


Sommaire des Matières pour Horizon Hobby Night Vapor Ultra Micro Série
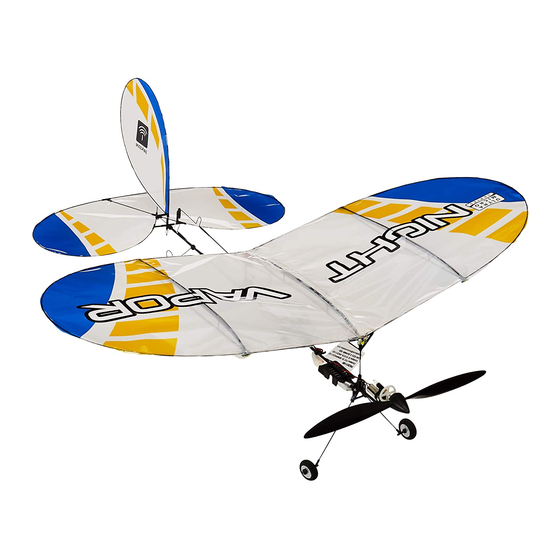
- Page 1 Instruction Manual | Bedienungsanleitung Manuel d’utilisation | Manuale di istruzioni...
-
Page 2: Meaning Of Special Language
Do not use with incompatible components or alter this product in any way outside of the instructions provided by Horizon Hobby, LLC. This manual contains instructions for safety, operation and maintenance. It is essential to read and follow all the instructions and warnings in the manual, prior to assembly, setup or use, in order to operate correctly and avoid damage or serious injury. -
Page 3: Battery Charging Warnings
Safety Precautions and Warnings, continued • Always keep transmitter powered on while aircraft is powered. • Always remove batteries before disassembly. • Always keep moving parts clean. • Always keep parts dry. • Always let parts cool after use before touching. • Always remove batteries after use. -
Page 4: Table Des Matières
Specifications Wingspan ....14.75 in (375mm) Length ....15.25 in (387mm) Weight (with battery) . -
Page 5: Night Vapor Rtf Contents
Night Vapor RTF Contents • Night Vapor Airframe • 8 AA batteries • 70mAh 3.7V 14C Li-Po battery • 2.4GHz DSM2/DSMX Transmitter • 1S 3.7V DC Li-Po battery charger, 0.3A charge rate Night Vapor BNF Contents • Night Vapor Airframe • 4 AA batteries • 70mAh 3.7V 14C Li-Po battery • 1S 3.7V DC Li-Po battery charger, 0.3A charge rate... -
Page 6: Battery Charging
Battery Charging See the Battery Warning and Guidelines section and familiarize yourself thoroughly with it before continuing. Follow these steps to charge the Li-Po battery with the included charger. 1. Remove the cover on the bottom of the charger and install four of the included AA batteries, noting proper polarity. -
Page 7: Installing The Flight Battery In The Airplane
Installing the Flight Battery in the Airplane Once the Li-Po battery is fully charged, you can install it in the airplane. This is done by placing it into the battery holder on the bottom of the fuselage. Make sure the plug faces the rear of the airplane. Note: The battery holder can slide forward and backwards to allow for Center of Gravity adjustment. -
Page 8: Transmitter Specific Binding Instructions
Transmitter Specific Binding Instructions MLP4DSM Transmitter 1. When you see the LED on the receiver begin to flash rapidly, push the left stick on the transmitter inward into the case (NOT pulling down on throttle stick) until you hear it click. 2. -
Page 9: Transmitter Control Identification
Transmitter Control Identification Note: Before each flight you should ALWAYS turn the transmitter on before connecting the flight battery to the receiver unit. After each flight, be sure you always disconnect the flight battery from the receiver unit before powering the transmitter off. Mode 2 Rudder/Elevator Functions Throttle Function... -
Page 10: Led Identification
LED Identification The Night Vapor is equipped with six LED lights. Below is a description of what each individual light looks like. • There are 3 LED lights on the leading edge of the wing. These lights are a bright white color and remain solid. -
Page 11: Reversing The Flight Controls
Move the rudder stick left and right to check yaw control. When the stick is pushed to the right, the rudder should also move right. Note: On 3-channel aircraft, like the Vapor, the rudder is controlled by the stick usually used by the ailerons on 4-channel aircraft. -
Page 12: Control Centering
d. Right rudder trim button—rudder reverse 3. Continue holding the desired digital trim button down and turn the transmitter on. 4. Hold the digital trim buttons down for approximately five seconds until tones are heard, confirming the selection. 5. Connect the flight battery and complete the flight control test, confirming all surfaces are operating in the correct direction. -
Page 13: Flying Checklist
The following checklist contains the steps to ensure proper arming and operation of the receiver unit, as well as the proper motor response. • The throttle stick MUST be set in the lowest possible position, and for most transmitters, the throttle trim must also be set to the lowest possible position in order for the receiver unit to arm. -
Page 14: Replacing/Removing The Landing Gear
Replacing/Removing the Landing Gear To remove the landing gear, follow these steps: 1. Gently grasp the landing gear base and pull the landing gear out of the mounts. Note: It may be difficult to remove the landing gear the first time. 2. -
Page 15: Replacing The Vertical Fin
Replacing the Vertical Fin To replace the vertical fin on your Night Vapor, follow the steps listed below. 1. Gently remove the clear pressure fitting tube located on the bottom of the aircraft. 2. Gently disconnect the pushrod from the control horn. 3. -
Page 16: Replacing The Wing
Replacing the Wing All LEDs on the wing are permanently attached. The new wing will include a new set of LEDs. To replace the wing follow the steps below: 1. Disconnect the main LED wire from the receiver board. 2. Remove the LED that is attached to the tail of the aircraft. Note: The LED is tack glued to the fuselage and it will be necessary to very carefully break the glue joint loose. -
Page 17: Replacing The Propeller
Replacing the Propeller The propeller is threaded onto the shaft of the gearbox. 1. To remove the propeller, use needle-nose pliers or hemostats to grip the shaft. 2. Spin the propeller counterclockwise to remove the old propeller. 3. Thread the new 140mm x 45mm prop and spinner clockwise onto the gearbox shaft. Replacing the Prop Shaft You may need to replace the prop shaft in the gearbox should it become damaged. - Page 18 2. While holding the nylon nut, rotate the spur gear clockwise. The prop shaft will thread out of the nut. 3. Gently pull on the spur gear and the prop shaft will slide out of the gearbox. 4. Thread the 140mm x 45mm prop and spinner onto the new prop shaft by holding the spur gear and turning the prop clockwise.
-
Page 19: Replacement Parts
Replacement Parts PKZ3001....3.7V 70mAh Li-Po Battery PKZ3240....DC 3.7V LiPo Charger PKZ3302....Propeller with Spinner (140mm x 45mm) PKZ3307. -
Page 20: Troubleshooting Guide
Troubleshooting Guide If you have any problems with setup or programming that cannot be fixed by the Troubleshooting Guide, please see page 23 and call the appropriate Horizon Product Support office. Problem Possible Solutions Lower throttle trim and/or throttle stick to their lowest settings Aircraft will not “throttle up”... -
Page 21: Limited Warranty
(iii) modification of or to any part of the Product, (iv) attempted Horizon directly. This will enable Horizon to better answer your service by anyone other than a Horizon Hobby authorized questions and service you in the event that you may need service center, (v) Product not purchased from an authorized any assistance. -
Page 22: Contact Information
4105 Fieldstone Rd Horizon Product Support United States Champaign, Illinois, 61822 (Product Technical Assistance) 877-504-0233 of America websales@horizonhobby.com Sales 800-338-4639 Hanskampring 9 Horizon Technischer Service service@horizonhobby.eu European D 22885 Barsbüttel, Union Sales: Horizon Hobby GmbH +49 (0) 4121 2655 100 Germany... -
Page 23: Fcc Information
RTF PKZU1100: Horizon Hobby, LLC hereby declares that this product is in compliance with the essential requirements and other relevant provisions of the RED and EMC Directives. BNF PKZU1180: Horizon Hobby, LLC hereby declares that this product is in compliance with the essential requirements and other relevant provisions of the RED and EMC Directives. -
Page 24: Sicherheitsmaßnahmen Und Warnungen
Verletzungen oder Schäden am Produkt oder anderem Eigentum entstehen. Dieses Produkt ist nicht für den Gebrauch durch Kinder ohne direkte Aufsicht eines Erwachsenen vorgesehen. Versuchen Sie nicht, das Produkt ohne Zustimmung von Horizon Hobby, LLC zu zerlegen, mit nicht-kompatiblen Komponenten zu verwenden oder beliebig zu verbessern. Dieses Handbuch enthält Sicherheitshinweise sowie Anleitungen zu Betrieb und Wartung. -
Page 25: Warnungen Zum Laden
Sicherheitsmaßnahmen und Warnungen, Fortsetzung • Nehmen Sie niemals ein Element des Modells in Ihren Mund, da dies zu schweren Verletzungen oder sogar zum Tod führen könnte. • Betreiben Sie Ihr Modell niemals mit schwachen Senderbatterien. • Halten Sie das Fluggerät stets unter Blickkontakt und Kontrolle. • Fliegen Sie nur mit vollständig aufgeladenen Akkus. -
Page 26: Spezifikationen
Spezifikationen Spannweite ....375mm Länge ....387mm Gewicht (ohne Akku) . -
Page 27: Night Vapor Rtf Lieferumfang
Night Vapor RTF Lieferumfang • Night Vapor • 8 AA Batterien • 70mAh 3,7V 14C LiPO Akku • 2,4 GHz DSM2/DSMX Sender • 1S 3,7 DC LiPO Akku Ladegerät 0,3A Ladestrom Night Vapor RTF Lieferumfang • Night Vapor • 8 AA Batterien • 70mAh 3,7V 14C LiPo Akku • 1S 3,7 DC LiPo Akku Ladegerät 0,3A Ladestrom Zum Betrieb wird ein DSM2/DSMX kompatibler Fugzeug Sender benötigt. -
Page 28: Aufladen Der Batterie
Aufladen der Batterie Gehen Sie zum Abschnitt Warnhinweise und Richtlinien zu den Akkus und machen Sie sich gründlich damit vertraut, bevor Sie fortfahren. Befolgen Sie diese Schritte, um den LiPo-Akku mit dem inbegriffenen Lade- gerät aufzuladen. 1. Entfernen Sie den Deckel von der Unterseite des Ladegeräts und setzen Sie vier der im Lieferumfang enthaltenen AA-Batterien unter Beachtung der richtigen Polarität ein. -
Page 29: Einbau Des Flugakkus
Einbau des Flugakkus Ist der Akku vollständig geladen, können Sie ihn in die Akkuhalterung einsetzen. Achten Sie bitte dabei darauf, dass der Akku dabei nach vorne zeigt. Hinweis: Zur Veränderung des Schwerpunktes können Sie den Akkuhalter nach vorne oder hinten schieben. -
Page 30: Senderspezifische Bindeanweisungen
Senderspezifische Bindeanweisungen MLP4DSM Sender 1. Drücken Sie bitte wenn die LED auf dem Sender anfängt zu blinken den linken Stick in den Sender ein (Eindrücken NICHT Runter) bis Sie ein Klick hören. 2. Schalten Sie den Sender mit eingedrückten Knüppel ein. Lassen Sie danach den Knüppel los. Der Sender piept und die LED auf dem Sender blinkt. -
Page 31: Sender Kontroll Identifikation
Sender Kontroll Identifikation Hinweis: Schalten Sie vor dem Fliegen immer erst den Sender ein und verbinden dann den Flugakku. Nach dem Flug trennen Sie immer erst den Flugakku und schalten dann den Empfänger aus. Mode 2 Seiten / Höhenruder Funktion Gas Funktion Seitenruder Trimmung Gas Trimmung... -
Page 32: Led Beleuchtung
LED Beleuchtung Der Night Vapor ist mit sechs LED ausgerüstet. • Vorne am Flügel befinden sich 3 LEDs. Diese LEDs leuchten weiss. • An den Außenseiten der Tragflächen befinden sich 2 weitere LEDs. Die LED auf der rechten Seite (von vorne betrachtet) blinkt Rot , die LED auf der linken Seite blinkt Grün. -
Page 33: Reversieren (Umdrehen) Der Steuerfunktion
Bewegen Sie den Seitenruderstick nach links und rechts. Wir der Stick nach rechts gedrückt, sollte sich das Seitenruder ebenfalls nach rechts bewegen. Hinweis: Bei einem drei Kanal Flugzeug wie der Vapor wird das Seitenruder mit dem Stick gesteuert, dass normalerweise bei einem 4 Kanal Flugzeug die Querruder steuert. Wird der Stick nach links gedrückt,sollte sich das Seitenruder ebenfalls nach links bewegen. -
Page 34: Zentrieren Der Ruderflächen
d. rechter Seitenrudertrimmbutton - Seitenruder reversiert 3. Halten Sie den gewünschten Trimmbutton gedrück und schalten den Sender ein 4. Halten Sie den Button für ca 5 Sekunden gedrückt bis einen Quittungston hören 5. Schließen Sie dem Flugakku an und testen die Steuerung, ob alle Kontrollen nun in die gewünschte Richtung arbeiten. -
Page 35: Checkliste Zum Fliegen
Die folgende Checkliste beinhaltet die Schritte, die Sie befolgen sollten, um einen einwandfreien Betrieb des Empfängers sicher zu stellen. • Der Gasstick muß in der Motor AUS / Leerlaufposition stehen, die Gastrimmung sollte ebenfalls in der untersten möglichen Postion stehen, um der Empfangseinheit ein Scharfschalten zu ermöglichen. Fliegen Sie das Modell zum ersten Mal oder nach einer Reparatur, zentrieren Sie bitte auch die Trim- mungen von Höhen-, Seiten- und Querruder. -
Page 36: Austausch Des Fahrwerkes
Austausch des Fahrwerkes Um das Fahrwerk auszuwechseln gehen Sie bitte wie folgt vor: 1. Fassen Sie vorsichtig ein Fahrwerksbein an und ziehen es aus dem Halter. Hinweis: D as Herausziehen des Fahrwerkdrahtes könnte bei dem ersten Wechsel etwas schwerer sein. 2. -
Page 37: Austausch Des Seitenruders
Austausch des Seitenruders Um das Seitenruder auszutauschen gehen Sie bitte wie folgt vor: 1. Entfernen Sie bitte vorsichtig das klare Stück Schlauch am unteren Ende des Ruders. 2. Stecken sie das Rudergestänge vorsichtig vom Ruderhorn ab. 3. Schieben Sie das Seitenruder aus der Halterung. 4. -
Page 38: Austausch Der Tragfläche
Austausch der Tragfläche Die LEDs sind dauerhaft mit der Tragfläche verbunden. Wenn Sie die Tragfläche austauschen tauschen Sie die LEDs mit aus. Um die Tragfläche zu wechseln gehen Sie bitte wie folgt vor: 1. Trennen Sie bitte den LED Stecker vom Empfänger. 2. -
Page 39: Austausch Des Propellers
Austausch des Propellers 1. Um den Propeller auszuwechseln benötigen Sie eine Zange oder Pinzette. Halten Sie damit die Propel- lerwelle fest. 2. Drehen Sie den Propeller zum Lösen gegen den Uhrzeigersinn 3. Drehen Sie den neuen 140 x 45mm Propeller mit Spinner im Uhrzeigersinn auf die Welle. Austausch der Propellerwelle Im Fall einer Beschädigung kann es sinnvoll sein, die Propellerwelle zu wechseln. - Page 40 2. Drehen Sie mit gehaltener Nylon Schraube den Propeller im Uhrzeigersinn. Die Welle dreht sich aus der Schraube. 3. Ziehen Sie vorsichtig die Welle aus der Halterung. 4. Drehen Sie den 140mm x 45mm Propeller und Spinner auf die neue Propellerwelle. Halten Sie dabei die Welle am Zahnrad fest und drehen den Propeller im Uhrzeigersinn.
-
Page 41: Ersatzteile
Ersatzteile PKZ3001....3.7V 70mAh LiPo Akku PKZ3240....DC 3.7V LiPo Charger PKZ3302. -
Page 42: Hilfestellung Zur Fehlersuche Und Behebung
Hilfestellung zur Fehlersuche und Behebung Sollten Sie ein Problem haben , dass nicht durch diese Hilfestellung gelöst werden kann, ersehen Sie bitte auf Seite 48 die Adresse des technischen Service. Problem Mögliche Lösung Bringen Sie den Gasstick und die Trimmung in die unterste Flugzeug nimmt kein Gas an, alle mögliche Position anderen Funktionen arbeiten ein-... -
Page 43: Garantie Und Service Informationen
Garantie und Service Informationen Warnung – Ein ferngesteuertes Modell ist kein Spielzeug. Rücksendungen durch den Käufer direkt an Horizon oder Es kann, wenn es falsch eingesetzt wird, zu erheblichen eine seiner Landesvertretung bedürfen der Schriftform. Verletzungen bei Lebewesen und Beschädigungen Schadensbeschränkung – Horizon ist nicht für direkte an Sachgütern führen. -
Page 44: Kontakt Informationen
Fachhändler beiliegt, aus dem der Käufer und das selbst vorgenommen werden. Kaufdatum hervorgeht. Sollte sich ein Garantiefall bestätigen wird das Produkt repariert oder ersetzt. Diese Entscheidung 10/2015 obliegt einzig Horizon Hobby. Kontakt Informationen Telefonnummer/ Land des Kaufs Horizon Hobby Adresse... -
Page 45: Signification De Certains Mots
Horizon Hobby, LLC. Ce manuel comporte des instructions de sécurité, de mise en œuvre et d’entretien. Il est capital de lire et de respecter toutes les instructions et avertissements du manuel avant l’assemblage, le réglage ou l’utilisation afin de le manipuler correctement et d’éviter les dommages ou... -
Page 46: Précautions Et Avertissements Liés À La Sécurité, Suite
Précautions et avertissements liés à la sécurité, suite • Ne léchez ni ne mettez jamais en bouche quelque partie de votre modèle que ce soit - risque de blessures graves voire de danger de mort. • Ne faites jamais fonctionner votre modèle lorsque les batteries de l’émetteur sont faibles. • Gardez toujours l’aéronef à... -
Page 47: Caractéristiques
Caractéristiques Envergure ....37,5 cm (375mm) Longueur ....38,7 cm (387mm) Poids (avec batterie) . -
Page 48: Contenu Du Night Vapor Rtf
Contenu du Night Vapor RTF • Cellule Night Vapor • 8 batteries AA • Batterie LiPo 70 mAh 3,7 V 14C • Emetteur DSM2/DSMX 2,4 GHz • Chargeur de batterie LiPo 1S 3,7 V DC, charge 0,3 A Contenu du Night Vapor BNF • Cellule Night Vapor • 4 batteries AA • Batterie LiPo 70 mAh 3,7 V 14C... -
Page 49: Charge De La Batterie
Charge de la batterie Consultez la section traitant des avertissements et directives relatifs à la batterie et familiarisez-vous complètement avec celle-ci avant de continuer. Suivez ces étapes pour charger la batterie LiPo avec le chargeur inclus. 1. Retirez le cache situé sur le bas du chargeur et installez quatre des batteries AA fournies, en respectant leur polarité. -
Page 50: Installation De La Batterie De Vol Dans L'avion
Installation de la batterie de vol dans l’avion Une fois la batterie LiPo complètement chargée, vous pouvez l’installer dans l’avion. Cette opération s’effectue en la plaçant dans le réceptacle de batterie situé sur le bas du fuselage. Assurez-vous que la prise soit orientée vers l’arrière de l’avion. -
Page 51: Instructions Spécifiques D'affectation Pour Les Émetteurs
Instructions spécifiques d’affectation pour les émetteurs Emetteur MLP4DSM 1. Lorsque vous constatez le clignotement rapide de la DEL sur le récepteur, appuyez sur la manette gauche de l’émetteur en poussant vers l’intérieur du coffret (NE PAS enfoncer la manette des gaz) jusqu’à... -
Page 52: Contrôle De L'appairage De L'émetteur
Contrôle de l’appairage de l’émetteur A noter: Avant chaque vol, allumez TOUJOURS l'émetteur en premier avant de connecter la batterie au récepteur. Après chaque vol, déconnectez toujours en premier la batterie de vol du module de réception avant d’éteindre l'émetteur. Mode 2 Fonctions Fonction gaz... -
Page 53: Identification Des Del
Identification des DEL Le Night Vapor est doté de six points lumineux à DEL. Vous en trouverez ci-dessous une description. • 3 feux à DEL sont intégrés au bord d'attaque de l’aile. Ces points lumineux de couleur blanche restent allumés en permanence. • 2 feux à... -
Page 54: Inversion Des Commandes De Vol
Déplacez la manette de la gouverne de direction de gauche à droite pour vérifier la commande de lacet. La gouverne doit se déplacer vers la droite lorsque la manette est poussée vers la droite. A noter: Sur un avion 3 voies comme l’est le Vapor, la gouverne de direction est commandée par la manette utilisée normalement pour les ailerons dans le cas d’un aéronef 4 voies. -
Page 55: Centrage Des Commandes
1. Assurez-vous que la batterie de vol est déconnectée de l’aéronef et que l’émetteur est éteint. 2. Enfoncez le bouton de trim numérique correspondant à la surface dont vous souhaitez changer la direction. a. Bouton de trim de profondeur haut — profondeur normale b. -
Page 56: Description De L'unité De Réception, Initialisation Et Contrôle De La Commande Moteur
Description de l’unité de réception, initialisation et contrôle de la commande moteur Le récepteur, très léger, installé dans votre Night Vapor est une combinaison de contrôleur électronique de vitesse (CEV) du moteur principal, de servos et d’un récepteur Spektrum compatible DSM2/DSMX. L’unité de réception est également équipée d’une DEL d’indication d’état. -
Page 57: Check-List De Vol
Check-list de vol ‰ Allumez toujours l’émetteur en premier. ‰ Branchez la batterie de vol sur le récepteur. ‰ Laissez le récepteur s’initialiser et s’armer correctement. ‰ Faites voler le modèle. ‰ Faites-le atterrir. ‰ Débranchez la batterie de vol du récepteur. ‰... -
Page 58: Remplacement De La Dérive Verticale
Remplacement de la dérive verticale Pour remplacer la dérive verticale de votre Night Vapor, procédez aux étapes suivantes: 1. Enlevez avec précaution le tube de fixation (par pression) transparent se trouvant en dessous de l’aéronef. 2. Déconnectez avec précaution la tige du bras de commande. 3. -
Page 59: Remplacement De L'aile
Remplacement de l’aile Toutes les DEL que comporte l’aile y sont fixées une fois pour toutes. La nouvelle aile comportera un nouvel ensemble de DEL. Pour remplacer l’aile, procédez aux étapes suivantes: 1. Débranchez le câble principal des DEL de la platine du récepteur. 2. -
Page 60: Remplacement De L'hélice
Remplacement de l’hélice L’hélice est vissée sur l’arbre du réducteur. 1. Pour enlever l’hélice, utilisez une pince à bec fin ou hémostatique pour maintenir l’arbre d’hélice. 2. Faites tourner l’hélice dans le sens antihoraire pour l’enlever. 3. Vissez la nouvelle hélice 140 mm x 45 mm et son cône dans le sens horaire sur l’arbre du réducteur. Remplacement de l’arbre d’hélice Vous serez peut-être amené... - Page 61 2. Tout en maintenant l’écrou en nylon, faites tourner la couronne dans le sens horaire. L’arbre d’hélice s’extraira de l’écrou. 3. Tirer doucement sur la couronne et l’arbre d’hélice sortira du réducteur. 4. Vissez l’hélice 140 mm x 45 mm et son cône sur le nouvel arbre d’hélice en maintenant la couronne et en tournant l’hélice dans le sens horaire.
-
Page 62: Pièces De Rechange
Pièces de rechange PKZ3001....Batterie LiPo 3,7 V 70 mAh PKZ3240....Chargeur LiPo courant continu 3,7 V PKZ3302. -
Page 63: Guide De Dépannage
Guide de dépannage Si vous avez un problème quelconque avec le réglage ou la programmation qui ne puisse être résolu avec le guide de dépannage, reportez-vous à la page 72 et appelez le bureau d’assistance produit Horizon approprié. Problème Solutions possibles L’avion ne «... -
Page 64: Garantie Et Réparations
Horizon Hobby ne saurait être tenu Horizon se réserve la possibilité de vérifier tous les élé- responsable d’une utilisation ne respectant pas les lois, les ments utilisés et susceptibles d’être intégrés dans le cas de... -
Page 65: Informations De Contact
Directives RED et CEM. BNF PKZU1180 : Horizon Hobby, LLC déclare par la présente que ce produit est en conformité avec les exigences essentielles et les autres dispositions des Directives RED et CEM. -
Page 66: Precauzioni Per La Sicurezza E Avvertenze
Horizon Hobby, LLC. Questo manuale contiene istruzioni relative a sicurezza, utilizzo e manutenzione del prodotto. È fondamentale leggere e seguire tutte le istruzioni e le avvertenze nel manuale prima di montare, mettere a punto o usare il prodotto, al fine di usarlo correttamente e di evitare danni o lesioni gravi. -
Page 67: Avvertenze Per La Carica
Precauzioni per la Sicurezza e Avvertenze, Continua • Rimuovere sempre le batterie prima dello smontaggio. • Tenere sempre libere le parti mobili. • Tenere sempre i componenti asciutti. • Lasciar sempre raffreddare i componenti dopo l’uso prima di toccarli. • Rimuovere sempre le batterie dopo l’uso. • Accertarsi sempre che il failsafe sia impostato correttamente prima del volo. - Page 68 Specifiche Apertura alare ....37,50 cm (375mm) Lunghezza ....38,70 cm (387mm) Peso (batteria inclusa) .
-
Page 69: Contenuti Di Night Vapor Rtf
Contenuti di Night Vapor RTF • Modello Night Vapor • 8 batterie AA • batteria 70mAh 3.7V 14C LiPo • Trasmittente DSM2/DSMX 2.4GHz • Caricabatteria 1S 3.7V DC LiPo, 0.3A CC Contenuti di Night Vapor BNF • Modello Night Vapor • 4 batterie AA • batteria 70mAh 3.7V 14C LiPo • Caricabatteria 1S 3.7V DC LiPo, 0.3A CC... -
Page 70: Carica Della Batteria
Carica della batteria Leggere attentamente le Avvertenze e il Modo di utilizzo delle batterie prima di proseguire. caricare la batteria LiPo con il caricabatteria incluso nella confezione. 1. Togliete il coperchio sul fondo del caricabatteria e installare le quattro pile AA incluse rispettando la polarità. -
Page 71: Istallazione Della Batteria Di Volo
Istallazione della batteria di volo Una volta che la LiPo è completamente carica, potete installarla. Per farlo, posizionatela nell’apposito alloggiamento sul fondo della fusoliera. Assicuratevi che l’etichetta sia rivolta verso la parte posteriore dell’aeroplano. Nota: L’alloggiamento della batteria può scorrere in avanti e all’indietro per permettere la variazione del Centro di Gravità. -
Page 72: Istruzioni Specifiche Per Il Collegamento Del Trasmettitore
Istruzioni specifiche per il collegamento del trasmettitore Trasmettitore MLP4DSM 1. Quando si vede il LED della ricevente che inizia a lampeggiare, spingete lo stick di sinistra della trasmittente verso l’interno della trasmittente (NON abbassando lo stick dell’acceleratore) fino a sentire il click. -
Page 73: Identificazione Di Controllo Del Trasmettitore
Identificazione di controllo del trasmettitore Nota: Prima di ogni volo accendere SEMPRE la trasmittente prima di collegare la batteria di volo alla ricevente. Al termine di ogni volo, scollegare sempre la batteria di volo dalla ricevente prima di spegnere la trasmittente. Modalità... -
Page 74: Identificazione Led
Identificazione LED Night Vapor è dotato di 6 luci a LED. Qui in basso è presente una descrizione delle singole luci. • Ci sono 3 LED sul bordo dell’ala. Le luci sono di color bianco e rimangono fisse. • Ci sono 2 LED sul bordo dell’ala. La luce nella parte destra dell’ala (guardando dalla zona frontale) lampeggerà... -
Page 75: Trim Digitali
Muovete la leva del timone da sinistra a destra per controllare l’imbardata. Quando la leva è spinta verso destra, il timone dovrebbe andare a destra. Nota: Negli aerei a 3 canali, come il Vapor, il timone è controllato dalla barra normalmente utilizzata dagli alettoni negli aerei a 4 canali. -
Page 76: Test Di Controllo
c. Tasto di sinistra del trim del timone - timone normale d. Tasto di destra del trim del timone - timone invertito 3. Continuate a mantenete premuto il tasto del trim digitale desiderato e accendete la trasmittente. 4. Mantenete premuto ancora per circa cinque secondi il tasto del trim digitale fino a sentire il segnale acustico che conferma la selezione. -
Page 77: Lista Di Controllo Per Il Volo
Nota: L’unica circostanza in cui si deve collegare prima la batteria di volo alla ricevente prima di accendere la trasmittente. è quando si deve effettuare il binding tra ricevente e trasmittente. Si prega di fare riferimento alla sezione del collegamento fra il trasmettitore e il ricevitore di questo manuale, per ottenere ulteriori informazioni. -
Page 78: Istallazione/Smontaggio Del Carrello Di Atterraggio
Istallazione/smontaggio del carrello di atterraggio Per smontare il carrello di atterraggio seguire queste fasi: 1. Avvicinate delicatamente il carrello ed estrarlo dal suo supporto. Nota: La prima volta può essere difficile smontare il carrello di atterraggio. 2. Spingere il nuovo carrello nelle due colonne di montaggio finchè non si inserisce con un click. Nota: Per dei voli brevi è... -
Page 79: Sostituire La Pinna Verticale
Sostituire la pinna verticale Per sostituire la penna verticale sul Night Vapor bisogna seguire le fasi elencate qui sotto. 1. Rimuovere delicatamente il tubo di pressione ubicato in basso sull'aereo. 2. Disconnettere delicatamente l’asta di spinta dall’antenna di controllo. 3. Far scorrere la pinna verticale fuori dalla colonna di montaggio. 4. -
Page 80: Sostituire L'ala
Sostituire l’ala Tutti i LED sull’ala sono collegati in maniera permanente. La nuova ala includerà un nuovo set di LED. Per sostituire l’ala bisogna seguire queste fasi: 1. Disconnettere il cavo del LED principale dalla scheda del ricevitore. 2. Rimuovere il LED vicino alla coda dell’aereo. Nota: Il LED è... -
Page 81: Sostituire L'elica
Sostituire l’elica L’elica è avvitata sull’albero della scatola del riduttore di giri. 1. Per rimuovere l’elica, usate un paio di pinze con becchi ad ago o pinze emostatiche per stringere l'albero dell’elica. 2. Fate ruotare l’elica in senso antiorario per rimuoverla. 3. - Page 82 2. Mantenete fermo il dado e ruotate in senso orario l’ingranaggio cilindrico a denti dritti. Mantenete fermo il dado e ruotate in senso orario l’ingranaggio cilindrico a denti dritti 3. Tirate delicatamente l’ingranaggio e l’albero dell’elica scivolerà fuori. 4. Avvitate l’elica e lo spinner nuovi da 140mm x 45mm tenendo fermo l’ingranaggio e ruotano l’elica in senso orario.
-
Page 83: Pezzi Di Ricambio
Pezzi di ricambio PKZ3001....Batteria 3.7V 70mAh LiPo PKZ3240....DC 3.7V caricatore LiPo PKZ3302....Elica con spinner (140mm x 45mm) PKZ3307. -
Page 84: Guida Alla Risoluzione Dei Problemi
Guida alla risoluzione dei problemi Se incontrate dei problemi con il montaggio o con la programmazione che non riuscite a risolvere attraverso la Guida alla risoluzione dei problemi, consultate pagina 96 e contattate il servizio di assistenza Horizon di competenza. Problema Soluzioni possibili Nell’aereo non funziona il “throttle... -
Page 85: Garanzia E Policy Per Le Riparazioni
Garanzia e policy per le riparazioni Periodo di garanzia – Garanzia esclusiva - Horizon taggio del prodotto l’utente acconsente a tutte le condizioni, Hobby, LLC, (Horizon) garantisce che i prodotti acquistati (il limitazioni e riserve di garanzia citate in questa sede. “Prodotto”) sono privi di difetti relativi ai materiali e di even- Qualora l’utente non fosse pronto ad assumersi tale tuali errori di montaggio. -
Page 86: Informazioni Per I Contatti
RTF PKZU1100: Horizon Hobby, LLC con la presente dichiara che il prodotto è conforme ai requisiti essenziali e ad altre disposizioni rilevanti delle direttive RED e EMC. BNF PKZU1180: Horizon Hobby, LLC con la presente dichiara che il prodotto è conforme ai requisiti essenziali e ad altre disposizioni rilevanti delle direttive RED e EMC. - Page 88 US 7,898,130. US D578,146. PRC ZL 200720069025.2. Other patents pending. The Spektrum trademark is used with permission of Bachmann Industries, Inc. DSMX is a trademark of Horizon Hobby, LLC., registered in the US. All other marks are trademarks or registered trademarks of Horizon Hobby, LLC.