Medion Life P85003 Notice D'utilisation

Medion Life P85003 Notice D'utilisation

Micro chaîne audio internet/dab+
Table des Matières

Publicité

Les langues disponibles
  • FR

Les langues disponibles

  • FRANÇAIS, page 52

Liens rapides

Internet/DAB+ Mikro Audio System
Micro chaîne audio Internet/DAB+
Internet/DAB+ micro-audiosysteem
Microsistema de sonido con DAB+/Internet
Sistema Micro Audio Internet/DAB+
Internet/DAB+ Micro Audio System
MEDION
®
Manual de instrucciones
LIFE
®
P85003 (MD 85008)
Bedienungsanleitung
Notice d'utilisation
Istruzioni per l uso
Istruzioni per l'uso
Operating instructions
Handleiding

Publicité

Table des Matières
loading

Sommaire des Matières pour Medion Life P85003

  • Page 1 Manual de instrucciones Istruzioni per l‘uso Istruzioni per l uso Operating instructions Internet/DAB+ Mikro Audio System Micro chaîne audio Internet/DAB+ Internet/DAB+ micro-audiosysteem Microsistema de sonido con DAB+/Internet Sistema Micro Audio Internet/DAB+ Internet/DAB+ Micro Audio System MEDION LIFE ® ® P85003 (MD 85008)
  • Page 2: Table Des Matières

    Inhaltsverzeichnis Informationen zu dieser Bedienungsanleitung ........5 1.1. Zeichenerklärung ....................5 Bestimmungsgemäßer Gebrauch .............. 6 Sicherheitshinweise ..................7 3.1. Betriebssicherheit ....................7 3.2. Aufstellungsort ..................... 8 3.3. Reparatur ........................9 3.4. Umgebungswerte ....................9 3.5. Stromversorgung ....................10 3.6. CD-Spieler ......................11 3.7.
  • Page 3 11.2. Sender speichern und aufrufen ..............28 11.3. Senderinformationen ..................29 11.4. Einstellungen im Menü ..................29 CDs und USB-Speicher wiedergeben ............31 12.1. Hinweise zu den Medien ..................31 12.2. Titelinformationen (ID3) ...................31 12.3. Disk einlegen/auswerfen ..................31 12.4. USB-Speicherstick einsetzen ................32 12.5. Wiedergabe starten/anhalten ................32 12.6.
  • Page 4: Informationen Zu Dieser Bedienungsanleitung

    1. Informationen zu dieser Bedienungsanleitung Vielen Dank, dass Sie sich für unser Produkt entschieden haben. Wir wünschen Ihnen viel Freude mit dem Gerät. Lesen Sie vor Inbetriebnahme die Sicherheitshinweise und die gesamte Anleitung aufmerksam durch. Beachten Sie die Warnungen auf dem Ge- rät und in der Bedienungsanleitung.
  • Page 5: Bestimmungsgemäßer Gebrauch

    Polaritätskennzeichnung Symbol für Polarität des Gleichstromanschlusses (nach IEC 60417). Bei Geräten mit dieser Kennzeichnung liegt Plus Innen und Minus Außen. Energieeffizienz Level VI Die Energie Effizienz Level sind eine Standardunterteilung der Wir- kungsgrade externer und interner Netzteile. Die Energieeffizienz gib dabei den Wirkungsgrad an und wird bis zur Level VI (effizientestes Level) unterteilt.
  • Page 6: Sicherheitshinweise

    • Verwenden Sie das Gerät nicht im Freien. • Setzen Sie das Gerät keinen extremen Bedingungen aus. Zu vermeiden sind: – Hohe Luftfeuchtigkeit oder Nässe, – extrem hohe oder tiefe Temperaturen, – direkte Sonneneinstrahlung, – offenes Feuer. 3. Sicherheitshinweise 3.1. Betriebssicherheit Dieses Gerät kann von Kindern ab 8 Jahren und darüber so- wie von Personen mit verringerten physischen, sensorisch oder mentalen Fähigkeiten oder Mangel an Erfahrung und Wissen be-...
  • Page 7: Aufstellungsort

    3.2. Aufstellungsort • Halten Sie Ihr Gerät und alle angeschlosse nen Komponenten von Feuchtigkeit fern und ver meiden Sie Staub, Hitze, direk- te Sonneneinstrahlung und offene Brandquellen (Kerzen oder ähnliches). Das Nichtbeachten dieser Hinweise kann zu Stö- rungen oder zur Beschädigung des Bildschirms führen. •...
  • Page 8: Reparatur

    3.3. Reparatur • Wenden Sie sich an den Kundendienst, wenn: – das Netzkabel angeschmort oder beschädigt ist – Flüssigkeit in das Gerät eingedrungen ist – das Gerät nicht ordnungsgemäß funktioniert – das Gerät heruntergefallen oder das Gehäuse beschädigt ist. • Überlassen Sie die Reparatur Ihres Gerätes ausschließlich qua- lifiziertem Fachpersonal.
  • Page 9: Stromversorgung

    3.5. Stromversorgung GEFAHR! Stromschlaggefahr! Auch bei ausgeschaltetem Gerät sind Teile des Gerätes unter Spannung.  Um die Stromversorgung Ihres Gerätes zu unterbre- chen oder es gänzlich von Spannung freizuschalten, ziehen Sie das Steckernetzteil aus der Steckdose. • Betreiben Sie das Gerät nur an einer leicht erreichbaren und in der Nähe befindlichen Schutzkontakt-Steckdose mit 100 - 240 V ~ 50/60 Hz.
  • Page 10: Cd-Spieler

    3.6. CD-Spieler Der CD-Spieler ist ein Laserprodukt der Klasse 1. Das Gerät ist mit einem Sicherheitssystem ausge- rüstet, das das Austreten von gefährlichen Laser- strahlen während des normalen Gebrauchs ver- hindert. Um Augenverletzungen zu vermeiden, manipulieren oder beschädigen Sie niemals das Sicherheitssystem des Geräts.
  • Page 11 • Achten Sie beim Einlegen der Batterien auf die Polarität (+/–). • Bei unsachgemäßem Auswechseln der Batterien besteht Ex- plosionsgefahr! Ersetzen Sie die Batterien nur durch densel- ben oder einen gleichwertigen Typ. • Versuchen Sie niemals, Batterien wieder aufzuladen. Es be- steht Explosionsgefahr! •...
  • Page 12: Lieferumfang

    4. Lieferumfang GEFAHR! Erstickungsgefahr! Es besteht Erstickungsgefahr durch Verschlucken oder Einatmen von Kleinteilen oder Folien.  Halten Sie die Verpackungsfolie von Kindern fern.  Entnehmen Sie das Produkt aus der Verpackung und entfernen Sie sämtliches Verpackungsmaterial.  Bitte überprüfen Sie die Vollständigkeit der Lieferung und benachrichtigen Sie uns bitte innerhalb von 14 Tagen nach dem Kauf, falls die Lieferung nicht kom- plett ist.
  • Page 13: Geräteübersicht

    5. Geräteübersicht 5.1. Vorderseite 0.3A Display VOLUME • Lautstärkeregler • durch Drücken Menüauswahl bestätigen CD-Fach CD auswerfen FM-Sendersuchlauf vorwärts, DAB nächster Sender, nächster Titel FM-Sendersuchlauf rückwärts, DAB vorheriger Sender, vorherigen Titel • Wiedergabe stoppen • Displayanzeigen wechseln Abspielen, Pause/ Stummschalten •...
  • Page 14: Rückseite

    Gerät einschalten / in den Standby-Modus schalten USB Anschluss A U X Audioeingang 3,5 mm Stereobuchse Kopfhöreranschluss 3,5 mm Stereoklinke 5.2. Rückseite DAB/FM-Antenne L+/L- Anschlussbuchsen für den linken Lautsprecher R+/R- Anschlussbuchsen für den rechten Lautsprecher 15 V 3 A Buchse für Steckernetzteil...
  • Page 15: Fernbedienung

    5.3. Fernbedienung Dimmer Sleep Program Info MODE MENU VOL+ VOL- PQRS WXYZ CD auswerfen Equalizermodus wählen, SLEEP Sleepmodus aufrufen, DIMMER Displayhelligkeit dimmen, PROGRAMM Programmfunktion / Sender speichern Schnelllauf rückwärts/vorherigen Titel aufrufen / Radiostationstaste – Wiedergabe stoppen Schnelllauf vorwärts/nächsten Titel aufrufen / Radiostationstaste + Info Radiosenderinformationen/Titelinformationen anzeigen...
  • Page 16: Gerät Aufstellen

    Stummschaltung Sender speichern/ gespeicherte Sender aufrufen VOL - Lautstärke verringern MODE Betriebsart wählen Gerät in den Standby Modus schalten 6. Gerät aufstellen Stellen Sie das Gerät und die Lautsprecher auf ebene, feste Oberflächen. Einige ag- gressive Möbellacke können die Gummifüße der Geräte angreifen. Stellen Sie das Gerät ggf.
  • Page 17: Anschlüsse

    6.2. Anschlüsse Bevor Sie Anschlüsse vornehmen, Trennen Sie das Gerät vom Strom. Betrieb im WLAN-Modus:  Eine WiFi-Antenne ist im Gerät integriert.  Richten Sie die Antenne an der Geräterückseite für Betrieb des UKW/DAB- Radios: den Empfang aus.  Steckernetzteil: Verbinden Sie den Hohlstecker des mitgelieferten Steckernetzteils mit dem Anschluss DC IN und das Steckernetzteil mit einer Steckdose.
  • Page 18: Kopfhörer Anschließen

    6.4. Kopfhörer anschließen 0.3A Auf der Vorderseite des Gerätes befindet sich ein 3,5 mm Klinkenanschluss mit der Beschriftung  Stecken Sie das Anschlusskabel des Kopfhörers mit einem 3,5 mm Klinkenste- cker in den Anschluss. WARNUNG! Möglicher Gehörschaden! Übermäßiger Schalldruck bei Verwendung von Ohrhö- rern und Kopfhörern kann zu Schäden am Hörvermö- gen und/oder zum Verlust des Hörsinns führen.
  • Page 19: Usb-Gerät Anschließen

    6.5. USB-Gerät anschließen 0.3A Am USB-Anschluss auf der Vorderseite des Gerätes können Sie USB-Speichersticks anschließen. Damit können Musikstücke von einem USB-Speicherstick wiedergege- ben werden. Der USB-Anschluss unterstützt keine Video-Wiedergabe.  Schließen Sie ein USB-Gerät am USB-Anschluss U S B an. 6.6.
  • Page 20: Inbetriebnahme

    7. Inbetriebnahme 7.1. Steuerung am Gerät oder über die Fernbedienung Mit den Tasten am Gerät können Sie die wesentlichen Wiedergabefunktionen Ih- res Geräts aktivieren. Die Fernbedienung bietet über diese Grundfunktionen hinaus zahlreiche zusätzliche Bedienelemente für die volle Funktionalität Ihres Geräts. In dieser Anleitung beziehen wir uns auf die Tasten der Fernbedienung.
  • Page 21  Bestätigen Sie durch Druck auf den Regler V O L U M E O K am Gerät oder O K auf der Fernbedienung. Wenn Sie die Option AKTUALISIERUNG VON NET ausgewählt haben, stellen Sie im nächsten Abfragefenster Ihre Zeitzone ein. ...
  • Page 22: Verbindung Zu Einem Netzwerk Herstellen

    7.3.2. Verbindung zu einem Netzwerk herstellen Die gefundenen Netzwerke werden mit ihrem Namen (SSID) in einer Liste ange- zeigt. WLAN-Access Points, die den Aufbau einer Verbindung über WPS anbieten, werden mit [WPS] angezeigt. Darunter sehen Sie die Einträge: NEUER SUCHLAUF: Erneute Suche starten MANUELLE KONFIG: Verbindungsdaten manuell eingeben ...
  • Page 23: Netzwerkschlüssel Eingeben

    PIN eingeben Wenn der Router über keine WPS-Taste verfügt, aber die Möglichkeit der WPS-Ver- bindung über die PIN-Eingabe im Web-Interface des Routers bietet, wählen Sie die Option PIN EINGEBEN. Geben Sie nach Aufforderung im Web-Interface des Routers die auf dem Display des Internetradios angegebene PIN-Nummer ein und bestätigen Sie O K die Eingabe.
  • Page 24: Displayhelligkeit Dimmen

    7.4. Displayhelligkeit dimmen Ein- oder mehrmaliges Drücken der Taste D I M M E R auf der Fernbedienung er- möglicht das stufenweise Dimmen der Displayhelligkeit. 7.5. Antenne ausrichten  Ziehen Sie die Teleskopantenne auf der Rückseite des Gerätes vollständig aus. Die Antenne sollte vollständig ausgezogen sein, um einen guten Signal- empfang und eine gute Tonqualität zu gewährleisten.
  • Page 25: Internetradio Hören

    9. Internetradio hören  Um Internetradio zu hören, wählen Sie den Eintrag INTERNETRADIO im Haupt- menü und bestätigen Sie mit OK oder drücken Sie mehrmals die Taste MODE. 9.1. Radiodienste auswählen Wählen Sie einen der Einträge aus, um folgende Dienste auswählen zu können: 9.1.1.
  • Page 26: Verbindung Zu Einem Internetradiosender / Einem Podcast

    10.1.4. Länder Unter LÄNDER können Sie weltweite Podcasts auswählen. 10.1.5. Entdecken Mit der Funktion ENTDECKEN können Sie Podcasts anhand Ihrer ausgewählten Vorlieben auswählen. 10.2. Verbindung zu einem Internetradiosender / einem Podcast Nachdem Sie einen Sender/einen Podcast ausgewählt haben, wie oben beschrie- ben, wird das Radio wird mit dem Internetradioserver verbunden.
  • Page 27: Dab- & Fm-Radio

    11. DAB- & FM-Radio Sie können mit dem Gerät sowohl DAB- als auch FM-Radiosender empfangen. Wäh- len Sie den gewünschten Radiobetrieb:  Drücken Sie die Taste M O D E an der Fernbedienung oder drücken Sie die Taste am Gerät wiederholt bis Sie den gewünschten Radiomodus erreicht haben. Im Display erscheint DAB RADIO bzw.
  • Page 28: Senderinformationen

    11.2.3. Gespeicherten Sender aufrufen  Drücken Sie die Taste FAV . Im Display wird der erste Speicherplatz der Radio- sender angezeigt.  Wählen Sie mit den Tasten die Programmplätze. Neben der Programmplatz- nummer wird der Sendername angezeigt.  Wenn Sie den gewählten Sender aufrufen möchten, drücken Sie O K . Der Sen- der wird eingestellt.
  • Page 29 Menüname Beschreibung SENDERLISTE (nur Betriebsart DAB) Listet alle Sender auf VOLLSTÄNDIGER SUCHLAUF (nur Betriebsart DAB) Automatischer Sendersuchlauf MANUELL EINSTELLEN (nur Betriebsart DAB) Frequenz manuell einstellen INAKTIVE SENDER LÖSCHEN (nur Betriebsart DAB) Löschen aller DAB-Sender, die in der aktuellen Region nicht zu empfan- NEIN gen sind.
  • Page 30: Cds Und Usb-Speicher Wiedergeben

    12. CDs und USB-Speicher wiedergeben  Drücken Sie die Taste M O D E an der Fernbedienung oder drücken Sie die Tas- am Gerät wiederholt bis Sie den gewünschten Modus erreicht haben. Im Display erscheint CD bzw. USB. 12.1. Hinweise zu den Medien Am USB-Anschluss können Sie USB-Speichersticks anschließen.
  • Page 31: Usb-Speicherstick Einsetzen

    12.4. USB-Speicherstick einsetzen  Stecken Sie den USB-Speicherstick in den USB-Anschluss.  Die Titel werden eingelesen und das Display zeigt die Gesamtzahl der Alben und Titel. Die Wiedergabe des ersten Titels im ersten Album startet automatisch. 12.5. Wiedergabe starten/anhalten  Mit der Taste O K / auf der Fernbedienung oder der Taste auf dem Gerät starten Sie die Wiedergabe von Titeln.
  • Page 32: Bluetooth-Modus

     Aktivieren Sie ebenso die Bluetooth-Funktion auf ihrem externen Gerät und füh- ren die einen Kopplungsvorgang durch. Lesen Sie dazu die Anleitung ihres Gerä- tes. Der Name des Audio-Systems ist „MEDION MD 85008“.  Sollte eine Passwortabfrage im Display des externen Gerätes erscheinen, geben Sie als Kennziffer „0000“...
  • Page 33: Systemeinstellungen

    15. Systemeinstellungen 15.1. Equalizer Unter EQUALIZER können Sie vordefinierte Klangformate auswählen oder ein eige- nes erstellen. Wählen Sie eines der Klangformate  NORMAL, MITTIG, JAZZ, ROCK, SOUNDTRACK, KLASSIK, POP, NACHRICHTEN, MEIN EQ aufzurufen oder MEINE EQ EINSTELLUNG aus und bestätigen Sie O K . Die Klangeinstellung wird sofort übernommen. Das Klangformat NORMAL ist voreingestellt.
  • Page 34: Zeit Einstellen

    15.2.4. Manuelle Einstellungen  Wählen Sie unter MANUELLE EINSTELLUNGEN die drahtlose Verbindung (WLAN) aus und stellen Sie jeweils die DHCP Funktion auf DHCP AKTIV oder DHCP INAKTIV. 15.2.5. NetRemote PIN ändern Unter NETREMOTE PIN-SETUP können Sie den vierstelligen Code, der bei der Ver- bindung mit der App eines Smartphones oder Tablet PCs eingegeben wird, neu ver- geben.
  • Page 35: Software Aktualisieren

    15.6. Software aktualisieren Unter SOFTWAREUPDATE können Sie nach Softwareaktualisierungen suchen und sie ggf. installieren. 15.6.1. Auto-Update durchführen Wählen Sie unter AUTO-UPDATE den Eintrag JA, um regelmäßig automatisch nach Softwareaktualisierungen zu suchen. 15.6.2. Softwareaktualisierungen suchen Wählen Sie JETZT PRÜFEN, um die Suche nach Softwareaktualisierungen sofort zu starten.
  • Page 36: Einstellungen Im Hauptmenü

    16. Einstellungen im Hauptmenü Über das HAUPTMENÜ können Sie wie mit der Taste M O D E die Betriebsarten aufrufen: • INTERNETRADIO • PODCASTS • DAB • FM • CD • USB • AUX EINGANG • BLUETOOTH • SLEEP • WECKER Außerdem können Sie hier die Schlummer-Funktion und die Weckfunktion einstellen.
  • Page 37: Internet Radio

    16.2.3. Wecksignal auswählen  Stellen Sie unter MODUS das Wecksignal für den Wecker ein: • SUMMER: Wecken mit Weckton • INTERNET RADIO: Wecken mit Internetradio • DAB: Wecken mit DAB-Radio • FM: Wecken mit FM-Radio 16.2.4. Radioprogramm zum Wecken auswählen ...
  • Page 38: Wenn Störungen Auftreten

    19. Wenn Störungen auftreten Sollten Störungen auftreten, prüfen Sie bitte zunächst, ob Sie das Problem selbst beheben können. Die folgende Übersicht kann Ihnen dabei helfen. Störung Mögliche Ursache Maßnahme Sind die Batterien richtig Batterien korrekt einle- eingelegt? gen. Sind Sie weiter als 7 Me- Distanz verringern.
  • Page 39 Störung Mögliche Ursache Maßnahme Justieren Sie die Fre- quenz der Sender nach. Ändern Sie ggfs. den Kein oder schlechter Ra- Die Sendersignale sind Standort des Radios oder dioempfang zu schwach. die Ausrichtung der An- tenne, um den Empfang zu verbessern. Ziehen Sie den Netzad- apter aus der Steckdose Kondensation hat sich...
  • Page 40 Störung Mögliche Ursache Maßnahme Überprüfen Sie die Ein- Es ist kein DHCP-Server stellungen des Routers. aktiviert. Es wurde ein falscher Verschlüsselungsalgo- Problem bei der Verbin- Verschlüsselungsalgo- rithmus des Netzwerkes dung zum Router. rithmus des Netzwerkes erneut eingeben. eingeben. Der RJ45-Port oder das Kontaktieren Sie den WiFi-Modul sind defekt.
  • Page 41: Entsorgung

    20. Entsorgung VERPACKUNG Ihr Gerät befindet sich zum Schutz vor Transportschäden in einer Verpa- ckung. Verpackungen sind aus Materialien hergestellt, die umweltscho- nend entsorgt und einem fachgerechten Recycling zugeführt werden können. GERÄT Alle mit dem nebenstehenden Symbol gekennzeichneten Altgeräte dür- fen nicht im normalen Hausmüll entsorgt werden.
  • Page 42: Technische Daten

    21. Technische Daten Spannungsversorgung Spannung AC 100-240 V~ 50-60 Hz Leistungsaufnahme im Standby < 0,9 W Ausgangsleistung 2 x 15 Watt RMS Batterien Fernbedienung 2 x 1,5 V R03/LR03/AAA Radio UKW-Band 87,5 – 108 MHz DAB-Band III 174,928 - 239,200 MHz Senderspeicher CD-Spieler Laserleistung...
  • Page 43 Lautsprecher: Breite x Höhe x Tiefe ca. 15 x 24,7 x 17 cm Gewicht 5,4 kg Netzadapter Shenzhen Adition Audio Science and Technology Co., Ltd Importeur: MEDION AG Hersteller Am Zehnthof 77 45307 Essen Deutschland HR-Nummer: HRB 13274 Modellbezeichnung AD4501503000EU...
  • Page 44 Ausgangsleistung 45,0 W Durchschnittliche Effizienz im Betrieb 89,78 % Effizienz bei geringer Last (10%) 90,0 % Leistungsaufnahme bei Nulllast 0,09 W Relevante Lastbedingungen: Prozentsatz des Ausgangsstroms laut Typenschild Lastbedingung 1 100 % ± 2 % Lastbedingung 2 75 % ± 2 % Lastbedingung 3 50 % ±...
  • Page 45: Eu - Konformitätsinformation

    22. EU - Konformitätsinformation Hiermit erklärt die MEDION AG, dass sich dieses Gerät in Übereinstim- mung mit den grundlegenden Anforderungen und den übrigen ein- schlägigen Bestimmungen befindet: • RE- Richtline 2014/53/EU • Öko-Design Richtlinie 2009/125/EG (und Öko-Design Verordnung 2019/1782) •...
  • Page 46: Serviceinformationen

    Ihre Erfahrungen austauschen und Ihr Wissen weiter- geben. Sie finden unsere Service Community unter community.medion.com. • Gerne können Sie auch unser Kontaktformular unter www.medion.com/contact nutzen. • Selbstverständlich steht Ihnen unser Serviceteam auch über unsere Hotline oder postalisch zur Verfügung.
  • Page 47 Schweiz Öffnungszeiten Rufnummer  Mo. - Fr.: 09:00 - 19:00 0848 - 33 33 32 Serviceadresse MEDION/LENOVO Service Center Ifangstrasse 6 8952 Schlieren Schweiz Belgien Öffnungszeiten Rufnummer  Mo. - Fr.: 09:00 - 19:00 02 - 200 61 98 Serviceadresse MEDION B.V.
  • Page 48 Deutschland Diese und viele weitere Bedienungsanleitungen stehen Ihnen über das Serviceportal www.medion.com/de/service/start/ zum Download zur Verfügung. Dort finden Sie auch Treiber und andere Software zu diversen Geräten. Sie können auch den nebenstehenden QR Code scannen und die Bedienungsanleitung über das Serviceportal auf Ihr mobiles Endgerät laden.
  • Page 49: Impressum

    Luxemburg Diese und viele weitere Bedienungsanleitungen stehen Ihnen über das Serviceportal www.medion.com/lu/de/service/start/ zum Download zur Verfügung. Dort finden Sie auch Treiber und andere Software zu diversen Geräten. Sie können auch den nebenstehenden QR Code scannen und die Bedienungsanleitung über das Serviceportal auf Ihr mobiles Endgerät laden.
  • Page 50: Datenschutzerklärung

    25. Datenschutzerklärung Sehr geehrter Kunde! Wir teilen Ihnen mit, dass wir, die MEDION AG, Am Zehnthof 77, 45307 Essen als Ver- antwortlicher Ihre personenbezogenen Daten verarbeiten. In datenschutzrechtlichen Angelegenheiten werden wir durch unseren betrieb- lichen Datenschutzbeauftragten, erreichbar unter MEDION AG, Datenschutz, Am Zehnthof 77, D –...
  • Page 52 Sommaire Informations concernant la présente notice d’utilisation ...... 55 1.1. Explication des symboles .................55 Utilisation conforme .................. 56 Consignes de sécurité................57 3.1. Sécurité de fonctionnement ................57 3.2. Lieu d’installation ....................58 3.3. Réparation ......................59 3.4. Valeurs ambiantes ....................59 3.5. Alimentation électrique ..................60 3.6.
  • Page 53 11.2. Mémorisation et sélection de stations ............78 11.3. Informations sur les stations ................79 11.4. Réglages dans le menu ..................79 Lecture de CD et supports USB ..............81 12.1. Remarques sur les supports ................81 12.2. Informations relatives aux titres (ID3) ............81 12.3.
  • Page 54: Informations Concernant La Présente Notice D'utilisation

    1. Informations concernant la présente notice d’utilisation Merci d’avoir choisi notre produit. Nous vous souhaitons une bonne uti- lisation. Veuillez lire attentivement les consignes de sécurité et la notice d’utili- sation dans son intégralité avant la mise en service de l’appareil. Tenez compte des avertissements figurant sur l’appareil et dans la notice d’utilisation.
  • Page 55: Utilisation Conforme

    Marquage de polarité Symbole de polarité du connecteur d’alimentation en courant conti- nu (norme CEI 60417). Appareils portant ce symbole : intérieur plus, extérieur moins. Efficacité énergétique niveau VI Le niveau d’efficacité énergétique est une classification standard du rendement des adaptateurs secteur internes et externes. L’efficacité énergétique indique le niveau d’efficacité.
  • Page 56: Consignes De Sécurité

    • N’utilisez pas l’appareil en plein air. • N’exposez pas l’appareil à des conditions extrêmes. À éviter : – humidité de l’air élevée ou exposition à l’eau, – températures extrêmement hautes ou basses, – rayonnement direct du soleil, – flamme nue. 3.
  • Page 57: Lieu D'installation

    3.2. Lieu d’installation • Maintenez votre appareil et tous les composants raccordés à l’abri de l’humidité, de la poussière, de la chaleur, du rayon- nement direct du soleil et des flammes nues (bougies ou pro- duits similaires). Le non-respect de ces consignes peut entraî- ner des dysfonctionnements ou l’endommagement de l’écran.
  • Page 58: Réparation

    3.3. Réparation • Adressez-vous au SAV, lorsque : – le cordon d’alimentation est grillé ou endommagé, – du liquide s’est infiltré dans l’appareil, – l’appareil ne fonctionne pas correctement, – l’appareil est tombé par terre ou le boîtier est endommagé. •...
  • Page 59: Alimentation Électrique

    3.5. Alimentation électrique DANGER ! Risque d’électrocution ! Certaines pièces de l’appareil restent sous tension, même lorsque l’appareil est éteint.  Pour couper votre appareil de l’alimentation élec- trique et le mettre entièrement hors tension, débran- chez l’adaptateur secteur de la prise de courant. •...
  • Page 60: Lecteur De Cd

    3.6. Lecteur de CD Le lecteur de CD est un produit laser de catégo- rie 1. L’appareil est doté d’un système de sécuri- té qui empêche l’émission de rayons laser dan- gereux pendant une utilisation normale. Afin d’éviter toute lésion oculaire, ne manipulez ou n’endommagez jamais le système de sécurité...
  • Page 61 • Veillez à bien respecter la polarité (+/–) lorsque vous insérez les piles. • Il existe un risque d’explosion en cas de remplacement non conforme des piles ! Remplacez les piles par des piles de même type ou de type équivalent uniquement. •...
  • Page 62: Contenu De L'emballage

    4. Contenu de l’emballage DANGER ! Risque de suffocation ! L’ingestion ou l’inhalation de petites pièces ou de films présente un risque de suffocation.  Conservez le film d’emballage hors de portée des en- fants.  Sortez le produit de son emballage et retirez tout le matériel d’emballage. ...
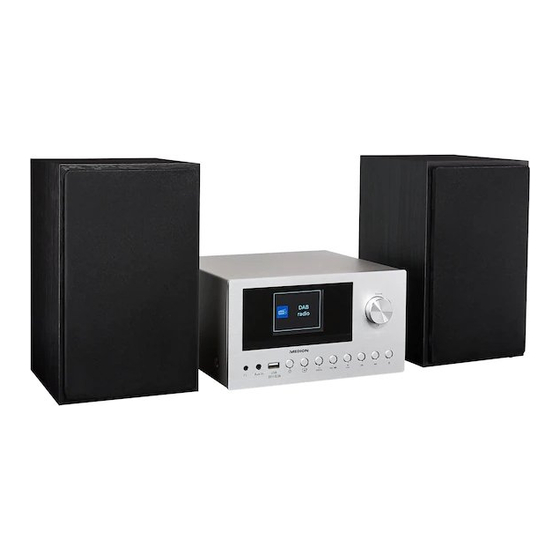
  • Page 63: Vue D'ensemble De L'appareil

    5. Vue d’ensemble de l’appareil 5.1. Face avant 0.3A Écran VOLUME • Bouton de réglage du volume • Appuyer pour confirmer la sélection du menu Compartiment CD Éjection du CD Recherche de stations FM en avant, station DAB suivante, titre suivant Recherche de stations FM en arrière, station DAB précédente, titre précédent •...
  • Page 64: Face Arrière

    Mise en marche/en mode veille de l’appareil Port USB AUX IN Entrée audio port stéréo 3,5 mm Port casque jack stéréo 3,5 mm 5.2. Face arrière Antenne DAB/FM L+/L- Prises de raccordement pour le haut-parleur gauche R+/R- Prises de raccordement pour le haut-parleur droit 15 V 3 A Prise pour l’adaptateur secteur...
  • Page 65: Télécommande

    5.3. Télécommande Dimmer Sleep Program Info MODE MENU VOL+ VOL- PQRS WXYZ Éjection du CD Sélection du mode Égaliseur SLEEP Passage en mode Sommeil DIMMER Variation de la luminosité de l’écran PROGRAMM Enregistrement de la fonction de programmation/station Retour rapide/passage au titre précédent / Station de radio précédente Arrêt de la lecture Avance rapide/passage au titre suivant /...
  • Page 66: Installation De L'appareil

    Mise en sourdine Mémorisation de stations/affichage des stations mémorisées VOL - Diminution du volume MODE Sélection du mode de fonctionnement Mise en veille de l’appareil 6. Installation de l’appareil Posez l’appareil et les haut-parleurs sur une surface stable et plane. Le vernis parti- culièrement agressif de certains meubles peut attaquer les pieds en caoutchouc de l’appareil.
  • Page 67: Raccordements

    6.2. Raccordements Avant de procéder à des raccordements, débranchez l’appareil.  Une antenne Wi-Fi est intégrée à l’appareil. Fonctionnement en mode Wi-Fi :  Orientez l’antenne au dos de l’appareil de manière à Fonctionnement de la radio UKW/DAB : obtenir la meilleure réception possible. ...
  • Page 68: Raccordement D'un Casque

    6.4. Raccordement d’un casque 0.3A À l’avant de l’appareil se trouve une prise jack de 3,5 mm portant l’inscription  Branchez le câble de raccordement du casque à fiche jack de 3,5 mm dans la prise. AVERTISSEMENT ! Risque de lésions auditives ! Une surpression acoustique lors de l’utilisation d’un casque ou d’écouteurs peut entraîner des lésions du système auditif et/ou une perte de l’ouïe.
  • Page 69: Raccordement D'un Périphérique Usb

    6.5. Raccordement d’un périphérique USB 0.3A Vous pouvez brancher une clé USB sur le port USB situé à l’avant de l’appareil. Cela vous permet d’écouter de la musique à partir d’une clé USB. Le port USB ne prend pas en charge la lecture de vidéos. ...
  • Page 70: Mise En Marche

    7. Mise en marche 7.1. Commande sur l’appareil ou par télécommande Vous pouvez activer les fonctions de lecture essentielles de votre appareil à l’aide de ses touches. La télécommande offre, outre ces fonctions de base, de nombreuses commandes supplémentaires garantissant la fonctionnalité intégrale de votre appa- reil.
  • Page 71  Confirmez en appuyant sur le bouton de réglage VOLUME OK de l’appareil ou sur OK de la télécommande. Si vous avez sélectionné l’option MAJ VIA RÉSEAU, définissez votre fu- seau horaire dans la fenêtre suivante.  Réglez l’heure d’été sur ON ou OFF à l’aide du bouton de réglage VOLUME OK de l’appareil ou des touches de navigation de la télécommande.
  • Page 72: Connexion À Un Réseau

    7.3.2. Connexion à un réseau Les réseaux trouvés sont affichés dans une liste accompagnés de leur nom (SSID). Les points d’accès Wi-Fi qui permettent d’établir une connexion via WPS sont affi- chés avec [WPS]. Vous voyez en dessous les options suivantes : NLLE RECHERCHE : démarrer une nouvelle recherche CONFIG MANUELLE : entrer manuellement les données de connexion ...
  • Page 73: Saisie Du Code Pin

    Saisie du code PIN Si le routeur ne comporte pas de touche WPS, mais permet d’établir une connexion WPS en saisissant le code PIN sur l’interface Web du routeur, sélectionnez l’option ENTRER LE CODE PIN. Lorsque vous y êtes invité, saisissez le code PIN indiqué sur l’écran de la radio Inter- net sur l’interface Web du routeur et confirmez votre saisie en appuyant sur OK.
  • Page 74: Variation De La Luminosité De L'écran

    7.4. Variation de la luminosité de l’écran Appuyez une ou plusieurs fois sur la touche DIMMER de la télécommande pour varier progressivement la luminosité de l’écran. 7.5. Orientez convenablement l’antenne  Déployez entièrement l’antenne télescopique située au dos de l’appareil. L’antenne doit être entièrement déployée pour assurer une bonne ré- ception du signal et une parfaite qualité...
  • Page 75: Écoute De La Radio Internet

    9. Écoute de la radio Internet  Pour écouter la radio Internet, sélectionnez l’option RADIO INTERNET dans le menu principal et confirmez avec OK ou appuyez plusieurs fois sur la touche MODE. 9.1. Sélection de services radio Sélectionnez l’une des options pour pouvoir choisir les services suivants : 9.1.1.
  • Page 76: Découvrir

    10.1.4. Des pays Dans DES PAYS, vous pouvez sélectionner des podcasts internationaux. 10.1.5. Découvrir La fonction DÉCOUVRIR vous permet de sélectionner des podcasts en fonction de vos préférences. 10.2. Connexion à une station de radio Internet/un podcast Une fois que vous avez sélectionné une station/un podcast comme décrit ci-dessus, la radio se connecte au serveur radio Internet.
  • Page 77: Dab Et Fm

    11. DAB et FM L’appareil capte les stations radio DAB et FM. Sélectionnez le mode radio souhaité :  Appuyez sur la touche MODE de la télécommande ou appuyez plusieurs fois de l’appareil pour accéder au mode radio souhaité. DAB RA- sur la touche DIO ou FM RADIO s’affiche à...
  • Page 78: Écoute Des Stations Mémorisées

    11.2.3. Écoute des stations mémorisées  Appuyez sur la touche FAV. Le premier emplacement mémoire de station de ra- dio est affiché à l’écran.  Sélectionnez les emplacements de programmation à l’aide des touches Outre le numéro de l’emplacement de programmation, le nom de la station s’af- fiche.
  • Page 79 Nom du menu Description LISTE DE STATIONS (mode DAB uniquement) Liste de toutes les stations RECHERCHE COMPLÈTE (mode DAB uniquement) Recherche automatique de stations RÉGLAGE MANUEL (mode DAB uniquement) Réglage manuel de la fréquence SUPPRIMER LES STATIONS INACTIVES (mode DAB uniquement) Suppression de toutes les stations DAB qui ne sont pas captées dans la région actuelle.
  • Page 80: Lecture De Cd Et Supports Usb

    Nom du menu Description Choisissez entre le son mono et sté- réo (uniquement pour la lecture au- dio via le casque). 12. Lecture de CD et supports USB  Appuyez sur la touche MODE de la télécommande ou appuyez plusieurs fois de l’appareil pour accéder au mode souhaité.
  • Page 81: Branchement D'une Clé Usb

    En l’absence de disque ou lorsque le disque n’est pas lisible, PAS DE CD s’affiche à l’écran.  Pour éjecter le CD, appuyez sur la touche . L’écran affiche OPEN. 12.4. Branchement d’une clé USB  Insérez la clé USB dans le port USB. ...
  • Page 82: Mode Bluetooth

     Activez également la fonction Bluetooth sur votre périphérique externe et pro- cédez au couplage. Pour cela, veuillez lire la notice d’utilisation de votre appareil. Le nom du système audio est « MEDION MD 85008 ».  Si une demande de mot de passe apparaît sur l’écran du périphérique externe, veuillez saisir le code «...
  • Page 83: Paramètres Système

    15. Paramètres système 15.1. Égaliseur Dans EQUALIZER, vous pouvez sélectionner des formats sonores prédéfinis ou en créer de façon personnalisée. Sélectionnez l’un des formats sonores  NORMAL, BÉMOL, JAZZ, ROCK, FILM, CLASSIQUE, POP, ACTUA- LITÉS ou MON EQ et confirmez avec OK. L’effet sonore sélectionné est immé- diatement appliqué.
  • Page 84: Réglage De L'horloge

    15.2.4. Réglages manuels  Dans CONFIG. MANUELLE, sélectionnez le réglage Sans fil (Wi-Fi) et activez ou désactivez la fonction DHCP avec DHCP ACTIVÉ ou DHCP DÉSACTIVÉ. 15.2.5. Modification du code PIN NetRemote Dans NETREMOTE PIN-SETUP, vous pouvez réattribuer le code à quatre chiffres saisi lors de la connexion à...
  • Page 85: Mise À Jour Du Logiciel

    15.6. Mise à jour du logiciel Dans SOFTWAREUPDATE, vous pouvez rechercher les mises à jour logicielles dis- ponibles et les installer si nécessaire. 15.6.1. Mise à jour automatique Dans MAJ AUTOMATIQUE, sélectionnez l’option OUI pour que l’appareil pro- cède régulièrement à la recherche automatique de mises à jour logicielles. 15.6.2.
  • Page 86: Réglages Dans Le Menu Principal

    16. Réglages dans le menu principal Dans le MENU PRINCIPAL, vous pouvez afficher les modes de fonctionnement avec la touche MODE : RADIO INTERNET • PODCASTS • • • • • ENTRÉE AUX • BLUETOOTH • SLEEP • RÉVEIL • Vous pouvez également régler ici la fonction arrêt automatique et la fonction réveil.
  • Page 87: Sélection De La Sonnerie Du Réveil

    16.2.3. Sélection de la sonnerie du réveil  Dans MODE, sélectionnez la sonnerie du réveil : SUMMER : réveil avec sonnerie • INTERNET RADIO : réveil avec radio Internet • DAB : réveil avec radio DAB • FM : réveil avec radio FM •...
  • Page 88: En Cas De Dysfonctionnements

    19. En cas de dysfonctionnements En cas de dysfonctionnements, veuillez d’abord vérifier si vous pouvez résoudre le problème vous-même. Le tableau ci-dessous peut vous aider. Problème Cause possible Mesure Les piles sont-elles cor- Veillez à la bonne inser- rectement insérées ? tion des piles.
  • Page 89 Problème Cause possible Mesure Ajustez la fréquence de la station. Réception radio inexis- Changez éventuellement Les signaux émis sont tante ou de mauvaise la radio de place ou mo- trop faibles. qualité difiez l’orientation de l’antenne pour améliorer la réception. Débranchez l’adapta- teur secteur de la prise De la condensation s’est...
  • Page 90 Problème Cause possible Mesure Vérifiez les réglages du Aucun serveur DHCP routeur. n’est activé. Un algorithme de chiffre- Saisissez à nouveau l’al- Problème de connexion ment du réseau incorrect gorithme de chiffrement au routeur. a été saisi. du réseau. Le port RJ45 ou le mo- dule Wi-Fi est défec- Contactez le SAV tueux.
  • Page 91: Recyclage

    20. Recyclage EMBALLAGE L’appareil est placé dans un emballage afin de le protéger contre tout dommage pendant le transport. Les emballages sont fabriqués à partir de matériaux qui peuvent être éliminés de manière écologique et remis à un service de recyclage approprié. APPAREIL Il est interdit d’éliminer les appareils usagés portant le symbole ci-contre avec les déchets ménagers.
  • Page 92: Caractéristiques Techniques

    21. Caractéristiques techniques Alimentation électrique Tension CA 100-240 V~ 50-60 Hz Consommation en veille < 0,9 W Puissance de sortie 2 x 15 watts RMS Piles de la télécommande 2 x 1,5 V R03/LR03/AAA Radio Bande FM 87,5 – 108 MHz Bande DAB III 174,928 –...
  • Page 93 15 x 24,7 x 17 cm Profondeur Poids 5,4 kg Adaptateur secteur Shenzhen Adition Audio Science and Technology Co., Ltd Importateur : MEDION AG Fabricant Am Zehnthof 77 45307 Essen Deutschland Numéro HR : HRB 13274 Modèle AD4501503000EU Tension/courant d’entrée / fréquence 100 - 240 V~, 50-60 Hz, 1,0 A du courant alternatif d’entrée...
  • Page 94 Tension/courant de sortie 15,0 V 3,0 A Puissance de sortie 45,0 W Efficacité moyenne en fonctionnement 89,78 % Efficacité à charge faible (10 %) 90,0 % Consommation électrique à charge 0,09 W nulle Conditions de charge pertinentes : Pourcentage du courant de sortie selon plaque signalétique Condition de charge 1 100 % ±...
  • Page 95: Information Relative À La Conformité Ue

    22. Information relative à la conformité UE Par la présente, MEDION AG déclare que ce produit est conforme aux exigences de base et aux autres réglementations en vigueur : • Directive RE 2014/53/UE • Directive sur l’écoconception 2009/125/CE (et directive sur l’écoconception 2019/1782) •...
  • Page 96: Informations Relatives Au Service Après-Vente

    MEDION France 75 Rue de la Foucaudière 72100 LE MANS France Suisse Horaires d’ouverture Hotline SAV  Lun - Ven : 9h00 à 19h00 0848 - 33 33 32 Adresse du service après-vente MEDION/LENOVO Service Center Ifangstrasse 6 8952 Schlieren Suisse...
  • Page 97 Belgique Horaires d’ouverture Hotline SAV  Lun - Ven : 9h00 à 19h00 02 - 200 61 98 Adresse du service après-vente MEDION B.V. John F.Kennedylaan 16a 5981 XC Panningen Nederland Luxembourg Horaires d’ouverture Hotline SAV  Lun - Ven : 9h00 à 19h00 34 - 20 808 664 Adresse du service après-vente...
  • Page 98: Mentions Légales

    La présente notice d’utilisation est protégé par les droits d’auteur. Toute reproduction sous forme mécanique, électronique ou sous toute autre forme que ce soit est interdite sans l’autorisation préalable écrite du fabricant. L’entreprise suivante possède les droits d’auteur : MEDION AG Am Zehnthof 77 45307 Essen Allemagne Veuillez noter que l’adresse ci-dessus n’est pas celle du service des retours.
  • Page 99: Déclaration De Confidentialité

    En matière de protection des données, nous sommes assistés par le délégué à la protection des données personnelles de notre entreprise, que vous pouvez contacter à l’adresse MEDION AG, Datenschutz, Am Zehnthof 77, D - 45307 Essen ; datenschutz@medion.com. Nous traitons vos données dans le cadre du déroule- ment de la garantie et des processus connexes (p.
  • Page 100 Inhoudsopgave Informatie over deze gebruiksaanwijzing ..........103 1.1. Betekenis van de symbolen ................103 Gebruiksdoel .................... 104 Veiligheidsvoorschriften................. 105 3.1. Veilig gebruik ..................... 105 3.2. Plaats van opstelling ..................106 3.3. Reparatie ......................107 3.4. Omgevingswaarden ..................107 3.5. Stroomvoorziening ..................108 3.6.
  • Page 101 11.2. Zenders opslaan en beluisteren ..............126 11.3. Zenderinformatie ..................... 127 11.4. Instellingen in het menu ................127 Cd's en USB-opslagmedia weergeven ............ 129 12.1. Aanwijzingen over de te gebruiken media ..........129 12.2. Nummerinformatie (ID3) ................129 12.3. Cd plaatsen/uitwerpen .................. 129 12.4.
  • Page 102: Informatie Over Deze Gebruiksaanwijzing

    1. Informatie over deze gebruiksaanwijzing Hartelijk dank dat u voor ons product hebt gekozen. Wij wensen u veel plezier met het apparaat. Lees de veiligheidsvoorschriften en de volledige gebruiksaanwijzing aandachtig door voordat u het apparaat in gebruik neemt. Neem de waarschuwingen op het apparaat en in de gebruiksaanwijzing in acht.
  • Page 103: Gebruiksdoel

    Polariteitsaanduiding Symbool voor polariteit van de gelijkstroomaansluiting (conform IEC 60417). Bij apparaten met deze aanduiding ligt plus aan de binnenkant en minus aan de buitenkant. Energie-efficiëntieniveau VI Het energie-efficiëntieniveau is een standaardindeling van het rendement van externe en interne netvoedingen. De energie- efficiëntie geeft hierbij het rendement aan en wordt onderverdeeld in verschillende niveaus, waarbij VI het hoogste (meest efficiënte niveau) is.
  • Page 104: Veiligheidsvoorschriften

    • Gebruik het product niet in omgevingen waar gevaar voor explosie bestaat. Hiertoe behoren bijv. tankinstallaties, opslagplaatsen voor brandstof en ruimtes waar oplosmiddelen worden verwerkt. Ook in omgevingen waar veel fijnstof (bijvoorbeeld meel- of houtstof ) voorkomt, mag dit apparaat niet worden gebruikt. •...
  • Page 105: Plaats Van Opstelling

    GEVAAR! Verstikkingsgevaar! Verpakkingsfolie kan worden ingeslikt of verkeerd worden gebruikt. Hierdoor bestaat er gevaar voor verstikking!  Houd het verpakkingsmateriaal zoals folie of plastic zakken uit de buurt van kinderen. 3.2. Plaats van opstelling • Houd het apparaat en alle aangesloten onderdelen uit de buurt van vocht en vermijd stof, hitte, direct zonlicht en open vuur (kaarsen en dergelijke).
  • Page 106: Reparatie

    3.3. Reparatie • Neem contact op met de klantenservice als: – het netsnoer verschroeid of beschadigd is; – er vloeistof in het apparaat terecht is gekomen; – het apparaat niet goed werkt; – het apparaat is gevallen of de behuizing beschadigd is. •...
  • Page 107: Stroomvoorziening

    3.5. Stroomvoorziening GEVAAR! Gevaar voor elektrische schok! Ook als het apparaat uitgeschakeld is, staan onderdelen ervan onder spanning.  Als u de voeding naar uw apparaat wilt onderbreken of alle spanning wilt uitschakelen, haalt u de netadapter uit het stopcontact. •...
  • Page 108: Cd-Speler

    3.6. Cd-speler De cd-speler is een laserproduct klasse 1. Het apparaat is uitgerust met een veiligheidssysteem dat voorkomt dat gevaarlijke laserstralen tijdens normaal gebruik naar buiten komen. Om oogletsel te voorkomen, mag u het veiligheidssysteem van het apparaat nooit manipuleren of beschadigen. 3.7.
  • Page 109 • Let bij het plaatsen van de batterijen op de polariteit (+/-). • Als de batterijen niet op de juiste manier worden vervangen, bestaat er explosiegevaar! Vervang batterijen alleen door batterijen van hetzelfde of een gelijkwaardig type. • Probeer nooit batterijen opnieuw op te laden. Er bestaat explosiegevaar! •...
  • Page 110: Inhoud Van De Levering

    4. Inhoud van de levering GEVAAR! Verstikkingsgevaar! Er bestaat verstikkingsgevaar door het inslikken of inademen van kleine onderdelen of folie.  Houd verpakkingsfolie buiten het bereik van kinderen.  Haal het product uit de verpakking en verwijder al het verpakkingsmateriaal. ...
  • Page 111: Overzicht Van Het Apparaat

    5. Overzicht van het apparaat 5.1. Voorkant 0.3A Display VOLUME • Volumeregelaar • Door indrukken menuselectie bevestigen Cd-lade Cd uitwerpen Vooruit zoeken naar FM-zenders, DAB volgende zender, volgend nummer Achteruit zoeken naar FM-zenders, DAB vorige zender, vorig nummer • Weergave stoppen •...
  • Page 112: Achterkant

    Apparaat inschakelen/in stand-bymodus zetten USB-aansluiting AUX IN audio-ingang, 3,5 mm stereo-aansluiting aansluiting voor hoofdtelefoon, 3,5 mm stereo-jackplug 5.2. Achterkant DAB-/FM-antenne L+/L- Aansluitbussen voor de linkerluidspreker R+/R- Aansluitbussen voor de rechterluidspreker 15 V 3 A bus voor netvoeding...
  • Page 113: Afstandsbediening

    5.3. Afstandsbediening Dimmer Sleep Program Info MODE MENU VOL+ VOL- PQRS WXYZ Cd uitwerpen Equalizermodus selecteren, SLEEP Sleepmodus oproepen, DIMMER Helderheid van het display dimmen, PROGRAMM Programmafunctie/zenders opslaan Snel achteruit/vorig nummer afspelen / radiozendertoets – Weergave stoppen Snel vooruit/volgend nummer afspelen / radiozendertoets + Info Radiozenderinformatie/nummerinformatie weergeven...
  • Page 114: Apparaat Plaatsen

    geluid dempen Zenders opslaan/opgeslagen zenders kiezen VOL - Volume verlagen MODE Modus selecteren apparaat op stand-by zetten 6. Apparaat plaatsen Plaats het apparaat en de luidsprekers op een vlakke, stevige ondergrond. Sommige agressieve meubellakken kunnen de rubberen voetjes van het apparaat aantasten. Leg eventueel iets onder het apparaat.
  • Page 115: Aansluitingen

    6.2. Aansluitingen Voordat u aansluitingen uitvoert, dient u het apparaat van het los te koppelen.  Een wifi-antenne is in het apparaat geïntegreerd. Gebruik in de wifi- modus:  Richt de antenne aan de achterkant van het apparaat Gebruik van de FM/ DAB-radio: zo uit, dat de ontvangst optimaal is.
  • Page 116: Hoofdtelefoon Aansluiten

    6.4. Hoofdtelefoon aansluiten 0.3A Aan de voorkant van het apparaat bevindt zich een jackaansluiting van 3,5 mm met het opschrift  Steek de aansluitkabel van de hoofdtelefoon met een jackplug van 3,5 mm in de aansluiting. WAARSCHUWING! Mogelijke gehoorschade! Overmatige geluidsdruk bij het gebruik van oordopjes en hoofdtelefoons kan gehoorschade en/of doofheid tot gevolg hebben.
  • Page 117: Usb-Apparaat Aansluiten

    6.5. USB-apparaat aansluiten 0.3A Aan de USB-aansluiting aan de voorkant van het apparaat kunt u de USB- geheugenstick aansluiten. Zo kunt u met het apparaat muziek van een USB-stick afspelen. De USB-aansluiting ondersteunt geen videoweergave.  Sluit een USB-apparaat aan op de USB-aansluiting USB. 6.6.
  • Page 118: Ingebruikname

    7. Ingebruikname 7.1. Bediening via het apparaat of via de afstandsbediening Met de toetsen op het apparaat kunt u de belangrijkste afspeelfuncties van het apparaat activeren. De afstandsbediening heeft naast deze basisfuncties een groot aantal extra bedieningselementen waarmee u alle functies van het apparaat kunt gebruiken.
  • Page 119  Bevestig door op de draaiknop VOLUME OK op het apparaat of OK op de afstandsbediening te drukken. Als u de optie UPDATE VAN NET hebt gekozen, moet u in het volgende venster uw tijdzone invoeren.  Selecteer door aan de draaiknop VOLUME OK op het apparaat te draaien of door op de navigatietoetsen op de afstandsbediening te drukken de zomertijd AAN of UIT.
  • Page 120: Verbinding Met Een Netwerk Maken

    7.3.2. Verbinding met een netwerk maken De gevonden netwerken worden met hun naam (SSID) weergegeven in een lijst. Wifi-access points waarmee via WPS verbinding kan worden gemaakt, worden aangeduid met [WPS]. Daaronder ziet u de opties: OPNW SCANNEN: opnieuw zoeken HANDM.
  • Page 121: Netwerksleutel Invoeren

    Pincode invoeren Als de router geen WPS-knop heeft, maar wel de mogelijkheid biedt om door invoer van een pincode een WPS-verbinding tot stand te brengen, kiest u de optie PIN INVOEREN. Zodra hierom via de webinterface van de router wordt gevraagd, voert u de pincode in die op het display van de internetradio wordt weergegeven en bevestigt u de ingevoerde code met OK.
  • Page 122: Helderheid Van Het Display Dimmen

    7.4. Helderheid van het display dimmen Druk een of meerdere keren op de toets DIMMER op de afstandsbediening om de helderheid van het display stapsgewijs te dimmen. 7.5. Richt de antenne uit.  Trek de telescoopantenne aan de achterkant van het apparaat volledig uit. Voor een goede signaalontvangst en geluidskwaliteit moet de antenne helemaal worden uitgetrokken.
  • Page 123: Naar Internetradio Luisteren

    9. Naar internetradio luisteren  Om naar internetradio te luisteren, kiest u in het hoofdmenu de optie INTERNETRADIO en bevestigt u uw keuze met OK of drukt u een paar keer op de toets MODE. 9.1. Radiodiensten selecteren Selecteer een van de opties om volgende diensten te kunnen selecteren: 9.1.1.
  • Page 124: Verbinding Maken Met Een Internetradiozender/Podcast

    10.1.3. Zoeken Hier kunt u gericht naar een podcast zoeken. 10.1.4. Landen Onder LANDEN kunt u podcasts van over de hele wereld selecteren. 10.1.5. Ontdek Met de functie ONTDEK kunt u podcasts aan de hand van de door u gekozen voorkeuren selecteren.
  • Page 125: Dab- & Fm-Radio

    11. DAB- & FM-radio U kunt met het apparaat zowel DAB- alsook FM-radiozenders ontvangen. Kies de gewenste radiomodus:  Druk meerdere keren op de toets MODE op de afstandsbediening of op de toets op het apparaat tot u de gewenste radiomodus hebt bereikt. Op het display verschijnt DAB RADIO of FM RADIO.
  • Page 126: Opgeslagen Zenders Oproepen

    11.2.3. Opgeslagen zenders oproepen  Druk op de toets FAV. Op het display verschijnt de eerste geheugenplaats waar een radiozender is opgeslagen.  Selecteer met de toets de programmaplaatsen. Naast het nummer van de programmaplaats wordt ook de naam van de zender weergegeven. ...
  • Page 127 Menu Omschrijving STATIONSLIJST (alleen DAB-modus) Geeft alle zenders weer VOLLEDIGE SCAN (alleen modus DAB) Automatisch naar zenders zoeken HANDM. AFSTMMN. (alleen DAB-modus) Frequentie handmatig instellen VERWIJDER INACTIEVE STATIONS (alleen modus DAB) Alle DAB-zenders wissen die in de huidige regio niet kunnen worden ontvangen.
  • Page 128: Cd's En Usb-Opslagmedia Weergeven

    12. Cd's en USB-opslagmedia weergeven  Druk meerdere keren op de toets MODE op de afstandsbediening of op de toets op het apparaat tot u de gewenste modus hebt bereikt. Op het display verschijnt CD of USB. 12.1. Aanwijzingen over de te gebruiken media Op de USB-aansluiting kunt u USB-sticks aansluiten.
  • Page 129: Usb-Stick Plaatsen

    12.4. USB-stick plaatsen  Steek de USB-stick in de USB-aansluiting.  De titels worden ingelezen en op het display verschijnt het totale aantal albums en nummers. Het afspelen van het eerste nummer in het eerste album start automatisch. 12.5. Afspelen starten/onderbreken ...
  • Page 130: Bluetoothmodus

     Activeer ook de bluetoothfunctie op uw externe apparaat en voer een koppelprocedure uit. Lees hiervoor de gebruiksaanwijzing van uw apparaat. De naam van het audiosysteem is 'MEDION MD 85008' .  Als er op het display van het externe apparaat wordt gevraagd om een wachtwoord, voer dan '0000' in.
  • Page 131: Systeeminstellingen

    15. Systeeminstellingen 15.1. Equalizer Onder EQUALIZER kunt u kiezen uit verschillende vooraf gedefinieerde audio- indelingen of kunt u zelf een audio-indeling maken. Selecteer een van de audio-indelingen  NORMAAL, VLAK, JAZZ, ROCK, FILM, KLASSIEK, POP, NIEUWS of MIJN EQ en bevestig met OK. De geluidsinstelling wordt direct opgeslagen.
  • Page 132: Tijd Instellen

    15.2.4. Handmatige instellingen  Selecteer onder HANDMATIGE INST. de draadloze verbinding (WLAN) en zet de DHCP-functie op DHCP INSCHAKLN of DHCP UITSCHAKLN. 15.2.5. NetRemote PIN wijzigen Onder NETREMOTE PIN-SETUP kunt u de viercijferige code wijzigen die wordt ingevoerd bij het maken van verbinding met de app op een smartphone of tablet. 15.2.6.
  • Page 133: Software Updaten

    15.6. Software updaten Onder SOFTWAREUPDATE kunt u zoeken naar software-updates en deze eventueel installeren. 15.6.1. Auto-update uitvoeren Kies onder AUTO UPDATE de optie JA om het apparaat regelmatig automatisch te laten zoeken naar software-updates. 15.6.2. Software-updates zoeken Kies JETZT PRÜFEN om het zoeken naar software-updates direct te starten. 15.7.
  • Page 134: Instellingen In Het Hoofdmenu

    16. Instellingen in het hoofdmenu Vanuit het HOOFDMENU kunt u net als met de toets MODE de verschillende modi activeren: INTERNETRADIO • PODCASTS • • • • • AUX EINGANG • BLUETOOTH • SLEEP • WEKKER • Ook kunt u hier de sluimerfunctie en de wekfunctie instellen. 16.1.
  • Page 135: Internet Radio

    16.2.3. Weksignaal selecteren  Onder BRON kunt u het weksignaal van de wekker instellen: SUMMER: wekken met een wektoon • INTERNET RADIO: wekken met internetradio • DAB: wekken met DAB-radio • FM: wekken met FM-radio • 16.2.4. Radiozender voor het wekken selecteren ...
  • Page 136: Bij Storingen

    19. Bij storingen Als zich een storing voordoet, controleer dan eerst of u het probleem zelf kunt oplossen. Hierbij kunt u het volgende overzicht gebruiken. Storing Mogelijke oorzaak Maatregel Zijn de batterijen op de Plaats de batterijen correct. juiste manier geplaatst? Bent u verder dan 7 meter bij de radio uit de Verklein de afstand.
  • Page 137 Storing Mogelijke oorzaak Maatregel Stel de frequentie van de zenders af. Geen of slechte De zendersignalen zijn Verplaats eventueel de radio radio-ontvangst te zwak. of wijzig de stand van de antenne om de ontvangst te verbeteren. Trek de adapter uit het stopcontact en wacht Er heeft zich condens totdat het apparaat en de...
  • Page 138 Storing Mogelijke oorzaak Maatregel Controleer de instellingen Er is geen DHCP-server van de router. geactiveerd. Er is een verkeerd Probleem met de Voer het versleutelingsalgoritme verbinding met de versleutelingsalgoritme voor voor het netwerk router. het netwerk opnieuw in. ingevoerd. De RJ45-poort of de wifi- Neem contact op met de module zijn defect.
  • Page 139: Afvalverwerking

    20. Afvalverwerking VERPAKKING Het apparaat zit ter bescherming tegen transportschade in een verpakking. Verpakkingen zijn gemaakt van materialen die milieuvriendelijk kunnen worden afgevoerd en vakkundig kunnen worden gerecycled. APPARAAT Oude apparaten met het hiernaast afgebeelde symbool mogen niet bij het gewone huishoudelijke afval worden gedaan. Volgens richtlijn 2012/19/EU moet het apparaat aan het einde van de levensduur op een passende manier worden afgevoerd.
  • Page 140: Technische Gegevens

    21. Technische gegevens Voedingsspanning Spanning AC 100-240 V~ 50-60 Hz Opgenomen vermogen in stand-by < 0,9 W Uitgangsvermogen 2 x 15 watt RMS Batterijen afstandsbediening 2 x 1,5 V R03/LR03/AAA Radio FM-band 87,5 – 108 MHz DAB-band III 174,928 - 239,200 MHz Zendergeheugen Cd-speler Laservermogen...
  • Page 141 Luidsprekers Breedte x hoogte x diepte ongeveer 15 x 24,7 x 17 cm Gewicht 5,4 kg Netadapter Shenzhen Adition Audio Science and Technology Co., Ltd Importeur: MEDION AG Fabrikant Am Zehnthof 77 45307 Essen Duitsland HR-nummer: HRB 13274 Modeltype AD4501503000EU...
  • Page 142 Uitgangsvermogen 45,0 W Gemiddelde efficiëntie tijdens gebruik 89,78 % Efficiëntie bij lage belasting (10%) 90,0 % Opgenomen vermogen bij nullast 0,09 W Relevante belasting: Percentage van de uitgangsstroom volgens typeplaatje Belasting 1 100% ± 2% Belasting 2 75% ± 2% Belasting 3 50% ±...
  • Page 143: Eu-Conformiteitsinformatie

    22. EU-conformiteitsinformatie Hierbij verklaart MEDION AG dat dit apparaat in overeenstemming is met de fundamentele eisen en de overige toepasselijke voorschriften: • Radioapparatuurrichtlijn 2014/53/EU • Ecodesign-richtlijn 2009/125/EG (en ecodesignrichtlijn 2019/1782) • RoHS-richtlijn 2011/65/EU Alle multimedia-apparaten die worden aangesloten op de daarvoor bedoelde aansluitingen van het apparaat moeten voldoen aan de eisen van de laagspanningsrichtlijn.
  • Page 144: Service-Informatie

    • In onze Service Community vindt u andere gebruikers en onze medewerkers en daar kunt u uw ervaringen uitwisselen en uw kennis delen. U vindt onze Service Community onder community.medion.com. • U kunt natuurlijk ook ons contactformulier gebruiken onder www.medion.com/contact.
  • Page 145 Luxemburg Openingstijden Klantenservice  Ma - vr: 09:00 - 19:00 34 - 20 808 664 Serviceadres MEDION B.V. John F.Kennedylaan 16a 5981 XC Panningen Nederland Nederland Deze en vele andere gebruiksaanwijzingen staan ter beschikking om te downloaden via het serviceportaal www.medion.com/nl/service/start/.
  • Page 146: Colofon

    Deze gebruiksaanwijzing is auteursrechtelijk beschermd. Verveelvoudiging in mechanische, elektronische of welke andere vorm dan ook zonder schriftelijke toestemming van de fabrikant is verboden. Het copyright berust bij de firma: MEDION AG Am Zehnthof 77 45307 Essen Duitsland Houd er rekening mee dat het bovenstaande adres geen retouradres is. Neem eerst...
  • Page 147: Privacy Statement

    25. Privacy statement Beste klant! Wij delen u mee dat wij, MEDION AG, Am Zehnthof 77, 45307 Essen, als verwerkingsverantwoordelijke uw persoonsgegevens verwerken. In aangelegenheden die te maken hebben met het recht op gegevensbescherming, worden wij bijgestaan door de functionaris voor gegevensbescherming van onze onderneming, die bereikbaar is onder MEDION AG, Datenschutz, Am Zehnthof 77, D-45307 Essen;...
  • Page 148 Índice Información acerca de este manual de instrucciones ......151 1.1. Explicación de los símbolos ................151 Uso conforme a lo previsto ..............152 Indicaciones de seguridad ..............153 3.1. Seguridad operativa ..................153 3.2. Lugar de colocación ..................154 3.3.
  • Page 149 11.2. Guardado y consulta de emisoras .............. 174 11.3. Información sobre emisoras ................. 175 11.4. Ajustes en el menú ..................175 Reproducción de CD y memorias USB ............ 177 12.1. Indicaciones sobre los medios ..............177 12.2. Informaciones sobre pistas (ID3) ..............177 12.3.
  • Page 150: Información Acerca De Este Manual De Instrucciones

    1. Información acerca de este manual de instrucciones Muchas gracias por haber elegido nuestro producto. Le deseamos que disfrute con este aparato. Antes de la puesta en servicio, lea atentamente las indicaciones de segu- ridad y todo el manual. Tenga en cuenta las advertencias que aparecen en el propio aparato y en el manual de instrucciones.
  • Page 151: Uso Conforme A Lo Previsto

    Identificación de la polaridad Símbolo de la polaridad de la conexión de corriente continua (se- gún IEC 60417). En los aparatos que lleven esta identificación, el polo positivo está dentro y el negativo fuera. Eficiencia energética nivel VI El nivel de eficiencia energética es una subclasificación estándar del grado de eficiencia de fuentes de alimentación externas e internas.
  • Page 152: Indicaciones De Seguridad

    • Nunca utilice el aparato al aire libre. • No exponga el aparato a condiciones extremas. Se debe evi- tar: – una alta humedad del aire o humedad en general, – temperaturas extremadamente altas o bajas, – la radiación solar directa, –...
  • Page 153: Lugar De Colocación

    3.2. Lugar de colocación • Mantenga su aparato y todos los componentes conectados alejados de la humedad y evite el polvo, el calor, la radiación solar directa y fuentes de fuego abiertas (como velas o simila- res). El incumplimiento de estas indicaciones puede provocar averías o daños en la pantalla.
  • Page 154: Reparación

    3.3. Reparación • Diríjase al servicio de atención al cliente en los siguientes ca- sos: – el cable de alimentación está fundido o dañado, – ha penetrado líquido en el aparato, – el aparato no funciona correctamente, – el aparato se ha caído o la carcasa está dañada. •...
  • Page 155: Alimentación Eléctrica

    3.5. Alimentación eléctrica PELIGRO! ¡Peligro de descarga eléctrica! Incluso con el aparato apagado, algunas piezas del mis- mo siguen bajo tensión.  Para interrumpir la alimentación eléctrica del apara- to o desconectarlo completamente de la tensión, ex- traiga la clavija de enchufe de la toma de corriente. •...
  • Page 156: Lector De Cd

    3.6. Lector de CD El lector de CD es un producto láser de la clase 1. El aparato está equipado con un sistema de segu- ridad que evita la salida de rayos láser peligrosos durante el uso normal. Para evitar lesiones en los ojos, nunca manipule ni dañe el sistema de segu- ridad del aparato.
  • Page 157 • ¡En caso de un cambio inadecuado de las pilas existe peligro de explosión! Sustituya las pilas solo por pilas del mismo tipo o un tipo equivalente. • Nunca intente recargar las pilas. ¡Existe peligro de explosión! • Nunca exponga las pilas a un sobrecalentamiento excesivo (como luz solar, fuego o similares).
  • Page 158: Volumen De Suministro

    4. Volumen de suministro PELIGRO! ¡Peligro de asfixia! Existe peligro de asfixia por la ingestión o inhalación de piezas pequeñas o láminas de plástico.  Mantenga la lámina de plástico del embalaje alejada de los niños.  Extraiga el producto del embalaje y retire todo el material de embalaje. ...
  • Page 159: Vista General Del Aparato

    5. Vista general del aparato 5.1. Parte delantera 0.3A Pantalla VOLUME • Regulador de volumen • pulsando se confirma la selección de menú Compartimiento de CD Expulsar el CD Búsqueda de emisoras FM hacia delante, siguiente emisora DAB, pista siguiente Búsqueda de emisoras FM hacia atrás, emisora DAB anterior, pis- ta anterior •...
  • Page 160: Parte Trasera

    Encender el aparato/cambiar al modo Standby Conexión USB AUX IN Entrada de audio (conector hembra estéreo de 3,5 mm) Conexión para auriculares (conector jack estéreo de 3,5 mm) 5.2. Parte trasera Antena DAB/FM L+/L- Conectores hembra para el altavoz izquierdo R+/R- Conectores hembra para el altavoz derecho Conector hembra para la fuente de alimentación del co-...
  • Page 161: Mando A Distancia

    5.3. Mando a distancia Dimmer Sleep Program Info MODE MENU VOL+ VOL- PQRS WXYZ Expulsar el CD Seleccionar el modo de ecualizador, SLEEP Activar el modo Sleep, DIMMER Atenuar el brillo de pantalla, PROGRAMM Función de programa/guardar emisora Retroceso rápido/llamar pista anterior/tecla de emisora de ra- dio –...
  • Page 162: Colocación Del Aparato

    Para introducir caracteres Modo silencioso Guardar emisoras/abrir emisoras guardadas VOL - Bajar el volumen MODE Seleccionar modo operativo Cambiar el aparato al modo Standby 6. Colocación del aparato Coloque el aparato y los altavoces sobre una superficie plana y firme. Algunas pintu- ras de muebles agresivas pueden dañar las patas de goma del aparato.
  • Page 163: Conexiones

    6.2. Conexiones Antes de realizar conexiones, desconecte el aparato de la corriente.  El aparato integra una antena wifi. Funcionamiento en el modo wifi:  Oriente la antena en la parte posterior del aparato Funcionamiento de la radio VHF/DAB: para la recepción. ...
  • Page 164: Conexión De Los Auriculares

     Enchufe el cable de conexión con un conector jack de 3,5 mm en la conexión. 6.4. Conexión de los auriculares 0.3A En la parte delantera del aparato hay un conector jack de 3,5 mm con la rotulación  Enchufe el cable de conexión del auricular con un conector jack de 3,5 mm en la conexión.
  • Page 165: Conexión De Dispositivos Usb

    6.5. Conexión de dispositivos USB 0.3A En la conexión USB de la parte delantera del aparato puede conectar memorias USB. De este modo, pueden reproducirse canciones de una memoria USB. La cone- xión USB no es compatible con la reproducción de vídeo. ...
  • Page 166: Puesta En Servicio

    7. Puesta en servicio 7.1. Control en el aparato o mediante mando a distancia Con las teclas del aparato puede activar las funciones de reproducción más impor- tantes de su aparato. Más allá de estas funciones básicas, el mando a distancia ofre- ce múltiples elementos de control adicionales para la plena funcionalidad de su aparato.
  • Page 167  Confirme pulsando en el regulador VOLUME OK en el aparato u OK en el mando a distancia. Si ha elegido la opción UPDATE FROM NET, defina su zona horaria en la siguiente ventana de diálogo.  Girando el regulador VOLUME OK en el aparato o pulsando las teclas de navegación correspondientes en el mando a distancia ajuste el idioma de verano a ACTIVA o NO ACTIVA.
  • Page 168: Establecimiento De Conexión A Una Red

    7.3.2. Establecimiento de conexión a una red Las redes encontradas se muestran en una lista con su nombre (SSID). Los puntos de acceso wifi que ofrecen el establecimiento de una conexión mediante WPS se iden- tifican con [WPS]. Se incluyen los siguientes registros: VOLVER A BUSCAR: iniciar una búsqueda nueva CONFIG.
  • Page 169: Introducción De La Clave De Red

    Introducción del PIN Si el router no dispone de tecla WPS, pero ofrece la posibilidad de conexión WPS mediante la introducción de un PIN en la interfaz web del router, seleccione la op- ción INTRODUCIR PIN. Cuando se le solicite, introduzca en la interfaz web del router el número PIN mostra- do en la pantalla de la radio por Internet y confirme la entrada con OK.
  • Page 170: Atenuación Del Brillo De Pantalla

    7.4. Atenuación del brillo de pantalla Una o varias pulsaciones de la tecla DIMMER en el mando a distancia permite la atenuación gradual del brillo de pantalla. 7.5. Orientación de la antena  Extraiga por completo la antena telescópica situada en la parte trasera del apa- rato.
  • Page 171: Escuchar La Radio Por Internet

    9. Escuchar la radio por Internet  Para escuchar la radio por Internet, seleccione la entrada INTERNET RADIO del menú principal y confirme con OK o pulse varias veces la tecla MODE. 9.1. Selección de servicios de radio Seleccione una de las entradas para poder seleccionar los siguientes servicios: 9.1.1.
  • Page 172: Conexión A Una Emisora De Radio Por Internet/A Un Podcast

    10.1.4. Países En PAÍSES puede seleccionar podcasts de todo el mundo. 10.1.5. Encontrar Con la función ENCONTRAR puede seleccionar podcasts según las preferencias que haya seleccionado. 10.2. Conexión a una emisora de radio por Internet/a un podcast Después de haber seleccionado una emisora o un podcast tal y como se describe arriba, la radio se conecta al servidor de radio por Internet.
  • Page 173: Radio Dab Y Fm

    11. Radio DAB y FM Con el aparato puede recibir tanto emisoras de radio DAB como FM. Seleccione el modo de radio que desea:  Pulse la tecla MODE en el mando a distancia o pulse repetidamente la tecla en el aparato hasta que haya llegado al modo de radio que desea. En la pantalla aparece DAB RADIO y/o FM RADIO.
  • Page 174: Información Sobre Emisoras

    11.2.3. Activación de emisoras guardadas  Pulse la tecla FAV. En la pantalla se muestra el primer canal de programación de la emisora de radio.  Con las teclas seleccione los canales de programación. Junto al número de canal de programación se muestra el nombre de la emisora. ...
  • Page 175 Nombre del menú Descripción LISTA DE EMISORAS (solo en el modo operativo DAB) Muestra un listado de todas las emi- soras BÚSQUEDA COMPLETA (solo en el modo operativo DAB) Búsqueda de emisoras automática SINTONIZACIÓN MANUAL (solo en modo DAB) Ajuste manual de la frecuencia ELIMINAR ESTACIONES INACTIVAS (solo en el modo operativo DAB) SÍ...
  • Page 176: Reproducción De Cd Y Memorias Usb

    Nombre del menú Descripción SÍ Seleccione si debe reproducirse el so- nido mono o estéreo (solo en caso de reproducción de audio mediante au- riculares). 12. Reproducción de CD y memorias USB  Pulse la tecla MODE en el mando a distancia o pulse repetidamente la tecla en el aparato hasta que haya llegado al modo que desea.
  • Page 177: Conexión De Una Memoria Usb

     Para volver a expulsar el CD, pulse la tecla . En la pantalla aparece OPEN. 12.4. Conexión de una memoria USB  Inserte la memoria USB en la conexión USB.  Se leerán las pistas y la pantalla mostrará el número total de álbumes y pistas. La reproducción de la primera pista en el primer álbum se inicia automáticamente.
  • Page 178: Modo Bluetooth

     Active también la función de Bluetooth en su equipo externo y ejecute un pro- ceso de acoplamiento. Lea al respecto el manual de su aparato. El nombre del sistema de audio es «MEDION MD 85008».  En caso de que se le solicite una contraseña en la pantalla del dispositivo exter- no, introduzca el código «0000».
  • Page 179: Ajustes Del Sistema

    15. Ajustes del sistema 15.1. Ecualizador En EQUALIZER puede seleccionar formatos de tono predefinidos o crear el suyo propio. Seleccione uno de los formatos de tono  Active NORMAL, PLANA, JAZZ, ROCK, PELÍCULA, CLÁSICA, POP, NOTICIAS o MI EQ y confírmelo con OK. El ajuste de tono se adopta inme- diatamente.
  • Page 180: Ajuste De La Hora

    15.2.4. Ajustes manuales  En CONFIG. MANUAL seleccione la conexión inalámbrica (wifi) y fije la fun- ción DHCP en DHCP ACTIVO o DHCP INACTIVO respectivamente. 15.2.5. Modificación del NetRemote PIN En NETREMOTE PIN-SETUP puede asignar un nuevo código de cuatro cifras para la conexión con la app de un smartphone o de una tablet.
  • Page 181: Actualización Del Software

    15.6. Actualización del software En SOFTWAREUPDATE puede buscar actualizaciones de software y, dado el caso, instalarlas. 15.6.1. Ejecutar actualización automática En ACTUALIZACIÓN AUTOM., seleccione la opción SI para buscar actualiza- ciones de software automáticamente de manera periódica. 15.6.2. Buscar actualizaciones de software Seleccione SPRAWD TERAZ para iniciar de inmediato la búsqueda de actualiza- ciones del software.
  • Page 182: Ajustes En El Menú Principal

    16. Ajustes en el menú principal En el MENU PRINCIPAL puede utilizar la tecla MODE para seleccionar los distin- tos modos operativos: INTERNET RADIO • PODCASTS • • • • • ENTRADA AUX • BLUETOOTH • HIBERNAR • DESPERTADOR • Además, aquí...
  • Page 183: Internet Radio

    16.2.3. Selección de la alarma del despertador  Ajuste en MODO la alarma del despertador: SUMMER: despertarse con un tono del despertador • INTERNET RADIO: despertarse con la radio por Internet • DAB: despertarse con la radio DAB • FM: despertarse con la radio FM •...
  • Page 184: En Caso De Fallos

    19. En caso de fallos En caso de que se produzcan fallos, compruebe primero si puede solucionar usted mismo el problema. El siguiente sinóptico puede resultarle de ayuda. Fallo Posible causa Medida ¿Están las pilas coloca- Coloque las pilas correc- das correctamente? tamente.
  • Page 185 Fallo Posible causa Medida Ajuste la frecuencia de la emisora. En caso necesario, cam- Sin recepción de radio o Las señales de emisión bie la ubicación de la ra- recepción mala. son muy débiles. dio o la orientación de la antena para mejorar la recepción.
  • Page 186 Fallo Posible causa Medida Compruebe la configura- No se ha activado nin- ción del router. gún servidor DHCP. Se ha introducido un al- Vuelva a introducir el al- Problema al conectar goritmo de cifrado inco- goritmo de cifrado de con el router. rrecto de la red.
  • Page 187: Eliminación

    20. Eliminación EMBALAJE El aparato se envía embalado para protegerlo de posibles daños duran- te el transporte. Los embalajes están hechos con materiales que pueden desecharse de forma respetuosa con el medioambiente y llevarse a un punto de reciclaje. APARATO Los residuos eléctricos o electrónicos marcados con este símbolo no de- ben eliminarse con la basura doméstica normal.
  • Page 188: Datos Técnicos

    21. Datos técnicos Alimentación de tensión Tensión 100-240 V CA ~ 50-60 Hz Consumo de potencia en standby < 0,9 W Potencia de salida 2 x 15 vatios RMS Pilas del mando a distancia 2 x 1,5 V R03/LR03/AAA Radio Frecuencia FM 87,5-108 MHz Banda DAB III...
  • Page 189 15 x 24,7 x 17 cm Peso 5,4 kg Adaptador de red Shenzhen Adition Audio Science and Technology Co., Ltd Importador: MEDION AG Fabricante Am Zehnthof 77 45307 Essen Alemania N.º de registro mercantil: HRB 13274 Nombre del modelo AD4501503000EU Tensión/corriente de entrada / frecuen-...
  • Page 190 Potencia de salida 45,0 W Eficiencia media durante el funciona- 89,78 % miento Eficiencia con carga baja (10 %) 90,0 % Consumo de potencia en vacío 0,09 W Condiciones de carga relevantes: Porcentaje de la corriente de salida según la placa de características Condición de carga 1 100 % ±...
  • Page 191: Información Sobre La Conformidad Ue

    22. Información sobre la conformidad UE Por la presente, MEDION AG declara que este aparato cumple los requi- sitos básicos y el resto de disposiciones pertinentes: • Directiva 2014/53/UE sobre la comercialización de equipos radioeléctricos • Directiva sobre el Diseño Ecológico 2009/125/CE (Directiva sobre diseño ecoló- gico 2019/1782) •...
  • Page 192: Informaciones De Asistencia Técnica

    • Si lo desea, también puede utilizar nuestro formulario de contacto que encon- trará en www.medion.com/contact. • Por supuesto, nuestro equipo de asistencia técnica también está a su disposición a través de nuestra línea directa o por correo postal.
  • Page 193: Aviso Legal

    Este manual de instrucciones está protegido por derechos de autor. Queda prohibida la reproducción mecánica, electrónica o de cualquier otro tipo sin la autorización por escrito del fabricante. El copyright pertenece a la empresa: MEDION AG Am Zehnthof 77 45307 Essen Alemania Tenga en cuenta que la dirección indicada arriba no es una dirección para devolu-...
  • Page 194: Declaración De Privacidad

    En el caso de las cuestiones legales relacionadas con la protección de datos, esta- mos a su disposición a través de nuestro responsable de la protección de datos em- presarial al que puede localizar en MEDION AG, Datenschutz, Am Zehnthof 77, D – 45307 Essen; datenschutz@medion.com. Por nuestra parte, procesamos sus datos para fines de ejecución de la garantía y con ello procesos relacionados (p.
  • Page 196 Contenuto Informazioni relative alle presenti istruzioni per l’uso ......199 1.1. Spiegazione dei simboli ................. 199 Utilizzo conforme ..................200 Indicazioni di sicurezza ................201 3.1. Utilizzo sicuro ....................201 3.2. Luogo di posizionamento ................202 3.3. Riparazione ......................203 3.4.
  • Page 197 11.2. Memorizzazione e richiamo di una stazione radio ......222 11.3. Informazioni sulla stazione ................223 11.4. Impostazioni nel menu .................. 223 Riproduzione di CD e supporti di memorizzazione USB ...... 225 12.1. Istruzioni per i supporti .................. 225 12.2. Informazioni sulla traccia (ID3) ..............
  • Page 198: Informazioni Relative Alle Presenti Istruzioni Per L'uso

    1. Informazioni relative alle presenti istruzioni per l’uso La ringraziamo per l’acquisto di questo prodotto. Ci auguriamo che sia soddisfatto. Prima di utilizzare il prodotto, leggere attentamente e interamente le in- dicazioni di sicurezza e le presenti istruzioni per l’uso. Osservare le av- vertenze riportate sul dispositivo e nelle istruzioni per l’uso.
  • Page 199: Utilizzo Conforme

    Indicazione della polarità Simbolo della polarità del collegamento a corrente continua (secon- do IEC 60417). Nei dispositivi contrassegnati con questo simbolo il polo negativo si trova all’interno e il polo positivo all’esterno. Efficienza energetica livello VI I livelli di efficienza energetica sono una suddivisione standard del grado di efficienza degli alimentatori esterni e interni.
  • Page 200: Indicazioni Di Sicurezza

    • Non utilizzare il dispositivo all’aperto. • Non esporre il dispositivo a condizioni estreme. Occorre evita- – elevata umidità dell’aria o umidità in generale, – temperature estremamente alte o basse, – raggi diretti del sole, – fiamme libere. 3. Indicazioni di sicurezza 3.1.
  • Page 201: Luogo Di Posizionamento

    3.2. Luogo di posizionamento • Posizionare il dispositivo e tutti i componenti a esso collega- ti in un luogo al riparo da umidità, polvere, calore, raggi sola- ri diretti e fiamme libere (candele o simili). La mancata osser- vanza di queste indicazioni può provocare malfunzionamenti o danni al dispositivo.
  • Page 202: Riparazione

    3.3. Riparazione • Rivolgersi al Servizio clienti se: – il cavo di alimentazione è bruciato o danneggiato – è penetrato del liquido nel dispositivo – il dispositivo non funziona correttamente – il dispositivo è caduto o l’involucro è danneggiato. • Affidare la riparazione del dispositivo esclusivamente a perso- nale specializzato.
  • Page 203: Alimentazione Elettrica

    3.5. Alimentazione elettrica PERICOLO! Pericolo di scossa elettrica! Alcuni componenti del dispositivo sono sotto tensione anche quando il dispositivo è spento.  Per interrompere l’alimentazione elettrica del dispo- sitivo o per metterlo totalmente fuori tensione, stac- care l’alimentatore a spina dalla presa elettrica. •...
  • Page 204: Lettore Cd

    3.6. Lettore CD Il lettore CD è un prodotto laser della classe 1. Il dispositivo è dotato di un sistema di sicurezza che impedisce la fuoriuscita di raggi laser perico- losi durante il normale utilizzo. Per evitare danni alla vista, non manomettere né danneggiare mai il sistema di sicurezza del dispositivo.
  • Page 205 • In caso di sostituzione impropria delle batterie, sussiste il peri- colo di esplosione! Sostituire le batterie soltanto con altre del- lo stesso tipo o equivalenti. • Non cercare mai di ricaricare le batterie. Pericolo di esplosio- • Non esporre mai le batterie a un calore eccessivo (ad esempio raggi diretti del sole, fuoco o simili).
  • Page 206: Contenuto Della Confezione

    4. Contenuto della confezione PERICOLO! Pericolo di soffocamento! Pericolo di soffocamento in caso di ingestione o inala- zione di componenti piccoli o pellicole dell’imballaggio.  Tenere la pellicola dell’imballaggio fuori dalla porta- ta dei bambini.  Estrarre il prodotto dalla confezione e rimuovere tutto il materiale d’imballaggio. ...
  • Page 207: Panoramica Del Dispositivo

    5. Panoramica del dispositivo 5.1. Lato anteriore 0.3A Display VOLUME • Manopola per la regolazione volume • Conferma della voce di menu selezionata Vano CD Espulsione CD Ricerca stazioni avanti, stazione DAB successiva, traccia successiva Ricerca stazioni indietro, stazione DAB precedente, traccia prece- dente •...
  • Page 208: Lato Posteriore

    Accensione del dispositivo/passaggio alla modalità standby Presa USB AUX IN Ingresso audio, presa stereo da 3,5 mm Presa per cuffie/auricolari, spinotto da 3,5 mm 5.2. Lato posteriore Antenna DAB/FM L+/L- Prese di collegamento per il diffusore acustico sinistro R+/R- Prese di collegamento per il diffusore acustico destro 15 V 3 A Presa per alimentatore...
  • Page 209: Telecomando

    5.3. Telecomando Dimmer Sleep Program Info MODE MENU VOL+ VOL- PQRS WXYZ Espulsione CD Selezione della modalità di equalizzazione SLEEP Impostazione della modalità Sleep DIMMER Smorzamento della luminosità del display PROGRAMM Funzione di programmazione / memorizzazione delle stazioni Scorrimento veloce indietro/riproduzione traccia preceden- te / tasto stazione radio –...
  • Page 210: Posizionamento Del Dispositivo

    Per l’immissione di caratteri Disattivazione dell’audio Memorizzazione della stazione/richiamo delle stazioni me- morizzate VOL - Riduzione del volume MODE Selezione della modalità di funzionamento Impostazione della modalità standby del dispositivo 6. Posizionamento del dispositivo Posizionare il dispositivo e i diffusori acustici su una superficie piana e stabile. Alcu- ne vernici aggressive per mobili possono danneggiare i piedini in gomma del dispo- sitivo.
  • Page 211: Collegamenti

    6.2. Collegamenti Prima di eseguire qualsiasi collegamento, estrarre l’alimentatore a spina del disposi- tivo dalla presa elettrica.  nel dispositivo è integrata un’antenna Wi-Fi. Funzionamento in mo- dalità Wi-Fi:  orientare l’antenna sul retro del dispositivo in modo Funzionamento della radio FM/DAB: da ottenere una buona ricezione.
  • Page 212: Collegamento Di Cuffie/Auricolari

    6.4. Collegamento di cuffi e/auricolari 0.3A Nella parte anteriore del dispositivo è presente una presa per spinotto da 3,5 mm con la scritta  Inserire nella presa lo spinotto da 3,5 mm del cavo di collegamento delle cuffie/ degli auricolari. AVVERTENZA! Possibili danni al dispositivo! Un’eccessiva pressione acustica durante l’uso di cuffie...
  • Page 213: Collegamento Di Un Dispositivo Usb

    6.5. Collegamento di un dispositivo USB 0.3A Nella parte anteriore del dispositivo è presente una presa USB alla quale si possono collegare le chiavette USB. Questo consente di riprodurre i brani musicali memoriz- zati sulla chiavetta USB. La presa USB non supporta la riproduzione di video. ...
  • Page 214: Messa In Funzione

    7. Messa in funzione 7.1. Comando tramite dispositivo o telecomando I tasti sul dispositivo permettono di attivare le principali funzioni di riproduzione del dispositivo stesso. Oltre a queste funzioni di base, il telecomando possiede molti al- tri tasti con i quali utilizzare tutte le funzioni del dispositivo. Nelle presenti istruzioni per l’uso si fa riferimento ai tasti del telecomando.
  • Page 215  Confermare la selezione premendo la manopola VOLUME OK sul dispositivo oppure il tasto OK sul telecomando. Se è stata selezionata l’opzione AGGIORN. DALLA RETE , nella finestra successiva impostare il proprio fuso orario.  Ruotare la manopola VOLUME OK sul dispositivo oppure premere i tasti di navigazione corrispondenti sul telecomando per impostare l’ora legale su ON o OFF.
  • Page 216: Connessione A Una Rete

    7.3.2. Connessione a una rete Le reti trovate vengono visualizzate in un elenco con il loro nome (SSID). Gli Ac- cess Point Wi-Fi che offrono una connessione tramite WPS vengono visualizzati con [WPS]. Di seguito le voci: CERCARE ANCORA: avvio di una nuova ricerca CONFIG.
  • Page 217: Immissione Della Chiave Di Rete

    Immissione del PIN Se il router non dispone di un pulsante WPS, ma offre l’opzione di connessione WPS tramite immissione del PIN nell’interfaccia web del router, selezionare l’opzione IM- METTI PIN. Quando richiesto, immettere nell’interfaccia web del router il numero PIN visualizza- to sul display della radio Internet e confermare l’immissione con il tasto OK.
  • Page 218: Smorzamento Della Luminosità Del Display

    7.4. Smorzamento della luminosità del display Premendo una o più volte il tasto DIMMER sul telecomando è possibile smorzare gradualmente la luminosità del display. 7.5. Orientare l’antenna.  Estrarre completamente l’antenna telescopica sul retro del dispositivo. L’antenna deve essere estratta completamente per garantire una buona ricezione del segnale e una buona qualità...
  • Page 219: Ascolto Della Radio Internet

    9. Ascolto della radio Internet  Per ascoltare la radio Internet, selezionare la voce RADIO INTERNET nel menu principale e confermare con OK oppure premere più volte il tasto MODE. 9.1. Selezione dei servizi radio Selezionare una delle voci per usufruire dei servizi seguenti: 9.1.1.
  • Page 220: Connessione A Una Stazione Radio Internet/Un Podcast

    10.1.4. Paesi Alla voce PAESI è possibile selezionare i podcast di tutto il mondo. 10.1.5. Scoprire La funzione SCOPRIRE consente di selezionare i podcast sulla base delle preferen- ze impostate. 10.2. Connessione a una stazione radio Internet/un podcast Dopo aver selezionato una stazione/un podcast come descritto sopra, la radio ver- rà...
  • Page 221: Radio Dab E Fm

    11. Radio DAB e FM Il dispositivo è in grado di ricevere sia le stazioni radio DAB, sia quelle FM. Seleziona- re la modalità radio desiderata:  premere ripetutamente il tasto MODE sul telecomando oppure il tasto dispositivo finché non viene visualizzata la modalità radio desiderata. Sul display viene visualizzata l’indicazione DAB RADIO oppure FM RADIO.
  • Page 222: Informazioni Sulla Stazione

    11.2.3. Richiamo di una stazione radio memorizzata  Premere il tasto FAV. Sul display viene visualizzata la prima posizione di memo- ria delle stazioni radio.  Premere i tasti per selezionare le posizioni di memorizzazione. Accanto al numero della posizione di memorizzazione viene visualizzato il nome della sta- zione.
  • Page 223 Nome menu Descrizione LISTA STAZIONI (solo modalità di funzionamento DAB) Elenco di tutte le stazioni RICERCA COMPLETA (solo modalità di funzionamento DAB) Ricerca automatica delle stazioni ra- SINTONIZZ. MANUALE (solo modalità di funzionamento DAB) Impostazione manuale della frequen- ELIMINA LE STAZIONI INATTIVE (solo modalità di funzionamento DAB) SÌ...
  • Page 224: Riproduzione Di Cd E Supporti Di Memorizzazione Usb

    Nome menu Descrizione SÌ Selezionare se l’audio deve essere ri- prodotto in mono o stereo (solo con riproduzione audio su cuffie/aurico- lari). 12. Riproduzione di CD e supporti di memorizzazione USB  Premere ripetutamente il tasto MODE sul telecomando oppure il tasto dispositivo finché...
  • Page 225: Inserimento Di Una Chiavetta Usb

    Sul display vengono visualizzati il numero complessivo delle tracce e la durata tota- le del CD. Una volta terminato il processo di lettura, la riproduzione della prima trac- cia inizia automaticamente. Se non si inserisce alcun CD o se viene inserito un CD non leggibile, sul display com- pare NESSUN CD.
  • Page 226: Modalità Bluetooth

     Attivare la funzione Bluetooth anche sul dispositivo esterno ed eseguire l’as- sociazione. A tale scopo leggere le istruzioni del dispositivo esterno. Il nome dell’impianto audio è “MEDION MD 85008”.  Qualora sul display del dispositivo esterno sia richiesto l’inserimento di una pas- sword, digitare il codice "0000".
  • Page 227: Impostazioni Di Sistema

    15. Impostazioni di sistema 15.1. Equalizzatore Alla voce EQUALIZER è possibile selezionare formati sonori predefiniti o crearne di personalizzati. Selezionare uno dei formati sonori NORMALE, FLAT, JAZZ, ROCK, FILM, CLASSICA, POP, NEWS o IL MIO EQ e confermarlo con OK. L’impostazione del formato sonoro viene applica- ta immediatamente.
  • Page 228: Impostazione Dell'ora

    15.2.4. Impostazioni manuali  Alla voce IMPOSTAZ. MANUALI selezionare la connessione wireless (Wi- Fi) ed eventualmente impostare la funzione DHCP su DHCP ATTIVO o DHCP INATTIVO. 15.2.5. Modifica del PIN NetRemote Alla voce NETREMOTE PIN-SETUP è possibile definire un nuovo codice a quat- tro cifre da immettere quando ci si connette all’app di uno smartphone o di un tablet PC.
  • Page 229: Aggiornamento Del Software

    15.6. Aggiornamento del software Alla voce SOFTWAREUPDATE è possibile cercare gli aggiornamenti del software e installarli. 15.6.1. Aggiornamento automatico Alla voce AGGIORN. AUTOM. selezionare l’opzione SI per cercare gli aggiorna- menti del software automaticamente, a intervalli regolari. 15.6.2. Ricerca di aggiornamenti software Selezionare VERIFICA ORA per avviare immediatamente la ricerca degli aggior- namenti del software.
  • Page 230: Impostazioni Nel Menu Principale

    16. Impostazioni nel menu principale Tramite il MENU PRINCIPALE è possibile richiamare le modalità di funzionamen- to come con il tasto MODE: RADIO INTERNET • PODCAST • • • • • INGRESSO AUX • BLUETOOTH • SLEEP • SVEGLIA • Inoltre, qui è...
  • Page 231: Internet Radio

    16.2.3. Selezione del segnale della sveglia  Alla voce MODALITÀ impostare il segnale della sveglia: SUMMER: sveglia con segnale acustico • INTERNET RADIO: sveglia con radio Internet • DAB: sveglia con radio DAB • FM: sveglia con radio FM • 16.2.4.
  • Page 232: In Caso Di Problemi

    19. In caso di problemi Se dovessero presentarsi problemi, innanzitutto verificare se sia possibile risolverli autonomamente. La seguente tabella può essere di aiuto. Anomalia Possibile causa Rimedio Le batterie sono inserite Inserire correttamente le correttamente? batterie. La distanza dalla radio è Avvicinarsi alla radio.
  • Page 233 Anomalia Possibile causa Rimedio Regolare la frequenza delle stazioni radio. Eventualmente cambiare Nessuna ricezione radio I segnali delle stazioni ra- l’ubicazione della radio o cattiva ricezione radio dio sono troppo deboli. o l’orientamento dell’an- tenna per migliorare la ricezione. Staccare l’alimentatore dalla presa elettrica e at- Si è...
  • Page 234 Anomalia Possibile causa Rimedio Controllare le imposta- Nessun server DHCP è zioni del router. attivato. È stato immesso un algo- Inserire nuovamente l’al- Problema di connessione ritmo di crittografia della goritmo di crittografia al router. rete errato. della rete. La porta RJ45 o il modu- Contattare il servizio di lo Wi-Fi sono difettosi.
  • Page 235: Smaltimento

    20. Smaltimento IMBALLAGGIO L’imballaggio protegge il dispositivo da eventuali danni durante il tra- sporto. Gli imballaggi sono prodotti con materiali che possono essere smaltiti nel rispetto dell’ambiente e destinati a un corretto riciclaggio. DISPOSITIVO Tutti i dispositivi usati contrassegnati con il simbolo a lato non devono essere smaltiti insieme ai rifiuti domestici.
  • Page 236: Dati Tecnici

    21. Dati tecnici Alimentazione elettrica Tensione AC 100-240 V~ 50-60 Hz Potenza assorbita in standby < 0,9 W Potenza in uscita 2 x 15 Watt RMS Batterie del telecomando 2 x 1,5 V R03/LR03/AAA Radio Banda FM 87,5-108 MHz Banda DAB III 174,928-239,200 MHz sì...
  • Page 237 15 x 24,7 x 17 cm profondità Peso 5,4 kg Alimentatore Shenzhen Adition Audio Science and Technology Co., Ltd Importatore: MEDION AG Costruttore Am Zehnthof 77 45307 Essen Deutschland Numero di registro delle imprese: HRB 13274 Nome del modello...
  • Page 238 Tensione di uscita/corrente 15,0 V 3,0 A Potenza in uscita 45,0 W Efficienza media durante il funziona- 89,78 % mento Efficienza con carico ridotto (10%) 90,0 % Potenza assorbita a vuoto 0,09 W Condizioni di carico rilevanti: Percentuale della corrente di uscita indicata nella targhetta Condizione di carico 1 100% ±...
  • Page 239: Informazioni Sulla Conformità Ue

    22. Informazioni sulla conformità UE MEDION AG dichiara che il dispositivo è conforme ai requisiti fondamen- tali e alle altre disposizioni vigenti in materia: • Direttiva RED 2014/53/UE • Direttiva sulla progettazione ecocompatibile 2009/125/CE (e regolamento Eco- design 2019/1782) •...
  • Page 240: Informazioni Relative Al Servizio Di Assistenza

    Teleca Lab S.R.L. Medion c/o Via Daniele da Torricella, 42 42122 Reggio Emilia RE Italia Svizzera Orari di apertura Assistenza Post-Vendita  Lun.-ven.: 9.00-19.00 0848 - 33 33 32 Indirizzo del servizio di assistenza MEDION/LENOVO Service Center Ifangstrasse 6 8952 Schlieren Svizzera...
  • Page 241: Note Legali

    Italia Queste e altre istruzioni per l’uso possono essere scaricate dal portale dell’assistenza www.medion.com/it/. Lì sono disponibili anche driver e altri software per diversi dispo- sitivi. È inoltre possibile effettuare una scansione del codice QR ripor- tato a fianco e scaricare le istruzioni per l’uso dal portale dell’as- sistenza utilizzando un dispositivo portatile.
  • Page 242: Informativa Sulla Protezione Dei Dati Personali

    GDPR in combinato disposto con l’articolo 19 secondo le speciali disposizioni lega- li tedesche in materia di protezione dei dati in conformità con la BDSG). Per MEDION AG, si tratta dell’incaricato regionale per la protezione dei dati e la libertà d’informa- zione della Renania Settentrionale-Vestfalia, casella postale 200444, 40212 Düsseld-...
  • Page 244 Table of Contents Information about this user manual ............247 1.1. Explanation of symbols .................. 247 Proper use ....................248 Safety information .................. 249 3.1. Operating safety ....................249 3.2. Installation location ..................250 3.3. Repairs ........................251 3.4. Environmental conditions ................251 3.5.
  • Page 245 11.2. Storing and selecting stations ..............270 11.3. Station information ..................271 11.4. Settings in the menu ..................271 Playing back CDs and USB storage media ..........273 12.1. Notes on the media ..................273 12.2. Track information (ID3) .................. 273 12.3.
  • Page 246: Information About This User Manual

    1. Information about this user manual Thank you for choosing our product. We hope you enjoy using this de- vice. Please read the safety instructions and the user manual carefully before using the device for the first time. Note the warnings on the device and in the user manual.
  • Page 247: Proper Use

    Polarity markings Symbol denoting the polarity of the DC connector (according to IEC 60417). On devices carrying this marking, positive is on the inside and nega- tive on the outside. Energy efficiency level VI Energy efficiency levels are used to describe the efficiency levels of internal and external power supply units.
  • Page 248: Safety Information

    • Do not use the device outdoors. • Do not expose the device to extreme conditions. Avoid: – high humidity or wet conditions – extremely high or low temperatures – direct sunlight – open flames. 3. Safety information 3.1. Operating safety This device may be used by children over the age of 8 and by persons with limited physical, sensory or mental abilities or by those without experience and knowledge, if they are supervised...
  • Page 249: Installation Location

    3.2. Installation location • Keep your device and all connected components away from moisture and avoid dust, heat, direct sunlight and naked flames (such as candles, for instance). Non-compliance with these instructions can lead to faults or damage to the display. •...
  • Page 250: Repairs

    3.3. Repairs • Contact customer services if: – the mains cable is burnt or damaged – liquid has penetrated the device – the device is not operating correctly – the device has fallen or the housing is damaged. • Repairs to your device should only be carried out by qualified specialists.
  • Page 251: Power Supply

    3.5. Power supply DANGER! Risk of electric shock! Even when the device is switched off, some compo- nents are live.  In order to disconnect the power to your device or to completely isolate the device from voltage sources, remove the mains power adapter from the socket. •...
  • Page 252: Cd Player

    3.6. CD player The CD player is a class 1 laser product. The de- vice has a safety system that prevents dangerous laser beams from escaping during normal use. To avoid eye injuries, never tamper with or damage the device’s safety system. 3.7.
  • Page 253 • There is a risk of explosion if batteries are replaced incorrect- ly! Only replace batteries with those of the same or an equiva- lent type. • Never try to recharge non-rechargeable batteries. Risk of ex- plosion! • Never expose the batteries to excessive heat (such as direct sunlight, fire or similar).
  • Page 254: Package Contents

    4. Package contents DANGER! Risk of choking and suffocation! There is a risk of choking and suffocation due to swal- lowing or inhaling small parts or plastic wrap.  Keep the plastic packaging out of the reach of chil- dren. ...
  • Page 255: Device Overview

    5. Device overview 5.1. Front 0.3A Display VOLUME • Volume control • Press to confirm menu selection CD compartment Eject CD FM station search forwards, next DAB station, next track FM station search backwards, previous DAB station, previous track • Stop playback •...
  • Page 256: Back

    Switch device on/switch to standby mode USB port AUX IN Audio input, 3.5 mm stereo socket Headphone connection (3.5 mm stereo jack) 5.2. Back DAB/FM antenna L+/L- Connection jacks for the left loudspeaker R+/R- Connection jacks for the right loudspeaker 15 V 3 A Socket for mains power adapter...
  • Page 257: Remote Control

    5.3. Remote control Dimmer Sleep Program Info MODE MENU VOL+ VOL- PQRS WXYZ Eject CD Select equaliser mode SLEEP Call up sleep mode DIMMER Dim the display brightness PROGRAM Programme function/store station Rewind/play previous track/radio station button – Stop playback –...
  • Page 258: Setting Up The Device

    mute Store station/call up stored station VOL - Decrease volume MODE Select operating mode Switch device to standby mode 6. Setting up the device Place the device and loudspeakers on sturdy, level surfaces. Some aggressive var- nishes can corrode the rubber feet on the device. If necessary, place the device on a suitable underlay.
  • Page 259: Connections

    6.2. Connections Before making any connections, disconnect the device from the power supply.  the device has an integrated WLAN antenna. Operation in WLAN mode:  adjust the antenna on the back of the device for re- Operating the FM/DAB radio: ception.
  • Page 260: Connecting Headphones

    6.4. Connecting headphones 0.3A There is a 3.5 mm jack connection labelled on the front of the device.  Plug the headphone connection cable with a 3.5 mm jack plug into the jack con- nection. WARNING! Possible hearing damage! Excessive sound pressure when using earphones and headphones can result in damage to and/or loss of hearing.
  • Page 261: Connecting Usb Devices

    6.5. Connecting USB devices 0.3A You can connect USB sticks to the USB port on the front of the device. This enables music tracks to be played from a USB memory stick. The USB port does not support video playback. ...
  • Page 262: Getting Started

    7. Getting started 7.1. Operation using the controls on the device or remote control You can activate the main play functions on your audio system using the buttons on the device. In addition to the basic controls, the remote control also provides nu- merous other options for using all functions of your device.
  • Page 263  Press the VOLUME OK controller on the device or OK on the remote control to confirm your selection. If you have selected UPDATE FROM NETWORK, configure your time zone in the next dialogue window.  Turn the VOLUME OK controller on the device or press the corresponding navigation buttons on the remote control to switch summer time to ON or OFF.
  • Page 264: Establishing A Connection To A Network

    7.3.2. Establishing a connection to a network The names (SSID) of the networks found are shown in a list. WLAN Access Points that provide connections via WPA are indicated with [WPS]. Beneath this, you will see: RESCAN: start a new search MANUAL CONFIG: enter connection data manually ...
  • Page 265: Entering A Network Key

    Entering a PIN If the router does not feature a WPS button, but does provide the option for a WPS connection by entering a PIN on the router’s web interface, select ENTER PIN. When prompted, enter the PIN shown on the internet radio display on the router’s web interface and press OK to confirm your entry.
  • Page 266: Dimming The Display Brightness

    7.4. Dimming the display brightness Press the DIMMER button on the remote control one or more times to dim the dis- play brightness in increments. 7.5. Adjust the antenna  Pull out the telescopic aerial on the back of the device completely. The aerial should be fully extended to ensure good signal reception and sound quality.
  • Page 267: Listening To Internet Radio

    9. Listening to internet radio  To listen to internet radio, select INTERNET RADIO from the main menu and then press OK to confirm or press the MODE button several times. 9.1. Selecting radio services Select an entry in order to select the following services: 9.1.1.
  • Page 268: Connecting To An Internet Radio Station/Podcast

    10.1.4. Countries You can select podcasts globally under LÄNDER. 10.1.5. Discover The DISCOVER function allows you to select podcasts based on the favourites you have selected. 10.2. Connecting to an internet radio station/podcast Once you have selected a station/podcast as described above, the radio is connect- ed to the internet radio server.
  • Page 269: Dab And Fm Radio

    11. DAB and FM radio This device can receive both DAB and FM radio stations. Select the required radio mode:  Press the MODE button on the remote control or press on the device sever- al times until you reach the desired radio mode. DAB RADIO or FM RADIO is shown on the display.
  • Page 270: Station Information

    11.2.3. Retrieving stored stations  Press the FAV button. The first radio station storage space is shown on the dis- play.  Use the buttons to select the programme positions. The station name is dis- played next to the programme position number. ...
  • Page 271 Menu name Description STATION LIST (DAB operating mode only) Lists all stations SCAN (DAB operating mode only) Automatic station search MANUAL TUNE (DAB operating mode only) Set frequency manually DELETE INACTIVE STATIONS (DAB operating mode only) Delete all DAB stations that cannot be received in the current region.
  • Page 272: Playing Back Cds And Usb Storage Media

    12. Playing back CDs and USB storage media  Press the MODE button on the remote control or press on the device sever- al times until you reach the desired mode. CD or USB is shown on the display. 12.1. Notes on the media USB memory sticks can be connected to the USB port.
  • Page 273: Inserting Usb Memory Sticks

    12.4. Inserting USB memory sticks  Insert the USB memory stick into the USB port.  The tracks are read, and the display shows the total number of albums and tracks. Playback starts automatically with the first track on the first album. 12.5.
  • Page 274: Bluetooth Mode

     Enable the Bluetooth function on your external device and then connect to it. Refer to the instructions for your device for more information. The audio system’s name is “MEDION MD 85008”.  If you are prompted to enter a password on the external device, enter “0000” as the password.
  • Page 275: System Settings

    15. System settings 15.1. Equaliser Under EQUALIZER, you can select a default sound format or configure your own. Select one of the following sound formats:  NORMAL, FLAT, JAZZ, ROCK, MOVIE, CLASSIC, POP, NEWS or MY EQ and press OK to confirm. The setting will take effect immediately. The sound format is preset to NORMAL.
  • Page 276: Setting The Time

    15.2.5. Changing the NetRemote PIN Under NETREMOTE PIN-SETUP, you can re-assign the four-digit number entered when establishing a connection with a smartphone or tablet PC app. 15.2.6. Deleting a network profile The device stores the last 4 WLAN networks that have been connected. ...
  • Page 277: Starting The Set-Up Wizard

    15.6.2. Searching for software updates Select CHECK NOW to start searching for software updates. 15.7. Starting the set-up wizard Select SETUP WIZARD to start the set-up wizard as described in the section on using the device for the first time. 15.8.
  • Page 278: Settings In The Main Menu

    16. Settings in the main menu From the MAIN MENU, you can use the MODE button to call up the operating modes: INTERNET RADIO • PODCASTS • • • • • AUX INPUT • BLUETOOTH • SLEEP • ALARM • In addition, you can set the sleep and alarm functions here.
  • Page 279: Cleaning

    16.2.3. Selecting an alarm signal  Set the alarm tone for the alarm under MODE: SUMMER: Wake to alarm tone • INTERNET RADIO: Wake to internet radio • DAB: Wake to DAB radio • FM: Wake to FM radio • 16.2.4.
  • Page 280: Troubleshooting

    19. Troubleshooting If a fault occurs, first see whether you can resolve the problem yourself. You might find this overview useful. Fault Possible cause Corrective action Are the batteries insert- Insert the batteries cor- ed correctly? rectly. Are you more than 7 m Reduce the distance.
  • Page 281 Fault Possible cause Corrective action Adjust the frequency of the stations. Move the radio to a dif- No or poor radio recep- The station signals are ferent location or change tion too weak. the direction of the aerial to improve the recep- tion, if necessary.
  • Page 282 Fault Possible cause Corrective action Check the router set- No DHCP server is acti- tings. vated. An incorrect encryption Re-enter the encryption Problem with the router algorithm has been en- algorithm for the net- connection. tered for the network. work. The RJ45 port or WiFi Contact our Service Cen- module is defective.
  • Page 283: Disposal

    20. Disposal PACKAGING Your device has been packaged to protect it from damage in transit. The packaging is made of materials that can be recycled in an environmen- tally friendly manner. DEVICE Old devices that carry the symbol illustrated may not be disposed of in ordinary household waste.
  • Page 284: Technical Specifications

    21. Technical specifi cations Power supply Voltage AC 100–240 V~ 50–60 Hz Power consumption in standby mode < 0.9 W Output power 2 x 15 watt RMS Remote control batteries 2 x 1.5 V R03/LR03/AAA Radio FM band 87.5–108 MHz DAB band III 174.928–239.200 MHz Station memory...
  • Page 285 Loudspeaker: Width x height x depth approx. 15 x 24,7 x 17 cm Weight 5.4 kg Mains adapter Shenzhen Adition Audio Science and Technology Co., Ltd Importer: MEDION AG Manufacturer Am Zehnthof 77 45307 Essen Germany HR number: HRB 13274 Model name AD4501503000EU Input voltage/current/input AC fre- 100–240 V~, 50–60 Hz, 1.0 A...
  • Page 286 Output power 45.0 W Average efficiency during operation 89.78 % Efficiency with low load (10%) 90.0 % Power consumption with zero load 0.09 W Relevant load conditions: Percentage of output current according to type plate Load condition 1 100% ± 2% Load condition 2 75% ±...
  • Page 287: Eu - Declaration Of Conformity

    22. EU – Declaration of Conformity MEDION AG hereby declares that this device complies with the funda- mental requirements and the other relevant provisions of: • Radio Equipment Directive 2014/53/EU • Ecodesign Directive 2009/125/EC (and Ecodesign Regulation 2019/1782) • RoHS Directive 2011/65/EU All multimedia devices that can be connected to the corresponding connections of the device must comply with the requirements of the Low Voltage Directive.
  • Page 288: Service Information

    In our Service Community, you can meet other users, as well as our staff, and you can exchange your experiences and pass on your knowledge there. You will find our Service Community at community.medion.com. • Alternatively, use our contact form at www.medion.com/contact.
  • Page 289: Legal Notice

    These operating instructions are protected by copyright. Mechanical, electronic and any other forms of reproduction are prohibited without the written permission of the manufacturer. Copyright is owned by the company: MEDION AG Am Zehnthof 77 45307 Essen Germany Please note that you cannot use the address above for returns. Please always con-...
  • Page 290: Privacy Statement

    25. Privacy statement Dear customer, We wish to inform you that we, MEDION AG, Am Zehnthof 77, 45307 Essen, Germa- ny process your personal data as a data controller. For matters regarding data protection, we are supported by our company data pro- tection officer who can be contacted at MEDION AG, Datenschutz, Am Zehnthof 77, D –...

Ce manuel est également adapté pour:

Md 85008

Table des Matières