Parkside PAS 1200 B2 Traduction Des Instructions D'origine
Table des Matières
Les langues disponibles
Les langues disponibles
Liens rapides
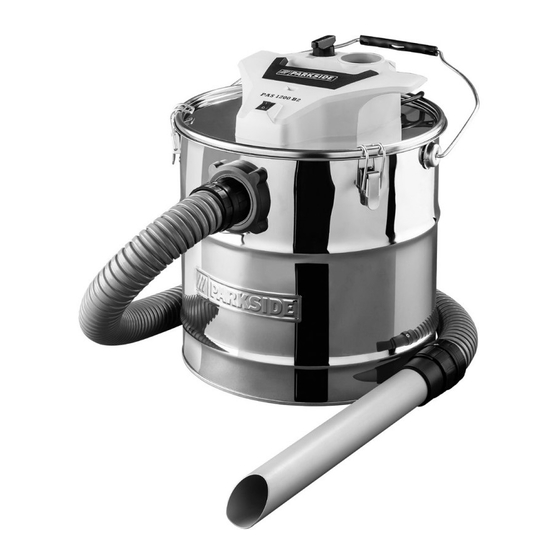
ASCHESAUGER / ASH VACUUM CLEANER/
ASPIRATEUR DE CENDRES PAS 1200 B2
ASCHESAUGER
Originalbetriebsanleitung
ASPIRATEUR DE CENDRES
Traduction des instructions d'origine
VYSAVAČ POPELA
Překlad originálního provozního návodu
ASPIRADOR DE CINZAS
Tradução do manual de instruções original
IAN 283499
All manuals and user guides at all-guides.com
ASH VACUUM CLEANER
Translation of the original instructions
ASZUIGER
Vertaling van de originele gebruiksaanwijzing
ASPIRADOR DE CENIZAS
Traducción del manual de instrucciones original
Chapitres
Table des Matières

Manuels Connexes pour Parkside PAS 1200 B2


Sommaire des Matières pour Parkside PAS 1200 B2
- Page 2 All manuals and user guides at all-guides.com Klappen Sie vor dem Lesen die Seite mit den Abbildungen aus und machen Sie sich anschließend mit allen Funktionen des Gerätes vertraut. Before reading, unfold the page containing the illustrations and familiarise yourself with all functions of the device.
- Page 27 All manuals and user guides at all-guides.com Table des matières Introduction Introduction ....... 27 Toutes nos félicitations pour l’achat de Emploi ........27 votre nouvel appareil. Vous avez ainsi Description générale ....28 choisi un produit de qualité supérieure. Volume de la livraison ....28 Description du fonctionnement ..
-
Page 28: Description Générale
All manuals and user guides at all-guides.com Description générale 7 Regard pour indicateur de ni- veau Les illustrations se trouvent sur le 8 Commutateur marche/ arrêt rabat avant. 9 Clips de fermeture 10 Couvercle du collecteur Volume de la livraison 11 Raccord de tuyauterie 12 Anse du collecteur en métal Déballez l’appareil et contrôlez si les... -
Page 29: Symboles Sur L'appareil
All manuals and user guides at all-guides.com un manque d’expérience et de en brassant les cendres avec une barre métallique avant d‘utiliser aient reçu une supervision ou des l‘appareil. Aucune chaleur rayon- instructions concernant I’utilisation nante perceptible ne doit être de I’appareil en toute sécurité... -
Page 30: Symboles Utilisés Dans Le Mode D'emploi
All manuals and user guides at all-guides.com Régulateur pour système des prescriptions légales de sécurité et de prévention des autonettoyant accidents. Tuyau d‘aspiration Attention ! En cas d‘utilisa- Raccordement Récep- tacle en métal de se protéger contre les chocs électriques, les risques Les appareils ne peuvent pas de blessure et d‘incendie, les mesures de sécurité... -
Page 31: Vous Éviterez Ainsi Accidents Et Blessures
All manuals and user guides at all-guides.com Vous éviterez ainsi accidents • N’utilisez pas le câble d’alimen- et blessures : tation pour débrancher l’appa- reil. Protégez le câble d’alimen- • Ne laissez jamais sans surveil- tation de la chaleur, d’huile et de bords tranchants lorsque vous tionner. -
Page 32: Montage
All manuals and user guides at all-guides.com • La matière pulvérulente ne • Faites attention aux instructions doit pas dépasser une tempé- rature de 40°C. La matière nance de l’appareil. pulvérulente qui paraît refroidie • Avant et après le passage de extérieurement peut encore être l’aspirateur, vider l’aspirateur et pulvérulente chaude peut s’en-... -
Page 33: Mise En Marche/Arrêt
All manuals and user guides at all-guides.com Mise en marche de l’aspirateur: Pour placer le couvercle du réser- Commutateur Marche/Arrêt ( que l‘interrupteur marche/arrêt en position „I“ Arrêt de l’aspirateur : 8) et le raccordement de tuyau (11) soient grossièrement Commutateur Marche/Arrêt ( alignés, sinon le couvercle du en position „0“... -
Page 34: Système Semi-Automatique À Fi Ltre Autonettoyant
All manuals and user guides at all-guides.com Nettoyage/Entretien • Videz le collecteur en plein air pour éviter les pollutions (voir «Nettoyage/ Entretien»). Avant toute intervention sur l’appa- (voir « Nettoyage/Entretien »): Danger de choc électrique. - en cas de puissance d’aspiration N‘aspergez pas l‘appareil affaiblie, avec de l‘eau et n‘utilisez au-... -
Page 35: Nettoyer Le Fi Ltre Plissé
All manuals and user guides at all-guides.com Rangement Nettoyer le fi ltre plissé • Avant de ranger l’appareil, enroulez est endommagé, usé ou très sale. le câble de réseau (1) autour de la (voir «Pièces de rechange»). collecteur (10). 1. Retirez le couvercle du collecteur (10). -
Page 36: Pièces De Rechange/Accessoires
All manuals and user guides at all-guides.com Pièces de rechange/Accessoires Vous obtiendrez des pièces de rechange et des accessoires à l’adresse www.grizzly-service.eu Si vous ne disposez d’aucun accès Internet, veuillez téléphoner au centre de SAV (voir «Service-Center » page 39). Veuillez tenir prêts les numéros de commande indiqués ci- dessous. -
Page 37: Dépistage Des Dysfonctionnement
All manuals and user guides at all-guides.com Dépistage des dysfonctionnement Problème Cause possible Solution Contrôle de la prise, du câble, Il n’est pas branché sur le réseau fusible, réparation éventuelle par un électricien. L’appareil n’est pas sous Mettre l’appareil sous tension tension (voir «Mise en marche/Arrêt») L’appareil ne... -
Page 38: Garantie
All manuals and user guides at all-guides.com Garantie Volume de la garantie L’appareil a été fabriqué avec soin, selon Chère cliente, cher client, de sévères directives de qualité et il a été entièrement contrôlé avant la livraison. La garantie s’applique aux défauts de maté- En cas de manques constatés sur ce riel ou aux défauts de fabrication. -
Page 39: Service Réparations
All manuals and user guides at all-guides.com Service-Center • En cas de produit défectueux vous pou- vez, après contact avec notre service Service France clients, envoyer le produit, franco de Tel.: 0800 919270 E-Mail: grizzly@lidl.fr IAN 283499 d’achat (ticket de caisse) et en indi- quant quelle est la nature du défaut et Service Belgique quand celui-ci s’est produit. -
Page 90: Traduction De La Déclaration De Conformité Ce Originale
All manuals and user guides at all-guides.com Traduction de la déclaration de conformité CE originale Aspirateur de cendres de construction PAS 1200 B2 Numéro de série 201707000001 - 201707149610 est conforme aux directives UE actuellement en vigueur : 2014/30/EU • 2014/35/EU • 2011/65/EU* En vue de garantir la conformité les normes harmonisées ainsi que les normes et déci- sions nationales suivantes ont été... -
Page 97: Designação De Explosão
All manuals and user guides at all-guides.com Explosionszeichnung • Exploded Drawing Vue éclatée • Explosietekening • Výkres sestavení Plano de explosión • Designação de explosão PAS 1200 B2 informativ informative informatif informatief informativo • • • • • 2017-06-07_rev03_sh...