Télécharger Imprimer la page

Publicité

Les langues disponibles
  • FR

Les langues disponibles

  • FRANÇAIS, page 89

Liens rapides

This manual MUST be given to the user of the product.
BEFORE using this product, read this manual and save for future
reference.
Invacare® Birdie® EVO
Birdie® EVO, Birdie® EVO COMPACT, Birdie® EVO PLUS
en Mobile Patient Lift
User Manual . . . . . . . . . . . . . . . . . . . . . . . . . . . . . . . . . . . 3
de Mobiler Patientenlifter
Gebrauchsanweisung . . . . . . . . . . . . . . . . . . . . . . . . . . . 31
es
Grúa de elevación
Manual del usuario. . . . . . . . . . . . . . . . . . . . . . . . . . . . . 61
fr
Lève-personne mobile
Manuel d'utilisation . . . . . . . . . . . . . . . . . . . . . . . . . . . . 89
it
Sollevatore mobile
Manuale d'uso . . . . . . . . . . . . . . . . . . . . . . . . . . . . . . . . .117
nl
Mobiele patiëntenlift
Gebruiksaanwijzing . . . . . . . . . . . . . . . . . . . . . . . . . . . . .147
Manual de utilização . . . . . . . . . . . . . . . . . . . . . . . . . . .175

Publicité

loading

Sommaire des Matières pour Invacare Birdie EVO

  • Page 1: Table Des Matières

    Invacare® Birdie® EVO Birdie® EVO, Birdie® EVO COMPACT, Birdie® EVO PLUS en Mobile Patient Lift User Manual ........3 de Mobiler Patientenlifter Gebrauchsanweisung .
  • Page 2 Tutti i diritti riservati. È proibita la riproduzione, la duplicazione o la modifica parziale o completa, salvo previa autorizzazione scritta da parte di Invacare. I marchi sono contrassegnati da ™ e ®. Tutti i marchi sono di proprietà o licenza di Invacare Corporation o di sue affiliate, salvo indicazione contraria.
  • Page 3 Contents 8.2 Daily inspections ....... 22 8.3 Cleaning and disinfection......22 This manual MUST be given to the user of the product.
  • Page 4: General

    Note that there may be sections in this document, which are not relevant to your product, since this document applies Invacare accepts no liability for damage arising from: to all available models (on the date of printing). If not otherwise stated, each section in this document refers to all •...
  • Page 5: Safety

    If you are – See 11.4 Environmental conditions, page 27. unable to understand the warnings, cautions or instructions, contact a healthcare professional, Invacare provider or qualified technician before WARNING! attempting to use this product. Risk of injury or damage...
  • Page 6: Safety Information On Accessories

    WARNING! – Due to regional differences, refer to your Risk of malfunction local Invacare website or catalog for available Electromagnetic interference may cause improper accessories or contact your Invacare provider. operation. – See the manual delivered with the accessory –...
  • Page 7: Other Symbols

    Safety 2.4.3 Other symbols Symbols Refer to User Manual Serial Number Reference Number Total weight of the product with the maximum safe working load applied Manufacturer Address Do not use the actuator as a push bar Manufacturing Date Do not remove Max.
  • Page 8: Product Overview

    All position changes are possible without assistance of the Due to regional differences, refer to your local patient. Invacare website or catalog for details about available accessories or contact your Invacare provider. There are no known contraindications for this product.
  • Page 9: User Manual

    Risk of Injury and washing instructions. Improper assembly may cause injury or damage. – Use only Invacare parts in the assembly of this patient lift. 4.3 Installing the mast – After each assembly, check that all fittings...
  • Page 10: Assembling The Mast To The Base

    Invacare® Birdie® EVO 4.4 Unfolding the spreader bar 1. Lock both rear castors B. Remove the locking pin A. 2. Raise the mast assembly C to an upright position by stepping with one foot on the leg D and pulling the push bar E upwards until the safety catch F snaps in place.
  • Page 11: Resetting The Service Light

    If the service light is flashing yellow during daily usage or after a reassembly, the lift requires service. – Contact your Invacare provider for service. After the initial assembly of the lift, the service light is flashing yellow and needs to be reset before using the lift.
  • Page 12: Usage

    The hand control is used to open or close the legs of the assistants. base. – Invacare recommends that the rear castors be left unlocked during lifting procedures to 1. To close the legs, press allow the patient lift to stabilize itself when the...
  • Page 13: Performing An Emergency Stop

    Usage Removing the spreader bar 5.7.2 CBJ Care, CBJ1, CBJ2 control unit Emergency lowering If the hand control fails, the boom can be lowered by using 1. Push and hold the release button up. the circular switch for emergency release. Use a sharp 2.
  • Page 14: Cbj Care, Cbj1, Cbj2 Control Unit

    Invacare® Birdie® EVO Birdie® EVO COMPACT 5.9.2 CBJ Care, CBJ1, CBJ2 control unit (optional) The manual emergency release system is located at the top of the actuator piston. 1. Rotate the emergency release knob A counterclockwise. The control unit is equipped with a sound signal. A beep indicates that the battery has low capacity, but lowering the patient is still possible.
  • Page 15: Optional Battery Charger

    Usage CBJ1 and CBJ2 with LCD Battery Battery Description Indicator State Type Full The battery is OK — no need Charge for charging (100%). (100%) Partial The battery is OK — no need Charge for charging (75%). (75%) Partial The battery needs to be 1.
  • Page 16: Lifting The Patient

    – Use the push bars on the mast at all times to possible. push or pull the lift. – Avoid using the lift on an incline. Invacare recommends that the product only be used on 6.2 Preparing to lift a flat surface.
  • Page 17: Attaching The Sling To The Lift

    Usage of wrong or damaged slings can cause the patient to fall or cause injury to assistants. 4-point spreader bar – Use an Invacare approved sling that is recommended by the individual’s doctor, nurse or medical assistant for the comfort and safety of the individual being lifted.
  • Page 18: Transferring A Patient To A Bed

    Invacare® Birdie® EVO Move the patient lift with both hands firmly on the push bars. Before moving the patient, check again to make sure 11. Proceed with the transfer to another resting surface or that the sling is properly attached to the hooks of the stationary object.
  • Page 19: Transferring A Patient To A Wheelchair

    6.6 Transferring a patient to and from a commode The Invacare patient lift is NOT intended as a transport device. If the bathroom facilities are NOT near the bed or if the patient lift cannot be easily...
  • Page 20: Lifting A Patient From The Floor

    Invacare® Birdie® EVO 5. Open the legs of the lift. See 5 Usage, page 12 When the patient is clear of the commode surface, use the push bars to move the lift away from the commode. Position the lift with one leg under the patient’s bent 8.
  • Page 21: Transportation And Storage

    6. Reverse the procedure described in 4.3.1 Unfolding the mast, page 9 and pull and hold the safety catch F upwards before folding down the mast. The folded lift can now be placed in an upright position. 7.4 Mast extension for upright positioning (Birdie EVO only) 1650023-B...
  • Page 22: Maintenance

    WARNING! – If the service light is flashing yellow the lift requires Risk of injury or damage service. Do not use the lift and contact your Invacare Service must be performed only by a qualified provider for service. technician.
  • Page 23: After Use

    After Use Be environmentally responsible and recycle the different 9 After Use materials and components of this product separately through your recycling facility at its end of life. 9.1 Disposal The disposal and recycling of used products and packaging must comply with the laws and regulations for waste WARNING! handling in each country.
  • Page 24: Troubleshooting

    The control unit emits a beeping sound Max. load is exceeded Reduce the load (and the lift will during lifting, and the motor stops. function normally). Contact your Invacare provider if the above does not solve your problems. 1650023-B...
  • Page 25: Technical Data

    Technical Data 11 Technical Data 11.1 Maximum safe working load Birdie® EVO Birdie® EVO Birdie® EVO COMPACT PLUS Max. Safe Working Load (patient + spreader bar + sling) 180 kg 150 kg 180 kg 11.2 Dimensions and weights * Forward direction Dimensions [mm] Birdie®...
  • Page 26: Electrical System

    Invacare® Birdie® EVO Dimensions [mm] Birdie® EVO Birdie® EVO Birdie® EVO COMPACT PLUS Internal width at maximum reach (k) Turning diameter 1400 1400 1070 1070 1400 Height to upper edge of legs (m) Min. free height (p) Minimum distance from wall to CSP* at maximum reach (legs...
  • Page 27: Environmental Conditions

    Technical Data Birdie™ EVO Birdie™ EVO Birdie™ EVO COMPACT PLUS Battery type Lead acid (service free, sealed) Optional (at bottom of (at bottom of Manual emergency lowering (at top of actuator) actuator) actuator) Yes / Yes (for CBJ1 and CBJ Care) Yes / No (for CBJ2 Yes / Yes (CBJ1 and Electric emergency lowering / lifting...
  • Page 28: Electromagnetic Compatibility (Emc)

    Invacare® Birdie® EVO 12 Electromagnetic compatibility (EMC) 12.1 General EMC information Medical Electrical Equipment needs to be installed and used according to the EMC information in this manual. This product has been tested and found to comply with EMC limits specified by IEC/EN 60601-1-2 for Class B equipment.
  • Page 29 Electromagnetic compatibility (EMC) Immunity test Electromagnetic environment – guidance Test / Compliance level < 0% U for 0,5 cycle at Voltage dips, short Mains power quality should be that of a typical commercial or hospital 45° steps interruptions and environment. If the user of this product requires continued operation during voltage variations 0% U for 1 cycles...
  • Page 30 Notes...
  • Page 31 Inhaltsverzeichnis 7 Transport und Lagerung ......52 7.1 Allgemeine Informationen ......52 Diese Gebrauchsanweisung muss dem Benutzer des Produkts 7.2 Demontage des Masts von der Basis .
  • Page 32: Allgemein

    Modelle abdeckt. Sofern nicht anders angegeben, bezieht sich jeder Abschnitt in dieser Gebrauchsanweisung auf alle 1.3 Beschränkung der Haftung Modelle des Produkts. Invacare übernimmt keine Haftung für Schäden aufgrund von: Die für Ihr Land erhältlichen Modelle und Ausstattungsvarianten sind über die länderspezifischen •...
  • Page 33: Sicherheit

    Ihnen die Warnungen, Sicherheitshinweise und – Wenn der Patientenlifter in einer Umgebung Anweisungen unverständlich sind, wenden Sie mit hoher Luftfeuchtigkeit verwendet wird, sich an einen Arzt, einen Invacare-Anbieter muss er unbedingt nach jeder Verwendung oder einen qualifizierten Techniker, bevor Sie trocken gewischt werden.
  • Page 34: Einklemmgefahr

    Produkt und anderen elektrischen Geräten – Aufgrund regionaler Unterschiede ziehen auftreten und die elektrischen Einstellfunktionen Sie die Invacare-Website für Ihr Land oder dieses Produkts beeinträchtigen. Um solche den Invacare-Katalog zu Rate, um sich über elektromagnetischen Störungen zu verhindern, zu erhältliches Zubehör zu informieren, oder...
  • Page 35: Etiketten Und Symbole Auf Dem Produkt

    Warnetikett – nicht bei allen Modellen vorhanden Bei Entfernung oder Beschädigung dieses Etiketts erlischt die Garantie 2.4.2 Typenschild Temperaturbereich Invacare Portugal, Lda Rua Estrada V elha 949 ISO 10535 4465- 7 84 Leça do Balio, Port ugal XXXXXX XXXXX_XX Xxxxxxx xxxxx xxx...
  • Page 36: Produktübersicht

    Invacare® Birdie® EVO 3.2 Hauptkomponenten des Lifters 3 Produktübersicht 3.1 Verwendungszweck Der mobile Patientenlifter ist eine akkubetriebene Transfervorrichtung und dient dazu, eine Person von einer Sitz- oder Liegefläche auf eine andere zu transferieren und zu positionieren. Beispiel: • Transfer von Patienten zwischen Bett und Rollstuhl •...
  • Page 37: Zubehör

    Wandladegerät für einen abnehmbaren Akku • Zusatzakku Aufgrund regionaler Unterschiede ziehen Sie • Schutzbezüge für Fußschienen die Invacare-Website für Ihr Land oder den • Schutzbezug für Spreizbügel Invacare-Katalog zurate, um Informationen über Patientengurtmodelle mit Schlaufenbefestigung, geeignet für erhältliches Zubehör zu erhalten, oder wenden Sie Spreizbügel (Kleiderbügel-Stil) mit Haken:...
  • Page 38: Gebrauchsanweisung

    Wenn der Lifter mit einem Patientengurt geliefert – Für die Montage dieses Patientenlifters dürfen wird, finden Sie in der Gebrauchsanweisung für den Sie nur Originalteile von Invacare verwenden. Patientengurt Hinweise zur Verwendung, zum Einsatz, – Stellen Sie nach jeder Montage sicher, dass alle zur Instandhaltung sowie zur Reinigung.
  • Page 39: Montage Des Masts Auf Der Basis

    Inbetriebnahme 4.3.2 Montage des Masts auf der Basis 1. Verriegeln Sie die beiden hinteren Rollen B. Entfernen Sie den Verriegelungsstift A. (nur fester Mast) 2. Bringen Sie die Masteinheit C in eine aufrechte Position, indem Sie mit einem Fuß auf die Fußschiene D treten und die Schiebestange E nach oben ziehen, bis der Sicherungsverschluss F einrastet.
  • Page 40: Montage Des Verstellmotors Am Ausleger

    Invacare® Birdie® EVO 1. Drücken und halten Sie den Ausleger A in Richtung des Masts B und klappen Sie die Klemme C des Spreizbügels nach unten. 2. Klappen Sie den Spreizbügel D nach unten und klappen Sie die Klemme C des Spreizbügels nach oben, bis sie an der Montagehalterung des Verstellmotors E einrastet.
  • Page 41: Verwenden

    Verletzungsgefahr oder Gefahr von Sachschäden Der Lifter könnte kippen und die Sicherheit des Patienten und der Helfer gefährden. 5.4.1 Schließen und Öffnen der elektrischen – Invacare empfiehlt, die hinteren Rollen während Fußschienen des Hebevorgangs nicht zu verriegeln, damit der Patientenlifter sich selbst stabilisieren kann, Die Handsteuerung dient zum Öffnen oder Schließen der...
  • Page 42: Austauschen Des Spreizbügels

    Invacare® Birdie® EVO 5.5 Austauschen des Spreizbügels 5.7 Aktivieren einer Notabsenkung über die Steuerungseinheit (nur Spreizbügel mit SMARTLOCK™) WARNUNG! 5.7.1 CBJ Home-Steuerungseinheit Verletzungsgefahr – Verwenden Sie nur Spreizbügel, die für diesen Wenn das Handbedienteil nicht anspricht, kann der Ausleger Lifter vorgesehen sind.
  • Page 43: Aufladen Des Akkus

    Verwenden Es wird empfohlen, den Akku täglich aufzuladen, um die Es wird empfohlen, die primäre Notentriegelung optimale Verwendung des Lifters zu gewährleisten und die zu verwenden. Die sekundäre (manuelle) Lebensdauer des Akkus zu verlängern. Darüber hinaus wird Notentriegelung dient nur als Sicherung für die empfohlen, den Akku vor dem ersten Gebrauch zu laden.
  • Page 44: Optionales Akkuladegerät

    Invacare® Birdie® EVO 1. Stecken Sie das Netzkabel A in eine Steckdose ein. Akkuanzeige Ladestand Beschreibung des Akkus Der Akku ist in ungefähr 4 Stunden aufgeladen. Das Ladegerät wird automatisch ausgeschaltet, Niedriger Der Akku muss aufgeladen wenn der Akku vollständig aufgeladen ist.
  • Page 45 Verwenden Wenn der Akku in das Ladegerät eingesetzt ist, leuchtet die Laden-LED. Wenn der Ladevorgang abgeschlossen ist, erlischt die Lade-LED wieder. Es dauert etwa vier Stunden, bis der Akku vollständig geladen ist. 1650023-B...
  • Page 46: Patienten Anheben Und Transferieren

    Es besteht die Gefahr des Einklemmens – Verwenden Sie den Lifter nicht auf abschüssigen zwischen den Haken des Spreizbügels und dem Oberflächen. Invacare empfiehlt, das Produkt Patientengurt. nur auf ebenen Böden zu verwenden. – Gehen Sie beim Heben vorsichtig vor.
  • Page 47: Anbringen Des Patientengurts Am Lifter

    Patientengurte kann dazu führen, dass der Patient mit Schlaufen gleicher Farben auf, um ein gleichmäßiges herunterfällt oder Helfer verletzt werden. Anheben des Patienten zu ermöglichen. – Verwenden Sie einen von Invacare zugelassenen Patientengurt, der vom Arzt, der Schwester 2-Punkt-Spreizbügel oder dem medizinischen Helfer des Patienten...
  • Page 48: Transfer Eines Patienten Von Einem Bett

    Invacare® Birdie® EVO 4-Punkt-Spreizbügel Prüfen Sie vor dem Transfer des Patienten noch einmal, ob der Patientengurt ordnungsgemäß an den Haken des Spreizbügels befestigt ist. Siehe 6.2.1 Anbringen des Patientengurts am Lifter, Seite 47. Falls eine der Befestigungen nicht ordnungsgemäß angebracht ist, senken Sie den Patienten wieder auf das stehende 1.
  • Page 49: Transfer Eines Patienten Auf Ein Bett

    Patienten anheben und transferieren 8. Lösen Sie die hinteren Rollen. Bewegen Sie den Patientenlifter, indem Sie die Schiebestangen mit beiden Händen festhalten. Schieben Sie den Lifter aus dem Patientenbereich. 11. Fahren Sie mit dem Transfer auf eine andere Sitzfläche oder ein stehendes Objekt fort. 6.5 Transfer eines Patienten in einen Rollstuhl 6.4 Transfer eines Patienten auf ein Bett...
  • Page 50: Transfer Eines Patienten Auf Einen Und Von Einem Toilettensitz

    Invacare® Birdie® EVO 6.6 Transfer eines Patienten auf einen und von einem Toilettensitz Der Patientenlifter von Invacare ist KEIN Transportfahrzeug. Wenn sich das Badezimmer NICHT in unmittelbarer Nähe des Betts befindet oder der Patientenlifter nicht leicht in Richtung Toilettensitz bewegt werden kann, MUSS der Patient in einem...
  • Page 51 Patienten anheben und transferieren 1. Stellen Sie fest, ob der Patient Verletzungen aufgrund eines Sturzes erlitten hat. Wenn keine medizinische Versorgung erforderlich ist, fahren Sie mit dem Transfer fort. Positionieren Sie den Lifter mit einer Fußschiene unter den angewinkelten Knien des Patienten und der anderen Fußschiene unter dem Kopf des Patienten.
  • Page 52: Transport Und Lagerung

    Invacare® Birdie® EVO 7.4 Mastverlängerung für aufrechte 7 Transport und Lagerung Positionierung (nur Birdie EVO) 7.1 Allgemeine Informationen Eine mitgelieferte magnetische Mastverlängerung ermöglicht Während des Transports oder bei längerer Nichtbenutzung eine aufrechte Positionierung, wenn der Patientenlifter mit des Patientenlifters sollte die Notaus-Taste gedrückt sein.
  • Page 53: Instandhaltung

    Sicherheit eines Teils haben, verwenden auf dem Patientengurt und der zugehörigen Sie den Lifter nicht. Setzen Sie sich umgehend Gebrauchsanweisung. mit Ihrem zuständigen Invacare-Anbieter in Verbindung. Stellen Sie außerdem sicher, dass Reinigen des Lifters der Lifter erst dann wieder verwendet wird, Methode: Wischen Sie die Teile mit einem feuchten Tuch wenn die Reparaturmaßnahmen abgeschlossen...
  • Page 54: Nach Dem Gebrauch

    Invacare® Birdie® EVO Handeln Sie umweltbewusst, und lassen Sie die diversen 9 Nach dem Gebrauch Materialien und Bauteile dieses Produkt nach Ende seiner Lebensdauer über eine lokale Müllverwertungsanlage separat recyceln. 9.1 Entsorgung Die Entsorgung und das Recycling von gebrauchten WARNUNG! Produkten und Verpackungen muss in Übereinstimmung...
  • Page 55: Problembehandlung

    Max. Last ist überschritten Last reduzieren (der Lifter funktioniert kurzes akustisches Signal während normal). des Anhebens aus und der Motor unterbricht den Betrieb. Wenden Sie sich an Ihren Invacare-Anbieter, falls das Problem nicht durch die oben aufgeführten Schritte behoben werden kann. 1650023-B...
  • Page 56: Technische Daten

    Invacare® Birdie® EVO 11 Technische Daten 11.1 Maximale Tragfähigkeit Birdie® EVO Birdie® EVO Birdie® EVO COMPACT PLUS Max. Tragfähigkeit (Patient + Spreizbügel + Patientengurt) 180 kg 150 kg 180 kg 11.2 Abmessungen und Gewicht * Fahrtrichtung Abmessungen [mm] Birdie® EVO Birdie®...
  • Page 57: Elektrisches System

    Technische Daten Abmessungen [mm] Birdie® EVO Birdie® EVO Birdie® EVO COMPACT PLUS Gesamtbreite (Fußschienen geschlossen), Außenmaß Min. Innenbreite (i) Innenbreite mit maximaler Reichweite (k) Wendekreis 1400 1400 1070 1070 1400 Höhe bis zur Oberkante der Fußschienen (m) Mindest-Bodenfreiheit (p) Mindestabstand zwischen Wand und ZAP* bei maximaler Ausladung (Fußschienen geöffnet) (q) Mindestabstand zwischen Wand und ZAP* bei maximaler Höhe (Fußschienen geöffnet) (r)
  • Page 58: Umgebungsbedingungen

    Invacare® Birdie® EVO Birdie™ EVO Birdie™ EVO Birdie™ EVO COMPACT PLUS 40 vollständige Hebevorgänge (mit Akku zwischen 100 % Arbeitsfähigkeit und 50 % der vollen Kapazität) Aussetzbetrieb (periodischer Motorbetrieb) 10 %, max. 2 min/18 min Akku-Spezifikation 2 x 12 V/2,9 Ah Akku-Typ Bleisäure (wartungsfrei, versiegelt)
  • Page 59: Elektromagnetische Verträglichkeit (Emv)

    Elektromagnetische Verträglichkeit (EMV) 12 Elektromagnetische Verträglichkeit (EMV) 12.1 Allgemeine Informationen zu Elektromagnetischer Verträglichkeit (EMV) Medizinische elektrische Geräte müssen gemäß den EMV-Informationen in diesem Handbuch installiert und verwendet werden. Dieses Produkt wurde getestet und erfüllt die in IEC/EN 60601-1-2 für Ausrüstung der Klasse B angegebenen EMV-Grenzwerte. Tragbare und mobile HF-Kommunikationsgeräte können den Betrieb dieses Produkts beeinträchtigen.
  • Page 60 Invacare® Birdie® EVO Störfestigkeitstest Elektromagnetische Umgebung – Anleitung Test-/ Konformitätswert ± 1 kV zwischen Stoßspannung Leitungen Die Netzstromqualität muss der einer typischen gewerblichen oder Krankenhausumgebung entsprechen. IEC 61000-4-5 ± 2 kV zwischen Leitung und Erdung Spannungsabfälle, < 0 % U für halben...
  • Page 61 Contenido 8 Mantenimiento ........81 8.1 Información sobre mantenimiento general ... . 81 Este manual DEBE ser entregado al usuario final.
  • Page 62: Generalidades

    1.3 Limitación de responsabilidad sección de este manual hace referencia a todos los modelos del producto. Invacare no se hace responsable de los daños surgidos por: Los modelos y las configuraciones disponibles en su país • Incumplimiento del manual del usuario pueden encontrarse en las listas de precios específicas del...
  • Page 63: Seguridad

    Sustituya las piezas que estén corroídas o instrucciones, póngase en contacto con un o dañadas. profesional sanitario, el proveedor de Invacare o – Consulte 11.4 Condiciones ambientales, página un técnico cualificado antes de intentar utilizar este producto.
  • Page 64: Información De Seguridad Sobre Los Accesorios

    ¡PRECAUCIÓN! Compatibilidad de las eslingas con el sistema de fijación Invacare utiliza un sistema de fijación de uso frecuente que emplea ganchos y anillas. Las anillas de las eslingas se conectan a los ganchos de las perchas (tipo perchero). Por tanto, pueden utilizarse eslingas de otros fabricantes con esta grúa siempre que cumplan los requisitos...
  • Page 65: Etiqueta Del Producto

    Para obtener más información sobre los datos técnicos, consulte 11 Datos Técnicos, página 84. 2.4.2 Etiqueta del producto Invacare Portugal, Lda 2.4.3 Otros símbolos Rua Estrada V elha 949 ISO 10535 4465- 7 84 Leça do Balio, Port ugal...
  • Page 66: Descripción Del Producto

    Dadas las diferencias regionales existentes, consulte Todos los cambios de posición son posibles sin la ayuda del en el sitio web o en el catálogo local de Invacare paciente. información sobre los accesorios disponibles o No existen contraindicaciones conocidas para este producto.
  • Page 67: Manual Del Usuario

    4.3.1 Desplegado del mástil de elevación. (solo mástiles plegables) Si tiene algún problema o duda durante el montaje, póngase en contacto con el proveedor de Invacare. ¡ADVERTENCIA! – El mástil puede plegarse para guardarlo o transportarlo. Siempre que se vaya a plegar el 4.2 Contenido de la entrega...
  • Page 68: Montaje Del Mástil En La Base

    Invacare® Birdie® EVO 4.3.2 Montaje del mástil en la base 1. Bloquee las dos ruedas traseras B. Quite el pasador de bloqueo A. (sólo mástiles fijos) 2. Levante el conjunto del mástil C hasta dejarlo en posición vertical pisando con un pie la pata D y tirando de la barra de empuje E hacia arriba hasta que el tope de seguridad F encaje en su sitio.
  • Page 69: Instalación Del Pistón En El Brazo

    – Póngase en contacto con el proveedor de Invacare para obtener asistencia. Alinee los orificios, vuelva a instalar el pasador de liberación rápida A y fíjelo con la horquilla orientada Cuando se monta por primera vez la grúa, la luz de servicio...
  • Page 70: Utilización

    La grúa podría volcar y poner en peligro al mantenga pulsado el botón paciente y a los cuidadores. de patas cerradas A. – Invacare recomienda que las ruedas traseras 2. Para abrir las patas, permanezcan desbloqueadas durante los mantenga pulsado el botón procedimientos de elevación para que la grúa...
  • Page 71: Montaje De La Percha

    Utilización ¡ADVERTENCIA! Riesgo de lesiones – Utilice únicamente las perchas diseñadas para esta grúa. – Asegúrese de que la percha es adecuada para el paciente y la grúa o el traslado que se va a realizar. – Compruebe que la percha está bien fijada al conector del brazo y que no puede extraerse 1.
  • Page 72: Carga De La Batería

    Invacare® Birdie® EVO 1. Tire hacia arriba del asa de emergencia roja A y, al mismo tiempo, presione el brazo hacia abajo. El sistema de liberación de emergencia manual solo funcionará si hay un paciente en la grúa. Puede ajustarse 1.
  • Page 73: Cargador De Batería Opcional

    Utilización 5.9.3 Cargador de batería opcional CBJ Care Tipo de Estado Descripción (solo para unidades de control con baterías desmontables) indicador de de la la batería batería El procedimiento para extraer o instalar la batería es el mismo en la unidad de control y el cargador. Carga El estado de la batería es completa...
  • Page 74: Elevación Del Paciente

    – Evite utilizar la grúa en superficies inclinadas. describen a continuación pueden realizarse con Invacare recomienda utilizar el producto un (1) único asistente. Sin embargo, Invacare únicamente en superficies planas. recomienda que, siempre que sea posible, estos – Durante el traslado, mientras el paciente esté...
  • Page 75: Acoplamiento De La Eslinga A La Grúa

    Si las eslingas están deterioradas o se han instalado de forma incorrecta, el paciente podría caer y los cuidadores podrían sufrir daños. – Utilice una eslinga Invacare aprobada que cuente con la recomendación del médico, el auxiliar o el cuidador para ofrecer seguridad y comodidad al paciente.
  • Page 76: Traslado De Un Paciente A La Cama

    Invacare® Birdie® EVO Baje al paciente de forma que sus pies descansen sobre la base de la grúa, con una pierna a cada lado del mástil. Levante al paciente lo suficiente como para que quede Cuanto más bajo esté situado el centro de separado de la superficie de descanso y que la grúa...
  • Page 77: Traslado Del Paciente A Una Silla De Ruedas

    Elevación del paciente 6.6 Traslado de un paciente al inodoro La grúa de elevación de Invacare NO ha sido diseñada como dispositivo de transporte. Si el cuarto de baño NO se encuentra próximo a la cama o si la grúa no puede maniobrar fácilmente hasta el inodoro, el...
  • Page 78: Elevación De Un Paciente Que Está En El Suelo

    Baje al paciente hasta el inodoro y deje la eslinga fijada en los ganchos de la percha. Invacare recomienda que la eslinga se mantenga fijada en los ganchos de la percha mientras el paciente usa la silla de inodoro o el inodoro Coloque la eslinga A debajo del paciente.
  • Page 79 Elevación del paciente 9. Eleve el brazo de la grúa para levantar al paciente del suelo. 10. Realice el traslado a otra superficie de descanso u otro objeto fijo. Acople la eslinga. Consulte 6.2.1 Acoplamiento de la eslinga a la grúa, página 75. 1650023-B...
  • Page 80: Transporte Y Almacenamiento

    4.3.1 Desplegado del mástil, página 67 y, antes de plegar el mástil, tire del pestillo de seguridad F y manténgalo La grúa plegada podrá colocarse ahora en posición en esa posición. vertical. 7.4 Extensión del mástil para colocar la grúa en posición vertical (solo Birdie EVO) 1650023-B...
  • Page 81: Mantenimiento

    Póngase en contacto inmediatamente Método: limpie la superficie con un cepillo suave o un paño con el proveedor de Invacare y asegúrese de húmedo. que la grúa no se utiliza hasta que se hayan realizado todas las reparaciones.
  • Page 82: Después Del Uso

    Invacare® Birdie® EVO Proteja el medio ambiente y recicle por separado los 9 Después del uso distintos materiales y componentes de este producto al final de su vida útil en una planta de reciclaje. 9.1 Eliminación La eliminación o el reciclaje de los productos usados y del embalaje deberán llevarse a cabo conforme a las normativas...
  • Page 83: Solución De Problemas

    La unidad de control emite un pitido La carga máxima es excesiva. Reduzca la carga (y la grúa funcionará durante la elevación y el motor se para. con normalidad). Póngase en contacto con el proveedor de Invacare si las instrucciones descritas no solucionan el problema. 1650023-B...
  • Page 84: Datos Técnicos

    Invacare® Birdie® EVO 11 Datos Técnicos 11.1 Carga máxima de utilización segura Birdie® EVO Birdie® EVO Birdie® EVO COMPACT PLUS Carga máxima de utilización segura (paciente + percha + eslinga) 180 kg 150 kg 180 kg 11.2 Dimensiones y pesos * Dirección de avance...
  • Page 85: Sistema Eléctrico

    Datos Técnicos Dimensiones [mm] Birdie® EVO Birdie® EVO Birdie® EVO COMPACT PLUS Anchura total (con las patas cerradas) medida desde el exterior Anchura interna mín. (i) Anchura interna con la máxima extensión (k) Diámetro de giro 1400 1400 1070 1070 1400 Altura hasta el borde superior de las patas (m) Altura libre mín.
  • Page 86: Condiciones Ambientales

    Invacare® Birdie® EVO Birdie™ EVO Birdie™ EVO Birdie™ EVO COMPACT PLUS 40 elevaciones completas (con batería entre 100 % Capacidad de funcionamiento y 50 % de la capacidad total) Intermitente (funcionamiento periódico del motor) 10 %, máx. 2 min/18 min Especificaciones de la batería...
  • Page 87: Compatibilidad Electromagnética (Emc)

    Compatibilidad electromagnética (EMC) 12 Compatibilidad electromagnética (EMC) 12.1 Información general sobre EMC Los equipos eléctricos médicos deben instalarse y utilizarse de acuerdo con la información sobre EMC de este manual. Este equipo se ha probado y cumple con los límites de EMC establecidos por IEC/EN 60601-1-2 para equipos de Clase B. Los equipos de comunicaciones por radiofrecuencia portátiles y móviles pueden afectar al funcionamiento de este producto.
  • Page 88 Invacare® Birdie® EVO Prueba de Nivel de Entorno electromagnético: guía inmunidad prueba/cumplimiento < 0 % U durante 0,5 Caídas de tensión, La calidad de la red de suministro eléctrico debería ser la habitual de un ciclo en pasos de 45°...
  • Page 89 7.4 Extension de mât pour positionnement vertical ..108 Sommaire 8 Maintenance ........109 Ce manuel DOIT être remis à...
  • Page 90: Généralités

    • un assemblage ou montage incorrect par l'acheteur ou des tiers, Invacare se réserve le droit de modifier les caractéristiques • des modifications techniques, des produits sans préavis. • des modifications non autorisées et/ou l'utilisation de pièces de rechange inadaptées.
  • Page 91: Sécurité

    – Si le lève-personne est utilisé dans un contactez un professionnel de santé, un environnement humide, veillez à ce qu'il soit fournisseur Invacare ou un technicien qualifié correctement nettoyé et séché après utilisation. avant d'essayer d'utiliser ce produit. – Vous ne devez pas brancher ou débrancher le câble d'alimentation dans un environnement...
  • Page 92: Points De Pincement

    ATTENTION ! Compatibilité des sangles avec le système de fixation Invacare utilise un système de fixation courant de type boucles et crochets. Les boucles situées sur les sangles se fixent sur les crochets situés sur le fléau (style cintre). De ce fait, des sangles d'autres marques qui sont adaptées à...
  • Page 93: Étiquettes Et Symboles Figurant Sur Le Produit

    Étiquette d'avertissement (ne figure pas sur tous est retiré ou cassé les modèles) Limite de température 2.4.2 Étiquette du produit Limite d'humidité Invacare Portugal, Lda Rua Estrada V elha 949 ISO 10535 4465- 7 84 Leça do Balio, Port ugal XXXXXX XXXXX_XX Xxxxxxx xxxxx xxx...
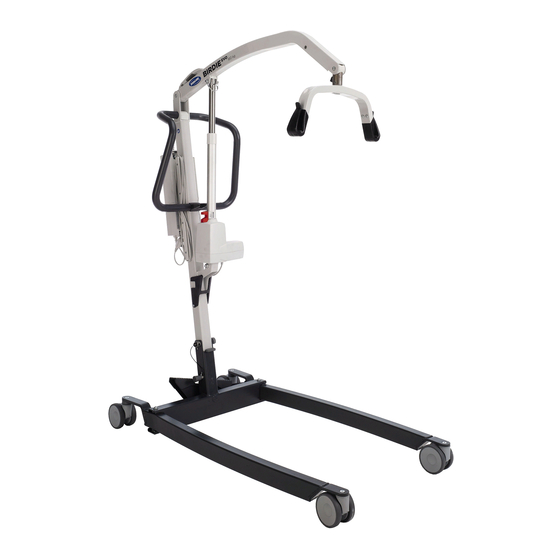
  • Page 94: Présentation Du Produit

    Toutes les modifications de position peuvent être effectuées sans l'aide du patient. Du fait de différences régionales, vous devez vous reporter au site Internet ou au catalogue Invacare de Ce produit ne présente aucune contre-indication connue. votre pays pour connaître les accessoires qui sont disponibles ;...
  • Page 95: Manuel D'utilisation

    Un montage inadéquat est susceptible d'entraîner Sangle (1 pièce)* des blessures ou des dégâts matériels. – Seules des pièces Invacare doivent être utilisées * Selon le modèle et/ou la configuration pour le montage de ce lève-personne. Si le lève-personne est livré avec une sangle, –...
  • Page 96: Fixation Du Mât À La Base

    Invacare® Birdie® EVO 4.3.2 Fixation du mât à la base 1. Verrouillez les deux roulettes arrière B. Retirez la goupille de verrouillage A. (mât fixe uniquement) 2. Hissez le mât C à la verticale en posant un pieds sur le pied D et en tirant la barre de poussée E vers le haut...
  • Page 97: Installation Du Vérin Sur La Flèche

    Alignez les trous, remettez en place la goupille de – Contactez votre fournisseur Invacare pour démontage rapide A et fixez-la avec le clip orienté vers effectuer un entretien.
  • Page 98: Utilisation

    La télécommande permet d'ouvrir ou de fermer les pieds le patient et les assistants en danger. de la base. – Invacare recommande que les roulettes arrière 1. Pour fermer les pieds, soient déverrouillées lors du soulèvement appuyez sur le bouton du patient pour permettre la stabilité...
  • Page 99: Procédure D'arrêt D'urgence

    Utilisation 5.7 Activation d'un déverrouillage AVERTISSEMENT ! d'urgence sur le boîtier de contrôle Risque de blessure – Utilisez exclusivement des fléaux spécialement conçus pour ce lève-personne. 5.7.1 Boîtier de contrôle CBJ Home – Vérifiez que le fléau est adapté au patient et à l'élévation ou au transfert à...
  • Page 100: Recharge De La Batterie

    Invacare® Birdie® EVO Birdie® EVO et Birdie® EVO PLUS l'abaissement du patient reste possible. Il est recommandé de recharger les batteries dès que le signal sonore est émis. Le système manuel de déverrouillage d'urgence se trouve au bas du piston du vérin.
  • Page 101: Chargeur De Batterie En Option

    Utilisation 5.9.3 Chargeur de batterie en option CBJ Care Type de Description État de la (pour les boîtiers de contrôle avec batterie amovible témoin de batterie uniquement) batterie La procédure de démontage ou d'installation de la Charge La batterie n'a pas besoin batterie est identique pour le boîtier de contrôle et complète d'être rechargée (charge...
  • Page 102: Soulèvement Du Patient

    Il existe un risque de coincement entre les – Évitez d'utiliser le lève-personne sur une pente. crochets du fléau et la sangle. Invacare recommande d'utiliser le produit sur – Prenez toutes les précautions nécessaires lors des surfaces planes exclusivement. des opérations de levage.
  • Page 103: Installation De La Sangle Sur Le Lève-Personne

    Fléau à 2 points patient ou occasionner des blessures aux tierces-personnes. – Utilisez une sangle approuvée par Invacare et recommandée par le médecin, l'infirmier ou l'assistant médical afin d'assurer la sécurité et le confort du patient durant la levée.
  • Page 104: Fléau À 4 Points

    Invacare® Birdie® EVO Fléau à 4 points Avant de déplacer le patient, assurez-vous à nouveau que la sangle est correctement fixée aux crochets du fléau. Reportez-vous à la section 6.2.1 Installation de la sangle sur le lève-personne, page 103 . Si l'une des attaches n'est pas correctement installée, redescendez le...
  • Page 105: Transfert Du Patient Dans Un Lit

    équilibre et évite que le fauteuil ne bascule vers l'avant. 6.6 Transfert d'un patient vers et depuis une chaise toilettes Le lève-personne Invacare n'est PAS un dispositif de transport. Si la salle de bains est loin du lit ou si le lève-personne ne peut être facilement manœuvré...
  • Page 106: Toilettes

    Si aucun soin médical n'est requis, procédez au transfert. Abaissez le patient vers la chaise toilettes en laissant la sangle accrochée aux crochets du fléau. Invacare recommande que la sangle reste fixée aux crochets du fléau pendant que le patient utilise la chaise toilettes ou Positionnez la sangle A au-dessous du patient.
  • Page 107 Soulèvement du patient Pliez les genoux du patient et soulevez-lui la tête du sol Abaissez la flèche de manière à ce que le fléau se trouve en la plaçant sur un oreiller B. directement au-dessus de la poitrine du patient. 4.
  • Page 108: Transport Et Stockage

    6. Appliquez la procédure décrite à la section 4.3.1 Dépliage position verticale. du mât, page 95 en commençant par la fin et tirez le cran d'arrêt F vers le haut avant de replier le mât. 7.4 Extension de mât pour positionnement vertical (Birdie EVO uniquement) 1650023-B...
  • Page 109: Maintenance

    élément du lève-personne, vous ne devez Méthode : essuyez à l'aide un chiffon humide ou d'une pas l'utiliser. Contactez votre fournisseur brosse souple. Invacare immédiatement et veillez à ce que le lève-personne ne soit pas utilisé jusqu'à sa Température maximale : 40 °C réparation.
  • Page 110: Après L'utilisation

    Invacare® Birdie® EVO Préservez l'environnement en faisant recycler les différents 9 Après l’utilisation matériaux et composants de ce produit séparément dans une déchetterie lorsqu'il est arrivé en fin de vie. 9.1 Mise au rebut La mise au rebut et le recyclage des produits usagés et de l'emballage doivent respecter la législation et les règlements...
  • Page 111: Dépannage

    Le boîtier de contrôle émet un bip La charge maximale a été dépassée. Réduisez la charge (le lève-personne sonore en cours de levage et le moteur devrait refonctionner normalement). s'arrête. Si les problèmes persistent après application des solutions suggérées, veuillez contacter votre fournisseur Invacare. 1650023-B...
  • Page 112: Caractéristiques Techniques

    Invacare® Birdie® EVO 11 Caractéristiques Techniques 11.1 Charge maximale d'utilisation Birdie® EVO Birdie® EVO Birdie® EVO COMPACT PLUS 180 kg 150 kg 180 kg Charge max. d'utilisation (patient + fléau + sangle) 11.2 Dimensions et poids * Vers l'avant Dimensions [mm] Birdie®...
  • Page 113: Système Électrique

    Caractéristiques Techniques Dimensions [mm] Birdie® EVO Birdie® EVO Birdie® EVO COMPACT PLUS Largeur interne min. (i) Largeur interne à la portée maximale (k) Diamètre de braquage 1400 1400 1070 1070 1400 Hauteur jusqu'à la partie supérieure des pieds (m) Hauteur libre min. (p) Distance minimum du mur au PSC* à...
  • Page 114: Conditions Ambiantes

    Invacare® Birdie® EVO Birdie™ EVO Birdie™ EVO Birdie™ EVO COMPACT PLUS 40 élévations complètes (avec une batterie chargée Capacité de travail à 100 % - 50 %) Intermittent (fonctionnement périodique des moteurs) 10 %, 2 min/18 min max. Caractéristiques de la batterie...
  • Page 115: Compatibilité Électromagnétique (Cem)

    Compatibilité électromagnétique (CEM) 12 Compatibilité électromagnétique (CEM) 12.1 Informations relatives aux interférences électromagnétiques L'équipement médical électrique doit être installé et utilisé conformément aux informations relatives aux interférences magnétiques présentes dans ce manuel. Ce produit a été testé et est certifié conforme aux limites CEM spécifiées dans la norme CEI/EN 60601-1-2 pour les équipements de classe B.
  • Page 116 Invacare® Birdie® EVO Test d’immunité Directives relatives à l'environnement électromagnétique Test/Niveau de conformité ± 1 kV de ligne à ligne Ondes de choc La qualité du réseau électrique doit être la même que celle du réseau ± 2 kV de la ligne à la électrique d’un hôpital ou d’un établissement commercial.
  • Page 117 7.2 Smontaggio dell'albero dalla base ....137 Sommario 7.3 Ripiegamento dell'albero ......137 7.4 Prolunga dell'albero per il posizionamento in verticale .
  • Page 118: Generale

    I modelli e le configurazioni disponibili nel proprio paese derivanti da: sono riportati nei listini prezzi specifici per paese. • Non conformità con il manuale d'uso Invacare si riserva il diritto di modificare le specifiche del • Utilizzo non corretto prodotto senza ulteriore preavviso. •...
  • Page 119: Sicurezza

    – Se il sollevatore viene utilizzato in un ambiente fossero di difficile comprensione, contattare un umido, assicurarsi che il sollevatore sia asciutto professionista sanitario, il fornitore Invacare e pulito da qualsiasi traccia di umidità dopo o un tecnico qualificato prima di iniziare a l'uso.
  • Page 120: Punti Di Pizzicamento

    – Utilizzare esclusivamente cavi, accessori e fare riferimento al sito web o al catalogo pezzi di ricambio originali, non aumentare locale di Invacare per gli accessori disponibili o le emissioni elettromagnetiche né ridurre contattare il proprio fornitore Invacare. l'immunità elettromagnetica di questo prodotto.
  • Page 121: Etichette E Simboli Sul Prodotto

    Decadenza della garanzia in caso di modelli) rimozione o rottura Limite di temperatura 2.4.2 Etichetta del prodotto Invacare Portugal, Lda Rua Estrada V elha 949 ISO 10535 4465- 7 84 Leça do Balio, Port ugal Limite di umidità XXXXXX XXXXX_XX...
  • Page 122: Panoramica Del Prodotto

    Tutti i cambiamenti di posizione sono possibili senza In considerazione delle differenze regionali, fare collaborazione da parte del paziente. riferimento al sito web o al catalogo locale di Invacare Non si conoscono controindicazioni per questo prodotto. per dettagli sugli accessori disponibili o contattare il proprio fornitore Invacare.
  • Page 123: Manuale D'uso

    Un montaggio non corretto può causare lesioni applicazione, manutenzione e lavaggio. o danni. – Utilizzare solo pezzi di Invacare per il montaggio di questo sollevatore. 4.3 Montaggio dell'albero – Dopo ogni montaggio, controllare che tutti i raccordi siano ben serrati e che tutte le parti funzionino correttamente.
  • Page 124: Montaggio Dell'albero Sulla Base

    Invacare® Birdie® EVO 4.3.2 Montaggio dell'albero sulla base 1. Bloccare entrambe le ruote posteriori orientabili B. Rimuovere il perno di bloccaggio A. (solo albero fisso) 2. Sollevare il gruppo dell'albero C in posizione verticale poggiando un piede sulla gamba D e tirando verso l'alto la barra di spinta E fino a far scattare il fermo di sicurezza F.
  • Page 125: Montaggio Dell'attuatore Sul Braccio

    – Per la manutenzione, rivolgersi al proprio fornitore Invacare. Allineare i fori, reinserire il perno a sgancio rapido A e fissarlo con il fermo rivolto in avanti. Dopo il montaggio iniziale del sollevatore, la spia di manutenzione è...
  • Page 126: Uso

    La pulsantiera viene utilizzata per aprire o chiudere le gambe il paziente e gli assistenti. della base. – Invacare raccomanda che le ruote posteriori orientabili siano sbloccate durante le procedure 1. Per chiudere le gambe, di sollevamento per consentire al sollevatore...
  • Page 127: Esecuzione Di Un Arresto Di Emergenza

    5.7 Attivazione di un rilascio di ATTENZIONE! emergenza sulla centralina Pericolo di lesioni – Utilizzare esclusivamente bilancini realizzati per questo sollevatore. 5.7.1 Centralina CBJ Home – Assicurarsi che il bilancino sia adatto per il paziente e per l'effettiva operazione di Se la pulsantiera non funziona, il braccio può...
  • Page 128: Ricarica Della Batteria

    Invacare® Birdie® EVO Si consiglia di caricare la batteria quotidianamente per Si raccomanda di utilizzare il rilascio di emergenza garantire l'utilizzo ottimale del sollevatore e per prolungare primario. Il rilascio di emergenza secondario la vita della batteria. Inoltre, si raccomanda di caricare la (manuale) è...
  • Page 129: Caricabatteria Opzionale

    1. Collegare il cavo di alimentazione A a una presa di Descrizione Tipo di Stato di corrente. indicatore carica della batteria della La carica della batteria sarà completata batteria in circa 4 ore. Quando le batterie sono completamente cariche, il caricabatteria si arresta Parzial- La batteria deve essere automaticamente.
  • Page 130 Invacare® Birdie® EVO 1. Collocare la batteria Quando la batteria viene collocata sul caricabatteria, B sulla centralina o il LED di carica si illumina. Quando la ricarica è sul caricabatteria come completa, il LED di carica si spegne. mostrato in figura e...
  • Page 131: Sollevamento Del Paziente

    ATTENZIONE! di seguito possono essere eseguite da un (1) Pericolo di lesioni o danni assistente: Invacare consiglia tuttavia, se possibile, Danni a parti del sollevatore (pulsantiera, ruote l'utilizzo di due (2) assistenti per l'esecuzione orientabili, ecc.) provocate da un urto contro il delle procedure.
  • Page 132: Attacco Dell'imbracatura Al Sollevatore

    Collegare le cinghie di Invacare sono appositamente progettati per colore corrispondente su ciascun lato dell'imbracatura per l'uso in combinazione con i sollevatori Invacare. ottenere un sollevamento uniforme del paziente. – Dopo ogni lavaggio (nel rispetto delle istruzioni...
  • Page 133: Trasferimento Del Paziente Da Un Letto

    Sollevamento del paziente Bilancino a 4 punti Prima di spostare il paziente, controllare nuovamente che l'imbracatura sia fissata correttamente ai ganci del bilancino. Consultare la sezione 6.2.1 Attacco dell'imbracatura al sollevatore, pagina 132 . Se gli attacchi non sono posizionati correttamente, abbassare nuovamente il paziente sull'oggetto fisso e correggere 1.
  • Page 134: Trasferimento Del Paziente Su Un Letto

    6.6 Trasferimento di un paziente da e verso una sedia WC Il sollevatore Invacare NON è inteso come un dispositivo di trasporto. Se le strutture del bagno NON sono vicine al letto o se il sollevatore non può...
  • Page 135: Sollevamento Del Paziente Dal Pavimento

    Se non è necessario l'intervento del medico, procedere al trasferimento. Abbassare il paziente sulla sedia WC lasciando l'imbracatura fissata ai ganci del bilancino. Invacare raccomanda che l'imbracatura rimanga collegata ai ganci del bilancino mentre il paziente sta utilizzando la sedia WC o la sedia WC standard.
  • Page 136 Invacare® Birdie® EVO Piegare le ginocchia del paziente e sollevarne la testa dal Abbassare il braccio in modo che il bilancino si trovi pavimento sostenendola con un cuscino B. direttamente sopra il torace del paziente. 4. Sbloccare le ruote posteriori orientabili. Consultare la sezione 5 Uso, pagina 126 5.
  • Page 137: Trasporto E Immagazzinamento

    Trasporto e immagazzinamento 7.4 Prolunga dell'albero per il 7 Trasporto e immagazzinamento posizionamento in verticale (Solo Birdie EVO) 7.1 Informazioni generali Se il sollevatore è dotato di un meccanismo di apertura Durante il trasporto, o quando il sollevatore non deve...
  • Page 138: Manutenzione

    Non utilizzare La manutenzione deve essere eseguita almeno ogni 12 mesi salvo quanto previsto dalle norme locali. il prodotto e contattare il proprio fornitore Invacare per assistenza. – Se la spia di manutenzione non lampeggia, il sollevatore è...
  • Page 139: Dopo L'utilizzo

    Dopo l'utilizzo Rispettare l'ambiente e riciclare separatamente i differenti 9 Dopo l'utilizzo materiali e componenti del presente prodotto presso un centro di riciclaggio locale al termine del suo utilizzo. 9.1 Smaltimento Lo smaltimento e il riciclaggio dei prodotti usati e degli imballaggi devono essere eseguiti nel rispetto delle leggi ATTENZIONE! e delle normative in materia di gestione dei rifiuti vigenti...
  • Page 140: Guida Alla Soluzione Dei Problemi

    La centralina emette un segnale acustico Ridurre il carico (il sollevatore tornerà a È stato superato il carico massimo durante il sollevamento e il motore si funzionare normalmente). ammissibile arresta. Se quanto indicato in precedenza non risolve i problemi, contattare il proprio fornitore Invacare. 1650023-B...
  • Page 141: Dati Tecnici

    Dati Tecnici 11 Dati Tecnici 11.1 Carico massimo per un utilizzo in sicurezza Birdie® EVO Birdie® EVO Birdie® EVO COMPACT PLUS Carico massimo per un utilizzo in sicurezza (paziente + bilancino + 180 kg 150 kg 180 kg imbracatura) 11.2 Dimensioni e pesi * Direzione di marcia Dimensioni [mm] Birdie®...
  • Page 142: Impianto Elettrico

    Invacare® Birdie® EVO Dimensioni [mm] Birdie® EVO Birdie® EVO Birdie® EVO COMPACT PLUS Larghezza interna minima (i) Larghezza interna in corrispondenza dell'estensione massima (k) Diametro di sterzata 1400 1400 1070 1070 1400 Altezza del bordo superiore delle gambe (m) Altezza minima libera da terra (p)
  • Page 143: Condizioni Ambientali

    Dati Tecnici Birdie™ EVO Birdie™ EVO Birdie™ EVO COMPACT PLUS Intermittenza (funzionamento periodico del motore) 10%, max. 2 minuti/18 minuti Specifiche della batteria 2 da 12 V / 2,9 Ah Tipo di batteria Piombo-acido (esente da manutenzione, sigillata) Sì Opzionale Sì...
  • Page 144: Compatibilità Elettromagnetica (Emc)

    Invacare® Birdie® EVO 12 Compatibilità elettromagnetica (EMC) 12.1 Informazioni generali sulla compatibilità elettromagnetica (EMC) Le apparecchiature elettromedicali devono essere installate e utilizzate conformemente alle informazioni sulla compatibilità elettromagnetica contenute nel presente manuale. Questo prodotto è stato collaudato ed è risultato conforme ai limiti di compatibilità elettromagnetica specificati dalla norma IEC/EN 60601-1-2 per le apparecchiature di classe B.
  • Page 145 Compatibilità elettromagnetica (EMC) Test di immunità Ambiente elettromagnetico - guida Test / Livello di conformità Sbalzi di tensione ± 1 kV da linea a linea La qualità della connessione elettrica deve essere quella di un tipico ambiente commerciale od ospedaliero. IEC 61000-4-5 ±...
  • Page 146 Notes...
  • Page 147 8 Onderhoud ........167 Inhoudsopgave 8.1 Algemene informatie over onderhoud .
  • Page 148: Algemeen

    • Normale slijtage zijn te vinden op de prijslijst van het desbetreffende land. • Verkeerde montage of afstelling door de koper of een Invacare behoudt zicht het recht om productspecificaties te derde wijzigen zonder voorafgaand bericht. • Technische aanpassingen •...
  • Page 149: Veiligheid

    Invacare-leverancier – Als de patiëntenlift wordt gebruikt in een of een technisch medewerker voordat u dit vochtige omgeving, moet deze na gebruik product gaat gebruiken.
  • Page 150: Klempunten

    U kunt elektromagnetische interferentie op de – Omdat er verschillen zijn per regio, kunt u volgende manieren voorkomen of verminderen: het beste de Invacare-website of -catalogus – Gebruik alleen originele accessoires voor uw regio raadplegen voor de beschikbare en reserve-onderdelen. Zo neemt de accessoires.
  • Page 151: Typeplaatjes En Symbolen Op Het Product

    Als dit wordt verwijderd of verbroken, Waarschuwingslabel; niet op alle modellen aanwezig vervalt de garantie Minimale/maximale temperatuur 2.4.2 Productlabel Invacare Portugal, Lda Rua Estrada V elha 949 ISO 10535 4465- 7 84 Leça do Balio, Port ugal Minimale/maximale luchtvochtigheid XXXXXX XXXXX_XX...
  • Page 152: Productoverzicht

    Alle positiewijzigingen kunnen worden uitgevoerd zonder hulp van de patiënt. Omdat er verschillen zijn per regio, kunt u het beste de Invacare-website of -catalogus voor uw regio Voor dit product zijn geen contra-indicaties bekend. raadplegen voor informatie over de beschikbare accessoires.
  • Page 153: Gebruiksaanwijzing

    Gevaar voor lichamelijk letsel Een onjuiste montage kan tot letsel of schade Draagband (1 stuk)* leiden. – Gebruik alleen onderdelen van Invacare voor de * Afhankelijk van model en/of uitvoering montage van deze patiëntenlift. – Controleer na elke montage of alle bevestigingen...
  • Page 154: De Mast Op Het Onderstel Monteren

    Invacare® Birdie® EVO 4.3.2 De mast op het onderstel monteren 1. Vergrendel beide achterste zwenkwielen B. Verwijder de vergrendelingspin A. (alleen voor de vaste mast) 2. Zet de mastconstructie C rechtop door met één voet op de poot D te gaan staan en de duwstang E omhoog te trekken totdat de veiligheidsvergrendeling F op zijn plaats vastklikt.
  • Page 155: De Actuator Op De Hefboom Installeren

    – Neem voor onderhoud contact op met Invacare. Nadat de lift de eerste keer in elkaar is gezet, knippert het servicelampje geel. Het servicelampje moet worden gereset Lijn de gaten met elkaar uit en plaats de voordat de lift wordt gebruikt.
  • Page 156: Gebruik

    1. Klap de poten in door de – Invacare raadt aan de vergrendeling van de knop voor het inklappen achterste zwenkwielen niet in te schakelen van de poten A ingedrukt tijdens het tillen en verplaatsen, zodat de te houden.
  • Page 157: Een Noodstop Uitvoeren

    Gebruik 5.7 Een noodstop activeren op de WAARSCHUWING! bedieningseenheid Kans op lichamelijk letsel – Gebruik alleen tiljukken die zijn gemaakt voor deze lift. 5.7.1 CBJ Home-bedieningseenheid – Controleer of het tiljuk geschikt is voor de patiënt en voor de vereiste wijze van tillen of Als de handbediening niet werkt, kan de hefboom verplaatsen.
  • Page 158: De Accu Opladen

    Invacare® Birdie® EVO Birdie® EVO en Birdie® EVO PLUS nog wel mogelijk om de patiënt te laten zakken. Het wordt aangeraden de accu op te laden zodra het geluidssignaal Het handmatige noodstopsysteem bevindt zich onder aan de klinkt. zuiger van de actuator.
  • Page 159: Optionele Acculader

    Gebruik 5.9.3 Optionele acculader CBJ Care Type Accustatus Omschrijving (alleen voor bedieningseenheden met afneembare accu) acculampje De procedure voor het verwijderen en installeren van Volledig Er is voldoende spanning de accu is hetzelfde voor de bedieningseenheid en opgeladen - opladen is niet nodig de lader.
  • Page 160: De Patiënt Optillen

    Beknellingsgevaar de lift te duwen of te trekken. Het risico bestaat dat u bekneld raakt tussen het – Gebruik de lift niet op een helling. Invacare tiljuk en de draagband. adviseert het product alleen op een vlakke – Wees voorzichtig bij het tillen.
  • Page 161: De Draagband Aan De Lift Bevestigen

    De lussen aan de draagband kunnen banden met – Gebruik een door Invacare goedgekeurde verschillende kleuren bevatten die verschillende lengtes draagband die wordt aanbevolen door de aangeven. Hiervan kan gebruik worden gemaakt om de arts, verpleegkundige of arts-assistent van de patiënt in verschillende posities te plaatsen.
  • Page 162: De Patiënt Vanaf Een Bed Verplaatsen

    Invacare® Birdie® EVO 4-punts tiljuk Controleer voor het verplaatsen van de patiënt nogmaals of de draagband goed is bevestigd aan de haken van het tiljuk. Raadpleeg 6.2.1 De draagband aan de lift bevestigen, pagina 161 . Als u merkt dat bevestigingspunten niet goed vastzitten, laat u de patiënt...
  • Page 163: Een Patiënt Naar Een Bed Verplaatsen

    6.6 Een patiënt van en naar een toiletstoel verplaatsen De Invacare-patiëntenlift is GEEN vervoermiddel. Wanneer de badkamer zich NIET in de buurt van het bed bevindt of wanneer de patiënt niet gemakkelijk naar de toiletstoel kan worden verplaatst, MOET de patiënt in een rolstoel worden verplaatst en naar...
  • Page 164: Een Patiënt Van De Vloer Omhoog Tillen

    Laat de patiënt zakken op de toiletstoel waarbij de draagband aan de haken van het tiljuk bevestigd dienen te blijven. Invacare raadt aan de draagband aan de haken van het tiljuk te laten terwijl de patiënt een toiletrolstoel of een standaard toiletstoel gebruikt.
  • Page 165 De patiënt optillen Laat de patiënt zijn/haar knieën buigen en zijn/haar Breng de hefboom omlaag zodat het tiljuk zich precies hoofd van de vloer tillen terwijl u het hoofd van de boven de borstkas van de patiënt bevindt. patiënt ondersteunt met een kussen B. 4.
  • Page 166: Transport En Opslag

    Invacare® Birdie® EVO 7.4 Mastverlengstuk voor rechtop zetten 7 Transport en opslag van de lift (Alleen Birdie EVO) 7.1 Algemene informatie Er is een magnetisch mastverlengstuk meegeleverd waarmee De noodstopknop moet worden ingedrukt tijdens transport de lift rechtop kan worden gezet. Hiervoor moet er een en wanneer de patiëntenlift enige tijd niet wordt gebruikt.
  • Page 167: Onderhoud

    Gebruik de lift niet en neem een bevoegd technicus. contact op met uw Invacare-leverancier voor – Neem voor onderhoud contact op met Invacare. onderhoud. – Als het servicelampje niet knippert, is de lift klaar Er moet minimaal eens per 12 maanden onderhoud worden voor gebruik.
  • Page 168: Na Gebruik

    Invacare® Birdie® EVO Wij hopen dat u voldoende milieubewust bent om de 9 Na gebruik verschillende materialen en onderdelen van dit product aan het einde van hun gebruiksduur afzonderlijk te recycleren via een afvalverwerkingsstation. 9.1 Afvoeren Het afvoeren en het recycleren van gebruikte producten en...
  • Page 169: Problemen Oplossen

    Tijdens het tillen klinkt er een pieptoon Max. belasting is overschreden. Verminder de belasting (zodat de lift vanuit de bedieningseenheid en de weer normaal functioneert). motor stopt. Neem contact op met uw Invacare-leverancier als de problemen hiermee niet kunnen worden opgelost. 1650023-B...
  • Page 170: Technische Specificaties

    Invacare® Birdie® EVO 11 Technische Specificaties 11.1 Maximale veilige belasting Birdie® EVO Birdie® EVO Birdie® EVO COMPACT PLUS 180 kg 150 kg 180 kg Maximale veilige belasting (patiënt + tiljuk + draagband) 11.2 Afmetingen en gewichten * Voorwaartse richting Afmetingen (mm) Birdie®...
  • Page 171: Elektrisch Systeem

    Technische Specificaties Afmetingen (mm) Birdie® EVO Birdie® EVO Birdie® EVO COMPACT PLUS Min. binnenbreedte (i) Binnenbreedte bij maximale reikwijdte (k) Draaidiameter 1400 1400 1070 1070 1400 Hoogte tot bovenrand van poten (m) Min. vrije hoogte (p) Minimale afstand van muur tot CSP* bij maximaal bereik (poten uitgeklapt) (q) Minimale afstand van muur tot CSP* bij maximale hoogte (poten uitgeklapt) (r)
  • Page 172: Voorwaarden Voor De Gebruiksomgeving

    Invacare® Birdie® EVO Birdie™ EVO Birdie™ EVO Birdie™ EVO COMPACT PLUS 40 keer volledig tillen (met de accu tussen 50% - Werkvermogen 100% van het volledige vermogen) Met onderbrekingen (periodieke motorfunctie) 10%, max. 2 min/18 min Specificaties accu 2 x 12 V/2,9 Ah...
  • Page 173: Elektromagnetische Compatibiliteit (Emc)

    Elektromagnetische compatibiliteit (EMC) 12 Elektromagnetische compatibiliteit (EMC) 12.1 Algemene informatie over EMC Elektrische medische apparatuur moet worden geïnstalleerd en gebruikt in overeenstemming met de EMC-informatie in deze handleiding. Tests hebben uitgewezen dat dit product voldoet aan de EMC-richtlijnen volgens IEC/EN 60601-1-2 voor apparatuur van klasse B. Draagbare en mobiele RF-communicatieapparatuur kan de werking van dit product beïnvloeden.
  • Page 174 Invacare® Birdie® EVO Immuniteitstest Elektromagnetische omgeving– richtlijn Testniveau/ mate van overeenkomst < 0% U gedurende 0,5 De kwaliteit van de netstroom moet overeenkomen met die cyclus in stappen van 45° Spanningsdips, van een commerciële omgeving of ziekenhuisomgeving. Als de korte...
  • Page 175 8 Manutenção........196 Índice 8.1 Informações gerais sobre manutenção .
  • Page 176: Limitação De Responsabilidade

    Os modelos e configurações disponíveis no seu país podem utilização ser encontrados em catálogos de preços específicos do país. • Utilização incorreta A Invacare reserva-se o direito de alterar as especificações • Desgaste natural devido ao uso do produto sem aviso prévio. •...
  • Page 177: Informações Gerais De Segurança

    Substitua as peças corroídas um técnico qualificado ou um fornecedor ou danificadas. Invacare antes de tentar utilizar este produto. – Consulte a secção 11.4 Condições ambientais, página 201 . ADVERTÊNCIA! A carga útil máxima não pode ser ultrapassada.
  • Page 178 (RF) portáteis a uma distância – Devido a diferenças regionais, consulte o inferior a 30 cm de qualquer parte deste catálogo ou o site local da Invacare para obter produto (incluindo cabos). detalhes sobre os acessórios disponíveis ou – Não utilize este produto perto de equipamento contacte o seu fornecedor Invacare.
  • Page 179: Rótulos E Símbolos No Produto

    A garantia será anulada se o remover ou todos os modelos partir Limite de temperatura 2.4.2 Rótulo do produto Invacare Portugal, Lda Rua Estrada V elha 949 ISO 10535 4465- 7 84 Leça do Balio, Port ugal Limite de humidade...
  • Page 180: Descrição Geral Do Produto

    Unidade de controlo CBJ Care, CBJ1 ou CBJ2 com bateria removível 3.3 Acessórios Devido a diferenças regionais, consulte o catálogo ou o site local da Invacare para obter detalhes sobre os acessórios disponíveis ou contacte o seu fornecedor Invacare. 1650023-B...
  • Page 181 Descrição geral do produto • Barra de suporte de 4 pontos (estilo cabide), com 450 Os modelos de cesta com fixações de presilha, adequados ou 550 mm de largura para barras de suporte (estilo cabide) com ganchos: • Barra de suporte de 2 pontos (estilo cabide), com 350, •...
  • Page 182: Pt Elevador De Transferência Móvel

    A montagem incorreta deste produto pode causar Cesta (1 unidade)* lesões ou danos. – Utilize apenas peças da Invacare na montagem deste elevador de transferência. * Depende do modelo e/ou da configuração – Após cada montagem, verifique se os encaixes Se o elevador for entregue com uma cesta, consulte estão devidamente apertados e se todas as...
  • Page 183 Configuração 4.3.2 Montar o mastro na base 1. Bloqueie ambos os rodízios traseiros B. Retire o pino de bloqueio A. (apenas mastro fixo) 2. Levante a unidade do mastro C para uma posição vertical pousando um pé na perna D e puxando a barra de empurrar E para cima até...
  • Page 184 Se a luz de assistência estiver a piscar a amarelo durante a utilização diária ou após uma nova montagem, o elevador necessita de assistência. – Contacte o fornecedor Invacare para solicitar manutenção. Alinhe os orifícios, reinstale o pino de extração rápida A Depois da montagem inicial do elevador, a luz de assistência...
  • Page 185 O elevador pode tombar e colocar o paciente e os assistentes em perigo. O comando é utilizado para abrir ou fechar as pernas da – A Invacare recomenda que os rodízios traseiros base. permaneçam desbloqueadas durante os procedimentos de elevação, para permitir que 1.
  • Page 186 Invacare® Birdie® EVO 5.5 Substituir a barra de suporte 5.7 Ativar uma emergência na unidade de controlo (barra de suporte apenas com SMARTLOCK™) 5.7.1 Unidade de controlo CBJ-Home ADVERTÊNCIA! Risco de lesão Se o comando manual falhar, o braço pode ser baixado –...
  • Page 187: Carregar A Bateria

    Utilização Birdie® EVO e Birdie® EVO PLUS é possível baixar o paciente. Recomenda-se que as baterias sejam carregadas assim que o sinal sonoro seja ouvido. O sistema de emergência manual está localizado na parte inferior do pistão do atuador. 1. Puxe a pega de emergência vermelha para cima A e, simultaneamente,...
  • Page 188 Invacare® Birdie® EVO 5.9.3 Carregador da bateria opcional CBJ Care Tipo de Estado Descrição (apenas para unidades de controlo com bateria removível) indicador da bateria bateria O procedimento de remoção ou instalação da bateria é o mesmo para a unidade de controlo e o Carga A bateria está...
  • Page 189 (1) assistência. No entanto, a Invacare – Evite utilizar o elevador num declive. A Invacare recomenda que, sempre que possível, os recomenda que o produto seja apenas utilizado procedimentos sejam realizados por dois (2) numa superfície plana.
  • Page 190 A utilização de cestas incorretas ou danificadas pode fazer com que o paciente caia ou provocar lesões nos assistentes. – Utilize uma cesta aprovada pela Invacare que seja recomendada pelo médico responsável, enfermeiro ou médico assistente da pessoa a elevar, para o seu conforto e segurança.
  • Page 191 Elevar o paciente Desça a cama para a posição mais baixa. Utilizando as pegas da cesta, vire o paciente de modo a que este fique de frente para o cuidador que está a manobrar o elevador de transferência. Eleve o paciente a uma altura suficiente para ficar Baixe o paciente de modo a que os respetivos pés completamente fora do objeto estacionário, com todo o fiquem pousados na base do elevador, um de cada lado...
  • Page 192 Desprenda a cesta da barra de suporte. 8. Desbloqueie os rodízios traseiros. O elevador de transferência da Invacare NÃO se destina ser utilizado como dispositivo de transporte. Se as instalações sanitárias NÃO estiverem junto à cama ou se o elevador de transferência não puder ser manobrado na direção da sanita, o paciente...
  • Page 193 Baixe o paciente até o colocar na sanita, deixando a consulte o manual de utilização da cesta. cesta presa aos ganchos da barra de suporte. A Invacare recomenda que a cesta permaneça ligada aos ganchos da barra de suporte enquanto o paciente estiver a utilizar a cadeira sanitária ou uma sanita standard.
  • Page 194 Invacare® Birdie® EVO Baixe o braço de modo a que a barra de suporte fique Fixe a cesta. Consulte a secção 6.2.1 Fixar a cesta ao diretamente por cima do peito do paciente. elevador, página 190 . 9. Suba o braço para levantar o paciente do chão.
  • Page 195: Transporte E Armazenamento

    6. Execute o procedimento descrito na secção 4.3.1 Desdobrar o mastro, página 182 pela ordem inversa e puxe e segure o gancho de segurança F para cima antes de dobrar o mastro. 7.4 Extensão do mastro para posicionamento vertical (apenas o modelo Birdie EVO) 1650023-B...
  • Page 196: Informações Gerais Sobre Manutenção

    – Se a luz de assistência estiver a piscar a amarelo manutenção. o elevador necessita de assistência. Não utilize o elevador e contacte o seu fornecedor Invacare para obter assistência. É necessário realizar as operações de manutenção pelo – Se a luz de assistência não estiver a piscar, o elevador menos a cada 12 meses, salvo indicação em contrário dos...
  • Page 197: Após A Utilização

    Após a utilização Seja amigo do ambiente e recicle os diferentes materiais 9 Após a utilização e componentes deste produto em separado através das instalações de reciclagem no fim da respetiva vida útil. 9.1 Eliminação A eliminação e a reciclagem de produtos utilizados e da embalagem devem cumprir as leis e os regulamentos ADVERTÊNCIA! relativos à...
  • Page 198: Resolução De Problemas

    A unidade de controlo emite um bip A carga máx. foi ultrapassada. Reduza a carga (e o elevador irá durante a elevação e o motor para. funcionar normalmente). Contacte o seu fornecedor Invacare, se as instruções acima não resolverem os seus problemas. 1650023-B...
  • Page 199: Características Técnicas

    Características Técnicas 11 Características Técnicas 11.1 Carga útil máx. Birdie® EVO Birdie® EVO Birdie® EVO COMPACT PLUS Carga útil máx. (paciente + barra de suporte + cesta) 180 kg 150 kg 180 kg 11.2 Dimensões e pesos * Direção em frente Dimensões [mm] Birdie®...
  • Page 200: Sistema Elétrico

    Invacare® Birdie® EVO Dimensões [mm] Birdie® EVO Birdie® EVO Birdie® EVO COMPACT PLUS Largura interna com o alcance máximo (k) Diâmetro de rotação 1400 1400 1070 1070 1400 Altura até à extremidade superior das pernas (m) Altura livre mín. (p) Distância mínima da parede ao CSP* no alcance máximo...
  • Page 201: Condições Ambientais

    Características Técnicas Birdie™ EVO Birdie™ EVO Birdie™ EVO COMPACT PLUS Intermitente (utilização periódica dos motores) 10%, máx. 2 min./18 min. Especificações da bateria 2 x 12 V/2,9 Ah Tipo de bateria Chumbo-ácido (isenta de assistência, selada) Opcional Abaixamento de emergência manual (na parte inferior (na parte superior (na parte inferior...
  • Page 202: Informações Gerais Sobre Compatibilidade Eletromagnética (Emc)

    Invacare® Birdie® EVO 12 Compatibilidade eletromagnética (EMC) 12.1 Informações gerais sobre compatibilidade eletromagnética (EMC) O equipamento elétrico médico deve ser instalado e utilizado de acordo com as informações de EMC incluídas neste manual. Este produto foi testado e considerado em conformidade com os limites de EMC especificados pela norma IEC/EN 60601-1-2 para o equipamento de Classe B.
  • Page 203 Compatibilidade eletromagnética (EMC) Teste de imunidade Nível de Ambiente eletromagnético – diretrizes teste/conformidade < 0% U para 0,5 ciclo a Quedas de tensão, Mains power quality should be that of a typical commercial or hospital incrementos de 45° interrupções curtas environment.
  • Page 204 Italia: Nederland: Belgium & Luxemburg: Norge: Invacare AS Invacare Mecc San s.r.l., Invacare BV Invacare nv Grensesvingen 9, Postboks 6230, Via dei Pini 62, Galvanistraat 14-3 Autobaan 22 Etterstad I-36016 Thiene (VI) NL-6716 AE Ede...

Ce manuel est également adapté pour:

Birdie evo compactBirdie evo plus