Toro Recycler 20995 Mode D'emploi
Masquer les pouces
Voir aussi pour Recycler 20995:
- Manuel de l'opérateur (108 pages) ,
- Manuel de l'utilisateur (28 pages) ,
- Manuel de l'utilisateur (25 pages)
Table des Matières
Les langues disponibles
Les langues disponibles
Liens rapides
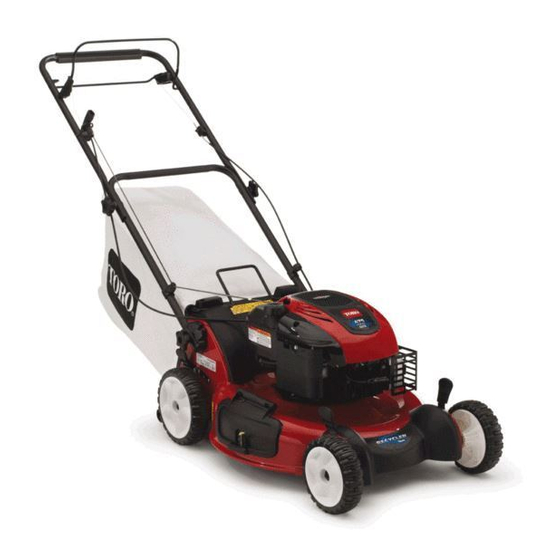
53cm Recycler
Model No. 20995—Serial No. 310000001 and Up
Model No. 20995—Serial No. 311000001 and Up
Model No. 20996—Serial No. 311000001 and Up
Model No. 20996—Serial No. 310000001 and Up
Introduction
This rotary-blade, walk-behind lawn mower is
intended to be used by residential homeowners.
It is designed primarily for cutting grass on
well-maintained lawns on residential properties. It
is not designed for cutting brush or for agricultural
uses.
Read this information carefully to learn how to operate
and maintain your product properly and to avoid injury
and product damage. You are responsible for operating
the product properly and safely.
You may contact Toro directly at www.Toro.com for
product and accessory information, help finding a
dealer, or to register your product.
Whenever you need service, genuine Toro parts, or
additional information, contact an Authorized Service
Dealer or Toro Customer Service and have the model
and serial numbers of your product ready. Figure 1
identifies the location of the model and serial numbers
on the product.
Figure 1
1. Model and serial number plate
Write the product model and serial numbers in the space
below:
© 2011—The Toro® Company
8111 Lyndale Avenue South
Bloomington, MN 55420
Lawn Mower
®
Model No.
Serial No.
This manual identifies potential hazards and has
safety messages identified by the safety alert symbol
(Figure 2), which signals a hazard that may cause serious
injury or death if you do not follow the recommended
precautions.
1. Safety alert symbol
This manual uses two words to highlight information.
Important calls attention to special mechanical
information and Note emphasizes general information
worthy of special attention.
This product complies with all relevant European
directives. For details, see the separate product specific
Declaration of Conformity (DOC) sheet.
For models with stated engine horsepower, the gross
horsepower of the engine was laboratory rated by the
engine manufacturer in accordance with SAE J1940.
As configured to meet safety, emission, and operating
requirements, the actual engine horsepower on this class
of lawn mower will be significantly lower.
Do not tamper with the engine controls or alter the
governor speed; doing so may create an unsafe condition
resulting in personal injury.
Safety
Improperly using or maintaining this mower can
result in injury. To reduce the potential for injury,
comply with these safety instructions.
Register at www.Toro.com.
Form No. 3363-932 Rev B
Operator's Manual
Figure 2
Original Instructions (EN)
Printed in the USA
All Rights Reserved
Table des Matières

Manuels Connexes pour Toro Recycler 20995


Sommaire des Matières pour Toro Recycler 20995
- Page 49 Important, pour attirer Lorsque vous contactez un distributeur ou un réparateur l'attention sur des informations mécaniques spécifiques, Toro agréé pour l'entretien de votre machine, pour vous et Remarque, pour signaler des informations d'ordre procurer des pièces Toro d'origine ou pour obtenir des général méritant une attention particulière.
-
Page 50: Sécurité Générale De La Tondeuse
• Faites le plein avant de mettre le moteur en marche. suivantes. N'enlevez jamais le bouchon du réservoir de La société Toro a conçu et testé votre tondeuse pour carburant et n'ajoutez jamais de carburant lorsque le qu'elle fonctionne correctement et sans danger à... -
Page 51: Entretien Et Remisage
– après avoir heurté un obstacle, recherchez et réparez les dégâts éventuels de la tondeuse avant pièces de rechange et des accessoires Toro d'origine. N'utilisez pas de pièces et accessoires de la remettre en marche et de l'utiliser. -
Page 52: Niveau De Pression Acoustique
Niveau de pression acoustique Cette machine produit au niveau de l'oreille de l'utilisateur une pression acoustique de 89 dBA, qui comprend une valeur d'incertitude (K) de 1 dBA. La pression acoustique est déterminée en conformité avec les procédures énoncées dans la norme EN 836. Puissance acoustique Cette machine a un niveau de puissance acoustique garanti de 98 dBA, qui comprend une valeur d'incertitude... - Page 53 112-8760 1. Risque de projections – tenez les spectateurs à bonne distance de la machine. 117-5918 2. Risque de coupure/mutilation des mains ou des pieds – ne 3. Petite vitesse 1. Grande vitesse vous approchez pas des pièces mobiles. 2. Réglage de vitesse continu 114-2820 1.
-
Page 54: Mise En Service
Mise en service Important: Retirez et mettez au rebut la pellicule de plastique qui protège le moteur. Dépliage du guidon Aucune pièce requise Figure 5 Procédure 1. Dépliez le guidon comme illustré à la Figure 3 et Figure 4. Plein d'huile moteur Aucune pièce requise Procédure Important: Le carter moteur de la tondeuse est... -
Page 55: Installer L'obturateur De Mulching Ou Le Bac À Herbe
Remarque: Si vous remplissez excessivement le moteur, vidangez un peu d'huile comme expliqué à la section Vidange et remplacement de l'huile moteur. 3. Revissez la jauge fermement en place. Important: Changez l'huile moteur après les 5 premières heures de fonctionnement , puis une fois par an (voir Vidange et remplacement de l'huile moteur). -
Page 56: Vue D'ensemble Du Produit
Remarque: Si le levier ne se verrouille pas correctement, débranchez la bougie et éliminez les débris éventuellement accumulés dans le logement. Vue d'ensemble du produit Figure 12 Modèle 20996 1. Levier de hauteur de 5. Poignée du lanceur coupe (4) 2. -
Page 57: Utilisation
Utilisation Contrôle du niveau d'huile moteur Remplissage du réservoir de Périodicité des entretiens: À chaque utilisation ou une carburant fois par jour 1. Retirez la jauge, essuyez-la sur un chiffon et DANGER remettez-la dans le tube de remplissage (Figure 15). L'essence est extrêmement inflammable et explosive. -
Page 58: Réglage De La Hauteur De La Partie Supérieure Du Guidon
2. Placez la partie supérieure du guidon à la position PRUDENCE voulue (Figure 18). Si le moteur vient de tourner, le silencieux est très chaud et risque de vous brûler gravement. Ne vous approchez pas du silencieux encore chaud. Choisissez la hauteur de coupe voulue. Réglez les quatre roues à... -
Page 59: Utilisation De La Commande D'autotraction
Figure 23 Modèle 20996 uniquement 1. Barre de commande de la lame Remarque: Si le moteur ne démarre toujours pas, Figure 20 contactez un réparateur agréé. 3. Contrôlez le système de sécurité de la tondeuse ; reportez-vous à la section Contrôle du système de sécurité... -
Page 60: Arrêt Du Moteur
Figure 25 Figure 27 Modèle 20996 illustré Mulching À la livraison, votre tondeuse est prête pour le "mulching", c.-à-d. prête à broyer l’herbe et les feuilles coupées pour nourrir votre pelouse. Si le bac à herbe est monté sur la tondeuse, retirez-le (voir Figure 26 Retrait du bac à... -
Page 61: Ramassage De L'herbe Coupée
Ramassage de l'herbe coupée Remarque: Le guide inférieur libère le câble du lanceur quand vous tirez sur la poignée. Utilisez le bac à herbe pour recueillir les débris d'herbe 3. Insérez la poignée du bac à herbe dans les rainures et de feuilles déposés sur la pelouse. -
Page 62: Pose De L'éjecteur Latéral
Pose de l'éjecteur latéral 1. Déverrouillez le volet d'éjection latérale (Figure 35). Figure 35 Figure 33 2. Soulevez et ouvrez le volet d'éjection latérale (Figure 36). 3. Insérez l'obturateur de mulching (Figure 34). Figure 36 3. Montez l'éjecteur latéral et rabattez le volet sur l'éjecteur (Figure 37). -
Page 63: Conseils D'utilisation
• Remplacez la lame dès que nécessaire par une lame Toro d'origine. • Ralentissez la vitesse de déplacement si les feuilles ne sont pas hachées assez menues. -
Page 64: Programme D'entretien Recommandé
Entretien Remarque: Determine the left and right sides of the machine from the normal operating position. Programme d'entretien recommandé Périodicité d'entretien Procédure d'entretien Après les 5 premières • Vidangez et changez l'huile moteur. heures de fonctionnement • Contrôlez le niveau d'huile moteur. •... -
Page 65: Vidange Et Remplacement De L'huile Moteur
Figure 40 2. Remplacez le filtre à air (Figure 41). Figure 42 3. Inclinez la tondeuse sur le côté (filtre à air vers le haut) pour vidanger l'huile usagée par le goulot de remplissage (Figure 43). Figure 41 3. Remettez le couvercle en place. Vidange et remplacement de l'huile moteur Périodicité... -
Page 66: Lubrification Des Engrenages Des Roues
Une fois par an ou aussi souvent que nécessaire, pulvérisez les côtés droit et gauche de la partie supérieure du guidon avec un lubrifiant au silicone basse viscosité. 1. Pulvérisez l'extrémité en plastique extérieure de la poignée intérieure (Figure 46). Figure 46 Figure 44 Remarque: Pour diriger le jet avec précision,... -
Page 67: Réglage De L'autotraction
Figure 48 1. 25 à 38 mm 4. Écrou de support de câble 2. Barre d'autotraction 5. Support de câble 3. Gaine du câble G009696 Figure 49 2. Maintenez la barre de commande d'autotraction à 25 1. Support du câble à... -
Page 68: Remplacement De La Lame
Figure 51 1. Support du câble 2. Gaine du câble Remarque: La vitesse de déplacement de la machine diminue quand vous remontez la gaine et augmente quand vous l'abaissez. 5. Serrez fermement l'écrou. 6. Démarrez la tondeuse et contrôlez le réglage. Figure 52 Remarque: Si l'autotraction n'est pas réglée correctement, répétez cette procédure. -
Page 69: Pliage Du Guidon
Remarque: L'eau éclaboussera en direction de la 7. Remettez la bougie sans la serrer. lame et enlèvera les débris d'herbe agglomérés. 8. Serrez tous les écrous, boulons et vis. 9. Chargez la batterie pendant 24 heures, puis débranchez le chargeur et remisez la tondeuse dans un local non chauffé. -
Page 70: Remise En Service Après Remisage
4. Mettez le moteur en marche ; reportez-vous à la toutes les pièces mobiles et amenez votre tondeuse section Démarrage du moteur dans votre Manuel de chez un concessionnaire Toro agréé pour faire l'utilisateur. réparer correctement le système de sécurité. -
Page 71: Liste Des Distributeurs Internationaux
Spypros Stavrinides Limited Chypre 357 22 434131 Surge Systems India Limited Inde 91 1 292299901 T-Markt Logistics Ltd. Hongrie 36 26 525 500 Toro Australia Australie 61 3 9580 7355 Toro Europe BVBA Belgique 32 14 562 960 374-0269 Rev A... -
Page 72: La Garantie Toro
Conditions et produits couverts Comment faire intervenir la garantie ? La société The Toro® Company et sa filiale, la société Toro Warranty Si vous pensez que votre produit Toro présente un défaut de fabrication Company, en vertu de l'accord passé entre elles, s'engagent conjointement ou de matériau, procédez comme suit :...