Table des Matières
Publicité
Les langues disponibles
Les langues disponibles
Liens rapides
Anleitung RT_FF_1220_U_SPK1:_
Bedienungsanleitung
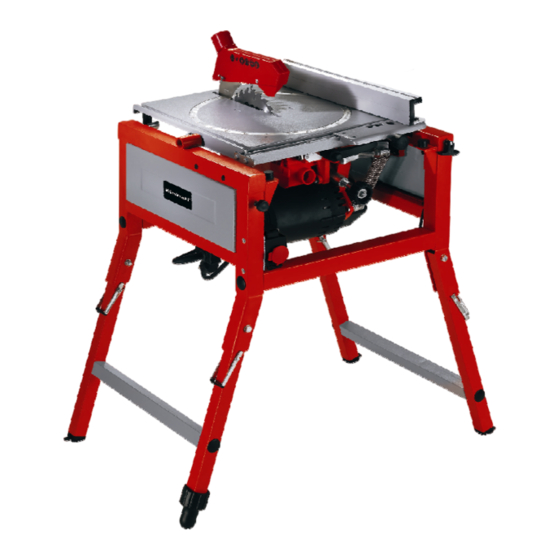
Tisch-, Kapp- und Gehrungssäge
Operating Instructions
Bench, Crosscut and Miter Saw
Mode d'emploi
de la scie de table, tronçonneuse et à onglet
Istruzioni per l'uso
Sega da banco, per troncature e tagli obliqui
Betjeningsvejledning
for bord,- kap- og geringssav
Használati utasítás
asztali, fejező és sarkaló fűrész
B
Upute za uporabu
f
stolne kružne pile, pile za prorezivanje i koso
j
Návod k obsluze
Stolní kotoučová, kapovací a pokosová pila
W
Návod na obsluhu
Stolná, kapovacia a pokosová píla
Art.-Nr.: 43.072.02
29.12.2008
16:19 Uhr
Seite 1
I.-Nr.: 01017
1220 U
RT-FF
Publicité
Table des Matières

Manuels Connexes pour EINHELL RT-FF 1220 U


Sommaire des Matières pour EINHELL RT-FF 1220 U
- Page 1 Anleitung RT_FF_1220_U_SPK1:_ 29.12.2008 16:19 Uhr Seite 1 Bedienungsanleitung Tisch-, Kapp- und Gehrungssäge Operating Instructions Bench, Crosscut and Miter Saw Mode d’emploi de la scie de table, tronçonneuse et à onglet Istruzioni per l’uso Sega da banco, per troncature e tagli obliqui Betjeningsvejledning for bord,- kap- og geringssav Használati utasítás...
- Page 2 Anleitung RT_FF_1220_U_SPK1:_ 29.12.2008 16:19 Uhr Seite 2 Vor Inbetriebnahme Bedienungsanleitung und Sicherheitshinweise lesen und beachten Read and follow the operating instructions and safety information before using for the first time. Avant la mise en service, lisez le mode d’emploi et les consignes de sécurité...
- Page 3 Anleitung RT_FF_1220_U_SPK1:_ 29.12.2008 16:19 Uhr Seite 3...
- Page 4 Anleitung RT_FF_1220_U_SPK1:_ 29.12.2008 16:19 Uhr Seite 4...
- Page 5 Anleitung RT_FF_1220_U_SPK1:_ 29.12.2008 16:20 Uhr Seite 5...
- Page 6 Anleitung RT_FF_1220_U_SPK1:_ 29.12.2008 16:20 Uhr Seite 6 90°...
- Page 7 Anleitung RT_FF_1220_U_SPK1:_ 29.12.2008 16:20 Uhr Seite 7...
- Page 8 Anleitung RT_FF_1220_U_SPK1:_ 29.12.2008 16:20 Uhr Seite 8...
- Page 9 Anleitung RT_FF_1220_U_SPK1:_ 29.12.2008 16:20 Uhr Seite 9...
- Page 10 Anleitung RT_FF_1220_U_SPK1:_ 29.12.2008 16:20 Uhr Seite 10 41 40 39...
- Page 11 Anleitung RT_FF_1220_U_SPK1:_ 29.12.2008 16:21 Uhr Seite 11 45° max. 5 mm max. 3-5 mm...
- Page 12 Anleitung RT_FF_1220_U_SPK1:_ 29.12.2008 16:21 Uhr Seite 12...
- Page 13 Anleitung RT_FF_1220_U_SPK1:_ 29.12.2008 16:21 Uhr Seite 13...
- Page 14 Anleitung RT_FF_1220_U_SPK1:_ 29.12.2008 16:21 Uhr Seite 14...
- Page 15 Anleitung RT_FF_1220_U_SPK1:_ 29.12.2008 16:21 Uhr Seite 15...
-
Page 16: Bestimmungsgemäße Verwendung
Anleitung RT_FF_1220_U_SPK1:_ 29.12.2008 16:21 Uhr Seite 16 von Brennholz geeignet. Die Maschine darf nur nach Achtung! ihrer Bestimmung verwendet werden. Beim Benutzen von Geräten müssen einige Sicherheitsvorkehrungen eingehalten werden, um Bitte beachten Sie dass unsere Geräte bestimmungs- Verletzungen und Schäden zu verhindern. Lesen Sie gemäß... -
Page 17: Technische Daten
Anleitung RT_FF_1220_U_SPK1:_ 29.12.2008 16:21 Uhr Seite 17 flussen können, beinhalten die Dauer der Einwir- 6. Vor Inbetriebnahme kungen, die Eigenart des Arbeitsraumes, andere Geräuschquellen usw., z.B. die Anzahl der Maschi- Ziehen Sie vor allen Einstell-, Umbau- und nen und anderen benachbarten Vorgängen. Die Montagearbeiten den Netzstecker ab! zuverlässigen Arbeitsplatzwerte können ebenso von Land zu Land variieren. -
Page 18: Kapp- Und Gehrungssäge
Anleitung RT_FF_1220_U_SPK1:_ 29.12.2008 16:21 Uhr Seite 18 7. Betrieb 5. Maschinenkopf (17) am Griff (Abb. 1/Pos. 16) nach unten drücken, dabei den Arretierstift (Abb. 16/Pos. 25) für Höhenverstellung herausziehen 7.1 Allgemeine Bedienelemente (Abb. 10-12) und um 90° nach rechts drehen. Achtung! Durch die Rückholfedern schlägt Ein-/ Ausschalter die Maschine automatisch nach oben, d.h. -
Page 19: Betrieb Als Kapp- Und Gehrungssäge
Anleitung RT_FF_1220_U_SPK1:_ 29.12.2008 16:21 Uhr Seite 19 Achtung! Durch die Rückholfedern schlägt die 3) lösen und mit dem Handgriff (Abb. 29/Pos. 16) Maschine automatisch nach oben, d.h. Griff den Maschinenkopfnach links neigen, bis der (Abb. 23/Pos. 16) nicht sofort loslassen, sondern Zeiger (Abb. - Page 20 Anleitung RT_FF_1220_U_SPK1:_ 29.12.2008 16:21 Uhr Seite 20 noch den Spalt im Tisch für das Sägeblatt ver- 12. Spanabsauganschluss des Sägeblattschutzes decken (siehe auch 7.2.1/9). (11) mit einer geeigneten Absauganlage verbin- 5. Die Haltemutter (Abb. 32/Pos. 26) für den den. Spaltkeil (Abb. 32/Pos. 12) lösen, Spaltkeil nach unten schwenken (Abb.
- Page 21 Anleitung RT_FF_1220_U_SPK1:_ 29.12.2008 16:21 Uhr Seite 21 C Schiebestock (Abb. 1/Pos. 9) (11). Der Schiebestock muss immer verwendet werden Werkstück immer bis zum Ende des Spaltkeils wenn bei Längsschnitten der Abstand zwischen (Abb. 47/Pos. 12) durchschieben. Anschlagschiene und Sägeblatt weniger als 120mm Der Schnittabfall bleibt auf dem Sägetisch liegen, beträgt.
- Page 22 Anleitung RT_FF_1220_U_SPK1:_ 29.12.2008 16:21 Uhr Seite 22 Gegebenenfalls Alu-Profil des Parallelanschlages Spänekasten entfernen. (siehe 7.3.6) (14B) verwenden. Sägeblatt (Abb. 58/Pos. 4) von unten von der Werkstück fest gegen den Queranschlag Sägewelle (Abb. 59/Pos. 56) abnehmen und drücken. nach unten herausnehmen. Hierzu Sägeblatt Säge einschalten (siehe auch 7.1).
-
Page 23: Austausch Der Netzanschlussleitung
Anleitung RT_FF_1220_U_SPK1:_ 29.12.2008 16:21 Uhr Seite 23 8.3.2 Antriebsriemen spannen bzw. wechseln 8.4.3 Rastpunkte für Drehtisch einstellen Vier Schrauben der Motorbefestigung mit Inbus- Säge in die Position Kapp- und Gehrungssäge schlüssel um ca. 1 Umdrehung lösen (Abb. 62). bringen (siehe auch 7.2.1), Maschinenkopf in der Der Riemen ist nun entspannt, gegebenenfalls untersten Position verriegeln (siehe auch neuen Riemen aufziehen. -
Page 24: Entsorgung Und Wiederverwertung
Anleitung RT_FF_1220_U_SPK1:_ 29.12.2008 16:21 Uhr Seite 24 Reinigen Sie das Gerät regelmäßig mit einem feuchten Tuch und etwas Schmierseife. Verwenden Sie keine Reinigungs- oder Lösungsmittel; diese könnten die Kunststoffteile des Gerätes angreifen. Achten Sie darauf, dass kein Wasser in das Geräteinnere gelangen kann. 10.2 Wartung Im Geräteinneren befinden sich keine weiteren zu wartenden Teile. -
Page 25: Safety Information
Anleitung RT_FF_1220_U_SPK1:_ 29.12.2008 16:21 Uhr Seite 25 Please note that our equipment has not been Important! designed for use in commercial, trade or industrial When using equipment, a few safety precautions applications. Our warranty will be voided if the must be observed to avoid injuries and damage. machine is used in commercial, trade or industrial Please read the complete operating manual with due businesses or for equivalent purposes. -
Page 26: Technical Data
Anleitung RT_FF_1220_U_SPK1:_ 29.12.2008 16:21 Uhr Seite 26 5. Technical data Before you connect the machine to the mains supply make sure that the data on the model plate are identical to the mains data. AC motor 230 V ~ 50 Hz Rating 1200 W 6.1 Assembling the machine (Fig. - Page 27 Anleitung RT_FF_1220_U_SPK1:_ 29.12.2008 16:21 Uhr Seite 27 7.2 Crosscut and miter saw 7.2.2 Safety equipment for the crosscut and miter saw 7.2.1 Conversion work for use as a crosscut and miter saw Saw blade guard (Fig. 1 / Pos. 15) 1.
- Page 28 Anleitung RT_FF_1220_U_SPK1:_ 29.12.2008 16:21 Uhr Seite 28 scale (Fig. 26 / Item 32). The saw has automatic 7.3 Bench circular saw locking points at angles of -45°, 0° and +45°. Tighten the locking lever again to secure the 7.3.1 Conversion work for use as a bench turntable.
- Page 29 Anleitung RT_FF_1220_U_SPK1:_ 29.12.2008 16:21 Uhr Seite 29 to its highest position for bench circular saw B Splitter (Fig. 1 / Item 12) mode. The splitter guard must be swung out at all times 11. Fit the saw blade guard (11) (Fig. 37 – 39). To do when the machine is being used as a bench circular this, remove the nut (Fig.
-
Page 30: General Maintenance Work
Anleitung RT_FF_1220_U_SPK1:_ 29.12.2008 16:21 Uhr Seite 30 Guide at the side with your left or right hand the saw blade (4) has reached maximum speed. (depending on the position of the parallel stop) Push the cross stop (Fig. 52 / Item 52) and the only as far as the front edge of the saw blade workpiece toward the blade (4) in order to make guard (11). - Page 31 Anleitung RT_FF_1220_U_SPK1:_ 29.12.2008 16:21 Uhr Seite 31 Fit the new saw blade. Note the running 8.4 Adjust the saw direction. The cutting angle of the teeth must point in running direction, i.e. forwards (see 8.4.1 Adjust the stop limit for the saw blade the arrow on the blade guard).
-
Page 32: Ordering Replacement Parts
Anleitung RT_FF_1220_U_SPK1:_ 29.12.2008 16:21 Uhr Seite 32 8.4.4 Adjust the scale 10.3 Ordering replacement parts Every scale on the crosscut and miter saw should be Please quote the following data when ordering checked and adjusted if necessary. replacement parts: Undo all the fastening screws for the scales. Type of machine Adjust the saw precisely to an angle dimension, Article number of the machine... -
Page 33: Description De L'appareil Et Étendue De La Livraison (Fig. 1 - 2)
Anleitung RT_FF_1220_U_SPK1:_ 29.12.2008 16:21 Uhr Seite 33 être employée conformément à son affectation. Attention ! Lors de l’utilisation d’appareils, il faut respecter Veillez au fait que nos appareils, conformément à leur certaines mesures de sécurité afin d’éviter des affectation, n’ont pas été construits, pour être utilisés blessures et dommages. -
Page 34: Caractéristiques Techniques
Anleitung RT_FF_1220_U_SPK1:_ 29.12.2008 16:21 Uhr Seite 34 d’immission sur le lieu de travail, sont entre autres la 6. Avant la mise en service durée du bruit, les conditions spécifiques au lieu de travail, d’autres sources sonores etc., comme p.ex. Avant de procéder à tous travaux de montage, le nombre des machines sur place ainsi que les de transformation ou de réglage, tirez la fiche de opérations avoisinantes. -
Page 35: Fonctionnement
Anleitung RT_FF_1220_U_SPK1:_ 29.12.2008 16:21 Uhr Seite 35 7. Fonctionnement fermement la table lors du pivotement ! Après le pivotement, assurez-vous que le levier s’encrante à nouveau de manière 7.1 Organes de commande généraux (fig. 10-12) sûre et qu’il bloque la table de menuisier ! Interrupteur Marche/Arrêt 5. -
Page 36: Dispositifs De Sécurité De La Scie Tronçonneuse À Onglet
Anleitung RT_FF_1220_U_SPK1:_ 29.12.2008 16:21 Uhr Seite 36 7.2.2 Dispositifs de sécurité de la scie B. Tronçonnage 0° et table tournante 0° - 45° tronçonneuse à onglet (fig. 25 – 27) En mode de fonctionnement scie tronçonneuse à Capot de protection de lame de scie onglet, on peut réaliser des coupes en biseau vers la (fig. -
Page 37: Scie Circulaire
Anleitung RT_FF_1220_U_SPK1:_ 29.12.2008 16:21 Uhr Seite 37 Desserrez le levier pour le réglage de l’inclinaison Attention ! Risque d’écrasement des mains et (fig. 28/pos. 3) et inclinez la tête de machine vers des doigts lors du pivotement de la table de la gauche avec la poignée (fig. -
Page 38: Dispositifs De Sécurité De La Scie Circulaire
Anleitung RT_FF_1220_U_SPK1:_ 29.12.2008 16:21 Uhr Seite 38 dessus des têtes de vis avec l’autre gorge de scie (4) est inférieure à 30 mm en cas de coupes guidage. longitudinales. Ce faisant, privilégiez la surface de Attention: décalez la butée parallèle autant guidage la plus basse du rail de butée. -
Page 39: Remplacer La Lame De Scie, Maintenance Et Ajustage De Précision
Anleitung RT_FF_1220_U_SPK1:_ 29.12.2008 16:21 Uhr Seite 39 Coupe de pièces très étroites (fig. 49) Mettez la scie à nouveau hors service. Pour couper des pièces à usiner très étroites ayant Enlevez les sciures de bois uniquement lorsque une largeur de 30 mm ou moins, il faut absolument la lame est à... -
Page 40: Vérifier La Tension Et État De La Courroie
Anleitung RT_FF_1220_U_SPK1:_ 29.12.2008 16:21 Uhr Seite 40 mouvement, c.à.d. vers l’avant (voir flèche Déplacez le moteur vers la droite avec un sur le capot de protection de lame). Pour ce tournevis, jusqu’à ce que la tension de courroie faire, amenez la lame de la scie (fig. 58/pos. 4) désirée soit atteinte. -
Page 41: Réglage Des Points De Crantage Pour La Table Tournante
Anleitung RT_FF_1220_U_SPK1:_ 29.12.2008 16:21 Uhr Seite 41 8.4.3 Réglage des points de crantage pour la Nous recommandons de nettoyer l’appareil table tournante directement après chaque utilisation. Amenez la scie en position scie tronçonneuse à Nettoyez l’appareil régulièrement à l’aide d’un onglet (voir aussi 7.2.1), verrouillez la tête de chiffon humide et un peu de savon. -
Page 42: Avvertenze Di Sicurezza
Anleitung RT_FF_1220_U_SPK1:_ 29.12.2008 16:21 Uhr Seite 42 dell’apparecchio. La sega non è adatta per segare Attenzione! legna da ardere. L’apparecchio deve venire usato Nell’usare gli apparecchi si devono rispettare diverse solamente per lo scopo a cui è destinato. avvertenze di sicurezza per evitare lesioni e danni. Quindi leggete attentamente queste istruzioni per Tenete presente che i nostri apparecchi non sono l’uso. -
Page 43: Caratteristiche Tecniche
Anleitung RT_FF_1220_U_SPK1:_ 29.12.2008 16:21 Uhr Seite 43 comprendono la durata dell’azione, la particolarità 6. Prima della messa in esercizio del luogo dove si lavora, le altre fonti di rumore ecc., p.es. il numero delle macchine ed altri relativi Prima di qualsiasi operazione di regolazione, di funzionamenti. - Page 44 Anleitung RT_FF_1220_U_SPK1:_ 29.12.2008 16:21 Uhr Seite 44 7. Esercizio rotazione tenete sempre saldamente il piano! Accertatevi che una volta ultimata la rotazione la leva sia nuovamente scattata in posizione 7.1 Elementi generali di comando (Fig. 10-12) originaria e che il piano di lavoro sia bloccato! Interruttore ON/OFF 5.
- Page 45 Anleitung RT_FF_1220_U_SPK1:_ 29.12.2008 16:21 Uhr Seite 45 Blocco antiabbassamento (Fig. 23) arresto automatiche a -45°, 0° e +45°. Il blocco antiabbassamento protegge da un Riportate la leva di fissaggio in posizione per abbassamento involontario della testa stabilizzare il piano girevole. dell’apparecchio.
-
Page 46: Sega Circolare Da Banco
Anleitung RT_FF_1220_U_SPK1:_ 29.12.2008 16:21 Uhr Seite 46 E. Sacchetto di raccolta della polvere (Fig. 1 + verso l’alto la testa dell’apparecchio (17) mentre 2/Pos. 1) tirate l’impugnatura per la regolazione La sega è dotata di un sacchetto di raccolta per i dell’inclinazione (3). - Page 47 Anleitung RT_FF_1220_U_SPK1:_ 29.12.2008 16:21 Uhr Seite 47 7.3.3 Dispositivi di sicurezza della sega circolare deve essere mai sulla stessa linea del taglio. da banco Impostate la guida parallela (Fig. 47/Pos. 14) in base all’altezza del pezzo da lavorare e alla A Coprilama (Fig.
- Page 48 Anleitung RT_FF_1220_U_SPK1:_ 29.12.2008 16:21 Uhr Seite 48 C Esecuzione di tagli trasversali (Fig. 51/52) parte in plastica. Spingete la guida trasversale (Fig. 52/Pos. 52) nella scanalatura (Fig. 52/Pos. 47) del piano di 8.2 Sostituzione della lama (Fig. 51 - 57) lavoro e impostate l’angolazione desiderata.
- Page 49 Anleitung RT_FF_1220_U_SPK1:_ 29.12.2008 16:21 Uhr Seite 49 8.3 Sostituzione / tensione della cinghia di 65/Pos. 58). Dopodiché serrate nuovamente il trasmissione (Fig. 60 - 63) controdado. La battuta per i 45° viene regolata in La cinghia di trasmissione trasmette la forza dal modo analogo con una apposita squadra.
-
Page 50: Regolazione Del Cuneo
Anleitung RT_FF_1220_U_SPK1:_ 29.12.2008 16:21 Uhr Seite 50 8.4.5 Regolazione del cuneo 10.3 Ordinazione di pezzi di ricambio: La regolazione del cuneo avviene come mostrato in Volendo commissionare dei pezzi di ricambio, si Fig. 69. Nel far ciò è necessario rispettare le misure dovrebbe dichiarare quanto segue: indicate nel grafico 46. -
Page 51: Sikkerhedsanvisninger
Anleitung RT_FF_1220_U_SPK1:_ 29.12.2008 16:21 Uhr Seite 51 DK/N overensstemmelse med dens tiltænkte formål. Vigtigt! Ved brug af el-værktøj er der visse Bemærk, at vore produkter ikke er konstrueret til sikkerhedsforanstaltninger, der skal respekteres for erhvervsmæssig, håndværksmæssig eller industriel at undgå skader på personer og materiel. Læs derfor brug. -
Page 52: Tekniske Data
Anleitung RT_FF_1220_U_SPK1:_ 29.12.2008 16:21 Uhr Seite 52 DK/N andre støjkilder m.v., fx. antallet af maskiner og 6. Inden ibrugtagning andre processer i nærheden. De pålidelige arbejdspladsværdier kan endvidere variere fra land til Træk stikket ud af stikkontakten inden land. Disse oplysninger skal imidlertid give brugeren indstillings- omstillings- og monteringsarbejder. - Page 53 Anleitung RT_FF_1220_U_SPK1:_ 29.12.2008 16:21 Uhr Seite 53 DK/N 7. Drift mod højre. Vigtigt! Returfjedrene gør, at maskinen automatisk rykker op, dvs. du ikke skal 7.1 Almindelige betjeningselementer (fig. 10-12) slippe grebet (fig. 1/pos. 16) med det samme, men flytte maskinhovedet (17) langsomt op Tænd/Sluk-knap med et let modtryk.
- Page 54 Anleitung RT_FF_1220_U_SPK1:_ 29.12.2008 16:21 Uhr Seite 54 DK/N 7.2.3 Anvendelse som kap- og geringssav D. Geringssnit 0° - 45° og drejebord 0° - 45° (fig. A. Kapsnit 0° og drejebord 0° (fig. 24) I modus kap- og geringssav kan der udføres Tænd for saven (se punkt 7.1) geringssnit mod venstre på...
- Page 55 Anleitung RT_FF_1220_U_SPK1:_ 29.12.2008 16:21 Uhr Seite 55 DK/N 9. Træk grebet (fig. 35/pos. 24) ind mod dig, og - Når savklingen er i skrå position sving forsigtigt saven om (fig. 36) Til montering af parallelanslaget (14) løsnes Vigtigt! Pas på, at hænder og fingre ikke kommer fingerskruen (fig.
-
Page 56: Anvendelse Som Bordrundsav
Anleitung RT_FF_1220_U_SPK1:_ 29.12.2008 16:21 Uhr Seite 56 DK/N 7.3.4 Anvendelse som bordrundsav Indstil parallelanslaget (fig. 50/pos. 14) efter Ved anvendelse som bordrundsav skal emnets bredde og højde. (Se også 7.3.2.) drejebordet altid befinde sig i 0°-position. Udfør snittet i henhold til emnets bredde. (Se A.) Indsatsskæring og skjult skæring må... -
Page 57: Almindelig Vedligeholdelse
Anleitung RT_FF_1220_U_SPK1:_ 29.12.2008 16:21 Uhr Seite 57 DK/N 8. Klingeskift, vedligeholdelse og Vigtigt - venstregevind! Spænd flangeskruen godt fast! finjustering Sæt gummiproppen (fig. 53/pos. 53) på remhuset i igen. Stikket skal trækkes ud af stikkontakten, inden Kontroller, at savklingen (fig. 58/pos. 4) og det 2- arbejde med vedligeholdelse og indstilling delte klingeværn fungerer korrekt. -
Page 58: Udskiftning Af Nettilslutningsledning
Anleitung RT_FF_1220_U_SPK1:_ 29.12.2008 16:21 Uhr Seite 58 DK/N 8.4 Justering af sav 8.4.4 Justering af skalaer Alle skalaer på kap- og geringssaven skal 8.4.1 Indstilling af anslagsbegrænsning til kontrolleres og ved behov efterjusteres: klingehældning Løsn alle fastgørelsesskruer på skalaerne. Indstil saven nøjagtigt på et vinkelmål, ret Saven har indstillelige anslag til positionerne 0°... -
Page 59: Bortskaffelse Og Genanvendelse
Anleitung RT_FF_1220_U_SPK1:_ 29.12.2008 16:21 Uhr Seite 59 DK/N 10.3 Reservedelsbestilling: Ved bestilling af reservedele skal følgende oplyses: Savens type. Savens artikelnummer. Savens identifikationsnummer. Nummeret på den nødvendige reservedel. Aktuelle priser og øvrige oplysninger finder du på internetadressen www.isc-gmbh.info 11. Bortskaffelse og genanvendelse Maskinen er pakket ind for at undgå... -
Page 60: Biztonsági Utasítások
Anleitung RT_FF_1220_U_SPK1:_ 29.12.2008 16:21 Uhr Seite 60 gépet csak rendeltetése szerint szabad alkalmazni. Figyelem! A készülékek használatánál be kell tartani egy pár Kérjük vegye figyelembe, hogy a készülékeink a biztonsági intézkedéseket, azért hogy sérüléseket meghatározásuk szerint nem kisipari, kézműipari és károkat megakadályozzon. Olvassa ezért ezt a vagy ipari üzemek területén történő... -
Page 61: Technikai Adatok
Anleitung RT_FF_1220_U_SPK1:_ 29.12.2008 16:21 Uhr Seite 61 más szomszédos lefolyásokat tartalmazzák. 6. Üzembevétel előtt Ugyanúgy variálhatnak országról országra a megbízható munkahelyi értékek. De ez az információ Minden beállítási, átszerelési és szerelési munka a használónak a veszélyeztetés és a rizikó jobb előtt kihúzni a hálózati csatlakozót! felbecsülését kell hogy lehetővé... - Page 62 Anleitung RT_FF_1220_U_SPK1:_ 29.12.2008 16:21 Uhr Seite 62 7. Üzem 5. A gépfejet (17) a fogantyúnál (1-es ábra / poz. 16) lefelé nyomni, ennél a magasságelállítás arretáló szegét (16-os ábra/poz. 25) kihúzni és 90°-ba 7.1 Álltalános kezelési elemek jobbra csavarni. (ábrák 10-től – 12-ig) Figyelem! A visszahozó...
- Page 63 Anleitung RT_FF_1220_U_SPK1:_ 29.12.2008 16:22 Uhr Seite 63 ábra/poz. 16), hanem vezesse a motorfejet (17) szabadonfutó funkcióval van ellátva. lassan és enyhe ellennyomás alatt felfelé. Üzemeltetéshez hátrahúzni a fogantyút (a hüvelykujjal a tengelynél ellentartani) és 7.2.3 Fejező és sarkaló fűrészkénti használat csavarni.
- Page 64 Anleitung RT_FF_1220_U_SPK1:_ 29.12.2008 16:22 Uhr Seite 64 6. Eltávolítani a forgácsdobozt (20). Ehhez az 7.3.2 A párhuzamos ütköző felszerelése (14): inbuszcsavart felfelé nyomni (20-as ábra) és 90°- Lecsavarni mind a két anyát (42-es ábra/poz. 38) ba elcsavarni, akkor le lehet venni a forgácsdobozt a párhuzamosütköző...
- Page 65 Anleitung RT_FF_1220_U_SPK1:_ 29.12.2008 16:22 Uhr Seite 65 C Toló bot (1-es ábra/ poz. 9) ábra/poz. 12) áttolni. A toló botot mindig használni kell, ha a hosszanti A vágási hulladék a fűrészasztalon fekve marad, vágásoknál az ütközősín és a fűrészlap közötti mig a fűrészlap ismét nyugalmi állásba nem távolság 120 mm-nél kisebb.
- Page 66 Anleitung RT_FF_1220_U_SPK1:_ 29.12.2008 16:22 Uhr Seite 66 A munkadarabot feszesen a harántütköző ellen kivenni. Ehhez a fűrészlapot a fűrészasztal alatt nyomni. megfogni (kesztyűket hordani), a fűrészlapot az Bekapcsolni a fűrészt (lásd a 7.1-et is). elülső fűrészlapvédőn elől hagyni ráfeküdni és A fűrész bekpacsolása után megvárni, amig a hátul lefelé...
-
Page 67: Fűrészlapot Ill. A Gépfejet Párhuzamosan Eltolni
Anleitung RT_FF_1220_U_SPK1:_ 29.12.2008 16:22 Uhr Seite 67 8.3.2 Hajtószíjat feszíteni ill. cserélni 8.4.3 A forgóasztalhoz való reteszpontok A motorrögzítés négy csavarját az inbuszkulccsal beállítása cca. 1 fordulattal meglazítani (62-es ábra). A fűrészt a fejező és sarkaló fűrész állásba tenni A szíj most feszesség nélküli, adott esetben egy (lásd a 7.2.1-et is), a gépfejet a legalsó... -
Page 68: Tisztítás, Karbantartás És Pótalkatrészmegrendelés
Anleitung RT_FF_1220_U_SPK1:_ 29.12.2008 16:22 Uhr Seite 68 10. Tisztítás, karbantartás és pótalkatrészmegrendelés Tisztítási munkák előtt húzza ki a hálózati csatlakozót. 10.1 Tisztítás Tartsa a védőberendezéseket, szellőztető nyíllásokat és a gépházat annyira por és piszokmentesen, amennyire csak lehet. Dörzsölje le a készüléket egy tiszta posztóval le vagy pedig fúja ki sűrített levegővel, alacsony nyomás alatt. -
Page 69: Sigurnosne Napomene
Anleitung RT_FF_1220_U_SPK1:_ 29.12.2008 16:22 Uhr Seite 69 Molimo da obratite pažnju na to da naši uređaji nisu Pažnja! konstruirani za korištenje u komercijalne svrhe kao ni Da bi se spriječila ozljedjivanja i nastanak šteta u obrtu i industriji. Ne preuzimamo jamstvo ako se prilikom korištenja uredjaja, treba se pridržavati uređaj koristi u obrtničkim ili industrijskim pogonima sigurnosnih mjera opreza. -
Page 70: Tehnički Podaci
Anleitung RT_FF_1220_U_SPK1:_ 29.12.2008 16:22 Uhr Seite 70 5. Tehnički podaci 6. Prije puštanja u rad Prije svih radova podešavanja, preinaka i Izmjenični motor 230 V ~ 50 Hz montaže izvucite mrežni utikač! Snaga 1200 W Vrsta pogona S6 40 % Stroj mora biti stabilno postavljen. - Page 71 Anleitung RT_FF_1220_U_SPK1:_ 29.12.2008 16:22 Uhr Seite 71 ga u opsegu isporuke). 9. Granične vodilice (sl. 22/poz. 18) ne smiju biti na razmaku od područja rezanja većem od 5mm i po Zaštita motora: potrebi se moraju naknadno justirati. U tu svrhu Kod preopterećenja (npr.
- Page 72 Anleitung RT_FF_1220_U_SPK1:_ 29.12.2008 16:22 Uhr Seite 72 B. Prorez 0° i okretni stol 0° - 45° (sl. 25 – 27) E. Vreća za sakupljanje prašine (sl. 1 + 2/poz. 1) U režimu rada prorezivanja i kosog rezanja mogu se Pila ima vreću za sakupljanje piljevine. Ona se može izvoditi kosi rezovi ulijevo i udesno pod kutem od 0°...
- Page 73 Anleitung RT_FF_1220_U_SPK1:_ 29.12.2008 16:22 Uhr Seite 73 podložne pločice i matice (sl. 39). Demontaža se C Komad za guranje (sl. 1/poz. 9) odvija obrnutim redoslijedom. Komad za guranje morate koristiti uvijek kad kod 12. Spojite priključak za usisavanje strugotine na uzdužnih rezova razmak između granične vodilice i zaštiti lista pile (11) s prikladnimm uređajem za lista pile iznosi manje od 120 mm.
- Page 74 Anleitung RT_FF_1220_U_SPK1:_ 29.12.2008 16:22 Uhr Seite 74 Rezanje uskih radnih komada (sl. 48) 8. Zamjena, održavanje i fino justiranje Uzdužno rezanje radnih komada širine manje od 120 lista pile mm morate obavezno izvoditi pomoću komada za guranje (sl. 48/poz. 9). (vidi također 7.3.3 C) Prije svih radova održavanja i podešavanja treba izvući mrežni utikač! Rezanje vrlo uskih radnih komada (sl.
- Page 75 Anleitung RT_FF_1220_U_SPK1:_ 29.12.2008 16:22 Uhr Seite 75 remena. justira se analogno pomoću odgovarajućeg Provjerite funkcioniraju li besprijekorno list pile (sl. kutnika. U tu svrhu upotrijebite kontramaticu (sl. 58/poz. 4) i 2-dijelna zaštita lista pile. 65/poz. 59) i granični vijak (sl. 65/poz. 60). Ako ćete nastaviti raditi u režimu rada prorezivanja i kosog rezanja, ponovno stavite 8.4.2 Paralelno pomicanje lista pile odn.
-
Page 76: Zamjena Mrežnog Priključka
Anleitung RT_FF_1220_U_SPK1:_ 29.12.2008 16:22 Uhr Seite 76 9. Zamjena mrežnog priključka Ako se ošteti mrežni priključni vod ovog uređaja, zamijeniti ga mora proizvođač ili njegova servisna služba ili slična kvalificirana osoba, kako bi se izbjegle opasnosti. 10. Čišćenje, održavanje i narudžba rezervnih dijelova Prije svih radova čišćenja izvucite mrežni utikač. -
Page 77: Bezpečnostní Pokyny
Anleitung RT_FF_1220_U_SPK1:_ 29.12.2008 16:22 Uhr Seite 77 Dbejte prosím na to, že naše přístroje nebyly podle Pozor! svého účelu určení konstruovány pro živnostenské, Při používání přístrojů musí být dodržována určitá řemeslnické nebo průmyslové použití. Nepřebíráme bezpečnostní opatření, aby se zabránilo zraněním a žádné... -
Page 78: Technická Data
Anleitung RT_FF_1220_U_SPK1:_ 29.12.2008 16:22 Uhr Seite 78 5. Technická data 6.1 Montáž přístroje (obr. 3 – 9) 1. Přístroj vyjmout z balení a odstranit čtyři nastrčené plastové ochranné kryty (obr. 3). Tyto slouží pouze Motor na střídavý proud 230 V~ 50 Hz jako ochrana při transportu a mohou být Výkon 1200 W... - Page 79 Anleitung RT_FF_1220_U_SPK1:_ 29.12.2008 16:22 Uhr Seite 79 7.2 Kapovací a pokosová pila 7.2.2 Bezpečnostní zařízení kapovací a pokosové pily 7.2.1 Přestavění na provoz jako kapovací a pokosová pila Ochrana pilového kotouče (obr. 1/pol. 15) 1. Pila se nalézá v poloze stolní kotoučová pila. Dvoudílná...
-
Page 80: Stolní Kotoučová Pila
Anleitung RT_FF_1220_U_SPK1:_ 29.12.2008 16:22 Uhr Seite 80 +45°. 7.3 Stolní kotoučová pila Aretační páčku opět utáhnout, aby byl otočný stůl fixován. 7.3.1 Přestavění na provoz jako stolní kotoučová Řez provést podle popisu v bodě A (obr. 27). pila 1. Pila se nalézá v poloze kapovací a pokosová pila. C. - Page 81 Anleitung RT_FF_1220_U_SPK1:_ 29.12.2008 16:22 Uhr Seite 81 38/pol. 36) a šroub (obr. 37/pol. 37). Poté nasadit vrhání obrobku (viz také 8.4.5 Nastavení ochranu pilového kotouče přes roztahovací klín roztahovacího klínu). (12) tak, aby se kryly otvory v ochraně pilového kotouče a roztahovacím klínu. Nyní ochranu C Posuvná...
-
Page 82: Všeobecné Údržbářské Práce
Anleitung RT_FF_1220_U_SPK1:_ 29.12.2008 16:22 Uhr Seite 82 dokud se pilový kotouč opět nenachází v klidové Pilu opět vypnout. poloze. Odpad odstranit teprve tehdy, když je pilový Dlouhé obrobky zajistit proti přepadnutí na konci kotouč zastaven. řezání (např. odvalovací stojan atd.). Řezání... -
Page 83: Nastavení Pily
Anleitung RT_FF_1220_U_SPK1:_ 29.12.2008 16:22 Uhr Seite 83 Opět nastrčit vnější přírubu (obr. 57/pol. 55). Obě 8.4 Nastavení pily unášecí příruby musí zasahovat do otvorů hřídele pily. 8.4.1 Nastavení omezení dorazu pro sklon pily Přírubový šroub (obr. 56/pol. 54) opět vsadit a Pila disponuje nastavitelnými dorazy pro polohu 0°... -
Page 84: Likvidace A Recyklace
Anleitung RT_FF_1220_U_SPK1:_ 29.12.2008 16:22 Uhr Seite 84 8.4.4 Seřízení stupnic 10.3 Objednání náhradních dílů: Každá stupnice kapovací a pokosové pily by měla být Při objednávce náhradních dílů je třeba uvést kontrolována a v případě potřeby dodatečně následující údaje: seřízena: Typ přístroje povolit všechny upevňovací... -
Page 85: Bezpečnostné Pokyny
Anleitung RT_FF_1220_U_SPK1:_ 29.12.2008 16:22 Uhr Seite 85 zariadenia. Píla nie je vhodná na pílenie palivového Pozor! dreva. Prístroj smie byť použitý len na ten účel, na Pri používaní prístrojov sa musia dodržiavať príslušné ktorý bol určený. bezpečnostné opatrenia, aby bolo možné zabrániť prípadným zraneniam a vecným škodám. -
Page 86: Technické Údaje
Anleitung RT_FF_1220_U_SPK1:_ 29.12.2008 16:22 Uhr Seite 86 opatrenia. Faktory, ktoré môžu ovplyvňovať 6. Pred uvedením do prevádzky momentálnu imisnú hladinu nachádzajúcu sa na pracovisku, sú medzi inými doba trvania vplyvov, Pred všetkými nastavovacími, prestavovacími a druh pracovnej miestnosti, iné zdroje hlukov atď., montážnymi prácami vytiahnite kábel zo siete! napr. - Page 87 Anleitung RT_FF_1220_U_SPK1:_ 29.12.2008 16:22 Uhr Seite 87 7. Prevádzka zapadla a pílový stôl zaistila! 5. Pomocou rukoväte (obr. 1/pol. 16) zatlačte hlavu 7.1 Všeobecné ovládacie prvky (obr. 10 - 12) prístroja (17) smerom nadol, pritom povytiahnite aretačný čap (obr. 16/pol. 25) pre výškové Vypínač...
- Page 88 Anleitung RT_FF_1220_U_SPK1:_ 29.12.2008 16:22 Uhr Seite 88 Pozor! Vratná pružina automaticky vracia stroj 28/pol. 34). naspäť nahor, t.j. nepúšťajte rukoväť (obr. Páčka pre nastavovanie sklonu je vybavená 23/pol. 16) hneď po skončení rezania, ale voľnobežnou funkciou. Na jej prestavenie pohybujte hlavou prístroja (17) pomaly a s potiahnite rukoväť...
- Page 89 Anleitung RT_FF_1220_U_SPK1:_ 29.12.2008 16:22 Uhr Seite 89 5. Povoľte pridržiavaciu maticu (obr. 32/pol. 26) pre 7.3.2 Montáž paralelného dorazu (14): rozovierací klin (obr. 32/pol. 12), vyklopte Z vedenia paralelného dorazu (obr. 40) rozovierací klin smerom nadol (obr. 33) a odskrutkujte obidve matice (obr. 42/pol. 38). pridržiavaciu maticu znovu dotiahnite (obr.
- Page 90 Anleitung RT_FF_1220_U_SPK1:_ 29.12.2008 16:22 Uhr Seite 90 predĺženie ruky a chráni pred náhodným dotykom odvaľovací stojan, apod.) pílového listu (4). Ak sa posuvný prípravok nepoužíva, je potrebné ho uskladniť pri prístroji. Rezanie úzkych obrobkov (obr. 48) Zaveste ho na príslušný držiak. Na poistenie Pozdĺžne rezy obrobkov so šírkou menšou ako 120 predlžovacieho prípravku na držiaku sa na ňom mm sa musia bezpodmienečne vykonávať...
- Page 91 Anleitung RT_FF_1220_U_SPK1:_ 29.12.2008 16:22 Uhr Seite 91 Priečny doraz (obr. 52/pol. 52) posuňte vždy Za týmto účelom presuňte pílový list (obr. 58/pol. natoľko dopredu, aby sa prerezal kompletne celý 4) zospodu cez pílový stôl, vzadu priložte pílový obrobok. list na zadnú ochranu pílového listu a vpredu ho Pílu opäť...
-
Page 92: Nastavenie Píly
Anleitung RT_FF_1220_U_SPK1:_ 29.12.2008 16:22 Uhr Seite 92 8.4 Nastavenie píly 8.4.4 Nastavenie stupníc Každá stupnica kapovacej a pokosovej píly by sa 8.4.1 Nastavenie dorazového obmedzenia pre mala kontrolovať a v prípade potreby nastaviť: sklon pílového listu Povoľte všetky upevňovacie skrutky stupníc. Píla má... -
Page 93: Objednávanie Náhradných Dielov
Anleitung RT_FF_1220_U_SPK1:_ 29.12.2008 16:22 Uhr Seite 93 10.3 Objednávanie náhradných dielov: Pri objednávaní náhradných dielov je potrebné uviesť nasledovné údaje; Typ prístroja Výrobné číslo prístroja Identifikačné číslo prístroja Číslo potrebného náhradného dielu Aktuálne ceny a informácie nájdete na stránke www-isc-gmbh.info 11. -
Page 94: Konformitätserklärung
Samræmisyfirl‡sing sta›festir eftirfarandi samræmi mas∂n∂ sunar. samkvæmt reglum Evfrópubandalagsins og stö›lum ‰ËÏÒÓÂÈ ÙËÓ ·ÎfiÏÔ˘ıË Û˘Ìʈӛ· Û‡Ìʈӷ Ì fyrir vörur ÙËÓ √‰ËÁ›· ∂∂ Î·È Ù· ÚfiÙ˘Ô ÁÈ· ÙÔ ÚÔ˚fiÓ Tisch-, Kapp- und Gehrungssäge RT-FF 1220 U 98/37/EC 87/404/EEC 2006/95/EC R&TTED 1999/5/EC 97/23/EC... - Page 95 Anleitung RT_FF_1220_U_SPK1:_ 29.12.2008 16:22 Uhr Seite 95 Der Nachdruck oder sonstige Vervielfältigung von Dokumentation und Begleitpapieren der Produkte, auch auszugsweise ist nur mit aus- drücklicher Zustimmung der ISC GmbH zulässig. The reprinting or reproduction by any other means, in whole or in part, of documentation and papers accompanying products is permitted only with the express consent of ISC GmbH.
- Page 96 Anleitung RT_FF_1220_U_SPK1:_ 29.12.2008 16:22 Uhr Seite 96 k Nur für EU-Länder Werfen Sie Elektrowerkzeuge nicht in den Hausmüll! Gemäß europäischer Richtlinie 2002/96/EG über Elektro- und Elektronik-Altgeräte und Umsetzung in nationales Recht müssen verbrauchte Elektrowerkzeuge getrennt gesammelt werden und einer umweltgerechten Wiederverwertung zugeführt werden. Recycling-Alternative zur Rücksendeaufforderung: Der Eigentümer des Elektrogerätes ist alternativ anstelle Rücksendung zur Mitwirkung bei der sachge- rechten Verwertung im Falle der Eigentumsaufgabe verpflichtet.
- Page 97 Anleitung RT_FF_1220_U_SPK1:_ 29.12.2008 16:22 Uhr Seite 97 C Solo per paesi membri dell'UE Non gettate gli utensili elettrici nei rifiuti domestici. Secondo la Direttiva europea 2002/96/CE sui rifiuti di apparecchiature elettriche ed elettroniche e l'applicazione nel diritto nazionale gli elettroutensili usati devono venire raccolti separatamente e smaltiti in modo ecologico.
- Page 98 Anleitung RT_FF_1220_U_SPK1:_ 29.12.2008 16:22 Uhr Seite 98 j Pouze pro členské země EU Nedávejte elektrické nářadí do domácího odpadu. Podle Evropské směrnice 2002/96/EG o starých elektrických a elektronických přístrojích (WEEE) a podle národního práva musí být použité elektrické nářadí odděleně skladováno a odevzdáno k ekologické recyklaci.
-
Page 99: Guarantee Certificate
Anleitung RT_FF_1220_U_SPK1:_ 29.12.2008 16:22 Uhr Seite 99 t GUARANTEE CERTIFICATE Dear Customer, All of our products undergo strict quality checks to ensure that they reach you in perfect condition. In the unlikely event that your device develops a fault, please contact our service department at the address shown on this guarantee card. -
Page 100: Bulletin De Garantie
Anleitung RT_FF_1220_U_SPK1:_ 29.12.2008 16:22 Uhr Seite 100 p BULLETIN DE GARANTIE Chère Cliente, Cher Client, Nos produits sont soumis à un contrôle de qualité très strict. Si cet appareil devait toutefois ne pas fonctionner impeccablement, nous en serions désolés. Dans un tel cas, nous vous prions de bien vouloir prendre contact avec notre service après-vente à... - Page 101 Anleitung RT_FF_1220_U_SPK1:_ 29.12.2008 16:22 Uhr Seite 101 C CERTIFICATO DI GARANZIA Gentili clienti, i nostri prodotti sono soggetti ad un rigido controllo di qualità. Se l’apparecchio non dovesse tuttavia funzionare correttamente, ci scusiamo e vi preghiamo di rivolgervi al nostro servizio di assistenza clienti all’indirizzo indicato in questa scheda di garanzia.
- Page 102 Anleitung RT_FF_1220_U_SPK1:_ 29.12.2008 16:22 Uhr Seite 102 GARANTIBEVIS Kære kunde! Vore produkter er underlagt streng kvalitetskontrol. Hvis produktet alligevel på et tidspunkt skulle udvise fejl, beklager vi naturligvis dette og beder dig kontakte vores kundeservice på adressen, som står angivet på dette garantibevis.
- Page 103 Anleitung RT_FF_1220_U_SPK1:_ 29.12.2008 16:22 Uhr Seite 103 A GARANCIAOKMÁNY Tisztelt Vevő, termékeink szigorú minőségi kontroll alá vannak vetve. Ha ez a készülék mégis egyszer nem működne kifogástalanul, akkor azt nagyon sajnáljuk és kérjük Önt forduljon a szervízszolgáltatásunkhoz amely ebben a garanciakártyában megadott cím alatt található.
- Page 104 Anleitung RT_FF_1220_U_SPK1:_ 29.12.2008 16:22 Uhr Seite 104 Bf JAMSTVENI LIST Poštovani kupče, naši proizvodi podliježu strogoj kontroli kvalitete. Žao nam je ako bi ipak došlo do toga da uređaj ne funkcionira besprijekorno i zamolili bismo Vas da se u tom slučaju obratite na adresu naše servisne službe navedenu ispod ovog jamstva.
-
Page 105: Záruční List
Anleitung RT_FF_1220_U_SPK1:_ 29.12.2008 16:22 Uhr Seite 105 j ZÁRUČNÍ LIST Vážená zákaznice, vážený zákazníku, naše výrobky podléhají přísné kontrole kvality. Pokud i přesto tento přístroj bezvadně nefunguje, velice toho litujeme a prosíme Vás, abyste se obrátili na náš zákaznický servis, jehož adresa je uvedena na tomto záručním listu. - Page 106 Anleitung RT_FF_1220_U_SPK1:_ 29.12.2008 16:22 Uhr Seite 106 W ZÁRUČNÝ LIST Vážená zákazníčka, vážený zákazník, naše výrobky podliehajú prísnej kontrole kvality. V prípade, že nebude prístroj napriek tomu bezchybne fungovať, je nám to veľmi ľúto a prosíme Vás, aby ste sa obrátili na našu servisnú službu na adrese uvedenej na tomto záručnom liste.
- Page 107 Anleitung RT_FF_1220_U_SPK1:_ 29.12.2008 16:22 Uhr Seite 107 k GARANTIEURKUNDE Sehr geehrte Kundin, sehr geehrter Kunde, unsere Produkte unterliegen einer strengen Qualitätskontrolle. Sollte dieses Gerät dennoch einmal nicht ein- wandfrei funktionieren, bedauern wir dies sehr und bitten Sie, sich an unseren Servicedienst unter der auf die- ser Garantiekarte angegebenen Adresse zu wenden.
- Page 108 Anleitung RT_FF_1220_U_SPK1:_ 29.12.2008 16:22 Uhr Seite 108 EH 11/2007...