Table des Matières

Publicité

Les langues disponibles
  • FR

Les langues disponibles

  • FRANÇAIS, page 33

Liens rapides

DE Sprunggelenk TENS
Gebrauchsanweisung .....................................................2
EN Ankle TENS
Instructions for use .......................................................18
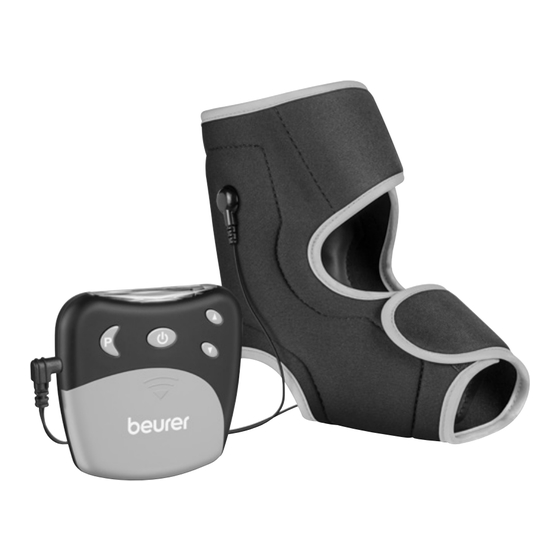
FR Appareil d'articulation de la cheville TENS
Mode d'emploi .............................................................33
ES TENS para el tobillo
Instrucciones de uso ....................................................49
IT
Apparecchio TENS per articolazione tibio-sacrale
Istruzioni per l'uso ........................................................64
TR Ayak bileği TENS cihazı
Kullanım kılavuzu ..........................................................79
RU Прибор TENS для голеностопного сустава
Инструкция по применению ......................................93
PL Prądy TENS na bóle stawu skokowego
Instrukcja obsługi .......................................................109
EM 27

Publicité

Table des Matières
loading

Sommaire des Matières pour Beurer EM 27

  • Page 1 EM 27 DE Sprunggelenk TENS Gebrauchsanweisung .............2 EN Ankle TENS Instructions for use ............18 FR Appareil d’articulation de la cheville TENS Mode d’emploi .............33 ES TENS para el tobillo Instrucciones de uso ............49 Apparecchio TENS per articolazione tibio-sacrale Istruzioni per l’uso ............64 TR Ayak bileği TENS cihazı...
  • Page 2: Table Des Matières

    • Sprunggelenksmanschette • 1x Bedieneinheit Mit freundlicher Empfehlung • 1x Anschlusskabel Ihr Beurer-Team • Batterien, 3 x 1,5 V AAA (LR03, Micro) Schmerzbehandlung mit dem EM 27 Stimulati­ • 2x selbstklebende Elektrodenabdeckung onsgerät • Diese Gebrauchsanweisung Wie funktioniert Reizstrom? 1. Kennenlernen Das TENS-Gerät arbeitet auf Basis der Elektrischen Ner-...
  • Page 3: Zeichenerklärung

    lung. Der schmerzlindernde bzw. -unterdrückende Effekt Folgende Symbole werden auf dem Typenschild verwen- wird unter anderem erreicht durch die Unterdrückung der det. Weiterleitung des Schmerzes in Nervenfasern (hierbei vor allem durch hochfrequente Impulse) und Steigerung der Anwendungsteil Typ BF Ausscheidung körpereigener Endorphine, die das Schmer- zempfinden durch ihre Wirkung im Zentralen Nervensys- tem vermindern.
  • Page 4: Wichtige Hinweise

    • Das Gerät ist für den Betrieb in allen Umgebungen ge- Zulässige Lagerungs- und Transport- Storage / Transport eignet, die in dieser Gebrauchsanweisung aufgeführt temperatur und -luftfeuchtigkeit sind, einschließlich der häuslichen Umgebung. • Vor dem Gebrauch ist sicherzustellen, dass das Gerät Zulässige Betriebstemperatur und Operating und Zubehör keine sichtbaren Schäden aufweisen.
  • Page 5 sichtigt oder erhielten von ihr Anweisungen, wie das Ge- Schmerzen einstellen, brechen Sie die Anwendung so- rät zu benutzen ist. fort ab. • Halten Sie Kinder vom Verpackungsmaterial fern (Ersti- • Manschette nur abnehmen, wenn das Gerät ausge- ckungsgefahr!). schaltet ist! •...
  • Page 6 • Das Gerät niemals in Wasser oder andere Flüssigkeiten • Bei einer bestehenden Schwangerschaft. tauchen. • Bei vorliegenden Krebserkrankungen. • Nicht anwenden in der Nähe leicht entzündlicher Stoffe, • Nach Operationen, bei denen verstärkte Muskelkontrak- Gase oder Sprengstoffe. tionen den Heilungsprozess stören könnten. •...
  • Page 7 • Achten Sie darauf, dass während der Stimulation keine • Im Falle von Diabetes oder anderer Erkrankungen. metallischen Objekte in Kontakt mit den Elektroden ge- • Nicht abgeklärten chronischen Schmerzzuständen un- langen können, da es sonst zu punktuellen Verbrennun- abhängig von der Körperregion. gen kommen kann.
  • Page 8 • Fehlen oder lösen sich die selbstklebenden Abdeckun- • Auf Polaritätskennzeichen Plus (+) und Minus (-) achten. gen für den Elektrodenanschluss empfehlen wir dringend • Wenn eine Batterie ausgelaufen ist, Schutzhandschuhe die beigefügten Elektrodenabdeckungen aufzukleben. anziehen und das Batteriefach mit einem trockenen Tuch reinigen.
  • Page 9: Gerätebeschreibung

    4. Gerätebeschreibung Batteriestatus, erscheint bei verbrauchten Bat- Übersicht Bedieneinheit terien Intensität, Level 0 – 20 Pausesymbol, blinkt wenn aktiviert TIMER: Restlaufzeit der aktiven Programme in Minuten Tastensperre aktiv Aktives Programm 5. Inbetriebnahme Batterien einlegen Öffnen Sie das Batteriefach [4], in- Pos.
  • Page 10 Anschlusskabel verbinden 2. Fixieren Sie die Manschette in der gewünschten Position mit und Sprunggelenksman­ den Klettverschlüssen. Achten schette anlegen Sie darauf, dass die Manschette 1. Verbinden Sie das Anschlusska- nicht zu fest sitzt, die Wasser- bel mit den metallischen Clipan- kontaktelektroden jedoch noch schlüssen der Sprunggelenks- über ausreichend Kontakt mit...
  • Page 11: Bedienung

    6. Bedienung Hinweis: Bei Programm A verspüren Sie beim Wechsel von Allgemeine Hinweise zur Anwendung Phase 1 zu Phase 2 (nach ca. 10 Minuten) eine stär- kere Wirkung. Dies ist normal und so beabsichtigt. Schalten Sie das Gerät erst ein, wenn die Manschet- Sollte Ihnen die Intensität als zu hoch erscheinen, te korrekt angelegt ist.
  • Page 12: Reinigung Und Aufbewahrung

    Eine Pause einlegen erst ein Kribbeln, das bis zu einer Muskelkontraktion an- steigen kann. Sollten Sie im Laufe eines Programms eine Pause wollen, drücken Sie kurz die Pause Taste [1]. Ein akustisches Sig- Wählen Sie die Einstellung so, dass die Anwendung nal ertönt und das Pausezeichen „II“...
  • Page 13: Entsorgen

    Seifenlauge befeuchten. Benutzen Sie zum Reinigen keine • Legen Sie die Bedieneinheit, die Sprunggelenksmanschet- chemischen Reiniger oder Scheuermittel. Achten Sie darauf, te und das Anschlusskabel in die Originalverpackung. dass kein Wasser in das Innere der Bedieneinheit gelangt! • Bewahren Sie die Originalverpackung an einem kühlen, trocken, für Kinder unzugänglichen Ort auf.
  • Page 14: Problemlösung

    Diese Zeichen finden Sie auf schadstoffhaltigen Batterien: Problem Mögliche Ursache Behebung Pb = Batterie enthält Blei, Intensität am Gerät Cd = Batterie enthält Cadmium, Senken Sie am Ge- ist zu hoch einge- Hg = Batterie enthält Quecksilber. rät die Intensität. stellt.
  • Page 15: Technische Angaben

    Schmerz 10. Technische Angaben Eine Wasserkon- tritt auf. Tauschen Sie die taktelektrode ist Manschette aus. Umfang des Sprung- 18-31 cm zerkratzt. gelenks Wasserkontaktelek- Gerät ausschalten. EM 29 troden nicht ausrei- Elektroden be- chend befeuchtet feuchten. Modell EM 27...
  • Page 16: Garantie/ Service

    wendung des Gerätes außerhalb der Spezifikation ist eine Gewicht einwandfreie Funktion nicht gewährleistet! Dieses Gerät – Gerät – ca. 90 g inkl. Batterien entspricht den europäischen Normen EN60601-1 und – Gerät, Manschette – ca. 165 g inkl. Batterien EN60601-1-2 (Übereinstimmung mit CISPR 11, 61000-4- und Kabel 2, 61000-4-3, 61000-4-8) und unterliegt besonderen Vor- Elektrodengröße...
  • Page 17 Garantiefalles innerhalb der Garantiezeit ist durch den Kunden der Nachweis des Kaufes zu führen. Die Garantie ist innerhalb eines Zeitraumes von 5 Jahren ab Kaufdatum gegenüber der Beurer GmbH, Ulm (Germany) geltend zu machen. Bitte wenden Sie sich im Falle von Reklamationen an...
  • Page 18 • 1x connection cable Your Beurer team • Batteries, 3 x 1.5 V AAA (LR03, Micro) Pain relief with the EM 27 stimulation device • 2x self-adhesive electrode covers • These instructions for use How does electrical muscle stimulation work? The TENS device works on the basis of electrical nerve 1.
  • Page 19: Signs And Symbols

    inhibiting the transference of pain to nerve fibres (caused The following symbols are used on the type plate. mainly by high-frequency impulses) and by increasing the secretion of endorphins in the body. Their effect on the Application part, type BF central nervous system reduces the sensation of pain.
  • Page 20: Important Notes

    • The device is suitable for use in all environments listed Permissible storage and transport tempe- Storage / Transport in these instructions for use, including domestic environ- rature and humidity ments. • Before use, ensure that there is no visible damage to the Permissible operating temperature and Operating device or accessories.
  • Page 21 • Do not move the cuff or put it on if the control unit is sues such as error messages or the failure of the display/ switched on. device. • Only connect the connection cable for the electrode plug • Avoid using this device directly next to other devices or to the intended control unit and the cuff that is included.
  • Page 22 • Whilst undertaking any activity where an unexpected Warning reaction (e.g. strong muscle contractions even at low intensity) could be dangerous, e.g. while driving or oper- To avoid damage to health, we strongly advise against ating/driving machinery. using the device in the following situations: •...
  • Page 23 Consult your GP before use: • Never put the ankle cuff on if it has bare metal elec- trodes. Using the ankle cuff without electrode covers • If you suffer from a serious illness, in particular if you can cause injury. suspect or have been diagnosed with a blood coagula- •...
  • Page 24: Device Description

    4. Device description • Choking hazard! Small children may swallow and choke on batteries. Store batteries out of the reach of Overview of the control unit small children. • Observe the plus (+) and minus (-) polarity signs. • If a battery has leaked, put on protective gloves and clean the battery compartment with a dry cloth.
  • Page 25: Initial Use

    Connecting the connection Battery status, appears when batteries are dead cable and positioning the Intensity, level 0 – 20 ankle cuff 1. Connect the connection cable Pause symbol, flashes when activated with the metallic connection clips TIMER: Remaining time in the active on the ankle cuff.
  • Page 26: Operation

    Switching on 3. Insert the plug for the connec- tion cable into the connector Hold down the On/Off button [1] until a short signal sounds socket [5] on the control unit. and the LCD display [6] switches on. When the device is switched on for the first time, program A is automatically activated.
  • Page 27 Note: symbol " " appears in the display [6]. To release the button lock, press and hold the P button [3] for approx. If the program is changed during stimulation 2 seconds. (for example from A to B), the output intensity will increase gradually in the new program until it reach- Reacting to unpleasant sensations es the inten sity that was previously set.
  • Page 28: Cleaning And Storage

    Memory function Warning The device saves the last program that was set. • If the cuff is damaged, it must be replaced. After replacing the battery, the device starts again with the • Before putting the cuff on again, first clean the body parts first program.
  • Page 29: Troubleshooting

    Empty, completely flat batteries must be Problem Possible cause Solution disposed of through specially designated The intensity on the collection boxes, recycling points or Lower the intensity device is set too electronics retailers. You are legally required on the device. high.
  • Page 30: Technical Specifications

    The cuff is dirty. turns red Type EM 29 instructions for and/or use. Model EM 27 a stabbing One of the water pain occurs. Weight contact electrodes Replace the cuff. – Device – Approx. 90 g incl. batteries has a scratch.
  • Page 31: Warranty/Service

    The following warranty terms shall apply: We reserve the right to make technical changes to improve 1. The warranty period for BEURER products is either and develop the product. If the device is not used accord- 5 years or- if longer- the country specific warranty peri- ing to the instructions specified, perfect functionality can- od from date of Purchase.
  • Page 32 4. Liability for direct or indirect consequential losses cau- sed by the unit are excluded even if the damage to the unit is accepted as a warranty claim.
  • Page 33 • 1 unité de commande • 1 câble de connexion Sincères salutations, • 3 piles 1,5 V AAA (LR03, micro) Votre équipe Beurer • 2 revêtements d’électrodes autocollants Traitement de la douleur avec l’appareil de • Le présent mode d’emploi stimu lation EM 27 1.
  • Page 34: Symboles Utilisés

    taines origines, tout comme pour le traitement autonome L’appareil ne doit pas être utilisé par des per- simple. L’effet d’atténuation ou de répression de la douleur sonnes portant des implants médicaux (par est atteint entre autres en réprimant la transmission de la ex.
  • Page 35: Remarques Importantes

    3. Remarques importantes Le sigle CE atteste de la conformité aux exigences fondamentales de la directive Consignes de sécurité 93/42/CEE relative aux dispositifs médi- caux. Avertissement Mise au rebut conformément à la direc- • Utilisez l’appareil d’articulation de la cheville TENS exclu- tive européenne WEEE (Waste Electrical sivement : and Electronic Equipment) relative aux...
  • Page 36 lisation de l’appareil sur d’autres parties du corps peut • Ne pliez ou ne tirez pas sur l’extrémité du câble de entraîner de graves problèmes de santé. connexion. • Une légère rougeur de la peau après l’utilisation est nor- • Ne portez pas d’appareils électroniques tels que des male et disparaîtra rapidement.
  • Page 37 • Évitez d’utiliser cet appareil à proximité immédiate Avertissement d’autres appareils ou en l’empilant sur d’autres appa- reils, car cela peut provoquer des dysfonctionnements. Pour éviter de compromettre votre santé, l’utilisation S’il n’est pas possible d’éviter le genre de situation pré- de l’appareil est fortement déconseillée dans les cas cédemment indiqué, il convient alors de surveiller cet suivants :...
  • Page 38 • après la prise de calmants, d’alcool ou de somnifères ; • au niveau de la gorge et du larynx : cela risque de pro- • en parallèle de toutes les activités dans lesquelles une voquer des crampes musculaires, pouvant entraîner une réaction imprévisible (par ex.
  • Page 39 Avant la mise en service assuré. Le non-respect de cette consigne annulera la garantie. • Pour toute réparation, adressez-vous au service client Attention ou à un revendeur agréé. • L’emballage doit être retiré avant l’utilisation de l’appa- reil. Remarques relatives aux piles •...
  • Page 40: Description De L'appareil

    4. Description de l’appareil État des piles, apparaît lorsque les piles sont Aperçu de l’unité de commande faibles Intensité, niveau 0 – 20 Symbole pause, clignote lorsqu’il est activé MINUTEUR : Durée restante du programme actif en minutes Verrouillage activé Programme actif 5.
  • Page 41 Raccorder le câble de 2. Fixez la manchette d’articula- tion de la cheville dans la connexion et placer la position souhaitée à l’aide de manchette d’articulation la fermeture auto-aggripante. de la cheville Assurez-vous que la manchette 1. Raccordez le câble de connexion d’articulation de la cheville n’est avec les clips métalliques de la pas trop serrée, mais que les...
  • Page 42: Utilisation

    Les programmes suivants sont disponibles : • Vous devez introduire 3 piles 1,5 V type AAA (LR 03 mi- cro). Assurez-vous de bien respecter la polarité. Confor- Programme Fréquence Durée mez-vous pour cela au schéma dans le compartiment à 4 Hz – 110 Hz (3 phases) 30 min piles.
  • Page 43 Interrompre des impulsions trop fortes • vérifiez si le revêtement rond sur les électrodes est encore présent ; À tout moment, vous pouvez réduire l’intensité ou, en ap- • retirez la manchette et humidifiez-la à nouveau complè- puyant sur le bouton Marche/Arrêt [1] (pendant env. 2 s), tement ;...
  • Page 44: Nettoyage Et Stockage

    7. Nettoyage et stockage Avertissement Nettoyage de l’unité de commande • Si la manchette est endommagée, remplacez-la. • Avant de replacer la manchette, nettoyez et dégraissez la Attention partie du corps à traiter. Avant de débuter le nettoyage, déconnectez le câble de Stockage connexion de l’unité...
  • Page 45: Solution Aux Problèmes

    Electrical and Electronic Equipment) relative aux appareils Problème Cause possible Solution électriques et électroniques usagés. La manchette d’ar- Repositionnez Pour toute question, adressez-vous aux collectivités lo- ticulation de la che- la manchette. cales responsables de l’élimination et du recyclage de ces ville n’est pas suffi- Assurez un contact produits.
  • Page 46 Problème Cause possible Solution Problème Cause possible Solution Diminuez l’inten sité La manchette Assurez-vous que et tournez le câble d’articulation de la la manchette est de connexion cheville n’est pas fermement posée dans la prise correctement posée Stimulation Câble de connexion sur la peau.
  • Page 47: Caractéristiques Techniques

    Si votre problème ne figure pas ici, contactez notre ser- Alimentation 4,5 V vice client. électrique (3 x 1,5 V AAA, type LR03) 10. Caractéristiques techniques Conditions Entre 0 °C et 40 °C, 20 à 65 % d’utilisation d’humidité relative de l’air Circonférence de la 18 –...
  • Page 48: Garantie/Maintenance

    Les conditions de garantie suivantes s’appliquent : 1. La période de garantie des produits BEURER est de 5 ans ou, si elle est plus longue, elle est applicable dans le pays concerné à compter de la date d’achat.
  • Page 49 Tratamiento para aliviar el dolor con el aparato • 2 cubiertas de electrodos autoadhesivas • Estas instrucciones de uso de estimulación EM 27 ¿Cómo funciona la corriente estimuladora? 1. Introducción El aparato TENS funciona sobre la base de la electroesti- mulación nerviosa (TENS).
  • Page 50: Símbolos

    o eliminación del dolor se alcanza, entre otras formas, En la placa de características se utilizan los siguientes sím- gracias a la supresión de la transmisión del dolor a través bolos. de las fibras nerviosas (sobre todo por medio de impulsos de alta frecuencia) y a la estimulación de la secreción de Pieza de aplicación tipo BF endorfinas naturales del cuerpo, que disminuyen la sensa-...
  • Page 51: Indicaciones Importantes

    • El aparato está diseñado para usarse en todos los entor- Temperatura y humedad de almacena- Storage / Transport nos que se especifican en estas instrucciones de uso, miento y transporte admisibles incluido el ámbito doméstico. • Antes de utilizar el aparato, deberá asegurarse de que ni Temperatura y humedad de funcionamien- Operating este ni los accesorios presenten daños visibles.
  • Page 52 • Mantenga a los niños alejados del material de embalaje • No utilice el aparato cerca (~1 m) de aparatos de onda (peligro de asfixia). corta o microonda (p. ej., teléfonos móviles), ya que pue- • No utilice piezas adicionales no recomendadas por el den producir oscilaciones en los valores de salida del fabricante.
  • Page 53 Indicaciones sobre los electrodos • Sobre piel con enfermedades agudas o crónicas (daña- da o inflamada), p.  ej., con inflamaciones dolorosas o indoloras, o enrojecimiento. Atención • En caso de erupciones cutáneas (como alergias), que- • Los electrodos no deben colocarse sobre heridas maduras, contusiones, hinchazones, heridas abiertas abiertas.
  • Page 54 • Si lleva una bomba de insulina. Advertencia • En un entorno con un nivel de humedad elevado, como el cuarto de baño, o durante el baño o la ducha. La utilización del aparato no exime de acudir al médico ni de seguir el tratamiento prescrito por él.
  • Page 55: Descripción Del Aparato

    otro motivo. El aparato no se debe exponer a altas tem- • Cambie siempre todas las pilas a la vez. peraturas ni a la luz solar. • No utilice baterías. • No debe abrir ni reparar el aparato bajo ningún concep- •...
  • Page 56: Puesta En Funcionamiento

    Conectar el cable de Compartimento de las pilas conexión y colocar la tobillera Conector hembra 1. Conecte el cable de conexión a los clips metálicos de la tobi- Pantalla con indicador LCD llera. Estado de las pilas; aparece cuando están gastadas Intensidad, nivel 0-20 Nota...
  • Page 57: Manejo

    Encender el aparato 3. Introduzca la clavija del cable de conexión en el conector hembra Mantenga pulsada la tecla de encendido y apagado [1] [5] de la unidad de control. hasta que suene una señal breve y el indicador LCD de la pantalla [6] se encienda.
  • Page 58 Impedir cambios de impulsos no deseados Nota: Si se cambia de programa durante la estimulación Para impedir que la intensidad aumente involuntariamen- (por ejemplo, de A a B), la intensidad de salida au- te durante un tratamiento, active simplemente la tecla de mentará...
  • Page 59: Limpieza Y Conservación

    Detección de contacto Limpieza de la tobillera Si los electrodos no están en contacto con el cuerpo, la Atención intensidad se ajustará automáticamente a cero. De esta forma se impedirá que se produzcan irritaciones no de- 1. Antes de proceder a limpiar la tobillera, desenchufe el seadas.
  • Page 60: Eliminación

    8. Eliminación 9. Resolución de problemas A fin de preservar el medioambiente, cuando el Problema Posible causa Solución aparato llegue al final de su vida útil no lo deseche Las pilas están con la basura doméstica. Cambie las pilas. gastadas. El aparato Se puede desechar en los puntos de recogida adecuados no se en-...
  • Page 61 Problema Posible causa Solución Problema Posible causa Solución El ajuste del nivel Retire los electro- Disminuya el nivel de intensidad del dos y vuelva a co- de intensidad del La estimula- Los electrodos no aparato es demasia- locarlos sobre la aparato.
  • Page 62: Datos Técnicos

    El número de serie se encuentra en el aparato o en el com- Tipo EM 29 partimento de las pilas. Modelo EM 27 Nos reservamos el derecho de efectuar modificaciones Peso técnicas para mejorar y perfeccionar el producto. No – Aparato –...
  • Page 63: Garantía/Asistencia

    Se aplican las siguientes condiciones de garantía: 1. El periodo de garantía para productos de BEURER es de 5 años o, si es superior, se aplica el periodo de garantía vigente en el país correspondiente a partir de la fecha de...
  • Page 64 • Manicotto per articolazione tibio-sacrale • 1 unità di comando Cordiali saluti • 1 cavo di alimentazione Il team Beurer • Batterie, 3 da 1,5 V AAA (LR03, Micro) Trattamento del dolore con l'elettrostimolatore • 2 coperture per elettrodi autoadesive •...
  • Page 65: Spiegazione Dei Simboli

    lori di origine diversa e utile anche per l'autotrattamento. Sulla targhetta vengono utilizzati i seguenti simboli. L'effetto analgesico può essere ottenuto, tra l'altro, attra- verso la soppressione della trasmissione del dolore alle fi- Parte applicativa tipo BF bre nervose (soprattutto tramite impulsi ad alta frequenza) e l'aumento del rilascio naturale di endorfine, che svolgono un'azione analgesica nel sistema nervoso centrale.
  • Page 66: Indicazioni Importanti

    • Prima dell'uso assicurarsi che l'apparecchio e gli ac- Temperatura e umidità di esercizio Operating cessori non presentino nessun danno palese. In caso di consentite dubbio non utilizzare l'apparecchio e consultare il pro- prio rivenditore o contattare il Servizio clienti indicato. Marchio di certificazione per i prodotti •...
  • Page 67 • Non utilizzare moduli aggiuntivi non raccomandati dal • Non utilizzare l'apparecchio in prossimità (~ 1 m) di ap- produttore. parecchi a onde corte o a microonde (ad es. cellulari) in • Non spostare e indossare il manicotto quando l'unità di quanto possono provocare oscillazioni dei valori d'uscita comando è...
  • Page 68 Indicazioni per gli elettrodi • In presenza di eruzioni cutanee (ad es. allergie), ustioni, contusioni, gonfiori e ferite aperte o in via di guarigione • Su cicatrici in via di guarigione Attenzione • In contemporanea con altri apparecchi chirurgici ad alta •...
  • Page 69 Non usare l'apparecchio: Avvertenza • Nella zona della testa: può causare crampi. L'utilizzo dell'apparecchio non sostituisce il controllo e il • Nella zona del collo/della carotide: può causare un arre- trattamento medico. In presenza di dolori o malattie rivol- sto cardiaco. gersi sempre prima al proprio medico.
  • Page 70: Descrizione Dell'apparecchio

    deve più essere utilizzato. L'apparecchio non deve es- • Utilizzare solo tipologie di batterie uguali o equivalenti. sere esposto a temperature elevate o alla luce solare. • Sostituire sempre tutte le batterie contemporaneamente. • Non aprire o riparare l'apparecchio per non compro- •...
  • Page 71: Messa In Funzione

    Collegamento del cavo di Vano batterie alimentazione e applicazione Presa di collegamento del manicotto per articola­ zione tibio­sacrale Display con visualizzazione LCD 1. Collegare il cavo di alimentazio- Stato della batteria, compare quando le batterie ne ai contatti metallici a clip del sono scariche manicotto per articolazione tibio- Intensità, livello 0 –...
  • Page 72: Uso

    6. Uso 2. Fissare il manicotto nella posi- zione desiderata con le chiusure Indicazioni generali di impiego a strappo. Non stringere trop- po il manicotto, ma accertarsi Accendere l'apparecchio quando il manicotto è stato che gli elettrodi di contatto con indossato correttamente.
  • Page 73 Esclusione di modifiche indesiderate Nota: degli impulsi Con il programma A si percepisce un'azione più forte passando dalla fase 1 alla fase 2 (dopo circa Per impedire che l'intensità aumenti sensibilmente duran- 10 minuti). Ciò è normale ed è intenzionale. Qualora te un trattamento, attivare il blocco dei tasti.
  • Page 74: Pulizia E Conservazione

    Rilevamento dei contatti Pulizia del manicotto per articolazione tibio­ sacrale Se gli elettrodi non sono a contatto con il corpo, l'intensi- tà viene impostata automaticamente sullo zero. In questo modo si evitano irritazioni indesiderate. L'intensità non può Attenzione essere aumentata in assenza di contatto con la pelle. 1.
  • Page 75: Smaltimento

    9. Soluzione dei problemi • Conservare l'imballo originale in un luogo fresco, asciutto e non accessibile ai bambini. Problema Possibile causa Soluzione • Rimuovere le batterie quando l'apparecchio non viene usato per un lungo periodo. La fuoriuscita del liquido dalle Le batterie sono Sostituire le batterie può...
  • Page 76 Problema Possibile causa Soluzione Problema Possibile causa Soluzione Sull'apparecchio Rimuovere gli elet- è stata impostata Ridurre l'intensità trodi di contatto Gli elettrodi di con- un'intensità troppo sull'apparecchio. con acqua e riposi- La stimola- tatto con acqua elevata. zionarli sulla pelle. zione è...
  • Page 77: Dati Tecnici

    Il numero di serie si trova sull'apparecchio o nel vano Tipo EM 29 batterie. Modello EM 27 Ci riserviamo il diritto di apportare modifiche tecniche al Peso fine del miglioramento e del continuo sviluppo del prodot- – Apparecchio – Ca. 90 g incluse batterie to.
  • Page 78: Garanzia/Assistenza

    Si applicano le seguenti condizioni di garanzia: alle norme europee EN60601-1 e EN60601-1-2 (corrispon- 1. La garanzia dei prodotti BEURER dura 5 anni op- denza con CISPR 11, 61000-4-2, 61000-4-3, 61000-4-8) e pure, se più lunga, fa fede la durata di garanzia vali- necessita di precauzioni d'impiego particolari per quanto da dalla data di acquisto di ciascun paese.
  • Page 79 Yeni cihazınızı iyi günlerde kullanmanı dileriz. • 1x bağlantı kablosu Beurer Ekibiniz • 3 x 1,5 V AAA pil (LR03, mikro) EM 27 stimülasyon cihazıyla ağrı tedavisi • 2x kendinden yapışkanlı elektrot kapağı • Bu kullanım kılavuzu Uyarıcı akım nasıl çalışır? TENS cihazı, elektriksel sinir stimülasyonu (TENS) yönte-...
  • Page 80: İşaretlerin Açıklaması

    merkezi sinir sistemine olan etkilerinden dolayı ağrı hissini Tip etiketinin üzerinde aşağıdaki semboller kullanılmıştır. azaltan vücudun kendi ürettiği endorfinlerin daha yüksek miktarda salgılanması ile elde edilir. Bu yöntem klinik olarak Uygulama parçası tip BF test edilmiştir ve onaylanmıştır. TENS uygulamasını man- tıklı...
  • Page 81: Önemli Bilgiler

    • Cihazı kullanmadan önce, cihazda ve aksesuarlarında İzin verilen depolama ve nakliye sıcaklığı Storage / Transport gözle görülür hasarlar olmadığından emin olun. Şüphe- ve hava nemi li durumlarda kullanmayın ve satıcınıza veya belirtilen müşteri hizmetleri adresine başvurun. İzin verilen çalışma sıcaklığı ve hava nemi. Operating •...
  • Page 82 • Elektrot fişinin bağlantı kablosunu yalnızca onun için ön- • Bu cihaz başka cihazların hemen yanında veya başka ci- görülmüş olan kumanda ünitesine ve ait olduğu manşete hazlarla üst üste koyularak kullanılmamalıdır, aksi halde takın. cihazın hatalı çalışması söz konusu olabilir. Bahsedilen •...
  • Page 83 • Uyuyan kişiler üzerinde. Uyarı • Bu cihazı, vücudunuza elektrikli impulslar veren başka Sağlığa zararlı olmasını önlemek için aşağıda belirtilen cihazlarla aynı anda kullanmayın. • Cihaz, kendi kendinize uygulama yapmak için uygundur. durumlarda cihazın kullanılması tavsiye edilmez: • Manşet hijyenik sebeplerle sadece bir kişide kullanılabi- •...
  • Page 84 Aşağıdaki durumlarda uygulamadan önce dokto­ • Ayak bileği manşetini asla metal elektrotlar açık haldey- ken takmayın. Ayak bileği manşetinin elektrot kapağı runuza danışın: olma dan kullanılması yaralanmalara neden olabilir. • Akut hastalıklar, özellikle kan pıhtılaşması bozuklukları, • Elektrot bağlantısı için kendinden yapışkanlı kapaklar tromboembolik hastalıklar veya kötü...
  • Page 85: Cihaz Açıklaması

    • Artı (+) ve eksi (-) kutup işaretlerine dikkat edin. Poz. Tanım • Bir pil aktığında koruyucu eldiven giyin ve pil bölmesini kuru bir bezle temizleyin. Açma/kapatma/duraklatma tuşu • Pilleri aşırı ısıya karşı koruyun. Yoğunluk ayarı • Patlama tehlikesi! Piller ateşe atılmamalıdır. ▲...
  • Page 86: İlk Çalıştırma

    5. İlk çalıştırma Manşeti ayak bileğinize takın. Su kontaklı elektrotların ayak bileğinizi çepeçevre sarmasına dikkat edin. Bu- Pillerin takılması rada manşetin dairesel açıklığı topuğunuza gelmelidir. Kapağı ok işareti olan yerden bastı- 2. Manşeti takmadan istediğiniz rıp aşağı kaydırarak pil bölmesini [4] konumda kenetlenen bantlarla açın.
  • Page 87: Kullanım

    • Cihazı çalıştırmak için 3 adet 1,5 V AAA tip (LR 03 mik- 4 Hz 25 dak. ro) pil yerleştirilmelidir. Kutupların doğru yönde olmasına 2 Hz (Burst) 25 dak. dikkat edin. Pil bölmesindeki grafiğe dikkat edin. • Şarj edilebilir piller kullanmayın! 110 Hz 25 dak.
  • Page 88: Temizlik Ve Saklama

    Kontak algılaması ayarlayabilirsiniz. Yoğunluk seviyesine göre önce gıdıklan- ma hissedersiniz, bu kas kasılmasına kadar artabilir. Elektrotlar vücuda temas etmiyorsa yoğunluk otomatik ola- rak sıfıra ayarlanır. Böylece istenmeyen stimülasyonların ol- Uygulama için kendinizi rahat hissedeceğiniz bir ayar ması önlenir. Vücuda temas olmadan yoğunluk artırılamaz. seçin.
  • Page 89: Bertaraf Etme

    8. Bertaraf etme Ayak bileği manşetinin temizliği Çevreyi korumak için, kullanım ömrü dolan cihaz Dikkat evsel atıklarla birlikte bertaraf edilmemelidir. Cihaz, kullanıldığı ülkedeki uygun atık toplama mer- 1. Temizliğe başlamadan önce bağlantı kablosunu manşet- kezleri aracılığıyla bertaraf edilmelidir. Cihaz, elektrikli ve ten ayırın.
  • Page 90: Sorun Giderme

    9. Sorun giderme Sorun Olası neden Çözüm Yoğunluğu azaltın Sorun Olası neden Çözüm ve bağlantı kablo- Piller tükenmiştir. Pilleri değiştirin. sunu soket içinde Cihaz açıl- Düzensiz sti- Bağlantı kablosu 90° döndürün. Piller doğru yerleşti- Pilleri tekrar yer- mıyor. mülasyon. arızalıdır. Kesintiler devam rilmemiştir.
  • Page 91: Teknik Veriler

    18-31 cm Seri numarası, cihazın üzerinde veya pil bölmesindedir. EM 29 Ürünü iyileştirmek ve geliştirmek için teknik değişiklik yap- Model EM 27 ma hakkımız saklıdır. Cihaz belirtilen şartlar dışında kul- Ağırlık lanılırsa, kusursuz çalışması garanti edilemez! Bu cihaz, – Cihaz –...
  • Page 92: Garanti/Servis

    Cihazı geri gönderirken faturanızın bir kopyasını ve arızanın kısa açıklamasını ekleyin. Aşağıdaki garanti koşulları geçerlidir: 1. BEURER ürünlerinin garanti süresi 5 yıldır veya – daha uzun ise – ilgili ülkede geçerli olan satın alma ta- rihinden itibaren garanti süresi kabul edilir.
  • Page 93 и следуйте ее указаниям. • 1 элемент управления • 1 соединительный кабель С наилучшими пожеланиями, • батарейки, 3 x 1,5 В AAA (тип LR03, Micro) компания Beurer • 2 самоклеющихся электрода Лечение боли при помощи электростимуля тора • Данная инструкция по применению EM 27 1.
  • Page 94: Пояснения К Символам

    и болеподавляющее действие достигается, кроме про- Запрещается применение прибора лицами чего, подавлением передачи боли по нервным волокнам c установленными медицинскими имплан- (прежде всего благодаря высокочастотным импульсам) татами (например, кардиостимулятором). и усилением выделения аутогенного эндорфина, кото- В противном случае качество работы рый...
  • Page 95: Важные Указания

    3. Важные указания Символ CE подтверждает соответ- ствие основным требованиям ди- Указания по технике безопасности рективы о медицинских изделиях 93/42/ЕЭС. Предостережение Утилизация прибора в соответствии • Используйте электростимулятор TENS для голеностоп- с директивой ЕС по отходам элек- ного сустава исключительно: трического и электронного оборудо- —...
  • Page 96 • При наличии каких-либо проблем со здоровьем, вы- • Не перемещайте и не накладывайте манжету при зывающих сомнения в возможности терапии, прокон- включенном элементе управления. сультируйтесь с лечащим врачом! • Подключайте соединительный кабель штекера элек- • Прибор TENS для голеностопного сустава предна- трода только в предназначенные для него элемент значен...
  • Page 97 • При наличии электромагнитных помех возможности • Макс. рекомендуемое значение выходных сигналов использования прибора могут быть ограничены. В ре- для электродов 5 мА/см зультате, например, могут появляться сообщения об • Эффективная плотность тока выше 2 мА/см требует ошибках или произойдет выход из строя дисплея/ повышенного...
  • Page 98 • При высыпаниях на коже (например, аллергии), • При высокой влажности, например в ванной комнате ожогах, ушибах, опухолях, открытых и заживающих или во время приема душа. ранах. Где запрещено использовать устройство. • На послеоперационных рубцах, находящихся в стадии • В области головы: может вызвать судороги. заживления.
  • Page 99 • Защищайте прибор от пыли, грязи и влаги. Предостережение • Если прибор упал, подвергся сильному воздействию Применение прибора не заменяет консультации у врача влаги или получил иные повреждения, его дальней- шее использование запрещено. Устройство не должно и лечения. Поэтому при любых видах боли или забо- подвергаться...
  • Page 100 • Защищайте батарейки от чрезмерного воздействия Поз. Наименование тепла. Кнопка ВКЛ./ВЫКЛ./ПАУЗА. • Опасность взрыва! Не  бросайте батарейки в огонь. Настройка интенсивности • Не заряжайте и не замыкайте батарейки накоротко. ▲ Увеличение • Если прибор длительное время не используется, из- ▼ Уменьшение влеките...
  • Page 101 5. Ввод в эксплуатацию Перед наложением манжеты для голе­ ностопного сустава смочите водой водя­ Установка батареек ные контактные электроды и  голеностоп­ Откройте отделение для ба- ный сустав. тареек [4], нажав на крышку Наложите манжету на голеностопный сустав. Сле- в месте, обозначенном стрелкой, дите...
  • Page 102 Включение Замена батареек Нажмите и удерживайте кнопку ВКЛ./ВЫКЛ. [1] до по- Когда появится символ ин- явления звукового сигнала и включения ЖК-дисплея [6]. дикации смены батареек [7], При первом включении устройства автоматически акти- замените батарейки. вируется программа А. • Откройте отделение для бата- Выбор...
  • Page 103 Предупреждение нежелательных изменений Указание импульса Если во время стимуляции произошла смена программы (например, с А на В), то выходная Чтобы избежать случайного повышения интенсивности интен сивность новой программы повышается по- во время использования, включите блокировку кнопок. степенно до установленной интенсивности. При Нажмите...
  • Page 104 Распознавание контакта Очистка манжеты для голеностопного сустава Если отсутствует контакт электродов с телом, то ин- Внимание тенсивность автоматически становится нулевой. Это необходимо, чтобы избежать нежелательного воздей- 1. Перед началом очистки отсоедините кабель от ман- ствия. Без контакта с телом невозможно увеличить жеты.
  • Page 105: Решение Проблем

    9. Решение проблем • Извлекайте батарейки из прибора, если он не будет использоваться длительное время. Протекающие ба- Проблема Возможные Меры по ее устра­ тарейки могут повредить прибор. причины нению 8. Утилизация Батарейки разря- Замените бата- жены. рейки. В интересах охраны окружающей среды по за- Прибор...
  • Page 106 Проблема Возможные Меры по ее устра­ Проблема Возможные Меры по ее устра­ причины нению причины нению Установлена Снимите водяные слишком высокая контактные элект- Уменьшите интен- Водяные контакт- интенсивность Стимуляция роды и устано- сивность. ные электроды работы устрой- неэффек- вите их заново. неправильно ле- ства. тивна...
  • Page 107: Технические Данные

    10. Технические данные Питающее 4,5 В Обхват голеностоп- 18–31 см напряжение (3 x 1,5 В AAA, тип LR03) ного сустава Условия От 0 до 40 °C при относи- Тип EM 29 эксплуатации тельной влажности воздуха 20–65 % Модель EM 27 Хранение От 0 до 55 °C при относи- тельной влажности воздуха 10–90 %...
  • Page 108: Гарантия/Сервисное Обслуживание

    11. Гарантия/сервисное Серийный номер находится на приборе или в отсеке для батареек. обслуживание Мы оставляем за собой право на технические измене- Более подробная информация по гарантии/сервису ния в связи с модернизацией и усовершенствованием находится в гарантийном/сервисном талоне, который изделия. Если способ и условия применения прибора не входит...
  • Page 109 (TENS). TENS to elektryczna stymulacja ner- Cieszymy się, że zdecydowali się Państwo na zakup na- wów działająca przez skórę. TENS to sprawdzona klinicz- szego produktu. Firma Beurer oferuje dokładnie przetesto- nie, skuteczna, niefarmakologiczna metoda zwalczania wane, wysokiej jakości produkty przeznaczone do pomia- dolegliwości bólowych o określonym podłożu, która przy...
  • Page 110: Objaśnienie Symboli

    rapii. Efekt uśmierzenia, względnie tłumienia, bólu uzysku- Na tabliczce znamionowej zostały użyte następujące sym- je się między innymi poprzez zahamowanie przewodzenia bole: bólu we włóknach nerwowych (przede wszystkim poprzez impulsy o wysokiej częstotliwości) oraz wzrost wydzielania Część aplikacyjna typu BF endorfin, które działając w centralnym układzie nerwowym tłumią...
  • Page 111: Ważne Wskazówki

    • Urządzenie nie jest przystosowane do użytku komercyj- Dopuszczalna temperatura i wilgotność Storage / Transport nego ani klinicznego, lecz wyłącznie do użytku prywat- powietrza podczas przechowywania oraz nego. transportu. • Urządzenie jest przeznaczone do użytkowania w każ- Dopuszczalna temperatura i wilgotność Operating dym otoczeniu wymienionym w niniejszej instrukcji ob- powietrza podczas pracy.
  • Page 112 doświadczenia i/lub wiedzy, chyba że w celu zacho- • Terapia powinna być przyjemna. W razie nieprawidłowe- wania bezpieczeństwa znajdują się one pod nadzorem go działania urządzenia, złego samopoczucia lub poja- odpowiedniej osoby lub zostały poinstruowane, w jaki wienia się bólu natychmiast wyłączyć urządzenie. sposób korzysta się...
  • Page 113 • Nie wolno używać urządzenia w pobliżu materiałów ła- • Nagłe lub chroniczne choroby skóry (rany lub zapalenia), twopalnych, gazów ani materiałów wybuchowych. np. w przypadku bolesnych lub bezbolesnych zapaleń, zaczerwienień. Wskazówki dotyczące elektrod • Wysypka (np. alergie), oparzenia, stłuczenia, opuchlizny i otwarte oraz leczone rany. Uwaga •...
  • Page 114 • W przypadku ostrych lub przewlekłych schorzeń prze- • Wszelkiego rodzaju zaburzenia czucia ze zmniejszonym wodu pokarmowego. odczuwaniem bólu (np. zaburzenia metabolizmu). • Implanty metalowe. • Jednoczesne leczenie medyczne. • Pompy insulinowe. • Dolegliwości występujące podczas terapii stymulacyj- • Stosowanie w pomieszczeniach o wysokiej wilgotności, nej.
  • Page 115 • Jeśli z baterii wyciekł elektrolit, należy założyć rękawi- Uwaga ce ochronne i wyczyścić przegrodę na baterie suchą • Producent nie ponosi odpowiedzialności za szkody szmatką. • Należy chronić baterie przed nadmiernym działaniem wynikające z niewłaściwego użytkowania urządzenia. wysokiej temperatury. •...
  • Page 116: Opis Urządzenia

    4. Opis urządzenia Stan baterii, pojawia się w przypadku zużytych Opis panelu obsługi baterii Intensywność, poziom od 0 do 20 Symbol pauzy, miga przy aktywacji TIMER: Pozostały czas aktywnych programów w minutach Blokada przycisków aktywna Program aktywny 5. Uruchomienie Wkładanie baterii Otwórz komorę...
  • Page 117 Podłączanie przewodu przy­ 3. Włóż wtyczkę przewodu przy- łączeniowego do gniazda przy- łączeniowego i zakładanie łączeniowego [5] na panelu mankietu na staw skokowy obsługi. 1. Połącz przewód przyłączeniowy z metalowymi zaciskami klipsa mankietu na staw skokowy. Wymiana baterii Wskazówka: Jeżeli pojawi się wskazanie stanu baterii [7], należy wy- Przed założeniem mankietu na staw skokowy należy mienić...
  • Page 118: Obsługa

    6. Obsługa Wskazówka: W przypadku programu A przy zmianie z fazy 1 na Ogólne wskazówki dotyczące użytkowania fazę 2 (po ok. 10 minutach) odczuwalne jest silniej- sze działanie. Jest to zjawisko normalne i zamierzo- Urządzenie można włączyć dopiero po prawidłowym ne.
  • Page 119: Czyszczenie I Przechowywanie

    Należy wybrać takie ustawienie, które nadal gwaran- wyświetlaczu [6]. Po ponownym wciśnięciu przycisku [1] tuje przyjemność podczas używania urządzenia. można kontynuować przebieg programu. Zapobieganie niepożądanym zmianom impulsów Rozpoznanie kontaktu Aby uniknąć ewentualnego zwiększenia intensywno- Jeśli elektrody nie mają kontaktu z ciałem, intensywność ści podczas terapii, należy włączyć...
  • Page 120: Utylizacja

    8. Utylizacja Czyszczenie mankietu na staw skokowy Ze względu na ochronę środowiska nie należy wy- Uwaga rzucać zużytego urządzenia razem ze zwykłymi od- padami domowymi. 1. Przed rozpoczęciem czyszczenia należy odłączyć kabel Utylizację należy zlecić w odpowiednim punkcie zbiórki przyłączeniowy od mankietu. w danym kraju.
  • Page 121: Rozwiązywanie Problemów

    9. Rozwiązywanie problemów Problem Możliwa przyczyna Rozwiązanie Zmniejsz intensyw- Problem Możliwa przyczyna Rozwiązanie ność i obróć prze- Baterie są zużyte. Wymień baterie. Urządzenie wód przyłącze- nie włącza niowy w gnieździe Baterie nie są wło- Włóż baterie po- Nieregularna Przewód przyłącze- się.
  • Page 122: Dane Techniczne

    90% względnej wilgotności powietrza EM 29 Numer seryjny znajduje się na urządzeniu lub w komorze Model EM 27 baterii. Masa – Urządzenie – ok. 90 g łącznie z bateriami Producent zastrzega sobie prawo do zmian technicznych – Urządzenie, mankiet –...
  • Page 123: Gwarancja/Serwis

    (zgodność z CISPR 11, 61000-4-2, 61000-4-3, 61000-4-8) Obowiązują następujące warunki gwarancji: i wymaga zachowania szczególnych środków ostrożności 1. Okres gwarancji na produkty firmy BEURER wynosi 5 lat odnośnie do kompatybilności elektromagnetycznej. Na- lub, jeśli jest dłuższy, obowiązuje w danym kraju od daty leży pamiętać, że przenośne urządzenia komunikacyjne...
  • Page 124 Beurer GmbH • Söflinger Straße 218 • 89077 Ulm, Germany • www.beurer.com www.beurer-gesundheitsratgeber.com • www.beurer-healthguide.com...

Ce manuel est également adapté pour:

64707

Table des Matières