Table des Matières

Publicité

Les langues disponibles

Les langues disponibles

Liens rapides

VMO 5020 V
BEDIENUNGSANLEITUNG/GARANTIEURKUNDE
OWNER'S MANUAL/WARRANTY DOCUMENT
MODE D'EMPLOI/CERTIFICAT DE GARANTIE
®

Publicité

Table des Matières
loading

Sommaire des Matières pour Audiovox VMO 5020 V

  • Page 1 VMO 5020 V BEDIENUNGSANLEITUNG/GARANTIEURKUNDE OWNER’S MANUAL/WARRANTY DOCUMENT MODE D’EMPLOI/CERTIFICAT DE GARANTIE ®...
  • Page 2 “Made for iPod,” and “Made for iPhone mean that an electronic accessory has been designed to connect specifically to iPod, iPhone, or iPad, respectively, and has been certified by the developer to meet Apple performance standards. Apple is not responsible for the operation of this device or its compliance with safety and regulatory standards.
  • Page 3 Installation...
  • Page 4 EINLEITUNG Danke, dass Sie sich für ein Produkt von Audiovox entschieden haben. Wir hoffen, Ihnen die Funktion des Geräts mit den in dieser Bedienungsanleitung beschriebenen Anweisungen einfach und verständlich erklären zu können. Bitte nehmen Sie sich einige Minuten Zeit um sich mit der Bedienungsanleitung zu befassen. Dieses erleichtert Ihnen dann später die Bedienung des Gerätes.
  • Page 5: Table Des Matières

    INHALT WARNHINWEISE ..........4 BESONDERHEITEN .
  • Page 6 INHALT iPOD/iPHONE-BETRIEB ........30 iPod/iPhone-Menü...
  • Page 7 Bluetooth-Einstellungen ........47 PIN-Code-Einstellungen ........47 Kontakt-Liste .
  • Page 8: Besonderheiten

    BESONDERHEITEN Allgemein • Eingebaute Navigation • Composite-Video-Ausgang für den Anschluss eines Rear-LCD-Monitors • Audio/Video-AUX-Eingang • 5 Line-Audio-Ausgänge: 2x vorne, 2x hinten, 1x Subwoofer • 9-Band-Equalizer mit 3 Voreinstellungen und 3 benutzerdefinierten Equalizerkurven • Videoeingang für Rückfahrkamera • Bildformat - 16: 9 oder 4: 3 •...
  • Page 9: Bluetooth

    Bluetooth • Bluetooth-Freisprecheinrichtung für mehr Sicherheit und Komfort • Audio Streaming (A2DP) • Anklopffunktion and Anruferkennung für den wartenden Anruf • Automatische Anrufübertragung auf Handy bei Ausschalten des Fahrzeuges • Unabhängige Lautstärkeregulierung Rückfahrkamera • An das Gerät kann eine Rückfahrkamera angeschlossen werden.
  • Page 10: Bedienelemente Und Anzeigen

    BEDIENELEMENTE UND ANZEIGEN BEDIENELEMENTE UND ANZEIGEN 1. Power/Volume/Mute-Drehknopf (Ein/Aus, Lautstärke, Stummschaltung) Drücken Sie diesen Knopf, um das Gerät einzuschalten. Halten Sie ihn für 2 Sekunden gedrückt, um das Gerät auszuschalten. Durch Drehen des Knopfes regulieren Sie die Lautstärke. Der Einstellbereich der Lautstärke reicht von 0 bis 30. Durch kurzes Drücken dieses Knopfes wird die Audio-Wiedergabe stumm geschaltet.
  • Page 11 7. MAP-Abdeckklappe Unter der Abdeckklappe befindet sich der Micro-SD-Kartensteckplatz. Dieser wird nur für das Navigationskartenmaterial verwendet, und nicht für Musik- oder andere Dateien. Der Kartensteckplatz kann gegebenenfalls für Firmware-Updates verwendet werden. 8. Tune/Audio-Drehknopf Radiobetrieb: Drehen Sie diesen Knopf, um den nächsten Sender mit einer höhreren oder niedrigeren Frequenz einzustellen.
  • Page 12: Media Link

    Hinweis: Wenn Ihr Fahrzeug mit einer Lenkradfernbedienung für das Klangsystem ausgestattet ist, kann die Bedienung von der in der Bedienungsanleitung des Fahrzeuges beschriebenen Funktionsweise abweichen. Die Funktionsweise des Audiovox-Gerätes kann von der des OEM-Radios abweichen aufgrund zusätzlicher Features und Funktionen, die das OEM- Radio nicht unterstützt.
  • Page 13: Dvd/Cd-Grundlagen

    DVD/CD-Grundlagen Um den CD/DVD-Player optimal nutzen zu können, lesen Sie bitte den nachfolgenden Abschnitt. Abspielbare Discs Folgende Disc-Typen können abgespielt werden: • DVDs - DVDs, die Audio- und/oder Video-Daten enthalten. • Audio-Discs - Audio-CDs, die nur Musik oder Ton enthalten. •...
  • Page 14: Kurzanleitung

    KURZANLEITUNG Ein- und Ausschalten des Gerätes: Drücken Sie den Power/Volume/Mute-Knopf auf der Vorderseite des Gerätes, um das Gerät einzuschalten. Um das Gerät auszuschalten, drücken Sie den Power/Volume/ Mute-Knopf für 2 Sekunden. Abspielen einer DVD/CD/MP3-Disc: 1. Schalten Sie das Gerät ein. 2.
  • Page 15: Stummschalten

    Stummschalten: Drücken Sie auf den Power/Volume/Mute-Knopf auf der Vorderseite des Gerätes, um das Gerät stummzuschalten. Auf dem LCD-Monitor erscheint das Mute-Symbol . Drücken Sie den Knopf erneut, um die Lautstärke wiederherzustellen. Eine Lautstärkeänderung oder die Verwendung der Klangeinstellungen heben die Stummschaltung auf.
  • Page 16: Einstellen Der Zeit

    KURZANLEITUNG 3. Der Equalizer bietet folgende Einstellungsmöglichkeiten: a. Stellen Sie den 9-Band-Equalizer mit den Cursor-Tasten nach Ihrem persönlichen Hörgeschmack ein. b. Wählen Sie eine der voreingestellten Equalizereinstellungen (Klassik, Pop oder Linear). c. Wählen Sie eine benutzerdefinierte Einstellung, indem Sie User1, User2 oder User3 drücken.
  • Page 17: Zurücksetzen Des Systems (Reset)

    Zurücksetzen des Systems (Reset): Drücken Sie den Reset-Schalter auf der Vorderseite des Gerätes mit Hilfe der Spitze eines Stiftes, oder drücken Sie das Symbol SYSTEM RESET im Menü EINSTELLUNGEN, wenn sich das System aufgehängt hat oder sich in einem unzulässigen Zustand befindet.
  • Page 18: Hauptmenü

    HAUPTMENÜ HAUPTMENÜ Rear LCD: Im Hauptmenü können Sie eine Audio/ Video-Quelle für den vorderen und Drücken Sie dieses Symbol, um das hinteren Teil Ihres Fahrzeugs auswählen. Menü für den Rear-Monitor aufzurufen. Weiterhin können Sie das Navigations- Ist Ihr Fahrzeug mit Rear-Monitoren oder Einstellungen-Menü...
  • Page 19 Deutsch/English: Drücken Sie dieses Symbol, um zwischen deutscher und englischer Display-Sprache zu wechseln. Hinweis: Während das Gerät zwischen den Displaysprachen wechselt, werden Video- und Audio- Wiedergabe für ca. 10 Sekunden unterbrochen. Nacht/Tag: Drücken Sie dieses Symbol, um die Helligkeit des Displays heller oder dunkler einzustellen.
  • Page 20: Cd/Mp3-Betrieb

    CD/MP3-BETRIEB Informationsdisplay CD-Menü Die Wiedergabe startet automatisch, Play/Pause: wenn eine CD eingelegt wird. Drücken Sie diese Taste, um die MENÜ: Wiedergabe zu starten. Drücken Sie Drücken Sie diese Taste, um zum sie erneut, um die Wiedergabe zu Hauptmenü zurückzukehren. unterbrechen. Stummschaltung: Stop: Diese Anzeige erscheint, wenn die...
  • Page 21: Direkte Titelauswahl

    Titelliste: DIREKTE TITELAUSWAHL Drücken Sie diese Taste, um das Tastenfeld für die direkte Titelauswahl aufzurufen. Wiederholung: Drücken Sie diese Taste während der Disc-Wiedergabe, um den aktuellen Titel erneut abzuspielen. Das Symbol leuchtet auf und der Titel wird wiederholt. Drücken Sie die Taste erneut, um die Wiederholungsfunktion auszuschalten.
  • Page 22: Mp3-Menü

    CD/MP3-BETRIEB Informationsdisplay MP3-Menü Audio: MP3 ist ein Format zur Speicherung digitaler Audiodaten. Ein CD-Musiktitel Drücken Sie dieses Symbol, um die kann ohne erheblichen Qualitätsverlust Klangeinstellungen aufzurufen. in das MP3-Format komprimiert werden, dabei wir die Datenmenge erheblich Drücken Sie dieses Symbol, um die reduziert.
  • Page 23: Direkte Ordnerauswahl

    Ordner: DIREKTE ORDNERAUSWAHL Während eine CD abgespielt wird, ist dieses Symbol grau und kann nicht ausgewählt werden. Titelliste: Während eine MP3-Disc abgespielt wird, ist dieses Symbol grau und kann nicht ausgewählt werden. Wiederholung: Drücken Sie diese Taste während der Drücken Sie die Taste ORDNER, um die Disc-Wiedergabe, um den aktuellen direkte Ordnerauswahl aufzurufen.
  • Page 24: Dvd-Betrieb

    DVD-BETRIEB Informationsdisplay DVD-Menü Audio: Die Wiedergabe startet automatisch, wenn eine DVD eingelegt wird. Drücken Sie dieses Symbol, um die Hinweis: Bei ordnungsgemäßer Klangeinstellungen aufzurufen. Installation wird auf dem LCD-Monitor nur dann ein Drücken Sie dieses Symbol, um das Video angezeigt, wenn die vorherige Kapitel abzuspielen.
  • Page 25 Stumm: Drücken Sie diese Taste, um das Gerät stummzuschalten. Das Stummschaltungssymbol erscheint. Drücken Sie diese Taste erneut, um die Stummschaltung aufzuheben. Das Stummschaltungssymbol verschwindet. Ordner: Während eine DVD abgespielt wird, ist dieses Symbol grau und kann nicht ausgewählt werden. 4:3: Drücken Sie diese Taste, um eine Anzeige im Format 4:3 einzustellen.
  • Page 26: Bildschirm-Menü

    DVD-BETRIEB BILDSCHIRM-MENÜ Schneller Rücklauf: Drücken Sie diese Taste, um einen schnellen Rücklauf durchzuführen. Schneller Vorlauf: Drücken Sie diese Taste, um einen schnellen Vorlauf durchzuführen. Setup: Drücken Sie diese Taste, um die Bildeinstellungen aufzurufen. Um das Bildschirm-Menü aufzurufen, Drücken Sie dieses Symbol, um das berühren Sie den Bildschirm während der vorherige Kapitel abzuspielen.
  • Page 27: Bildeinstellungen

    BILDEINSTELLUNGEN Wenn Sie ein Video abspielen, können Sie Farbe, Farbton, Kontrast und Helligkeit Ihren Wünschen anpassen. Hinweis: Das Bildeinstellungs-Menü verschwindet automatisch, wenn nicht innerhalb von 4 Sekunden eine Einstellung vorgenommen wird oder wenn eine andere Taste gedrückt wird. Anpassen der Einstellungswerte: Drücken Sie t oder u, um den gewünschten Einstellungswert schrittweise anzupassen.
  • Page 28: Ukw/Mw Radio-Betrieb

    UKW/MW RADIO-BETRIEB Sender- Speicherplätze Banner Display UKW/MW-MENÜ MENÜ: Preset-Tasten (Sender- Speicherplätze) Drücken Sie diese Taste, um zum Hauptmenü zurückzukehren. zum Speichern von Radiosendern. Sie können 12 UKW (6 auf UKW1 und 6 auf Stummschaltung: UKW2) sowie 6 MW-Sender abspeichern. Diese Anzeige erscheint, wenn die Ggf.
  • Page 29 Wichtiger Hinweis: Wenn die TA- Funktion aktiviert wurde, ändern Sie die Drücken Sie diese Taste, um das Audio/Video-Quelle nur über die Menü- MW-Band auszuwählen und die AM- Taste. Die TA-Funktion funktioniert nicht, Senderspeicherplätze aufzurufen. Hier wenn Sie die SRC-Taste verwenden, um können 6 MW-Sender gespeichert zwischen den Quellen zu wechseln.
  • Page 30: Ipod/Iphone-Betrieb

    Reihenfolge abzuspielen. Das Shuffle- separat erhältlich ist. Für iPod/ Symbol wird angezeigt, wenn die iPhone-Videowiedergabe Shuffle-Funktion aktiviert ist. verwenden die das Audiovox RPT: jLink4-Kabel. Drücken Sie diese Taste während MENÜ: der Wiedergabe, um den aktuellen Drücken Sie diese Taste, um zum Titel erneut abzuspielen.
  • Page 31: Suchmenü

    Suchmenü Drücken Sie diese Taste, um den vorherigen Titel in dem Verzeichnis abzuspielen. Play/Pause: Drücken Sie diese Taste, um die Wiedergabe zu starten. Drücken Sie sie erneut, um die Wiedergabe zu unterbrechen. Mithilfe des Suchmenüs können Sie nach Drücken Sie diese Taste, um den Musik- oder Video-Dateien suchen, die nächsten Titel in dem Verzeichnis auf Ihrem iPod/iPhone gespeichert sind.
  • Page 32: Setup-Menü

    iPOD/iPHONE-BETRIEB SETUP-MENÜ BILDEINSTELLUNGEN Wenn Sie ein Video abspielen, können Sie Farbe, Farbton, Kontrast und Berühren Sie den LCD-Monitor bei Helligkeit Ihren Wünschen anpassen. Vollbildanzeige, um das Setup-Menü Hinweis: Das Bildeinstellungs-Menü aufzurufen. verschwindet automatisch, wenn Hinweis: Das Setup-Menü verschwindet nicht innerhalb von 4 Sekunden automatisch, wenn nicht eine Einstellung vorgenommen innerhalb von 4 Sekunden eine...
  • Page 33: Rear Lcd Menü

    REAR-LCD-MENÜ REAR-LCD-MENÜ MENÜ: Ihr Audiovox-Gerät kann zwei Quellen zur gleichen Zeit abspielen. So kann z. B. Drücken Sie diese Taste, um zum auf dem Audiovox-Gerät der Radiomodus Hauptmenü zurückzukehren. eingestellt sein, und die Insassen auf Stummschaltung: dem Rücksitz können eine DVD auf...
  • Page 34: Navigation

    NAVIGATION NAVIGATION NAVIGATION In den Navigations-Modus können Sie - Lesen Sie den Endbenutzer- auf verschiedene Weise gelangen: Lizenzvertrag. Tippen Sie auf Drücken Sie z. B. die NAV- oder DEST- , um fortzufahren. Taste auf der Vorderseite des Gerätes oder das Symbol NAVIGATION im Hauptmenü.
  • Page 35: Einstellen Der Lautstärke Für Die Sprachanweisungen

    - Ändern Sie gegebenenfalls das Schritt 3 - Zieleingabe: Zeitformat und die verwendeten Es gibt verschiedene Möglichkeiten, ein Einheiten. Diese Auswahl können Sie Ziel einzugeben. Die Auswahl erfolgt über später in den regionalen Einstellungen die Berührung des Touchscreens. ändern. Adresse: Drücken Sie SUCHE und dann ADDRESSE SUCHEN.
  • Page 36: Setup-Menü

    Lieferumfang enthalten) an den Media Link an. Hinweis: Über den Media Link angeschlossene externe Geräte können nicht über das Berühren Sie den LCD-Monitor bei Audiovox-Gerät gesteuert Vollbildanzeige, um das Setup-Menü werden. Bitte lesen Sie die aufzurufen. Bedienungsanleitung, die dem Hinweis: Das Setup-Menü verschwindet externen Gerät beiliegt.
  • Page 37: Bildeinstellungen

    BILDEINSTELLUNGEN Wenn Sie ein Video abspielen, können Sie Farbe, Farbton, Kontrast und Helligkeit Ihren Wünschen anpassen. Hinweis: Das Bildeinstellungs-Menü verschwindet automatisch, wenn nicht innerhalb von 4 Sekunden eine Einstellung vorgenommen wird oder wenn eine andere Taste gedrückt wird. Anpassen der Einstellungswerte: Drücken Sie t oder u , um den gewünschten Einstellungswert schrittweise anzupassen.
  • Page 38: Usb-Menü

    USB-MENÜ Wiedergabe- informationen USB-Menü EQ - Equalizer: Sie können ein USB-Gerät über den Drücken Sie dieses Symbol, um das Equalizer-Menü aufzurufen. Touchscreen bedienen, um auf Audio- Dateien zuzugreifen, die auf dem Gerät Audio: gespeichert sind. Drücken Sie dieses Symbol, um die Hinweis: Ihr USB-Gerät muss an den Klangeinstellungen aufzurufen.
  • Page 39: Titelliste

    TITELLISTE Shuffle: Drücken Sie diese Taste, um die Titel in einem Verzeichnis in zufälliger Reihenfolge abzuspielen. Erneutes Drücken deaktiviert die Funktion. Wiederholung: Drücken Sie diese Taste während der Disc-Wiedergabe, um den aktuellen Titel erneut abzuspielen. Das Symbol leuchtet auf und der Titel wird wiederholt. Drücken Sie die Taste erneut, um die Mithilfe der Titelliste können Sie Musik Wiederholungsfunktion auszuschalten.
  • Page 40: Bluetooth-Betrieb

    Diese Anzeige erscheint, wenn die Telefonen. Lautstärke stummgeschaltet ist. HINWEIS: Zeitanzeige: Die Entfernung zwischen dem Audiovox- Hier wird die Zeit angezeigt, die im Menü Gerät und Ihrem Mobiltelefon darf Einstellungen eingegeben wurde. maximal 2,4 Meter betragen, um mit der drahtlosen Bluetooth-Technologie Sprache und Daten senden und empfangen zu können.
  • Page 41: Gesprächslautstärke Einstellen

    Kontakte: erhöhen und zu verringern. Drücken Sie diese Taste, um die Kontaktliste aufzurufen. Diese Funktion Gesprächslautstärke einstellen ist nur verfügbar, wenn das Audiovox- Um die Lautstärke während eines Gerät mit einem Mobiltelefon gekoppelt Gespräches einzustellen, drehen ist. Sie den Lautstärkeknopf. Diese Anrufliste: Lautstärkeeinstellung wird für zukünftige...
  • Page 42: Verbinden Ihres Mobiltelefons

    Aufrufen des Bluetooth-Setup, zum Verbindungen zwischen den Geräten zu Ein- und Ausschalten von Bluetooth Authentifizierungszwecken verwendet und zum Herstellen einer Verbindung wird. Das Audiovox-Gerät kann sich mit 5 finden Sie im Handbuch Ihres Geräten verbinden. Mobiltelefons). Es stehen zwei Möglichkeiten zur 4.
  • Page 43: Verbinden Eines Mobiltelefons Mit Dem Gerät

    Bildschirm, der die Mobiltelefone auflistet. Das Autoradio kann nun nach Mobilteilen suchen. 8. Geben Sie das Gerätepasswort ein. Der Standard-Code des Audiovox- Geräts lautet “1234”. Drücken Sie 9. Jetzt erhalten Sie von dem Mobiltelefon die Anfrage, ob Sie Ihr Audiovox-Gerät mit dem Telefon koppeln möchten.
  • Page 44: Verbundene Geräte Löschen

    BLUETOOTH-BETRIEB Verbundene Geräte löschen: EINEN ANRUF TÄTIGEN 1. Drücken Sie die PHONE-Taste auf Sie haben zwei Möglichkeiten, einen der Vorderseite des Gerätes oder die Anruf zu tätigen. Sie können die Nummer Taste BLUETOOTH im Hauptmenü, direkt mithilfe der Bildschirmtastatur um das Bluetooth-Menü aufzurufen. eingeben, oder Sie drücken die Taste KONTAKTE, wählen dann einen Namen 2.
  • Page 45: Eine Nummer Aus Der Kontaktliste Anrufen

    Eine Nummer aus der Kontaktliste EINGEHENDE ANRUFE anrufen Wenn Sie mit einem Bluetooth-Telefon 1. Drücken Sie die PHONE-Taste auf verbunden sind, schaltet das Audiovox- Gerät automatisch stumm, unterbricht der Vorderseite des Gerätes oder die Taste BLUETOOTH im Hauptmenü, die DVD/CD-Wiedergabe und wechselt in das Bluetooth-Menü, wenn ein Anruf...
  • Page 46: Anklopfen

    BLUETOOTH-BETRIEB ANKLOPFEN VERBUNDENE GERÄTE Während Sie ein Gespräch führen, werden Sie durch das Anklopfen darüber informiert, dass ein weiterer Anrufer versucht Sie zu erreichen. Sie können einen Anruf in die Warteschleife setzen, während Sie den zweiten Anruf beantworten, und dann zwischen den zwei Anrufen wechseln.
  • Page 47: Bluetooth-Einstellungen

    PIN- Automatische Verbindung: Code im Menü Bluetooth-Einstellungen. Ist diese Funktion aktiviert (EIN), Der werkseitig eingestellte PIN-Code verbindet Ihr Audiovox-Gerät sich lautet 1234. automatisch mit bereits gekoppelten Bluetooth-Geräten, wenn diese sich in Reichweite befinden. Ist die Funktion deaktiviert (AUS), müssen Sie den...
  • Page 48: Kontakt-Liste

    BLUETOOTH-BETRIEB KONTAKT-LISTE ANRUFLISTE Diese Liste ist eine Kopie der Kontaktliste In der Anrufliste werden eingegangene, auf Ihrem Mobiltelefon. Die Liste wird abgehende und unbeantwortete Anrufe normalerweise in alphabetischer angezeigt. Reihenfolge angezeigt und kann bis Hinweis: Diese Funktion wird nicht von zu 2000 Namen und Telefonnummern allen Mobiltelefonen unterstützt.
  • Page 49: Bluetooth Audio-Funktion

    Drücken Sie diese Taste, um zum besteht. Es kann sein, dass ein vorherigen Bildschirm zurückzukehren. Passwort abgefragt wird. Das werkseitig EQ - Equalizer: voreingestellte Passwort für Ihr Audiovox- Gerät lautet “1234”. Drücken Sie dieses Symbol, um das Hinweis: Bevor Sie einen Anruf tätigen, Equalizer-Menü aufzurufen.
  • Page 50: Systemeinstellungen

    SYSTEMEINSTELLUNGEN SYSTEMEINSTELLUNGEN SYSTEMEINSTELLUNGEN (ERSTE SEITE) Wenn Sie Ihr Audiovox-Gerät zum Drücken Sie AUS, um die ersten Mal in Betrieb nehmen, Navigationspriorität zu deaktivieren. empfehlen wir, das System nach Ihren Sie müssen dann manuell zwischen Wünschen einzustellen. Sie können die Navigationsmodus und anderen Menüs Einstellungen auch zu jedem anderen wechseln.
  • Page 51: Kalibrierung Des Touchscreens

    Zurück: Quadranten fort, bis die Kalibrierung abgeschlossen ist. Es erscheint Drücken Sie diese Taste, um die erste folgende Bildschirmanzeige: Seite der Systemeinstellungen aufzurufen Bildschirm kalibrieren: Drücken Sie diese Taste, um die Kalibrierung des Touchscreens zu initiieren. Vorwärts: Drücken Sie diese Taste, um die zweite Seite der Systemeinstellungen aufzurufen.
  • Page 52: Systemeinstellungen Zweite Seite

    System Update: Diese Anzeige erscheint, wenn die Diese Funktion wird zum Softwareupdate Lautstärke stummgeschaltet ist. verwendet. Für weitere Informationen Zeitanzeige: wenden Sie sich an den Audiovox- Hier wird die Zeit angezeigt, die im Menü Service. Einstellungen eingegeben wurde. Zeitzone: Einschaltlautstärke: Drücken Sie (p) oder (q), um die...
  • Page 53: Einstellen Der Systemzeit

    Einstellen der Systemzeit Drücken Sie (p) oder (q), um Jahr, Monat, Stunde, Minute oder Sekunde einzustellen. Wird ein GPS-Signal empfangen, wird die manuelle Zeiteinstellung außer Kraft gesetzt. Back Drücken Sie diese Taste, um die zweite Seite der Systemeinstellungen aufzurufen.
  • Page 54: Klangeinstellungen

    KLANGEINSTELLUNGEN KLANGEINSTELLUNGEN Sub Filter: Mithilfe der Klangeinstellungen können Sie Ihr Audiosystem problemlos an die Mit dieser Einstellung können Sie die akustischen Gegebenheiten im Fahrzeug Übergangsfrequenz des Subwoofers anpassen, die je nach Fahrzeugtyp und (falls vorhanden) einstellen. Stellen -größe unterschiedlich sein können. Sie die Filterfrequenzen nach Ihrem Back persönlichen Hörgeschmack auf 60,...
  • Page 55: Equalizer-Menü

    EQUALIZER-MENÜ Klassik, Pop und Linear: Mit dem 9-Band-Grafik-Equalizer können Sie Ihr Audiosystem problemlos Drücken Sie eine diese Tasten, um einen an die akustischen Gegebenheiten im voreingestellten Equalizer auszuwählen. Fahrzeug anpassen. Die akustischen Ist eine dieser Voreinstellungen aktiviert, Gegebenheiten variieren je nach können die Einstellungen am 9-Band- Fahrzeugtyp- und -größe.
  • Page 56: Rückfahrkamera

    RÜCKFAHRKAMERA RÜCKFAHRKAMERA (falls vorhanden) An das Gerät kann eine Rückfahrkamera angeschlossen werden. Bevor Sie auf die Kamerafunktionen zugreifen können, muss eine Rückfahrkamera installiert werden. 1. Aktivieren Sie die Rückfahrkamera in den Systemeinstellungen. 2. Legen Sie den Rückwärtsgang ein. Ist eine Kamera installiert, wird automatisch der Bereich hinter dem Fahrzeug angezeigt.
  • Page 58 INTRODUCTION Congratulations on your purchase of the Audiovox In-Dash Navigation Radio VMO 5020 V. Please read the instruction manual for this product before using. The documentation provided will allow you to fully enjoy all the features this unit has to offer.
  • Page 59 CONTENTS WARNINGS ..........58 FEATURES .
  • Page 60 CONTENTS iPOD/iPHONE OPERATION ........84 iPod/iPhone Screen .
  • Page 61 Bluetooth Settings Screen ........101 PIN Code Setting Screen ........101 Contacts List Screen .
  • Page 62: Features

    FEATURES General • Built-in navigation • Composite video outputs for additional screens • Audio /Video auxiliary input • Rotary encoder audio control • Nine-Band EQ with three preset and three user-defined EQ curves • Subwoofer control • Rear camera input •...
  • Page 63: Bluetooth

    Bluetooth • Bluetooth hands-free profile for safety / convenience and A2DP profile for streaming music from a PDA / PMP • Call waiting and caller ID for call on hold • Call automatically transfered to handset when vehicle is turned off •...
  • Page 64: Controls And Indicators

    CONTROLS AND INDICATORS CONTROLS AND INDICATORS 1. Power, Volume, and Mute Control Knob Press the knob to turn the unit on. Press and hold the knob for 2 seconds to turn the unit off. Rotate the knob to adjust the volume from 0 to 30. Press the knob momentarity to mute the audio.
  • Page 65 7. MAP Cover Covers the Micro SD card slot. The Micro SD card slot is used for the Navigation Map only, not for music or other files. This may be used for firmware updates if required. 8. Tune/Audio Control Knob When the unit is set to Radio mode, rotate this knob to acquire the next or previous available frequency.
  • Page 66: Media Link

    The media link will accept a USB device, a 3.5 mm jack, or an iPod/iPhone. NOTE: For basic connectivity, your iPod/iPhone must be connected to the Media Link using the iPod/iPhone adapter cable that comes with your iPod/iPhone or is available separately. For iPod/iPhone video playback, use the Audiovox jLink4 cable. HANDS FREE MICROPHONE The hands-free microphone is installed in your vehicle in an accessible location that provides optimum voice reception.
  • Page 67: Dvd/Cd Basics

    DVD/CD BASICS To get the optimum use out of your CD/DVD player, please read this section. Types of Discs Your System Will Play Your system will play the following types of discs: • DVD disc - DVD discs that contain audio and/or video. •...
  • Page 68: Quick Start Guide

    QUICK START GUIDE Turning the Unit ON or OFF: Press the front panel Power/Volume/Mute control knob to turn the unit on. To turn the unit off, press and hold the front panel Power/Volume/Mute control knob for 2 seconds. Playing a DVD/CD/MP3 Disc: 1.
  • Page 69: Adjusting Fade And Balance

    Adjusting Fade and Balance: 1. Press the front panel Tune/Audio control knob or the touch screen Audio icon to view the Audio Control Screen. 2. Press the left ( L ) or right ( R ) icons to adjust the left/right balance, or press the front ( F ) or rear ( R ) icons to adjust the front/rear fade.
  • Page 70: Setting System Time

    QUICK START GUIDE Setting System Time: 1. Press the front panel SETUP button or front panel Settings icon. A Settings Screen appears. 2. Press the Next icon. A second Settings Screen appears. 3. Press the Up (p) or Down (q) icon to select your time zone. 4.
  • Page 71: Resetting The System

    Resetting the System: To correct a system halt or other illegal operation, use the tip of a pen to press the reset button located on the front of your unit or press the System Reset icon on the Settings Screen.
  • Page 72: Main Menu

    MAIN MENU MAIN MENU SCREEN Rear LCD Icon: The Main Menu Screen allows you to select an audio/video source for your Press this icon to access the Rear LCD vehicle’s front and rear zone. In addition, Screen. This screen allows a user to you may access the Navigation or control DVD video in the rear of a vehicle System Setup functions.
  • Page 73 Deutsch/English Icon: Press this icon to switch between Ger- man and English display language. NOTE: Video will turn off and audio will mute for approximately ten seconds as the unit switches between German and English display language. Night/Day Icon: Press this icon to dim or brighten the display.
  • Page 74: Cd/Mp3 Audio Disc Operation

    CD/MP3 AUDIO DISC OPERATION Information Display CD CONTROLS SCREEN Previous Icon: Upon inserting a compact disc, CD mode is entered and disc playback begins. Press this icon to play the previous track. MENU Icon: Fast Reverse Icon: Press this icon to return to the Main Menu Press this icon to fast reverse playback.
  • Page 75: Tracklist Direct Entry Screen

    Tracklist Icon: TRACKLIST DIRECT ENTRY SCREEN Press this icon to access the Tracklist Direct Entry Screen. Repeat Icon: Press this icon during playback to repeat playback of the current track. The icon will light and the track will repeat. Press this icon a second time cancel repeat.
  • Page 76: Mp3 Controls Screen

    CD/MP3 AUDIO DISC OPERATION Information Display MP3 CONTROLS SCREEN Audio Icon: MP3 is a format for storing digital audio. An audio CD-quality song can be Press this icon to access the audio compressed into the MP3 format with controls. very little loss of quality, while taking up Previous Icon: much less space.
  • Page 77: Folder Direct Entry Screen

    Tracklist Icon: FOLDER DIRECT ENTRY SCREEN When a MP3 disc is playing, this icon is gray, indicating that it can not be selected. Repeat Icon: Press this icon during playback to repeat playback of the current track. The icon will light and the track will repeat. Press this icon a second time cancel repeat.
  • Page 78: Dvd Operation

    DVD OPERATION Information Display DVD CONTROLS SCREEN Audio Icon: Upon inserting a DVD disc, DVD mode is entered and disc playback begins. Press this icon to access the audio NOTE: When properly installed, DVD controls. video can not be displayed on Previous Icon: the front LCD screen unless the Press this icon to play the previous...
  • Page 79 4:3 Icon: Press this icon to view a standard display image. The standard display image has a 4 to 3 ratio of horizontal to vertical, leaving a blank area on the right and left sides of the display. 16:9 Icon: Press this icon to view a wide screen display image.
  • Page 80: On Screen Controls

    DVD OPERATION ON-SCREEN CONTROLS Fast Reverse Icon: Press this icon to fast reverse video playback. Fast Forward Icon: Press this icon to fast forward video playback. Setup Icon: Press this icon to access the Picture Adjustment Screen. Previous Icon: To access the on-screen controls, touch Press this icon to play the previous the screen while a DVD is playing.
  • Page 81: Picture Adjustment Screen

    PICTURE ADJUSTMENT SCREEN When watching a video, the color, tint, contrast or brightness levels can be adjusted to suit your preferences. NOTE: The Picture Adjustment Screen will turn off automatically if no adjustment is made within four seconds or if any other button is pressed.
  • Page 82: Am/Fm Radio Operation

    AM/FM RADIO OPERATION Preset Icons Banner Display AM/FM RADIO SCREEN MENU Icon: Preset Icons Press this icon to return to the Main Menu Presets consist of stations that were Screen. stored into memory. The radio can store 12 FM (6 FM1 and 6 FM2) and 6 AM Mute Indicator: stations.
  • Page 83: Af Alternative Frequencies

    AF Alternative Frequencies AM Icon: Press the AF icon to activate and Press this icon select the AM band to deactivate automatic scanning for view AM station presets. Up to six AM alternative frequencies. presets may be stored. Scan Icon: The AF indicator lit up in blue color when the automatic scanning for alternative Press this icon to scan for the next...
  • Page 84: Ipod/Iphone Operation

    iPOD/iPHONE OPERATION iPOD/iPHONE SCREEN EQ - Equalizer Icon: You can control your iPod/iPhone via the touch screen to access playlists, artists, Press this icon to access the equalizer albums, songs, videos, etc. controls. NOTE: For basic connectivity, your iPod/ Audio Icon: iPhone must be connected to the Press this icon to access the audio Media Link using the iPod/iPhone...
  • Page 85: Search Screen

    Previous Icon: SEARCH SCREEN Press this icon to play the previous track in the directory. Play/Pause Icon: Press this icon to begin playback. Press this icon again to pause playback. Next Icon: Press this icon to play the next track in the directory.
  • Page 86: Setup Screen

    iPOD/iPHONE OPERATION SETUP SCREEN PICTURE ADJUSTMENT SCREEN When full screen video is displayed, When watching a video, the color, tint, touch the LCD screen to view the Setup contrast or brightness levels can be Screen. adjusted to suit your preferences. NOTE: The Setup Screen will turn off NOTE: The Picture Adjustment Screen automatically if no selection is...
  • Page 87: Rear Lcd Operation

    REAR LCD OPERATION REAR LCD SCREEN MENU Icon: The unit allows two sources to be played simultaneously. For example, the unit’s Press this icon to return to the Main Menu screen can be set to the radio function Screen. while the rear passengers can watch a Mute Indicator: DVD video using an optional rear monitor.
  • Page 88: Navigation Quick Start

    NAVIGATION QUICK START NAVIGATION SCREEN - Read the End User Licence Agreement. The Navigation mode can be selected Press to continue: in a number of ways. Navigation can be accessed from the Main Menu. Navigation can also be selected by pressing the front panel NAV or DEST buttons.
  • Page 89: Adjusting The Navigation Voice Volume

    - If needed, modify the time format and Step 3 - Select a Destination: the unit settings. You can also change You have many ways to select a them later in REGIONAL SETTINGS. destination. Select by touching screen: Address: Tap FIND and then FIND ADDRESS.
  • Page 90: Av In Operation

    AV IN OPERATION AV IN SCREEN SETUP SCREEN You can play back audio/video from an external device connected to the unit. NOTE: Your audio/video device must be connected to the Media Link using an audio/video adapter cable that is available separately. NOTE: The unit can not directly control external devices connected to the Media Link.
  • Page 91: Picture Adjustment Screen

    PICTURE ADJUSTMENT SCREEN When watching a video, the color, tint, contrast or brightness levels can be adjusted to suit your preferences. NOTE: The Picture Adjustment Screen will turn off automatically if no adjustment is made within four seconds or if any other button is pressed.
  • Page 92: Usb Operation

    USB OPERATION Information Display USB SCREEN Audio Icon: You can control a USB device via the Press this icon to access the audio touch screen to access audio files stored controls. on that device. Playlist Icon: NOTE: Your USB device must be Press this icon to access the Playlist connected to the Media Link.
  • Page 93: Playlist Screen

    PLAYLIST SCREEN The Playlist Screen allows you to search for music or video files stored in your USB device. Press a list box item to display contents of a directory or begin playback of that item, as applicable. Press the Scroll Down (q) icon to view the next page in the menu list or the Scroll Up (p) icon to view the previous page.
  • Page 94: Bluetooth Operation

    BLUETOOTH OPERATION Paired Device Identifier BLUETOOTH SCREEN MENU Icon: Bluetooth® technology has the capability to wirelessly synchronize and transfer Press this icon to return to the Main Menu data among devices. The Bluetooth Screen. audio capabilities can be used for Bluetooth Indicator wireless phones hands free applications.
  • Page 95: To Adjust Your Call'svolume

    Device Icon: Dial Icon: Press this icon to access the Device Press this icon to dial to phone number Screen. that you entered. Transfer Icon: Hang Up Icon: Press this icon while talking to transfer Press this icon to end a call or reject an audio from the unit back to the wireless incoming call.
  • Page 96: Pairing Your Wireless Phone

    BLUETOOTH OPERATION PAIRING YOUR WIRELESS PHONE To Pair a Wireless Phone to the Unit: Before using Bluetooth functions, you must pair your wireless phone and the 1. Press the front panel PHONE button unit. Pairing is a special process used or press the Main Menu Bluetooth when two devices connect for the first icon to access the Bluetooth Screen.
  • Page 97: To Pair The Unit To A Wireless Phone

    To Pair the Unit to a Wireless 6. Press the Search icon to look for new Phone: phones if yours is not discovered by the unit. Upon completion of the 1. Access the wireless phone Bluetooth search, the following screen appears: function and set the Bluetooth function to on.
  • Page 98: To Delete Paired Wireless Phones

    BLUETOOTH OPERATION To Delete Paired Wireless MAKING OUTGOING CALLS Phone(s): Outgoing calls can be performed in two 1. Press the front panel PHONE button manners. The outgoing call can be direct dialed using the front panel keypad or the or press the Main Menu Bluetooth icon to access the Bluetooth Screen.
  • Page 99: To Make An Outgoing Call Using Your Contact List

    To Make an Outgoing Call Using MANAGING INCOMING CALLS Your Contact List: When connected to a Bluetooth phone, 1. Press the front panel PHONE button the unit will mute audio output, pause DVD/CD play, and change to the or press the Main Menu Bluetooth icon to access the Bluetooth Screen.
  • Page 100: Call Waiting

    BLUETOOTH OPERATION CALL WAITING DEVICE SCREEN Call Waiting lets you know when another caller is trying to reach you while you are already on a call. You may put one call on hold while you answer the second one, then alternate between the two calls. The second caller or call on hold is identified in the upper left corner of the screen.
  • Page 101: Bluetooth Settings Screen

    BLUETOOTH SETTINGS SCREEN CONTACTS LIST SCREEN The Bluetooth Settings screen allows you The Contacts List Screen is a copy of the to configure Bluetooth settings. contact list on your wireless phone which contains a listing of your important names Back Icon: and phone numbers.
  • Page 102: Call Log Screen

    BLUETOOTH OPERATION CALL LOG SCREEN Missed Calls Icon Press the this icon to view the Missed Calls List. The Missed Calls List retrieves the list of missed numbers from your wireless phone. The last missed number is the first number on the list. The Call Log Screen consists of received calls, dialed calls or missed calls.
  • Page 103: Bluetooth Music Function

    BLUETOOTH MUSIC FUNCTION NOTE: Song information (e.g. elapsed playing time, song title, song index, etc.) cannot be displayed on this unit. Since there are a number of Bluetooth audio players available on the market, operations with your Bluetooth audio player using this unit vary greatly.
  • Page 104: System Settings

    SYSTEM SETTINGS FIRST SETTINGS SCREEN GPS Voice Setting: When using the in-dash navigation radio Press the ON icon to hear turn-by-turn the first time, it is recommended that you navigation instructions. This will override customize the system settings to suit your the settings in the Map setup.
  • Page 105: Touch Screen Calibration

    TOUCH SCREEN CALIBRATION INFORMATION SCREEN The Touch Screen Calibration adjustment is used to set the parameters of the touch screen to ensure that when the screen is pressed, it corresponds to the feature that you are selecting. NOTE: Never use a pen or sharp object to calibrate the touch screen as this will damage the panel.
  • Page 106: Second Settings Screen

    The System Update function is used to volume is muted. update the unit’s software. Please contact Time Display: AUDIOVOX Technical Support for further information on how to update software. This indicator displays the time as Time Zone Setting: entered by the user in the Settings Menu.
  • Page 107: System Time Set Screen

    SYSTEM TIME SET SCREEN Press the Increase (p) icon or Decrease (q) icon to set the desired year, month, day, hour, minute or seconds value. If a GPS signal is received it will override the manual time settings. Back Icon: Press this icon to return to the Second Settings Screen.
  • Page 108: Audio/Equalizer Controls

    AUDIO/EQUALIZER CONTROLS AUDIO CONTROL SCREEN Sub Control: Press the ON icon to turn the vehicle’s The audio control screen allows you to subwoofer on (if equipped). Press the easily adjust your audio system to meet OFF icon to turn the vehicle’s subwoofer the acoustical characteristics of your off.
  • Page 109: Equalizer Screen

    EQUALIZER SCREEN Classical, Pop, and Flat Icons: The Equalizer Screen features a 9-band graphic equalizer that allows you to easily Press the Classical, Pop or Flat icons adjust your audio system to meet the to apply a preset equalization level to acoustical characteristics of your vehicle.
  • Page 110: Rearview Camera

    REARVIEW CAMERA REARVIEW CAMERA (if equipped) The unit is “camera ready.” Before accessing any camera features, you must install a rear video camera. To view the rearview camera: 1. Turn on the rearview camera in the System Settings. 2. Place the vehicle’s gear selector to reverse.
  • Page 112 INTRODUCTION Nous vous remercions d’avoir opté pour un produit Audiovox. Avant la mise en marche de l’appareil, lisez attentivement la notice d’utilisation et conservez-la. AVERTISSEMENT AVERTISSEMENT Ne jamais démonter ni régler Ne jamais installer cet appareil à un l’appareil. endroit qui pourrait compromettre la sécurité...
  • Page 113 CONTENU AVERTISSEMENTS ......... .112 SPÉCIFICATIONS .
  • Page 114 CONTENU UTILISATION D’UN iPOD/iPHONE ......138 Écran iPod/iPhone ........138 Écran de recherche .
  • Page 115 CONTENU Écran de configuration Bluetooth ......155 Écran de configuration du code PIN ......155 Écran de la liste des contacts .
  • Page 116: Spécifications

    SPÉCIFICATIONS Général • Navigation intégré • Sortie composite vidéo pour un écran LCD arrière • Entrée auxiliaire audio/vidéo • 5 sorties line audio: 2x frontal, 2x arrière, 1x subwoofer • Egaliseur 9 bandes avec 3 préréglages et 3 réglages personnalisés •...
  • Page 117 Bluetooth • Profil mains libres Bluetooth pour plus de sécurité / commodité et profil Bluetooth A2DP pour écouter la musique en flux continu (streaming) à partir d’un PDA / lecteur multimédia • Appel en attente et affichage du numéro pour les appels en attente •...
  • Page 118: Commandes Et Témoins

    COMMANDES ET TÉMOINS COMMANDES ET TÉMOINS 1. Bouton Power/Volume/Mute (on/off, silence et volume) Appuyez sur ce bouton pour allumer l’appareil. Appuyez et maintenez appuyé pendant 2 secondes pour éteindre. Régulez le volume en tournant le bouton. La plage du volume s’étend de 0 à 30. Appuyez brièvement pour couper le son. Appuyez de nouveau pour remettre le volume.
  • Page 119: Bouton Tune/Audio (Réglage Audio)

    8. Bouton Tune/Audio (réglage audio) Lorsque l’appareil est en mode Radio, tournez ce bouton pour sélectionner la fréquence suivante ou précédente. Lorsque l’appareil est en mode Lecteur MP3/USB, tournez ce bouton pour sélectionner un morceau. Lorsque l’appareil est en mode DVD, tournez ce bouton pour sélectionner le chapitre suivant ou précédent.
  • Page 120: Liaison Multimédia

    Il est possible que le système de radionavigation In-Dash d’AUDIOVOX ne fonctionne pas comme la radio d’origine en raison des fonctions et fonctionnalités supplémentaires non prises en charge par la radio d’origine.
  • Page 121: Informations Fondamentales Sur Le Dvd/Cd

    INFORMATIONS FONDAMENTALES SUR LE DVD/CD Pour une utilisation optimale de votre lecteur CD/DVD, veuillez lire cette section. Types de disques compatibles avec votre système Votre système peut lire les types de disques suivants : • DVD - Des DVD contenant des fichiers audio et/ou vidéo. •...
  • Page 122: Guide De Démarrage Rapide

    GUIDE DE DÉMARRAGE RAPIDE Mise en marche/arrêt: Appuyez sur le bouton Power/Volume/Mute pour allumer l’appareil. Appuyez et maintenez appuyé pendant 2 secondes pour éteindre. Lecture d’un DVD/CD/MP3: 1. Allumez l’appareil. 2. Insérez un DVD/CD/MP3 dans la fente, étiquette sur le dessus. La lecture commence lorsqu’un disque est inséré.
  • Page 123: Mise Sous Silence De La Source Audio

    Mise sous silence de la source audio : Appuyez sur le bouton Power/Volume/Mute (on/off, silence et volume) du panneau avant pour mettre sous silence la source audio de l’appareil. Le témoin Silence s’affiche sur l’écran LCD. Appuyez à nouveau sur le bouton Power/Volume/Mute (on/ off, silence et volume) pour remettre le volume audio à...
  • Page 124: Réglage Des Commandes De L'égaliseur

    GUIDE DE DÉMARRAGE RAPIDE Réglage des commandes de l’égaliseur : 1. Sélectionnez une source audio/vidéo 2. Appuyez sur le bouton de l’égaliseur pour afficher l’écran de l’égaliseur. 3. Pour régler la source audio de sorte qu’elle réponde aux caractéristiques acoustiques de votre véhicule : a.
  • Page 125: Réinitialisation Du Système

    3. Appuyez sur le bouton Vers le haut (p) ou Vers le bas (q) pour sélectionner votre fuseau horaire. 4. Appuyez sur le bouton Time Set (Réglage de l’heure) pour afficher l’écran de réglage de l’heure système. 5. Appuyez sur le bouton Augmenter (p) ou Diminuer (q) pour régler les valeurs pour l’année, le mois, le jour, les heures, les minutes ou secondes.
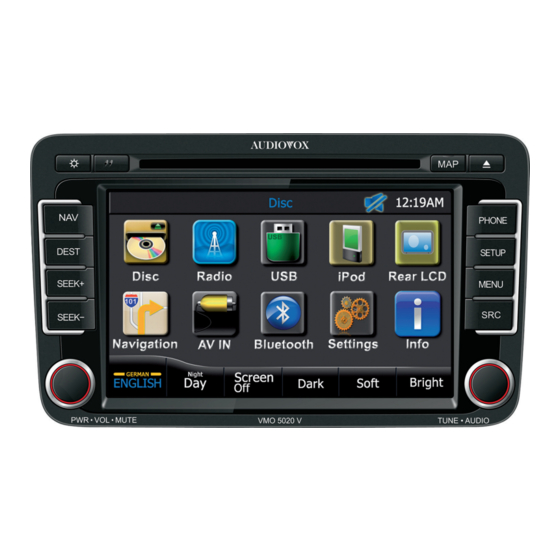
  • Page 126: Menu Principal

    MENU PRINCIPAL ÉCRAN DU MENU Bouton Rear LCD: PRINCIPAL Appuyez sur ce bouton pour accéder à L’écran du menu principal vous permet l’écran LCD arrière. Cet écran permet de de sélectionner une source audio/vidéo contrôler la vidéo (DVD) à l’arrière d’un pour les zones avant et arrière de votre véhicule équipé...
  • Page 127 Bouton Deutsch/English (allemand/anglais): Appuyez sur ce bouton pour basculer en- tre l’allemand et l’anglais pour la langue d’affichage. REMARQUE : La vidéo s’éteint et la source audio est mise sous silence pendant en- viron dix secondes lorsque l’appareil bascule entre l’allemand et l’anglais.
  • Page 128: Utilisation D'un Cd/Mp3

    UTILISATION D’UN CD/MP3 Affichage des informations ÉCRAN DE COMMANDES CD Bouton En insérant un CD, le mode CD est activé et la lecture du disque commence. Appuyez sur ce bouton pour choisir le Bouton MENU: titre précédent. Bouton (retour rapide): Appuyez sur ce bouton pour revenir sur le Menu Principal.
  • Page 129: Écran De Sélection Directe De Pistes

    Bouton Folder: ÉCRAN DE SÉLECTION DIRECTE DE PISTES Lorsqu’un CD est en cours de lecture, ce bouton est grisé car il ne peut pas être sélectionné. Bouton Tracklist: Appuyez sur ce bouton pour accéder à l’écran de sélection directe de pistes. Bouton (répétition): Lors de la lecture, appuyez sur ce bouton...
  • Page 130: Écran De Commandes Mp3

    UTILISATION D’UN CD/MP3 Affichage des informations ÉCRAN DE COMMANDES Bouton Appuyez sur ce bouton pour ouvrir le MP3 est un format de stockage de menu égaliseur. contenu audio numérique. Un morceau Bouton Audio: audio de qualité CD peut être compressé au format MP3 avec une très faible perte Appuyez sur ce bouton pour ouvrir le de qualité...
  • Page 131: Écran De Sélection Directe De Dossiers

    Bouton Mute: Lorsque vous appuyez sur le bouton Folder (Dossier), l’écran de sélection Appuyez sur ce bouton pour réduire directe de dossiers apparaît. au silence le volume de l’appareil. Bouton Back L’indicateur “muet” s’affiche. Appuyez de nouveau pour restaurer le volume. Appuyez sur ce bouton pour retourner à...
  • Page 132: Utilisation D'un Dvd

    UTILISATION D’UN DVD Affichage des informations ÉCRAN DE COMMANDES Bouton Appuyez sur ce bouton pour ouvrir le En insérant un disque DVD, le mode menu égaliseur. DVD est activé et la lecture du disque Bouton Audio: commence. REMARQUE: Lorsqu’elle est Appuyez sur ce bouton pour ouvrir le correctement installée, la menu de commande audio.
  • Page 133: Bouton Mute

    Bouton Mute: Appuyez sur ce bouton pour réduire au silence le volume de l’appareil. L’indicateur “muet” s’affiche. Appuyez de nouveau pour restaurer le volume. L’indicateur “muet” disparaît. Bouton Folder: Lorsqu’un DVD est en cours de lecture, ce bouton est grisé car il ne peut pas être sélectionné.
  • Page 134: Commandes À L'écran

    DVD Operation COMMANDES À L’ÉCRAN Bouton Main Menu: Appuyez sur ce bouton pour afficher le menu racine du DVD. Bouton (retour rapide) Appuyez sur ce bouton pour obtenir un retour rapide de la lecture vidéo. Bouton (avance rapide): Appuyez sur ce bouton pour obtenir une avance rapide de la lecture vidéo.
  • Page 135: Écran De Réglage De L'image

    ÉCRAN DE RÉGLAGE DE L’IMAGE Lors de la lecture d’une vidéo, vous pouvez régler les niveaux de couleur, teinte, contraste ou luminosité selon vos préférences. REMARQUE : L’écran de réglage de l’image s’éteint automatiquement si aucun réglage n’est effectué dans les quatre secondes ou si aucun autre bouton n’est sélectionné.
  • Page 136: Utilisation De La Radio Am/Fm

    UTILISATION DE LA RADIO AM/FM Boutons des présélections Bannière d’affichage ÉCRAN DE RADIO AM/FM Bouton Bouton MENU: Appuyez sur ce bouton pour régler la Appuyez sur ce bouton pour revenir sur radio sur la station, étant la mieux reçue, le Menu Principal. suivante dans la bande de fréquence Indication “muet”: supérieure.
  • Page 137 Bouton TA - Traffic Announcement Bouton FM1 : (messages d’information routière) Appuyez sur ce bouton pour sélectionner Appuyez sur le bouton TA pour activer la bande FM1 et afficher les stations FM1 présélectionnées. Vous pouvez ou désactiver la priorité aux messages d’information routière.
  • Page 138: Utilisation D'un Ipod/Iphone

    UTILISATION D’UN iPOD/iPHONE ÉCRAN iPOD/iPHONE Bouton Vous pouvez contrôler votre iPod/iPhone à l’aide de l’écran tactile pour accéder Appuyez sur ce bouton pour ouvrir le aux listes de lecture, artistes, albums, menu égaliseur. morceaux, vidéos, etc. Bouton Audio: REMARQUE : Pour la connectivité de Appuyez sur ce bouton pour ouvrir le base, votre iPod/iPhone menu de commande audio.
  • Page 139: Écran De Recherche

    Bouton ÉCRAN DE RECHERCHE Appuyez sur ce bouton pour choisir le titre précédent du répertoire. Bouton (Lecture/Pause): Appuyez sur ce bouton pour commencer la lecture. Appuyez de nouveau pour la mettre en pause. Bouton Appuyez sur ce bouton pour choisir le titre suivant du répertoire.
  • Page 140: Écran De Configuration

    UTILISATION D’UN iPOD/iPHONE ÉCRAN DE CONFIGURATION ÉCRAN DE RÉGLAGE DE L’IMAGE Lorsque la vidéo est affichée en plein Lors de la lecture d’une vidéo, vous écran, touchez l’écran LCD pour afficher pouvez régler les niveaux de couleur, l’écran de configuration. teinte, contraste ou luminosité...
  • Page 141: Utilisation De L'écran Arrière

    UTILISATION DE L’ÉCRAN ARRIÈRE ÉCRAN LCD ARRIÈRE Bouton MENU: L’appareil permet de lire deux sources simultanément. A titre d’exemple, l’écran Appuyez sur ce bouton pour revenir sur de l’appareil peut être mis sur la fonction le Menu Principal. radio alors que les passagers arrière peu- Indication “muet”: vent regarder une vidéo (DVD) à...
  • Page 142: Démarrage Rapide De La Navigation

    DÉMARRAGE RAPIDE DE LA NAVIGATION ÉCRAN NAVIGATION - Lisez le contrat de licence utilisateur final. Touchez pour continuer. Vous avez plusieures possibilités d’activer le mode navigation. Appuyez sur le bouton NAV ou DEST sur le front de l’appareil ou touchez NAVIGATION sur le menu principal.
  • Page 143: Réglage Du Volume De La Voix De Navigation

    les modifier ultérieurement dans Adresse: Appuyez sur RECHERCHER et puis sur CHERCHER L’ADRESSE. Paramètres régionaux Entrez l’adresse avec le clavier. Lieu d’intérêt (Point of Interest - POI) Appuyez sur RECHERCHER et puis sur RECHERCHER DES..Cherchez lieu d’intérêt. Historique: Appuyez sur RECHERCHER pour sélectionner une destination récente.
  • Page 144: Utilisation Des Sources Av In

    UTILISATION DES SOURCES AV IN ÉCRAN AV IN Bouton Vous pouvez lire des sources audio/ vidéo à partir d’un périphérique externe Appuyez sur ce bouton pour ouvrir le connecté à l’appareil. menu égaliseur. REMARQUE : Votre périphérique audio/ Bouton Audio: vidéo doit être connecté...
  • Page 145: Écran De Configuration

    ÉCRAN DE CONFIGURATION ÉCRAN DE RÉGLAGE DE L’IMAGE Lorsque la vidéo est affichée en plein Lors de la lecture d’une vidéo, vous écran, touchez l’écran LCD pour afficher pouvez régler les niveaux de couleur, l’écran de configuration. teinte, contraste ou luminosité selon vos préférences.
  • Page 146: Utilisation Usb

    UTILISATION USB Affichage des informations ÉCRAN USB Affichage des informations de lecture : Vous pouvez contrôler un périphérique USB à l’aide de l’écran tactile pour Affiche le type de fichier en cours de accéder aux fichiers audio stockés sur ce lecture, la piste, l’artiste, l’album, la périphérique.
  • Page 147: Écran De La Liste De Lecture

    Bouton ÉCRAN DE LA LISTE DE LECTURE Appuyez sur ce bouton pour lire le fichier suivant. Bouton Appuyez sur ce bouton pour lire les titres du répertoire dans un ordre aléatoire. Appuyez de nouveau pour annuler le mode de lecture aléatoire. Bouton (répétition): Appuyez sur ce bouton lors de la lecture...
  • Page 148: Utilisation Bluetooth

    UTILISATION BLUETOOTH Identifiant du dispositif apparié ÉCRAN BLUETOOTH Bouton MENU: Bluetooth® et sa technologie, permettent de synchroniser et de transférer des Appuyez sur ce bouton pour revenir sur informations entre appareils, sans besoin le Menu Principal. de fil. Les possibilités audio de Bluetooth Indicateur Bluetooth permettent d’utiliser les téléphones Cet indicateur s’allume en bleu lorsque...
  • Page 149: Pour Régler Le Volume De Votre Appel

    REMARQUE: Les commandes au volant Bouton Device: de votre véhicule (selon Appuyez sur ce bouton pour accéder à équipement) activent l’écran des périphériques. également les commandes Bouton Transfer: vocales de votre téléphone Appuyez sur ce bouton pendant que sans fil. vous parlez afin de transférer le son de Bouton d’appel : l’appareil vers le téléphone sans fil.
  • Page 150: Appariement De Votre Téléphone Sans Fil

    UTILISATION BLUETOOTH APPARIEMENT DE VOTRE Apparier un téléphone sans fil à TÉLÉPHONE SANS FIL l’appareil: Avant d’utiliser les fonctions Bluetooth, 1. Appuyez sur le bouton PHONE du vous devez apparier l’appareil à votre panneau frontal, ou sur le bouton téléphone sans fil. L’appariement est BLUETOOTH sur le menu principal, un processus spécial utilisé...
  • Page 151: Apparier L'appareil À Un Téléphone Sans Fil

    Apparier l’appareil à un téléphone 7. Appuyez sur l’identifiant du téléphone sans fil: sans fil que vous souhaitez apparier. L’écran suivant s’affiche : 1. Accédez à la fonction Bluetooth du téléphone sans fil et mettre la fonction Bluetooth sur ON. 2.
  • Page 152: Effectuer Des Appels Sortants

    UTILISATION BLUETOOTH Pour supprimer des téléphones EFFECTUER DES APPELS sans fil appariés, procédez comme SORTANTS suit : Vous pouvez effectuer des appels sortants 1. Appuyez sur le bouton PHONE de deux façons différentes. L’appel sortant peut être effectué en composant (TÉLÉPHONE) du panneau avant ou sur le bouton Bluetooth du menu directement le numéro avec le clavier...
  • Page 153: Pour Effectuer Un Appel Sortant À Partir De La Liste Des Contacts

    Pour effectuer un appel sortant à 6. Appuyez sur le bouton partir de la liste des contacts : Composer ( ) pour appeler. L’écran d’appel apparaît. 1. Appuyez sur le bouton PHONE (TÉLÉPHONE) du panneau avant 7. Pour terminer l’appel, appuyez sur le ou sur le bouton Bluetooth du bouton Raccrocher ( menu principal pour accéder à...
  • Page 154: Appel En Attente

    Bluetooth Operation UTILISATION BLUETOOTH APPEL EN ATTENTE ÉCRAN DES PÉRIPHÉRIQUES L’appel en absence vous informe lorsque vous recevez un autre appel alors que vous êtes déjà en communication. Vous pouvez mettre le premier appel en absence pendant que vous répondez au second, puis passer d’un appel à...
  • Page 155: Écran De Configuration Bluetooth

    ÉCRAN DE CONFIGURATION ÉCRAN DE CONFIGURATION DU BLUETOOTH CODE PIN L’écran de configuration Bluetooth vous Le code PIN peut être modifié et permet de configurer les paramètres comporter un maximum de huit chiffres. Bluetooth. Utilisez le clavier pour sélectionner les chiffres et appuyez sur .
  • Page 156: Écran De La Liste Des Contacts

    Bluetooth Operation ÉCRAN DE LA LISTE DES La liste des contacts peut contenir CONTACTS jusqu’à 2 000 noms et numéros de téléphone. ÉCRAN DU JOURNAL DES APPELS L’écran de la liste des contacts est une copie de la liste des contacts de votre téléphone sans fil.
  • Page 157: Fonction Musique De Bluetooth

    FONCTION MUSIQUE DE Bouton Dialed Calls BLUETOOTH Appuyez sur ce bouton pour afficher la liste des numéros composés. La liste des numéros composés récupère la liste des numéros composés à partir de votre téléphone sans fil. Le dernier numéro composé est le premier numéro de la liste.
  • Page 158 Bouton Play/Pause: •AVRCP : Lecture, pause, sélection de morceaux, etc. tout en transférant en flux Appuyez sur ce bouton pour commencer continu des fichiers audio depuis votre la lecture. Appuyez de nouveau pour la lecteur audio compatible Bluetooth vers mettre en pause. l’appareil.
  • Page 159: Paramètres Système

    PARAMÈTRES SYSTÈME PREMIER ÉCRAN DE Appuyez sur le bouton OFF pour que le CONFIGURATION mode Navigation ne soit plus prioritaire. Lorsque vous utilisez le système de Vous devez passer manuellement du radionavigation In-Dash pour la première mode Navigation aux autres fonctions du fois, nous vous recommandons de menu.
  • Page 160: Calibration De L'écran Tactile

    Bouton Prev: 2. Suivez les instructions à l’écran. Appuyez et maintenez brièvement Appuyez sur ce bouton pour ouvrir la votre doigt ou un stylet sur le centre première page du menu de configuration de la cible. Répétez l’opération (Settings). lorsque la cible se déplace dans Bouton Calibrate Touch Screen: chaque coin de l’écran pour s’arrêter Appuyez sur ce bouton pour initier la...
  • Page 161: Second Écran De Configuration

    à jour le logiciel de Affiche l’heure comme l’a saisie l’appareil. Veuillez contacter le support l’utilisateur sur le menu de configuration. technique AUDIOVOX pour de plus Bouton Turn On Volume: amples informations sur la méthode de mise à jour du logiciel.
  • Page 162: Écran De Réglage De L'heure Système

    ÉCRAN DE RÉGLAGE DE L’HEURE SYSTÈME Appuyez sur le bouton Augmenter (p) ou Diminuer (q) pour régler les valeurs pour l’année, le mois, le jour, les heures, les minutes ou secondes. Si un signal GPS est reçu, il annule les paramètres de temps manuels.
  • Page 163: Commandes Audio/Égaliseur

    COMMANDES AUDIO/ÉGALISEUR ÉCRAN DE RÉGLAGE AUDIO Option Sub (Caisson de basses) : Appuyez sur le bouton ON pour activer La fonction de Audio Control/comman- le caisson de basses du véhicule (selon de audio permet de régler facilement le équipement). Appuyez sur le bouton OFF système audio pour l’adapter aux ca- pour désactiver le caisson de basses du ractéristiques acoustiques du véhicule,...
  • Page 164: Écran De L'égaliseur

    ÉCRAN DE Boutons Classical, Pop et Flat: L’ÉGALISEUR Appuyez sur les boutons Classical L’écran de l’égaliseur comporte un (Classique), Pop (Pop) ou Flat (Plat) égaliseur graphique à 9 bandes qui pour appliquer un niveau d’égaliseur vous permet de régler facilement présélectionné...
  • Page 165: Caméra De Recul

    CAMÉRA DE RECUL CAMÉRA DE RECUL (le cas échéant) La caméra est déjà prête à être utilisée sur l’appareil. Avant d’accéder aux fonctions de la caméra, acheter et installer une caméra vidéo à l’arrière. 1. Activez la caméra de recul (premier écran de configuration).
  • Page 166 INSTALLATIONSANWEISUNG FÜR DIE STECKVERBINDER/ INSTALLATION GUIDE FOR HARNESS CONNECTORS BITTE BEACHTEN SIE: Eine fehlerhafte Verbindung der Steckverbinder kann zu Schäden des Gerätes führen. Die Anweisungen dieser Anleitung sollten ausführlich beachtet werden, oder lassen Sie die Installation von erfahrenen Technikern durchführen. ABKLEMMEN DER BATTERIE Um einen Kurzschluss zu verhindern sollten Sie vor der Installation die Zündung ausschalten und den Minuspol (-) der Batterie abklemmen.
  • Page 167 INSTALLATIONSANWEISUNG FÜR DIE STECKVERBINDER/ INSTALLATION GUIDE FOR HARNESS CONNECTORS Verbinden Sie die Steckverbinder des Multimedia- Systems mit den Steckern des Fahrzeuges Connect the multimedia system main harnesses ANTENNA IN GPRS to the vehicle harness. OPTIONAL Nur erforderlich für (Yellow) Battery +12 VDC die Versorgungs- spannung des (Red) Ignition +12 VDC...
  • Page 168 INSTALLATIONSANWEISUNG FÜR DIE STECKVERBINDER/ INSTALLATION GUIDE FOR HARNESS CONNECTORS Für Fahrzeuge mit zweifachen FAKRA-Steckverbindern For cars with double FAKRA antenna output ANTENNA IN GPRS Subwoofer Out Front Left Audio Out Front Right Audio Out Rear Left Audio Out Rear Right Audio Out Rear Monitor Video Out Rear Monitor Left Audio Out Rear Monitor Right Audio Out...
  • Page 169 INSTALLATIONSANWEISUNG FÜR DIE STECKVERBINDER/ INSTALLATION GUIDE FOR HARNESS CONNECTORS Für Fahrzeuge mit einfachen FAKRA-Steckverbindern For cars with single FAKRA antenna output ANTENNA IN GPRS Subwoofer Out Front Left Audio Out Front Right Audio Out Rear Left Audio Out Rear Right Audio Out Rear Monitor Video Out Rear Monitor Left Audio Out Rear Monitor Right Audio Out...
  • Page 170 Congratulations! You have made a wise selection in becoming the owner of a AUDIOVOX Mobile Video equipment. Due to high quality AUDIOVOX Mobile Video products have earned an excellent reputation through the western world. And this high quality standard enables us to grant a 2-years warranty for AUDIOVOX Mobile Video products.
  • Page 171 arantiekarte arranty Typ/Type Serien-Nr./Serial-No. Name und Anschrift des Händlers/Stempel Name and address of the dealer/stamp Käufer/Customer Name/Name Straße/Street PLZ, Ort/City Land /Country Kaufdatum /buying date Nur gültig in Verbindung mit Ihrer Kaufquittung! No warranty without receipt!
  • Page 172 ® Audiovox Audio Produkte GmbH Lise-Meitner-Str. 9 • D-50259 Pulheim • Germany Tel. +49 (0) 2234 807-0 • Fax +49 (0) 2234 807-399 www.audiovox.de...

Table des Matières