Masquer les pouces Voir aussi pour ROOT PAR TW:
Table des Matières

Publicité

Les langues disponibles
  • FR

Les langues disponibles

  • FRANÇAIS, page 33

Liens rapides

USER´S MANUAL
BEDIENUNGSANLEITUNG
MANUEL D´UTILISATION
MANUAL DE USUARIO
INSTRUKCJA OBSŁUGI
MANUALE D´USO
ROOT PAR TW
7 X 4 W CW + WW PAR SPOTLIGHT
CLROOTPARTW

Publicité

Table des Matières
loading

Sommaire des Matières pour Cameo ROOT PAR TW

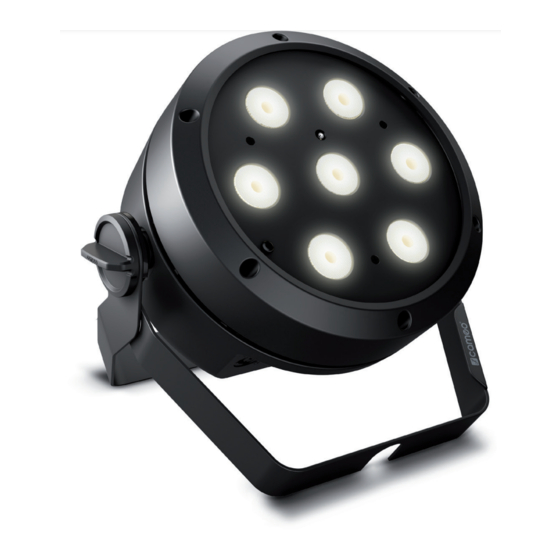
  • Page 1 USER´S MANUAL BEDIENUNGSANLEITUNG MANUEL D´UTILISATION MANUAL DE USUARIO INSTRUKCJA OBSŁUGI MANUALE D´USO ROOT PAR TW 7 X 4 W CW + WW PAR SPOTLIGHT CLROOTPARTW...
  • Page 2: Table Des Matières

    CONTENTS / INHALTSVERZEICHNIS / CONTENU / CONTENIDO / TREŚĆ / CONTENUTO ENGLISH ESPAÑOL SAFETY INFORMATION MEDIDAS DE SEGURIDAD INTRODUCTION INTRODUCCIÓN CONNECTIONS, CONTROL, AND DISPLAY ELEMENTS CONEXIONES, ELEMENTOS DE MANEJO Y ELEMENTOS OPERATION DE VISUALIZACIÓN IR REMOTE CONTROL (optional) FUNCIONAMIENTO SETUP AND INSTALLATION MANDO A DISTANCIA POR INFRARROJOS (opcional) DMX TECHNOLOGY INSTALACIÓN Y MONTAJE...
  • Page 3: English

    This device was developed and produced under the highest standards of quality in order to ensure smooth operation for many years. Please read these operating instructions carefully so that you can use your new Cameo Light product quickly and optimally. You can find more information on Cameo Light on our website WWW.CAMEOLIGHT.COM.
  • Page 4 36. The appliance is not to be used by persons (including children) with reduced physical, sensory or mental capabilities, or lack of experience and knowledge. 37. Children must be instructed not to play with the device. 38. If the power cord of the device is damaged, do not use the device. The power cord must be replaced by an adequate cable or assembly from an authorized service center.
  • Page 5: Introduction

    Blue Power Twist power input socket. Operating voltage: 100–240 V AC / 50–60 Hz. A suitable power cable with Power Twist plug is included in the delivery. POWER OUT White Power Twist power output socket to supply power to additional Cameo spotlights (max. 8 A). DMX IN Male 3-pin XLR connector to connect a DMX control device (e.g., DMX console).
  • Page 6 ROOT PAR TW FUSE: F3A / 250 V FUSE Fuse holder for 5 × 20 mm micro fuses. IMPORTANT NOTE: Only replace the fuse with a fuse of the same type and values. If a fuse trips repeatedly, please contact an authorized service center.
  • Page 7: Operation

    NOTES • As soon as the spotlight is correctly connected to the power supply, “Welcome to Cameo”, the model designation, and then the software version are displayed in sequence on the display as part of the startup process. The spotlight is ready for use after this process, and the previously selected mode will activate.
  • Page 8 DMX DELAY The DMX Delay function allows a chaser light effect to be easily created with any number of spotlights of the same model and software version, which could otherwise only be achieved with a suitable DMX controller and complex programming. All spotlights integrated into the setup are set to the same DMX mode and controlled with the same DMX start address.
  • Page 9: Direct Mode

    STAND-ALONE MODE DIRECT As with a DMX control device, stand-alone mode Direct makes it possible to directly set values from 000 to 255 on the device for the dimmer, strobe, cold white, and warm white. This allows the user to create individual scenes without needing an additional DMX controller. Starting from the main display, press MODE to go to the main menu.
  • Page 10: Slave Mode

    1st step 4 presets with various color temperatures Hal (Halogen) Neu (Neutral) Stu (Studio) Day (Daylight) 2nd step 4 presets with various color temperatures plus blackout Hal (Halogen) Neu (Neutral) Stu (Studio) Day (Daylight) Black (Blackout) SLAVE MODE Standard Slave mode: Starting from the main display, press MODE to go to the main menu. Using UP and DOWN, now select the Slave menu option, press ENTER to confirm, then select Slave Group 0, and select ENTER once again to confirm.
  • Page 11 SYSTEM SETTINGS (Settings) Starting from the main display, press MODE to go to the main menu. Using UP and DOWN, now select the Settings menu option and press ENTER to confirm. This will take you to the submenu for setting the submenu options (see table, use UP and DOWN to select, press ENTER to confirm, use UP and DOWN to change status/value, press ENTER to confirm).
  • Page 12: System Info

    SYSTEM INFORMATION (System Info) Starting from the main display, press MODE to go to the main menu. Using UP and DOWN, now select the System Info menu option and press ENTER to confirm your selection. This will take you to the submenu which will let you access system information (see table, use UP and DOWN to select, press ENTER to confirm, use UP and DOWN to change status, press ENTER to confirm).
  • Page 13: Ir Remote Control (Optional)

    IR REMOTE CONTROL (optional) Aim the infrared remote control directly, within line-of-sight, at the infrared sensor installed on the front side of the spotlight. The maximum range is approx. 26.24 feet. The spotlight’s sensor is deactivated in DMX and slave mode. The infrared remote directly controls the internal stand-alone modes: Direct, CCT, and Loop/Sound.
  • Page 14: Setup And Installation

    SETUP AND INSTALLATION Thanks to the convenient twin mounting bracket, the spotlight can be placed in a suitable location on a flat surface. Install on a crossbeam using a traverse clamp that is attached to the mounting bracket . Suitable traverse clamps are available as needed. Ensure that the connections are tight and secure the spotlight to the fixing eyelet on the back of the spotlight using a suitable safety eyebolt.
  • Page 15: Dmx Technology

    DMX TECHNOLOGY DMX-512 DMX (Digital Multiplex) is the designation for a universal transmission protocol for communications between corresponding devices and controllers. A DMX controller sends DMX data to the connected DMX device(s). The DMX data is always transmitted as a serial data stream that is forwarded from one connected device to the next via the "DMX IN"...
  • Page 16: Technical Specifications

    TECHNICAL SPECIFICATIONS Article number: CLROOTPARTW Product type: LED Spotlight Type: PAR Spotlight Color spectrum: CW + WW Number of LEDs: LED type: LED PWM frequency: 650 Hz, 1530 Hz, 2150 Hz, 4000 Hz (adjustable) Beam angle 37.5° (19.5°) (half peak angle): DMX input: 3-pin male DMX output:...
  • Page 17: Manufacturer´s Declarations

    MANUFACTURER´S DECLARATIONS MANUFACTURER‘S WARRANTY & LIMITATIONS OF LIABILITY You can find our current warranty conditions and limitations of liability at: https://cdn-shop.adamhall.com/media/pdf/MANUFACTURERS- DECLARATIONS_CAMEO.pdf. To request warranty service for a product, please contact Adam Hall GmbH, Adam-Hall-Str. 1, 61267 Neu Anspach / Email: Info@adamhall.com / +49 (0)6081 / 9419-0. CORRECT DISPOSAL OF THIS PRODUCT (valid in the European Union and other European countries with a differentiated waste collection system) This symbol on the product, or on its documents indicates that the device may not be treated as household waste.
  • Page 18: Deutsch

    Dieses Gerät wurde unter hohen Qualitätsanforderungen entwickelt und gefertigt, um viele Jahre einen reibungslosen Betrieb zu gewähr- leisten. Bitte lesen Sie diese Bedienungsanleitung sorgfältig, damit Sie Ihr neues Produkt von Cameo Light schnell und optimal einsetzen können. Weitere Informationen über Cameo Light erhalten Sie auf unserer Website WWW.CAMEOLIGHT.COM.
  • Page 19 34. Der Abstand zu brennbaren Materialien muss mindestens 0,5 m betragen. 35. Netzleitungen zur Spannungsversorgung mehrerer Geräte müssen mindestens 1,5 mm² Aderquerschnitt aufweisen. In der EU müssen die Leitungen H05VV-F, oder gleichartig, entsprechen. Geeignete Leitungen werden von Adam Hall angeboten. Mit diesen Leitungen können Sie mehrere Geräte über den Power out Anschluss mit dem Power IN Anschluss eines weiteren Gerätes verbinden.
  • Page 20: Einführung

    Blaue Power Twist Netzeingangsbuchse. Betriebsspannung 100 - 240V AC / 50 - 60Hz. Ein geeignetes Netzkabel mit Power Twist Geräteste- cker befindet sich im Lieferumfang. POWER OUT Weiße Power Twist Netzausgangsbuchse für die Spannungsversorgung weiterer Cameo Scheinwerfer (max. 8A). DMX IN Männliche 3-Pol XLR-Buchse zum Anschließen eines DMX-Kontrollgeräts (z.B. DMX-Pult).
  • Page 21 ROOT PAR TW FUSE: F3A / 250 V FUSE Sicherungshalter für 5 x 20mm Feinsicherungen. WICHTIGER HINWEIS: Ersetzen Sie die Sicherung ausschließlich durch eine Sicherung des gleichen Typs und mit gleichen Werten. Sollte die Sicherung wiederholt auslösen, wenden Sie sich bitte an ein autorisiertes Servicezentrum.
  • Page 22: Bedienung

    BEDIENUNG ANMERKUNGEN • Sobald der Scheinwerfer korrekt am Stromnetz angeschlossen ist, wird während des Startvorgangs nacheinander „Welcome to Cameo“, die Modellbezeichnung und die Softwareversion im Display angezeigt. Nach diesem Vorgang ist der Scheinwerfer betriebsbereit und die Betriebsart, die zuvor aktiviert war, wird gestartet.
  • Page 23 DMX DELAY Mit Hilfe der Funktion DMX Delay kann auf einfache Weise mit einer beliebig großen Anzahl Scheinwerfern des gleichen Modells und Softwarestands ein Lauflichteffekt realisiert werden, der sonst nur mit einem geeigneten DMX-Controller und aufwändiger Programmierung erreicht werden könnte. Dabei werden alle einbezogenen Scheinwerfer auf die gleiche DMX-Betriebsart eingestellt und auf der gleichen DMX-Startadresse angesteuert.
  • Page 24: Direct Mode

    STAND-ALONE-BETRIEBSART DIRECT Die Stand-Alone Betriebsart Direct ermöglicht es, ähnlich wie mit einem DMX-Steuergerät, Dimmer, Stroboskop (Strobe), Kaltweiß und Warmweiß direkt am Gerät mit Werten von 000 bis 255 einzustellen. Somit kann eine individuelle Szene erstellt werden, ohne einen zusätz- lichen DMX-Controller zu benötigen. Ausgehend von der Hauptanzeige gelangen Sie durch Drücken auf MODE in das Hauptmenü.
  • Page 25 1.Step 4 Presets mit unterschiedlicher Farbtemperatur Hal (Halogen) Neu (Neutral) Stu (Studio) Day (Daylight) 2.Step 4 Presets mit unterschiedlicher Farbtemperatur plus Blackout Hal (Halogen) Neu (Neutral) Stu (Studio) Day (Daylight) Black (Blackout) SLAVE-BETRIEB Standard Slave-Betrieb: Ausgehend von der Hauptanzeige gelangen Sie durch Drücken auf MODE in das Hauptmenü. Mit Hilfe der Taster UP und DOWN wählen Sie nun den Menüpunkt Slave aus, bestätigen mit ENTER, wählen dann die Slave-Gruppe 0 (Slave Group 0) aus und bestätigen wiederum mit ENTER.
  • Page 26 SYSTEMEINSTELLUNGEN (Settings) Ausgehend von der Hauptanzeige gelangen Sie durch Drücken auf MODE in das Hauptmenü. Mit Hilfe der Bedienfelder UP und DOWN wählen Sie nun den Menüpunkt Settings aus und bestätigen mit ENTER. Daraufhin gelangen Sie in das Untermenü zum Einstellen der Untermenüpunkte (siehe Tabelle, Auswahl mit UP und DOWN, bestätigen mit ENTER, Wert bzw.
  • Page 27: System Info

    SYSTEMINFORMATIONEN (System Info) Ausgehend von der Hauptanzeige gelangen Sie durch Drücken auf MODE in das Hauptmenü. Mit Hilfe der Taster UP und DOWN wählen Sie nun den Menüpunkt System Info aus und bestätigen mit ENTER. Daraufhin gelangen Sie in das Untermenü zum Aufrufen der Systeminformationen (siehe Tabelle, Auswahl mit UP und DOWN, bestätigen mit ENTER, Status ändern mit UP und DOWN, bestätigen mit ENTER).
  • Page 28: Ir Fernbedienung (Optional)

    IR FERNBEDIENUNG (optional) Richten Sie die Infrarot-Fernbedienung in Sichtverbindung direkt auf den auf der Vorderseite des Scheinwerfers verbauten Infrarot-Sensor. Die maximale Reich- weite beträgt circa 8 Meter. In der DMX- und der Slave-Betriebsart ist der Sensor des Scheinwerfers deaktiviert. Die Infrarot-Fernbedienung kontrolliert direkt die internen Stand-Alone-Betriebsarten Direct, CCT und Loop / Sound.
  • Page 29: Aufstellung Und Montage

    AUFSTELLUNG UND MONTAGE Dank des komfortablen Doppelbügels kann der Scheinwerfer an einer geeigneten Stelle auf eine ebene Fläche gestellt werden. Die Montage an einer Traverse erfolgt mit Hilfe einer Traversenklemme, die am Montagebügel befestigt wird . Geeignete Traversenklemmen sind optional erhältlich. Sorgen Sie für feste Verbindungen und sichern Sie den Scheinwerfer mit einem geeigneten Sicherungsseil an der Siche- rungsöse auf der Rückseite des Scheinwerfers.
  • Page 30: Dmx Technik

    DMX TECHNIK DMX-512 DMX (Digital Multiplex) ist die Bezeichnung für ein universelles Übertragungsprotokoll für die Kommunikation zwischen entsprechenden Geräten und Controllern. Ein DMX-Controller sendet DMX-Daten an das/die angeschlossene(n) DMX-Gerät(e). Die DMX-Datenübertragung erfolgt stets als serieller Datenstrom, der über die an jedem DMX-fähigen Gerät vorhandenen DMX IN- und DMX OUT-Anschlüsse (XLR-Steckverbinder) von einem angeschlossenen Gerät an das nächste weitergeleitet wird, wobei die maximale Anzahl der Geräte 32 nicht überschreiten darf.
  • Page 31: Technische Daten

    TECHNISCHE DATEN Artikelnummer: CLROOTPARTW Produktart: LED-Scheinwerfer Typ: PAR- Scheinwerfer Farbspektrum: CW + WW LED Anzahl: LED Typ: LED PWM Frequenz: 650Hz, 1530Hz, 2150Hz, 4000Hz (einstellbar) Abstrahlwinkel 37,5° (19,5°) (Halbstreuwinkel): DMX-Eingang: 3-Pol männlich DMX-Ausgang: 3-Pol weiblich DMX Modi: 2-Kanal, 3-Kanal, 4-Kanal 1, 4-Kanal 2, 8-Kanal DMX Funktionen: Dimmer, Dimmer fein, Stroboskop, Kaltweiß, Warmweiß, Farbtemperatur, DMX Delay, Mikrofonempfindlichkeit...
  • Page 32: Herstellererklärungen

    HERSTELLERERKLÄRUNGEN HERSTELLERGARANTIE & HAFTUNGSBESCHRÄNKUNG Unsere aktuellen Garantiebedingungen und Haftungsbeschränkung finden Sie unter: https://cdn-shop.adamhall.com/media/pdf/ MANUFACTURERS-DECLARATIONS_CAMEO.pdf. Im Service Fall wenden Sie sich bitte an Adam Hall GmbH, Adam-Hall-Str. 1, 61267 Neu Anspach / E-Mail Info@adamhall.com / +49 (0)6081 / 9419-0. KORREKTE ENTSORGUNG DIESES PRODUKTS (Gültig in der Europäischen Union und anderen europäischen Ländern mit Mülltrennung) Dieses Symbol auf dem Produkt oder dazugehörigen Dokumenten weist darauf hin, dass das Gerät am Ende der Produktlebenszeit nicht zusammen mit dem normalen Hausmüll entsorgt werden darf, um Umwelt- oder Personenschäden durch unkontrollierte Abfallentsorgung zu vermeiden.
  • Page 33: Francais

    Cet appareil a été développé et fabriqué en appliquant des exigences de qualité très élevées: il garantit des années de fonctionnement sans problème.Veuillez lire attentivement ce Manuel Utilisateur : vous apprendrez rapidement à utiliser votre appareil Cameo Light de façon optimale.
  • Page 34 34. Respectez une distance minimale de 0,5m par rapport à des matériaux inflammables. 35. Si vous désirez alimenter plusieurs projecteurs simultanément, les conducteurs du câble secteur doivent posséder une section minimale de 1,5 mm². Dans l’Union Européenne, les câbles électriques doivent être de type H05VV-F ou équivalent. Adam Hall propose des câbles secteur adaptés.
  • Page 35: Introduction

    Power Twist est fourni. POWER OUT (SORTIE D’ALIMENTATION) Prise de sortie secteur blanche Power Twist pour l’alimentation en tension d’autres projecteurs Cameo (max. 8 A). DMX IN (ENTRÉE DMX) Connecteur XLR mâle à 3 broches pour le raccordement d’un contrôleur DMX (par ex. console DMX).
  • Page 36: Œillet De Sécurité

    ROOT PAR TW FUSE: F3A / 250 V FUSE (FUSIBLE) Porte-fusible pour fusibles à courant faible de 5 x 20 mm. REMARQUE IMPORTANTE : Remplacer le fusible exclusivement par un fusible de même type et de même valeur. Si le fusible saute de façon récurrente, contacter un centre de réparation agréé.
  • Page 37: Utilisation

    REMARQUES • Dès que le projecteur est correctement raccordé à l’alimentation secteur, un message de bienvenue (« Welcome to Cameo »), la désigna- tion du modèle et la version du logiciel s’affichent successivement à l’écran pendant la phase de démarrage. À l’issue de cette phase, le projecteur est opérationnel et le mode de fonctionnement précédemment activé...
  • Page 38: Dmx Delay (Décalage Dmx)

    DMX DELAY (DÉCALAGE DMX) Grâce à la fonction DMX Delay, il est possible de créer facilement un effet de chenillard avec un nombre quelconque de projecteurs du même modèle et de la même version de logiciel, ce qui ne pourrait autrement être réalisé qu’avec un contrôleur DMX approprié et une programmation complexe.
  • Page 39: Mode De Fonctionnement Stand-Alone Direct

    MODE DE FONCTIONNEMENT STAND-ALONE DIRECT De façon similaire à un dispositif de pilotage DMX, le mode de fonctionnement Stand-Alone Direct permet de régler les fonctions Dimmer, stroboscope (Strobe), Blanc froid et Blanc chaud directement sur l’appareil, avec des valeurs comprises entre 000 et 255. Il est ainsi possible de créer une scène personnalisée sans recourir à...
  • Page 40: Mode Slave

    1.Step 4 Presets avec température chromatique différente Hal (Halogen) Neu (Neutral) Stu (Studio) Day (Daylight) 2.Step 4 Presets avec température chromatique différente et Blackout Hal (Halogen) Neu (Neutral) Stu (Studio) Day (Daylight) Black (Blackout) MODE SLAVE Mode Slave standard : À partir de l’écran principal, appuyer sur MODE pour accéder au menu principal. Sélectionner ensuite l’option de menu Slave à...
  • Page 41 PARAMÈTRES DU SYSTÈME (Settings) À partir de l’écran principal, appuyer sur MODE pour accéder au menu principal. Utiliser ensuite les touches de commande UP et DOWN pour sélectionner l’option de menu Settings et appuyer sur ENTER pour confirmer. On accède alors au sous-menu permettant de régler les options de sous-menu (voir tableau, sélectionner avec UP et DOWN, confirmer avec ENTER, modifier la valeur ou l’état avec UP et DOWN, confirmer avec ENTER).
  • Page 42: System Info

    INFORMATIONS SYSTÈME (System Info) À partir de l’écran principal, appuyer sur MODE pour accéder au menu principal. Utiliser ensuite les touches UP et DOWN pour sélectionner l’option de menu System Info et appuyer sur ENTER pour confirmer. On accède alors au sous-menu permettant d’appeler les informations système (voir tableau, sélectionner avec UP et DOWN, confirmer avec ENTER, modifier l’état avec UP et DOWN, confirmer avec ENTER).
  • Page 43: Télécommande Infrarouge (En Option)

    TÉLÉCOMMANDE INFRAROUGE (en option) Diriger la télécommande infrarouge en contact visuel direct vers le capteur infrarouge situé sur la face avant du projecteur. Sa portée maximale est d’environ 8 mètres. En modes de fonctionnement DMX et Slave, le capteur du projecteur est désactivé.
  • Page 44: Installation Et Montage

    INSTALLATION ET MONTAGE Grâce à l’étrier double pratique, le projecteur peut être placé à un endroit approprié sur une surface plane. Le montage sur traverse s’effectue à l’aide d’un dispositif de serrage spécifique fixé sur l’étrier de montage . Des pinces de serrage sur traverse adaptées sont disponibles en option.
  • Page 45: Technique Dmx

    TECHNIQUE DMX DMX-512 Le terme DMX (Digital Multiplex) désigne un protocole de transport universel permettant la communication entre des appareils et des contrôleurs à ce format. Un contrôleur DMX envoie des données DMX aux appareils DMX qui lui sont connectés. Les données DMX sont transportées sous forme d'un flux série, renvoyé...
  • Page 46: Caractéristiques Techniques

    CARACTÉRISTIQUES TECHNIQUES Référence : CLROOTPARTW Catégorie de produit : Projecteur à LED Type : Projecteur PAR Spectre de couleurs : CW + WW Nombre de LED : Type de LED : 4 W Fréquence du signal PWM 650 Hz, 1530 Hz, 2150 Hz, 4000 Hz (réglable) de la LED : Angle de dispersion 37,5°...
  • Page 47: Declarations

    DECLARATIONS GARANTIE FABRICANT & LIMITATION DE RESPONSABILITÉ Nos conditions actuelles de garantie et de limitation de responsabilité sont disponibles à l‘adresse suivante : https://cdn-shop.adamhall.com/ media/pdf/MANUFACTURERS-DECLARATIONS_CAMEO.pdf. Pour les réparations, veuillez contacter Adam Hall GmbH, Adam-Hall-Str. 1, 61267 Neu Anspach / E-Mail Info@adamhall.com / +49 (0)6081 / 9419-0. TRI ET MISE AUX DÉCHETS CORRECTE DE CE PRODUIT (Valid in the European Union and other European countries with waste separation) (Applicable dans l‘Union Européenne et les autres pays européens pratiquant le tri des déchets) La présence de ce symbole sur le...
  • Page 48: Español

    Este equipo está diseñado y fabricado con los estándares de calidad más exigentes, para garantizar un correcto funcionamiento durante muchos años.Lea atentamente este manual de usuario para poder aprovechar rápidamente toda la funcionalidad de su nuevo producto de Cameo Light. Más información sobre Cameo Light en la web WWW.CAMEOLIGHT.COM. MEDIDAS DE SEGURIDAD 1.
  • Page 49 33. La acumulación de polvo y otras partículas en el interior del equipo puede causar daños. Dependiendo de las condiciones ambientales (polvo, nicotina, niebla, etc.), deberá realizarse periódicamente el mantenimiento o la limpieza del equipo por personal especializado, para evitar cualquier sobrecalentamiento o fallo de funcionamiento (mantenimiento y limpieza no cubiertos por la garantía). 34.
  • Page 50: Introducción

    Power Twist. POWER OUT Toma de salida de alimentación Power Twist blanca para la alimentación eléctrica de otros focos Cameo (máx. 8 A). DMX IN Conector XLR macho de 3 pines para conectar un equipo de control DMX (por ejemplo, una mesa DMX).
  • Page 51 ROOT PAR TW FUSE: F3A / 250 V FUSE Portafusibles para fusibles sensibles de 5 x 20 mm. NOTA IMPORTANTE: El fusible deberá sustituirse exclusivamente por otro del mismo tipo y con las mismas características técnicas. Si el fusible salta de forma recurrente, diríjase a un centro de servicio técnico autorizado.
  • Page 52: Funcionamiento

    • En cuanto el foco esté correctamente conectado a la red eléctrica, durante el proceso de arranque se mostrarán de forma consecutiva en pantalla el mensaje «Welcome to Cameo» (Bienvenidos a Cameo), así como la denominación de modelo y la versión del software.
  • Page 53 DMX DELAY Con la función DMX Delay se puede crear un efecto de luces en movimiento de manera sencilla con un gran número de focos del mismo modelo y con la misma versión de software, lo que normalmente solo se podría hacer con un controlador DMX adecuado y mucha programación. Para ello, todos los focos integrados se ajustan en el mismo modo DMX y se controlan con la misma dirección inicial DMX.
  • Page 54: Direct Mode

    MODO AUTÓNOMO DIRECT De forma similar a la configuración con un equipo de control DMX, el modo autónomo Direct permite ajustar las funciones de atenuación (Dimmer), estrobo (Strobe), blanco frío y blanco cálido directamente en el equipo seleccionando valores entre 000 y 255. De esa forma, se podrá...
  • Page 55 1.Step 4 presets con distintas temperaturas de color Hal (Halogen) Neu (Neutral) Stu (Studio) Day (Daylight) 2.Step 4 presets con distintas temperaturas de color más Blackout Hal (Halogen) Neu (Neutral) Stu (Studio) Day (Daylight) Black (Blackout) MODO ESCLAVO Modo esclavo estándar: Partiendo de la pantalla principal, si pulsa MODE accederá al menú principal. Ahora, con los botones UP y DOWN, seleccione la opción del menú...
  • Page 56 CONFIGURACIÓN DEL SISTEMA (Settings) Partiendo de la pantalla principal, si pulsa MODE accederá al menú principal. Ahora, utilice los botones UP y DOWN para seleccionar la opción Settings del menú y confirme con ENTER. Seguidamente se abre el submenú que permite ajustar las opciones de submenú (ver tabla; se seleccionan con los botones UP y DOWN y se confirman con ENTER.
  • Page 57: System Info

    INFORMACIÓN DEL SISTEMA (System Info) Partiendo de la pantalla principal, si pulsa MODE accederá al menú principal. Ahora, utilice los botones UP y DOWN para seleccionar la opción System Info del menú y confirme con ENTER. A continuación llegará al submenú que permite acceder a la información del sistema (consulte la tabla, selección con los botones UP y DOWN;...
  • Page 58: Mando A Distancia Por Infrarrojos (Opcional)

    MANDO A DISTANCIA POR INFRARROJOS (opcional) Apunte con el mando a distancia por infrarrojos directamente a la parte delantera del sensor de infrarrojos incorporado en el foco. El rango de alcance máximo es de unos 8 metros. En el modo DMX y en el esclavo, el sensor del foco estará desactivado.
  • Page 59: Instalación Y Montaje

    INSTALACIÓN Y MONTAJE Gracias al cómodo soporte doble, el foco puede instalarse en un lugar adecuado sobre una superficie nivelada. El montaje en un travesaño se realiza con una abrazadera apta para travesaño. Esta abrazadera se fija en el soporte de montaje .
  • Page 60: Tecnología Dmx

    TECNOLOGÍA DMX DMX512 DMX (Digital Multiplex) es el nombre de un protocolo universal utilizado como medio de comuni- cación entre dispositivos y controladores. El controlador DMX envía datos DMX a los equipos DMX conectados. Los datos DMX se envían como datos serie que se transmiten de equipo a equipo a través de los conectores XLR «DMX IN»...
  • Page 61: Datos Técnicos

    DATOS TÉCNICOS Número de artículo: CLROOTPARTW Clase de producto: Foco LED Tipo: Foco PAR Espectro cromático: CW + WW Cantidad de LED: Tipo de LED: 4 W Frecuencia de la modula- 650 Hz, 1530 Hz, 2150 Hz, 4000 Hz (ajustable) ción por ancho de pulsos (PWM) del LED: Ángulo de dispersión 37,5°...
  • Page 62: Declaración Del Fabricante

    DECLARACIÓN DEL FABRICANTE GARANTÍA DEL FABRICANTE Y LIMITACIÓN DE RESPONSABILIDAD Consulte nuestras condiciones de garantía y limitaciones de responsabilidad en: https://cdn-shop.adamhall.com/media/pdf/MANUFACTU- RERS-DECLARATIONS_CAMEO.pdf. En caso de necesitar servicio técnico, póngase en contacto con Adam Hall GmbH, Adam-Hall-Str. 1, 61267 Neu Anspach (Alemania); correo electrónico Info@adamhall.com; +49 (0)6081 / 9419-0. ELIMINACIÓN CORRECTA DE ESTE PRODUCTO (Aplicable en la Unión Europea y en los países europeos que dispongan de un sistema de recogida selectiva) El símbolo que aparece sobre el producto o en la documentación adjunta indica que al final de la vida útil del equipo, no deberá...
  • Page 63: Polski

    To urządzenie zostało zaprojektowane i wyprodukowane przy zastosowaniu najwyższych kryteriów jakościowych w celu zapewnienia wieloletniej bezawaryjnej eksploatacji. Proszę starannie przeczytać niniejszą instrukcję obsługi, aby móc jak najszybciej zacząć użytkować ten produkt marki Cameo Light. Więcej informacji na temat Cameo Light znajdą Państwo na naszej stronie internetowej pod adresem WWW.CAMEOLIGHT.COM.
  • Page 64 32. Instalacja urządzenia powinna odbywać się, gdy urządzenie nie jest podłączone do źródła zasilania (należy wyjąć wtyczkę z gniazda). 33. Kurz i inne osady wewnątrz urządzenia mogą je uszkodzić. W zależności od warunków otoczenia (kurz, nikotyna, opary itp.) urządzenie powinno być konserwowane lub czyszczone przez wykwalifikowanego specjalistę (usługa nieobjęta gwarancją), aby zapobiec przegrza- niu i nieprawidłowemu działaniu.
  • Page 65: Wprowadzenie

    Niebieskie wejściowe gniazdo sieciowe Power Twist. Napięcie robocze 100–240 V AC / 50–60 Hz. W zestawie znajduje się także odpowiedni kabel sieciowy z wtyczką Power Twist. POWER OUT Białe wyjściowe gniazdo sieciowe Power Twist do zasilania sieciowego kolejnych reflektorów CAMEO (maks. 8 A). DMX IN 3-stykowe złącze męskie XLR do podłączenia kontrolera DMX (np. pulpitu DMX).
  • Page 66 ROOT PAR TW FUSE: F3A / 250 V FUSE Oprawa na czułe bezpieczniki 5 x 20 mm. WAŻNA WSKAZÓWKA: Bezpiecznik wymieniaj wyłącznie na bezpiecznik tego samego typu i o tych samych parametrach. Jeżeli bezpiecznik zadziała powtórnie, należy zwrócić się do autoryzowanego centrum serwisowego.
  • Page 67: Obsługa

    UWAGI • Po prawidłowym podłączeniu reflektora do sieci zasilania podczas procesu uruchamiania jest wyświetlana następująca sekwencja komunikatów: „Welcome to Cameo”, nazwa modelu oraz wersja oprogramowania. Następnie reflektor jest gotowy do pracy w ostatnio wybranym trybie. • Aby przejść bezpośrednio do głównego wyświetlacza z niższych poziomów menu, należy nacisnąć i przytrzymać przycisk MODE przez około 2 sekundy.
  • Page 68 DMX DELAY Za pomocą funkcji DMX Delay można w prosty sposób stworzyć efekt ruchomego światła przy użyciu dowolnej liczby reflektorów tego samego modelu i tej samej wersji oprogramowania, co w innym przypadku byłoby możliwe tylko przy zastosowaniu odpowiedniego kontro- lera DMX i skomplikowanego programowania. Wszystkie połączone urządzenia są w tym samym trybie DMX i sterowane pod tym samym adresem startowym DMX.
  • Page 69: Direct Mode

    USTAWIANIE TRYBU PRACY STANDALONE DIRECT Tryb standalone umożliwia, podobnie jak sterownik DMX, ustawienie ściemniacza, stroboskopu (Strobe), zimnej i ciepłej bieli bezpośrednio w urządzeniu w przedziale od 000 do 255. Dzięki temu można stworzyć indywidualną scenę bez dodatkowego kontrolera DMX. Rozpoczynając od ekranu głównego, należy nacisnąć MODE, aby wejść do menu głównego. Przyciskami UP i DOWN wybrać opcję Stand Alone i potwierdzić...
  • Page 70 1.Step 4 nastawy z różną temperaturą barwową Hal (halogen) Neu (neutralna) Stu (studio) Day (światło dzienne) 2.Step 4 nastawy z różną temperaturą barwową i Blackout Hal (halogen) Neu (neutralna) Stu (studio) Day (światło dzienne) Black (blackout) TRYB SLAVE Standardowy tryb pracy Slave: Rozpoczynając od ekranu głównego, należy nacisnąć MODE, aby wejść do menu głównego. Za pomocą przycisków UP i DOWN wybierz pozycję...
  • Page 71 USTAWIENIA SYSTEMU (Settings) Rozpoczynając od ekranu głównego, należy nacisnąć MODE, aby wejść do menu głównego. Przyciskami UP i DOWN wybierz pozycję menu Settings i potwierdź przyciskiem ENTER. Nastąpi przejście do podmenu, w którym można dokonać ustawień punktów podmenu (patrz tabela, wybór przyciskami UP i DOWN, potwierdzenie przyciskiem ENTER, zmiana wartości lub statusu przyciskami UP i DOWN, potwierdzenie przyciskiem ENTER).
  • Page 72: System Info

    INFORMACJE O SYSTEMIE (System Info) Rozpoczynając od ekranu głównego, należy nacisnąć MODE, aby wejść do menu głównego. Przyciskami UP i DOWN wybierz pozycję menu Sys Info i potwierdź przyciskiem ENTER. Spowoduje to przejście do podmenu umożliwiającego wywołanie informacji systemowych (patrz tabela) — wybór przyciskami UP i DOWN, potwierdzenie przyciskiem ENTER, zmiana statusu przyciskami UP i DOWN, potwierdzenie przyciskiem ENTER.
  • Page 73: Pilot Zdalnego Sterowania (Opcjonalny)

    PILOT ZDALNEGO STEROWANIA (opcjonalny) Skieruj pilot na podczerwień bezpośrednio na czujnik podczerwieni wbudowany w przedniej części reflektora. Maksymalny zasięg wynosi około 8 metrów. W trybie pracy DMX oraz slave czujnik reflektora jest nieaktywny. Pilot zdalnego sterowania na podczerwień bezpośrednio steruje wewnętrznymi trybami pracy standalone Direct, CCT i Loop / Sound.
  • Page 74: Ustawianie I Montaż

    USTAWIANIE I MONTAŻ Do ustawienia reflektora w odpowiednim miejscu na płaskiej powierzchni służy wygodny w użyciu podwójny pałąk. Aby zamontować urządzenie na kratownicy, konieczny jest specjalny zacisk do kratownic, przytwierdzany do uchwytu montażowego . Odpowiednie zaciski do trawersów są dostępne jako opcja. Należy zapewnić solidne mocowanie i zabezpieczyć reflektor odpowiednią liną zabezpieczającą w przeznaczonym do tego miejscu z tyłu reflektora.
  • Page 75: Technika Dmx

    TECHNIKA DMX DMX-512 DMX (Digital Multiplex) to nazwa uniwersalnego protokołu transmisji do komunikacji między odpowiednimi urządzeniami a kontrolerami. Kontroler DMX wysyła dane DMX do podłączonych urządzeń DMX. Transmisja danych DMX następuje zawsze w formie szeregowego strumienia danych, który jest przekazywany z jednego urządzenia do następnego przez znajdujące się w każdym urządzeniu obsługującym standard DMX złącza „DMX IN”...
  • Page 76: Dane Techniczne

    DANE TECHNICZNE Numer artykułu: CLROOTPARTW Rodzaj produktu: Reflektor LED Typ: Reflektor PAR Spektrum kolorów: CW + WW Liczba diod LED: Typ diod LED: Częstotliwość PWM diody 650 Hz, 1530 Hz, 2150 Hz, 4000 Hz (regulowane) LED: Kąt promieniowania 37,5° (19,5°) (kąt półrozproszenia): Wejście DMX: 3-pinowe złącze męskie...
  • Page 77: Deklaracje Producenta

    DEKLARACJE PRODUCENTA GWARANCJA PRODUCENTA I OGRANICZENIE ODPOWIEDZIALNOŚCI Nasze aktualne warunki gwarancji i informacje dotyczące ograniczenia odpowiedzialności znajdą Państwo na stronie: https://cdn-shop. adamhall.com/media/pdf/MANUFACTURERS-DECLARATIONS_CAMEO.pdf. W razie konieczności skorzystania z serwisu proszę skontaktować się z firmą Adam Hall GmbH, Adam-Hall-Str. 1, 61267 Neu Anspach / e-mail Info@adamhall.com / +49 (0)6081 / 9419-0. PRAWIDŁOWA UTYLIZACJA NINIEJSZEGO PRODUKTU (Obowiązuje w Unii Europejskiej i innych krajach europejskich stosujących system sortowania odpadów) Niniejszy symbol na produk- cie lub związanych z nim dokumentach wskazuje, iż...
  • Page 78: Italiano

    Questo dispositivo è stato sviluppato e prodotto in conformità con elevati standard qualitativi che ne garantiscono il regolare funzionamento per molti anni. Leggete attentamente questo manuale d‘uso per utilizzare al meglio il vostro nuovo prodotto Cameo Light. Per maggiori informazioni su Cameo Light consultare la nostra pagina Web WWW.CAMEOLIGHT.COM.
  • Page 79 34. La distanza dai materiali infiammabili deve essere di almeno 0,5 m. 35. I cavi di rete utilizzati per l’alimentazione elettrica di più dispositivi devono avere una sezione di almeno 1,5 mm². I cavi impiegati nell’Unione Europea devono essere di tipo H05VV-F o simile. Adam Hall offre cavi idonei. Tali cavi consentono di collegare più dispositivi dalla presa di uscita POWER OUT di un apparecchio alla presa POWER IN di un altro dispositivo.
  • Page 80: Introduzione

    Twist in dotazione. POWER OUT Presa uscita di rete Power Twist bianca per l'alimentazione di ulteriori proiettori Cameo (max. 8 A). DMX IN Connettore XLR maschio a 3 poli per il collegamento di un dispositivo di controllo DMX (ad es. mixer DMX).
  • Page 81 ROOT PAR TW FUSE: F3A / 250 V FUSE Portafusibili per microfusibili (5 x 20 mm). NOTA IMPORTANTE: sostituire il fusibile solo con un altro dello stesso tipo e con gli stessi valori. Se il fusibile continua a saltare, rivolgersi a un centro di assistenza autorizzato.
  • Page 82: Utilizzo

    • Non appena il proiettore è correttamente allacciato alla rete elettrica, durante il processo di avvio sul display appaiono in successione il messaggio "Welcome to Cameo", la denominazione del modello e la versione del software. Al termine della procedura il proiettore è...
  • Page 83 DMX DELAY Con l'ausilio della funzione DMX Delay, è possibile creare facilmente un effetto chaser con un numero qualsiasi di proiettori dello stesso modello e della stessa versione software, che altrimenti si potrebbe ottenere solo con un idoneo controller DMX e una programmazione complessa.
  • Page 84 MODALITÀ DI FUNZIONAMENTO STAND-ALONE DIRECT Analogamente a quanto avviene in un dispositivo di comando DMX, la modalità stand-alone Direct consente di impostare direttamente sul dispositivo le funzioni dimmer e stroboscopio (Strobe), bianco freddo e bianco caldo con valori da 000 a 255. È quindi possibile creare una scena personalizzata, senza necessità...
  • Page 85 1.Step 4 preset con diversa temperatura di colore Hal (Alogeno) Neu (Neutro) Stu (Studio) Day (Daylight) 2.Step 4 preset con diversa temperatura di colore più Blackout Hal (Alogeno) Neu (Neutro) Stu (Studio) Day (Daylight) Black (Blackout) MODALITÀ SLAVE Modalità Slave Standard: Premere MODE dalla schermata principale per accedere al menu principale. Con i tasti UP e DOWN selezionare la voce di menu Slave e confermare con ENTER;...
  • Page 86 IMPOSTAZIONI DI SISTEMA (Settings) Premere MODE dalla schermata principale per accedere al menu principale. Con i tasti UP e DOWN selezionare la voce di menu Settings e confermare con ENTER. Si accede quindi al sottomenu per l’impostazione delle seguenti voci di sottomenu (v. tabella, selezionare con UP e DOWN, confermare con ENTER, modificare il valore o lo stato con UP e DOWN, confermare con ENTER).
  • Page 87 INFORMAZIONI DI SISTEMA (System Info) Premere MODE dalla schermata principale per accedere al menu principale. Con i tasti UP e DOWN selezionare la voce di menu System Info e confermare con ENTER. Si accede al sottomenu per richiamare le informazioni di sistema (v. tabella, selezionare con UP e DOWN, confermare con ENTER, modificare lo stato con UP e DOWN, confermare con ENTER).
  • Page 88: Telecomando A Infrarossi (Opzionale)

    TELECOMANDO A INFRAROSSI (opzionale) Dirigere il telecomando a infrarossi direttamente sul sensore a infrarossi sul pannello frontale della barra LED. Il raggio d'azione massimo è di circa 8 metri. Nelle modalità DMX e slave il sensore del proiettore è disattivato. Il telecomando a infrarossi controlla direttamente le modalità...
  • Page 89: Installazione E Montaggio

    INSTALLAZIONE E MONTAGGIO Grazie alla comoda staffa doppia, è possibile sistemare il proiettore in una posizione idonea, su una superficie piana. Il montaggio su una traversa viene effettuato tramite un apposito morsetto per traverse, da fissare alla staffa di montaggio .
  • Page 90: Tecnologia Dmx

    TECNOLOGIA DMX DMX512 DMX (Digital Multiplex) è la sigla di un protocollo di trasmissione universale per la comunicazione tra dispositivi e controller. Un controller DMX invia dati DMX ai dispositivi DMX collegati. I dati DMX vengono sempre trasmessi come flusso di dati seriale, che viene inoltrato da un dispositivo collegato al successivo attraverso le connessioni (connettori XLR) DMX IN e DMX OUT presenti per ogni dispositivo DMX compati- bile, per un massimo di 32 dispositivi.
  • Page 91: Dati Tecnici

    DATI TECNICI Codice articolo: CLROOTPARTW Tipologia di prodotto: Proiettore LED Tipo: Proiettori PAR Spettro cromatico: CW + WW Numero di LED: Tipo di LED: Frequenza LED PWM: 650 Hz, 1530 Hz, 2150 Hz, 4000 Hz (regolabile) Angolo di proiezione 37,5° (19,5°) (angolo di diffusione parziale): Ingresso DMX:...
  • Page 92: Dichiarazioni Del Produttore

    DICHIARAZIONI DEL PRODUTTORE MANUFACTURER’S WARRANTY & LIMITATION OF LIABILITY Le nostre attuali condizioni di garanzia e la limitazione di responsabilità sono consultabili alla pagina: https://cdn-shop.adamhall.com/media/ pdf/MANUFACTURERS-DECLARATIONS_CAMEO.pdf. In caso di assistenza, rivolgersi a Adam Hall GmbH, Adam-Hall-Str. 1, 61267 Neu Anspach / E-mail Info@adamhall.com / +49 (0)6081 / 9419-0. CORRETTO SMALTIMENTO DEL PRODOTTO (In vigore nell‘Unione Europea e in altri Paesi europei in cui si attui la raccolta differenziata) Questo simbolo apposto sul prodotto o sui relativi documenti indica che, per evitare danni all‘ambiente e alle persone causati da uno smaltimento incontrollato dei rifiuti,...
  • Page 93: Dmx

    DMX CONTROL / DMX STEUERUNG / PILOTAGE DMX / CONTROL DMX / STEROWANIE DMX / CONTROLLO DMX The DMX Delay channel of each DMX mode is only enabled, if by DMX? in the menu item DMX Delay is set to Yes. Der Kanal DMX Delay ist in den DMX-Modi nur aktiviert, wenn im Menüpunkt DMX Delay unter by DMX? Yes eingestellt ist.
  • Page 94 4 CH 2 Mode Function Values Sub-Group Dimmer 0% to 100% Dimmer Strobe open Strobe Strobe Strobe slow -> fast <1Hz - 20Hz Warm White Warm White -> 3200K Halogen White (3200K) 3200K-4000K Neutral White (4000K) Color Temperature 4000K-5600K Studio White (5600K) 5600K-6500K Daylight White (6500K) 6500K ->...
  • Page 96 CAMEOLIGHT.COM Adam Hall GmbH | Adam-Hall-Str. 1 | 61267 Neu-Anspach | Germany Phone: +49 6081 9419-0 | adamhall.com REV: 02...

Table des Matières