Cameo ROOT PAR TW Manuel D'utilisation
Masquer les pouces Voir aussi pour ROOT PAR TW:
Table des Matières

Publicité

Les langues disponibles
  • FR

Les langues disponibles

  • FRANÇAIS, page 51

Liens rapides

USER´S MANUAL
BEDIENUNGSANLEITUNG
MANUEL D´UTILISATION
MANUAL DE USUARIO
INSTRUKCJA OBSŁUGI
MANUALE D´USO
FIRMWARE VERSION 1.1 AND LATER
ROOT PAR TW
7 X 4 W CW + WW PAR SPOTLIGHT
CLROOTPARTW

Publicité

Table des Matières
loading

Sommaire des Matières pour Cameo ROOT PAR TW

  • Page 1 USER´S MANUAL BEDIENUNGSANLEITUNG MANUEL D´UTILISATION MANUAL DE USUARIO INSTRUKCJA OBSŁUGI MANUALE D´USO FIRMWARE VERSION 1.1 AND LATER ROOT PAR TW 7 X 4 W CW + WW PAR SPOTLIGHT CLROOTPARTW...
  • Page 2: Table Des Matières

    CONTENTS / INHALTSVERZEICHNIS / TABLE DES MATIÈRES / CONTENIDO / SPIS TREŚCI / CONTENUTO ENGLISH ESPAÑOL INTENDED USE ................ USO PREVISTO ................ 75 SAFETY INSTRUCTIONS ............INSTRUCCIONES DE SEGURIDAD ..........75 INFORMATION FOR PORTABLE INDOOR DEVICES ..... INFORMACIÓN SOBRE DISPOSITIVOS PORTÁTILES INTRODUCTION ...............
  • Page 3: English

    This device was developed and manufactured under high quality requirements to ensure smooth operation for many years. Please read this user manual carefully to ensure you can quickly make the best use of your new Cameo Light product. Further information about Cameo Light is available on our website at WWW.CAMEOLIGHT.COM.
  • Page 4 This symbol indicates an electrical hazard. This symbol indicates a general hazard. This symbol indicates danger from hot surfaces. This symbol indicates danger from intense light sources. This symbol indicates additional information on the operation of the product. DANGER: 1. Do not open the device or make any modifications to it. 2.
  • Page 5 3. Simply pressing the On/Off switch on the device is not enough to entirely disconnect the device from the power supply. 4. Make sure that the fuse used corresponds to the type shown on the device. 5. Make sure that suitable measures have been taken to prevent power surges (e.g., lightning strike).
  • Page 6: Information For Portable Indoor Devices

    NOTICE: 1. Do not install or operate the device near heating elements, heat storage units, stoves, or other sources of heat. Make sure that the device is always installed so that it is adequately cooled and cannot overheat. 2. Do not put any sources of ignition (e.g., burning candles) near the device. 3.
  • Page 7: Introduction

    INTRODUCTION 7 X 4W TUNABLE WHITE SPOTLIGHT CLROOTPARTW CONTROL FUNCTIONS • DMX modes without DMX delay channel: 1-channel, 2-channel, 3-channel 1, 3-channel 2, and 7-channel DMX control • DMX modes with DMX delay channel: 2-channel, 3-channel, 4-channel 1, 4-channel 2, and 8-channel DMX control •...
  • Page 8: Connections, Control, And Display Elements

    Power Twist plug is included in the delivery. POWER OUT White Power Twist power output socket to supply power to additional Cameo spotlights (max. 8 A). DMX IN Male 3-pin XLR connector to connect a DMX control device (e.g., DMX console).
  • Page 9: Oled-Display

    FUSE Fuse holder for 5 × 20 mm micro fuses. IMPORTANT NOTE: Only replace the fuse with a fuse of the same type and values. If a fuse trips repeatedly, please contact an authorized service center. OLED-DISPLAY The OLED display shows the currently active operating mode (main display), the menu options in the Options menu, and the numerical values or operating status for certain menu options.
  • Page 10: Operation

    OPERATION NOTES • As soon as the spotlight is correctly connected to the power supply, “Welcome to Cameo”, the model designation, and then the software version are displayed in sequence on the display as part of the startup process. The spotlight is ready for use after this process, and the previously selected mode will activate.
  • Page 11 SETTING DMX MODE Starting from the main display, press MODE to go to the main menu. Using the UP and DOWN keys, now select the DMX Mode menu option and press ENTER to confirm your selection. Use UP and DOWN again to select the desired DMX mode and press ENTER to confirm your selection (DMX modes with DMX delay channel are marked with “D”).
  • Page 12 Setup example: Set the DMX delay for DMX operating modes with DMX delay channel (D2CH, D3CH, D4CH1, D4CH2, D8CH): Starting from the main display, press MENU to go to the main menu. Using the buttons, now select the DMX Delay menu option and press ENTER twice to confirm your selection.
  • Page 13 Starting from the main display, press MODE to go to the main menu. Using UP and DOWN, now select the Stand Alone menu option and press ENTER to confirm. Use the UP and DOWN buttons again to select Direct, press ENTER to confirm, and then use UP and DOWN to select the menu option you’d like to adjust.
  • Page 14: Slave Mode

    This will take you to the submenu for setting the submenu options (see table, use UP and DOWN to select, press ENTER to confirm, use UP and DOWN to change status/value, press ENTER to confirm). The settings remain unchanged even once the device is restarted. LOOP MODE Dimmer Adjusts the brightness...
  • Page 15: System Settings (Settings)

    unit in the slave menu. This allows a chaser light effect to be easily created with any number of spotlights of the same model and software version, which could otherwise only be achieved with a suitable DMX controller and complex programming. Main display with group number plus delay time of the master unit Assign the slave units to one of up to 15 groups as required.
  • Page 16 Settings Disp Rev = Rotates display Display does not rotate Display rotates 180° (e.g., for overhead installation) Disp Back = Display backlight Deactivates after approx. 30 seconds of inactivity Permanently on Sig Fail = Operating status if Hold Last command is held control signal Black Activates blackout...
  • Page 17 SYSTEM INFORMATION (SYSTEM INFO) Starting from the main display, press MODE to go to the main menu. Using UP and DOWN, now select the System Info menu option and press ENTER to confirm your selection. This will take you to the submenu which will let you access system information (see table, use UP and DOWN to select, press ENTER to confirm, use UP and DOWN to change status, press ENTER to confirm).
  • Page 18: Ir Remote Control (Optional)

    IR REMOTE CONTROL (optional) Aim the infrared remote control directly, within line-of-sight, at the infrared sensor installed on the front side of the spotlight. The maximum range is approx. 26.24 feet. The spotlight’s sensor is deactivated in DMX and slave mode. The infrared remote directly controls the internal stand- alone modes: DIRECT, CCT, and LOOP/SOUND.
  • Page 19: Setup And Installation

    Su (music-triggered lighting sequence) For bass, the preconfigured color temperature presets in the stand-alone mode Loop under Step 1 and Step 2 change. The control microphone is located on the back of the spotlight; the micro- phone sensitivity is preset in the stand-alone loop mode. CM (CCT) Press CM+ or CM- to start the CCT stand-alone mode.
  • Page 20 To achieve more subtle looks for uplights, the twin mounting bracket can be removed by loosening the two handle screws.
  • Page 21: Care, Maintenance, And Repair

    CARE, MAINTENANCE, AND REPAIR The device must be maintained and serviced regularly, at least every 3,000 operating hours or at the latest after one year, in order to ensure that it continues to operate properly over the long term. CARE (user executable) WARNING! The power supply and, if possible, all device connections must be disconnected before carrying out any care/maintenance measures.
  • Page 22: Dmx Technology

    DMX TECHNOLOGY DMX-512 DMX (Digital Multiplex) is the designation for a universal transmis- sion protocol for communications between corresponding devices and controllers. A DMX controller sends DMX data to the connected DMX device(s). The DMX data is always transmitted as a serial data stream that is forwarded from one connected device to the next via the “DMX IN”...
  • Page 23: Pin Assignment

    PIN ASSIGNMENT DMX cable with 3-pin XLR connectors: DMX cable with 5-pin XLR connectors (pin 4 and 5 are not used): Shield Shield DMX TERMINATORS (TERMINATING RESISTORS) To prevent system errors, the last device in a DMX chain needs to be equipped with a terminating resistor (120 ohm, 1/4 Watt).
  • Page 24: Technical Specifications

    TECHNICAL SPECIFICATIONS ARTICLE NUMBER: CLROOTPARTW Product type: LED Spotlight Type: PAR Spotlight Color spectrum: CW + WW Number of LEDs: LED type: LED PWM frequency: 650 Hz, 1530 Hz, 2150 Hz, 4000 Hz (adjustable) Beam angle 37.5° (19.5°) (half peak angle): DMX input: 3-pin male DMX output:...
  • Page 25 ARTICLE NUMBER: CLROOTPARTW Dimensions 7.67 x 5.23 x 7.67 inches (W x H x D, without mounting bracket): Weight (incl. mounting 1.75 kg bracket): Additional features: Power cable included in delivery; IR remote control filter (CLPFLA- T1REMOTE) and iDMX stick optionally available as accessories...
  • Page 26: Disposal

    DISPOSAL Packaging 1. Packaging can be recycled using the usual disposal methods. 2. Please separate packaging in accordance with the disposal laws and recycling regulations in your country. Device: 1. This device is subject to the European Community Directive on waste electrical and electronic equipment (WEEE) in the currently applicable version.
  • Page 27: Deutsch

    Dieses Gerät wurde unter hohen Qualitätsanforderungen entwickelt und gefertigt, um viele Jahre einen reibungslosen Betrieb zu gewährleisten. Bitte lesen Sie diese Bedienungsanleitung sorgfäl- tig, damit Sie Ihr neues Produkt von Cameo Light schnell und optimal einsetzen können. Weitere Informationen über Cameo Light erhalten Sie auf unserer Website WWW.CAMEOLIGHT.COM.
  • Page 28 Dieses Symbol weist auf elektrische Gefährdung hin. Dieses Symbol weist auf allgemeine Gefährdung hin. Dieses Symbol kennzeichnet Gefährdung durch heiße Oberflächen. Dieses Symbol kennzeichnet Gefährdung durch intensive Lichtquellen. Dieses Symbol kennzeichnet ergänzende Informationen zur Bedienung des Produkts. GEFAHR: 1. Öffnen Sie das Gerät nicht und verändern Sie es nicht. 2.
  • Page 29 2. Stellen Sie sicher, dass die Spannung und die Frequenz des Stromnetzes mit den auf dem Gerät angegebenen Werten übereinstimmen. Verfügt das Gerät über einen Span- nungswahlschalter, schließen Sie das Gerät erst an, wenn dieser korrekt eingestellt ist. Nutzen sie nur geeignete Netzkabel. 3.
  • Page 30 VORSICHT: 1. Bei beweglichen Bauteilen wie Montagebügeln, oder sonstigen beweglichen Bau- teilen besteht die Möglichkeit sich zu klemmen. 2. Bei Geräten mit motorisch angetriebenen Bauteilen besteht Verletzungsgefahr durch die Bewegung des Gerätes. Plötzliche Gerätebewegungen können zu Schreck- reaktionen führen. 3. Die Gehäuseoberfläche des Geräts kann sich im regulären Betrieb stark erwärmen. Stellen Sie sicher, dass ein versehentliches Berühren des Gehäuses ausgeschlossen ist.
  • Page 31: Hinweise Für Ortsveränderliche Indoor-Geräte

    HINWEISE FÜR ORTSVERÄNDERLICHE OUTDOOR-GERÄTE 1. Temporärer Betrieb! Veranstaltungsequipment ist grundsätzlich nur für den vorübergehenden Betrieb konzipiert. 2. Dauerbetrieb oder dauerhafte Installation kann zur Beeinträchtigung der Funktion und vorzeitiger Alterung der Geräte führen. EINFÜHRUNG 7 X 4W TUNABLE WHITE SCHEINWERFER CLROOTPARTW STEUERUNGSFUNKTIONEN •...
  • Page 32: Anschlüsse, Bedien- Und Anzeigeelemente

    Blaue Power Twist Netzeingangsbuchse. Betriebsspannung 100 – 240V AC / 50 – 60Hz. Ein  geeignetes Netzkabel mit Power Twist Gerätestecker befindet sich im Lieferumfang. POWER OUT Weiße Power Twist Netzausgangsbuchse für die Spannungsversorgung weiterer Cameo Scheinwerfer (max. 8A). DMX IN Männliche 3-Pol XLR-Buchse zum Anschließen eines DMX-Kontrollgeräts (z.B.
  • Page 33 FUSE Sicherungshalter für 5 x 20mm Feinsicherungen. WICHTIGER HINWEIS: Ersetzen Sie die Sicherung ausschließlich durch eine Sicherung des gleichen Typs und mit gleichen Werten. Sollte die Siche- rung wiederholt auslösen, wenden Sie sich bitte an ein autorisiertes Servicezentrum. OLED-DISPLAY Das OLED-Display zeigt die aktuell aktivierte Betriebsart (Hauptanzeige), die Menüpunkte im Auswahl-Menü...
  • Page 34: Bedienung

    ANMERKUNGEN • Sobald der Scheinwerfer korrekt am Stromnetz angeschlossen ist, wird während des Startvor- gangs nacheinander „Welcome to Cameo“, die Modellbezeichnung und die Softwareversion im Display angezeigt. Nach diesem Vorgang ist der Scheinwerfer betriebsbereit und die Betriebsart, die zuvor aktiviert war, wird gestartet.
  • Page 35: Dmx-Startadresse Einstellen

    DMX-STARTADRESSE EINSTELLEN Ausgehend von der Hauptanzeige gelangen Sie durch Drücken auf MODE in das Hauptmenü. Mit Hilfe der Taster UP und DOWN wählen Sie nun den Menüpunkt DMX Address aus und bestätigen mit ENTER. Nun können Sie die DMX-Startadresse wunschgemäß mit Hilfe von UP und DOWN einstellen.
  • Page 36 Die Delay-Zeit (Verzögerungszeit des DMX-Signals) kann manuell an jedem Scheinwerfer separat mit unterschiedlichen Werten eingestellt werden (0.0s bis 2.0s in 0.1s Schritten). Setup-Beispiel: Einstellen des DMX-Delays bei DMX-Betriebsarten mit DMX-Delay-Kanal (D2CH, D3CH, D4CH1, D4CH2, D8CH): Ausgehend von der Hauptanzeige gelangen Sie durch Drücken auf MENU in das Hauptmenü. Mit Hilfe der Taster wählen Sie nun den Menüpunkt DMX Delay aus und bestätigen 2x mit ENTER.
  • Page 37 Setup-Beispiel: STAND-ALONE-BETRIEBSART DIRECT Die Stand-Alone Betriebsart Direct ermöglicht es, ähnlich wie mit einem DMX-Steuergerät, Dimmer, Stroboskop (Strobe), Kaltweiß und Warmweiß direkt am Gerät mit Werten von 000 bis 255 einzustellen. Somit kann eine individuelle Szene erstellt werden, ohne einen zusätzlichen DMX-Controller zu benötigen.
  • Page 38: Loop Mode

    CCT Mode Dimmer Helligkeit 0 - 255 Strobe Stroboskopeffekt 0 - 5 = deaktiviert 6 - 255 = ca. 1Hz - 20Hz Correlated Color 3100K - 6500K Temperature STAND-ALONE-BETRIEBSART LOOP / SOUND Die Stand-Alone-Betriebsart Loop ermöglicht es, eine Lichtsequenz individuell zu gestalten und wieder aufzurufen.
  • Page 39 2.Step 4 Presets mit unterschiedlicher Farbtemperatur plus Blackout Hal (Halogen) Neu (Neutral) Stu (Studio) Day (Daylight) Black (Blackout) SLAVE-BETRIEB Standard Slave-Betrieb: Ausgehend von der Hauptanzeige gelangen Sie durch Drücken auf MODE in das Hauptmenü. Mit Hilfe der Taster UP und DOWN wählen Sie nun den Menüpunkt Slave aus, bestätigen mit ENTER, wählen dann die Slave-Gruppe 0 (Slave Group 0) aus und bestätigen wiederum mit ENTER.
  • Page 40: Systemeinstellungen (Settings)

    SYSTEMEINSTELLUNGEN (SETTINGS) Ausgehend von der Hauptanzeige gelangen Sie durch Drücken auf MODE in das Hauptmenü. Mit Hilfe der Bedienfelder UP und DOWN wählen Sie nun den Menüpunkt Settings aus und bestäti- gen mit ENTER. Daraufhin gelangen Sie in das Untermenü zum Einstellen der Untermenüpunkte (siehe Tabelle, Auswahl mit UP und DOWN, bestätigen mit ENTER, Wert bzw.
  • Page 41: Zurücksetzen Der Einstellungen

    = LED PWM 650Hz, Auswählen der LED PWM Frequenz Frequenz 1530Hz, 2150Hz, 4000Hz Calibration = Farbkalibrierung Cold White Individuelle Einstellung der Helligkeit von Kaltweiß und Warmweiß mit Werten von Warm White 0 - 255 (betriebsartübergreifend) Reset = Zurücksetzen der Factory Zurücksetzen auf Werkseinstellungen: Einstellungen Reset durchführen mit ENTER, abbrechen...
  • Page 42: Ir Fernbedienung (Optional)

    System Info Firmware = Anzeige der Firmware Geräte-Firmware V1.xx Temperature = Temperaturanzeige xxx°C / xxx°F der LED-Einheit Unit °C (= Anzeige in Grad Celsius) °F (= Anzeige in Grad Fahrenheit) Op Hours = Betriebszeit- xx:xxh Anzeige der Gesamtbetriebszeit in anzeige Stunden und Minuten IR FERNBEDIENUNG (optional) Richten Sie die Infrarot-Fernbedienung in Sichtverbindung...
  • Page 43: Aufstellung Und Montage

    CW und WW (R, G, B, W, A, UV ohne Funktion) Mit Hilfe dieser 2 Tasten können individuelle Farbtemperaturen durch das Mischen von Kaltweiß und Warmweiß erzeugt werden. Die 6 Helligkeitsstufen werden durch mehrmaliges Drücken der jeweiligen Farbtaste abgerufen, wobei bei Stufe 1 die LEDs abgeschaltet sind. Ju (ohne Funktion) Fa (ohne Funktion) Au (Betriebsart Loop)
  • Page 44 Um bei der Verwendung als Uplight eine dezentere Optik zu erzielen, kann der Montage-Doppel- bügel demontiert werden, indem Sie die beiden Griffschrauben lösen.
  • Page 45: Pflege, Wartung Und Reparatur

    PFLEGE, WARTUNG UND REPARATUR Um die einwandfreie Funktion des Gerätes auf Dauer zu gewährleisten, muss es regelmäßig, mindestens alle 3000 Betriebsstunden oder spätestens nach Ablauf eines Jahres gepflegt und gewartet werden. PFLEGE (vom Anwender durchführbar) WARNUNG! Vor jeglichen Pflegemaßnahmen müssen die Spannungsversorgung und sofern möglich sämtliche Geräteverbindungen getrennt werden.
  • Page 46: Dmx Technik

    DMX TECHNIK DMX-512 DMX (Digital Multiplex) ist die Bezeichnung für ein universelles Übertragungsprotokoll für die Kommunikation zwischen entsprechenden Geräten und Controllern. Ein DMX-Controller sendet DMX-Daten an das/die angeschlossene(n) DMX-Gerät(e). Die DMX-Datenübertragung erfolgt stets als serieller Datenstrom, der über die an jedem DMX-fähigen Gerät vorhandenen DMX IN- und DMX OUT-Anschlüsse (XLR-Steckverbinder) von einem angeschlossenen Gerät an das nächste weitergeleitet wird, wobei die maximale Anzahl der Geräte 32 nicht überschreiten darf.
  • Page 47 DMX-KABEL: Beachten Sie bei der Anfertigung eigener Kabel unbedingt die Abbildungen auf dieser Seite. Verbinden Sie auf keinen Fall die Abschirmung des Kabels mit dem Massekontakt des Steckers, und achten Sie darauf, dass die Abschirmung nicht mit dem XLR-Steckergehäuse in Kontakt kommt.
  • Page 48: Technische Daten

    TECHNISCHE DATEN ARTIKELNUMMER: CLROOTPARTW Produktart: LED-Scheinwerfer Typ: PAR- Scheinwerfer Farbspektrum: CW + WW LED Anzahl: LED Typ: LED PWM Frequenz: 650Hz, 1530Hz, 2150Hz, 4000Hz (einstellbar) Abstrahlwinkel 37,5° (19,5°) (Halbstreuwinkel): DMX-Eingang: 3-Pol männlich DMX-Ausgang: 3-Pol weiblich DMX Modi: Ohne DMX-Delay-Kanal: 1-Kanal, 2-Kanal, 3-Kanal 1, 3-Kanal 2 und 7-Kanal DMX-Steuerung Mit DMX-Delay-Kanal: 2-Kanal, 3-Kanal, 4-Kanal 1, 4-Kanal 2 und 8-Kanal DMX-Steuerung...
  • Page 49 ARTIKELNUMMER: CLROOTPARTW Gehäusematerial: ABS Kunststoff Gehäusekühlung: Konvektionskühlung Abmessungen 195 x 133 x 195 mm (B x H x T, ohne Montagebügel): Gewicht 1,75 kg (inkl. Montagebügel): Weitere Eigenschaften: Netzkabel im Lieferumfang, IR Fernbedienung (CLPFLAT1REMOTE) und iDMX-Stick als optionales Zubehör...
  • Page 50: Entsorgung

    ENTSORGUNG Verpackung: 1. Verpackungen können über die üblichen Entsorgungswege dem Wertstoffkreislauf zugeführt werden. 2. Bitte trennen Sie die Verpackung entsprechend der Entsorgungsgesetze und Wertstoff- verordnungen in Ihrem Land. Gerät: 1. Dieses Gerät unterliegt der europäischen Richtlinie für Elektro- und Elektronik-Altgeräte in der jeweils geltenden aktuellen Fassung. WEEE-Richtlinie Waste Electrical and Electronical Equipment.
  • Page 51: Français

    Cet appareil a été développé et fabriqué en appliquant des exigences de qualité très élevées : il garantit des années de fonctionnement sans problème.Veuillez lire attentivement ce Manuel Utilisateur : vous apprendrez rapidement à utiliser votre appareil Cameo Light de façon optimale. Vous trouverez davantage d‘informations à propos de Cameo Light sur notre site Web: WWW.CAMEOLIGHT.COM.
  • Page 52 4. AVIS : Le mot AVIS, parfois utilisé en combinaison avec un symbole, fait référence à des situa- tions pouvant entraîner des dommages matériels et/ou environnementaux. Ce symbole avertit d’un danger électrique. Ce symbole avertit d’un danger général. Ce symbole avertit d’un danger lié à des surfaces chaudes. Ce symbole avertit d’un danger provenant de rayonnements lumineux intenses.
  • Page 53 2. Vérifie que la tension et la fréquence de l’alimentation correspondent aux valeurs spécifiées sur l’appareil. Si l’appareil est équipé d’un sélecteur de tension, ne le branche pas tant qu’il n’a pas été correctement configuré. Utilise uniquement des cordons d’alimentation appropriés. 3.
  • Page 54 ATTENTION ! 1. Les composants mobiles tels que les supports de montage ou d’autres composants mobiles peuvent se coincer. 2. Dans le cas de dispositifs dotés de composants motorisés, il existe un risque de blessure occasionnée par le dispositif mobile. Des mouvements brusques du dispositif peuvent entraîner des réactions.
  • Page 55: Informations Sur Les Appareils Portables D'extérieur

    4. Une source lumineuse est intégrée de manière fixe à ce luminaire et ne peut pas être remplacée par l’utilisateur. Adresse-toi à ton revendeur en cas de défaillance du système. INFORMATIONS SUR LES APPAREILS PORTABLES D’EXTÉRIEUR 1. Fonctionnement temporaire ! L’équipement événementiel est conçu en général uni- quement pour un fonctionnement temporaire.
  • Page 56: Raccordements, Éléments De Commande Et D'affichage

    Connecteur XLR mâle à 3 broches pour le raccordement d’un contrôleur DMX (par ex. console DMX) DMX OUT (SORTIE DMX) Connecteur XLR femelle à 3 broches pour le renvoi du signal de pilotage DMX. ROOT PAR TW FUSE: F3A / 250 V...
  • Page 57: Œillet De Sécurité

    FUSE (FUSIBLE) Porte-fusible pour fusibles à courant faible de 5 x 20 mm. REMARQUE IMPORTANTE : Remplacer le fusible exclusivement par un fusible de même type et de même valeur. Si le fusible saute de façon récurrente, contacter un centre de réparation agréé. ÉCRAN OLED L’écran OLED affiche le mode de fonctionnement actuellement activé...
  • Page 58: Utilisation

    • Dès que le projecteur est correctement raccordé à l’alimentation secteur, un message de bienvenue (« Welcome to Cameo »), la désignation du modèle et la version du logiciel s’affichent successivement à l’écran pendant la phase de démarrage. À l’issue de cette phase, le projec- teur est opérationnel et le mode de fonctionnement précédemment activé...
  • Page 59: Réglage De L'adresse De Départ Dmx

    RÉGLAGE DE L’ADRESSE DE DÉPART DMX À partir de l’écran principal, appuyer sur MODE pour accéder au menu principal. À l’aide des touches UP et DOWN, sélectionner l’option de menu DMX Address et confirmer avec ENTER. Il est maintenant possible de configurer l’adresse de départ DMX souhaitée à l’aide des touches UP et DOWN.
  • Page 60 La durée de décalage (temporisation du signal DMX) peut être réglée manuellement sur chaque projecteur avec des valeurs différentes (0,0 à 2,0 s par paliers de 0,1 s). Exemple de configuration : Réglage du décalage DMX en modes DMX avec canal de décalage DMX (D2CH, D3CH, D4CH1, D4CH2, D8CH) : À...
  • Page 61: Mode De Fonctionnement Stand-Alone Direct

    Exemple de configuration : MODE DE FONCTIONNEMENT STAND-ALONE DIRECT De façon similaire à un dispositif de pilotage DMX, le mode de fonctionnement Stand-Alone Direct permet de régler les fonctions Dimmer, stroboscope (Strobe), Blanc froid et Blanc chaud directe- ment sur l’appareil, avec des valeurs comprises entre 000 et 255. Il est ainsi possible de créer une scène personnalisée sans recourir à...
  • Page 62: Mode De Fonctionnement Stand-Alone Loop / Sound

    CCT Mode Dimmer Luminosité 0 - 255 Strobe Effet stroboscopique 0 - 5 = désactivé 6 - 255 = env. 1 Hz - 20 Hz Correlated Color 3100 K - 6500 K Temperature MODE DE FONCTIONNEMENT STAND-ALONE LOOP / SOUND Le mode de fonctionnement Stand-Alone Loop permet de concevoir et de rappeler individuel- lement une séquence lumineuse.
  • Page 63: Mode Slave

    2.Step 4 Presets avec température chromatique différente et Blackout Hal (Halogen) Neu (Neutral) Stu (Studio) Day (Daylight) Black (Blackout) MODE SLAVE Mode Slave standard : À partir de l’écran principal, appuyer sur MODE pour accéder au menu principal. Sélectionner ensuite l’option de menu Slave à l’aide des touches UP et DOWN, appuyer sur ENTER pour confirmer, sélectionner ensuite le groupe Slave 0 (Slave Group 0) et confirmer à...
  • Page 64: Paramètres Du Système (Settings)

    PARAMÈTRES DU SYSTÈME (SETTINGS) À partir de l’écran principal, appuyer sur MODE pour accéder au menu principal. Utiliser ensuite les touches de commande UP et DOWN pour sélectionner l’option de menu Settings et appuyer sur ENTER pour confirmer. On accède alors au sous-menu permettant de régler les options de sous-menu (voir tableau, sé- lectionner avec UP et DOWN, confirmer avec ENTER, modifier la valeur ou l’état avec UP et DOWN, confirmer avec ENTER).
  • Page 65: Réinitialisation Des Paramètres

    = Fréquence du 650 Hz, Sélection de la fréquence du signal PWM signal PWM de la 1530 Hz, de la LED 2150 Hz, 4000 Hz Calibration = Étalonnage des Cold White Réglage individuel de la luminosité du couleurs blanc froid et du blanc chaud entre 0 Warm White et 255 (concerne tous les modes de fonctionnement)
  • Page 66: System Info

    System Info Firmware = Affichage du Firmware micrologiciel de V1.xx l’appareil Temperature = Affichage de la xxx °C / xxx °F température de Unit °C (= affichage en degrés Celsius) l’unité à LED °F (= affichage en degrés Fahrenheit) Op. Hours = Affichage de la xx:xxh Affichage de la durée de fonctionnement...
  • Page 67: Installation Et Montage

    la fréquence de flash la plus rapide. L’effet stroboscope ne peut être utilisé qu’en mode mélange de couleurs CW / WW. CW et WW (R, G, B, W, A, UV sans fonction) Utiliser ces 2 touches pour générer des températures chromatiques individuelles en mélangeant le blanc froid et le blanc chaud.
  • Page 68 Des appareils mal montés et mal fixés risquent de se détacher et de tomber. Cela peut causer des blessures graves voire mortelles. Pour obtenir un aspect plus discret lors de l’utilisation en Uplight, le double étrier de montage peut être retiré en desserrant les deux vis-poignées...
  • Page 69: Entretien, Maintenance Et Réparation

    ENTRETIEN, MAINTENANCE ET RÉPARATION Pour garantir le bon fonctionnement de l’appareil sur la durée, l’entretien et la maintenance doivent être effectués régulièrement, au moins toutes les 3000 heures de service, ou au plus tard à la fin de l’année. ENTRETIEN (exécutable par l’utilisateur) AVERTISSEMENT ! L’alimentation électrique et, si possible, toutes les connexions de l’appareil doivent être débranchées avant toute opération d’entretien/maintenance.
  • Page 70: Technique Dmx

    TECHNIQUE DMX DMX-512 Le terme DMX (Digital Multiplex) désigne un protocole de transport universel permettant la communication entre des appareils et des contrôleurs à ce format. Un contrôleur DMX envoie des données DMX aux appareils DMX qui lui sont connectés. Les données DMX sont transportées sous forme d‘un flux série, renvoyé...
  • Page 71: Assignation Des Contacts

    ASSIGNATION DES CONTACTS Câble DMX avec connecteurs XLR 3 points : Câble DMX avec connecteurs XLR 5 points (les points 4 et 5 ne sont pas câblés): Shield Shield Pour éviter tout dysfonctionnement, le dernier appareil d‘une chaîne DMX doit être équipé d‘une résistance de terminaison (120 Ohms, 1/4 Watt).
  • Page 72: Caractéristiques Techniques

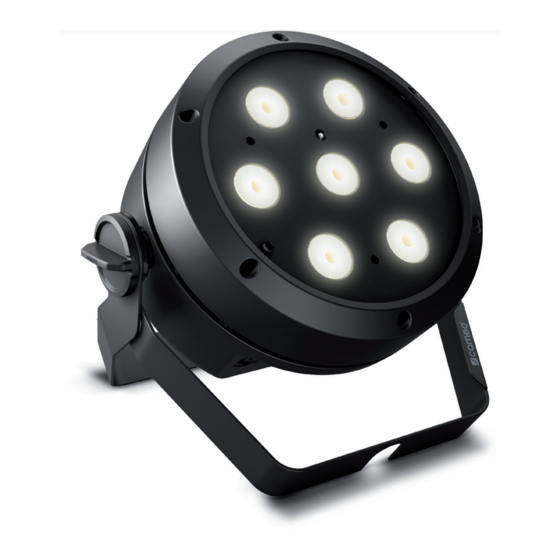
    CARACTÉRISTIQUES TECHNIQUES RÉFÉRENCE : CLROOTPARTW Catégorie de produit : Projecteur à LED Type : Projecteur PAR Spectre de couleurs : CW + WW Nombre de LED : Type de LED : 4 W Fréquence du signal 650 Hz, 1530 Hz, 2150 Hz, 4000 Hz (réglable) PWM de la LED : Angle de dispersion 37,5°...
  • Page 73 RÉFÉRENCE : CLROOTPARTW Température ambiante 0 °C - 40 °C (en fonctionnement) : Humidité relative : < 80 %, sans condensation Coloris du boîtier : Noir Matériau du boîtier : Plastique ABS Refroidissement du Refroidissement par convection boîtier : Dimensions (L x H x P, 195 x 133 x 195 mm sans étrier de montage) : Poids (y compris étrier 1,75 kg de montage) : Autres Câble d’alimentation fourni, télécommande IR (CLPFLAT1REMOTE) et caractéristiques :...
  • Page 74: Mise Au Rebut

    MISE AU REBUT Emballage 1. Les emballages peuvent être amenés au circuit de recyclage via les voies de collecte habituelles. 2. Veuillez trier l’emballage conformément à la législation sur l’élimination des déchets et à la réglementation sur les matériaux recyclables de votre pays. Appareil : 1.
  • Page 75: Español

    Este equipo está diseñado y fabricado con los estándares de calidad más exigentes, para garan- tizar un correcto funcionamiento durante muchos años.Lea atentamente este manual de usuario para poder aprovechar rápidamente toda la funcionalidad de su nuevo producto de Cameo Light. Más información sobre Cameo Light en la web WWW.CAMEOLIGHT.COM.
  • Page 76 Este símbolo indica peligro eléctrico. Este símbolo indica un peligro general. Este símbolo señala peligro por superficies calientes. Este símbolo señala peligro debido a fuentes de luz intensas. Este símbolo señala información complementaria sobre el uso del producto. PELIGRO: 1. No abrir el interior del equipo ni modificarlo. 2.
  • Page 77 bien antes de conectar el equipo a la toma de corriente. Utilizar únicamente cables de alimentación adecuados. 3. Para desconectar totalmente el equipo de la red, no basta con accionar el interruptor de encendido/apagado del equipo. 4. Hay que asegurarse de que el fusible utilizado coincida con el tipo de fusible indicado en el equipo.
  • Page 78 2. En equipos con componentes motorizados, existe peligro de lesiones por el movimiento del equipo. Los movimientos repentinos del equipo pueden provocar una reacción brusca. 3. La superficie de la carcasa del equipo puede calentarse mucho durante su funciona- miento normal. Evitar el contacto accidental con la carcasa. Esperar siempre hasta que el equipo se haya enfriado lo suficiente antes de desmontarlo, realizar trabajos de mantenimiento, cargarlo u otras manipulaciones.
  • Page 79: Información Sobre Dispositivos Portátiles Para Exteriores

    INFORMACIÓN SOBRE DISPOSITIVOS PORTÁTILES PARA EXTERIORES 1. Funcionamiento temporal. En principio, los equipos para eventos están diseñados solo para un funcionamiento temporal. 2. El funcionamiento continuo o la instalación permanente puede prerjudicar el funcio- namiento y provocar un envejecimiento prematuro del equipo. INTRODUCCIÓN FOCO CON 7 LED TUNABLE WHITE DE 4 W CLROOTPARTW...
  • Page 80: Conexiones, Elementos De Manejo Y Elementos De Visualización

    Conector XLR macho de 3 pines para conectar un equipo de control DMX (por ejemplo, una mesa DMX). DMX OUT Conector XLR hembra de 3 pines para transmitir la señal de control DMX. ROOT PAR TW FUSE: F3A / 250 V...
  • Page 81 FUSE Portafusibles para fusibles sensibles de 5 x 20 mm. NOTA IMPORTANTE: El fusible deberá sustituirse exclusivamente por otro del mismo tipo y con las mismas características técnicas. Si el fusible salta de forma recurrente, diríjase a un centro de servicio técnico autorizado. PANTALLA OLED La pantalla OLED muestra el modo operativo activado actualmente (pantalla principal), las opciones del menú...
  • Page 82: Funcionamiento

    «Welcome to Cameo» (Bienve- nidos a Cameo), así como la denominación de modelo y la versión del software. Después de este procedimiento, el foco estará listo para funcionar y se iniciará en el último modo operativo activado.
  • Page 83 CONFIGURACIÓN DE LA DIRECCIÓN INICIAL DMX Partiendo de la pantalla principal, si pulsa MODE accederá al menú principal. Ahora, utilice los botones UP y DOWN para seleccionar la opción DMX Address del menú y confirme con  ENTER. Ahora puede ajustar la dirección inicial DMX con los botones UP y DOWN según lo desee. Confirme el ajuste con ENTER.
  • Page 84 El tiempo de Delay (tiempo de retardo de la señal DMX) se puede ajustar manualmente en cada foco con diferentes valores (de 0,0 s a 2,0 s en pasos de 0,1 s). Ejemplo de configuración: Ajuste de DMX Delay en los modos DMX con canal DMX Delay (D2CH, D3CH, D4CH1, D4CH2, D8CH): Partiendo de la pantalla principal, al pulsar MENU se accede al menú...
  • Page 85 MODO AUTÓNOMO DIRECT De forma similar a la configuración con un equipo de control DMX, el modo autónomo Direct permite ajustar las funciones de atenuación (Dimmer), estrobo (Strobe), blanco frío y blanco cálido directamente en el equipo seleccionando valores entre 000 y 255. De esa forma, se podrá crear un escenario personalizado sin necesidad de un equipo de control DMX adicional.
  • Page 86: Loop Mode

    MODO AUTÓNOMO LOOP / SOUND El modo autónomo Loop permite organizar una secuencia de luces individualmente y acceder posteriormente a ella. El brillo, la duración de paso, el tiempo de superposición, el control por sonido con sensibilidad del micrófono y el Delay (retardo de la señal) se pueden ajustar por separado.
  • Page 87: Configuración Del Sistema (Settings)

    MODO ESCLAVO Modo esclavo estándar: Partiendo de la pantalla principal, si pulsa MODE accederá al menú principal. Ahora, con los botones UP y DOWN, seleccione la opción del menú Slave, confirme con ENTER, seleccione el grupo de esclavos 0 (Slave Group 0) y vuelva a confirmar con ENTER. Conecte las unidades esclava y maestra (del mismo modelo y de la misma versión de software) mediante un cable DMX y active en la unidad maestra uno de los modos autónomos (Direct, CCT, Loop).
  • Page 88 Seguidamente se abre el submenú que permite ajustar las opciones de submenú (ver tabla; se seleccionan con los botones UP y DOWN y se confirman con ENTER. También los valores o el estado se cambian con los botones UP y DOWN y se confirman con ENTER). Settings Disp Rev = Girar la imagen en...
  • Page 89: Restablecer Los Ajustes

    Reset = Restablecer los Factory Restablecer los ajustes de fábrica: realizar ajustes el restablecimiento con ENTER, cancelar con MENU Preset A Restablecer a Preset A: realizar el restablecimiento con ENTER, cancelar con MENU Preset B Restablecer a Preset B: realizar el restablecimiento con ENTER, cancelar con MENU Preset C...
  • Page 90: Mando A Distancia Por Infrarrojos (Opcional)

    Temperature = Visualización de la xxx°C / xxx°F temperatura de la Unit °C (= visualización en grados Celsius) unidad LED °F (= visualización en grados Fahrenheit) Op Hours = Visualización xx:xx h Visualización del tiempo de del tiempo de funcionamiento total en horas y minutos funcionamiento MANDO A DISTANCIA POR INFRARROJOS (optional)
  • Page 91: Instalación Y Montaje

    CW y WW (R, G, B, W, A, UV sin función) Con estos 2 botones se pueden crear temperaturas de color personalizadas mezclando blanco frío y blanco cálido. Se puede acceder a los 6 niveles de brillo pulsando repetidas veces el botón de color correspondiente.
  • Page 92: Cuidado, Mantenimiento Y Reparación

    Para obtener un aspecto más discreto durante el uso como foco de luz vertical, es posible desmontar el soporte doble de montaje aflojando los dos tornillos de manejo CUIDADO, MANTENIMIENTO Y REPARACIÓN Para garantizar el correcto funcionamiento del equipo a largo plazo, este se debe revisar y reparar periódicamente, como mínimo cada 3000 horas de servicio o, como máximo, al cabo de un año.
  • Page 93 CUIDADOS (que puede realizar el usuario) ¡ADVERTENCIA! Antes de realizar cualquier tarea para mantener cuidado el equipo, desconectar la alimentación eléctrica y, si es posible, todas las conexiones del equipo. ¡AVISO! Un cuidado inadecuado puede provocar daños en el equipo e incluso su destrucción.
  • Page 94: Tecnología Dmx

    TECNOLOGÍA DMX DMX512 DMX (Digital Multiplex) es el nombre de un protocolo universal utilizado como medio de comunicación entre dispositivos y con- troladores. El controlador DMX envía datos DMX a los equipos DMX conectados. Los datos DMX se envían como datos serie que se transmiten de equipo a equipo a través de los conectores XLR «DMX IN»...
  • Page 95: Asignación De Pines

    ASIGNACIÓN DE PINES: Cable DMX con XLR de 3 pines: Cable DMX con XLR de 5 pines (los pines 4 y 5 no se utilizan): Shield Shield TERMINACIÓN DMX (TERMINADOR): Para evitar errores de sistema, debe conectarse una resistencia de terminación (120 ohmios, 1/4 W) en el último equipo de la cadena DMX.
  • Page 96: Datos Técnicos

    DATOS TÉCNICOS NÚMERO DE ARTÍCULO: CLROOTPARTW Clase de producto: Foco LED Tipo: Foco PAR Espectro cromático: CW + WW Cantidad de LED: Tipo de LED: 4 W Frecuencia de la modula- 650 Hz, 1530 Hz, 2150 Hz, 4000 Hz (ajustable) ción por ancho de pulsos (PWM) del LED: Ángulo de dispersión 37,5°...
  • Page 97 NÚMERO DE ARTÍCULO: CLROOTPARTW Humedad relativa del <80 %, sin condensación aire: Color de la carcasa: Negro Material de la carcasa: Plástico ABS Refrigeración de la Refrigeración por convección carcasa: Dimensiones (anchura x 195 x 133 x 195 mm altura x profundidad, sin soporte de montaje): Peso (incl.
  • Page 98: Eliminación

    ELIMINACIÓN Embalaje 1. Los embalajes se pueden llevar a reciclar a través de las vías de eliminación habitua- les. 2. Separe el embalaje conforme a las leyes de eliminación de residuos y las normativas sobre reciclaje de su país Equipo: 1.
  • Page 99: Polski

    Proszę starannie przeczytać niniejszą instrukcję obsługi, aby móc jak najszybciej zacząć użytkować ten produkt marki Cameo Light. Więcej informacji na temat Cameo Light znajdą Państwo na naszej stronie internetowej pod adresem WWW.CAMEOLIGHT.COM.
  • Page 100 Ten symbol oznacza zagrożenie elektryczne. Ten symbol wskazuje zagrożenie ogólne. Ten symbol oznacza niebezpieczeństwo związane z gorącymi powierzchniami. Ten symbol oznacza zagrożenie ze strony intensywnych źródeł światła. Ten symbol wskazuje na dodatkowe informacje dotyczące obsługi urządzenia. NIEBEZPIECZEŃSTWO: 1. Nie otwierać urządzenia i nie modyfikować go. 2.
  • Page 101 2. Sprawdzić, czy napięcie i częstotliwość sieci zasilającej są zgodne z parametrami podanymi na urządzeniu. Jeżeli urządzenie jest wyposażone w selektor napięcia, nie podłączać go do źródła zasilania, dopóki nie zostanie ustawione poprawnie. Używać tylko odpowiednich przewodów sieciowych. 3. Aby odłączyć urządzenie od sieci na wszystkich biegunach, nie wystarczy naciśnięcie włącznika/wyłącznika na urządzeniu.
  • Page 102 2. W przypadku urządzeń z elementami sterowanymi elektrycznie istnieje niebez- pieczeństwo obrażeń w wyniku ruchów urządzenia. Nagłe ruchy urządzenia mogą wystraszyć użytkownika. 3. Podczas regularnej pracy powierzchnia obudowy urządzenia może się silnie nagrze- wać. Zachować ostrożność, aby przypadkowo nie dotknąć obudowy. Przed demon- tażem, pracami konserwacyjnymi, ładowaniem itp.
  • Page 103: Uwagi Dotyczące Przenośnego Sprzętu Wewnętrznego

    UWAGI DOTYCZĄCE PRZENOŚNEGO SPRZĘTU WEWNĘTRZNEGO 1. Działanie tymczasowe! Sprzęt do organizacji imprez zasadniczo przeznaczony jest do tymczasowego działania. 2. Ciągła eksploatacja lub montaż na stałe może prowadzić do pogorszenia funkcjonal- ności i przedwczesnego starzenia się urządzeń WPROWADZENIE REFLEKTOR Z REGULACJĄ BIELI (TUNABLE WHITE) 7 X 4 W CLROOTPARTW FUNKCJE STEROWANIA •...
  • Page 104: Przyłącza, Elementy Obsługi I Wskaźniki

    W zestawie znajduje się także odpowiedni kabel sieciowy z wtyczką Power Twist. POWER OUT Białe wyjściowe gniazdo sieciowe Power Twist do zasilania sieciowego kolejnych reflektorów CAMEO (maks. 8 A). DMX IN 3-stykowe złącze męskie XLR do podłączenia kontrolera DMX (np. pulpitu DMX).
  • Page 105 FUSE Oprawa na czułe bezpieczniki 5 x 20 mm. WAŻNA WSKAZÓWKA: Bezpiecznik wymieniaj wyłącz- nie na bezpiecznik tego samego typu i o tych samych parametrach. Jeżeli bezpiecznik zadziała powtórnie, należy zwrócić się do autoryzowanego centrum serwisowego. WYŚWIETLACZ OLED Wyświetlacz OLED pokazuje bieżący tryb pracy (widok główny), pozycje z menu wyboru oraz wartość...
  • Page 106: Obsługa

    UWAGI • Po prawidłowym podłączeniu reflektora do sieci zasilania podczas procesu uruchamiania jest wyświetlana następująca sekwencja komunikatów: „Welcome to Cameo”, nazwa modelu oraz wersja oprogramowania. Następnie reflektor jest gotowy do pracy w ostatnio wybranym trybie. • Aby przejść bezpośrednio do głównego wyświetlacza z niższych poziomów menu, należy nacisnąć...
  • Page 107: Ustawianie Trybu Dmx

    teraz przyciskami UP i DOWN wybrać żądany adres startowy DMX. Wprowadzone ustawienia potwierdzić przyciskiem ENTER. USTAWIANIE TRYBU DMX Rozpoczynając na ekranie głównym, naciśnij MODE, aby wejść do menu głównego. Przyciskami UPi DOWN wybierz opcję DMX Mode i potwierdź wybór przyciskiem ENTER. Ponownie wybierz przyciskami UP i DOWN żądany tryb DMX i potwierdź...
  • Page 108 Przykład konfiguracji: Ustawianie opóźnienia DMX w trybach pracy DMX z kanałem DMX Delay (D2CH, D3CH, D4CH1, D4CH2, D8CH): wybierz opcję DMX Delay i naciśnij MENU, aby wejść do menu głównego. Przyciskami potwierdź wybór, dwukrotnie naciskając przycisk ENTER. Przypisz reflektor do jednej z maksymalnie 95 grup w zależności od potrzeb (maksymalna liczba grup zależy od aktywnego trybu DMX), przy czym do jednej grupy można przypisać...
  • Page 109 USTAWIANIE TRYBU PRACY STANDALONE DIRECT Tryb standalone umożliwia, podobnie jak sterownik DMX, ustawienie ściemniacza, stroboskopu (Strobe), zimnej i ciepłej bieli bezpośrednio w urządzeniu w przedziale od 000 do 255. Dzięki temu można stworzyć indywidualną scenę bez dodatkowego kontrolera DMX. Rozpoczynając od ekranu głównego, należy nacisnąć MODE, aby wejść do menu głównego. Przyciskami UP i DOWN wybrać...
  • Page 110: Loop Mode

    Nastąpi przejście do podmenu, w którym można dokonać ustawień punktów podmenu (patrz tabela, wybór przyciskami UP i DOWN, potwierdzenie przyciskiem ENTER, zmiana wartości lub statusu przyciskami UP i DOWN, potwierdzenie przyciskiem ENTER). Ustawienia są zachowywane nawet po ponownym uruchomieniu urządzenia. LOOP MODE Dimmer Regulacja jasności 0 —...
  • Page 111: Ustawienia Systemu (Settings)

    Główny ekran Rozszerzony tryb pracy Slave: W rozszerzonym trybie Master / Slave, sygnał sterujący może być odtwarzany z opóźnieniem czasowym do 15 stopni. Czas opóźnienia ustawiany jest w urzą- dzeniu Master w podmenu Delay w trybie standalone Loop, współczynnik opóźnienia w menu Slave odpowiedniego urządzenia Slave.
  • Page 112 Nastąpi przejście do podmenu, w którym można dokonać ustawień punktów podmenu (patrz tabela, wybór przyciskami UP i DOWN, potwierdzenie przyciskiem ENTER, zmiana wartości lub statusu przyciskami UP i DOWN, potwierdzenie przyciskiem ENTER). Settings Disp Rev = obracanie widoku obraz wyświetlacza nie jest obrócony wyświetlacza obrócenie obrazu wyświetlacza o 180°(np.
  • Page 113 Edit Preset = zapisanie wszyst- Preset A potwierdź przyciskiem ENTER kich ustawień Preset B potwierdź przyciskiem ENTER systemowych w 3 Preset C potwierdź przyciskiem ENTER indywidualnych nastawach Serwis = tylko do celów serwisowych INFORMACJE O SYSTEMIE (SYSTEM INFO) Rozpoczynając od ekranu głównego, należy nacisnąć MODE, aby wejść do menu głównego. Przy- ciskami UP i DOWN wybierz pozycję...
  • Page 114: Pilot Zdalnego Sterowania (Opcjonalny)

    PILOT ZDALNEGO STEROWANIA (opcjonalny) Skieruj pilot na podczerwień bezpośrednio na czujnik podczerwieni wbudowany w przedniej części reflektora. Maksymalny zasięg wynosi około 8 metrów. W trybie pracy DMX oraz slave czujnik reflektora jest nieaktywny. Pilot zdalnego sterowania na podczerwień bezpośrednio steruje wewnętrznymi trybami pracy standalone DIRECT, CCT i LOOP / SOUND.
  • Page 115: Ustawianie I Montaż

    Su (sekwencje świetlne sterowane muzyką) W przypadku impulsów niskich tonów zmienia się temperatura barwowa ustawiona w trybie standalone Loop w krokach 1 i 2. Mikrofon służący do sterowania znajduje się z tyłu reflektora, czułość mikrofonu jest wstępnie ustawiona w trybie standalone Loop. CM (CCT) Nacisnąć...
  • Page 116 W celu uzyskania bardziej dyskretnego wyglądu w przypadku zastosowania reflektora do podświetlenia (uplight) podwójny uchwyt montażowy można zdemontować przez poluzowanie dwóch śrub z pokrętłem...
  • Page 117: Utrzymanie, Konserwacja I Naprawy

    UTRZYMANIE, KONSERWACJA I NAPRAWY Aby zapewnić długotrwałe, prawidłowe funkcjonowanie urządzenia, należy je regularnie konser- wować i serwisować, przynajmniej co 3000 godzin pracy lub co najmniej co roku. KONSERWACJA (do wykonania przez użytkownika) UWAGA! Przed rozpoczęciem wszelkich prac związanych z utrzymaniem urządzenia należy odłączyć...
  • Page 118: Technika Dmx

    TECHNIKA DMX DMX-512 DMX (Digital Multiplex) to nazwa uniwersalnego protokołu transmisji do komunikacji między odpowiednimi urządzeniami a kontrolerami. Kontroler DMX wysyła dane DMX do podłączonych urządzeń DMX. Transmisja danych DMX następuje zawsze w formie szeregowego strumienia danych, który jest przekazywany z jednego urządzenia do następnego przez znajdujące się...
  • Page 119 PRZYPORZĄDKOWANIE WTYCZEK: Kabel DMX z 3-stykowymi wtyczkami XLR: Kabel DMX z 5-stykowymi wtyczkami XLR (pin 4 i 5 są niepodłączone): Shield Shield TERMINATOR DMX: Aby zapobiec awariom systemu, należy wyposażyć ostatnie urządzenie w łańcuchu DMX w termi- nator (120 Ω, 1/4 W). 3-stykowa wtyczka XLR z terminatorem: K3DMXT3 5-stykowa wtyczka XLR z terminatorem: K3DMXT5 PRZYPORZĄDKOWANIE WTYCZEK:...
  • Page 120: Dane Techniczne

    DANE TECHNICZNE NUMER ARTYKUŁU: CLROOTPARTW Rodzaj produktu: Reflektor LED Typ: Reflektor PAR Spektrum kolorów: CW + WW Liczba diod LED: Typ diod LED: Częstotliwość PWM 650 Hz, 1530 Hz, 2150 Hz, 4000 Hz (regulowane) diody LED: Kąt promieniowania 37,5° (19,5°) (kąt półrozproszenia): Wejście DMX: 3-pinowe złącze męskie...
  • Page 121 NUMER ARTYKUŁU: CLROOTPARTW Kolor obudowy: czarny Materiał obudowy: tworzywo sztuczne ABS Chłodzenie obudowy: Chłodzenie konwekcyjne Wymiary (szer. x wys. 195 x 133 x 195 mm x gł., bez uchwytu montażowego): Waga (z uchwytem 1,75 kg montażowym): Pozostałe cechy: Dołączony kabel sieciowy, pilot zdalnego sterowania na podczerwień (CLPFLAT1REMOTE) oraz moduł...
  • Page 122: Utylizacja

    UTYLIZACJA Opakowanie 1. Opakowania można oddać do recyklingu. 2. Opakowanie należy oddzielić zgodnie z obowiązującymi w danym kraju przepisami dotyczącymi utylizacji. Urządzenie: 1. To urządzenie podlega obowiązującej dyrektywie europejskiej w sprawie zużytego sprzętu elektrycznego i elektronicznego. Dyrektywa WEEE (w sprawie zużytego sprzę- tu elektrycznego i elektronicznego).
  • Page 123: Italiano

    Questo dispositivo è stato sviluppato e prodotto in conformità con elevati standard qualitativi che ne garantiscono il regolare funzionamento per molti anni. Leggete attentamente questo manuale d‘uso per utilizzare al meglio il vostro nuovo prodotto Cameo Light. Per maggiori informazioni su Cameo Light consultare la nostra pagina Web WWW.CAMEOLIGHT.COM.
  • Page 124 Questo simbolo indica un rischio elettrico. Questo simbolo indica un pericolo generico. Questo simbolo indica un pericolo dovuto a superfici calde. Questo simbolo indica un pericolo dovuto a fonti luminose intense. Questo simbolo indica informazioni complementari sull’utilizzo del prodotto. PERICOLO: 1.
  • Page 125 2. Verificare che la tensione e la frequenza della rete elettrica corrispondano ai valori indicati sul dispositivo. Se il dispositivo è dotato di un selettore di tensione, non col- legarlo finché tale selettore non è impostato correttamente. Utilizzare esclusivamente cavi di alimentazione adatti. 3.
  • Page 126 PRUDENZA: 1. In caso di componenti mobili, come staffe di montaggio, sussiste il rischio di schiac- ciamento. 2. Nei dispositivi con componenti azionati a motore sussiste il pericolo di lesioni a causa del movimento del dispositivo. Movimenti improvvisi del dispositivo possono causare reazioni impreviste.
  • Page 127: Avvertenze Per Dispositivi Industriali Portatili

    AVVERTENZE PER DISPOSITIVI INDUSTRIALI PORTATILI 1. Funzionamento temporaneo! Le attrezzature per eventi sono concepite esclusivamen- te per un uso temporaneo. 2. Il funzionamento continuo o l’installazione permanente possono compromettere il funzionamento e causare l’usura precoce del dispositivo. INTRODUZIONE 7 PROIETTORI TUNABLE WHITE DA 4 W CLROOTPARTW FUNZIONI DI CONTROLLO •...
  • Page 128: Connessioni, Elementi Di Comando E Di Visualizzazione

    Power Twist in dotazione. POWER OUT Presa uscita di rete Power Twist bianca per l’alimentazione di ulteriori proiettori Cameo (max. 8 A). DMX IN Connettore XLR maschio a 3 poli per il collegamento di un dispositivo di controllo DMX (ad es.
  • Page 129: Piedini In Gomma

    FUSE Portafusibili per microfusibili (5 x 20 mm). NOTA IMPORTANTE: sostituire il fusibile solo con un altro dello stesso tipo e con gli stessi valori. Se il fusibile continua a saltare, rivolgersi a un centro di assistenza autorizzato. DISPLAY OLED Il display OLED mostra la modalità...
  • Page 130: Utilizzo

    • Non appena il proiettore è correttamente allacciato alla rete elettrica, durante il processo di avvio sul display appaiono in successione il messaggio “Welcome to Cameo”, la denominazione del modello e la versione del software. Al termine della procedura il proiettore è pronto e viene avviata la modalità...
  • Page 131 IMPOSTAZIONE DELL’INDIRIZZO DI AVVIO DMX Premere MODE dalla schermata principale per accedere al menu principale. Con i tasti UP e DOWN, selezionare la voce di menu DMX Address e confermare con ENTER. Impostare l’indirizzo di avvio DMX desiderato con i tasti UP e DOWN. Confermare l’inserimento premendo ENTER. IMPOSTAZIONE DELLA MODALITÀ...
  • Page 132 Il tempo di ritardo (tempo di ritardo del segnale DMX) può essere impostato manualmente su ciascun proiettore con valori diversi (da 0.0 s a 2.0 s con incrementi di 0.1 s). Esempio di setup: Impostazione del DMX Delay nelle modalità di funzionamento DMX con canale DMX Delay (D2CH, D3CH, D4CH1, D4CH2, D8CH): Premere MENU dalla schermata principale per accedere al menu principale.
  • Page 133 Esempio di setup: MODALITÀ DI FUNZIONAMENTO STAND-ALONE DIRECT Analogamente a quanto avviene in un dispositivo di comando DMX, la modalità stand-alone Direct consente di impostare direttamente sul dispositivo le funzioni dimmer e stroboscopio (Strobe), bianco freddo e bianco caldo con valori da 000 a 255. È quindi possibile creare una scena perso- nalizzata, senza necessità...
  • Page 134 MODALITÀ DI FUNZIONAMENTO STAND-ALONE LOOP / SOUND La modalità di funzionamento stand-alone Loop permette di configurare individualmente una sequenza luminosa e di richiamarla. Luminosità, durata del ciclo, tempo di dissolvenza, Sound Control con sensibilità microfono e ritardo (del segnale) sono regolabili separatamente. Premere MODE dalla schermata principale per accedere al menu principale.
  • Page 135 MODALITÀ SLAVE Modalità Slave Standard: Premere MODE dalla schermata principale per accedere al menu principale. Con i tasti UP e DOWN selezionare la voce di menu Slave e confermare con ENTER; selezionare poi il Gruppo Slave 0 (Slave Group 0) e confermare nuovamente con ENTER. Collegare le unità...
  • Page 136: Impostazioni Di Sistema (Settings)

    IMPOSTAZIONI DI SISTEMA (SETTINGS) Premere MODE dalla schermata principale per accedere al menu principale. Con i tasti UP e DOWN selezionare la voce di menu Settings e confermare con ENTER. Si accede quindi al sottomenu per l’impostazione delle seguenti voci di sottomenu (v. tabella, se- lezionare con UP e DOWN, confermare con ENTER, modificare il valore o lo stato con UP e DOWN, confermare con ENTER).
  • Page 137 Reset = Ripristinare Factory Tornare alle impostazioni di fabbrica: le impostazioni Effettuare il reset con ENTER, annullare con MENU Preset A Ripristino al Preset A: Effettuare il reset con ENTER, annullare con MENU Preset B Ripristino al Preset B: Effettuare il reset con ENTER, annullare con MENU Preset C Ripristino al Preset C: Effettuare il reset...
  • Page 138: Telecomando A Infrarossi (Opzionale)

    TELECOMANDO A INFRAROSSI (opzionale) Dirigere il telecomando a infrarossi direttamente sul senso- re a infrarossi sul pannello frontale della barra LED. Il raggio d’azione massimo è di circa 8 metri. Nelle modalità DMX e slave il sensore del proiettore è disattivato. Il telecomando a infrarossi controlla direttamente le modalità...
  • Page 139: Installazione E Montaggio

    Su (sequenza luminosa con Sound Control) Nel caso di impulsi gravi, i preset di temperatura di colore preimpostati in modalità stand-alone Loop ai Punti 1 e 2 cambiano. Il microfono per il controllo di questa funzione si trova sul retro del proiettore, la sensibilità del microfono viene preimpostata nella modalità...
  • Page 140 Per garantire una minore visibilità quando viene utilizzato come uplight, la staffa doppia di montaggio può essere rimossa allentando le due viti della maniglia.
  • Page 141: Cura, Manutenzione E Riparazione

    CURA, MANUTENZIONE E RIPARAZIONE Per garantire un funzionamento corretto e duraturo del dispositivo, è necessario effettuarne la pu- lizia e manutenzione almeno ogni 3000 ore di funzionamento regolare o al più tardi dopo un anno MANUTENZIONE (eseguibile dall’utente) AVVERTENZA! Prima di qualsiasi intervento di pulizia, scollegare l’alimentazione elettrica e, se possibile, tutti i collegamenti del dispositivo.
  • Page 142: Tecnologia Dmx

    TECNOLOGIA DMX DMX512 DMX (Digital Multiplex) è la sigla di un protocollo di trasmissione uni- versale per la comunicazione tra dispositivi e controller. Un controller DMX invia dati DMX ai dispositivi DMX collegati. I dati DMX vengono sempre trasmessi come flusso di dati seriale, che viene inoltrato da un dispositivo collegato al successivo attraverso le connessioni (con- nettori XLR) DMX IN e DMX OUT presenti per ogni dispositivo DMX compatibile, per un massimo di 32 dispositivi.
  • Page 143 CONFIGURAZIONE DEI CONNETTORI: Cavo DMX con connettori XLR a 3 poli: Cavo DMX con connettori XLR a 5 poli (pin 4 e 5 non assegnati): Shield Shield CONNETTORE TERMINALE DMX (TERMINATORE): Per evitare errori di sistema, l’ultimo dispositivo di una catena DMX deve essere dotato di una resistenza di terminazione (120 ohm, 1/4 W).
  • Page 144: Dati Tecnici

    DATI TECNICI CODICE ARTICOLO: CLROOTPARTW Tipologia di prodotto: Proiettore LED Tipo: Proiettori PAR Spettro cromatico: CW + WW Numero di LED: Tipo di LED: Frequenza LED PWM: 650 Hz, 1530 Hz, 2150 Hz, 4000 Hz (regolabile) Angolo di proiezione 37,5° (19,5°) (angolo di diffusione parziale): Ingresso DMX:...
  • Page 145 CODICE ARTICOLO: CLROOTPARTW Umidità relativa < 80%, senza condensa dell’aria: Colore cassa: nero Materiale cassa: plastica ABS Raffreddamento raffreddamento a convezione alloggiamento: Ingombro (L x H x P, 195 x 133 x 195 mm senza staffe di montaggio): Peso (inclusa staffa di 1,75 kg montaggio): Altre caratteristiche:...
  • Page 146: Smaltimento

    SMALTIMENTO Confezione: 1. Gli imballaggi possono essere conferiti tra i materiali riciclabili tramite i consueti percorsi di smaltimento. 2. Separare l‘imballaggio in conformità alle leggi sullo smaltimento e ai regolamenti sui materiali riciclabili del proprio Paese. Dispositivo: 1. Questo dispositivo è soggetto alla Direttiva europea sui rifiuti di apparecchiature elett- riche ed elettroniche e successive modifiche.
  • Page 147: Dmx

    DMX CONTROL / DMX STEUERUNG / COMMANDE DMX / CONTROL DMX / STEROWANIE DMX / CONTROLLO DMX 1 CH Mode (preselect color in stand-alone mode Direct or CCT) Function Values Dimmer 0% to 100% 2 CH Mode Function Values Cold White 0% to 100% Warm White 0% to 100%...
  • Page 148 7 CH Mode Function Values Dimmer 0% to 100% Dimmer fine 0% to 100% Strobe open Strobe closed Ramp up/down, slow -> fast Ramp up/down random, slow->fast Ramp up, slow -> fast Ramp up random, slow -> fast Strobe functions Ramp down, slow ->...
  • Page 149 2 CH Mode with DMX-Delay Channel (preselect color in stand-alone mode Direct or CCT) Function Values Dimmer 0% to 100% No Delay DMX Delay 0,1s -> 2,0s 3 CH Mode with DMX-Delay Channel Function Values Cold White 0% to 100% Warm White 0% to 100% No Delay...
  • Page 150 8 CH Mode with DMX-Delay Channel Function Values Dimmer 0% to 100% Dimmer fine 0% to 100% Strobe open Strobe closed Ramp up/down, slow -> fast Ramp up/down random, slow->fast Ramp up, slow -> fast Ramp up random, slow -> fast Strobe functions Ramp down, slow ->...
  • Page 152 CAMEOLIGHT.COM Adam Hall GmbH | Adam-Hall-Str. 1 | 61267 Neu-Anspach | Germany Phone: +49 6081 9419-0 | adamhall.com REV: 01...

Ce manuel est également adapté pour:

Clrootpartw

Table des Matières