Table des Matières
Publicité
Les langues disponibles
Les langues disponibles
Liens rapides
Publicité
Chapitres
Table des Matières

Sommaire des Matières pour DANUBE WED 8
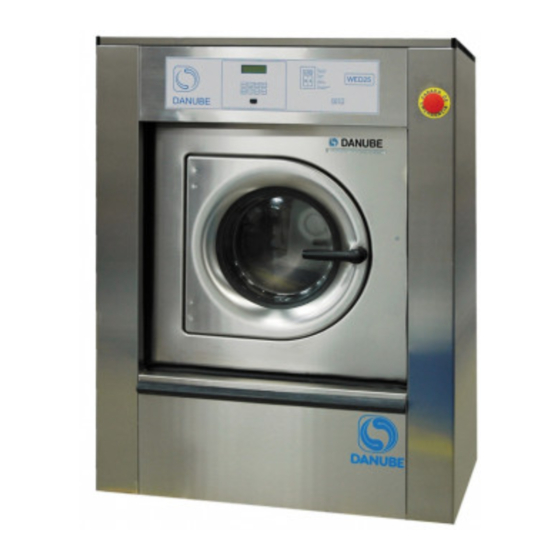
- Page 1 DANUBE INTERNATIONAL INSTRUCTIONS POUR L’INSTALLATION, L’UTILISATION ET LA MAINTENANCE / INSTRUCTIONS FOR INSTALLATION, USE, AND MAINTENANCE WED 8-10-13-18- 2007-25 (VERSION WED.0 01/02/08) MACHINE N°/SERIAL NUMBER :...
- Page 2 The technical documents contain informations that are priviliged confidential. You are hereby notified that any disclosure copying is strictly prohibited. We will proceed against any body copying these documents. Les documents techniques comportent des informations confidentielles. Nous tenons à porter à votre connaissance qu’il est interdit de dévoiler et copier ces documents et que nous engagerons des procédures contre les auteurs des dites copies.
- Page 3 WED - 8 WED-10 WED - 13 WED - 18 1042 WED - 25 Fig. 1 A = Câble électrique B = Prise eau froide C = Prise eau chaude D = Vidange E = Sortie de vapeurs F = Prise vapeur G = Prise eau adoucie H = Câble électrique doseurs...
- Page 4 Fig. 3 Fig. 2 Fig. 4 Fig. 5 A = Robinet d'arrêt ; B = Filtre ; C = Tuyau ; A.C. = Eau chaude ; A.F. = Eau froide ; A.D. = Eau adoucie Fig. 6 Fig. 7 A = Robinet d'arrêt B = Filtre A = Coude vidange B = Bride...
- Page 5 400 V 3N~ Fig. 8a 230 V 3~ Fig. 8b 230 V 1N~ Fig. 8c (Uniquement 886 F et WED-8) Fig. 9 TRANSFORMATEUR...
- Page 6 A = Produit prélavage B = Lessive C= Eau de Javel D = Assouplissant Fig. 10 Fig. 11...
-
Page 7: Table Des Matières
SOMMAIRE Page 1.- INSTALLATION ......................6 1.1.- Schéma d'installation ....................6 1.2.- Mise en place ......................6 1.3.- Raccordement de l'eau ....................6 1.4.- Raccordement de la vapeur ..................6 1.5.- Vidange ........................6 1.6.- Raccordement électrique .................... 7 1.7.- Raccordement doseurs ....................7 1.8.- Caractéristiques techniques .................. -
Page 8: Installation
1.- INSTALLATION 1.1.- Schéma d'installation Voir figure 1 1.2.- Mise en place Le sol sur lequel sera installé le lave-linge devra supporter le poids de celui-ci ainsi que la force résiduelle transmise lors de l'essorage. Après avoir sorti le lave-linge de l'emballage, retirez les pièces fixant la partie flottante et le châssis, nécessaires au transport. -
Page 9: Raccordement Électrique
1.6.- Raccordement électrique Accédez à la réglette de raccordement en démontant le sectionneur et en retirant le couvercle qui le recouvre ; raccordez le câble sous gaine sur le panneau arrière. Raccordez la réglette et vérifiez que les branchements correspondent à la tension de fonctionnement (Fig. -
Page 10: Caractéristiques Techniques
1.8.- Caractéristiques techniques Modèle WED-8 WED-10 WED-13 WED-18 WED-2007-25 Capacité tambour litres Diamètre tambour Profondeur tambour Diamètre bouche Hauteur 1155 1155 1300 1404 1562 Largeur Profondeur 1042 Poids net Vitesse lavage tr/mn Vitesse essorage tr/mn 1000 1000 1000 Facteur G Puissance moteur 0,75 0.75... -
Page 11: Utilisation
2.-UTILISATION 2.1.- Éléments de commande Le bandeau de commande du lave-linge avec microprocesseur programmable apparaît sur la figure 10. Écran (1) Il s'agit d'un écran à 4 lignes de 20 caractères chacune. Si vous sélectionnez un programme de lavage, les caractéristiques principales s'affichent à l'écran ; Une fois le programme commencé, l'information relative au déroulement et au stade du programme de lavage s'affiche à... -
Page 12: Sélection D'un Programme
sélectionner un programme de lavage, de modifier les valeurs des paramètres dans le menu programmation et certains écrans dans le menu entretien. 2.2.- Sélection d'un programme Lorsque vous allumez le lave-linge, le dernier programme exécuté s'affiche à l'écran, en indiquant son numéro et son titre ainsi que ses principales caractéristiques. Si vous sélectionnez par exemple le programme numéro un : P1: BLANC 90 ºC... -
Page 13: Exécution D'un Programme
2.4.- Exécution d'un programme Pour effectuer un programme de lavage, suivez les étapes indiquées ci-après : Introduisez le linge sale dans le tambour du lave-linge. Fermez la porte du lave-linge. Sélectionnez le programme souhaité. Appuyez sur la touche START. Une fois un programme commencé, le stade de celui-ci et son déroulement s'affichent à... -
Page 14: Fin De Programme
Puis la phase suivante commence -ici un lavage-, tel qu'indiqué sur la figure suivante : P2:BLANC/COULEUR 60ºC Lavage Température: 60 ºC Rempliss... Avec le programme en marche, vous pouvez appuyer sur les différentes touches du bandeau de commande pour activer des fonctions différentes : Touche START : Le programme s'arrête, il est sur pause. -
Page 15: Finalisation D'un Programme
Pour mettre fin au programme, appuyez sur la touche ENT ; appuyez sur la touche ESC pour que le programme continue. Il est possible de sélectionner la phase initiale d'un programme avant de le mettre en marche. En appuyant sur la touche INFO : →VOIR PHASES DÉPART DIFFÉRÉ... - Page 16 À la fin d'un programme, avant l'ouverture de la porte, le linge est défroissé pendant 30 secondes tandis que le message suivant s'affiche à l'écran : P2:BLANC/COULEUR 60ºC Défroissage Après 30 secondes, un message s'affiche à l'écran et un signal acoustique est émis qui indiquent que le programme est terminé...
-
Page 17: Menu Principal
2.6.- Menu principal Le lave-linge allumé, appuyez sur la touche info. → VOIR PHASES PROG. DIFFÉRÉE PROGRAMMATION CONFIGURATION 2.6.1- Voir phases Appuyez sur ENTER pour que l'écran indiquant la phase actuelle s'affiche. → Prélavage Lavage Rinçage Rinçage 2.6.2- Programmation différée Il est possible de sélectionner le moment où... -
Page 18: 3- Configuration
2.6.3- Configuration Le lave-linge allumé, appuyez sur la touche INFO : →VOIR PHASES PROG. DIFFÉRÉE PROGRAMMATION CONFIGURATION Appuyez trois fois sur la touche DEC (∨) pour sélectionner l'option CONFIGURATION, puis appuyez sur ENTER : →OPTIONS LANGUE ºC/F MODÈLE Comme il apparaît sur la figure, le menu Configuration offre quatre options. Utilisez les touches INC (∧) et DEC (∨) et appuyez sur “ENTER”... - Page 19 2.6.3.2. Langue Une fois l'option LANGUE sélectionnée, appuyez sur ENTER : Espagnol Français Anglais Allemand La touche DEC (∨) permet d'accéder à d'autres écrans : →Italien Portugais Utilisateur Les touches INC (∧) et DEC (∨) permettent de sélectionner l'une des 5 langues : anglais, français, allemand, italien et espagnol.
-
Page 20: Messages D'erreur
2.7.- Messages d'erreur Sur l'écran du lave-linge, des messages d'avertissement ou de pannes peuvent apparaître avant, pendant ou après l'exécution d'un programme de lavage et des signaux acoustiques sont émis. Sauf dans le cas d'une coupure de courant, le lave-linge sera sur pause (vanne de vidange fermée, moteur arrêté, etc.) et attendra que l'utilisateur agisse. - Page 21 Défaillance dans le système de chauffe Message : ALARME E5 “DÉF. CHAUFFE” Signification : Ce message apparaît lorsque, malgré l'activation de la sortie de chauffe, la température de l'eau n'a pas augmenté pendant un certain temps défini au préalable. Options : - Appuyez sur ENTER : l'exécution du programme reprend à...
- Page 22 “TEMPÉRATURE MAX.” Signification : Ce message apparaît lorsque la température de l'eau dépasse 95 ºC. Options : - Appuyez sur ENTER : l'exécution du programme se poursuit. - Appuyez sur ESC : le programme se termine. Niveau d'eau maximum Message : ALARME E8 “NIVEAU D'EAU MAXIMUM”...
-
Page 23: Conseils Pour Bien Laver
Eau dans la cuve Message : ALARME E12 “EAU DANS CUVE” Signification : Ce message apparaît lorsqu'un programme arrive à la fin mais qu'il y a toujours de l'eau dans la cuve. La porte ne pourra pas être ouverte tant que l'eau de la cuve n'aura pas été... -
Page 24: Entretien
3.- ENTRETIEN − Nettoyez chaque jour les bacs à lessive et à liquides. − Nettoyez à l'eau et au savon. N'utilisez jamais de détergents abrasifs. − Nettoyez une fois par mois les filtres des entrées d'eau et les conduits de dosage extérieurs. -
Page 25: Anomalies
3.2.- Anomalies PROBLÈME CAUSE POSSIBLE ACTION CORRECTIVE Amortisseur ou ressort cassé Changez-les Microrupteur mal installé Installez-le correctement Essorage accompagné d'un mouvement excessif ou pas Câble microrupteur détaché Attachez-le correctement d'essorage Butée microrupteur desserrée Serrez les vis Résistances en panne Changez les résistances L'un des deux contacteurs des résistances est en panne Changez le contacteur la machine ne chauffe pas... -
Page 26: Programmes Normalisés
4.- PROGRAMMES NORMALISÉS Nom : Blanc 90 ºC Numéro de programme : 1 Numéro de bloc : Nom : Prélavage Lavage Rinçage 1 Rinçage 2 Rinçage 3 Essorage Essorage Arrêt programme : Vitesse : 50 tr/mn 50 tr/mn 50 tr/mn 50 tr/mn 500 tr/mn 50 tr/mn... - Page 27 Nom : Blanc / couleur 60 ºC Blanc / couleur 40 ºC Blanc / couleur 30 ºC Blanc / couleur à froid Numéro de programme : 2 à 5 Numéro de bloc : 7/8/8/8 9/10/11/12 Nom : Prélavage Lavage Rinçage 1 Rinçage 2 Rinçage 3 Essorage...
- Page 28 Nom : Synthétique 60 ºC Synthétique 40 ºC Synthétique 30 ºC Synthétique à froid Numéro de programme : 6 à 9 Numéro de bloc : 13/14/14/14 15/16/17/18 Nom : Prélavage Lavage Rinçage 1 Rinçage 2 Rinçage 3 Essorage Essorage Arrêt programme : Vitesse : 50 tr/mn 50 tr/mn...
- Page 29 Nom : Délicat 40 ºC Délicat 30 ºC Délicat à froid Numéro de programme : 10 à 12 Numéro de bloc : 23/24/25 Nom : Prélavage Lavage Rinçage 1 Rinçage 2 Rinçage 3 Essorage Arrêt programme : Vitesse : 45 tr/mn 45 tr/mn 45 tr/mn 45 tr/mn...
- Page 30 Nom : Laine 30 ºC Laine à froid Numéro de programme : 13 et 14 Numéro de bloc : 28/29 Nom : Lavage Rinçage 1 Rinçage 2 Rinçage 3 Essorage Arrêt programme : Vitesse : 40 tr/mn 40 tr/mn 40 tr/mn 40 tr/mn 500 tr/mn Rythme :...
- Page 31 Nom : Essorage élevé Essorage faible Numéro de programme : 15 et 16 Numéro de bloc : 6/33 Nom : Essorage Arrêt programme : Vitesse : 1000/500 tr/mn Rythme : Entrée eau chaude : Entrée eau froide : Entrée eau adoucie : Niveau : Remplissage avec mouvement : Température:...
-
Page 32: Instructions De Programmation
Instructions de programmation ********* LAVE-LINGE Mod. : WED 8 WED 10 WED13 WED18 WED2007-25 WED 55... - Page 33 SOMMAIRE Page 1.- COMPOSITION D'UN PROGRAMME DE LAVAGE ..........2 2.- MENU PRINCIPAL DE PROGRAMMATION ............3 3.- TITRE PROGRAMME ....................3 3.1.- Créer Titre ....................3 3.2.- Copier Titre ......................... 4 3.3.- Modifier Titre ......................5 4.- NOM PHASE ........................5 4.1.- Créer Nom Phase ..................
-
Page 34: Composition D'un Programme De Lavage
COMPOSITION D'UN PROGRAMME DE LAVAGE Un programme de lavage comprend un nom de programme (titre) ainsi qu'un ensemble de phases allant d'un minimum de un à un maximum de 15. Chaque phase comprend un nom et un bloc, qui est une structure de 30 paramètres que l'utilisateur peut programmer et modifier librement, en fonction de ses besoins particuliers. -
Page 35: Menu Principal De Programmation
MENU PRINCIPAL DE PROGRAMMATION Après avoir allumé la machine, appuyez sur la touche INFO : →VOIR PHASES DÉPART DIFFÉRÉ PROGRAMMATION CONFIGURATION Appuyez deux fois sur DEC (∨), puis sur ENTER pour accéder au menu principal de programmation : →TITRE PROGRAMME NOM PHASE BLOC PROGRAMME... -
Page 36: Copier Titre
Les touches INC (∧) et DEC (∨) permettent de modifier le caractère sur lequel est situé le curseur ; avec la touche AVANCE (>>) le curseur passe au caractère suivant ; la touche INFO permet de passer des majuscules aux minuscules et aux caractères spéciaux. Une fois le titre écrit, appuyez sur ENTER. -
Page 37: Modifier Titre
Modifier titre Cette commande permet de modifier le titre des programmes créés par l'utilisateur. Les étapes à suivre sont les suivantes : Après avoir sélectionné MODIFIER TITRE, appuyez sur la touche ENTER. Le premier titre disponible s'affiche. Exemple : MODIFIER TITRE COUVERTURES Les touches INC (∧) et DEC (∨) permettent de sélectionner le titre à... -
Page 38: Créer Nom Phase
Créer nom phase Cette commande permet de créer le nom d'une phase. Les étapes à suivre sont les suivantes : Après avoir sélectionné CRÉER NOM PHASE, appuyez sur la touche ENTER : CRÉER NOM PHASE Les touches INC (∧) et DEC (∨) permettent de modifier le caractère sur lequel est situé le curseur ;... -
Page 39: Modifier Nom Phase
Les touches INC (∧) et DEC (∨) permettent d'afficher toutes les phases sauvegardées dans la mémoire. Une fois la phase à copier sélectionnée, appuyez sur ENTER. Copier nom phase? ENTER: ok ESC: annuler Pour revenir au menu précédent, appuyez sur la touche ESC. Modifier nom phase Cette commande permet de modifier le nom d'une des phases créées par l'utilisateur. -
Page 40: Bloc
BLOC L'ensemble des paramètres d'un bloc ainsi que les valeurs que ces paramètres admettent sont décrits ci-après : Arrêt de programme Ce paramètre permet de faire un arrêt au cours du programme avant que la phase ne commence, c'est-à-dire, avant que la cuve commence à se remplir d'eau ou que le tambour commence à tourner. Cet arrêt sera indiqué... - Page 41 Entrée eau froide Ce paramètre indique si la prise d'eau froide va être utilisée pour remplir la cuve. Les options sont les suivantes : : la prise d'eau froide est utilisée. : la prise d'eau froide n'est pas utilisée. Entrée eau adoucie Ce paramètre indique si la prise d'eau adoucie va être utilisée pour remplir la cuve.
- Page 42 12. Temps C'est le temps qui s'écoule à partir du moment où l'eau atteint le niveau d'eau (sans arrêt thermique), la température programmée (avec arrêt thermique) ou le temps d'essorage. Les valeurs possibles sont les suivantes : De 1 à 99 mn en étapes de 1 : temps de lavage ou d'essorage.
-
Page 43: Créer Bloc
18. 20, 22, 24, 26, 28, 30. Retard n C'est le temps qui s'écoule entre le moment où l'eau est détectée dans la cuve et le début du dosage de l'additif n. Les valeurs possibles sont les suivantes : De 0 à 99 secondes par étapes de 1 : temps de retard en secondes. Une fois les paramètres à... -
Page 44: Copier Bloc
Les touches INC (∧) et DEC (∨) permettent de modifier la valeur du paramètre correspondant ; la touche AVANCE (>>) permet de passer au paramètre suivant. Une fois tous les paramètres créés, appuyez sur ENTER. Sauveg. bloc? ENTER: ok ESC: annuler Pour revenir au menu précédent, appuyez sur la touche ESC. -
Page 45: Modifier Bloc
Modifier bloc Cette commande permet de modifier tous les paramètres d'un des blocs créés par l'utilisateur. Les étapes à suivre sont les suivantes : Après avoir sélectionné MODIF. BLOC, appuyez sur la touche ENTER. Le numéro du premier bloc disponible et le texte correspondant s'affichent : MODIFIER BLOC Bloc: Texte:Lavage... -
Page 46: Programme
PROGRAMME Après avoir appuyé sur la touche ENTER, il existe quatre options : CRÉER PROGR. COPIER PROGR. MODIFIER PROGR. EFFACER PROGR. Créer programme Cette commande permet de créer un nouveau programme. Les étapes à suivre sont les suivantes : Après avoir sélectionner CRÉER PROGR., appuyez sur la touche ENTER. Le plus petit numéro du programme à... -
Page 47: Copier Programme
Les touches INC (∧) et DEC (∨) permettent de modifier le nom de la phase. Une fois le nom sélectionné, appuyez sur AVANCE (>>). Le premier numéro de bloc disponible s'affiche : Pha.: ESSORAGE Bloc: Texte: Prélavage 40 ºC Les touches INC (∧) et DEC (∨) permettent d'augmenter ou de diminuer le numéro du bloc. -
Page 48: Modifier Programme
Les touches INC (∧) et DEC (∨) permettent d'augmenter et de diminuer le numéro du programme d'origine. Le titre correspondant s'affiche en même temps. Une fois le numéro de programme sélectionné, appuyez sur ENTER. Le numéro de programme de fin s'affiche : COPIER PROGR. -
Page 49: 1- Insérer
MODIFIER PROGR. Progr.: Titre programme COUVERTURES Les touches INC (∧) et DEC (∨) permettent de sélectionner le titre. Appuyez ensuite sur ENTER pour confirmer la sélection du nouveau titre. Appuyez sur AVANCE pour afficher le numéro de la phase, son nom et le numéro du bloc associé... -
Page 50: 1- Modifier
Les touches INC (∧) et DEC (∨) permettent de choisir le bloc. Une fois le bloc sélectionné, appuyez sur ENTER. Insérer phase? ENTER: ok ESC: annuler Pour revenir au menu précédent, appuyez sur la touche ESC. Modifier Cette commande permet de modifier une phase dans un programme. Les étapes à suivre sont les suivantes : Après avoir sélectionné... -
Page 51: 1- Éliminer
Éliminer Cette commande permet d'éliminer une phase dans un programme. Les étapes à suivre sont les suivantes : Après avoir sélectionné la phase à éliminer, appuyez sur ENTER et sélectionnez ÉLIMINER. Élimin. phase? ENTER: ok ESC: annuler Pour revenir au menu précédent, appuyez sur la touche ESC. Effacer programme Cette commande permet d'effacer un programme créé... - Page 52 Nº Programme: Titre du programme : Nom de la phase Nº de bloc Texte du bloc : Arrêt programme : Vitesse : Rythme : Entrée eau chaude : Entrée eau froide : Entrée eau adoucie : Niveau : Remplissage mouvement : Température : Arrêt thermique : Temps :...
- Page 53 WED - 8 WED-10 WED - 13 WED - 18 1042 WED - 25 Figs. 1 A = Electric hose B = Cold water inlet C = Hot water inlet D = Drainage E = Vapour outlet F = Vapour inlet G = Decalcified water inlet H = Electric hose dispensers...
- Page 54 Fig. 3 Fig. 2 Fig. 4 Fig. 5 A = Mains tap; B= Filter; C=Hose; A.C.= Hot water; A.F.= Cold Water; A.D.= Decalcified water Fig. 6 Fig. 7 A = Mains tap B = Filter A= Drainage elbow B = Clamp...
- Page 55 400 V 3N~ Fig. 8a 230 V 3~ Fig. 8b 230 V 1N~ Fig. 8C (Only 886 F and WED-8) Fig. 9 TRANSFORMER...
- Page 56 A = Pre-wash detergent B = Washing detergent C = Bleach D = Softener Fig. 10 Fig. 11...
- Page 57 INDEX Page 1.- INSTALLATION ......................6 1.1.- Installation diagram ....................6 1.2.- Positioning ........................6 1.3.- Water connection ......................6 1.4.- Steam connection ......................6 1.5.- Drainage ........................6 1.6.- Electrical connection ....................7 1.7.- Dispenser connection ....................7 1.8.- Technical specifications ..................... 8 2.- USE ............................
-
Page 58: Installation
1.- INSTALLATION 1.1.- Installation diagram See Figure. 1 1.2.- Positioning The washing machine must be firmly secured on the floor, which will support the its weight and the residual force generated while spinning. After unpacking the washing machine, the pieces that secure the free-floating part and the chassis during transportation should be removed. -
Page 59: Electrical Connection
1.6.- Electrical connection Access the connections terminal strip dismantling the section switch and removing its cover; fix the cable sleeve in the rear panel. Connect the terminal strip and check that the connections correspond to the operating voltage (Fig. 8). Put an autonomous power switch (I) into the mains socket, with a minimum distance between contacts of at least 3 mm. -
Page 60: Technical Specifications
1.8.- Technical specifications Model WED-8 WED-10 WED-13 WED-18 WED-2007-25 Drum capacity litres Drum diameter Drum depth Entrance diameter Height 1155 1155 1300 1404 1562 Width Depth 1042 Net weight Washing speed Spin speed 1000 1000 1000 G Factor Motor output 0.75 0.75 Heating output... -
Page 61: Use
2.-USE 2.1.-Controls Figure 10 shows the washing machine's control panel with a programmable microprocessor. Screen (1) Each screen has 4 lines and 20 characters. When selecting a wash programme, its main characteristics are shown on the screen; and once the programme has started, information relating to the wash programme status and function is shown on the screen. -
Page 62: Programme Selection
2.2.-Programme selection When the washing turns on, the last programme carried out appears on the screen, indicating its number and name, as well as its main characteristics. For example, if programme number one is selected: P1:WHITES 90 ºC Pre-wash Temperature: 40 ºC START to commence The first line on the screen indicates the programme number (P1) and its name... -
Page 63: Programme Operation
2.4.-Programme operation In order to carry out a wash programme, the following steps should be followed: Put the dirty clothes in the washing machine drum Close the washing machine door. Select the desired programme. Press the START key. Once the programme has started, information relating to the ongoing programme's status and function is shown on the screen. -
Page 64: End Of A Programme
Then the following phase begins, in this case the wash phase, as can be observed in the following Figure: P2:WHITES/COLOUREDS 60 ºC Wash Temperature: 60 ºC Filling... While the programme is running the next keys on the control panel may be pressed, activating different functions in each case: START key: the programme stops, it is paused. -
Page 65: Programme End
Before starting up the programme, the initial phase of a programme can be selected. If we press the INFO key: →SEE PHASES DELAYED START PROGRAMMING CONFIGURATION If we press ENTER, a screen appears with all the phases. → Pre-wash 30 ºC Wash 60 ºC Rinse... -
Page 66: Main Menu
2.6.- Main menu With the washing machine on, press the info. key. → SEE PHASES DELAYED PROGRAMMING PROGRAMMING CONFIGURATION 2.6.1- See phases If ENTER is pressed, a screen appears with the phase we are currently in. → Pre-wash Washing Rinse Rinse 2.6.2- Delayed programming Before starting up the programme, the initial time of a programme can be selected. -
Page 67: 1.- Options
2.6.3- Configuration With the washing machine on, press the INFO key: → SEE PHASES DELAYED PROGRAMMING PROGRAMMING CONFIGURATION Press the DEC (∨) key three times to select the CONFIGURATION option and, then press ENTER: →OPTIONS LANGUAGE ºC/F MODEL As can be seen in the figure, the configuration menu has four options. With the INC (∧) and DEC (∨) keys and pressing “ENTER”, any of the options is selected. -
Page 68: 3.- Degrees ºc/ºf
2.6.3.2. Language Once the LANGUAGE option has been selected, press ENTER: Spanish French English German With the DEC (∨) key you access more screens: →Italian Portuguese User With the INC (∧) and DEC (∨) keys any of the 5 languages can be selected: English, French, German, Italian and Spanish. -
Page 69: Error Messages
2.7.- Error messages On the washing machine screen, warning or fault messages can be displayed during or after the execution of a wash programme. Except in the event of a power cut-off, the washing machine will be paused (drainage valve off, motor off, etc.) waiting for the user to intervene. The messages shown are explained below: Power cut-off Message:... - Page 70 Heating system fault Message: ALARM E5 “FAULT HEATING” Meaning: This message is shown when, in spite of activating the heating output, the water temperature has not increased during a certain preestablished period of time. Options: - Press ENTER: the programme continues to operate in the next phase. - Press ESC: programme ends.
- Page 71 “MAXIMUM TEMPERATURE” Meaning: This message is displayed when water temperature has exceeded 95 ºC. Options: - Press ENTER: the programme continues to operate. - Press ESC: programme ends. Maximum water level Message: ALARM E8 “MAXIMUM WATER LEVEL” Meaning: This message is displayed when the water level has exceeded the safety limit.
-
Page 72: Washing Hints
Water in tub Message: ALARM E12 “WATER IN TUB” Meaning: This message is displayed when a programme execution is finished but there is still water inside the tub. The door can not be opened until the water is drained from the tub. Options: - Press ESC: programme ends. -
Page 73: Maintenance
3.- MAINTENANCE − -Daily remove any traces of detergent or liquids from the dispenser drawer. − -Never use abrasive detergents for cleaning; use only water and soap. − -Clean the water inlet filters and the external dispenser conducts once a month. −... -
Page 74: Faults
3.2.- Faults PROBLEM CAUSE CORRECTIVE ACTION Spring or shock absorber breakage. Change them Micro is in the wrong position. Position it correctly Spinning with excessive Micro cable loose. Tie it correctly movement or no spin. Micro stop loose. Tighten the screws Heating elements are broken. -
Page 75: Normal Programmes
4.- NORMAL PROGRAMMES Name: Whites 90 ºC Programme number: Block number: Name: Pre-wash Wash Rinse 1 Rinse 2 Rinse 3 Spin Stop programme: Speed: 50 rpm 50 rpm 50 rpm 50 rpm 500 rpm 50 rpm. 1000 rpm Rate: M=12”, P=3” M=12”, P=3”... - Page 76 Name: Whites/coloureds 60 ºC Whites/coloureds 40 ºC Whites/coloureds 30 ºC Whites/coloureds Cold Programme number: 2 to 5 Block number: 7/8/8/8 9/10/11/12 Name: Pre-wash Wash Rinse 1 Rinse 2 Rinse 3 Spin Stop programme: Speed: 50 rpm 50 rpm 50 rpm 50 rpm 500 rpm 50 rpm.
- Page 77 Name: Synthetics 60 ºC Synthetics 40 ºC Synthetics 30 ºC Synthetics Cold Programme number: 6 to 9 Block number: 13/14/14/14 15/16/17/18 Name: Pre-wash Wash Rinse 1 Rinse 2 Rinse 3 Spin Stop programme: Speed: 50 rpm 50 rpm 50 rpm 50 rpm 500 rpm 50 rpm...
- Page 78 Name: Delicates 40 ºC Delicates 30 ºC Delicates Cold Programme number: 10 to 12 Block number: 23/24/25 Name: Pre-wash Wash Rinse 1 Rinse 2 Rinse 3 Spin Stop programme: Speed: 45 rpm 45 rpm 45 rpm 45 rpm 45 rpm 800 rpm Rate: M=8”, P=6”...
- Page 79 Name: Woollens 30 ºC Cold woollens Programme number: 13 and 14 Block number: 28/29 Name: Wash Rinse 1 Rinse 2 Rinse 3 Spin Stop programme: Speed: 40 rpm 40 rpm 40 rpm 40 rpm 500 rpm M=4”, P=12” M=4”, P=12” M=4”, M=4”, P=12”...
- Page 80 Name: Fast spin Low spin Programme number: 15 and 16 Block number: 6/33 Name: Spin Stop programme: Speed: 1000/500 rpm Rate: Hot water inlet: Cold water inlet: Decalcified water inlet: Level: Filling movement: Temperature: Thermal stop: Time: 6/2 min. Dosage 1: Dosage 2: Dosage 3: Dosage 4:...
-
Page 81: Programming Instructions
Programming instructions ********* WASHING MACHINES Mods.: WED– 8 WED 10 WED – 13 WED – 18 WED2007 – 25 WED55... - Page 82 INDEX Page 1.- CREATING A WASH PROGRAMME ................. 2 2.- MAIN PROGRAMMING MENU .................. 3 3.- PROGRAM NAME ......................3 3.1.- Create name ..................... 3 3.2.- Copy name ........................4 3.3.- Change name ......................5 4.- PHASE NAME ......................... 5 4.1.- CREATE PHASE NAME ...............
-
Page 83: Creating A Wash Programme
CREATION OF A WASH PROGRAMME A wash programme is made up of a programme name (name) plus a group of phases ranging from one to a maximum of 15. Each phase has a name plus a block, which is a structure of 30 parameters that the user can programme and change as he wants, depending on his special needs. -
Page 84: Create Name
MAIN PROGRAMMING MENU After turning the machine on, press the INFO key: →SEE PHASES DELAYED START PROGRAMMING CONFIGURATION Press DEC (∨) twice and after ENTER to access the main programming menu: →PROGRAM NAME PHASE NAME BLOCK PROGRAM PROGRAM NAME After pressing the ENTER key we have three options: →CREATE NAME COPY... -
Page 85: Copy Name
With the INC (∧) and DEC (∨) keys, the character where the cursor is can be modified; with the ADVANCE key (>>) the cursor goes on to the next character; the INFO key changes from upper to lower case and to special characters. Once the name has been written, press ENTER. -
Page 86: Change Name
4.3 Change name This command allows for changing the name of a programme amongst those created by the user. The steps to follow are the following: After selecting CHANGE NAME, press the ENTER key and the first available name will be displayed. -
Page 87: Create Phase Name
5.1 Create phase name This command allows for the creation of a phase name. The steps to follow are the following: After selecting CREATE PHASE NAME, press the ENTER key: CREATE PHASE NAME With the INC (∧) and DEC (∨) keys, the character where the cursor is can be modified; with the ADVANCE key (>>) the cursor goes on to the next character;... -
Page 88: Change Phase Name
With the INC (∧) and DEC (∨) keys, all the phases saved in the memory are displayed. Once the phase has been selected, press ENTER. Copy phase name? ENTER: Accept ESC: Cancel If you wish to return to the previous menu you should press the ESC key. 5.3 Change phase name This command allows for the phase name to be modified amongst the names created by the user. - Page 89 BLOCK All the parameters of a block are described below and the values that each one allows: Stop programme With this parameter a programme stop can be carried out before the start of a phase, that is to say, before the tub begins to fill up with water or the drum starts to move. This stop will be indicated by means of a message on the screen and an acoustic signal.
- Page 90 Cold water inlet This serves to indicate if the cold water inlet is going to be used to fill the tub. The options are: : the cold water inlet will be used. : the cold water inlet will not be used. Decalcified water inlet This serves to indicate if the decalcified water inlet is going to be used to fill the tub.
- Page 91 30. Time This is the time that passes from the moment the water reaches the water level (without thermal stop), the programmed temperature (with thermal stop) or the spinning time. The possible values are: 1 to 99 min. in steps of 1: wash or spin time.
-
Page 92: Block
36. 20, 22, 24, 26, 28, 30. Delay n This is the time taken between the detection of water in the tub and the start of dosage of additive n. The possible values are: 0 to 99 sec. in steps of 1 sec.: delay time in seconds. Once all the parameters to be introduced are known, we return to the main programming menu. -
Page 93: Copy Block
With the INC (∧) and DEC (∨) keys, the corresponding value is modified; with the ADVANCE key (>>) you move to the next parameter. Once all the parameters have been created, press ENTER. Save block? ENTER: Accept ESC: Cancel If you wish to return to the previous menu you should press the ESC key. 6.2 Copy block This command allows for a block to be copied from an existing one. -
Page 94: Change Block
6.3 Change block This command allows for all the parameters of a block to be modified amongst those created by the user. The steps to follow are the following: After selecting CHANGE BLOCK, press the ENTER key and the number of the first available block will be displayed with its corresponding text: CHANGE BLOCK Block:... - Page 95 PROGRAM After pressing the ENTER key we have four options: CREATE PROGRAM COPY PROGRAM CHANGE PROGRAM ERASE PROGRAM 7.1 Create program This command allows for a new programme to be created. The steps to follow are the following: After selecting CREATE PROGRAM, press the ENTER key and the lowest programme number to be created will be displayed: CREATE PROGRAM Program:...
- Page 96 With the INC (∧) and DEC (∨) keys the phase name is varied. Once this name has been selected, press ADVANCE (>>) and the first available block number will be displayed: Phase: SPIN Block: Text: Pre-wash 40 ºC With the INC (∧) and DEC (∨) keys, the block number will be increased or decreased. Once this number has been selected, press ADVANCE (>>) and the number of the following phase will be displayed with the first available name.
- Page 97 With the INC (∧) and DEC (∨) keys, the source programme number will be increased or decreased and the corresponding name will be displayed at the same time. Once the programme number has been selected, press ENTER and the destination programme number will be displayed: COPY PROGRAM Orig.
-
Page 98: 1- Insert
With the INC (∧) and DEC (∨) keys the title is selected. Next on pressing ENTER, the new title is selected. If on the other hand ADVANCE is pressed, the phase number, its name and block number associated to this phase will be displayed. Phase: Pre-wash Block:... -
Page 99: 1- Change
With the INC (∧) and DEC (∨) keys, the block is chosen and once selected, press ENTER. Insert phase? ENTER: Accept ESC: Cancel If you wish to return to the previous menu you should press the ESC key. 7.3.2 Change This command allows for a programme phase to be modified. -
Page 100: 1- Remove
7.3.3 Remove This command allows for a programme phase to be removed. The steps to follow are the following: After selecting the phase to be removed press ENTER and select REMOVE. Remove phase? ENTER: Accept ESC: Cancel If you wish to return to the previous menu you should press the ESC key. 7.4 Erase program This command allows for erasing any programme created by the user. - Page 101 Program No.: Program name: Phase name Block no.: Block text: Stop programme: Speed: Rate: Hot water inlet: Cold water inlet: Decalcified water inlet: Level: Move filling: Temperature: Thermal stop: Time: Cooling: Cooling time: Drainage level: Unwinding: Dosage 1: Dosage 2: Dosage 3: Dosage 4: Dosage 5:...
- Page 102 ELECTRICAL DIAGRAM FOR WED2007-25...
- Page 104 WED8-13-18 (380÷480)V 3/3N ~ + 24 V RST 5 D/I DN1 4 Ides Isc TM DIN0 3 ADC1 + a am/ve b m vi r am g ve am na 200..230 V 3~ L2 L3 A A M CN11 CN 10 EQUILIBRADO N PE CN 5...
- Page 105 ENGLISH Simb / LENG ESPAÑOL FRANÇAIS DEUTSCH ITALIANO CT = Heating Contactor Heizschütz Contatore Riscaldamento Contactor Calentamiento Contacteur Chauffe DP = Position detector Stellung Taster Rilevatore posizione Detector posición. Détecteur position Neutralizer feeder Dosiervorrichtung Neutralspülmittel Dosatore Neutralizzante Dosificador Neutralizante. Doseur Neutralisant Liquid soap feeder Dosiervorrichtung Flüssigseife Dosatore sapone liquido...