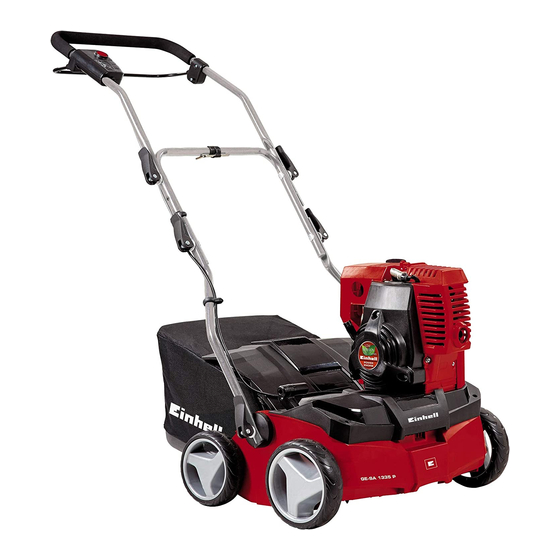
Table des Matières

Publicité

Les langues disponibles
  • FR

Les langues disponibles

  • FRANÇAIS, page 29

Liens rapides

D
Originalbetriebsanleitung
Benzin-Vertikutierer / Lüfter
GB
Original operating instructions
Petrol scarifi er/aerator
F
Instructions d'origine
Ventilateur / Scarifi cateur à
essence
I
Istruzioni per l'uso originali
Arieggiatore / Scarifi catore a
scoppio
CZ
Originální návod k obsluze
Benzínový vertikutátor /
provzdušňovač
NL
Originele handleiding
Benzine-verticuteerder / Beluchter
E
Manual de instrucciones original
Ventilador / escarifi cador con
motor de gasolina
P
Manual de instruções original
Ventilador / escarifi cador a
gasolina
7
Art.-Nr.: 34.200.30
Anl_GE_SA_1335_P_SPK7.indb 1
GE-SA 1335 P
I.-Nr.: 11014
18.08.2015 09:42:51
18.08.2015 09:42:51

Publicité

Table des Matières
loading

Sommaire des Matières pour EINHELL GE-SA 1335 P

  • Page 1 GE-SA 1335 P Originalbetriebsanleitung Benzin-Vertikutierer / Lüfter Original operating instructions Petrol scarifi er/aerator Instructions d’origine Ventilateur / Scarifi cateur à essence Istruzioni per l’uso originali Arieggiatore / Scarifi catore a scoppio Originální návod k obsluze Benzínový vertikutátor / provzdušňovač Originele handleiding...
  • Page 2 - 2 - Anl_GE_SA_1335_P_SPK7.indb 2 Anl_GE_SA_1335_P_SPK7.indb 2 18.08.2015 09:42:52 18.08.2015 09:42:52...
  • Page 3 11 12 - 3 - Anl_GE_SA_1335_P_SPK7.indb 3 Anl_GE_SA_1335_P_SPK7.indb 3 18.08.2015 09:42:53 18.08.2015 09:42:53...
  • Page 4 Pos. 1 Pos. 1 Pos. P - 4 - Anl_GE_SA_1335_P_SPK7.indb 4 Anl_GE_SA_1335_P_SPK7.indb 4 18.08.2015 09:42:56 18.08.2015 09:42:56...
  • Page 5 min. max. - 5 - Anl_GE_SA_1335_P_SPK7.indb 5 Anl_GE_SA_1335_P_SPK7.indb 5 18.08.2015 09:43:01 18.08.2015 09:43:01...
  • Page 6 - 6 - Anl_GE_SA_1335_P_SPK7.indb 6 Anl_GE_SA_1335_P_SPK7.indb 6 18.08.2015 09:43:05 18.08.2015 09:43:05...
  • Page 7 - 7 - Anl_GE_SA_1335_P_SPK7.indb 7 Anl_GE_SA_1335_P_SPK7.indb 7 18.08.2015 09:43:09 18.08.2015 09:43:09...
  • Page 8 - 8 - Anl_GE_SA_1335_P_SPK7.indb 8 Anl_GE_SA_1335_P_SPK7.indb 8 18.08.2015 09:43:13 18.08.2015 09:43:13...
  • Page 9: Table Des Matières

    Inhaltsverzeichnis 1. Sicherheitshinweise 2. Gerätebeschreibung und Lieferumfang 3. Bestimmungsgemäße Verwendung 4. Technische Daten 5. Vor Inbetriebnahme 6. Bedienung 7. Reinigung, Wartung, Lagerung, Transport und Ersatzteilbestellung 8. Entsorgung und Wiederverwertung 9. Fehlersuchplan - 9 - Anl_GE_SA_1335_P_SPK7.indb 9 Anl_GE_SA_1335_P_SPK7.indb 9 18.08.2015 09:43:13 18.08.2015 09:43:13...
  • Page 10: Sicherheitshinweise

    2. Gerätebeschreibung und Gefahr! Beim Benutzen von Geräten müssen einige Si- Lieferumfang cherheitsvorkehrungen eingehalten werden, um Verletzungen und Schäden zu verhindern. Lesen 2.1 Gerätebeschreibung (Bild 1/2) Sie diese Bedienungsanleitung / Sicherheitshin- 1. Motor weise deshalb sorgfältig durch. Bewahren Sie die- 2.
  • Page 11: Bestimmungsgemäße Verwendung

    4. Technische Daten Gefahr! Gerät und Verpackungsmaterial sind kein Kinderspielzeug! Kinder dürfen nicht mit Motortyp: ........1-Zylinder; 4-Takt Kunststoff beuteln, Folien und Kleinteilen Hubraum..........53,2 ccm spielen! Es besteht Verschluckungs- und Er- Motor-Leistung max.: ....1,3 kW / (1,8 PS) stickungsgefahr! Arbeitsdrehzahl: ........6800 min •...
  • Page 12: Bedienung

    6. Bedienung Montage des unteren Schubbügels (siehe Bild 4c) • Der untere Schubbügel (Abb. 4c/Pos. 9) muss Hinweis! über die Schubbügelhalter geschoben wer- Der Motor wird ohne Betriebsstoff e ausgelie- den. fert. Vor Inbetriebnahme daher unbedingt Öl • Mit den beiliegenden Schrauben (Pos. 12), und Benzin einfüllen.
  • Page 13: Reinigung, Wartung, Lagerung, Transport Und Ersatzteilbestellung

    Warnung! Die Vertikutierwalze rotiert, wenn der bearbeitet werden soll, hängt grundsätzlich Motor gestartet wird. vom Graswuchs des Rasens und der Härte des Bodens ab. Die Unterseite des Gerätes sauber Warnung! Öff nen Sie die Auswurfklappe nie, halten und Erd- und Grasablagerungen unbe- wenn der Motor noch läuft.
  • Page 14 Hinweis! Motor niemals ohne oder mit zu wenig kerzenschlüssel (Abb. 12b). • Öl betreiben. Dies kann schwere Schäden am Der Zusammenbau erfolgt in umgekehrter Motor verursachen. Reihenfolge. Ölwechsel Wechseln der Walze (siehe Bild 11a-11d) • Der Motorölwechsel sollte jährlich vor Sai- sonbeginn (zusätzlich zu den Informationen Unbedingt Handschuhe tragen! des Serviceheft Benzin) bei betriebswarmem...
  • Page 15: Entsorgung Und Wiederverwertung

    8. Zur platzsparenden Lagerung besitzt der Schubbügel eine P-Stellung (Abb. 6). Um in diese Position zu gelangen ist es nötig die Schnellspannhebel ca. 3 Umdrehungen zu lösen, da für die Parkposition eine erhöhte Arretierung vorgesehen ist. In dieser Stellung kann der Vertikutierer platzsparend in eine Ecke geschoben werden (Abb.
  • Page 16: Fehlersuchplan

    9. Fehlersuchplan Fehler Mögliche Ursachen Beseitigung Motor läuft nicht - Motor Start-/Stophebel nicht ge- - Motor Start-/Stophebel drücken drückt - Zündkerze defekt - Zündkerze erneuern - Kraftstoff tank leer - Kraftstoff einfüllen Motor läuft unruhig - Luftfi lter verschmutzt - Luftfi lter reinigen - Zündkerze verschlissen - Zündkerze reinigen/tauschen Unruhiger Lauf,...
  • Page 17: Serviceinformationen

    Service-Informationen Wir unterhalten in allen Ländern, welche in der Garantieurkunde benannt sind, kompetente Service- Partner, deren Kontakte Sie der Garantieurkunde entnehmen. Diese stehen Ihnen für alle Service- Belange wie Reparatur, Ersatzteil- und Verschleißteil-Versorgung oder den Bezug von Verbrauchsmate- rialien zur Verfügung. Es ist zu beachten, dass bei diesem Produkt folgende Teile einem gebrauchsgemäßen oder natürlichen Verschleiß...
  • Page 18 Garantieurkunde Sehr geehrte Kundin, sehr geehrter Kunde, unsere Produkte unterliegen einer strengen Qualitätskontrolle. Sollte dieses Gerät dennoch einmal nicht einwandfrei funktionieren, bedauern wir dies sehr und bitten Sie, sich an unseren Servicedienst unter der auf dieser Garantiekarte angegebenen Adresse zu wenden. Gerne stehen wir Ihnen auch telefo- nisch über die angegebene Servicerufnummer zur Verfügung.
  • Page 19 • Bestellverfolgung Wir freuen uns auf Ihren Besuch online unter www.isc-gmbh.info! Telefon: 09951 / 95 920 00 ·Telefax: 09951/95 917 00 E-Mail: info@einhell.de · Internet: www.isc-gmbh.info iSC GmbH · Eschenstraße 6 · 94405 Landau/Isar (Deutschland) - 19 - Anl_GE_SA_1335_P_SPK7.indb 19 Anl_GE_SA_1335_P_SPK7.indb 19...
  • Page 20 Table of contents 1. Safety regulations 2. Layout and items supplied 3. Proper use 4. Technical data 5. Before starting the equipment 6. Operation 7. Cleaning, maintenance, storage, transport and ordering of spare parts 8. Cleaning, maintenance and ordering of spare parts Troubleshooting guide - 20 - Anl_GE_SA_1335_P_SPK7.indb 20...
  • Page 21: Safety Regulations

    Danger! 9. Bottom push bar When using the equipment, a few safety pre- 10. 2x push bar bracket cautions must be observed to avoid injuries and 11. 6x quick-release fastener (2 already fi tted) damage. Please read the complete operating 12.
  • Page 22: Technical Data

    5. Before starting the equipment ned. We recommend you to scarify your lawn in the spring (April) and autumn (October). The aerating roller scratches the surface of the The scarifi er is delivered unassembled. The lawn, helping water to drain off more easily as catch basket, the complete push bar and the rear well as promoting oxygen intake.
  • Page 23: Operation

    Mounting the catch basket (see Figs. 5a/5b) 4. The safety lock-off is deactivated for as long • Pull the rubber clips over the metal frame (Fig. as you pull and hold the engine start/stop le- 5a). ver (Fig. 9d). • To hang the catch basket on the scarifier you 5.
  • Page 24: Cleaning, Maintenance, Storage, Transport And Ordering Of Spare Parts

    Tips for proper working 7.1 Cleaning It is recommended that you overlap scarifying The scarifi er should be cleaned thoroughly eve- paths a little. Try to scarify in straight lines for a ry time after it has been used. This particularly nice, clean look.
  • Page 25: Ordering Replacement Parts

    2. Always let the engine run until it has used up the remainder of petrol in the tank. Only replace the roller with a genuine Einhell rol- 3. Empty the engine oil from the warm engine. ler, as this will ensure top performance and safety 4.
  • Page 26: Troubleshooting Guide

    9. Troubleshooting guide Fault Possible causes Remedy The motor does not - Engine start/stop lever not activated - Press the engine start/stop lever start - Spark plug defective - Replace spark plug - Fuel tank empty - Top up fuel Engine does not run - Air fi...
  • Page 27: Service Information

    Service information We have competent service partners in all countries named on the guarantee certifi cate whose contact details can also be found on the guarantee certifi cate. These partners will help you with all service re- quests such as repairs, spare and wearing part orders or the purchase of consumables. Please note that the following parts of this product are subject to normal or natural wear and that the following parts are therefore also required for use as consumables.
  • Page 28: Warranty Certificate

    Warranty certifi cate Dear Customer, All of our products undergo strict quality checks to ensure that they reach you in perfect condition. In the unlikely event that your device develops a fault, please contact our service department at the address shown on this guarantee card.
  • Page 29 Sommaire 1. Consignes de sécurité 2. Description de l’appareil et volume de livraison 3. Utilisation conforme à l’aff ectation 4. Données techniques 5. Avant la mise en service 6. Commande 7. Nettoyage, maintenance, stockage, transport et commande de pièces de rechange 8.
  • Page 30: Consignes De Sécurité

    2. Description de l’appareil et Danger ! Lors de l’utilisation d’appareils, il faut respecter volume de livraison certaines mesures de sécurité afi n d’éviter des blessures et dommages. Veuillez donc lire atten- 2.1 Description de l’appareil (fi gure 1/2) tivement ce mode d’emploi/ces consignes de 1.
  • Page 31: Utilisation Conforme À L'aff Ectation

    • 4. Données techniques Mode d’emploi d’origine • Consignes de sécurité Type de moteur : .......1-Vérin ; 4 temps Cylindrée..........53,2 cm 3. Utilisation conforme à Puissance du moteur maxi. : ..1,3 kW / 1,8 CH l’aff ectation Vitesse de travail : ......6800 tr/min Carburant : ......
  • Page 32: Commande

    6. Commande Montage du guidon supérieur (voir fi gures 4d à 4f) • Positionnez le guidon supérieur (fig. 4d/pos. Remarque ! 8) de façon à ce que les trous du guidon su- Le moteur est livré sans carburant. périeur correspondent aux trous du guidon C‘est pourquoi, il faut absolument mettre de inférieur.
  • Page 33: Nettoyage, Maintenance, Stockage, Transport Et Commande De Pièces De Rechange

    Avertissement ! le rouleau du scarifi cateur est Avertissement ! Avant de retirer le sac coll- en rotation lorsque le moteur démarre. ecteur, coupez le moteur et attendez que le rou- leau s’arrête complètement ! Avertissement ! N’ouvrez jamais le clapet d’éjection lorsque le moteur est encore en mar- Pour décrocher le sac collecteur, soulevez d’une che.
  • Page 34: Préparation Pour Le Stockage De L'appareil

    usage dans le commerce. Avertissement ! ne nettoyez jamais le fi ltre avec de l’essence ni avec des solvants infl ammables. 7.2 Maintenance Maintenance/remplacement de la bougie Contrôle du niveau d’huile : d’allumage Mettez l’appareil sur une surface plane et droite. Contrôlez la bougie d’allumage pour la première Dévissez la jauge de niveau d’huile en la tournant fois au but de 10 heures de service.
  • Page 35: Préparation De L'appareil Pour Le Transport

    8. Nettoyage, maintenance et 4. Retirez la bougie d’allumage de la culasse. Remplissez avec une burette d’huile env. commande de pièces de 20 ml huile dans le cylindre. Tirez lentement rechange la poignée de démarrage, pour que l’huile protège l’intérieur du cylindre. Vissez à nou- L’appareil se trouve dans un emballage per- veau la bougie d’allumage.
  • Page 36: Plan De Recherche Des Erreurs

    9. Plan de recherche des erreurs Erreur Causes probables Suppression Moteur ne démarre - Levier de démarrage/d‘arrêt pas - Enfoncer le levier de démarrage/ enfoncé d‘arrêt - Bougie d‘allumage défectueuse - Remplacez la bougie d‘allumage - Réservoir à essence vide - Remplissez de carburant Le moteur fonction- - Filtre à...
  • Page 37: Informations Service Après-Vente

    Informations service après-vente Nous disposons dans tous les pays mentionnés dans le bon de garantie de partenaires de service après-vente compétents dont vous trouverez les coordonnées dans le bon de garantie. Ceux-ci se tiennent à votre disposition pour tout ce qui concerne le service après-vente comme les réparations, l‘approvisionnement en pièces de rechange et d‘usure ou l‘achat de pièces de consommation.
  • Page 38: Bon De Garantie

    Bon de garantie Chère cliente, cher client, nos produits sont soumis à un contrôle de qualité très strict. Si toutefois, il arrivait que cet appareil ne fonctionne pas parfaitement, nous en sommes désolés et nous vous prions de vous adresser à notre service après-vente à...
  • Page 39 Indice 1. Avvertenze sulla sicurezza 2. Descrizione dell’apparecchio ed elementi forniti 3. Utilizzo proprio 4. Caratteristiche tecniche 5. Prima della messa in esercizio 6. Uso 7. Pulizia, manutenzione, conservazione, trasporto e ordinazione dei pezzi di ricambio 8. Pulizia, manutenzione e ordinazione dei pezzi di ricambio 9.
  • Page 40: Avvertenze Sulla Sicurezza

    2. Descrizione dell’apparecchio ed Pericolo! Nell’usare gli apparecchi si devono rispettare elementi forniti diverse avvertenze di sicurezza per evitare lesi- oni e danni. Quindi leggete attentamente queste 2.1 Descrizione dell’apparecchio (Fig. 1/2) istruzioni per l’uso/le avvertenze di sicurezza. 1. Motore Conservate bene le informazioni per averle a 2.
  • Page 41: Utilizzo Proprio

    • 4. Caratteristiche tecniche Istruzioni per l’uso originali • Avvertenze di sicurezza Tipo del motore: ..motore a 4 tempi a 1 cilindro Cilindrata ..........53,2 cm 3. Utilizzo proprio Potenza max. del motore: ....1,3 kW / 1,8 CV Numero di giri: ........6800 min A seconda dell’utilizzo, l’apparecchio può...
  • Page 42: Uso

    6. Uso Montaggio del manico superiore (vedi da Fig. 4d a Fig. 4f) • Posizionate il manico superiore (Fig. 4d/Pos. Avvertenza! 8) in modo tale che i fori del manico superiore Il motore viene fornito senza materiali di coincidano con i fori del manico inferiore. esercizio.
  • Page 43: Pulizia, Manutenzione, Conservazione, Trasporto E Ordinazione Dei Pezzi Di Ricambio

    Attenzione: la leva di avvio/arresto del motore, fi ne di evitare strisce di prato non lavorate. se viene mollata, deve ritornare nella posizione di Non appena rimangono dei resti di erba sul prato partenza e il motore si deve fermare. In caso cont- mentre si sta lavorando, si deve svuotare il cestel- rario l‘apparecchio non deve essere utilizzato.
  • Page 44 Attenzione! Prima di ribaltare l’apparecchio, il Fig. 13a/13b. • serbatoio della benzina deve essere svuotato per Pulite i filtri dell’aria soltanto con aria com- evitare la fuoriuscita della benzina. Per farlo nel pressa o dando dei leggeri colpi sul filtro. •...
  • Page 45: Pulizia, Manutenzione E Ordinazione Dei Pezzi Di Ricambio

    8. Pulizia, manutenzione e 4. Togliete la candela di accensione dalla testa del cilindro. Versate ca. 20 ml di olio con un ordinazione dei pezzi di ricambio barattolo apposito nel cilindro. Tirate lenta- mente l’impugnatura dello starter in modo che L’apparecchio si trova in una confezione per evita- l’olio protegga l’interno del cilindro.
  • Page 46: Tabella Per L'eliminazione Delle Anomalie

    9. Tabella per l‘eliminazione delle anomalie Anomalia Possibili cause Eliminazione Il motore non fun- - Leva di avvio / arresto motore non - Premete la leva di avvio / arresto ziona premuta motore - Candela difettosa - Sostituite la candela - Serbatoio del carburante vuoto - Riempite di carburante.
  • Page 47: Informazioni Sul Servizio Assistenza

    Informazioni sul Servizio Assistenza In tutti i Paesi indicati nel certifi cato di garanzia disponiamo di competenti partner per il Servizio Assis- tenza (per i relativi dati di contatto si veda il certifi cato di garanzia), che sono a vostra disposizione per tutte le richieste di assistenza come riparazione, fornitura di pezzi di ricambio e parti di usura o vendita di materiali di consumo.
  • Page 48: Certificato Di Garanzia

    Certifi cato di garanzia Gentili clienti, i nostri prodotti sono soggetti ad un rigido controllo di qualità. Se l‘apparecchio non dovesse tuttavia funzionare correttamente, ci scusiamo e vi preghiamo di rivolgervi al nostro servizio di assistenza clienti all‘indirizzo indicato in questa scheda di garanzia. Siamo a vostra disposizione anche telefonicamente al numero del Servizio Assistenza indicato.
  • Page 49 Obsah 1. Bezpečnostní pokyny 2. Popis přístroje a rozsah dodávky 3. Použití podle účelu určení 4. Technická data 5. Před uvedením do provozu 6. Obsluha 7. Čištění, údržba, uložení, transport a objednání náhradních dílů 8. Likvidace a recyklace 9. Plán vyhledávání chyb - 49 - Anl_GE_SA_1335_P_SPK7.indb 49 Anl_GE_SA_1335_P_SPK7.indb 49...
  • Page 50: Bezpečnostní Pokyny

    2. Popis přístroje a rozsah dodávky Nebezpečí! Při používání přístrojů musí být dodržována určitá bezpečnostní opatření, aby se zabránilo zraněním 2.1 Popis přístroje (obr. 1/2) a škodám. Přečtěte si proto pečlivě tento návod 1. Motor k obsluze / bezpečnostní pokyny. Dobře si ho/ 2.
  • Page 51: Použití Podle Účelu Určení

    3. Použití podle účelu určení 4. Technická data Podle účelu použití může být přístroj použit jako vertikutátor nebo jako provzdušňovač trávníku, Typ motoru: ........1 válec; 4taktní k tomu je možné několika málo hmaty vyměnit Obsah válce: ..........53,2 ccm válec. Vertikutačním válcem je ze země vytrháván Výkon motoru max.: ....1,3 kW / (1,8 PS) mech a plevel včetně...
  • Page 52: Obsluha

    Montáž horní vodicí rukojeti (viz obr. 4d až 3. Ujistěte se, že je kabel zapalování připojen na obr. 4f) svíčku. • Horní vodicí rukojeť (obr. 4d/pol. 8) umístěte 4. Při spuštění přístroje musí být řezací mecha- tak, aby otvory horní vodicí rukojeti lícovaly s nismus volně...
  • Page 53: Čištění, Údržba, Uložení, Transport A Objednání Náhradních Dílů

    7. Čištění, údržba, uložení, Nastavení hloubky vertikutace (viz obr. 7) Hloubka vertikutace se nastavuje nastavovacím transport a objednání mechanismem. Zatáhněte za páčku ve směru náhradních dílů šipky (viz obr. 7) a nastavte ji do požadované polohy (0/1/2/3). Dbejte na správné zaskočení Varování! páčky! Nikdy nepracujte při běžícím motoru na vodivých...
  • Page 54: Objednání Náhradních Dílů

    • Po vytečení starého oleje přístroj postavte 7.3 Příprava k uložení přístroje zpět do normální polohy. Nebezpečí! Neodstraňujte benzín v uzavřených • Motorový olej doplňte podle znázornění na místnostech, v blízkosti ohně nebo při kouření. obrázku 8a/b. Výpary plynu mohou způsobit výbuch nebo požár. •...
  • Page 55: Likvidace A Recyklace

    8. Likvidace a recyklace Přístroj je uložen v balení, aby bylo zabráněno poškození při přepravě. Toto balení je surovina a tím znovu použitelné nebo může být dáno zpět do cirkulace surovin. Přístroj a jeho příslušenství jsou vyrobeny z rozdílných materiálů, jako např. kov a plasty.
  • Page 56: Plán Vyhledávání Chyb

    9. Plán vyhledávání chyb Chyba Možná příčina Odstranění Motor neběží - není stisknuta páčka spuštění/vy - stiskněte páčku spuštění/vypnutí nutí motoru motoru - Defektní zapalovací svíčka - Zapalovací svíčku vyměnit - Palivová nádrž prázdná - Doplnit palivo Motor běží neklidně - Znečištěný...
  • Page 57: Servisní Informace

    Servisní informace Ve všech zemích uvedených v záručním listu máme kompetentní servisní partnery, jejichž kontaktní údaje naleznete v záručním listu. Jsou Vám k dispozici pro všechny servisní požadavky jako opravy, ob- jednávání náhradních a rychle opotřebitelných dílů nebo nákup spotřebních materiálů. Je třeba dbát na to, že u tohoto přístroje podléhají...
  • Page 58: Záruční List

    Záruční list Vážená zákaznice, vážený zákazníku, naše výrobky podléhají přísné kontrole kvality. Pokud i přesto tento přístroj bezvadně nefunguje, je nám to velice líto a prosíme Vás, abyste se obrátili na naši servisní službu na adrese uvedené na tomto záručním listu. Rádi Vám budeme k dispozici také telefonicky na uvedeném servisním telefonním čísle. Pro uplatňování...
  • Page 59 Inhoudsopgave 1. Veiligheidsaanwijzingen 2. Beschrijving van het gereedschap en leveringsomvang 3. Reglementair gebruik 4. Technische gegevens 5. Vóór inbedrijfstelling 6. Bediening 7. Reiniging, onderhoud, opbergen, transport en bestellen van wisselstukken 8. Reiniging, onderhoud en bestellen van wisselstukken 9. Foutopsporing - 59 - Anl_GE_SA_1335_P_SPK7.indb 59 Anl_GE_SA_1335_P_SPK7.indb 59 18.08.2015 09:43:17...
  • Page 60: Veiligheidsaanwijzingen

    2. Beschrijving van het gereedschap Gevaar! Bij het gebruik van toestellen dienen enkele en leveringsomvang veiligheidsmaatregelen te worden nageleefd om lichamelijk gevaar en schade te voorkomen. Lees 2.1 Beschrijving van het gereedschap daarom deze handleiding / veiligheidsinstructies (fi g. 1/2) zorgvuldig door.
  • Page 61: Reglementair Gebruik

    Gevaar! ven alsmede bij gelijk te stellen activiteiten wordt Het toestel en het verpakkingsmateriaal zijn gebruikt. geen speelgoed voor kinderen! Kinderen mo- gen niet met plastic zakken, folies en kleine stukken spelen! Er bestaat inslik- en verstik- 4. Technische gegevens kingsgevaar! Motortype: ......
  • Page 62: Bediening

    6. Bediening Montage van de onderste schuifbeugel (zie afbeelding 4c) • De onderste schuifbeugel (fig. 4c, pos. 9) Aanwijzing! moet over de schuifbeugelhouder worden De motor wordt geleverd zonder benzine en geschoven. olie. • Met de meegeleverde schroeven (pos. 12), Daarom vóór inbedrijfstelling absoluut olie de onderlegplaatjes (pos.
  • Page 63: Reiniging, Onderhoud, Opbergen, Transport En Bestellen Van Wisselstukken

    Waarschuwing! De verticuteerwals roteert als Om de opvangzak los te haken tilt u de uitlaatklep de motor wordt gestart. met een hand op terwijl u met de andere hand de opvangzak wegneemt! Waarschuwing! Hoe vaak het gazon moet worden bewerkt hangt Open de uitlaatklep nooit terwijl de motor nog in principe af van de groei van het gras en van de draait.
  • Page 64 7.2 Onderhoud Onderhouden/verwisselen van de bougie Controleer de bougie voor het eerst na 10 bedri- Controle van het oliepeil: jfsuren op vervuiling en reinig haar, indien nodig, Plaats het gereedschap op een eff en horizontaal m.b.v. een koperdraadborstel. Daarna de bougie vlak.
  • Page 65: Reiniging, Onderhoud En Bestellen Van Wisselstukken

    8. Reiniging, onderhoud en 5. Maak de koelribben van de cilinder en het huis schoon. bestellen van wisselstukken 6. Maak het hele toestel schoon om de lakverf te beschermen. Het toestel bevindt zich in een verpakking om 7. Bewaar het toestel op een goed verluchte transportschade te voorkomen.
  • Page 66: Foutopsporing

    9. Foutopsporing Fout Mogelijke oorzaken Verhelpen Motor draait niet - Motor start- / stophendel niet inge- - Motor start- / stophendel indrukken drukt - Bougie defect - Bougie vervangen - Brandstoftank leeg - Brandstof ingieten Motor draait onre- - Luchtfi lter vervuild - Luchtfi...
  • Page 67: Service-Informatie

    Service-informatie Wij werken in alle landen die in het garantiebewijs zijn genoemd, samen met competente servicepart- ners, wier contactgegevens u kunt afl eiden uit het garantiebewijs. Deze staan voor alle diensten zoals reparatie, het verschaff en van wisselstukken of slijtdelen of voor de aankoop van verbruiksmaterialen te uwer beschikking.
  • Page 68: Garantiebewijs

    Garantiebewijs Geachte klant, onze producten worden onderworpen aan een strenge kwaliteitscontrole. Mocht dit apparaat echter ooit niet naar behoren functioneren, spijt dit ons ten zeerste en vragen u zich te wenden tot onze service- dienst onder het adres vermeld op dit garantiebewijs. Wij staan ook graag telefonisch tot uw dienst via het vermelde servicetelefoonnummer.
  • Page 69 Índice de contenidos 1. Instrucciones de seguridad 2. Descripción del aparato y volumen de entrega 3. Uso adecuado 4. Características técnicas 5. Antes de la puesta en marcha 6. Manejo 7. Limpieza, mantenimiento, almacenamiento, transporte y pedido de piezas de repuesto 8.
  • Page 70: Instrucciones De Seguridad

    2. Descripción del aparato y Peligro! Al usar aparatos es preciso tener en cuenta una volumen de entrega serie de medidas de seguridad para evitar le- siones o daños. Por este motivo, es preciso leer 2.1 Descripción del aparato (fi g. 1/2) atentamente este manual de instrucciones/adver- 1.
  • Page 71: Uso Adecuado

    • 4. Características técnicas Manual de instrucciones original • Instrucciones de seguridad Tipo de motor: ....1 cilindro; de 4 tiempos Cilindrada: ..........53,2 cm 3. Uso adecuado Potencia máx. del motor: .... 1,3 KW / 1,8 CV Velocidad de trabajo: ......6800 r.p.m. El aparato se puede utilizar como escarifi...
  • Page 72: Manejo

    6. Manejo Montaje del arco de empuje inferior (véase fi g. 4c) • Desplazar el arco de empuje inferior (fig. 4c/ Advertencia pos. 9) por encima del soporte del mismo. El motor se suministra sin combustible. An- • Conectar los tubos entre sí con los tornillos tes de la puesta en marcha, es imprescindib- (pos.
  • Page 73: Limpieza, Mantenimiento, Almacenamiento, Transporte Y Pedido De Piezas De Repuesto

    Advertencia! El cilindro escarifi cador empieza a terreno, vaciar la bolsa de recogida. girar tan pronto como se arranque el motor. Aviso! ¡Desconectar el motor y esperar a que el Aviso! cilindro se pare antes de sacar la bolsa de reco- No abrir nunca la compuerta de expulsión cuando gida! el motor esté...
  • Page 74 racción de gasolina convencional. den pero a la inversa. Aviso! No limpiar nunca el fi ltro de aire con gaso- 7.2 Mantenimiento lina o disolventes infl amables. Control del nivel de aceite: Mantenimiento/cambio de la bujía de encen- Colocar el aparato en una superfi cie plana. De- dido satornillar la varilla del nivel de aceite girándola Tras las primeras 10 horas de servicio, controlar...
  • Page 75: Pedido De Piezas De Recambio

    8. Mantenimiento, limpieza y pedido Con ayuda de una aceitera, llenar el cilindro con aprox. 20 ml de aceite. Tirar de la em- de piezas de repuesto puñadura de puesta en marcha lentamente con el fi n de que el aceite proteja el cilindro El aparato está...
  • Page 76: Plan Para Localización De Fallos

    9. Plan para localización de fallos Fallo Posibles causas Solución El motor no funci- - La palanca de arranque/paro del - Presionar la palanca de arranque/ motor no está pulsada paro del motor - Bujía de encendido defectuosa - Cambiar bujía de encendido - Depósito de combustible vacío - Rellenar de combustible El motor hace ruido...
  • Page 77: Información De Servicio

    Información de servicio En todos los países mencionados en el certifi cado de garantía disponemos de distribuidores compe- tentes cuyos datos de contacto podrán consultar en dicho certifi cado. Dichos distribuidores están a su disposición para cualquier asunto relacionado con el servicio como reparación, suministro de piezas de repuesto y desgaste, o con respecto a los materiales de consumo.
  • Page 78: Certificado De Garantía

    Certifi cado de garantía Estimado cliente: Nuestros productos están sometidos a un estricto control de calidad. No obstante, lamentaríamos que este aparato dejara de funcionar correctamente, en tal caso, le rogamos que se dirija a nuestro servicio de atención al cliente en la dirección indicada en la parte inferior de la presente tarjeta de garantía. Con mucho gusto le atenderemos también telefónicamente en el número de servicio indicado a continuaci- ón.
  • Page 79 Índice 1. Instruções de segurança 2. Descrição do aparelho e material a fornecer 3. Utilização adequada 4. Dados técnicos 5. Antes da colocação em funcionamento 6. Operação 7. Limpeza, manutenção, armazenagem, transporte e encomenda de peças sobressalentes 8. Limpeza, manutenção e encomenda de peças sobressalentes 9.
  • Page 80: Instruções De Segurança

    2. Descrição do aparelho e material Perigo! Ao utilizar ferramentas, devem ser respeitadas a fornecer algumas medidas de segurança para preve- nir ferimentos e danos. Por conseguinte, leia 2.1 Descrição do aparelho (fi gura 1/2) atentamente este manual de instruções / estas 1.
  • Page 81: Utilização Adequada

    4. Dados técnicos Perigo! O aparelho e o material da embalagem não são brinquedos! As crianças não devem Tipo do motor: ....1 cilindro; a 4 tempos brincar com sacos de plástico, películas ou Cilindrada ..........53,2 cm peças de pequena dimensão! Existe o perigo Potência máx.do motor: ....1,3 kW / 1,8 CV de deglutição e asfi...
  • Page 82 6. Operação alavanca de abertura rápida (pos. 11) forneci- dos. Nota! Montagem da barra de condução superior O motor é fornecido sem consumíveis. (ver fi gura 4d até fi gura 4f) Por conseguinte, antes da colocação em fun- • Posicione a barra de condução superior (fig. cionamento tem impreterivelmente de atestar 4d/pos.
  • Page 83: Limpeza, Manutenção, Armazenagem, Transporte E Encomenda De Peças Sobressalentes

    Aviso! O rolo escarifi cador roda, quando o motor Para desenganchar o saco de recolha, eleve a é ligado. portinhola de expulsão com uma mão e, com a outra, retire o saco de recolha! Aviso! Nunca abra a portinhola de expulsão O número de vezes que deve proceder a trabal- enquanto o motor ainda estiver a funcionar.
  • Page 84 7.2 Manutenção Atenção: nunca limpe o fi ltro de ar com gasolina ou solventes infl amáveis. Verifi cação do nível do óleo: Coloque o aparelho sobre uma superfície plana Manutenção/substituição da vela de ignição a direito. Desaparafuse a vareta de medição do Verifi...
  • Page 85: Limpeza, Manutenção E Encomenda De Peças Sobressalentes

    8. Limpeza, manutenção proteja o interior do cilindro. Volte a atarraxar a vela de ignição. e encomenda de peças 5. Limpe as nervuras de refrigeração do cilindro sobressalentes e a carcaça. 6. Limpe todo o aparelho, para proteger a tinta. O aparelho encontra-se dentro de uma embala- 7.
  • Page 86: Plano De Localização De Falhas

    9. Plano de localização de falhas Falha Causas possíveis Eliminação O motor não fun- - Manípulo de arranque/paragem do - Pressione o manípulo de arranque/ ciona motor não pressionado paragem do motor - Vela de ignição com anomalia - Substitua a vela de ignição - Tanque de combustível vazio - Ateste com combustível O motor funciona...
  • Page 87: Informações Do Serviço De Assistência Técnica

    Informações do serviço de assistência técnica Estamos representados em todos os países mencionados no certifi cado de garantia por agentes auto- rizados competentes, cujos contactos poderá encontrar no certifi cado de garantia. Estes encontram-se ao seu dispor para todos os serviços de que necessita, tais como reparações, fornecimento de peças sobressalentes e peças desgastadas ou a aquisição de consumíveis.
  • Page 88 Certifi cado de garantia Estimado(a) cliente, os nossos produtos são submetidos a um rigoroso controlo de qualidade. Se, ainda assim, o aparelho não funcionar nas devidas condições, lamentamos esse facto e pedimos-lhe que se dirija ao nosso ser- viço de assistência técnica na morada indicada no presente certifi cado de garantia. Se preferir, também pode contactar-nos telefonicamente através do número de assistência técnica indicado.
  • Page 89: Konformitätserklärung

    EÚ a noriem pre výrobok Lýsir uppfyllingu EU-reglna og annarra staðla vöru a cikkekhez az EU-irányvonal és Normák szerint a következő konformitást jelenti ki Benzin-Vertikutierer/Lüfter GE-SA 1335 P (Einhell) 87/404/EC_2009/105/EC 2006/42/EC Annex IV 2005/32/EC_2009/125/EC Notifi ed Body: 2006/95/EC Notifi...
  • Page 90 - 90 - Anl_GE_SA_1335_P_SPK7.indb 90 Anl_GE_SA_1335_P_SPK7.indb 90 18.08.2015 09:43:19 18.08.2015 09:43:19...
  • Page 91 - 91 - Anl_GE_SA_1335_P_SPK7.indb 91 Anl_GE_SA_1335_P_SPK7.indb 91 18.08.2015 09:43:19 18.08.2015 09:43:19...
  • Page 92 EH 08/2015 (01) Anl_GE_SA_1335_P_SPK7.indb 92 Anl_GE_SA_1335_P_SPK7.indb 92 18.08.2015 09:43:19 18.08.2015 09:43:19...

Ce manuel est également adapté pour:

34.200.30

Table des Matières