Table des Matières

Publicité

Les langues disponibles

Les langues disponibles

Liens rapides

Gebrauchsanweisung
D
Instructions for Use
GB
Mode d'emploi
F
Istruzioni per l'uso
I
Indirektleuchte
Uplighter
Luminaire indirect
Apparecchio d'illuminazione
a luce indiretta
CHORUS
LCS 455/2/D/P
LCT 455/2/D/P
LCA 455/2/D/P

Publicité

Table des Matières
loading

Sommaire des Matières pour Waldmann CHORUS LCS 455/2

  • Page 1 CHORUS Indirektleuchte Gebrauchsanweisung Uplighter Instructions for Use LCS 455/2/D/P LCT 455/2/D/P Luminaire indirect Mode d‘emploi LCA 455/2/D/P Apparecchio d‘illuminazione Istruzioni per l‘uso a luce indiretta...
  • Page 2 LC(S/T/A) 455 „CHORUS“ Original LCS 455/D Gebrauchsanweisung Translations Instructions for Use Mode d‘emploi Istruzioni per l‘uso ���������������������� ���������� �������� Fig. 1...
  • Page 3 LC(S/T/A) 455 „CHORUS“ Fig. 2 Fig. 3 Fig. 4 (LCS) (LCT) (LCA) 3.10...
  • Page 4: Table Des Matières

    Gebrauchsanweisung Indirektleuchte LC(S/T/A) 455 „CHORUS“ Sehr geehrter Kunde, Sicherheitshinweise Einleitung Sie haben sich für den Kauf eines Waldmann Produktes entschieden. Allgemeines Damit haben Sie ganz sicher eine gute Wahl getroffen, denn das Haus Waldmann ist stets bemüht seinen Kunden nur ausgereifte und zuverläs- sige Produkte zu liefern.
  • Page 5: Sicherheitshinweise

    Gebrauchsanweisung Indirektleuchte LC(S/T/A) 455 „CHORUS“ Sicherheitshinweise Vor Wartungs- und Reparaturar- Die Leuchte darf nur in trockenen Vor Inbetriebnahme ist zu überprü- und nicht explosionsgefährdeten fen, ob die Netzspannung mit der beiten ist die Leuchte vom Netz Räumen betrieben werden! auf dem Leistungsschild angegebe- zu trennen! Die Arbeiten dürfen nur von einem ausgebildeten nen Nennspannung und Frequenz...
  • Page 6: Einleitung

    Gebrauchsanweisung Indirektleuchte LC(S/T/A) 455 „CHORUS“ Einleitung CHORUS Die hochmoderne Designleuchte CHORUS ist in verschiedenen Komfortstufen erhältlich. Egal ob Sie sich für die einfache LC*/2 mit zwei Schaltstufen, die dimmbaren Version LC*/D, oder die interaktive LC*/P entschieden haben, Sie haben eines der modernsten Produkte aus der Welt der Büroleuchten erworben. Bereits das Grundmodell LC*/2 liefert ein ausgewogenes, blendfreies Licht für Ihr Büro.
  • Page 7: Allgemeines

    Gebrauchsanweisung Indirektleuchte LC(S/T/A) 455 „CHORUS“ Allgemeines Bestimmungsgemäßer Abkürzungen und Symbole: Gebrauch: Achtung, VDE-Zulassung Verwendungszweck: Begleitpapiere beachten! Die Leuchte wurde speziell für die Verwendung im Innenbereich ent- ENEC-Zulassung Schutzleiteranschluss wickelt. Sie ist erhältlich als: (Gerät der Schutzklasse I) - freistehende Stehleuchte (LCS) SEV-Zulassung Entsorgungshinweis - zur Montage auf Tischen (LCT)
  • Page 8: Montage

    Gebrauchsanweisung Indirektleuchte LC(S/T/A) 455 „CHORUS“ Montage - Stehleuchte (LCS) Vor der Montage Leuchtenfußmontage Leuchtenkopfmontage Fig. 11 (LCS) Prüfen Sie den Lieferumfang auf Siehe Fig. 11. Montieren Sie den Leuchtenkopf Vollständigkeit: wie auf Seite 11 beschrieben am Befestigen Sie das Standrohr [11.2] 11.2 Standrohr.
  • Page 9: Montage - Tischleuchte (Lct)

    Gebrauchsanweisung Indirektleuchte LC(S/T/A) 455 „CHORUS“ Montage - Tischleuchte (LCT) Vor der Montage Leuchtenkopfmontage Fig. 13 (LCT) Prüfen Sie den Lieferumfang auf Montieren Sie den Aufsteckzap- Montieren Sie den Leuchtenkopf 13.8 fen [13.8] wie im Beispiel Fig. 13 Vollständigkeit: wie auf Seite 11 beschrieben am gezeigt, mit Scheibe [13.11] und Standrohr.
  • Page 10: Montage - Aufbauleuchte (Lca)

    Gebrauchsanweisung Indirektleuchte LC(S/T/A) 455 „CHORUS“ Montage - Aufbauleuchte (LCA) Vor der Montage Standrohrmontage Leuchtenkopfmontage Fig. 14 (LCA) Prüfen Sie den Lieferumfang auf Beachten Sie Fig. 4 auf Seite 3 Montieren Sie den Leuchtenkopf Vollständigkeit: wie auf Seite 11 beschrieben am Setzen Sie das Standrohr [4.2] auf 14.1 Standrohr.
  • Page 11: Montage - Leuchtenkopf

    Gebrauchsanweisung Indirektleuchte LC(S/T/A) 455 „CHORUS“ Montage - Leuchtenkopf Fig. 15 Leuchtenkopfanschluss Leuchtenkopfmontage 15.3 Beachten Sie Fig. 15. Beachten Sie Fig. 15. a) Stellen Sie die elektrische Ver- c) Setzen Sie den Leuchtenkopf 15.4 bindung zwischen Standrohr [15.1] vorsichtig auf das Stand- [15.2] und Leuchtenkopf [15.1] rohr [15.2].
  • Page 12: Inbetriebnahme

    Gebrauchsanweisung Indirektleuchte LC(S/T/A) 455 „CHORUS“ Inbetriebnahme Elektrischer Anschluss Inbetriebnahme Hinweis für dimmbare Leuchten Überprüfen Sie vor Inbetriebnah- Standardausstattung (LC*/D und LC*/P): Die Leuchten sind mit einem me, ob die Netzspannung mit der Um ein Flackern neuer (nicht ein- handelsüblichen Netzstecker aus- auf dem Leistungsschild angegebe- gebrannter) Leuchtstofflampen zu gerüstet.
  • Page 13: Bedienung

    Gebrauchsanweisung Indirektleuchte LC(S/T/A) 455 „CHORUS“ Bedienung - Version LC* /2 Fig. 18 Bedienung Über den Wippschalter [18.1] am Niveau 1 einschalten Betätigen Sie den Wippschalter Leuchtenkopf lassen sich, je nach auf der rechten Seite - die Leuch- betätigter Seite, zwei verschiedene te schaltet auf Lichtniveau 1 (2 Helligkeitsstufen einschalten: Lampen ).
  • Page 14 Gebrauchsanweisung Indirektleuchte LC(S/T/A) 455 „CHORUS“ Bedienung - Version LC* /D Fig. 19 Bedienung Lichtniveau verändern Über den Tastschalter [19.1] am Leuchte einschalten (dimmen) Betätigen Sie kurz den Tastschalter Leuchtenkopf lässt sich die Leuchte Drücken Sie den Tastschalter auf auf der rechten oder linken Seite - ein- und ausschalten bzw.
  • Page 15 Gebrauchsanweisung Indirektleuchte LC(S/T/A) 455 „CHORUS“ Bedienung - Version LC* /P Fig. 20 Bedienung Lichtniveau verändern Über die beiden Tasten [20.8 und Einschalten 20.7 (dimmen) Die vordere Taste kurz drücken - die 20.9] am Sensor lassen sich, je 20.6 Drücken Sie die vordere Taste Leuchte schaltet auf Lichtniveau 1 nach betätigter Taste, verschiedene 20.8...
  • Page 16: Lichtregelung

    Gebrauchsanweisung Indirektleuchte LC(S/T/A) 455 „CHORUS“ Lichtregelung (nur Version LC* /P) Positionierung Lichtniveau an die Arbeitsum- (LC* /P) gebung anpassen Positionieren Sie die Leuchte so, dass der Sensor möglichst viel von Schalten Sie das zu verändern- Ihrem Arbeitsplatz erfasst (siehe de Lichtniveau ein (siehe „Ein- Fig.
  • Page 17: Präsenzüberwachung

    Gebrauchsanweisung Indirektleuchte LC(S/T/A) 455 „CHORUS“ Präsenzüberwachung (nur Version LC*/P) Präsenzsensor Automatisches Ausschalten Manuell Priori Logik Der integrierte Präsenzsensor Verlässt der Nutzer den Erfas- Manuelles Aus- und Einschalten Fig. 22 überwacht die Anwesenheit des sungsbereich des Sensors, so wird haben Vorrang gegenüber der Nutzers.
  • Page 18 Gebrauchsanweisung Indirektleuchte LC(S/T/A) 455 „CHORUS“ Grundeinstellung (nur Version LC*/P) Fig. 23 Grundeinstellungen anzeigen und ändern Grundsätzliches Wechsel in den Parametrier- Anzeigen und Ändern 23.7 modus 23.6 Alle Einstellungen können an den Mit der hinteren Taste [23.7] beiden Tasten [23.8 und 23.9] am - Halten Sie beide Tasten [23.8 und werden die einzelnen Funktionen 23.8...
  • Page 19 Gebrauchsanweisung Indirektleuchte LC(S/T/A) 455 „CHORUS“ Grundeinstellung (nur Version LC*/P) Fig. 24 Folgende Funktionen können gewählt werden: Die fett gedruckten Werte entsprechen der Standard-Werkseinstellung 24.7 24.6 Funktion Sensor-LED Benennung 24.8 - Funktion 1: grün Externes Schalten EIN/AUS 24.9 - Funktion 2: Lichtregelung EIN/AUS - Funktion 3: blau...
  • Page 20: Erweiterte Möglichkeiten

    Gebrauchsanweisung Indirektleuchte LC(S/T/A) 455 „CHORUS“ Erweiterte Möglichkeiten (nur Version LC*/P) Fig. 25 Externes Schalten Präsenzmelder Einschaltautomatik Die Funktion ist standardmäßig Die Funktion ist standardmäßig auf Die Funktion ist standardmäßig auf 25.7 ausgeschaltet, d.h. die Leuchte „Ein“ geschaltet, d.h. die Präsenz- „Ein“...
  • Page 21: Demo Mode

    Gebrauchsanweisung Indirektleuchte LC(S/T/A) 455 „CHORUS“ Erweiterte Möglichkeiten (nur Version LC*/P) Demomode Sonderfunktionen Die Funktion ist standardmäßig auf Die Sonderfunktionen sind nicht „Aus“ geschaltet, d.h. der Demo- nutzbar. Sie müssen auf „Aus“ mode ist nicht in Funktion. eingestellt sein. Ist der Demomode eingeschaltet, arbeiten alle Regelzeiten im Sekun- denbereich.
  • Page 22 Gebrauchsanweisung Indirektleuchte LC(S/T/A) 455 „CHORUS“ Was tun, wenn ..Sie die Werkseinstellung ... die Lampenpaare nicht ... die neu eingesetzten wieder herstellen wollen? synchron dimmen? Lampen flackern? Nur gültig bei Leuchte LC*/P Nur gültig bei Leuchte LC*/D Nur gültig bei dimmbaren Leuchten LC*/D und LC*/P Die Standardeinstellungen werden Hinweis: Durch fertigungsbedingte...
  • Page 23 Gebrauchsanweisung Indirektleuchte LC(S/T/A) 455 „CHORUS“ Was tun, wenn ..der Erfassungsbereich ... der Erfassungsbereich ... die Leuchte nicht auf des Präsenzsensors zu groß des Präsenzsensors zu klein Eingaben reagiert? ist? ist? Nur gültig bei Leuchte LC*/P Nur gültig bei Leuchte LC*/P Nur gültig bei Leuchte LC*/P Ziehen Sie den Netzstecker für einige Sekunden ab und versuchen...
  • Page 24: Wartung, Reparatur Und Pflege

    Gebrauchsanweisung Indirektleuchte LC(S/T/A) 455 „CHORUS“ Wartung, Reparatur, Pflege und Entsorgung Allgemeines Pflege Lampenwechsel Verwenden Sie ein mit normalem Vor Wartungs- und Reparaturar- Beachten Sie Fig. 31. beiten ist die Leuchte vom Netz Haushaltsreiniger getränktes Tuch Ziehen Sie die Lampe waagerecht zu trennen! Die Arbeiten dürfen zur Reinigung der Leuchtenteile.
  • Page 25: Technische Daten

    Gebrauchsanweisung Indirektleuchte LC(S/T/A) 455 „CHORUS“ Technische Daten LC* 455/2, LC* 455/D Weitere Varianten Nennspannung: 230 V AC Bei Bedarf wird diese Geräteserie Frequenzbereich: 50 Hz um weitere Varianten erweitert. Leistungsaufnahme: ca. 235 W Abweichende technische Daten Leistungsfaktor: 0,98 sind deshalb möglich. Bestückung: 4 x 55 W Beachten Sie grundsätz-...
  • Page 26 Instructions for Use Uplighter LC(S/T/A) 455 „CHORUS“ Dear customer, Safety instructions Introduction You have decided to purchase a Waldmann product. And you have surely General made a good choice because we always endeavor to supply perfectly designed and reliable products.
  • Page 27: Safety Instructions

    Instructions for Use Uplighter LC(S/T/A) 455 „CHORUS“ Safety instructions Disconnect the light from the The light may only be operated in Before putting the light into opera- dry rooms not subject to explo- tion, the user has to check whether mains before carrying out any the mains voltage is identical with maintenance or repair work! This...
  • Page 28: Introduction

    Instructions for Use Uplighter LC(S/T/A) 455 „CHORUS“ Introduction The ultra-modern design light CHORUS is available with various levels of comfort. No matter whether you have CHORUS opted for the simple LC*/2 with two switching steps, the dimmable version LC*/D, or the interactive LC*/P, you have bought one of the latest office lights.
  • Page 29: General

    Instructions for Use Uplighter LC(S/T/A) 455 „CHORUS“ General Designated use: Abbreviations and symbols: Intended purpose: Caution, take note of the VDE Approval The light was developed especially accompanying documents! for indoor use. It is available ENEC Approval - as free-standing light (LCS) Protective earth terminal (unit of protection class I) - for desk mounting (LCT)
  • Page 30: Included Components

    Instructions for Use Uplighter LC(S/T/A) 455 „CHORUS“ Assembly - free standing light (LCS) Before mounting Assembling the base of the Light head assembly Fig. 11 light (LCS) check the delivery for complete- Attach the light head to the column ness: as described on page 33.
  • Page 31 Instructions for Use Uplighter LC(S/T/A) 455 „CHORUS“ Assembly - desk light (LCT) Before mounting Light head assembly Fig. 13 (LCT) Mount the plug-on pin [13.8] as check the delivery for complete- Attach the light head to the column 13.8 shown in Fig. 13 with a disc [13.11], ness: as described on page 33.
  • Page 32 Instructions for Use Uplighter LC(S/T/A) 455 „CHORUS“ Assembly - modular light (LCA) Before mounting Column assembly Light head assembly Fig. 14 (LCA) Check the delivery for complete- Please see Fig. 4 on page 3 Attach the light head to the column ness: as described on page 33.
  • Page 33 Instructions for Use Uplighter LC(S/T/A) 455 „CHORUS“ Assembly - light head Fig. 15 Connecting the light head Light head assembly 15.3 Please see Fig. 15. Please see Fig. 15. a) Establish the electrical connec- c) Carefully put the light head 15.4 tion between the column [15.2] [15.1] on the column [15.2].
  • Page 34: Putting Into Operation

    Instructions for Use Uplighter LC(S/T/A) 455 „CHORUS“ Putting into operation Electric connection Putting into operation Information for dimmable lights Before putting the light into opera- Standard equipment (LC*/D and LC*/P): The lights are provided with a com- tion, the user has to check whether To avoid flickering of new (not mercially available mains plug.
  • Page 35: Operation

    Instructions for Use Uplighter LC(S/T/A) 455 „CHORUS“ Operation - Version LC* /2 Operation Fig. 18 Switch on level 1 Via the rocker switch [18.1] on the Actuate the rocker switch on the bottom of the light, two different right-hand side – the light will brightness levels may be switched switch to light level 1 (2 lamps).
  • Page 36 Instructions for Use Uplighter LC(S/T/A) 455 „CHORUS“ Operation - Version LC* /D Fig. 19 Operation The light can be switched on and Switching the light on Changing the light level Actuate briefly the touch switch on off or dimmed continuously via (dimming) right- or left-hand side - the light is the touch switch [19.1] on the...
  • Page 37: Switch-On And Switch-Off

    Instructions for Use Uplighter LC(S/T/A) 455 „CHORUS“ Operation - Version LC* /P Fig. 20 Operation Changing the light level (dim- Via the two keys [20.8 and 20.9] on Switching on 20.7 ming) Briefly press the front key, the light the sensor, different functions can 20.6 Press the front key (level 1) or will switch to light level 1 (front LED...
  • Page 38: Light Control

    Instructions for Use Uplighter LC(S/T/A) 455 „CHORUS“ Light control (LC* /P version only) Positioning Adapting the light level to (LC*/P) the working environment Place the light such that the sensor covers most of your workplace (see Switch on the light level to be Fig.
  • Page 39: Presence Sensor

    Instructions for Use Uplighter LC(S/T/A) 455 „CHORUS“ Presence sensor (LC* /P version only) Presence sensor Automatic switch-off Manual priority logic Fig. 22 The integrated presence sensor Manual switching on and switching When the user leaves the detec- detects the presence of the user. tion area of the sensor, the light off have priority over the automatic The range of detection is conical...
  • Page 40 Instructions for Use Uplighter LC(S/T/A) 455 „CHORUS“ Basic setting (LC* /P version only) Fig. 23 Displaying and changing the basic settings Display and change Fundamentals Change to parameterization mode 23.7 The individual functions are se- All settings can be performed by 23.6 lected via the rear key [23.7].
  • Page 41 Instructions for Use Uplighter LC(S/T/A) 455 „CHORUS“ Basic setting (LC* /P version only) Fig. 24 The following functions can be selected: The bold-printed values are the in-factory defaults 24.7 24.6 Function Sensor LED Designation 24.8 - Function 1: green External activation ON/OFF 24.9 - Function 2: Light control ON/OFF...
  • Page 42: Extended Features

    Instructions for Use Uplighter LC(S/T/A) 455 „CHORUS“ Extended features (LC* /P version only) Fig. 25 External switching Presence sensor Switch-on automatic This function is normally switched The standard setting of this func- The standard setting of this func- 25.7 off, that is, the light does not tion is “ON”...
  • Page 43: Special Functions

    Instructions for Use Uplighter LC(S/T/A) 455 „CHORUS“ Extended features (LC* /P version only) Demo mode Special functions The standard setting of this func- The special functions are not avail- tion is “Off“ , that is, the demo mode able. They must be ”Off” . is disabled.
  • Page 44 Instructions for Use Uplighter LC(S/T/A) 455 „CHORUS“ What to do if..you want to restore the ... the lamp pairs are not ... the newly inserted lamps in-factory settings? dimmed synchronously? flicker? Only applicable to LC*/P Only applicable to light LC*/D Only applicable to dimmable lights LC*/D and LC*/P To restore the default setting,...
  • Page 45 Instructions for Use Uplighter LC(S/T/A) 455 „CHORUS“ What to do if..the presence sensor ... the presence sensor ... the light does not re- range is too large? range is too small? spond to inputs? Only applicable to light LC*/P Only applicable to light LC*/P Only applicable to light LC*/P The presence sensor range can be...
  • Page 46: Maintenance, Repair And Care

    Instructions for Use Uplighter LC(S/T/A) 455 „CHORUS“ Maintenance, repair, care and disposal General Care Replacing the lamp Please use a cloth impregnated Disconnect the light from the Please see Fig. 31. mains before carrying out any with a suitable household clean- Pull the lamp horizontally out of maintenance or repair work! This ing agent to clean the light com-...
  • Page 47: Technical Data

    Instructions for Use Uplighter LC(S/T/A) 455 „CHORUS“ Technical data LC* 455/2, LC* 455/D Further variants Nominal voltage: 230 V AC If required, this series of units will Frequency range: 50 Hz be supplemented by further vari- Power consumption: approx. 235 W ants.
  • Page 48 Vous venez d’acquérir un produit de la marque Waldmann. Vous avez Généralités sans aucun doute fait le bon choix car l’entreprise Waldmann fait tout son possible pour proposer à ses clients uniquement des produits bien étudiés et dignes de confiance.
  • Page 49: Consignes De Sécurité

    Mode d’emploi Luminaire indirect LC(S/T/A) 455 „CHORUS“ Consignes de sécurité Déconnecter le luminaire du Le luminaire ne doit être utilisé que Avant la mise en service, s’assurer dans des locaux secs et exempts que la tension de réseau corres- secteur avant toute opération de risques d’explosion ! pond à...
  • Page 50: Introduction

    Mode d’emploi Luminaire indirect LC(S/T/A) 455 „CHORUS“ Introduction Ce luminaire de création ultramoderne CHORUS est disponible en plusieurs versions. Qu‘importe que vous ayez CHORUS opté pour la version simple LC*/2 avec 2 niveaux de commutation, la version LC*/D à variateur ou la LC*/P interactive, le fait est que vous avez acquis l‘un des produits les plus modernes de l‘univers de l‘éclairage de bureau.
  • Page 51: Généralités

    Mode d’emploi Luminaire indirect LC(S/T/A) 455 „CHORUS“ Généralités Utilisation conforme Abréviations et symboles : à l’emploi prévu : Attention, Homologation VDE Application : tenir compte des docu- Ce luminaire a été conçu spéciale- ments d’accompagnement ! ment pour une utilisation à l’inté- Homologation ENEC rieur de locaux.
  • Page 52: Montage

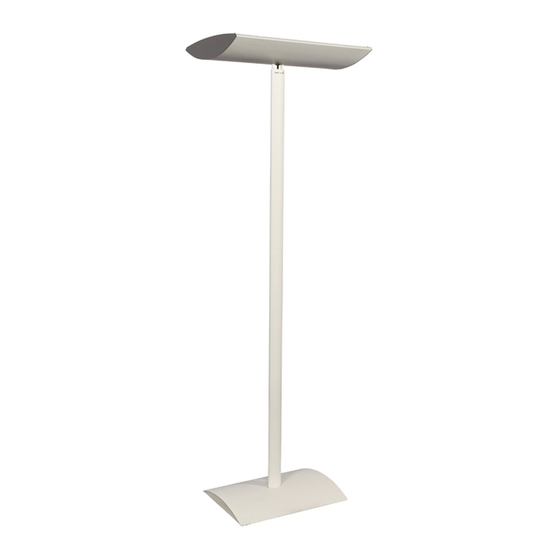
    Mode d’emploi Luminaire indirect LC(S/T/A) 455 „CHORUS“ Montage - lampadaire (LCS) Avant le montage Montage du pied Montage de la tête Fig. 11 du luminaire du luminaire (LCS) Contrôlez si la livraison est com- plète: Voir fig. 11. Montez la tête du luminaire sur 11.2 le bras vertical comme décrit à...
  • Page 53: Montage - Luminaire De Table (Lct)

    Mode d’emploi Luminaire indirect LC(S/T/A) 455 „CHORUS“ Montage - luminaire de table (LCT) Montage de la tête Avant le montage Fig. 13 du luminaire (LCT) Montez le tourillon de fixation [13.8] Contrôlez si la livraison est com- Montez la tête du luminaire sur 13.8 comme montré...
  • Page 54: Montage - Luminaire Monté Sur Cloison (Lca)

    Mode d’emploi Luminaire indirect LC(S/T/A) 455 „CHORUS“ Montage - luminaire monté sur cloison (LCA) Avant le montage Montage du bras vertical Montage de la tête Fig. 14 du luminaire (LCA) Contrôlez si la livraison est com- Observez la fig. 4 à la page 3 plète : Montez la tête du luminaire sur Placez le bras vertical [4.2] sur...
  • Page 55: Montage - Tête Du Luminaire

    Mode d’emploi Luminaire indirect LC(S/T/A) 455 „CHORUS“ Montage - tête du luminaire Fig. 15 Raccordement de la tête Montage de la tête du luminaire du luminaire 15.3 Observez la fig. 15. Observez la fig. 15. 15.4 a) Établissez la connexion électri- c) Placez la tête du luminaire [15.1] 15.1 que entre le bras vertical [15.2]...
  • Page 56: Mise En Service

    Mode d’emploi Luminaire indirect LC(S/T/A) 455 „CHORUS“ Mise en service Raccordement électrique Mise en service Instructions pour les luminaires à variateur de Avant la mise en service, assurez- Version standard lumière Les luminaires sont équipés d’une vous que la tension de réseau (LC*/D et LC*/P): fiche secteur standard (2P+T).
  • Page 57: Utilisation

    Mode d’emploi Luminaire indirect LC(S/T/A) 455 „CHORUS“ Utilisation (uniquement version LC*/2) Fig. 18 Utilisation L ’interrupteur à bascule [18.1] situé Activer niveau 1 sur la tête du luminaire permet, en Faîtes basculer l’interrupteur à fonction du côté actionné, d’ac- bascule à droit - le luminaire com- tiver deux niveaux d’eclairement mute sur le niveau lumineux 1 (2 différents.
  • Page 58 Mode d’emploi Luminaire indirect LC(S/T/A) 455 „CHORUS“ Utilisation (uniquement version LC*/D) Fig. 19 Utilisation L ’interrupteur [19.1] situé sur la Allumer le luminaire Modifier le niveau lumineux tête du luminaire permet d’allumer Actionnez brièvement l’interrupteur (varier la lumière) et d’éteindre le luminaire et de Actionnez l’interrupteur à...
  • Page 59: Allumer Et Éteindre Le Luminaire

    Mode d’emploi Luminaire indirect LC(S/T/A) 455 „CHORUS“ Utilisation (uniquement version LC*/P) Fig. 20 Utilisation Modifier le niveau lumineux Allumer Les deux touches [20.8 et 20.9] si- 20.7 Appuyer brièvement sur la touche (varier la lumière) tuées sur le détecteur permettent, 20.6 avant - le luminaire commute sur le Appuyez sur la touche avant (ni-...
  • Page 60: Régulation De La Lumière

    Mode d’emploi Luminaire indirect LC(S/T/A) 455 „CHORUS“ Régulation de la lumière (uniquement version LC*/P) Positionnement Adaptation du niveau lumi- (LC*/P) neux à la zone de travail Positionnez le luminaire de sorte à optimiser le périmètre de détection Activez le niveau lumineux à mo- du détecteur sur votre poste de difier (voir «Allumer»...
  • Page 61: Surveillance De La Présence

    Mode d’emploi Luminaire indirect LC(S/T/A) 455 „CHORUS“ Surveillance de présence (uniquement version LC*/P) Détecteur de présence Arrêt automatique Priorité du mode manuel Le détecteur de présence intégré Si l’utilisateur quitte la zone de dé- La mise en marche et l’arrêt ma- contrôle la présence de l’utilisateur.
  • Page 62: Réglages De Base (Uniquement Version Lc*/P)

    Mode d’emploi Luminaire indirect LC(S/T/A) 455 „CHORUS“ Réglages de base (uniquement version LC*/P) Fig. 23 Affichage et modification des réglages de base Affichage et modification Généralités Passage dans le mode de para- 23.7 métrage La touche arrière [23.7] permet 23.6 Tous les réglages peuvent être ef- de sélectionner les différentes fectués sur les deux touches [23.8...
  • Page 63: Réglage De Base (Uniquement Version Lc*/P)

    Mode d’emploi Luminaire indirect LC(S/T/A) 455 „CHORUS“ Réglage de base (uniquement version LC*/P) Fig. 24 Les fonctions suivantes peuvent être sélectionnées : Les valeurs en caractères gras correspondent au réglage standard réalisé à l’usine 24.7 24.6 Fonction Détecteur LED Désignation 24.8 - Fonction 1 : vert...
  • Page 64: Autres Possibilités

    Mode d’emploi Luminaire indirect LC(S/T/A) 455 „CHORUS“ Autres possibilités (uniquement version LC*/P) Fig. 25 Commutation externe Détecteur de présence Mise en marche automatique La fonction est désactivée en La fonction est activée en standard, 25.7 standard, c’est-à-dire que le lu- c’est-à-dire que le détecteur de 25.6 La fonction est activée en standard,...
  • Page 65 Mode d’emploi Luminaire indirect LC(S/T/A) 455 „CHORUS“ Autres possibilités (uniquement version LC*/P) Mode de démonstration Fonctions spéciales La fonction est désactivée en stan- Les fonctions spéciales ne peuvent dard, c’est-à-dire que le mode de pas être utilisées. Elles doivent être démonstration ne fonctionne pas.
  • Page 66 Mode d’emploi Luminaire indirect LC(S/T/A) 455 „CHORUS“ Que faire si … ... vous souhaitez rétablir le ... les paires de tubes ne ... les tubes neufs papillo- réglage usine ? varient pas la lumière de tent ? manière synchronisée ? Valable uniquement pour le lumi- Valable uniquement pour les naire LC*/P...
  • Page 67 Mode d’emploi Luminaire indirect LC(S/T/A) 455 „CHORUS“ Que faire si … ... la zone de détection du ... la zone de détection du ... le luminaire ne réagit détecteur de présence est détecteur de présence est pas ? trop grande ? trop petite ? Valable uniquement pour le lumi- naire LC*/P...
  • Page 68: Maintenance, Réparation, Entretien Et Élimination

    Mode d’emploi Luminaire indirect LC(S/T/A) 455 „CHORUS“ Maintenance, réparation, entretien et élimination Généralités Entretien Remplacement des tubes Pour nettoyer les éléments du lu- Déconnecter le luminaire du Observez la fig. 31. secteur avant toute opération minaire, utilisez un chiffon imbibé Retirez horizontalement le tube de maintenance ou de répara- d’un produit ménager usuel.
  • Page 69: Caractéristiques Techniques

    Mode d’emploi Luminaire indirect LC(S/T/A) 455 „CHORUS“ Caractéristiques techniques LC* 455/2, LC* 455/D Autres versions Tension nominale : 230 V AC En cas de besoin, d’autres versions Gamme de fréquences : 50 Hz viennent compléter cette série Consommation : env. 235 W d’appareils.
  • Page 70 Istruzioni per l’uso Apparecchio d’illuminazione a luce indiretta LC(S/T/A) 455 „CHORUS“ Gentilissimo Cliente! Avvertenze per la sicurezza Introduzione Ha acquistato un prodotto Waldmann. Congratulazioni per la buona scelta. Informazioni generali Ci diamo costantemente premura di fornire prodotti sviluppati ed affidabili alla clientela.
  • Page 71: Avvertenze Per La Sicurezza

    Istruzioni per l’uso Apparecchio d’illuminazione a luce indiretta LC(S/T/A) 455 „CHORUS“ Avvertenze per la sicurezza Per le operazioni di manuten- L ’apparecchio d’illuminazione deve Prima della messa in funzione essere utilizzato esclusivamente occorre controllare se la tensione zione e di riparazione scollegare in locali asciutti e non soggetti a della rete indicata corrisponde alla l’apparecchio d’illuminazione...
  • Page 72: Introduzione

    Istruzioni per l’uso Apparecchio d’illuminazione a luce indiretta LC(S/T/A) 455 „CHORUS“ Introduzione CHORUS L ’ apparecchio d’illuminazione CHORUS di concezione totalmente nuova, è disponibile in diverse versioni. Sia che abbiate optato per la versione semplice LC*/2, a due stadi di commutazione, la versione dimmerabile LC*/D o la versione interattiva LC*/P, siete ora in possesso di un prodotto di tecnologia avanzatissima nel campo dell ‘illuminazione per l’ufficio.
  • Page 73: Informazioni Generali

    Istruzioni per l’uso Apparecchio d’illuminazione a luce indiretta LC(S/T/A) 455 „CHORUS“ Informazioni generali Uso conforme allo scopo Abbreviazioni e simboli: d‘impiego previsto: Attenzione, Omologazione VDE Scopo d’impiego: osservare la documenta- L’apparecchio d’illuminazione zione in dotazione! è stato sviluppato specificamente Omologazione ENEC per l‘utilizzo in zone interne.
  • Page 74: Montaggio

    Istruzioni per l’uso Apparecchio d’illuminazione a luce indiretta LC(S/T/A) 455 „CHORUS“ Montaggio - apparecchio d’illuminazione a stelo (LCS) Prima del montaggio Montaggio della base del- Montaggio della testa del- Fig. 11 l’apparecchio l’apparecchio (LCS) Controllare che le parti fornite siano complete: vedi fig.
  • Page 75: Montaggio Del Tubo Di Sostegno

    Istruzioni per l’uso Apparecchio d’illuminazione a luce indiretta LC(S/T/A) 455 „CHORUS“ Montaggio - apparecchio d’illuminazione da tavolo (LCT) Prima del montaggio Montaggio della testa del- Fig. 13 l’apparecchio (LCT) Montare il perno a manicotto [13.8] Controllare che le parti fornite siano 13.8 come illustrato nella fig.
  • Page 76 Istruzioni per l’uso Apparecchio d’illuminazione a luce indiretta LC(S/T/A) 455 „CHORUS“ Montaggio - apparecchio d’illuminazione modulare (LCA) Prima del montaggio Montaggio della testa del- Montaggio del tubo di Fig. 14 l’apparecchio (LCA) sostegno Controllare che le parti fornite siano complete: Montare la testa dell’apparecchio Osservare la fig.
  • Page 77: Montaggio - Testa Dell'apparecchio

    Istruzioni per l’uso Apparecchio d’illuminazione a luce indiretta LC(S/T/A) 455 „CHORUS“ Montaggio - testa dell’apparecchio Fig. 15 Collegamento della testa Montaggio della testa dell’apparecchio dell’apparecchio 15.3 Osservare la fig. 15. Osservare la fig. 15. 15.4 a) Stabilire il collegamento elettri- c) Montare la testa dell’apparec- 15.1 co tra il tubo di sostegno [15.2] e...
  • Page 78: Messa In Funzione

    Istruzioni per l’uso Apparecchio d’illuminazione a luce indiretta LC(S/T/A) 455 „CHORUS“ Messa in funzione Collegamento elettrico Messa in funzione Avvertenza per apparec- chi dimmerabili Prima della messa in funzione Equipaggiamento standard (LC*/D e LC*/P): Gli apparecchi sono dotati di spine occorre controllare se la tensione Per evitare l’effetto di sfarfallio delle comuni.
  • Page 79: Comando

    Istruzioni per l’uso Apparecchio d’illuminazione a luce indiretta LC(S/T/A) 455 „CHORUS“ Comando (solo versione LC*/2) Fig. 18 Comando Inserire il livello 1 Mediante l’interruttore a bilico Azionare l’interruttore a bilico si- [18.1] situato sulla testa dell’ap- tuato sul lato destro - l’apparecchio parecchio è...
  • Page 80 Istruzioni per l’uso Apparecchio d’illuminazione a luce indiretta LC(S/T/A) 455 „CHORUS“ Comando (solo versione LC*/D) Fig. 19 Comando Cambiare il livello luminoso Per mezzo dell’interruttore a tasto Inserire l’apparecchio (dimmerare) Azionare brevemente l’interruttore [19.1] sulla testa dell’apparecchio è Premere l’interruttore a tasto situa- possibile accendere e spegnere o a tasto situato sul lato destro o sini- to sul lato destro o sinistro e tenerlo...
  • Page 81: Accensione E Spegnimento

    Istruzioni per l’uso Apparecchio d’illuminazione a luce indiretta LC(S/T/A) 455 „CHORUS“ Comando (solo versione LC*/P) Fig. 20 Comando Cambiare il livello luminoso Accensione Mediante i due interruttori a tasto 20.7 Premere brevemente il tasto ante- (dimmerazione) [20.8] e [20.9] situati sul sensore è 20.6 riore - l’apparecchio d’illuminazione Premere il tasto anteriore (livello...
  • Page 82: Regolazione Di Luminosità

    Istruzioni per l’uso Apparecchio d’illuminazione a luce indiretta LC(S/T/A) 455 „CHORUS“ Regolazione di luminosità (solo versione LC*/P) Posizionamento Adattare il livello luminoso (LC*/P) all’ambiente di lavoro Posizionare l’apparecchio d’illu- minazione in modo che il campo Accendere il livello luminoso da d’azione del sensore comprenda modificare (vedi “Accensione”...
  • Page 83: Spegnimento Automatico

    Istruzioni per l’uso Apparecchio d’illuminazione a luce indiretta LC(S/T/A) 455 „CHORUS“ Monitoraggio della presenza (solo versione LC*/P) Sensore di presenza Spegnimento automatico Logica di precedenza manuale Il sensore di presenza integrato Se l’utente lascia il campo d’azione Fig. 22 verifica la presenza dell’utente. del detector, dopo 10 minuti viene Il modo manuale per inserire e Nella zona del pavimento il campo...
  • Page 84: Modificare Le Impostazioni Di Base

    Istruzioni per l’uso Apparecchio d’illuminazione a luce indiretta LC(S/T/A) 455 „CHORUS“ Impostazione di base (solo versione LC*/P) Fig. 23 Visualizzare e modificare le impostazioni di base Visualizzare e modificare Elementi fondamentali Cambio nel modo di parametriz- 23.7 zazione Mediante il tasto posteriore [23.7] 23.6 Tutte le impostazioni possono es- vengono selezionate le singole...
  • Page 85 Istruzioni per l’uso Apparecchio d’illuminazione a luce indiretta LC(S/T/A) 455 „CHORUS“ Impostazione di base (solo versione LC*/P) Fig. 24 È possibile selezionare le seguenti funzioni: I valori riportati in grassetto corrispondono all’impostazione avvenuta in fabbrica. 24.7 24.6 Funzioni: LED sensore Denominazione 24.8 - Funzione 1:...
  • Page 86 Istruzioni per l’uso Apparecchio d’illuminazione a luce indiretta LC(S/T/A) 455 „CHORUS“ Ulteriori possibilità (solo versione LC*/P) Fig. 25 Commutazione esterna Detector di movimento Accensione automatica Di standard questa funzione è Di standard la funzione è regolata Di standard la funzione è regolata 25.7 disattivata, cioè...
  • Page 87: Modalità Demo

    Istruzioni per l’uso Apparecchio d’illuminazione a luce indiretta LC(S/T/A) 455 „CHORUS“ Ulteriori possibilità (solo versione LC*/P) Modalità demo Funzioni speciali Di standard la funzione è regolata Le funzioni speciali non sono uti- su „OFF“ , cioè la modaliatà demo lizzabili. Devono essere regolate è...
  • Page 88 Istruzioni per l’uso Apparecchio d’illuminazione a luce indiretta LC(S/T/A) 455 „CHORUS“ Che cosa si deve fare se ..si desidera ripristinare ... le coppie di lampade non ... le lampade appena inseri- l’impostazione di fabbrica? si dimmerano in sincrono? te lampeggiano? Valido solo per l’apparecchio lumi- Valido solo per l’apparecchio lumi-...
  • Page 89 Istruzioni per l’uso Apparecchio d’illuminazione a luce indiretta LC(S/T/A) 455 „CHORUS“ Che cosa si deve fare se ..il campo d’azione del ... il campo d’azione del ... l’apparecchio non reagi- detector di movimento è detector di movimento è sce agli inserimenti? troppo grande? troppo piccolo?
  • Page 90: Smaltimento

    Istruzioni per l’uso Apparecchio d’illuminazione a luce indiretta LC(S/T/A) 455 „CHORUS“ Manutenzione, riparazione, cura e smaltimento Informazioni generali Cura Sostituzione della lampada Per la pulizia delle parti dell’appa- Per le operazioni di manuten- Osservare la fig. 31. zione e di riparazione scollegare recchio di illuminazione fare uso Estrarre la lampada orizzontalmen- l’apparecchio d’illuminazione...
  • Page 91: Dati Tecnici

    Istruzioni per l’uso Apparecchio d’illuminazione a luce indiretta LC(S/T/A) 455 „CHORUS“ Dati tecnici LC* 455/2, LC* 455/D Ulteriori varianti Tensione nominale: 230 V AC Se necessario, questa serie di Gamma di frequenza: 50 Hz apparecchi viene ampliata con ulte- Potenza assorbita: circa 235 W riori varianti.
  • Page 92 LC(S/T/A) 455 „CHORUS“ Ausgabe: 26.11.2008...

Table des Matières