
Manuels Connexes pour Horizon Hobby UMX A-10 Thunderbolt II


Sommaire des Matières pour Horizon Hobby UMX A-10 Thunderbolt II
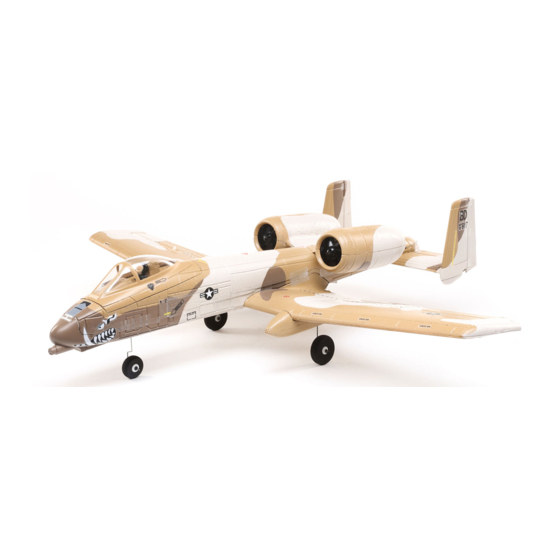
- Page 1 A-10 Thunderbolt II ™ Instruction Manual Bedienungsanleitung Manuel d’utilisation Manuale di Istruzioni...
-
Page 2: Safety Precautions And Warnings
Do not use with incompatible components or alter this product in any way outside of the instructions provided by Horizon Hobby, LLC. This manual contains instructions for safety, operation and maintenance. It is essential to read and follow all the instructions and warnings in the manual, prior to assembly, setup or use, in order to operate correctly and avoid damage or serious injury. -
Page 3: Table Des Matières
Table of Contents Transmitter Setup ..........4 Motor Service .............13 Binding ..............4 Post Flight Checklist ...........14 Integrated Telemetry ..........4 Replacement Parts ..........14 ESC/Receiver Arming, Battery Installation and Recommended Items ..........14 Center of Gravity ...........5 Optional Items ............14 SAFE® Select Technology ........6 Troubleshooting Guide ........15 Control Centering ..........7 Troubleshooting Guide (Continued) ......16... -
Page 4: Transmitter Setup
Transmitter Setup IMPORTANT: After you set up your model, always Computerized Transmitter Setup rebind the transmitter and receiver to set the desired DX series, NX series, iX series failsafe positions. If your transmitter allows it, enable the throttle Start all transmitter programming with a blank ACRO cut feature. -
Page 5: Esc/Receiver Arming, Battery Installation And Center Of Gravity
ESC/Receiver Arming, Battery Installation and Center of Gravity NOTICE: Always keep material or debris away from the intake. When armed, the rotor will turn in response to throttle movement and could ingest loose objects. The UMX A-10 requires a 3S 850mAh Li-Po battery with an IC2 or EC2 connector (SPMX8503S30 recommended). -
Page 6: Safe® Select Technology
SAFE® Select Technology When SAFE Select is activated, bank and pitch limitations keep you from over-controlling the aircraft. Additionally, by releasing the controls in the event you lose orientation, SAFE Select will keep the aircraft level. To activate SAFE Select, flip the Gear channel switch to position 0. Return the Gear switch to position 1 to ®... -
Page 7: Control Centering
Control Centering Before the first flights, or in the event of an accident, make sure the flight control surfaces are centered. Adjust the linkages mechanically if the control surfaces are not centered. Use of the transmitter sub-trims may not correctly center the aircraft control surfaces due to the mechanical limits of linear servos. -
Page 8: Landing Gear Removal
Landing Gear Removal The landing gear may be left installed or removed to suit your flying area. We recommend using the landing gear when you can take off and land from a smooth surface. If you have long grass you may choose to remove the landing gear, in which case you will need to hand launch the aircraft and belly land. -
Page 9: Control Direction Test
Control Direction Test You should bind your aircraft and Transmitter Aircraft Reaction transmitter before doing these tests. Command Move the controls on the transmitter to Down make sure the aircraft control surfaces Elevator move correctly and in the proper direction. Make sure the tail linkages move freely and that paint or decals are not adhered to them. -
Page 10: As3X Direction Test
AS3X Direction Test Aircraft You should bind your aircraft and AS3X Reaction movement transmitter before doing these tests. Move the controls on the transmitter to make sure the aircraft control surfaces move correctly and in the proper direction. Make sure the tail linkages move freely and that paint or decals are not adhered to them. -
Page 11: Flying Tips And Repairs
Flying Tips and Repairs Range Check your Radio System Landing After final assembly, range check the radio system Always land into the wind. Fly the landing pattern with the aircraft. Refer to your specific transmitter with a slightly nose high attitude. Use throttle instruction manual for range test information. -
Page 12: Safe Select Flying Tips
SAFE Select Flying Tips When flying in SAFE Select mode the aircraft will return to level flight any time the aileron and elevator controls are at neutral. Applying aileron or elevator control will cause the airplane to bank, climb or dive. The amount the stick is moved will determine the attitude the airplane flies. -
Page 13: Motor Service
Motor Service Disassembly CAUTION: DO NOT handle the rotor or motor while the flight battery is connected. Personal injury could result. In order to access the motor connector(s) it is necessary to separate the top and bottom of the fuselage to access the receiver/ESC. The top and bottom fuselage parts are secured with glue and clear tape. -
Page 14: Post Flight Checklist
Post Flight Checklist Disconnect the flight battery from the ESC 5. Store the flight battery apart from the (Required for safety and battery life). aircraft and monitor the battery charge. Power OFF the transmitter. 6. Make note of the flight conditions and flight plan results, planning for future flights. -
Page 15: Troubleshooting Guide
Troubleshooting Guide AS3X Problem Possible Cause Solution Control surfaces not at Control surfaces may not have been Center control surfaces mechanically by neutral position when mechanically centered from factory adjusting the U-bends on control linkages transmitter controls are Aircraft was moved after the flight battery Disconnect and reconnect the flight battery at neutral was connected and before sensors... -
Page 16: Troubleshooting Guide (Continued)
What this Warranty Covers OTHER THAN THE EXPRESS WARRANTY ABOVE, HORIZON MAKES NO OTHER WARRANTY OR Horizon Hobby, LLC, (Horizon) warrants to the REPRESENTATION, AND HEREBY DISCLAIMS ANY original purchaser that the product purchased (the AND ALL IMPLIED WARRANTIES, INCLUDING, “Product”) will be free from defects in materials and... - Page 17 Horizon reserves the right to inspect any and all that provides tracking and insurance for lost or Product(s) involved in a warranty claim. Service or damaged parcels, as Horizon is not responsible for replacement decisions are at the sole discretion merchandise until it arrives and is accepted at our of Horizon.
-
Page 18: Warranty And Service Contact Information
Supplier’s Declaration of Conformity guarantee that interference will not occur in a particular installation. If this equipment does UMX A-10 Thunderbolt II EDF (EFLU6550) cause harmful interference to radio or television This device complies with part 15 of the FCC reception, which can be determined by turning the Rules. -
Page 19: Eu Information
EU Compliance Statement: UMX A-10 Horizon Hobby, LLC Thunderbolt II EDF (EFLU6550) Hereby, 2904 Research Road Horizon Hobby, LLC declares that the device Champaign, IL 61822 USA is in compliance with the following: EU Radio Equipment Directive 2014/53/EU; EU Importer of Record: RoHS 2 Directive 2011/65/EU;... - Page 20 © 2021 Horizon Hobby, LLC. E-flite, AS3X, UMX, DSM, DSM2, DSMX, ModelMatch, Bind-N-Fly, EC2, IC2, IC3 and the Horizon Hobby logo are trademarks or registered trademarks of Horizon Hobby, LLC. The Spektrum trademark is used with permission of Bachmann Industries, Inc.
-
Page 21: Warnungen Und Sicherheitshinweise
Dieses Produkt ist nicht für den Gebrauch durch Kinder ohne direkte Aufsicht eines Erwachsenen vorgesehen. Verwenden Sie das Produkt nicht mit inkompatiblen Komponenten oder verändern es in jedweder Art ausserhalb der von Horizon Hobby LLC vorgegebenen Anweisungen. Dieses Handbuch enthält Sicherheitshinweise sowie Anleitungen zu Betrieb und Wartung. Es ist unerlässlich, dass Sie alle Anleitungen und Warnungen in diesem Handbuch vor dem Zusammenbau, der Einrichtung oder der Inbetriebnahme lesen und diese befolgen, um eine korrekte Bedienung zu gewährleisten und... -
Page 22: Lieferumfang
Lieferumfang Senderprogrammierung ........23 Tipps für das Fliegen mit SAFE® Select ....31 Binden von Sender und Empfänger .....23 Motorwartung .............32 Integrierte Telemetrie ..........23 Checkliste nach dem Flug ........33 ESC/Receiver Arming, Battery Installation and Ersatzteile ............33 Center of Gravity ..........24 Empfohlene Artikel ..........33 SAFE Select-Technologie ........25 Optionale Komponenten ........33 Zentrieren der Ruderflächen .......26... -
Page 23: Senderprogrammierung
Senderprogrammierung WICHTIG: Nach dem Einrichten des Modells immer Computergesteuerte Sendereinrichtung den Sender und Empfänger erneut binden, um die DX serie, NX serie, iX serie gewünschten Failsafe-Positionen einzurichten. Jede Senderprogrammierung mit einem leeren Wenn Ihr Sender es zulässt, aktivieren Sie die ACRO-Modell beginnen (Modell zurücksetzen), Gasabschaltungsfunktion. -
Page 24: Esc/Receiver Arming, Battery Installation And Center Of Gravity
ESC/Receiver Arming, Battery Installation and Center of Gravity HINWEIS: Material oder Schmutz immer von den Einlässen fernhalten. Wenn die Rotoren aktiviert sind, drehen sie sich in Antwort auf die Gasbewegung und können lose Objekte ansaugen. Die UMX A-10 benötigt eine 3S 850mAh Li-Po Batterie mit IC2-oder EC2-Anschluss (SPMX8503S30 recommended). -
Page 25: Safe Select-Technologie
SAFE Select-Technologie Wenn SAFE Select aktiviert ist, verhindern die Neigungsbegrenzungen, dass das Flugzeug übersteuert wird. Darüber hinaus hält SAFE Select das Flugzeug im Horizontalflug, indem es die Bedienelemente freigibt, falls Sie die Orientierung verlieren. Zum Aktivieren von SAFE Select stellen Sie den Getriebekanal auf die Position 0. Stellen Sie den Getriebe- Schalter wieder auf Position 1, um SAFE Select auszuschalten und fliegen Sie mit Hilfe der AS3X ®... -
Page 26: Zentrieren Der Ruderflächen
Zentrieren der Ruderflächen Before the first flights, or in the event of an accident, make sure the flight control surfaces are centered. Adjust the linkages mechanically if the control surfaces are not centered. Use of the transmitter sub-trims may not correctly center the aircraft control surfaces due to the mechanical limits of linear servos. -
Page 27: Entfernen Des Fahrwerks
Entfernen des Fahrwerks Das Fahrwerk kann installiert oder entfernt werden, um Ihrem Fluggebiet zu entsprechen. Das Fahrwerk kann installiert oder entfernt werden, um Ihrem Fluggebiet zu entsprechen.Wir empfehlen, das Fahrwerk zu verwenden, wenn Sie von einer glatten Oberfläche aus starten und landen können. Wenn Sie langes gras haben, können Sie das Fahrwerk entfernen, in diesem Fall müssen Sie das Flugzeug von hand starten und landen. -
Page 28: Steuerrichtungstest
Steuerrichtungstest Senderkom- Bevor Sie diese Test durchführen, sollte das Flugzeugreaktion mando Flugzeug an den Sender gebunden sein. Höhenruder Bewegen Sie die Steuerknüppel des nach unten Senders um sicher zu stellen, dass sich die Ruder korrekt und die richtige Richtung bewegen. Bitte überprüfen Sie auch ob die Anlenkungen freigängig sind und nicht Höhenruder... -
Page 29: As3X Steuertest
AS3X Steuertest Flugzeugbewe- Bevor Sie diesen Test durchführen, sollte AS3X Reaktion gung das Flugzeug an den Sender gebunden sein. Bewegen Sie die Steuerknüppel des Senders um sicher zu stellen, dass sich die Ruder korrekt und die richtige Richtung bewegen. Bitte überprüfen Sie auch ob die Anlenkungen freigängig sind und nicht durch die Lackierung oder Aufkleber behindert werden. -
Page 30: Tipps Zum Fliegen Und Reparieren
Tipps zum Fliegen und Reparieren Reichweitencheck der Fernsteuerung mit dem Seitenruder. Gehen Sie in den Steigflug und Führen Sie nach dem Zusammenbau eine überprüfen die Trimmung. Haben Sie das Flugzeug Reichweitenüberprüfung der Fernsteuerung mit eingetrimmt können Sie die Flugleistungen austesten. dem Modell durch. -
Page 31: Tipps Für Das Fliegen Mit Safe® Select
Tipps für das Fliegen mit SAFE® Select Wenn das Flugzeug im SAFE Select-Modus fliegt, kehrt es in den Horizontalflug zurück, wenn sich die Querruder- und Höhenrudersteuerung auf Neutral befinden. Mit der Querruder- oder Höhenrudersteuerung kann bewirkt werden, dass das Flugzeug sich neigt, steigt oder in einen Sturzflug übergeht. Zudem bestimmt die Intensität mit der Steuerhebel bewegt wird die Fluglage des Flugzeugs. -
Page 32: Motorwartung
Motorwartung Zerlegen ACHTUNG: Den Rotor oder Motor NICHT handhaben, während der Flugakku verbunden ist. Dies könnte Verletzungen verursachen. Um auf die Motorstecker zuzugreifen(en), müssen Ober und Unterseite des Rumpfes getrennt werden, um auf den Empfänger/ ESC zuzugreifen. Die oberen und unteren rumpfteile sind mit Klebstoff und klarem Klebeband gesichert. -
Page 33: Checkliste Nach Dem Flug
Checkliste nach dem Flug 1. Trennen Sie den Flugakku vom Regler 5. Bewahren Sie den Flugakku separat vom (erforderlich aus Sicherheitsgründen und zur Flugzeug auf, und überwachen Sie die Ladung Verlängerung der Akkulebensdauer). des Akkus. 6. Notieren Sie Flugbedingungen und Ergebnisse 2. -
Page 34: Problemlösung
Problemlösung AS3X Problem mögliche Ursache Lösung Ruderflächen sind bei Ruder sind ab Werk mechanisch nicht Zentrieren Sie die Kontrollen mechanisch zentrierten Knüppeln zentriert durch justieren der U-Bügel nicht in neutraler Flugzeug wurde nach Anschluss des Akkus Das Flugzeug sollte 5 Sekunden nach dem Position bewegt bevor sich die Sensoren initialisiert Anschluss des Akkus aufrecht und vollkom-... -
Page 35: Problemlösung (Fortsetzung)
Kaufnachweis erbracht wird. Horizon behält sich das Recht vor, diese Garantiebestimmungen Garantiezeitraum ohne Ankündigung zu ändern oder modifizieren und Exklusive Garantie ¬ Horizon Hobby LLC (Horizon) widerruft dann bestehende Garantiebestimmungen. garantiert, dass das gekaufte Produkt frei von Material- und Montagefehlern ist. Der Garantiezeitraum (b) Horizon übernimmt keine Garantie für die... - Page 36 Sollte sich ein Garantiefall bestätigen wird das Bestimmungen im Zusammenhang mit der Benutzung Produkt repariert oder ersetzt. Diese Entscheidung obliegt des Produktes zu akzeptieren, werden Sie gebeten, dass einzig Horizon Hobby. Produkt in unbenutztem Zustand in der Originalverpackung Kostenpflichtige Reparaturen vollständig bei dem Verkäufer zurückzugeben.
-
Page 37: Garantie Und Service Kontaktinformationen
Dieses Symbol weist Drahtloser Frequenzbereich / Drahtlose darauf hin, dass dieses Produkt kein Ausgangsleistung: normaler Haushaltsabfall ist, sondern in einer UMX A-10 Thunderbolt II EDF (EFLU6550) entsprechenden Sammelstelle für Elektro- und 2404-2476 MHz Elektronik-Altgeräte entsorgt werden muss. 1.43 dBm... -
Page 38: Signification De Certains Termes Spécifiques
Horizon Hobby, LLC. Ce manuel comporte des instructions relatives à la sécurité, au fonctionnement et à l’entretien. Il est capital de lire et de respecter la totalité des instructions et avertissements du manuel avant l’assemblage, le réglage et l’utilisation, ceci afin de manipuler correctement l’appareil et d’éviter... -
Page 39: Nécessaires Pour Achever Le Montage
Table des matières Configuration de l’émetteur ........40 Conseils de vol et réparations ......47 Affectation de l’émetteur au récepteur ....40 Conseils de vol en mode SAFE® Select ....48 Télémétrie intégrée ..........40 Entretien du moteur ..........49 ESC/Receiver Arming, Battery Installation and Vérifications à effectuer après le vol ....50 Center of Gravity ..........41 Pièces de rechange ..........50 Technologie SAFE Select ........42... -
Page 40: Configuration De L'émetteur
Configuration de l’émetteur IMPORTANT : Après avoir configuré votre modèle, Configuration informatisée de l’émetteur réaffectez toujours l’émetteur et le récepteur pour Série DX, série NX, série iX régler les positions souhaitées de sécurité intégrée. Démarrez toutes les programmations de l’émetteur Si votre émetteur le permet, activez la fonction de avec un modèle vierge ACRO (effectuez une Throttle Cut (Arrêt du moteur). -
Page 41: Esc/Receiver Arming, Battery Installation And Center Of Gravity
ESC/Receiver Arming, Battery Installation and Center of Gravity REMARQUE : Veillez toujours à ce qu’il n’y ait pas de saletés et de débris au niveau du tuyau d’entrée. Lorsqu’il est armé, le rotor tourne en réponse à tout mouvement d’accélération et peut ingérer les pièces en mouvement. -
Page 42: Technologie Safe Select
Technologie SAFE Select Lorsque SAFE Select est activé, les limites d’inclinaison et de tangage vous empêchent d’exercer un contrôle excessif sur l’appareil. De plus, en relâchant les commandes si vous perdez l’orientation, SAFE Select maintiendra l’appareil à niveau. Pour activer SAFE Select, basculez le commutateur du canal Gear sur la position 0. Retournez le commutateur Gear en position 1 pour désactiver SAFE Select et simplement voler avec l’assistance de la technologie AS3X. -
Page 43: Centrage Des Commandes
Centrage des commandes Avant les premiers vols, ou en cas d’accident, vérifiez Si les que les surfaces de contrôle de vol sont centrées. surfaces de contrôle ne sont pas centrées, ajustez les liaisons mécaniquement. Il se peut que les sous- trims de l’émetteur ne permettent pas de centrer correctement les surfaces de contrôle de l’avion à... -
Page 44: Démontage Du Train D'atterrissage
Démontage du train d’atterrissage Vous pouvez laisser le train d’atterrissage installé ou le retirer en fonction de votre zone de vol. Nous vous recommandons d’utiliser le train d’atterrissage lorsque vous pouvez décoller et atterrir sur une surface lisse. Si la zone contient de l’herbe haute, vous pouvez choisir de retirer le train d’atterrissage, auquel cas vous devrez lancer l’avion manuellement et atterrir sur le ventre. -
Page 45: Test De Direction Des Gouvernes
Test de direction des gouvernes Affectez votre émetteur à votre avion avant Commande à Réaction de l’avion de procéder à ces tests. l’émetteur Actionnez les commandes de l’émetteur Descente pour vous assurer que les gouvernes de l’avion s’orientent correctement. Vérifiez que les tringleries peuvent bouger librement, qu’elles ne sont pas collées par de la peinture ou des autocollants. -
Page 46: Test Du Système As3X
Test du système AS3X Mouvements de Affectez votre émetteur à votre avion avant Réactions de l’AS3X l’appareil de procéder à ces tests. Bougez l’avion dans les directions indiquées pour vous assurer que les gouvernes de l’avion s’orientent correctement. Vérifiez que les tringleries peuvent bouger librement, qu’elles ne sont pas collées par de la peinture ou des autocollants. -
Page 47: Conseils De Vol Et Réparations
Conseils de vol et réparations Contrôlez la portée de votre radio Atterrissage Atterrissez toujours face au vent. Volez avec le nez Après l’assemblage final du modèle, contrôlez la légèrement orienté vers le haut. Utilisez les gaz pour portée de la radio avec l’avion. Consultez le manuel contrôler le taux de descente de l’avion. -
Page 48: Conseils De Vol En Mode Safe® Select
Conseils de vol en mode SAFE® Select Lors d’un vol au mode SAFE Select, l’appareil retournera en vol à niveau à tout moment lorsque les commandes d’aileron et de gouverne de profondeur sont en position neutre. L’utilisation des commandes d’aileron ou de gouverne de profondeur fera s’incliner, grimper ou plonger l’appareil. La quantité de déplacement du manche déterminera l’attitude de vol de l’appareil. -
Page 49: Entretien Du Moteur
Entretien du moteur Démontage ATTENTION : NE manipulez PAS le rotor ou le moteur lorsque la batterie de vol est branchée. Vous risqueriez de vous blesser. Pour accéder au(x) connecteur(s) moteur, il est nécessaire de séparer le haut et le bas du fuselage pour accéder au récepteur/variateur ESC. -
Page 50: Vérifications À Effectuer Après Le Vol
Vérifications à effectuer après le vol 4. Rechargez la batterie. 1. Débranchez la batterie (Par sécurité et pour la longévité de la batterie). 5. Stockez précieusement la batterie hors de l’avion. 2. Mettez l’émetteur hors tension. 6. Notez les conditions de vol et planifiez vos 3. -
Page 51: Guide De Dépannage
Guide de dépannage AS3X Problème Cause Possible Solution Les gouvernes ne sont Les tringleries n’ont pas été correctement Effectuez un réglage mécanique en serrant ou pas au neutre alors que réglées à l’usine desserrant les “U” des tringleries les manches le sont L’avion a été... -
Page 52: Guide De Dépannage (Suite)
Garantie et réparations Durée de la garantie achetés chez un revendeur Horizon agréé. Les Garantie exclusive - Horizon Hobby, LLC (Horizon) ventes faites à des tiers ne sont pas couvertes garantit que le Produit acheté (le « Produit ») sera par cette garantie. - Page 53 émanant d’un revendeur spécialisé agréé, sur vant en résulter. Horizon Hobby ne saurait être tenu laquelle figurent le nom de l’acheteur ainsi que la responsable d’une utilisation ne respectant pas les date d’achat.
-
Page 54: Coordonnées De Garantie Et Réparations
électriques et électroniques (DEEE). Cette sortie sans fil: étiquette indique que ce produit ne doit pas UMX A-10 Thunderbolt II EDF (EFLU6550): être jeté avec les déchets ménagers, mais déposé dans une installation appropriée afin de permettre sa 2404-2476 MHz récupération et son recyclage. -
Page 55: Precauzioni Per La Sicurezza E Avvertimenti
Istruzioni, garanzie e tutti gli altri documenti accessori sono soggetti a modifiche a totale discrezione di Horizon Hobby, LLC. Per avere la documentazione aggiornata sul prodotto, visitare il sito Web www. horizonhobby.com e fare clic sulla scheda “support” per questo prodotto. -
Page 56: Necessario Per Completare
Indice Configurazione del trasmettitore ......57 Consigli per il volo e riparazioni ......64 Suggerimenti per il volo con SAFE® Select ..65 Binding del trasmettitore e del ricevitore .....57 Telemetria integrata ..........57 Manutenzione del motore ........66 Elenco di controllo dopo il volo ......67 Attivazione dell’ESC/ricevente, installazione della Parti di ricambio ..........67 batteria e baricentro ..........58... -
Page 57: Configurazione Del Trasmettitore
Configurazione del trasmettitore IMPORTANTE. Dopo avere impostato il modello, ripetere Impostazione trasmittente digitale sempre il collegamento tra trasmittente e ricevitore per Serie DX, Serie NX, Serie iX determinare le posizioni failsafe desiderate. Iniziare la programmazione della trasmittente con una Se la trasmittente lo consente, attivare la funzione di taglio memoria vuota di un modello ACRO (eseguire un reset), gas. -
Page 58: Attivazione Dell'esc/Ricevente, Installazione Della Batteria E Baricentro
Attivazione dell’ESC/ricevente, installazione della batteria e bari- centro AVVISO: tenere sempre materiali e detriti lontano dalla presa d’aria. Quando armato, il rotore gira in risposta al movimento dello stick del gas e può ingerire oggetti. Lo UMX A-10 richiede una batteria 3S 850 mAh LiPo con connettore IC2 o EC2 (SPMX8503S30 consigliata). -
Page 59: Tecnologia Safe Select
Tecnologia SAFE Select Quando il sistema SAFE Select è attivato, le limitazioni di inclinazione e beccheggio impediscono un controllo eccessivo sul velivolo. Inoltre, rilasciando i comandi nel caso in cui si perda l’orientamento, il SAFE Select manterrà stabile l’aeromodello. Per attivare il SAFE Select, posizionare l’interruttore del canale Gear in posizione 0. -
Page 60: Test Di Controllo
Test di controllo Prima del primo volo, o in caso di incidente, bisogna assicurarsi che le superfici di controllo di volo siano centrate. Regolare i giunti meccanicamente se le superfici di controllo non sono centrate. Usare i sub-trim del trasmettitore potrebbe non accentrare correttamente le superfici di controllo del velivolo a causa dei limiti meccanici dei servo lineari. -
Page 61: Rimozione Del Carrello D'atterraggio
Rimozione del carrello d’atterraggio Il carrello di atterraggio può essere lasciato montato oppure rimosso, se il campo di involo lo consente. Si consiglia di utilizzare il carrello di atterraggio quando si decolla e atterra su superfici lisce. Se il campo di volo è... -
Page 62: Verifica Della Direzione Dei Comandi
Verifica della direzione dei comandi Prima di fare questa verifica bisogna Comandi della Reazioni dell’aereo connettere (bind) l’aereo alla trasmittente. trasmittente Muovere i comandi della trasmittente per Elevatore accertarsi che le superfici di controllo in basso dell’aereo si muovano nel verso giusto. Controllare che le aste di comando in coda si muovano liberamente e che la vernice o gli adesivi non aderiscano su di esse... -
Page 63: Verifica Delle Reazioni Dell'as3X
Verifica delle reazioni dell’AS3X Prima di fare questa verifica bisogna Aircraft AS3X Reaction connettere (bind) l’aereo alla trasmittente. movement Muovere i comandi della trasmittente per accertarsi che le superfici di controllo dell’aereo si muovano correttamente nel verso giusto. Controllare che le aste di comando in coda si muovano liberamente e che la vernice o gli adesivi non aderiscano su di esse. -
Page 64: Consigli Per Il Volo E Riparazioni
Consigli per il volo e riparazioni Prova di portata del radiocomando verso l’alto. Salire gradualmente per provare il trimmaggio. Una volta regolati i trim, si può iniziare Dopo aver terminato l’assemblaggio, occorre fare una a esplorare l’inviluppo di volo dell’aereo. prova di portata del radiocomando con l’aereo montato. -
Page 65: Suggerimenti Per Il Volo Con Safe® Select
Suggerimenti per il volo con SAFE® Select In modalità SAFE Select, l’aereo riprende a volare in volo livellato ogni volta che i comandi di equilibratore e alettoni sono in posizione neutra. L’azionamento di alettoni o equilibratore porta il velivolo a inclinarsi, cabrare o picchiare. -
Page 66: Manutenzione Del Motore
Manutenzione del motore Smontaggio ATTENZIONE: NON maneggiare rotore o motore se la batteria è collegata. Rischio di lesioni. Per accedere ai connettori del motore è necessario separare la parte superiore e inferiore della fusoliera in modo da accedere al ricevitore/ESC. Le parti superiore e inferiore della fusoliera sono fissate con colla e nastro adesivo trasparente. -
Page 67: Elenco Di Controllo Dopo Il Volo
Elenco di controllo dopo il volo 1. Scollegare la batteria di volo dal controllo 5. Conservare la batteria di volo separatamente elettronico di velocità (ESC) (operazione dal velivolo e monitorare la carica della bat- obbligatoria per la sicurezza e la durata della teria. -
Page 68: Guida Alla Risoluzione Dei Problemi
Guida alla risoluzione dei problemi AS3X Problema Possibile causa Soluzione Le superfici di con- Le superfici di controllo non sono state ben Centrare meccanicamente le superfici di trollo non sono al centro centrate in fabbrica controllo regolando le piegature a U sulle aste mentre i comandi della dei comandi trasmittente lo sono... -
Page 69: Guida Alla Soluzione Dei Problemi (Continua)
Periodo di garanzia transazioni di terze parti non sono coperte da questa garanzia. La prova di acquisto è Garanzia esclusiva - Horizon Hobby, LLC, (Horizon) necessaria per far valere il diritto di garanzia. garantisce che i prodotti acquistati (il “Prodotto”) - Page 70 Questa decisione combinazioni di vari prodotti. Quindi Horizon non spetta esclusivamente a Horizon Hobby. accetta nessuna responsabilità per danni o lesioni derivanti da tali circostanze. Con l’utilizzo e il Riparazioni a pagamento montaggio del prodotto l’utente acconsente a tutte...
-
Page 71: Contatti Per La Garanzia E L'assistenza
Horizon Hobby, LLC UMX A-10 Thunderbolt II EDF (EFLU6550) Con la presente, 2904 Research Road Horizon Hobby, LLC dichiara che il dispositivo è Champaign, IL 61822 USA conforme a quanto segue: Direttiva europea sulle Importatore ufficiale dell’UE: apparecchiature radio (RED) 2014/53/UE;... - Page 72 © 2021 Horizon Hobby, LLC. E-flite, AS3X, UMX, DSM, DSM2, DSMX, ModelMatch, Bind-N-Fly, EC2, IC2, IC3 and the Horizon Hobby logo are trademarks or registered trademarks of Horizon Hobby, LLC. The Spektrum trademark is used with permission of Bachmann Industries, Inc.