JVC MX-KC45 Manuel D'instructions

Manuels Connexes pour JVC MX-KC45


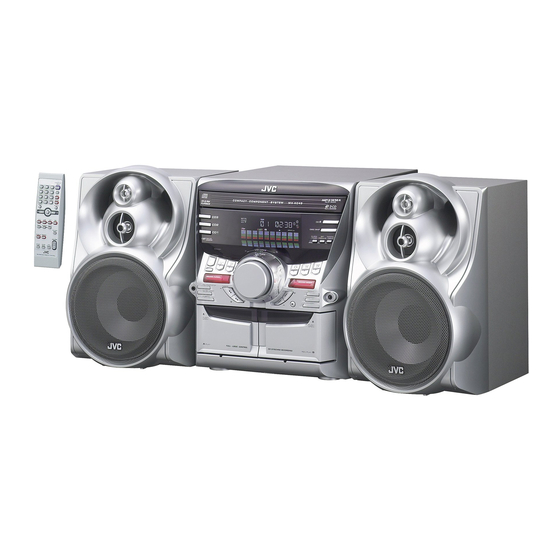
Sommaire des Matières pour JVC MX-KC45
-
Page 30: Structure Du Manuel
• La fonction COMPU PLAY de JVC permet de mettre le système sous tension et d'allumer automatiquement la radio, la platine à cassette ou le lecteur CD en enfonçant une seule touche. - Page 31 Table des matières Introduction ........................1 Fonctions ..............................1 Structure du manuel..........................1 PRECAUTIONS IMPORTANTES......................1 Table des matières ......................2 Introduction ........................3 Accessoires .............................. 3 Comment insérer les piles dans la télécommande ................... 3 Utilisation de la télécommande ....................... 3 Raccordement de l’antenne FM....................... 4 Branchement de l’antenne AM........................
-
Page 32: Introduction
Introduction Accessoires Vérifier si vous avez bien reçu tous les éléments suivants, livrés avec le système. Antenne cadre AM (1) Fil d'antenne FM (1) Télécommande (1) Piles (2) Si un de ces éléments devait manquer, contacter immédiatement le revendeur. Comment insérer les piles dans la télécommande Faire correspondre la polarité... -
Page 33: Raccordement De L'antenne Fm
Introduction ATTENTION: • Effectuer tous les branchements avant de raccorder le système à une prise secteur. Raccordement de l’antenne FM Utilisation du fil d’antenne livré Fil d’antenne FM Utilisation d’un connecteur coaxial (non livré) Brancher une antenne de 75 Ω munie d’un connecteur coaxial (IEC ou DIN45 325) à la borne COAXIAL FM de 75 Ω. Si la réception est mauvaise, raccorder une antenne externe. -
Page 34: Branchement De L'antenne Am
Introduction Branchement de l’antenne AM Dos de l’appareil Fil d’antenne AM (non livré) Si la réception est mauvaise, raccorder une antenne externe. Tourner le cadre pour avoir la meilleure réception possible. Antenne cadre AM (livrée) Fixer le cadre AM à son socle en insérant à fond les languettes du cadre dans la fente du socle. -
Page 35: Raccordement À Une Prise Secteur
CANCEL sur l'appareil pendant l'affichage DEMO. COMPU PLAY La fonction COMPU PLAY de JVC permet de contrôler les fonctions de le système le plus souvent utilisées en appuyant sur une seule touche. Ces opérations à une touche permettent d'écouter un CD, une cassette, d'allumer la radio ou d'écouter un équipement externe en appuyant simplement sur la touche de lecture correspondant à... -
Page 36: Opérations De Base
Opérations de base STANDBY/ON Affichage Touches Indicateur de veille numériques STANDBY (STANDBY/ON) SOUND MODE DISPLAY SOUND TURBO VOLUME PHONES SOUND VOLUME +, – Informations diverses TURBO FADE MUTING SOUND MODE Indicateur de Indicateur Sound Turbo SOUND MODE Barre de niveau Barre d'état (indique les différents états de fonctionnement.) * Lors de l'utilisation de le système, l'affichage indique également d'autres informations. - Page 37 Opérations de base Réglage du volume Sélection du mode son (SOUND MODE) Tourner la commande VOLUME de l'appareil dans le sens hor- logique pour augmenter le volume ou dans le sens anti-horlogique Vous pouvez choisir parmi trois modes SEA (amplificateurs d'ef- pour le diminuer.
-
Page 38: Utilisation Du Tuner
Utilisation du tuner Touches numériques FM/AM FM/AM FM MODE ¢ Á Á Affichage de bande, affichage de fréquence, station présélectionnée Indicateurs du mode FM * Lors de l'utilisation de le système, l'affichage indique également d'autres informations. Par souci de simplicité, nous ne montrons ici que les éléments décrits dans cette section. Vous pouvez écouter des émetteurs radio en FM et en AM. -
Page 39: Présélection Des Stations
Utilisation du tuner • En mode d'émission AM, vous pouvez changer la sensi- • Au point 4, vous pouvez sélectionner le numéro de bilité de la réception en tournant l'antenne cadre AM. présélection à l'aide des touches numériques de la télé- Tourner l'antenne cadre AM de manière à... -
Page 40: Utilisation Du Lecteur Cd
Utilisation du lecteur CD CD Ouvrir/ Fermer 0 DISC SKIP CD1-CD3 CANCEL Touches SET/RESUME numériques CD 6 ¢ REPEAT PROGRAM RANDOM ¢ Á CD1-CD3 CD 6 REPEAT RANDOM MP3/WMA PROGRAM MODE Numéro de plage, temps de lec- Indicateur ture, numéro du programme, etc. Indicateur MP3 Indicateur Programm Indicateurs de disque... -
Page 41: Pour Charger Des Cd
Utilisation du lecteur CD ❏ Lors de l'utilisation d'un CD de 8 cm, le placer sur le cercle in- Au sujet de l'indicateur du disque: térieur du tiroir. Indicateur de ro- Indicateur du ❏ Vous pouvez charger des CD pendant que vous écoutez une autre tation du disque numéro du disque source, ou pendant que vous écoutez le CD en cours de lecture. -
Page 42: Notions De Base Pour L'utilisation Du Lecteur Cd - Lecture Normale
Utilisation du lecteur CD Mode GROUP Notions de base pour l'utilisation du lecteur CD - Lecture normale Total du nombre de plages Pour écouter les CD Total du nombre de groupes Pour marquer une pause, appuyer sur la touche CD 6. L'in- Charger les CD. -
Page 43: Reprendre La Lecture Du Cd Audio Et Du Disque Mp3/Wma
Utilisation du lecteur CD Appuyer sur une des touches de disques Reprendre la lecture du CD audio (CD1-CD3) pour sélectionner le disque que et du disque MP3/WMA vous voulez écouter. L'affichage d'entrée de programme apparaît. Il est possible d’enregistrer le point où la lecture de la plage a été arrêtée. -
Page 44: Répétition Des Plages
Utilisation du lecteur CD Pour écouter le programme créé Répétition des plages Appuyer sur la touche CD 6. Le système lit les plages dans l'ordre où vous les avez program- Vous pouvez répéter toutes les plages ou une plage individuelle mées. -
Page 45: Utilisation De La Platine À Cassette (Écoute D'une Cassette)
Utilisation de la platine à cassette (écoute d'une cassette) TAPE B 3 TAPE A 3 ¢ Á 0 PUSH OPEN 0 PUSH OPEN (Platine B) (Platine A) TAPE B TAPE A 3: Indicateur de cassette Indicateurs de platine * Lors de l'utilisation de le système, l'affichage indique également d'autres informations. Par souci de simplicité, nous ne montrons ici que les éléments décrits dans cette section. -
Page 46: Utilisation De La Platine À Cassette (Enregistrement)
Utilisation de la platine à cassette (enregistrement) TAPE B 3 TAPE A 3 REC START/STOP CD REC START PROGRAM DUBBING 0 PUSH OPEN 0 PUSH OPEN (Platine B) (Platine A) TAPE B TAPE A 3: Indicateur de cassette Indicateurs de platine Indicateur d'enregistrement REC * Lors de l'utilisation de le système, l'affichage indique également d'autres informations. -
Page 47: Enregistrement Normal
Utilisation de la platine à cassette (enregistrement) Appuyer sur la touche CD REC START de Enregistrement normal l'appareil. L'indication “CD REC” s'affiche et l'indicateur “REC” s'al- Pour enregistrer n'importe quelle source sonore lume. Le système démarre ensuite l'enregistrement de CD syn- chronisé... -
Page 48: Branchement D'équipements Externes
Branchement d'équipements externes Jack AUX Ecoute d'équipements externes Vous pouvez écouter des équipements externes tels qu'un CD por- tatif, une platine MD, un STB ou d'autres équipements annexes. ❏ Vérifier tout d'abord si l'équipement externe est correctement raccordé à le système. (Voir page 6.) Régler le niveau de volume sur le minimum. -
Page 49: Utilisation Des Minuteries
Utilisation des minuteries SLEEP CLOCK/TIMER ¢ Indicateur de minuterie DAILY (QUOTIDIENNE) Indicateur SLEEP (BONSOIR) Indicateur de minuterie REC (Enregistrement) Indicateur de la minuterie * Lors de l'utilisation de le système, l'affichage indique également d'autres informations. Par souci de simplicité, nous ne montrons ici que les éléments décrits dans cette section. Trois types de minuteries sont disponibles: Correction du temps d'horloge La minuterie DAILY (QUOTIDIENNE) -
Page 50: Réglage De La Minuterie Quotidienne
Utilisation des minuteries 2. Appuyer sur les touches ¢ ou 4 pour régler les minutes Réglage de la minuterie quotidienne puis appuyer sur SET. Lorsque vous avez programmé la minuterie quotidienne, sa pro- grammation est mémorisée et elle s'activera automatiquement tous les jours à... -
Page 51: Appuyer De Manière Répétitive Sur La Touche
Utilisation des minuteries Lorsque vous sélectionnez CD: Pour annuler provisoirement la minuterie quotidienne: Appuyer sur les touches ¢ ou 4 pour sélectionner le Appuyer sur la touche CLOCK/TIMER jusqu'à numéro de disque puis appuyer sur SET. Chaque fois que vous appuyez sur la touche, le numéro de ce que l'indication “DAILY”... - Page 52 Utilisation des minuteries Sur l'appareil Appuyer sur la touche SET. Vous pouvez programmer l'heure comme pour la minuterie quotidienne. Le réglage de la minuterie est terminé et l'affichage revient à l'affichage initial avant que vous ayez réglé la minuterie. Insérer une cassette vierge ou effaçable dans la platine B et bobiner l'amorce.
-
Page 53: Programmation De La Minuterie Sleep
Utilisation des minuteries Programmation de la minuterie Priorité des minuteries SLEEP Etant donné que la minuterie REC et la minuterie DAILY peuvent être réglées séparément, vous pouvez vous demander ce qui se Utiliser la minuterie Bonsoir pour éteindre le système après un cer- passera en cas de chevauchement des réglages. -
Page 54: Nettoyage Et Entretien
Nettoyage et entretien Manipuler vos CD et vos cassettes avec grand soin, pour qu'ils du- Cassettes rent plus longtemps. Disques compacts • Si la bande n'est pas suffisamment ten- due dans la cassette, retendez-la en fai- sant tourner un crayon inséré dans un •... -
Page 55: Guide De Dépannage
Guide de dépannage • Si vous avez des problèmes avec votre système, vérifier la liste ci-dessous en vue d'y trouver une solution éventuelle avant d'appeler le service technique. • Si vous ne parvenez pas à résoudre les problèmes après avoir examiné les conseils donnés ou si le système est physiquement endommagée, appeler du personnel qualifié, comme votre revendeur, pour une intervention technique.