Publicité

Les langues disponibles
  • FR

Les langues disponibles

  • FRANÇAIS, page 14

Liens rapides

DO7288S
Handleiding
Mode d'emploi
Gebrauchsanleitung
Instruction booklet
Manual de instrucciones
Návod k použití
Návod na použitie
Robotstofzuiger
Aspirateur robot
Robotstaubsauger
Robot vacuum cleaner
Robot aspirador
Robotickývysavač
Robtickývysávač
PRODUCT OF

Publicité

Table des Matières
loading

Sommaire des Matières pour Linea 2000 DOMO Série

  • Page 1 DO7288S Handleiding Robotstofzuiger Mode d’emploi Aspirateur robot Gebrauchsanleitung Robotstaubsauger Instruction booklet Robot vacuum cleaner Manual de instrucciones Robot aspirador Návod k použití Robotickývysavač Návod na použitie Robtickývysávač PRODUCT OF...
  • Page 2 Lees aandachtig alle instructies - bewaar deze handleiding voor latere raadpleging. Lisez attentivement les instructions - gardez le mode d’emploi pour utilisation ultérieur. Lesen Sie genau die Anweisungen - bewahren Sie die Gebrauchsanleitung für spätere heranziehung. Read all instructions carefully - save this instruction manual for future reference. Lea detenidamente todas las instrucciones - Conserve este manual para futura referencia.
  • Page 3: Garantie

    GARANTIE Geachte klant, Al onze producten ondergaan steeds een strenge kwaliteitscontrole, alvorens ze aan je worden aangeboden. Mocht je desondanks toch nog problemen hebben met jouw toestel, dan betreuren wij dit ten zeerste. In dat geval verzoeken wij je contact op te nemen met onze klantendienst. Onze medewerkers zullen je met plezier verder helpen.
  • Page 4: Veiligheidsvoorschriften

    VEILIGHEIDSVOORSCHRIFTEN · Lees alle instructies voor gebruik. · Dit toestel mag gebruikt worden door kinderen vanaf 16 jaar en ouder, en door personen met een fysieke of sensoriële beperking of mensen met een beperkte mentale capaciteit of gebrek aan ervaring of kennis, op voorwaarde dat deze personen toezicht krijgen of instructies hebben gekregen over het gebruik van het toestel op een veilige manier en dat ze ook de gevaren kennen bij het gebruik van het toestel.
  • Page 5 · Gebruik het toestel enkel voor het doel waarvoor het bestemd is. · Gebruik het toestel altijd op een stevig, droog, effen oppervlak. · Gebruik het toestel alleen voor huishoudelijk gebruik. De fabrikant is niet verantwoordelijk voor ongelukken die een gevolg zijn van verkeerd gebruik van het toestel, of het niet naleven van de regels zoals ze vermeld zijn in deze handleiding.
  • Page 6 ONDERDELEN Apparaat Laadstation Afstandsbediening Adapter Stofborstel Zijborstel Stoffilter HEPA Apparaat Bovenkant: Infrarood ontvanger Bumper 10. Touchscreenknop aan/uit 11. Knop voor het openen van het stofopvangbakje 12. Aan-uitschakelaar Onderkant: 13. Knoopcel batterij voor interne klok 14. Zijborstels 15. UV lamp 16. Aanzuiging 17.
  • Page 7: Voor Het Eerste Gebruik

    VOOR HET EERSTE GEBRUIK · Plaats twee AAA-batterijen in de afstandsbediening. Stel de klok in (zie “gebruik met afstandsbediening/CLK: klok”) · Laad de robotstofzuiger gedurende 12 uur op voor het eerste gebruik. · Plaats de zijborstels op de stofzuiger. Duw ze vast tot je een klik hoort. Op de borstel en het toestel staat de L (links) en R (rechts), zorg ervoor dat deze overeenkomen.
  • Page 8: Gebruik Met Afstandsbediening

    Het toestel gaat automatisch in slaapstand na 15 minuten in standby-modus. Je kan de slaapstand ook zelf inschakelen door de aan/uit touchscreenknop op het toestel 3 seconden in te houden. Je kan het toestel volledig uitschakelen door in de standby-modus de aan-uitschakelaar aan de zijkant van het toestel op uit te zetten.
  • Page 9 · De minuten op het display beginnen te knipperen. Stel de minuten in met de pijltjes omhoog en omlaag. Je kan deze instellen op :00 of :30. Druk op het pijltje naar rechts om te bevestigen. · Druk op de ON/OFF-knop om te instelling te bewaren. ·...
  • Page 10 Op het display kan je de gekozen modus aflezen: · MODE 1: spiraal De stofzuiger beweegt voort in een spiraalvorm. · MODE 2: automatisch De stofzuiger zal zelf een pad uitstippelen om de hele ruimte te stofzuigen, rekening houdend met muren, obstakels en trappen. ·...
  • Page 11 · De minuten op het display beginnen te knipperen. Stel de minuten in met de pijltjes omhoog en omlaag. Druk op het pijltje naar rechts om te bevestigen. · De dag op het display begint te knipperen. Stel de dag in met het pijltje naar rechts. Druk op CLK-knop om te bevestigen.
  • Page 12: Reiniging En Onderhoud

    · Indicatielampje verandert continue van rood naar blauw: het toestel is aan het laden. REINIGING EN ONDERHOUD REINIGING STOFOPVANGBAKJE EN FILTERS Reinig het stofopvangbakje en de filters na ieder gebruik op volgende wijze: Druk op de knop voor het openen van het stofopvangbakje met PUSH-aanduiding. Neem het stofopvangbakje uit het toestel.
  • Page 13 de borstels is ongeveer 12 maanden. Op de borstel en het toestel staat de L (links) en R (rechts), zorg ervoor dat deze overeenkomen. · Dompel het toestel nooit onder in water. · De sensoren mogen niet nat gemaakt worden. MILIEURICHTLIJNEN Dit symbool op het product of op de verpakking wijst erop dat dit product niet als huishoudafval mag worden behandeld.
  • Page 14 GARANTIE Cher client, Tous nos produits sont soumis à des contrôles qualité stricts avant d’être proposés à la vente. Si vous deviez toutefois rencontrer un problème avec votre appareil, nous le déplorons vivement. Dans ce cas, nous vous invitons à prendre contact avec notre service à la clientèle. Nos collaboratrices se feront un plaisir de vous aider ! +32 14 21 71 91 info@linea2000.be...
  • Page 15: Consignes De Sécurité

    CONSIGNES DE SÉCURITÉ · Veuillez lire toutes les instructions avant d’utiliser l’appareil. · Cet appareil peut être utilisé par des enfants âgés d’au moins 16 ans et par des personnes ayant des capacités physiques, sensorielles ou mentales réduites ou dénuées d’expérience ou de connaissance, s’ils (si elles) sont correctement surveillé(e)s ou si des instructions relatives à...
  • Page 16 responsabilité pour des accidents qui découleraient d’un mauvais usage de l’appareil ou du non-respect des instructions fournies dans ce manuel. · Toutes les réparations, en dehors de l’entretien ordinaire de l’appareil, doivent être réalisées par le fabricant ou son service après-vente. ·...
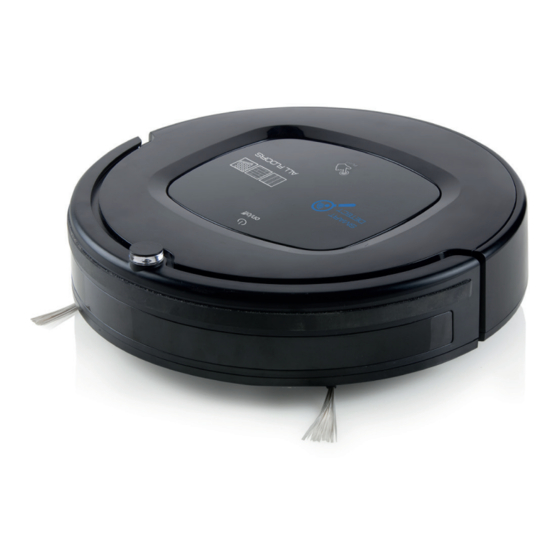
  • Page 17 PARTIES Appareil Station de charge Télécommande Adaptateur Brosse nettoyante Brosse latérale Filtre HEPA Appareil Partie supérieure: Récepteur infrarouge Pare-chocs 10. Touche marche/arrêt sur l’écran tactile 11. Bouton pour ouvrir le réservoir à poussière 12. Interrupteur allumé/éteint Partie inférieure: 13. Pile bouton pour l’horloge interne 14.
  • Page 18: Avant La Première Utilisation

    AVANT LA PREMIÈRE UTILISATION · Insérez deux piles AAA dans la télécommande. Réglez l’horloge (voir « Utilisation avec télécommande/CLK : horloge »). · Avant la première utilisation, chargez l’aspirateur robot pendant 12 heures. · Installez les brosses latérales sur l’aspirateur. Appuyez jusqu’à la perception d’un déclic. Assurez-vous que le L (gauche) et le R (droite) de la brosse et de l’appareil soient bien placés en regard.
  • Page 19: Utilisation Sans Télécommande

    L’appareil passe automatiquement en mode veille prolongée après 15 minutes en mode veille. Vous pouvez également activer le mode veille prolongée en maintenant la touche marche/ arrêt de l’écran tactile enfoncée pendant 3 secondes. Arrêt Pour éteindre complètement l’appareil en mode veille, appuyez sur le bouton marche/arrêt situé...
  • Page 20 · Le champ des minutes commence à clignoter à l’écran. Réglez les minutes en appuyant sur les flèches haut et bas. Vous avez le choix entre :00 ou :30. Appuyez sur la flèche droite pour confirmer. · Appuyez ensuite sur la touche ON/OFF pour enregistrer la programmation. ·...
  • Page 21 L’écran affiche le mode sélectionné : MODE 1 : spirale L’aspirateur se déplace en spirale. MODE 2 : automatique L’aspirateur définit lui-même un trajet, et nettoie ainsi toute la surface en tenant compte des murs, des obstacles et des marches. MODE 3 : coins L’aspirateur longe les murs et nettoie les coins.
  • Page 22 L’écran affiche les abréviations suivantes : · SUN : dimanche · MON : lundi · TUE : mardi · WED : mercredi · THU : jeudi · FRI : vendredi · SAT : samedi SPOT : nettoyage sur place · Lorsque le programme automatique est activé, vous pouvez appuyer sur le bouton SPOT pour nettoyer des surfaces plus sales.
  • Page 23: Nettoyage Et Entretien

    NETTOYAGE ET ENTRETIEN NETTOYAGE DU COLLECTEUR DE POUSSIÈRE ET DES FILTRES Nettoyez le collecteur de poussière et les filtres après chaque utilisation. Pour ce faire, suivez la procédure suivante : Appuyez sur le bouton PUSH pour ouvrir le collecteur de poussière. Enlevez ce dernier de l’appareil.
  • Page 24: Mise Au Rebut

    MISE AU REBUT Ce symbole sur le produit ou son emballage indique que ce produit ne peut être traité comme déchet ménager. Il doit plutôt être remis au point de ramassage concerné, se chargeant du recyclage du matériel électrique et électronique.
  • Page 25 GARANTIE Sehr geehrter Kunde, Sämtliche unserer Produkte unterliegen einer strengen Qualitätskontrolle, bevor Sie Ihnen angeboten werden. Sollten dennoch Probleme mit Ihrem Gerät auftreten, bedauern wir dies zutiefst. Wir möchten Sie in diesem Fall bitten, unseren Kundenservice zu kontaktieren. Unsere Mitarbeiter helfen Ihnen gern weiter! +32 14 21 71 91 info@linea2000.be Montag –...
  • Page 26: Sicherheitsvorkehrungen

    SICHERHEITSVORKEHRUNGEN · Bitte alle Anweisungen vor dem Gebrauch durchlesen. · Dieses Gerät darf von Kindern ab 16 Jahren oder älter gebraucht werden. Ebenso dürfen Personen mit körperlicher bzw. leichter geistiger Behinderung sowie Personen mit eingeschränkter Erfahrung das Gerät betätigen. Dies unter der Voraussetzung, dass diese Personen ausreichende Anweisungen sowohl zum Gebrauch des Gerätes, als auch zu den hiermit verbundenen Gefahren erhalten haben.
  • Page 27 · Benutzen Sie das Gerät ausschließlich für den Zweck, für den es gedacht ist. · Stellen Sie das Gerät immer auf eine stabile, flache und trockene Oberfläche. · Das Gerät ist nur auf den privaten Gebrauch ausgelegt. Der Hersteller ist nicht verantwortlich für Unfälle, die als Folge von unsachgemäßem Gebrauch des Geräts oder Nichtbefolgen der in dieser Anleitung aufgeführten Regeln entstehen.
  • Page 28 TEILE Gerät Ladestation Fernbedienung Adapter Staubbürste Seitenbürste HEPA-Filter Gerät Oberseite: Infrarotempfänger Dämpfer 10. Touchscreen-Taste Ein/Aus 11. Knopf zum Öffnen des Staubsammelbehälters 12. Ein-/Ausschalter Unterseite: 13. Knopfzelle für interne Uhr 14. Seitenbürste 15. UV-Lampe 16. Ansaugung 17. Batteriefach 18. Anschluss für das Laden des Akkus Staubsammelbehälter 19.
  • Page 29: Installation Der Ladestation

    VOR DER ERSTEN INBETRIEBNAHME · Legen Sie zwei AAA-Batterien in die Fernbedienung ein. Stellen Sie die Uhrzeit ein (siehe „Benutzung mit Fernbedienung/CLK: Uhrzeit“) · Laden Sie den Saugroboter vor der ersten Verwendung 12 Stunden lang auf. · Stecken Sie die Seitenbürsten auf den Staubsauger. Drücken Sie sie herunter, bis Sie ein Klickgeräusch hören.
  • Page 30 drücken bzw. mit der ON/OFF-Taste auf der Fernbedienung. Das Gerät wird nach 15 Minuten im Standby-Modus automatisch in den Energiesparmodus versetzt.. Sie können den Energiesparmodus auch selbst aktivieren, indem Sie die Ein-Aus- Touchscreen-Taste 3 Sekunden lang gedrückt halten. Sie können das Gerät vollständig ausschalten, indem Sie im Standby-Modus den Ein-/Aus- Schalter an der Seite des Geräts auf Aus stellen.
  • Page 31 · Halten Sie die PLAN-Taste 5 Sekunden lang gedrückt. · Auf dem Display blinken jetzt die Stunden. Stellen Sie die Stunden ein, indem Sie die Pfeile „nach oben“ und „nach unten“ betätigen. Drücken Sie zur Bestätigung auf den Pfeil „nach rechts“.
  • Page 32 Auf dem Display können Sie den gewählten Modus ablesen: · MODE 1: Spirale Der Staubsauger macht eine spiralförmige Bewegung. · MODE 2: automatisch Der Staubsauger wird selbst einen Streckenverlauf berechnen, um den gesamten Raum unter Berücksichtigung von Wänden, Hindernissen und Treppen Staub zu saugen.
  • Page 33 · Auf dem Display blinkt jetzt der Tag. Stellen Sie den Tag mit dem Pfeil „nach rechts“ ein. Drücken Sie zur Bestätigung auf die CLK-Taste. Auf dem Display sind die folgenden Abkürzungen zu sehen: · SUN: Sonntag · MON: Montag ·...
  • Page 34: Reinigung Und Wartung

    · Kontrollleuchte wechselt ständig zwischen Rot und Blau: das Gerät wird aufgeladen. REINIGUNG UND WARTUNG REINIGUNG VON STAUBBEHÄLTER UND FILTERN Reinigen Sie den Staubbehälter und die Filter nach jeder Benutzung folgendermaßen: Drücken Sie auf die mit PUSH gekennzeichnete Taste zum Öffnen des Staubbehälters. Nehmen Sie den Staubbehälter aus dem Gerät.
  • Page 35 L (links) und R (rechts) versehen. Stecken Sie die jeweilige Bürste auf die zugehörige Staubsaugerseite. · Tauchen Sie das Gerät auf keinen Fall in Wasser ein. · Die Sensoren dürfen nicht nass werden. ENTSORGEN Dieses Symbol auf dem Produkt oder seiner Verpackung weist darauf hin, dass dieses Produkt nicht als normaler Haushaltsabfall zu behandeln ist, sondern an einem Sammelpunkt für das Recyling von elektrischen und...
  • Page 36 WARRANTY Dear client , All of our products are always submitted to a strict quality control before they are sold to you. Should you nevertheless experience problems with your device, we sincerely regret this. In that case, we kindly request you to contact our customer service. Our staff will gladly assist you.
  • Page 37: Safety Instructions

    SAFETY INSTRUCTIONS · Read all instructions before use. · This appliance may be used by children from the age of 16 and up, and also by persons with a physical or sensorly limitation, as well as mentally limited persons or persons with a lack of experience and knowledge.
  • Page 38 · Never immerse the appliance, the cord or the plug in water or any other liquid. · Make sure that children do not touch the cord or appliance. · Keep the cord away from sharp edges and hot parts or other heat sources. ·...
  • Page 39 PARTS Appliance Charging station Remote control Adapter Cleaning brush Side brushes HEPA filter Appliance Top: Infrared receiver Bumper 10. Touch screen button on/off 11. Button for opening the dust bin 12. On/Off switch Bottom: 13. Button cell battery for internal clock 14.
  • Page 40: Before The First Use

    BEFORE THE FIRST USE · Put two AAA batteries in the remote control. Set the time (see “use with remote control/ CLK: clock”) · Prior to initial use, charge the robot vacuum cleaner for 12 hours. · Place the signed brushes on the vacuum cleaner. Press on them until you hear a click. The brushes and the machine are marked with L (left) and R (right);...
  • Page 41 You can turn off the machine completely by switching off the on switch on the side of the device while in standby mode. The machine turns itself off after being in sleep mode for 15 minutes if no timer has been set. USE WITHOUT REMOTE CONTROL Press on the on/off touchscreen button for automatic cleaning.
  • Page 42 begin vacuuming every day at 3:30 PM. The timer can be turned off by resetting it, setting the time at 00:00. You will hear a confirmation: “no scheduling”. Note: if the vacuum cleaner is turned off with the on switch, the machine will not vacuum at the time set.
  • Page 43 · MODE 2: automatic The vacuum cleaner will plot its own path to vacuum the entire area, taking walls, obstacles and stairs into account. · MODE 3: corners The vacuum cleaner will go along the walls and clean the corners as well. ·...
  • Page 44 SPOT: local cleaning · During the automatic program, it is possible to push the SPOT button to clean dirtier areas. The robot vacuum cleaner will clean that area intensively. · After +/- 90 seconds, the vacuum cleaner will automatically stop SPOT cleaning. It can also be stopped by pressing the SPOT button once again.
  • Page 45: Cleaning And Maintenance

    CLEANING AND MAINTENANCE CLEANING DUST COLLECTION COMPARTMENTS AND FILTERS Clean the dust collection compartment and the filters after each use in the following manner: Press the PUSH button to open the dust collection compartment. Remove the dust collection compartment from the machine. Remove the HEPA filter, including holder, from the dust collection compartment.
  • Page 46 ENVIRONMENTAL GUIDELINES This symbol on the product or on its packaging indicates that this product may not be treated as household waste. Instead it must be brought to the applicable collection point for recycling of electrical and electronic equipment. By ensuring this product is disposed of correctly, you will help prevent potential negative consequences for the environment and human health, which could otherwise be caused by...
  • Page 47 GARANTIA Este aparato tiene un periodo de garantía de 2 años a partir de la fecha de compra. Durante el periodo de garantía, el distribuidor será completamente responsable de los defectos directamente asignables a errores del material y fabricación. Cuando se detecten este tipo de errores, y siempre que se estime necesario, el aparato se sustituirá...
  • Page 48: Instrucciones De Seguridad

    INSTRUCCIONES DE SEGURIDAD · Lea todas las instrucciones antes del uso. · Este aparato está diseñado para ser utilizado por niños a partir de 16 años de edad y por personas con discapacidades físicas, sensoriales o mentales, o por personas que no dispongan de suficiente experiencia y conocimientos, a no ser que sean supervisados o instruidos inicialmente en la utilización segura del aparato y los posibles peligros.
  • Page 49 · Utilice el aparato sólo para uso doméstico. El fabricante no es responsable de los accidentes que resulten del uso incorrecto del aparato, ni del incumplimiento de las normas establecidas en este manual. · Todas las reparaciones aparte del mantenimiento ordinario de la unidad deben ser efectuadas por el fabricante o por su servicio post-venta.
  • Page 50 PIEZAS Aparato Estación de carga Mando a distancia Adaptador Cepillo para polvo Cepillo lateral Filtro de polvo HEPA Aparato Parte superior: receptor de infrarrojos Parachoques 10. botón de pantalla táctil de encendido/apagado 11. Botón para abrir el depósito de polvo 12.
  • Page 51: Antes Del Primer Uso

    ANTES DEL PRIMER USO · Inserte dos pilas AAA en el mando a distancia. Ajuste el reloj (consulte la sección “Uso con el mando a distancia /CLK: reloj”) · Cargue el robot aspirador durante 12 horas antes del primer uso. ·...
  • Page 52 El aparato entrará automáticamente en modo de ahorro de energía después de 15 minutos en el modo en espera. Puede activar el modo de ahorro de energía pulsando el botón de encendido/apagado en la pantalla táctil durante 3 segundos. Apagado Puede apagar completamente el aparato presionando el interruptor de encendido/apagado que se encuentra en el lateral del aparato.
  • Page 53 · Mantenga pulsado el botón PLAN durante 6 segundos. · Las horas empiezan a parpadear en la pantalla. Configure las horas empujando las flechas hacia arriba y hacia abajo. Presione la flecha hacia la derecha para confirmar. · Los minutos empezarán a parpadear en la pantalla. Ajuste los minutos con las flechas hacia arriba y hacia abajo.
  • Page 54 En la pantalla se puede leer el modo seleccionado: · MODE 1: espiral La aspiradora se desplaza en forma de espiral. · MODE 2: automático La aspiradora esbozará un recorrido para aspirar toda la zona, teniendo en cuenta las paredes, obstáculos y escaleras. ·...
  • Page 55 CLK para confirmar. En la pantalla pueden verse las siguientes abreviaturas: · SUN: domingo · MON: lunes · TUE: martes · WED: miércoles · THU: jueves · FRI: viernes · SAT: sábado SPOT: limpieza en un lugar concreto · Durante el programa automático puede pulsar el botón SPOT para limpiar las zonas más sucias.
  • Page 56: Limpieza Y Mantenimiento

    LIMPIEZA Y MANTENIMIENTO LIMPIEZA DE DEPÓSITO DE POLVO Y DE LOS FILTROS Limpie el depósito de polvo y los filtros después de cada uso. Haga esto de la siguiente manera: Presione el botón para abrir el depósito de polvo con la indicación PUSH. Retire el depósito de polvo de la unidad.
  • Page 57: Directrices Medioambientales

    · Los sensores no se pueden mojar. DIRECTRICES MEDIOAMBIENTALES El símbolo en el producto o en el embalaje indica que este producto no puede ser tratado como residuo doméstico. Se debe llevar a un lugar en el que se reciclan equipos eléctricos y electrónicos.
  • Page 58 ZÁRUKA Pro záruku začínající dnem prodeje spotřebiče platí na území ČR tyto podmínky: 1. trvání záruky: 2 roky 2. poskytování záruky: a) záruční opravu provedeme podle našeho zvážení opravou nebo výměnou vadných dílů, jestliže tyto závady vznikly prokazatelně vadou materiálu nebo chybou při výrobě b) záruční...
  • Page 59: Bezpečnostní Pokyny

    BEZPEČNOSTNÍ POKYNY · Před použitím si přečtěte všechny níže popsané pokyny · Tento spotřebič mohou používat děti ve věku od 16 let, ale také osoby s fyzickým nebo smyslovým omezením, jakož i psychicky omezené osoby nebo osoby s nedostatkem zkušeností a znalostí. Ale jen za podmínky, že tyto osoby obdržely nezbytné pokyny, jak používat tento spotřebič...
  • Page 60 · Používejte pouze v domácím prostředí. Výrobce nemůže být zodpovědný za nehody, které jsou výsledkem nesprávného použití spotřebiče nebo v nesouladu s pokyny popsanými v tomto návodu. · Všechny opravy by měly být prováděny výrobcem nebo odborným servisem. · Přístroj, kabel ani zástrčku nikdy neponořujte do vody nebo jiné kapaliny. ·...
  • Page 61 ČÁSTI Přístroj Dobíjecí stanice Dálkové ovládání Adaptér Čisticí kartáč Boční kartáče HEPA filtr Přístroj Horní část/kryt: Infračervený přijímač Nárazník 10. Hlavní vypínač on/off – dotykový 11. Tlačítko pro otevření zásobníku na prach 12. Spínač on/off Dno část: 13. Malá kulatá baterie pro napájení hodin/časovače 14.
  • Page 62: Před Prvním Použitím

    PŘED PRVNÍM POUŽITÍM · Do ovladače vložte dvě baterie AAA. Nastavte aktuální čas (viz „použití s dálkovým ovládáním/ CLK: clock“) · Před prvním použitím nechte přístroj plně nabít, alespoň 12 hodin. · Do vysavače nasaďte čistící kartáče. Kartáč stačí pouze nasadit a dotlačit dokud neuslyšíte zacvaknutí.
  • Page 63 spánku můžete také zapnout stisknutím a přidržením dotykového on/off tlačítka na 3 sekundy. Režim vypnuto Vysavač můžete zcela vypnout vypínačem na boku zařízení, zatímco je v pohotovostním režimu. Pokud nebyl nastaven žádný časovač, tak po uplynutí 15 minut v režimu spánku se přístroj vypne.
  • Page 64 HOME: návrat do nabíjecí stanice · Chcete-li během vysávání dát vysavač nabít, tak stiskněte tlačítko HOME. Vysavač automaticky přeruší proces vysávání a sám vyhledá nabíjecí stanici. · UPOZORNĚNÍ: Mohlo by se stát, že vysavač nemůže najít nabíjecí stanici, neboť je kolem stanice příliš...
  • Page 65 · MODE 3: vysátí rohů (corners) Vysavač bude jezdit a kopírovat místnost podél stěn (včetně rohů). · MODE 4: křižné cik-cak (ZigZag) Vysavač se bude pohybovat cik-cak a přitom vysávat celou oblast. Tato funkce je ideální pro použití na velké volné ploše bez překážek. CLK: hodiny Toto tlačítko umožňuje nastavit aktuální...
  • Page 66: Čištění A Údržba

    · V té chvíli se vysavač bude pohybovat podobně jako v režimu „spiral“ a při tom silně vysávat. SYSTÉM PROTI PŘEPADU · Vysavač má bezpečnostní funkci proti pádu. Vysavač sám detekuje schody nebo hrany, u kterých hrozí riziko pádu. Automaticky se takovým místům vyhne, což zabraňuje pádu. ·...
  • Page 67 Stisknutím tlačítka PUSH uvolníte/otevřete zásobník prachu Celý zásobník z vysavače vyjměte. Z prostoru zásobníku vyjměte HEPA filtr i s držákem. Zásobník prachu otevřete a vyjměte primární filtr. Samotný zásobník prachu vysypte nad odpadkovým košem. Zásobník a primární filtr můžete opláchnout pod tekoucí vodou. Před jejich opětovným použitím je nechte důkladně...
  • Page 68 OHLED NA ŽÍVOTNÍ PROSTŘEDÍ Symbol na přístroji či na jeho obalu znamená, že s tímto výrobkem není možno nakládat jako s běžným domovním odpadem, nýbrž musí být odevzdán na místech určených ke sběru a likvidaci elektrických a elektronických zařízení. Dodržením tohoto doporučení chráníte životní prostředí a zdraví...
  • Page 69 ZÁRUKA Pre záruku začínajúcich dňom predaja spotrebiča platí na území SR tieto podmienky: 1. trvania záruky: 2 roky 2. poskytovanie záruky: a) záručnú opravu vykonáme podľa nášho zvážení opravou alebo výmenou chybných dielov, ak tieto závady vznikli preukázateľne chybou materiálu alebo chybou pri výrobe b) záručná...
  • Page 70: Bezpečnostné Pokyny

    BEZPEČNOSTNÉ POKYNY · Pred použitím si prečítajte všetky nižšie popísané pokyny · Tento spotrebič môžu používať deti vo veku od 16 rokov, ale aj osoby s fyzickým alebo zmyslovým obmedzením, ako aj psychicky obmedzené osoby alebo osoby s nedostatkom skúseností a znalostí. Ale len za podmienky, že tieto osoby dostali pokyny, ako používať tento spotrebič...
  • Page 71 · Používajte iba v domácom prostredí. Výrobca nemôže byť zodpovedný za nehody, ktoré sú výsledkom nesprávneho použitia spotrebiča alebo v nesúlade s pokynmi popísanými v tomto návode. · Všetky opravy by mali byť vykonávané výrobcom alebo odborným servisom. · Prístroj, kábel ani zástrčku nikdy neponárajte do vody alebo inej kvapaliny. ·...
  • Page 72 ČASTI Zariadenie Nabíjacie staníca Diaľkové ovládanie Adaptér Čistiaca kefa Bočné kefy HEPA filter Zariadenie Hore / krytie: Infračervený prijímač Nárazník 10. Hlavný vypínač - dotykom 11. Tlačidlo na otvorenie zásobníka na prach 12. Prepínač zapnutia / vypnutia Spodná časť: 13. Malá okrúhla batéria na napájanie hodín/časovač 14.
  • Page 73: Pred Prvým Použitím

    PRED PRVÝM POUŽITÍM · Do vodiča vložte dve batérie typu AAA. Nastavte aktuálny čas (pozri “Použiť s diaľkovým ovládačom / CLK: hodiny”) · Pred prvým použitím nechajte prístroj úplne nabiť najmenej 12 hodín. · Vložte čistiace kefy do vysávača. Kefka sa musí stlačiť a stlačiť, až kým nezačujete kliknutie. Sú...
  • Page 74 Režim vypnutia Môžete úplne vypnúť vysávač na boku prístroja, keď je v pohotovostnom režime. Ak nie je nastavený časovač, po 15 minútach v režime spánku sa prístroj vypne. POUŽÍVANIE BEZ DIAĽKOVÉHO OVLÁDANIA · Pre automatické vysávanie jednoducho stlačte tlačidlo on/off. Vysávač navrhne svoju vlastnú...
  • Page 75 · UPOZORNENIE: Mohlo by dôjsť k tomu, že vysávač nemôže nájsť nabíjaciu stanicu, pretože okolo stanice je príliš veľa prekážok. Uistite sa, že okolo stanice je čo najviac miesta. · Ak je batéria takmer prázdna, vysávač sa automaticky vráti do nabíjacej stanice. V takejto situácii sa svetlo na vysávači rozsvieti červeno.
  • Page 76 · MODE 4: Cik-cak (ZigZag) Vysávač posunie cikcak pri vysávaní celej oblasti. Táto funkcia je ideálna na použitie na veľkej otvorenej ploche bez prekážok. CLK: hodiny Toto tlačidlo umožňuje nastaviť aktuálny čas a deň. · Stlačte a podržte CLK na 5 sekúnd. ·...
  • Page 77 primárne do takých nerovných miest so schodiskom nepúšťať. NABÍJANIE · Modré svetlo svieti na vysávači. Keď je batéria nízka, signalizuje ju červené svetlo. Vysávač sa automaticky vráti do nabíjacej stanice a nabite. · Ak ju chcete nabiť, môžete ju tiež znova odoslať - stlačením tlačidla HOME na diaľkovom ovládači.
  • Page 78: Čistenie A Údržba

    ČISTENIE A ÚDRŽBA ČISTENIE ZÁSOBNÍKA PRACHU A FILTROV Odporúča sa vyčistiť tieto časti po každom vysávanie podľa nasledujúceho postupu. Stlačením tlačidla PUSH uvoľnite / otvorte zásobník na prach Vyberte celý zásobník z vysávača. Vyberte filter HEPA s držiakom z priestoru zásobníka. Otvorte nádobu na prach a odstráňte primárny filter.
  • Page 79 OHĽAD NA ŽIVOTNÉ PROSTREDIE Symbol na prístroji alebo na jeho obale znamená, že s týmto výrobkom nie je možné nakladať ako s domovým odpadom, ale musí byť odovzdaný na miestach určených na zber a likvidáciu elektrických a elektronických zariadení. Dodržaním tohto odporúčania chránite životné prostredie a zdravie spoluobčanov.
  • Page 80 über: webshop.domo-elektro.be or scan here: oder hier scannen: of scan hier: ou scannez ici: LINEA 2000 bvba - Dompel 9 - 2200 Herentals - Belgium - Tel: +32 14 21 71 91 - Fax: +32 14 21 54 63...

Ce manuel est également adapté pour:

Do7288s

Table des Matières