Télécharger Imprimer la page
Masquer les pouces Voir aussi pour 1C66 Triton smart ankle:

Publicité

Les langues disponibles
  • FR

Les langues disponibles

Liens rapides

Gebrauchsanweisung .....................................................................................................
Instructions for use .........................................................................................................
Instructions d'utilisation ..................................................................................................
Istruzioni per l'uso ..........................................................................................................
Instrucciones de uso ......................................................................................................
6
19
33
48
62

Publicité

loading

Sommaire des Matières pour Ottobock 1C66 Triton smart ankle

  • Page 1: Table Des Matières

    1C66 Triton smart ankle Gebrauchsanweisung ..................... Instructions for use ......................Instructions d'utilisation ....................Istruzioni per l’uso ......................Instrucciones de uso ......................
  • Page 2 Aktiveringskoden for Galileo™ App til bandagister (sidste linje) må ikke videregives til brugeren. Aktiveringskoden til Galileo™ appen ment for ortopediteknikeren (siste linje) må ikke utleveres til brukeren. Apuvälineteknikoille tarkoitettua Galileo™-sovelluksen aktivointikoodia (viimeinen rivi) ei saa antaa edelleen käyttäjälle. 2 | Ottobock...
  • Page 3 Ottobock | 3...
  • Page 4 4 | Ottobock...
  • Page 5 Ottobock | 5...
  • Page 6 Bewahren Sie dieses Dokument auf. 1.1 Konstruktion und Funktion Der Prothesenfuß 1C66 Triton smart ankle besitzt eine hydraulische Knöcheleinheit, die von ei­ nem Mikroprozessor gesteuert wird. Die zur Steuerung notwendigen Daten werden während der Bewegung von Sensoren in der eingebauten Europa™ Pyramide und im Knöchelgelenk erfasst.
  • Page 7: 1C66 Triton Smart Ankle

    Schweiß, Urin, Salzwasser, Säuren Sand, stark hygroskopische Partikel (z. B. Talkum) 2.4 Nutzungsdauer 1C66 Triton smart ankle Das Produkt ist vom Hersteller nach ISO 22675 auf 2 Millionen Belastungszyklen geprüft. Dies entspricht, je nach Aktivitätsgrad des Patienten, einer Nutzungsdauer von 2 bis 3 Jahren.
  • Page 8 Verbrennungen, Sturzverletzungen durch Funktionsveränderungen und Schäden an Prothesen­ komponenten ► Berühren Sie keine überhitzten Prothesenkomponenten. ► Unterbrechen Sie bei Funktionsveränderungen alle Aktivitäten, um die überhitzten Prothe­ senkomponenten abkühlen zu lassen. Verringern Sie bei Funktionsveränderungen die Beanspruchung der Prothesenkomponente, ► um eine Abkühlung zu ermöglichen. 8 | Ottobock...
  • Page 9: Gebrauchsanweisung

    4 Lieferumfang Folgende Einzelteile und Zubehörteile sind in der angegebenen Menge im Lieferumfang enthalten und gemäß ihrem Symbol als Einzelteil ( ), Einzelteil mit Mindestbestellmenge ( ) oder im Ein­ zelteile-Pack ( ) nachbestellbar: 1C66 Triton smart ankle Abb. Pos. Menge...
  • Page 10 Die Mitte des Prothesenschafts mit der 50:50 Lehre ermitteln. Den Prothesenschaft mittig zur Aufbaulinie einordnen. Schaftflexion: Stumpfflexion des Patienten + 5° Frontalebene Aufbaulinie Prothesenfuß: Zwischen Großzeh und zweitem Zeh     Aufbaulinie Prothesenschaft: Entlang der lateralen Patellakante     Die Abduktionsstellung oder Adduktionsstellung beachten. 10 | Ottobock...
  • Page 11 Wenn notwendig, können weitere Eigenschaften des Prothesenfußes mit Hilfe der App ange­ passt werden (Settings>Setup>Features). Ottobock empfiehlt den Schritt Patient Training erneut durchzuführen, wenn der Benutzer • sich an den Prothesenfuß gewöhnt hat. So wird das veränderte Gangverhalten als Referenz­...
  • Page 12 Produkts muss der Akku geladen werden. INFORMATION Bei voll geladenem Akku und normaler Nutzung beträgt die Laufzeit bis zu 72 h. Ottobock empfiehlt den Akku alle 48 h aufzuladen. Der Ladevorgang dauert 2 bis 4 h. Er kann nur innerhalb der vorgegebenen Ladetemperaturen durchgeführt werden.
  • Page 13 Der Modus für Benutzer ist nach der Installation aktiv. Der Modus für Orthopädie-Techniker wird durch Eingabe des Freischaltcodes aktiviert. INFORMATION Beachten Sie die Gebrauchsanweisungen der Galileo™ App ► Die entsprechenden Gebrauchsanweisungen sind in die App integriert. Sie sind im Haupt­ menü unter dem Menüpunkt Hilfe zu finden. Ottobock | 13...
  • Page 14 → Es ertönt ein Signalton für 1 Sekunde. Ein 5 Sekunden Countdown läuft ab, jede Sekunde ertönt ein kurzer Signalton. 3) Den Prothesenfuß vollflächig aufstellen und nicht belasten. 4) Die Absatzhöhe durch verändern des Winkels im Knöchelgelenk einstellen. Dabei den Fuß nicht belasten. 14 | Ottobock...
  • Page 15 Wand). → Es ertönen 3 kurze Signaltöne. Das Knöchelgelenk des Prothesenfußes ist gesperrt. Deaktivieren ► Den Prothesenfuß flach auf den Boden stellen und mindestens 1 s belasten. → Es ertönt 1 kurzer Signalton. Das Knöchelgelenk ist entsperrt. Ottobock | 15...
  • Page 16 1) Das Produkt mit einem feuchten, weichen Tuch reinigen. 2) Das Produkt mit einem weichen Tuch abtrocknen. 3) Die Restfeuchtigkeit an der Luft trocknen lassen. 8 Wartung ► Die Prothesenkomponenten nach den ersten 30 Tagen Gebrauch einer Inspektion unterzie­ hen. 16 | Ottobock...
  • Page 17 Telekommunikationsendeinrichtungen. Die Konformitätsbewertung wurde vom Hersteller nach Anhang III der Richtlinie durchgeführt. Das Produkt erfüllt die Anforderungen der RoHS-Richtlinie 2011/65/EU des Europäischen Parla­ ments und des Rates vom 08.06.2011 zur Beschränkung der Verwendung gefährlicher Stoffe in Elektro- und Elektronikkomponenten und Geräten. Ottobock | 17...
  • Page 18 Bestimmungen Ihres Landes entsprechende Entsorgung kann sich schädlich auf die Umwelt und die Gesundheit auswirken. Bitte beachten Sie die Hinweise der für Ihr Land zuständigen Behörde zu Rückgabe- und Sammelverfah­ ren. Staubgeschützt, Schutz gegen Spritzwasser 18 | Ottobock...
  • Page 19 Please keep this document in a safe place. 1.1 Construction and Function The 1C66 Triton smart ankle prosthetic foot is equipped with a hydraulic ankle unit that is con­ trolled by a microprocessor. The required control data are captured during movements by sensors in the integrated Europa™...
  • Page 20 2.3 Environmental Conditions Allowable environmental conditions Temperature range for use: -10 °C to +60 °C Relative humidity: 15% to 93%, non-condensing Air pressure: 700 hPa to 1060 hPa Storage and transport temperature range:−25 °C to +65 °C Moisture: fresh water as splashing water 20 | Ottobock...
  • Page 21 Sand, highly hygroscopic particles (e.g. talcum) 2.4 Service Life 1C66 Triton smart ankle This product has been tested by the manufacturer with 2 million load cycles according to ISO 22675. Depending on the patient's activity level, this corresponds to a service life of 2 to 3 years.
  • Page 22: Instructions For Use

    The following single components and accessories are included in the scope of delivery in the spe­ cified quantities and are available for reordering according to their respective symbols as single components ( ), single components with minimum order quantities ( ) or single-component packs ( ): 1C66 Triton smart ankle Fig. Item Quantity...
  • Page 23 1C66 Triton smart ankle Fig. Item Quantity Designation Reference number – – 1 (   ) EU AC adapter 757S7* US AC adapter – – 1 (   ) Power supply 757L2 – – 1 (   ) Mini USB cable 625W20 –...
  • Page 24 Use the L.A.S.A.R. Posture for static alignment optimisation of the prosthesis, if available. If necessary, the alignment recommendations (TF modular leg prostheses: 646F219*, TT • modular leg prostheses: 646F336*) may be requested from Ottobock. 5.2.3 Dynamic Trial Fitting • Adapt the prosthesis in the sagittal plane (AP) and in the frontal plane (ML) by making angle or slide adjustments so that correct heel contact, smooth roll-over and optimal weight transfer onto the contralateral side are ensured.
  • Page 25 If required, additional properties of the prosthetic foot can be adapted with the help of the app (Settings>Setup>Features). Ottobock recommends performing the Patient Training step again once the user has got • used to the prosthetic foot. This sets the modified gait behaviour as the reference value.
  • Page 26 INFORMATION If the battery is fully charged, the battery life during normal use is up to 72 h. Ottobock recommends charging the battery every 48 h. The charging process takes 2 to 4 h. It can only be performed within the prescribed charging temperature range.
  • Page 27 Standby mode can be used to save energy. In standby mode, the prosthetic foot assumes a neut­ ral position and no longer adapts to various conditions. The Bluetooth connection of the prosthet­ ic foot is turned off as well. ► Briefly press the selection key. Ottobock | 27...
  • Page 28 → The relief function is deactivated, and when moved, the prosthetic foot returns to the most recently set position. 6.2.5 Locking the ankle joint The function locks the ankle joint of the prosthetic foot and secures it in the current position. The activation of the relief function is also prevented. 28 | Ottobock...
  • Page 29 The Bluetooth connection is severed. 7 Cleaning and Care 1) Clean the product with a damp, soft cloth. 2) Dry the product with a soft cloth. 3) Allow to air dry in order to remove residual moisture. Ottobock | 29...
  • Page 30 The product meets the requirements under the RoHS Directive 2011/65/EU of the European Par­ liament and of the Council of 8 June 2011 on the restriction of the use of certain hazardous sub­ stances in electrical and electronic equipment. 30 | Ottobock...
  • Page 31 L ‘ utilisation de ce dispositif est autorisée seulement aux conditions suivantes: (1) il ne doit pas produire d’interference et (2) l’ utilisateur du dispositif doit étre prêt à accepter toute interference radioélectrique reçu, même si celle-ci est sus­ ceptible de compromettre le fonctionnement du dispositif. Ottobock | 31...
  • Page 32 Please observe the instructions of your national authority pertaining to return and collec­ tion. Protected against dust, protected against splashing water Please note the instructions for use Type BF applied part 32 | Ottobock...
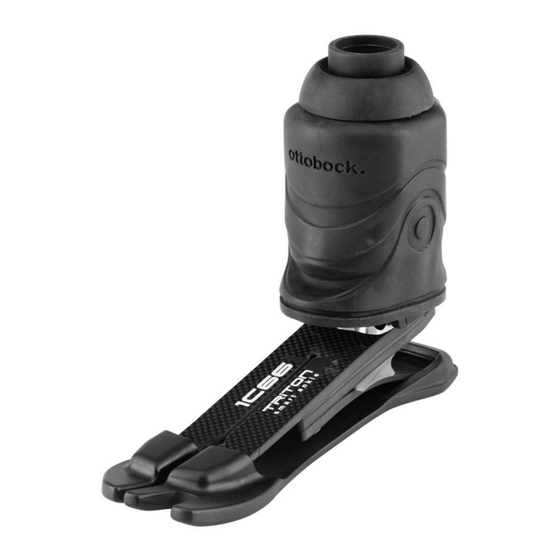
  • Page 33 Les propriétés fonctionnelles du pied prothétique sont obtenues grâce à des lames en carbone et en polymère haute performance. Le pied prothétique permet une flexion plantaire perceptible à la pose du talon et un déroulé naturel. Les éléments fonctionnels restituent l’énergie emmagasinée. Ottobock | 33...
  • Page 34 Plage de température de fonctionnement : -10 °C à +60 °C Humidité de l’air : 15 à 93 %, sans condensation Pression atmosphérique : 700  à 1060 hPa Plage de températures pour le stockage et le transport : -25 °C à +65 °C Humidité : eau douce sous forme d’eau projetée 34 | Ottobock...
  • Page 35 Si besoin, prenez les mesures nécessaires (par ex. nettoyage, réparation, remplacement, contrôle par le fabricant ou un atelier spécialisé, etc.). PRUDENCE Combinaison non autorisée des composants prothétiques Chute occasionnée par une rupture ou une déformation du produit Ottobock | 35...
  • Page 36: Instructions D'utilisation

    ( ), de pièces détachées avec quantité minimale de commande ( ) ou de kit de pièces dé­ tachées ( ). Triton smart ankle 1C66 Ill. Pos. Quantité Désignation Référence – – 1 (   ) Instructions d’utilisation 647G1082 – – 1 (   ) Pied prothétique – 36 | Ottobock...
  • Page 37 Alignement de base TT Déroulement de l’alignement de base Outils et matériel nécessaires : Goniomètre 662M4, appareil de mesure de la hauteur du talon 743S12, gabarit 50/50 743A80, appareil d’alignement (par ex. L.A.S.A.R. Assembly 743L200 ou PROS.A. Assembly 743A200) Ottobock | 37...
  • Page 38 Heel Height. La position neutre du pied prothétique est alors réglée sur la hauteur de talon dans l’appareil d’alignement. 5.2.2 Alignement statique Dans l’application Galileo™, continuez l’Initial Setup et procédez à l’étape Manual Aligne­ • ment. Suivez les indications. 38 | Ottobock...
  • Page 39 • Il convient d’adapter, si possible, la prothèse à l’aide du L.A.S.A.R. Posture. • En cas de besoin, Ottobock vous fournira les recommandations d’alignement (prothèses de jambe TF modulaires : 646F219*, prothèses de jambe TT modulaires : 646F336*). 5.2.3 Essai dynamique •...
  • Page 40 Lorsque l’accumulateur est complètement chargé et dans le cas d’une utilisation normale, la du­ rée de fonctionnement peut atteindre jusqu’à 72 h. Ottobock recommande de charger l’accumulateur toutes les 48 h. La charge dure entre 2 et 4 h. Elle ne peut être effectuée que dans le respect des températures de charge spécifiées.
  • Page 41 Lorsque le pied prothétique est arrêté, Bluetooth de la hauteur de talon est réinitialisée sur l’orthoprothésiste la valeur réglée par l’orthoprothésiste lors de l’alignement de base. Lorsque le pied prothétique est arrêté, la connexion Bluetooth de l’orthoprothésiste est supprimée. Ottobock | 41...
  • Page 42 → La connexion Bluetooth a été supprimée et le pied prothétique est mis hors tension. La hau­ teur de talon a été réinitialisée sur la valeur réglée lors de l’alignement de base. Utilisateur ► Maintenir appuyée la touche de sélection pendant au moins 8 secondes. 42 | Ottobock...
  • Page 43 Le pied prothétique émet des signaux d’avertissement pour indiquer la présence de problèmes. Il existe 3 catégories de signaux d’avertissement. Signal d’avertissement sans restriction fonctionnelle 3 signaux sonores toutes les 3 minutes La DEL jaune clignote rapi­ dement Le pied prothétique fonctionne sans restrictions. L’utilisateur doit toutefois intervenir pour éviter les erreurs. Ottobock | 43...
  • Page 44 ► Vérifiez les réglages de la prothèse après la période d’adaptation spécifique au patient et, si nécessaire, ajustez à nouveau les réglages aux besoins du patient. ► Contrôlez la présence de traces d’usure sur l’ensemble de la prothèse au cours d’une consultation habituelle. 44 | Ottobock...
  • Page 45 été effectuée par le fabricant conformément à l’annexe III de la directive. Le produit répond aux exigences de la directive RoHS 2011/65/UE du Parlement européen et du Conseil du 08/06/2011 relative à la limitation de l’utilisation de certaines substances dangereuses dans les équipements électriques et électroniques. Ottobock | 45...
  • Page 46 (1) this device may not cause interference, and (2) this device must accept any interference, including interference that may cause undesired operation of this device. L ‘ utilisation de ce dispositif est autorisée seulement aux conditions suivantes: 46 | Ottobock...
  • Page 47 Veuillez respecter les consignes des autorités compétentes de votre pays concernant les procédures de collecte et de retour des déchets. Protection contre la poussière, protection contre les projections d’eau Respecter les instructions d’utilisation Ottobock | 47...
  • Page 48 Europa™ integrata e nell'articolazione malleolare durante il movimento di sensori. Il piede protesico si adegua alle diverse caratteristiche del terreno e alla velocità di deambulazio­ ne attraverso il cambiamento della flessione plantare e dorsale. Il range di regolazione consente 48 | Ottobock...
  • Page 49 Protesi TF e disarticolazione di ginocchio: il prodotto è indicato per l'impiego su pazienti • con amputazione di uno o di entrambi gli arti inferiori. 2.3 Condizioni ambientali Condizioni ambientali consentite Intervallo di temperatura: -10 °C - +60 °C Ottobock | 49...
  • Page 50 Non sottoporre il prodotto a condizioni ambientali non consentite (vedere il capitolo "Condi­ zioni ambientali"). ► Se il prodotto è stato sottoposto a condizioni ambientali non consentite, controllare se è danneggiato. ► Non utilizzare più il prodotto in caso di danni evidenti o in caso di dubbio. 50 | Ottobock...
  • Page 51: Istruzioni Per L'uso

    I seguenti componenti singoli e accessori fanno parte della fornitura nella quantità indicata e in base al loro simbolo sono ordinabili come componenti singoli ( ), componenti singoli con quanti­ tà minima ordinabile ( ) oppure confezione di componenti singoli ( ): Ottobock | 51...
  • Page 52 5.2.1 allineamento base Allineamento base TT Svolgimento dell'allineamento base Utensili e materiali necessari: Goniometro 662M4, strumento di misurazione dell'altezza del tacco 743S12, cali­ bro 50:50 743A80, strumento di allineamento (ad es. L.A.S.A.R. Assembly 743L200 o PROS.A. Assembly 743A200) 52 | Ottobock...
  • Page 53 Alignment. Seguire le istruzioni. • Se disponibile, adattare la protesi con l'aiuto del L.A.S.A.R. Posture. • Se necessario, è possibile richiedere le indicazioni per l'allineamento (protesi transfemorali modulari TF: 646F219*, protesi transtibiali modulari TT: 646F336*) a Ottobock. Ottobock | 53...
  • Page 54 È possibile adeguare altre caratteristiche del piede protesico con l'ausilio della app (Settings>Setup> Features), se necessario. Ottobock consiglia di eseguire nuovamente il passaggio Patient Training, quando l'utente si • è abituato al piede protesico. La deambulazione diversa viene così adottata come valore di ri­...
  • Page 55 Con la batteria completamente carica e un utilizzo normale il periodo di carica e di max. 72 h. Ottobock consiglia di caricare la batteria ogni 48 h. Il processo di carica dura da 2 a 4  ore. Può essere eseguito soltanto nell'ambito delle tempera­...
  • Page 56 è spento. giallo Allo spegnimento l'altezza del tacco Cancellare il collegamento viene ripristinata al valore impostato dal Bluetooth tecnico ortope­ tecnico ortopedico durante l'allinea­ dico mento base. Allo spegnimento il collegamento Blue­ tooth tecnico ortopedico viene cancel­ lato. 56 | Ottobock...
  • Page 57 → Il collegamento Bluetooth è stato cancellato e il piede protesico è spento. L'altezza del tacco è stata ripristinata al valore impostato durante l'allineamento base. Utente ► Tenere premuto per min. 8 secondi il tasto di selezione. → Viene emesso un segnale acustico di 1 secondo. Il collegamento Bluetooth è stato cancellato. Ottobock | 57...
  • Page 58 Il piede protesico funziona senza limitazioni. L'utente deve tuttavia intervenire per evitare il gua­ sto. Guasti possibili Livello di carica troppo basso, manutenzione necessaria, gua­ sto dell'unità idraulica Nella app Galileo™ vengono visualizzati un messaggio dettagliato del guasto e le operazioni da eseguire. 58 | Ottobock...
  • Page 59 ► In occasione della normale ispezione, è necessario verificare lo stato di usura dell’intera pro­ tesi. ► Eseguire controlli annuali di sicurezza. 8.1 Applicazione/rimozione del rivestimento cosmetico INFORMAZIONE Infilare sopra il piede protesico la calza Spectra per evitare rumori nel rivestimento cosmetico. Ottobock | 59...
  • Page 60 Informazioni più dettagliate sulle condizioni di garanzia vengono fornite dalla società di distribu­ zione del produttore nel relativo paese. 60 | Ottobock...
  • Page 61 Uno smaltimento non conforme alle norme del Paese può avere ripercussioni sull'ambiente e sulla salute. Attenersi alle disposizioni delle autorità locali compe­ tenti relative alla restituzione e alla raccolta. Protetto dalla polvere, protezione dagli spruzzi d'acqua Osservare le istruzioni per l'uso Parte applicata di tipo BF Ottobock | 61...
  • Page 62 El pie protésico permite realizar una flexión plantar notable al apoyar el talón y un movimiento natural hacia delante. Al hacerlo, los elementos funcio­ nales vuelven a liberar la energía almacenada. 62 | Ottobock...
  • Page 63 Rango de temperatura de uso de -10 ºC a +60 ºC Humedad del aire: 15 % hasta 93 %, sin condensación Presión del aire: 700 hPa hasta 1060 hPa Margen de temperatura de almacenamiento y transporte: -25 °C a +65 °C Humedad: agua dulce a modo de salpicaduras Ottobock | 63...
  • Page 64 Tome las medidas pertinentes en caso necesario (p. ej., limpieza, reparación, repuesto, en­ vío del producto al fabricante o a un taller especializado para su revisión, etc.). PRECAUCIÓN Combinación no permitida de componentes protésicos Caídas debidas a la rotura o la deformación del producto 64 | Ottobock...
  • Page 65: Instrucciones De Uso

    ( ), una cantidad mínima de piezas individuales ( ) o bien como kit de componentes ( ): Triton smart ankle 1C66 Fig. Pos. Cantidad Denominación Referencia – – 1 (   ) Instrucciones de uso 647G1082 Ottobock | 65...
  • Page 66 Goniómetro 662M4, medidor de la altura del tacón 743S12, patrón 50:50 743A80, ali­ neador (p. ej., L.A.S.A.R. Assembly 743L200 o PROS.A. Assembly 743A200) Oriente y monte los componentes protésicos en el alineador como se indica a continuación: Plano sagital 66 | Ottobock...
  • Page 67 Prosiga con la función Initial Setup en la aplicación Galileo™ y ejecute el paso Manual • Alignment. Siga para ello las instrucciones correspondientes. • Adapte la prótesis con ayuda del alineador L.A.S.A.R. Posture, en caso de que disponga de uno. Ottobock | 67...
  • Page 68 De ser necesario, con la aplicación se pueden adaptar otras características del pie protésico (Settings>Setup>Features). Ottobock recomienda repetir el paso Patient Training una vez que el usuario se haya acos­ • tumbrado al pie protésico. De esta forma, el modo de caminar modificado se tomará como va­...
  • Page 69 Si está completamente cargada y se usa de manera normal, la duración de la batería es de has­ ta 72 h. Ottobock recomienda cargar la batería cada 48 h. El proceso de carga dura de 2 a 4 h. Solo se puede llevar a cabo dentro del rango de tempera­...
  • Page 70 Al apagarlo, la altura del tacón se res­ Bluetooth del técnico orto­ tablece al valor ajustado por el técnico pédico ortopédico durante el alineamiento bá­ sico. Al apagarlo se elimina el acoplamiento Bluetooth del técnico ortopédico. 70 | Ottobock...
  • Page 71 Usuario ► Mantenga pulsada la tecla de selección al menos 8 segundos. → Sonará una señal acústica durante 1 segundo. El acoplamiento Bluetooth se ha eliminado. Ottobock | 71...
  • Page 72 El pie protésico funciona sin limitaciones. Sin embargo, el usuario debe actuar para evitar fa­ llos. Posibles fallos Nivel bajo de carga, ha vencido el plazo de mantenimiento, fa­ llo en el sistema hidráulico En la aplicación Galileo™ se muestran un mensaje de error detallado y las instrucciones sobre cómo proceder. 72 | Ottobock...
  • Page 73 ► Durante la revisión normal se ha de comprobar si la prótesis presenta desgastes. ► Realizar inspecciones anuales de seguridad. 8.1 Colocación/extracción de la funda de pie INFORMACIÓN Cubra el pie protésico con el calcetín Spectra para evitar ruidos en la funda de pie. Ottobock | 73...
  • Page 74 Para obtener información más detallada sobre las condiciones de garantía consulte a la empresa de distribución del fabricante. 74 | Ottobock...
  • Page 75 Por eso, le rogamos que respete las advertencias que la administración de su país tiene en vigencia res­ pecto a la recogida selectiva de deshechos. Protegido contra el polvo y las salpicaduras Tenga en cuenta las instrucciones de uso Ottobock | 75...
  • Page 76 Ciclos de carga (hasta el 80 % de la capacidad com­ pleta) Temperatura de carga de la batería [°C] 0 hasta 45 Tensión de servicio del cargador [V] 100 hasta 240 Frecuencia de servicio del cargador [Hz] 50 hasta 60 76 | Ottobock...
  • Page 77 Ottobock | 77...
  • Page 78 Otto Bock HealthCare GmbH Max-Näder-Straße 15 · 37115 Duderstadt · Germany T +49 5527 848-0 · F +49 5527 72330 healthcare@ottobock.de · www.ottobock.com Ottobock has a certified Quality Management System in accordance with ISO 13485.