Faro ALYA Mode D'emploi

Lampada dentale a led
Masquer les pouces Voir aussi pour ALYA:
Table des Matières

Publicité

Les langues disponibles
  • FR

Les langues disponibles

Liens rapides

01
ALYA
L A M PA DA D E N TA L E A L E D
DENTAL LED LIGHT
M A N UA L E D ' U S O
I N ST R U C T I O N M A N UA L
M O D E D ' E M P LO I
G E B R AU C H S A N L E I T U N G
M A N UA L D E U S O
Dispositivo Medico conforme
alla direttiva 93/42/CE
FARO SPA Ornago (Italy)

Publicité

Table des Matières
loading

Sommaire des Matières pour Faro ALYA

  • Page 1 M O D E D ’ E M P LO I G E B R AU C H S A N L E I T U N G M A N UA L D E U S O Dispositivo Medico conforme alla direttiva 93/42/CE FARO SPA Ornago (Italy)
  • Page 2: Table Des Matières

    4.1 ACCENSIONE E SPEGNIMENTO............... 24 4.1.1 Regolazione: ....................24 4.1.2 Lampada / Testata CON PROXIMITY............24 4.1.3 Lampada / Testata “ALYA” CON COMANDO REMOTO ......25 4.1.4 Comandi di SINCRONIZZAZIONE ............25 4.2 MONTAGGIO LEVETTA JOYSTICK ALYA ............27 MANUTENZIONE ORDINARIA ................. 27 PULIZIA ........................
  • Page 3: Requisiti Di Sicurezza

    1. REQUISITI DI SICUREZZA Gentile Cliente, FARO le augura buon lavoro con la nuova lampada di alta qualità. Per lavorare in modo sicuro e per sfruttare al massimo le performances del prodotto, legga attentamente il presente manuale prima dell’utilizzo del dispositivo. Segua in particolare tutte le avvertenze e le note riportate.
  • Page 4: Simbologia Presente Sull'imballaggio

    1.1.3 Simbologia presente sull’imballaggio ALTO FRAGILE NON BAGNARE NON ROTOLARE NON USARE GANCI PESO MAX SOVRAPPONIBILE TEMPERATURA DI IMMAGAZZINAMENTO CONDIZIONI DI TRASPORTO UMIDITÀ RELATIVA PRESSIONE ATMOSFERICA CARTONE RICICLABILE USO PREVISTO Il dispositivo è destinato ad essere utilizzato esclusivamente nello studio odontoiatrico da medici odontoiatri, odontostomatologi ed igienisti per l’illuminazione del sito operatorio e di intervento nel trattamento delle patologie del cavo orale e dell’apparato dentale.
  • Page 5: Norme Generali E Principali Avvertenze

    NORME GENERALI E PRINCIPALI AVVERTENZE • Il dispositivo può essere applicato al riunito dentale, ma può anche essere installato su applicazioni dedicate. Il dispositivo può essere alimentato sia dal riunito dentale che da un alimentatore collegato direttamente alla rete. Si veda il paragrafo dedicato all’installazione •...
  • Page 6: Conservazioni Ed Utilizzo: Prescrizioni Ambientali

    Guida e dichiarazione del costruttore - Emissioni elettromagnetiche La lampada ALYA è prevista per funzionare nell’ambiente elettromagnetico sotto specificato. Il cliente o l’utilizzatore dovrebbero assicurarsi che esso venga usato in tale ambiente Prova di Emissione Ambiente Elettromagnetico - Guida Conformità...
  • Page 7: Immunita' Elettromagnetica

    La lampada ALYA è prevista per funzionare in un ambiente elettromagnetico in cui sono sotto controllo i disturbi irradiati RF. Il cliente o l’operatore dell’unità possono contribuire a prevenire interferenze elettromagnetiche assicurando una distanza minima fra apparecchi di comunicazione mobili e portatili a RF (trasmettitori) e l’unità...
  • Page 8: Caratteristiche Generali

    Nella versione con la luce sul braccio posteriore denominata “Alya con Theia Tech” la sorgente luminosa è costituita da una serie di LED la cui luce passando attraverso un diffusore viene distri- buita nell’ambiente sottostante.
  • Page 9: Descrizione Delle Parti

    Lo sviluppo dei codici è il seguente: Lunghezza bracci (solo per lampada completa) Lunghezza bracci (solo per lampada completa) ALYA – Lampada completa Alimentazione (con o senza trasformatore, solo per lampada completa) Alimentazione (con o senza trasformatore, solo per lampada completa) Lo sviluppo dei codici è...
  • Page 10 17-24 V AC 22-35 V DC 2 Riunito 9 810x 855 Auto-on 4 Riunito Cavo Rem ALYA – Lampada completa con Theia Tech Type 3° digit Mounting 4° digit tipo di 5° digit tipo di 6° digit 7° 8° 9° digit...
  • Page 11: Installazione Del Dispositivo

    7 Sensore + cavo 855*810 remoto Soffitto 8 Sensore auto-on 3. INSTALLAZIONE DEL DISPOSITIVO 855*960 + cavo remoto TESTATA ALYA (ALYA HEAD) Type 3 digit 4 digit – 5 digit 6 digit 7, 8, 9 digit Col Temperature e Alimentazione...
  • Page 12: Lampada Dentale Completa

    LAMPADA DENTALE COMPLETA 3.2.1 Requisiti Elettrici I requisiti per la corretta installazione per qualsiasi applicazione (riunito, parete, pavimento o soffitto) sono i seguenti: Tipo di alimentazione e Cavo di Conformità alla Alimentazione Classificaz. requisiti di protezione alimentazione IEC 60601-1 Versione trasformatore conforme lampada lalla IEC/EN 60601-1...
  • Page 13: Carichi Di Sicurezza

    - Lampada dentale / Testata (nella versione richiesta) - Foglietto per scaricare le istruzioni dal sito www.faro.it/download 3.2.2 Carichi di sicurezza La lampada dentale ALYA e ALYA THEIA può essere installata su varie applicazioni: RIUNITO, SOFFITTO, PARETE, PAVIMENTO. CARICHI DI SICUREZZA BRACCI...
  • Page 14: Connessione Cavo Remoto

    I manuali si trovano sul sito www.faro.it/download - Le applicazioni devono essere installate da tecnici specializzati La lampada deve essere installata solo con applicazioni FARO La lampada è dotata di un fine corsa di rotazione tra braccio fisso e braccio mobile.
  • Page 15: Sequenza Di Installazione

    APPLICAZIONE A SOFFITTO NB1. Il dispositivo deve essere installato da tecnici specializzati. NB2. L’alimentazione all’interno del locale dove si esegue l’installazione deve essere sempre disinserita. NB3. Prima di procedere con le operazioni di montaggio è necessario accertarsi che il soffitto sia in grado di reggere l’applicazione.
  • Page 16 APPLICAZIONE A SOFFITTO F. Calzare le 2 guide di fissaggio (23) sulle viti (8) e fissarle con dadi (9) e rondelle (10). G. Calcolare la lunghezza giusta della olonna (14), secondo la formula L=H-1900mm. Fare attenzione di tagliare la parte eccedente della colonna (14) dal lato dove NON vi sono le forature laterali.
  • Page 17 APPLICAZIONE A SOFFITTO M. Agganciare il gruppo appena assemblato (flangia attacco colonna (7) + colonna (14) ) alle guide di fissaggio (23), centrando i 4 fori della flangia (7)sulle viti (8) della flangia a soffitto (1). Gruppo 7+14 N. Avvitare (senza bloccarli) i dadi (12) e le restanti rondelle (11) sulle viti (8) della flangia a soffitto (1).
  • Page 18: Schema Elettrico

    APPLICAZIONE A SOFFITTO R. Infilare nella colonna (14) dall’alto un cavo di trazione. S. Collegare il conduttore della lampada al cavo di trazione. T. Inserire la lampada nella colonna (14) e fissarla con le tre viti (19), avendo cura di orientare i fori della bussola (20) in corrispondenza delle sedi delle viti sulla colonna (14) e avvitarle.
  • Page 19 APPLICAZIONE A PARETE MONTAGGIO LAMPADA APPLICAZIONE A PARETE 1. Tappo 2. Vite 3. Applicazione a parete 4. Espansori 5. Morsettiera 6. Copertura morsettiera 7. Copertura 8. Vite 9. Rondella 10. Passacavo 40° 50° NB1. Il dispositivo deve essere installato da tecnici specializzati. NB2.
  • Page 20 APPLICAZIONE A PARETE fig.A fig.A fig.B fig.B - L’alimentazione all’interno del locale dove si esegue l’installazione, deve essere sempre disinserita. - Stabilito il punto di fissaggio con riferimento il centro della poltrona (Vedi fig.A-B ), esegui- re sulla parete tre fori d.14 in corrispondenza dei fori dell’applicazione a parete (3), curando attentamente la perpendicolarità...
  • Page 21 APPLICAZIONE A PAVIMENTO MONTAGGIO APPLICAZIONE A PAVIMENTO 1. Perno 2. Bussola 3. Vite 4. Colonna 5. tappi 6. Vite 7. Rondella 8. Vite 9. Copertura 10. Morsettiera 11. Passacavo 12. Espansori 13. Supporto a Pavimento 14. Grani 15. Tappo 40° 50°...
  • Page 22 APPLICAZIONE A PAVIMENTO Il dispositivo deve essere installato da tecnici specializzati NB2. L’alimentazione all’interno del locale dove si esegue l’installazione deve essere sempre disinserita. NB3. Prima di procedere con le operazioni di montaggio è necessario accertarsi che il pavimento sia in grado di reggere l’applicazione. I materiali della parete autorizzati sono calcestruzzo e pietra naturale.
  • Page 23: Testata

    Avvertenza per il pericolo di caduta di masse sospese Avvertenza per il pericolo di caduta di masse sospese - usare solo le viti fornite dalla FARO. Attenzione – Rischio di caduta della testata post installazione: Attenzione – Rischio di caduta della testata post installazione: - avvitare le viti di sicurezza a pacco.
  • Page 24: Requisiti Elettrici

    3.3.2 Requisiti Elettrici I requisiti per la corretta installazione della testata sono i seguenti: Conformità alla Cavo di Tipo di alimentazione e Classificaz. Alimentazione IEC 60601-1 alimentazione requisiti di protezione 17-24 Vac Trasformatore conforme alla 50/60 Hz IEC/EN 60601-1terza edizione e alla IEC/EN 60601-1-2 con protezione termica o protetto a valle da almeno un fusibile...
  • Page 25: Istruzioni D'uso

    4. ISTRUZIONI D’USO Leggere attentamente il paragrafo 1 per un uso sicuro del dispositivo. Il dispositivo deve essere pulito prima dell’utilizzo (vedi paragrafo Pulizia del dispositivo). Attenzione L’uso contemporaneo della lampada con un elettrobisturi può provocare malfunzionamenti della stessa. Attenzione Il joystick di controllo deve essere maneggiato con delicatezza onde evitare rotture.
  • Page 26: Comandi Di Sincronizzazione

    4.1.4 LAMPADA / LAMPADA COMPLETA CON THEIA TECH / TESTATA “ALYA” CON COMANDO DI SINCRONIZZAZIONE Dove previsto è possibile collegare in modalità wireless la lampada Alya alla lampada am- biente Faro, al fine di creare un sistema di illuminamento sincronizzato tra loro, denominato “Syncro”.
  • Page 27 Note legate alla sincronizzazione: • Quando la lampada ambiente Faro è in sincrono (ossia si regola in automatico) con la lampada Alya, il led blu sito sul telaio è acceso fisso, quando il led è spento la sincronizzazione è disattiva.
  • Page 28: Montaggio Levetta Joystick Alya

    Non usare detergenti contenenti tensioattivi o idrorepellenti che depositandosi possono lasciare alonature. Lievi alonature non pregiudicano la qualità della luce. Prodotti differenti da quelli suggeriti potrebbero danneggiare i riflettori. In caso di dubbio contattare il customer care FARO.
  • Page 29: Pulizia Della Testata

    Prima della sterilizzazione le maniglie devono essere decontaminate e disinfettate. Per la disinfezione Faro ha testato i seguenti prodotti per la disinfezione: Eco Jet-1 (Cattani Group) / Sporekin Plus DS (Ims srl) / Zefirol Quick (Molteni Dental) / Durr FD366 Sensitive Attenzione - pericolo di rottura plastiche Le maniglie non possono essere disinfettate per termodisinfezione.
  • Page 30: Sterilizzazione

    Sterilizzazione Le maniglie devono essere imbustate in imballaggi conformi alla EN 868-5. Le maniglie possono essere sterilizzate con cicli standard 121°/134° C fino a duecento (200) cicli o comunque fino alla perdita delle performance meccaniche. I parametri del ciclo di sterilizzazione sono i seguenti: Ciclo EN Temperatura Pressione...
  • Page 31: Guida Ai Problemi

    Pulire le superfici con lo specifico pro- User Sui riflettori (parabole) sono comparse delle non approvati. dotto “Faro Perflex”. macchie o è venuto via Pulire le superfici con alcool isopropilico. Per il ripristino delle superfici bisogna lo strato riflettente. far sostituire il riflettore dal service.
  • Page 32: Caratteristiche Tecniche

    10. CARATTERISTICHE TECNICHE Lampada completa: Tensione alimentazione (senza trasformatore): • 17÷24Vac ±10% - 50/ 60Hz; • 22÷35Vdc ±10% Potenza assorbita : • 26VA (versione 17÷24Vac); • 14VA ( versione 22÷35Vdc) Fusibili consigliati: • Versione 17÷24Vac: T1.6AL 250V • Versione 22÷35Vdc: T630mAL 250V Protezione contro i pericoli elettrici: •...
  • Page 33: Schemi Elettrici

    10.1 SCHEMI ELETTRICI Lampada completa: • Circuito elettrico nella testata della lampada Fusibile Schema elettrico - Alya senza trasformatore...
  • Page 34 MANUALE D’USO E INSTALLAZIONE - IT Circuito elettrico nella testata della lampada Fusibile Circuito elettrico nella testata della lampada Circuito elettrico nella braccio posteriore Circuito elettrico nel braccio posteriore Fusibile / Fuse  Schema elettrico – Alya Theia Tech. Electrical Scheme – Alya Theia Tech. Edizione Apr 2016 – Rev 7C Pag. 22 di 23  ...
  • Page 35 • Testata: Schema elettrico - Testata Alya...
  • Page 36 INSTRUCTIONS FOR USE ....................58 4.1 SWITCH ON AND OFF ..................58 4.1.1 Adjustment: ....................58 4.1.2 Light / Head WITH PROXIMITY ..............58 4.1.3 Light / Complete light with Theia Tech / “ALYA” head WITH REMOTE CONTROL ................59 4.1.4 SYNCRONIZATION command ..............59 4.2 JOYSTICK ALYA JOYSTICK LEVER ASSEMBLY ..........61 ORDINARY MAINTENANCE ..................61...
  • Page 37: Safety Requirements

    1. SAFETY REQUIREMENTS Dear Client, FARO hopes you enjoy your work with the new high quality light. For safe work and to take full advantage of the performance of the product, carefully read this manual before using the device. In particular, follow all the warnings and the notes given.
  • Page 38: Symbols On The Packaging

    1.1.3 Symbols on the packaging HIGH FRAGILE DO NOT WET DO NOT ROLL DO NOT USE HOOKS MAXIMUM STACKABLE WEIGHT STORAGE TEMPERATURE TRANSPORT CONDITIONS RELATIVE HUMIDITY ATMOSPHERIC PRESSURE RECYCLABLE CARDBOARD PLANNED USE The device is intended for use solely in dental practices by dentists and hygienists to light the operative and intervention site in the treatment of oral cavity and dental treatments.
  • Page 39: General Standards And Main Warnings

    GENERAL STANDARDS AND MAIN WARNINGS • The device can be applied to the dental unit, but also be installed on specific applications. The device can be powered both by the dental unit and by a power supply unit connected directly to the mains. See the specific installation paragraph. • The device does not have Essential Performances for which inadequacy of the device performance does not prejudice patient safety. • The device does not provide life support. • The device must be clean before use (see Device Cleaning paragraph). • The packaging of the light is suitable to adequately protect it from penetration of external agents. Warnings against electrical danger and fire Do not use the light in the event parts are damaged.
  • Page 40: Storage And Use: Environmental Provisions

    Do not leave small parts of the equipment unguarded or within reach of exposed people (children) because they are a potential sources of danger. The company FARO does not allow any changes to the product not expressly authorised in writing, otherwise conformity to the safety standards and the warranty expires.
  • Page 41: Electromagnetic Immunity

    The ALYA lamp is designed to function in an electromagnetic environment in which disturbances from RF emissions are kept under control. The client or operator of the unit can contribute to preventing electromagnetic interference by assuring a minimum distance between mobile and portable RF communication devices (transmitters) and the dental unit, as recommended below, in relation to the maximum output power of the radio-communication devices.
  • Page 42: General Features

    In the version with light on the rear arm called “Alya with Theia Tech” the light source is composed of a series of LED whose light passes through a diffuser for distribution in the en- vironment below.
  • Page 43: Description Of The Parts

    Lo sviluppo dei codici è il seguente: Lunghezza bracci (solo per lampada completa) Lunghezza bracci (solo per lampada completa) ALYA – Lampada completa Alimentazione (con o senza trasformatore, solo per lampada completa) Alimentazione (con o senza trasformatore, solo per lampada completa) Lo sviluppo dei codici è...
  • Page 44 Codes are developed as follows: ALYA – Complete light Type 3° digit 4° digit – Voltage 5° digit – rear 6° digit 7° 8° 9° digits Mounting and interface arm x central Available Customisation combined control arm (mm) 0 Standard 0 Joystick 0 810x550 000 (std FARO) combined 17-24 V AC JJJ 22-35 V DC 1 Ceiling 1 Proximity sensor 1 960x550...
  • Page 45: Device Installation

    Soffitto 7 Sensore + cavo 855*810 remoto 3. DEVICE INSTALLATION Soffitto 8 Sensore auto-on 855*960 + cavo remoto TESTATA ALYA (ALYA HEAD) Type 3 digit 4 digit – 5 digit 6 digit 7, 8, 9 digit Col Temperature e Alimentazione...
  • Page 46: Complete Dental Light

    COMPLETE DENTAL LIGHT 3.2.1 Electrical requirements The requirements for correct installation for any application (combined, wall, floor or ceiling) are as follows: Type of power supply and Compliance with Power supply Power cable Classification safety requirements IEC 60601-1 Complete transformer complies with light IEC/EN 60601-1 third edition version and IEC/EN 60601-1-2 with thermal protection or protection 17-24 Vac downstream with at least one 50/60 Hz appropriate fuse: • T1.6AL 250V...
  • Page 47: Safe Working Load

    Thermal protection flame V1 or is installed is similar. certified to host the complete light. Tab 1 – Requirements for electrical connection and compliance with IEC 60601-1. Check the packaging contains the following parts: - Dental light / Head (in the required version) - Sheet to download for site instructions www.faro.it/download 3.2.2 Safe working load The dental light EDI Led type suits various installation positions: DENTAL UNIT, CEILING, WALL, FLOOR. SAFE WORKING LOAD Total load Safety load (SAFE WORKING LOAD) (MINIMUM BREAKING LOAD) Mobile arm 855 mm 29.2 N...
  • Page 48: Installation Applications

    - The applications are not supplied with the light I manuali si trovano sul sito www.faro.it/download - The device has to be installed by specialized technicians only The light has to be installed with FARO applications only. The light is supplied with rotation limit switch between the fix and the mobile arm. Edizione Apr 2016 – Rev 7C Pag.
  • Page 49: Ceiling Mounting

    CEILING MOUNTING NB1. The device has to be installed by specialized technicians only NB2. Always cut off the power supply prior to installation NB3. Before proceeding with the assembly, ensure the ceiling can bear the application. The authorized construction materials of the ceiling are concrete and natural stone. Use the supplied fittings or equivalent ones. NB4. Maximum applicable load: 70 kg NB5. Installation is allowed only in spaces provided with electrical plant compliant with the national legislation in force as regards spaces for medical use NB6.
  • Page 50 CEILING MOUNTING F. Match the 2 fixing guides (23) to the screws (8) and fix then by means of the nuts (9) and washers (10) G. Calculate the proper length of the column (14), according to the formula L=H-1900mm. Cut the exceeding column (14) part on the side were NO LATERAL BORES ARE PRESENT H. Insert them column (14) in the flange (7) and mark on the column (14) the position of the bores on the flange (7). Pay attention the orientation of the column in relation to the dental unit.
  • Page 51 CEILING MOUNTING M. Hook the unit freshly assembled (column fixing flange (7) + column (14) ) to the fixing guides (23), by matching the 4 bores of the flange (7) to the screws (8) of the flanged on the ceiling (1) Flange-column unit 7+14 N. Screw (without locking) the nuts (12) and the remaining washers (11) on the screws (8) of the ceiling flange (1) O.
  • Page 52: Wiring Diagram

    CEILING MOUNTING R. Slip - from the top - inside the column (14) a traction cord. S. Connect the lamp conductor to the traction cord. T. Fit the lamp on the column (14) and fix it with the three screws (19); make sure the bores of the bushing (20) match the screws seat on the column (14) and tighten.
  • Page 53: Wall Mounting

    WALL MOUNTING LIGHT MOUNTING WALL MOUNTING 1. Plug 2. Screw 3. Wall mounting 4. Expanders 5. Terminal board 6. Terminal board cover 7. Cover 8. Screw 8. Washer 8. Cable gland 40° 50° NB1. The device has to be installed by specialized technicians only NB2. Always cut off the power supply at the installation site prior to installation NB3.
  • Page 54 WALL MOUNTING fig.A fig.A fig.B fig.B Always cut off the power supply at the installation site prior to installation - After having fixed as reference point the chair centre (see fig. A-B), carry out on the wall three d.14 bores at the bores of the wall mounting (3); pay attention the perpendicularity of the bore. - Insert the expanders (12) in the d.14 bores previously carried out and block with the special hex spanner (installation accessory) the 2 screws;...
  • Page 55: Floor Mounting

    FLOOR MOUNTING FLOOR MOUNTING 1. Pin 2. Bushing 3. Screw 4. Support column 5. plugs 6. Screw 7. Washer 8. Screw 9. Cover 10. Terminal board 11. Cable gland 12. Expanders 13. Floor support 14. Dowels 15. Plug 40° 50°...
  • Page 56 FLOOR MOUNTING The device has to be installed by specialized technicians only NB2. Always cut off the power supply prior to installation NB3. Before proceeding with the assembly, ensure the floor can bear the application. The authorized construction materials of the wall are concrete and natural stone. Use the sup- plied fitting or equivalent ones. NB4. Maximum applicable load: 70 kg NB5. Installation is allowed only in spaces provided with electrical plant compliant with the national legislation in force as regards spaces for medical use NB6.
  • Page 57: Manuale D'uso E Installazione

    Warnings for danger of suspended loads falling Attenzione – Rischio di caduta della testata post installazione: nforme Component Il sistema medicale - usare solo le viti fornite dalla FARO. Attention - Risk of head falling after installation: built-in risultante deve essere 1-1terza - avvitare le viti di sicurezza a pacco.
  • Page 58: Electrical Requirements

    3.3.2 Electrical requirements The requirements for correct installation of the head are as follows: Type of power supply and Compliance with Power supply Classification Power cable safety requirements IEC 60601-1 17-24 Vac Transformer complies with 50/60 Hz IEC/EN 60601-1 third edition and IEC/EN 60601-1-2 with thermal protection or protection downstream with at least one appropriate fuse: • T1.6AL 250V Minimum requirements:...
  • Page 59: Switch On And Off

    4. ISTRUCTION FOR USE Read paragraph 1 carefully for safe use of the device. The device must be clean before use (see Device Cleaning paragraph). Attention S imultaneous use of the light with electro-surgical scalpels can cause its malfunctioning. Attention The control joystick must be handled with care to avoid breakages.
  • Page 60: Light / Complete Light With Theia Tech / "Alya" Head

    4.1.4 LAMP / COMPLETE LAMP WITH THEIA TECH / “ALYA” HEAD WITH SYNCHRO- NIZATION COMMAND Where foreseen, it is possible to connect the Alya lamp to the Faro environment lamp in wireless mode in order to turn them into a synchronized lighting system named “Synchro”. The “Synchro” mode has been purposefully designed to improve the comfort of the medical den- tist/orthodontist, in order to reduce the effect of glare generated when passing from observation of a highly illuminated surface (e.g.
  • Page 61: To De-Activate The Synchronization Function, Proceed As Follows

    60 seconds. To carry out the “Pairing”, proceed as follows: 1. Apply current to the Faro environment lamp you wish to couple. The environment lamp prepares itself for a Pairing connection, for a maximum time Sovrascrittura scenario: Modifica del livello di i esistente.
  • Page 62: Joystick Alya Joystick Lever Assembly

    Cleaning operations on the parabolas must be carried out wearing gloves, to avoid leaving fingerprints on the surfaces. Never use detergents containing surfactants or water-repellents that depositing can leave streaks. Slight streaking will not prejudice the quality of the light. Products differing from those suggested could damage the parabolas. If in doubt, contact FARO customer care.
  • Page 63: Cleaning The Head

    • AMMONIUM HYDROXIDE • SODIUM HYDROXIDE • METHYLENE CLORIDE • ME THYL ALCOHOL. • ALL KINDS OF ACIDS Faro has tested and suggests the following disinfectants: Eco Jet-1 (Cattani Group) / Sporekin Plus DS (Ims srl) / Zefirol Quick (Molteni Dental) / Durr FD366 Sensitive ARM CLEANING Always use a cloth soaked in disinfectant approved to disinfect the surfaces and pass it over. Warning against danger of corrosion and mechanical collapse with falling...
  • Page 64: Sterilisation

    Sterilisation The handles must be packaged in compliance with EN 868-5. The handles can be sterilised with standard cycles 121°/134° C up to two hundred (200) cycles or however up to loss of the mechanical performance. The parameters of the sterilisation cycle are as follows: Ciclo EN Temperature Pressure Minimum 13060 Holding Time 121°C 207 KPa 15 min 134°C 308 KPa 3 min...
  • Page 65: Guide To Problems

    Check you have maximum adjustment Use of wrong User with the command. procedures. Stains have appeared Clean the surfaces with specific “Faro User Use of non-approved on the parabolas or Perflex” product. Clean the surfaces with products. isopropyl alcohol. the reflective layer has To restore the surfaces, you need to get come away.
  • Page 66: Technical Features

    10. TECHNICAL FEATURES Complete light: Power supply voltage (without transformer): • 17÷24Vac ±10% - 50/ 60Hz; • 22÷35Vdc ±10% Absorbed power: • 26VA (version 17÷24Vac); • 14VA ( version 22÷35Vdc) Recommended fuses: • Version 17÷24Vac: T1.6AL 250V • Version 22÷35Vdc: T630mAL 250V Protection against electrical danger: • Class II device Classification EN 62471: • Exempt class Complete light with Theia Tech Power supply voltage (without transformer): • 24Vac ±10% - 50/ 60 Hz • 24Vdc ±10% Absorbed power: • 40VA (version 24Vac) • 28VA (version 24Vdc) Recommended fuses: •...
  • Page 67: Wiring Diagrams

    10.1 WIRING DIAGRAMS Complete light: • Electrical circuit in light head Fuse Wiring Diagram – Alya with transformer...
  • Page 68 MANUALE D’USO E INSTALLAZIONE - IT Electrical circuit in light head Fuse Circuito elettrico nella testata della lampada Circuito elettrico nella braccio posteriore Electric circuit in rear arm Fusibile / Fuse  Electrical Scheme – Alya Theia Tech. Electrical Scheme – Alya Theia Tech. Edizione Apr 2016 – Rev 7C Pag. 22 di 23  ...
  • Page 69 • Head: Electrical Scheme – Alya Head...
  • Page 70 4.1 MISE EN MARCHE ET ARRÊT .................92 4.1.1 Réglage: ......................92 4.1.2 Lampe / Tête AVEC PROXIMITY ..............92 4.1.3 Lampe / Tête “ALYA” AVEC COMMANDE À DISTANCE ......93 4.1.4 Commande de SYNCRHONISATION ............93 4.2 MONTAGE LEVIER JOYSTICK ALYA ..............95 ENTRETIEN ORDINAIRE ....................95 NETTOYAGE ........................95...
  • Page 71: Conditions De Sécurité

    1. CONDITIONS DE SÉCURITÉ Cher Client, FARO vous souhaite bon travail avec la nouvelle lampe de haute qualité. Pour travailler de façon sûre et exploiter au maximum les performances du produit, lisez attentivement ce manuel avant l’utilisation du dispositif. Suivez en particulier toutes les mises en garde et les notes reportées.
  • Page 72: Symboles Présents Sur L'emballage

    1.1.3 Symboles présents sur l’emballage HAUT FRAGILE NE PAS MOUILLER NE PAS ENROULER NE PAS UTILISER DE CROCHETS POIDS MAX SUPERPOSABLE TEMPÉRATURE DE STOCKAGE CONDITIONS DE TRANSPORT HUMIDITÉ RELATIVE PRESSION ATMOSPHÉRIQUE CARTON RECYCLABLE USAGE PRÉVU Le dispositif est destiné à être utilisé exclusivement dans le cabinet dentaire de médecins dentistes, chirurgiens dentaires et hygiénistes pour l’éclairage du site opératoire et d’intervention dan le traitement des pathologies de la cavité...
  • Page 73: Normes Générales Et Mises En Garde Principales

    NORMES GÉNÉRALES ET MISES EN GARDE PRINCIPALES • Le dispositif peut être appliqué à l’unité dentaire, mais il peut aussi être installé sur des applications consacrées. Le dispositif peut être alimenté aussi bien par l’unité dentaire que par un alimentateur branché directement au réseau. Voir le paragraphe consacré à l’installation •...
  • Page 74: Conservations Et Utilisation: Prescriptions Environnementales

    électromagnétique, il doit être installé et utilisé d’après les informations fournies par les documents d’accompagnement. Guide et déclaration du fabricant – Émissions électromagnétiques La lampe ALYA est prévue pour fonctionner dans l’espace électromagnétique spécifié ci-dessous. Le client ou l’utilisateur devrait s’assurer qu’il est bien utilisé dans cet espace. Test d’émission Conformité...
  • Page 75: Immunité Électromagnétique

    La lampe ALYA est prévue pour fonctionner dans un espace électromagnétique dans lequel les troubles irradiés RF sont sous con- trôle. Le client ou l’opérateur de l’unité peuvent contribuer à prévenir les interférences électromagnétiques en assurant une distance minimum entre les appareils de communication mobiles et portables à...
  • Page 76: Carctéristiques Générales

    Un bouton qui permet d’activer la fonction de synchronisation avec la lampe d’ambiance produite par Faro se trouve sur la tête en proximité du manche à balai et/ou du capteur de proximité. La fonction de synchronisation permet à la lampe Alya de contrôler le niveau d’éclairage ambiant afin d’assurer un niveau d’illumination plus uniforme entre le champ opératoire et la zone...
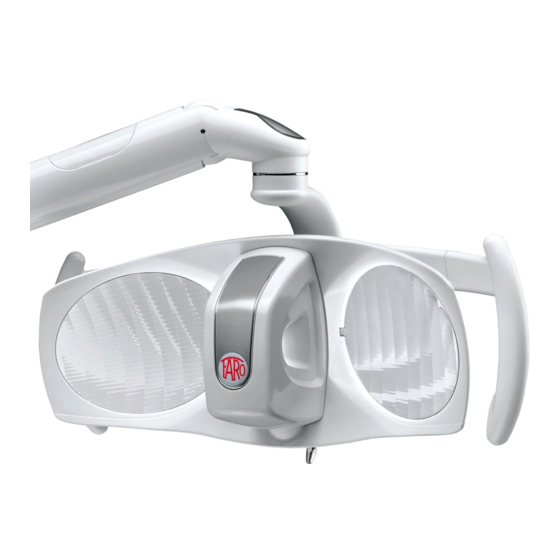
  • Page 77: Description Des Pièces

    Lo sviluppo dei codici è il seguente: Lunghezza bracci (solo per lampada completa) Lunghezza bracci (solo per lampada completa) ALYA – Lampada completa Alimentazione (con o senza trasformatore, solo per lampada completa) Alimentazione (con o senza trasformatore, solo per lampada completa) Lo sviluppo dei codici è...
  • Page 78: Tête Alya (Alya Head)

    17-24 V AC 22-35 V DC 2 Unité 9 810x 855 Auto-on 4 Unité Câble Dist ALYA – Lampe complète avec Theia Tech Type 3° chiffres Montage 4° chiffres type 5° chiffres type 6° chiffres 7° 8° 9° chiffres et dimensions bras de Têt...
  • Page 79: Installation Du Dispositif

    7 Sensore + cavo 855*810 remoto 3. INSTALLATION DU DISPOSITIF Soffitto 8 Sensore auto-on 855*960 + cavo remoto TESTATA ALYA (ALYA HEAD) Type 3 digit 4 digit – 5 digit 6 digit 7, 8, 9 digit Col Temperature e Alimentazione...
  • Page 80: Lampe Dentaire Complète

    LAMPE DENTAIRE COMPLÈTE 3.2.1 Conditions Electriques Les conditions pour l’installation correcte pour n’importe quelle application (unité, mur, sol ou plafond) sont les suivantes: Type d’alimentation et Conformité à l’IEC Câble Alimentation Classification conditions de protection 60601-1 d’alimentation Version transformateur conforme à lampe l’IEC/EN 60601-1troisième complète...
  • Page 81: Charges De Sécurité

    - Lampe dentaire / Tête (dans la version demandée) - Feuillet pour télécharger les instructions du site www.faro.it/download 3.2.2 Charges de sécurité La lampada dentale ALYA et ALYA THEIA peut être installée sur différents supports: ENSEMBLE DENTAIRE, PLAFOND, MUR, SOL. CHARGES DE SÉCURITÉ BRAS Charge totale Charge de sécurité...
  • Page 82: Connexion Câble À Distance

    - Les fixations doivent être installées par des techniciens spécialisés. I manuali si trovano sul sito www.faro.it/download La lampe doit être installée uniquement avec les fixations FARO. La lampe est pourvue d’un fin de course de rotation entre bras fixe et bras mobile.
  • Page 83: Séquence D'installation

    APPLICATION EN PLAFOND NB1. Le dispositif doit être installé par des techniciens spécialisés. NB2. L’alimentation à l’intérieur du local d’installation doit être toujours coupée. NB3. Avant d’effectuer les opérations de montage, s’assurer que le plafond supporte l’application. Les matériaux du plafond autorisés sont le béton et la pierre naturelle. Les chevilles à utiliser sont les modèles fournis ou équivalents.
  • Page 84 APPLICATION EN PLAFOND F. Enfiler les 2 guides de fixation (23) sur les vis (8) et les fixer avec des écrous (9) et rondelles (10) G. Calculer la longueur correcte de la colonne (14), selon la formule L=H-1900mm. Veiller à couper la partie e colonne (14) en trop du côté...
  • Page 85 APPLICATION EN PLAFOND M. Accrocher le groupe tout juste assemblé (bride de fixation colonne (7) + colonne (14) aux guides de fixation (23), en centrant les 4 trous de la bride (7) aux vis (8) de la bride de plafond (1). Groupe 7+14 N.
  • Page 86: Schéma Électrique

    APPLICATION EN PLAFOND R. Enfiler dans la colonne (14) par le haut un câble de traction. S. Brancher le fil de la lampe au câble de traction. T. Insérer la lampe dans la colonne (14) et la fixer avec les trois vis (19) en veillant à orienter les trous de la douille (20) vers les logements des vis sur la co- lonne (14) et les visser.
  • Page 87: Montage De La Lampe Application Murale

    A PPLICATION MURALE MONTAGE DE LA LAMPE APPLICATION MURALE 1. Bouchon 2. Vis 3. Application murale 4. Chevilles 5. Bornier 6. Cache bornier 7. Cache 8. Vis 9. Rondelle 10. Passe-fil 40° 50° NB1. Le dispositif doit être installé par des techniciens spécialisés NB2.
  • Page 88 A PPLICATION MURALE fig.A fig.A fig.B fig.B - L’alimentation à l’intérieur du local d’installation doit toujours être coupée. - Après avoir défini le point de fixation par rapport au centre du fauteuil (Voir fig.A-B), pratiquer sur le mur trois trous diam. 14 au niveau des orifices de la fixation murale (3), en veillant à ce que le trou soit perpendiculaire.
  • Page 89: Application Au Sol

    APPLICATION AU SOL MONTAGE DE LA LAMPE APPLICATION AU SOL 1. Pivot 2. Douille 3. Vis 4. Colonne 5 bouchons 6. Vis 7. Rondelle 8. Vis 9. Cache 10. Bornier 11. Passe-fil 12. Chevilles 13. Support de sol 14. Goujons 15.
  • Page 90 APPLICATION AU SOL Le dispositif doit être installé par des techniciens spécialisés NB2. L’alimentation à l’intérieur du local d’installation doit toujours être coupée NB3. Avant d’effectuer les opérations de montage, s’assurer que le sol supporte l’application. Les matériaux du sol autorisés sont le béton et la pierre naturelle. Les chevilles à utiliser sont les modèles fournis ou équivalents.
  • Page 91: Tête

    Attenzione – Rischio di caduta della testata post installazione: Attenzione – Rischio di caduta della testata post installazione: - usare solo le viti fornite dalla FARO. - usare solo le viti fornite dalla FARO. Attention - Risque de chute de la tête après installation: - avvitare le viti di sicurezza a pacco.
  • Page 92: Conditions Electriques

    3.3.2 Conditions Electriques Les conditions pour l’installation correcte de la tête sont les suivantes: Câble Type d’alimentation et Conformité à l’IEC Alimentation Classification d’alimentation conditions de protection 60601-1 17-24 Vac Transformateur conforme à 50/60 Hz l’IEC/EN 60601-1troisième édition et à l’IEC/EN 60601- 1-2 avec protection thermique ou protégé...
  • Page 93: Mode D'emploi

    4. MODE D’EMPLOI Lire attentivement le paragraphe 1 pour un usage sûr du dispositif. Le dispositif doit être nettoyé avant l’utilisation (voir paragraphe “Nettoyage du dispositif”). Attention L’utilisation simultanée de la lampe avec un bistouri électrique peut provoquer des dysfonctionnements de ce dernier. Attention La manette de contrôle doit être maniée avec délicatesse afin d’éviter des ruptures.
  • Page 94: Commande À Distance

    4.1.4 LAMPE / LAMPE COMPLÈTE AVEC THEIA TECH / TESTÉE «ALYA» AVEC COMMANDE DE SYNCRHONISATION Il est possible, où prévu, de brancher la lampe Alya à la lampe d’ambiante Faro, en mode sans fil, afin de créer un système d’éclairage synchronisé entre elles, dénommé «Synchro».
  • Page 95: Pour Désactiver La Fonction De Synchronisation Il Faut Procéder

    (avec la del bleue allumée) dès qu’un nouveau réglage s’effectue sur la lampe Alya la valeur de l’éclairage sera immédiatement mise à jour. • Si la lampe Alya devait s’éteindre, la lampe d’ambiance reste allumée à la valeur d’éclairage en cours d’utilisation.
  • Page 96: Montage Levier Manette Alya

    Ne pas utiliser de détergents contenant des tensioactifs ou hydrofuges qui peuvent laisser des auréoles en se déposant. De légères auréoles ne compromettent pas la qualité de la lumière. Des produits différents de ceux suggérés pourraient endommager les réflecteurs. En cas de doute, contacter le service clients FARO.
  • Page 97: Nettoyage De La Tête

    Avant la stérilisation, les poignées doivent être décontaminées et désinfectées. Pour la désinfection, Faro a testé les produits suivants pour la désinfection: Eco Jet-1 (Cattani Group) / Sporekin Plus DS (Ims srl) / Zefirol Quick (Molteni Dental) / Durr FD366 Sensitive Attention - danger de rupture plastiques Les poignées ne peuvent pas être désinfectées par thermo-désinfection.
  • Page 98: Stérilisation

    Stérilisation Les poignées doivent être emballées dans des emballages conformes à l’EN 868-5. Les poignées peuvent être stérilisées avec cycles standard 121°/134° C jusqu’à deux cents (200) cycles ou quoi qu’il en soit jusqu’à la perte des performances mécaniques. Les paramètres du cycle de stérilisation sont les suivants: Cycle EN Température Pression...
  • Page 99: Guide Des Problèmes

    Vérifier qu’on est au réglage maximum Utilisateur procédures erronées avec la commande Des taches sont Utilisateur Nettoyer les surfaces avec le produit Utilisation de spécifique “Faro Perflex”. apparues sur les produits non Nettoyer les surfaces avec de l’alcool réflecteurs (parabole) approuvés. isopropylique. ou la couche Pour la réinitialisation des surfaces, il...
  • Page 100: Caractéristiques Techniques

    10. CARACTÉRISTIQUES TECHNIQUES Lampe complète: Tension alimentation (sans transformateur): • 17÷24Vac ±10% - 50/ 60Hz; • 22÷35Vdc ±10% Puissance absorbée: • 26VA (version 17÷24Vac); • 14VA (version 22÷35Vdc) Fusibles conseillés : • Version 17÷24Vac: T1.6AL 250V • Version 22÷35Vdc: T630mAL 250V Protection contre les dangers électriques: •...
  • Page 101: Schémas Electriques

    10.1 SCHÉMAS ÉLECTRIQUES Lampe complète: • Circuit électrique dans la tête de la lampe Fusible Schéma Electrique – Alya sans transformateur...
  • Page 102 Circuit électrique dans la tête de la lampe Fusible Circuito elettrico nella testata della lampada Circuito elettrico nella braccio posteriore Circuit électrique dans le bras arrière Fusibile / Fuse  Schéma Electrique – Alya Theia Tech. Electrical Scheme – Alya Theia Tech. Edizione Apr 2016 – Rev 7C Pag. 22 di 23  ...
  • Page 103 • Tête: Schéma Electrique – Tête Alya...
  • Page 104 4.1 EINSCHALTEN UND AUSSCHALTEN ..............126 4.1.1 Regulierung: ....................126 4.1.2 Lampe / Kopf MIT SENSORSCHALTER ..........126 4.1.3 Lampe / Lampe komplett Theia Tech / Kopf“ALYA” MIT FERNBEDIENUNG 127 4.1.4 Synchronisationsbefehl ................127 4.2 MONTAGE DES KIPPSCHALTERS JOYSTICKS ALYA ........129 ORDENTLICHE WARTUNG ..................129 REINIGUNG ........................129...
  • Page 105: Sicherheitsanforderungen

    1. SICHERHEITSANFORDERUNGEN Sehr geehrter Kunde, FARO wünscht Ihnen gute Arbeit mit Ihrer neuen hochqualitativen Dentallampe. Um sicher zu arbeiten und um die Leistungen des Produkts optimal zu nutzen, lesen Sie bitte die Bedienungsanleitung sorgfältig durch, bevor Sie das Gerät benutzen.
  • Page 106: Symbole Auf Der Verpackung

    1.1.3 Symbole auf der Verpackung HOCH ZERBRECHLICH NICHT NASS MACHEN NICHT DREHEN KEINE HAKEN VERWENDEN ÜBERLAGBARES HÖCHSTGEWICHT LAGERTEMPERATUR TRANSPORTBEDINGUNGEN RELATIVE LUFTFEUCHTIGKEIT ATMOSPHÄRISCHER DRUCK WIEDERVERTWERTBARE PAPPE VORGESEHENER GEBRAUCH Das Gerät ist ausschließlich für den Einsatz in Praxen für Zahnmedizin, Zahn- und Mundheilkunde und Dentalhygiene zum Beleuchten des Behandlungs- und Eingriffsraumes bei Behandlungen von Pathologien der Mundhöhle und Zähne vorgesehen.
  • Page 107: Allgemeine Vorschriften Und Die Wichtigsten Warnhinweise

    ALLGEMEINE VORSCHRIFTEN UND DIE WICHTIGSTEN WARNHINWEISE • Das Gerät kann als Zubehör zur Dentaleinheit aber auch auf spezielle Anwendungen installiert werden. Das Gerät kann sowohl von der Dentaleinheit, als auch von einem an das Stromversorgungsnetz angeschlossenen Stromgerät versorgt werden. Bitte sehen Sie im Abschnitt zur Installation nach.
  • Page 108: Aufbewahrung Und Gebrauch Vorschriften Für Die Raumbedingungen

    Lieferumfangs installiert und verwendet werden. Leitlinien und Herstellererklärung – Elektromagnetische Emissionen Die ALYA-Leuchte ist zum Betrieb in der unten angegeben elektromagnetischen Umgebung bestimmt. Der Kunde bzw. der Benutzer muss gewährleisten, dass sie in einer solchen Umgebung verwendet wird Emissionstest Elektromagnetische Umgebung - Leitlinien Konformität...
  • Page 109: Elektromagnetische Störfestigkeit

    ELEKTROMAGNETISCHE STÖRFESTIGKEIT Leitlinien und Herstellererklärung – Elektromagnetische Störfestigkeit Die ALYA-Leuchte ist zum Betrieb in der unten angegeben elektromagnetischen Umgebung bestimmt. Der Kunde bzw. der Benutzer muss gewährleisten, dass sie in einer solchen Umgebung verwendet wird Störsicherheitstes Konformität Elektromagnetische Umgebung - Leitlinien Der Bodebelag sollte aus Holz, Beton oder Keramikfliesen sein.
  • Page 110: Allgemeine Eigenschaften

    Bereich zu garantieren, um so den Effekt der Blendung zu reduzieren und die Bequemlichkeit zu verbessern. Bei der Version “Alya mit Theia Tech” mit Licht auf dem hinteren Arm besteht die Lichtquelle aus einer Leuchtdiodenreihe, deren Licht über einen Lichtschirm in den umliegenden Raum gestreut wird.
  • Page 111: Beschreibung Der Teile

    Lo sviluppo dei codici è il seguente: Lunghezza bracci (solo per lampada completa) Lunghezza bracci (solo per lampada completa) ALYA – Lampada completa Alimentazione (con o senza trasformatore, solo per lampada completa) Alimentazione (con o senza trasformatore, solo per lampada completa) Lo sviluppo dei codici è...
  • Page 112 5 Sensorschalter Rem cable 230 V AC 9 Joystick 240 V AC 8 Sensorschalter 240 V AC ALYA – komplette Lampe mit Theia Tech 3° Digit Montage 4° Digit Kopftyp 5° Digit 6° Digit 7° 8° 9° Digit und Armgrößen...
  • Page 113: Geräteinstallation

    Soffitto 7 Sensore + cavo 855*810 remoto 3. GERÄTEINSTALLATION Soffitto 8 Sensore auto-on 855*960 + cavo remoto TESTATA ALYA (ALYA HEAD) Type 3 digit 4 digit – 5 digit 6 digit 7, 8, 9 digit Col Temperature e Alimentazione Available...
  • Page 114: Komplette Dentallampe

    KOMPLETTE DENTALLAMPE 3.2.1 Erforderliche elektrische Eigenschaften Die Anforderungen für die korrekte Installation für jede Anwendung (Dentaleinheit, Wand, Bo- den, Decke) sind die folgenden: Strom- Stromversorgungstyp und Konform mit IEC Stromkabel Klassifikat. versorgung Schutzvorrichtungen 60601-1 Version Transformator konform mit komplette IEC /EN 60601-1 dritte Lampe Ausgabe und IEC / EN 60601- 2 mit Thermoschutz oder nach...
  • Page 115: Sicherheitshinweis: Maximalbelastung

    Überprüfen, ob in der Verpackung folgende Komponenten sind: - Dentallampe / Kopf (in der bestellten Version) - Blatt zum Herunterladen der Anleitungen von der Webseite www.faro.it/download 3.2.2 Sicherheitshinweis: Maximalbelastung Die Dentallampen ALYA und ALYA Theia können wie folgt installiert werden: DENTALEINHEIT/DECKE/WAND/BODEN. SICHERHEITSHINWEIS: MAXIMALBELASTUNG Gesamtbelastung Sicherheitslast (SAFE WORKING LOAD) (MINIMUM BREAKING LOAD) 29.2 N...
  • Page 116: Anschluss Des Fernsteuerkabels

    I manuali si trovano sul sito www.faro.it/download - Die Anwendungen müssen von Fachtechnikern installiert werden Die Lampe darf nur mit FARO Anwendungen installiert werden Die Lampe hat einen Dreh-Endschalter zwischen dem festen Arm und dem Edizione Apr 2016 – Rev 7C Pag.
  • Page 117 DECKENBEFESTIGUNG HINWEIS 1. Das Gerät muss von Fachtechnikern installiert werden HINWEIS 2. Die Stromversorgung in dem Raum, wo die Installation durchgeführt wird, muss stets ausgeschaltet sein. HINWEIS 3. Vor den Montagearbeiten muss sichergestellt werden, dass die Decke geeignet ist, um die Anwendung zu halten. Die zugelassenen Deckenmaterialien sind Beton und Naturstein.
  • Page 118 DECKENBEFESTIGUNG F. Die 2 Befestigungsschienen (23) an den Schrauben (8) anbringen und mit den Muttern (9) und Unterlegscheiben (10) befestigen. G. Die genaue Länge der Säule (14), gemäß der Formel L=H-1900mm berechnen. Darauf achten den überschüssigen Teil der Säule (14) von der Seite zu schneiden, wo sich NICHT die seitlichen Bohrungen befinden.
  • Page 119 DECKENBEFESTIGUNG M. Die soeben zusammengebaute Einheit (Flansch zum Anschluss an die Säule (7) + Säule (14) ) an den Befestigungsschienen (23) einhaken, indem die 4 Löcher des Flansch (7) an den Schrauben (8) des Flansch an der Decke (1) zentriert werden. Gruppe 7+14 N.
  • Page 120 DECKENBEFESTIGUNG R. In die Säule (14) von oben ein Zugseil einfügen. S. Die Leitung der Lampe mit dem Zugseil verbinden. T. Die Lampe in die Säule (14) einsetzen und mit den drei Schrauben (19) befestigen, dabei darauf achten, die Löcher der Buchse (20) auf Höhe der Schrauben- sitze auf der Säule (14) auszurichten und die Schrauben anschrauben.
  • Page 121 WANDBEFESTIGUNG MONTAGE DER LAMPE MIT WANDBEFESTIGUNG 1. Verschluss 2. Schraube 3. Wandbefestigung 4. Expander 5. Klemmleiste 6. Klemmleistenabdeckung 7. Abdeckung 8. Schraube 9. Unterlegscheibe 10. Kabeldurchführung 40° 50° HINWEIS 1. Das Gerät muss von Fachtechnikern installiert werden HINWEIS 2. Die Stromversorgung in dem Raum, wo die Installation durchgeführt wird, muss stets ausgeschaltet sein.
  • Page 122 WANDBEFESTIGUNG Abb. A fig.A Abb. B fig.B - Die Stromversorgung in dem Raum, wo die Installation durchgeführt wird, muss stets ausge- schaltet sein. - Die Mitte des Behandlungsstuhl als Bezugspunkt bestimmen (siehe Abb.A-B) und a¬uf der Wand drei Löcher von Durchmesser 14 auf Höhe der Löcher der Wandbefestigung (3) bohren, dabei sorgfältig auf die Rechtwinkligkeit des Loches achten.
  • Page 123 BODENBEFESTIGUNG EINBAU DER ANWENDUNG AM BODEN 1. Stift 2. Buchse 3. Schraube 4. Säule 5. Deckel 6. Schraube 7. Unterlegscheibe 8. Schraube 9. Abdeckung 10. Klemmleiste 11. Kabeldurchführung 12. Expander 13. Bodenhalterung 14. Gewindestifte 15. Verschluss 40° 50°...
  • Page 124 BODENBEFESTIGUNG Das Gerät muss von Fachtechnikern installiert werden HINWEIS 2. Die Stromversorgung in dem Raum, wo die Installation durchgeführt wird, muss stets ausgeschaltet sein. HINWEIS 3. Vor den Montagearbeiten muss sichergestellt werden, dass der Boden geeignet ist, um die Anwendung zu halten. Die zugelassenen Wandmaterialien sind Beton und Naturstein.
  • Page 125: Manuale D'uso E Installazione

    Attenzione – Rischio di caduta della testata post installazione: Warnung vor Gefahr durch Herunterfallen aufgehängter Gegenstände - usare solo le viti fornite dalla FARO. - usare solo le viti fornite dalla FARO. - avvitare le viti di sicurezza a pacco.
  • Page 126: Erforderliche Elektrische Eigenschaften

    3.3.2 Erforderliche elektrische Eigenschaften Die Anforderungen für die korrekte Installation des Kopfes sind:: Stromversorgungstyp und Konform mit IEC Strom- Stromkabel Klassifikat. versorgung Schutzvorrichtungen 60601-1 17-24 Vac Transformator konform 50/60 Hz mit IEC /EN 60601-1 dritte Ausgabe und IEC / EN 60601- 2 mit Thermoschutz oder nachgeschalteter geeigneter Sicherung:...
  • Page 127: Bedienungsanweisung

    4. BEDIENUNGSANWEISUNG Aufmerksam den Absatz 1 zur sicheren Bedienung des Geräts durchlesen. Das Gerät muss vor dem ersten Gebrauch gereinigt werden (siehe Abschnitt “Reinigung des Geräts”). Achtung Der gleichzeitige Gebrauch von Lampe und einem Elektrokauter kann zu einer Fehlfunktion der Lampe führen. Achtung Der Joystick muss vorsichtig bedient werden, um Schäden zu vermeiden.
  • Page 128: Lampe / Lampe Komplett Theia Tech / Kopf"Alya" Mit Fernbedienung

    Fläche (zum Beispiel Mundhöhle mit der OP-Lampe) zu einer schwach beleuchteten Fläche (zum Beispiel Köcher) entsteht. Mit dem so genannten „Syncro”-Modus, der über die Taste auf dem Kopfstück der Lampe Alya aktiviert werden kann, ist es möglich die Beleuchtungsstärke durch die Raumlampe Faro auto- matisch basierend auf der Beleuchtungsstärke, die durch Alya produziert wird, zu ändern.
  • Page 129 Hinweise bezüglich der Synchronisierung: • Wenn die Raumlampe Faro synchronisiert ist (das heißt, sie steuert sich automatisch) mit der Lampe Alya, ist die blaue LED auf dem Rahmen fest eingeschaltet, wenn die LED ausgeschaltet ist, ist die Synchronisierung deaktiviert. • Die Fernsteuerung ist immer aktiviert, daher ist es möglich die Beleuchtungsstärke zu ändern, aber wenn die Raumlampe sich im Synchronisierungszustand befindet...
  • Page 130: Montage Des Kippschalters Joysticks Alya

    MONTAGE DES KIPPSCHALTERS JOYSTICKS ALYA - Den Kippschalter “A” auf den Joystickzapfen einsetzen und einrasten lassen. - Das Loch des Kippschalters “A” muss auf Höhe von “B” liegen. - Die Madenschraube “C” mit dem Schraubenschlüssel bis zum Anschlag einschrauben. Achtung DDer Joystick muss vorsichtig bedient werden, um Schäden zu vermeiden.
  • Page 131: Reinigung Des Kopfes

    Dekontamination und Desinfektion Vor dem Sterilisieren der Griffe müssen sie dekontaminiert und desinfiziert werden. Faro hat die folgenden Desinfektionsmittel in seinem Labor getestet: Eco Jet-1 (Cattani Group) / Sporekin Plus DS (Ims srl) / Zefirol Quick (Molteni Dental) / Durr FD366 Sensitive Achtung - Gefahr der Beschädigung von Plastikteilen...
  • Page 132: Sterilisation

    Sterilisation Die Griffe müssen in EN 868-5 konformen Beutel gesteckt werden. Die Griffe können mit Standardzyklen bei 121°c /134° C bis zu zweihundert (200) Mal oder in jedem Fall bis sie ihre mechanische Leistung verloren haben, sterilisiert werden. Die Zyklusparameter für die Sterilisation sind: Zyklus Temperatur...
  • Page 133: Leitfaden Für Probleme

    Benutzer Verfahren. Verwendung Die Oberflächen mit dem spezifischen Benutzer Auf den Reflektoren nicht empfohlener Produkt “Faro Perflex” reinigen. Die (Parabeln) haben sich Produkte. Oberflächen mit Isopropylalkohol reinigen, Flecken gebildet oder Um die Oberflächen wieder herzustellen, die reflektierende muss der Reflektor vom technischen Schicht ist abgegangen.
  • Page 134: Technische Charakteristiken

    10. TECHNISCHE CHARAKTERISTIKEN Komplette Lampe: Versorgungsspannung (ohne Transformator): • 17÷24Vac ±10% - 50/ 60Hz; • 22÷35Vdc ±10% Absorbierte Leistung: • 26VA (Version 17÷24Vac); • 14VA ( Version 22÷35Vdc) empfohlene Sicherungen: • Version 17÷24Vac: T1.6AL 250V • Version 22÷35Vdc: T630mAL 250V Schutz gegen elektrische Gefahren: •...
  • Page 135: Schaltpläne

    10.1 SCHALTPLÄNE Komplette Lampe: • Stromkreislauf im Kopf der Lampe Schmelzsicherung Schaltplan - Alya ohne Transformator...
  • Page 136 MANUALE D’USO E INSTALLAZIONE - IT Circuito elettrico nella testata della lampada Schmelzsicherung Circuito elettrico nella testata della lampada Circuito elettrico nella braccio posteriore Stromkreislauf im hinteren Arm Sicherung Fusibile / Fuse  Schaltplan – Alya Theia Tech. Electrical Scheme – Alya Theia Tech. Edizione Apr 2016 – Rev 7C Pag. 22 di 23  ...
  • Page 137 • Kopf: Schaltplan - Alya Kopf...
  • Page 138 4.1 ENCENDIDO Y APAGADO .................160 4.1.1 Ajuste: ......................160 4.1.2 Lámpara / Cabeza CON PROXIMITY ............160 4.1.3 Lámpara / Lámpara completa con Theia Tech / Cabeza “ALYA” CON MANDO REMOTO ................161 4.1.4 Mando de SINCRONIZACIÓN ..............161 4.2 MONTAJE DE LA PALANCA JOYSTICK ALYA ..........163 MANTENIMIENTO ORDINARIO ................163...
  • Page 139: Requisitos De Seguridad

    1. REQUISITOS DE SEGURIDAD Estimado Cliente: FARO le desea buen trabajo con la nueva lámpara de alta calidad. Para trabajar en modo seguro y para aprovechar al máximo las performances del producto, lea atentamente el presente manual antes del uso del dispositivo. Siga particularmente todas las advertencias y las notas indicadas.
  • Page 140: Simbología Presente En El Embalaje

    1.1.3 Simbología presente en el embalaje ALTO FRÁGIL NO MOJE NO RUEDE NO USE GANCHOS PESO MÁX SUPERPONIBLE TEMPERATURA DE ALMACENAMIENTO CONDICIONES DE TRANSPORTE HUMEDAD RELATIVA CARTÓN RECICLABLE USO PREVISTO El dispositivo está destinado a ser utilizado exclusivamente en el gabinete odontológico por médicos odontólogos, odontoestomatólogos e higienistas, para la iluminación del lugar operatorio y de intervención en el tratamiento de las patologías de la cavidad oral y del aparato dental.
  • Page 141: Normas Generales Y Principales Advertencias

    NORMAS GENERALES Y PRINCIPALES ADVERTENCIAS • El dispositivo puede aplicarse a la unidad dental, pero también puede instalarse en aplicaciones dedicadas. El dispositivo puede ser alimentado tanto por la unidad dental como por un alimentador conectado directamente a la red. Véase el párrafo dedicado a la instalación.
  • Page 142: Conservaciones Y Utilización: Prescripciones Ambientales

    Guía y declaración del fabricante – Emisiones electromagnéticas La lámpara ALYA ha sido ideada para poder funcionar en el ambiente electromagnético que se especifica a continuación. El cliente o el usuario debería asegurarse de que la misma se utilice en dicho ambiente.
  • Page 143: Inmunidad Electromagnética

    Guía y declaración del fabricante – Inmunidad electromagnética La lámpara ALYA ha sido ideada para poder funcionar en el ambiente electromagnético que se especifica a continuación. El cliente o el usuario debería asegurarse de que la misma se utilice en dicho ambiente.
  • Page 144: Características Generales

    En la versión con la luz en el brazo trasero denominada “Alya con Theia Tech” la fuente luminosa se compone de una serie de LED cuya luz, al pasar a través de un difusor, es distribuida por el ambiente subestante.
  • Page 145: Descripción De Las Piezas

    Lo sviluppo dei codici è il seguente: Lunghezza bracci (solo per lampada completa) Lunghezza bracci (solo per lampada completa) ALYA – Lampada completa Alimentazione (con o senza trasformatore, solo per lampada completa) Alimentazione (con o senza trasformatore, solo per lampada completa) Lo sviluppo dei codici è...
  • Page 146 230 V AC 9 Joystick 240 V AC 8 Proximity 240 V AC ALYA – Lámpara completa con Theia Tech 3° digit Mounting y 4° digit tipo de 5° digit tipo de 6° digit 7° 8° 9° digit dimens. de los brazos Cabeza...
  • Page 147: Instalación Del Dispositivo

    7 Sensore + cavo 855*810 remoto 3. INSTALACIÓN DEL DISPOSITIVO Soffitto 8 Sensore auto-on 855*960 + cavo remoto TESTATA ALYA (ALYA HEAD) Type 3 digit 4 digit – 5 digit 6 digit 7, 8, 9 digit Col Temperature e Alimentazione...
  • Page 148: Lámpara Dental Completa

    LÁMPARA DENTAL COMPLETA 3.2.1 Requisitos eléctricos Los requisitos para la correcta instalación para cualquier aplicación (unidad, pared, piso o techo) son los siguientes: Tipo de alimentación y Conformidad con la Cable de Alimentación Clasificación alimentación requisitos de protección IEC 60601-1 Versión Transformador conforme con lámpara...
  • Page 149: Montaje De La Lámpara Completa, Versión De Unidad

    - Lámpara dental / Cabeza (en la versión requerida) - Hoja para descargar las instrucciones del sitio www.faro.it/download 3.2.2 Cargas de seguridad La lámpara dental ALYA y ALYA THEIA TECH se puede instalar en diferentes aplicaciones: EQUIPO DENTAL- TECHO-PARED - PISO. CARGAS DE SEGURIDAD DE LOS BRAZOS Carga total Carga útil de seguridad...
  • Page 150: Conexión Del Cable Remoto

    I manuali si trovano sul sito www.faro.it/download - Las aplicaciones deben ser instaladas por técnicos especializados La lámpara debe ser instalada solo con aplicaciones FARO La lámpara dispone de un microinterruptor de tope de rotación entre el brazo fijo y Edizione Apr 2016 –...
  • Page 151: Secuencia De Instalación

    APLICACIÓN EN EL TECHO NB1. El dispositivo debe ser instalado por técnicos especializados. NB2. La alimentación en el interior del local donde se efectúa la instalación debe estar siempre desconectada. NB3. Antes de proceder con las operaciones de montaje es necesario asegurarse que el techo esté...
  • Page 152 APLICACIÓN EN EL TECHO F. las 2 guías de fijación (23) en los tornillos (8) y fíjelas con las tuercas (9) y las arandelas (10). G. Calcule la longitud justa de la columna (14) según la fórmula L=H-1900 mm. Preste atención a cortar la parte excedente de la columna (14) por el lado donde NO hay perforaciones laterales.
  • Page 153 APLICACIÓN EN EL TECHO M. Enganche el grupo apenas ensamblado (brida de unión de la columna (7) + colonna (14) ) a las guías de fijación (23) centrando los 4 agujeros de la brida (7) en los tornillos (8) de la brida de techo (1). Gruppo 7+14 N.
  • Page 154: Esquema Alámbrico

    APLICACIÓN EN EL TECHO R. Introduzca desde arriba en la columna (14) un cable de tracción. S. Conecte el conductor de la lámpara al cable de tracción. T. Introduzca la lámpara en la columna (14) y fíjela con los tres tornillos (19) teniendo cuidado de orientar los agujeros del casquillo (20) en correspondencia de las sedes de los tornillos en la columna (14) y atorníl- lelos.
  • Page 155 APLICACIÓN A LA PARED MONTAJE DE LA LÁMPARA APLICACIÓN A LA PARED 1. Tapón 2. Tornillo 3. Aplicación a la pared 4. Expandidor 5. Tablero de bornes 6. Cobertura del tablero de bornes 7. Cobertura 8. Tornillo 9. Arandela 10. Aislador pasapanel 40°...
  • Page 156 APLICACIÓN A LA PARED fig.A fig.A fig.B fig.B - La alimentación en el interior del local donde se efectúa la instalación debe estar siempre desconectada. - Establecido el punto de fijación con referencia el centro del sillón (véase fig. A-B) efectúe tres agujeros d.14 en la pared en correspondencia de los agujeros de la aplicación a la pared (3) cuidando atentamente la perpendicularidad del agujero.
  • Page 157 APLICACIÓN AL SUELO MONTAJE Y APLICACIÓN AL SUELO 1. Perno 2. Casquillo 3. Tornilloe 4. Columna 5. Tapones 6. Tornillo 7. Arandela 8. Tornillo 9. Cobertura 10. Tablero de bornes 11. Aislador pasapanel 12. Expnadidors 13. Soporte de suelo 14. Tornillos sin cabeza 15.
  • Page 158 APLICACIÓN AL SUELO El dispositivo debe ser instalado por técnicos especializados. NB2. La alimentación en el interior del local donde se efectúa la instalación debe estar siempre desconectada. NB3. Antes de proceder con las operaciones de montaje es necesario asegurarse que el techo esté en condiciones de sostener la aplicación.
  • Page 159: Cabeza

    Attenzione – Rischio di caduta della testata post installazione: Attenzione – Rischio di caduta della testata post installazione: - usare solo le viti fornite dalla FARO. - usare solo le viti fornite dalla FARO. Atención – Riesgo de caída de la cabeza después de la instalación: - avvitare le viti di sicurezza a pacco.
  • Page 160: Requisitos Eléctricos

    3.3.2 Requisitos eléctricos Los requisitos para la correcta instalación de la cabeza son los siguientes: Cable de Tipo de alimentación y Conformidad con la Alimentación Clasificación alimentación requisitos de protección IEC 60601-1 17-24 Vac Transformador conforme con 50/60 Hz la IEC/EN 60601-1 tercera edición y con la IEC/EN 60601-1-2 con protección térmica o protección a valle...
  • Page 161: Instrucciones De Uso

    4. INSTRUCCIONES DE USO Lea atentamente el párrafo 1 para un uso seguro del dispositivo. El dispositivo debe limpiarse antes del uso (véase párrafo Limpieza del dispositivo). Atención El uso simultáneo de la lámpara con un bisturí eléctrico puede provocar malfuncionamientos de esta.
  • Page 162: Lámpara / Lámpara Completa Con Theia Tech / Cabeza "Alya

    NOTA: • El procedimiento de “Pairing” es necesario solo a la primera conexión, sin embargo puede ser repetido en caso de sustitución de la lámpara Alya o de la electrónica de una de las dos lámparas conectadas entre ellas. • Si en el gabinete están presentes varias lámparas ambiente, asegúrese que las otras lám-...
  • Page 163 Notas relacionadas con la sincronización: • Cuando la lámpara ambiente Faro está en sincrónico, es decir se regula en automático, con la lámpara Alya el led azul el bastidor en está encendido fijo; cuando el led está apagado, la sincronización está desactivada.
  • Page 164: Montaje De La Palanca Joystick Alya

    No use detergentes que contengan tensioactivos o hidrófugos que, al depositarse, pueden dejar aureolados. Leves aureoleados no perjudican la calidad de la luz. Productos distintos de los sugeridos pueden dañar los reflectores. En caso de dudas póngase en contacto con el Customer Care de FARO.
  • Page 165: Limpieza De La Cabeza

    Antes de la esterilización, las manijas deben ser descontaminadas y desinfectadas. Para la desinfección, Faro ha probado los siguientes productos para la desinfección: Eco Jet-1 (Cattani Group) / Sporekin Plus DS (Ims srl) / Zefirol Quick (Molteni Dental) / Durr FD366 Sensitive Atención - peligro de rotura de plásticos...
  • Page 166: Inspecciones Periódicas

    Esterilización Las manijas deben ser puestas en sobres y embalajes conformes con la EN 868-5. Las manijas pueden ser esterilizadas con ciclos estándar 121°/134°C hasta doscientos (200) ciclos o en todo caso hasta la pérdida de las performances mecánicas. Los parámetros del ciclo de esterilización son los siguientes: Ciclo EN Température Presión...
  • Page 167: Guía A Los Problemas

    En los reflectores Limpie las superficies con el producto Utilizador Uso de productos no específico “Faro Perflex”. Limpie las (parábolas) han aprobados. superficies con alcohol isopropílico. Para aparecido manchas o el restablecimiento de las superficies es...
  • Page 168: Características Técnicas

    10. CARACTERÍSTICAS TÉCNICAS Lámpara completa: Tensión de alimentación (sin transformador): • 17÷24Vac ±10% - 50/ 60Hz; • 22÷35Vdc ±10% Potencia absorbida: • 26VA (versión 17÷24Vac); • 14VA ( versión 22÷35Vdc) Fusibles aconsejados: • Versión 17÷24Vac: T1.6AL 250V • Versión 22÷35Vdc: T630mAL 250V Protección contra los peligros eléctricos: •...
  • Page 169: Esquemas Alámbricos

    10.1 ESQUEMAS ALÁMBRICOS Lámpara completa: • Circuito eléctrico en la cabeza de la lámpara Fusibile Esquema alámbrico – Alya c/s transformador...
  • Page 170 Circuito eléctrico en la cabeza de la lámpara Fusibile Circuito elettrico nella testata della lampada Circuito elettrico nella braccio posteriore Circuito eléctrico en el brazo trasero Fusibile Fusibile / Fuse  Esquema alámbrico – Alya Theia Tech. Electrical Scheme – Alya Theia Tech. Edizione Apr 2016 – Rev 7C Pag. 22 di 23  ...
  • Page 171 • Cabeza: Esquema alámbrico – Alya Head...
  • Page 172: Certificato Di Garanzia

    Claims for damages and/or interest are excluded. The guarantee is not considered valid, at the sole discretion of FARO, if the fault is due to tampering, damage, incorrect use, improper maintenance and normal wear and tear.
  • Page 173: Certificado De Garantia

    La firma FARO concede al cliente final una garantía de 24 meses a partir de la fecha de adquisición. La reparación en garantía debe ser efectuada en la sede de FARO; los gastos y riesgos de transporte están a cargo del comprador.
  • Page 174 FARO SpA se reserve le droit de modifier, sàns préavis, les caractéristiques dans ce manuel. FARO SpA behält sich rechtvor, jederzeit stillschweigend technische oder bauliche Änderung worzunehmen. FARO SpA se reserva el derecho de modificar sin aviso previo la caracteristicas incluidas en el presente manual de uso.

Table des Matières